Home>Furniture>Outdoor Furniture>How To Make A Rat Hammock
Outdoor Furniture
How To Make A Rat Hammock
Modified: August 17, 2024
Learn how to make a cozy rat hammock for your outdoor furniture. Step-by-step instructions and tips for creating the perfect resting spot for your furry friend.
(Many of the links in this article redirect to a specific reviewed product. Your purchase of these products through affiliate links helps to generate commission for Storables.com, at no extra cost. Learn more)
Introduction
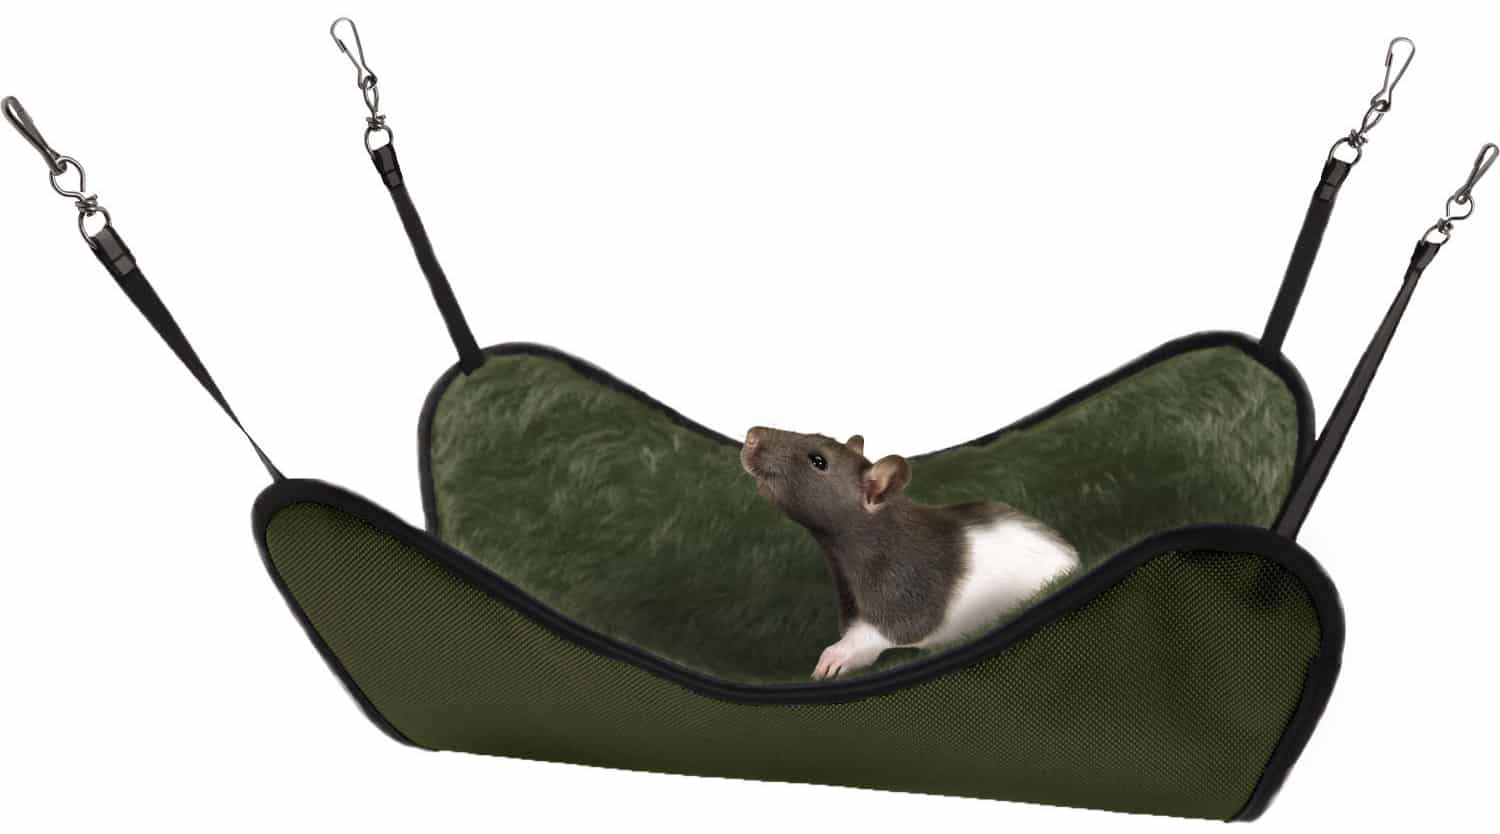
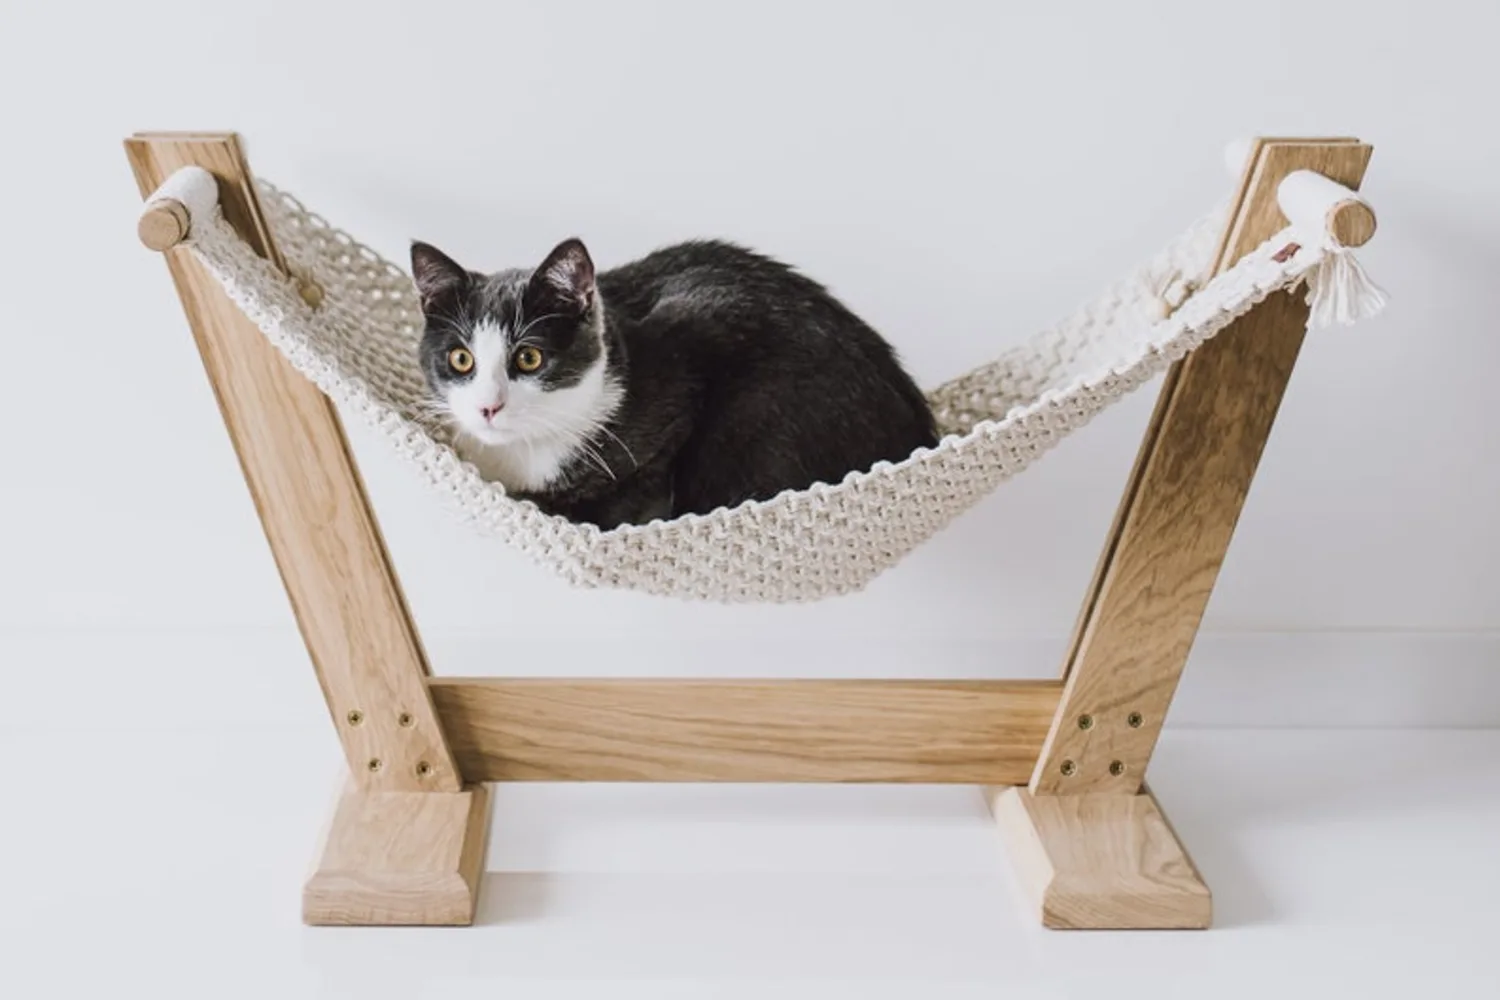
Welcome to the world of rat hammocks! If you’re a rat owner looking to provide your furry friend with a cozy and comfortable place to rest and play, then you’ve come to the right place. A rat hammock is a wonderful addition to any rat cage, offering an elevated spot for your rats to relax, sleep, and enjoy some hammock-style lounging. Plus, it adds a touch of whimsy and style to their living space.
In this article, we’ll guide you through the process of making a rat hammock from scratch. Don’t worry if you’re not a sewing expert – this DIY project is simple enough for beginners to tackle. We’ll walk you through each step, from selecting the fabric to attaching the hammock in the rat cage. So gather your materials and let’s get started!
Key Takeaways:
- Rat hammocks are a cozy and fun addition to a rat’s cage. Choosing the right fabric, measuring accurately, and securing the hammock are key steps to ensure your furry friends have a comfortable spot to relax and play.
- Regular cleaning and maintenance are essential to keep the rat hammock hygienic and comfy. By following these steps, you can create a safe and inviting space for your rats to enjoy.
Read more: How To Make Cayenne Pepper Spray For Rats
Materials Needed
Before diving into the process of making a rat hammock, let’s gather all the necessary materials. Here’s what you’ll need:
- Fabric: Choose a soft and durable fabric that is safe for rats. Fleece is a popular choice as it is cozy and easy to clean.
- Scissors: A good pair of scissors will be essential for cutting the fabric.
- Measuring tape: This will help you accurately measure the fabric and ensure a proper fit in the rat cage.
- Sewing machine or needle and thread: Depending on your sewing skills and preference, you can use a machine or sew by hand.
- Rings or hooks: These will be used to attach the hammock to the rat cage. Small carabiner clips or shower curtain rings work well.
- Optional: Decorative elements such as ribbons or pom-poms to add a personal touch to your rat hammock.
Once you have gathered all the materials, you’re ready to move on to the next step: selecting the fabric for your rat hammock.
Step 1: Selecting the Fabric
The fabric you choose for your rat hammock is important as it will determine the comfort and durability of the final product. It’s essential to select a fabric that is safe for your rats and can withstand their playful antics.
One of the most popular choices for rat hammocks is fleece fabric. Fleece is soft, cozy, and easy to clean. It also provides a good grip for your rats, preventing them from slipping off the hammock. Look for anti-pill or low-pile fleece, as it will resist pilling and maintain its appearance even after multiple washes. Avoid using fabrics with loose threads or embellishments that could pose a safety risk to your rats.
When choosing the color or pattern of the fabric, consider your rat’s personality and the theme of your rat cage. You can opt for a solid color, a fun pattern, or even a theme-related design. Remember that darker fabrics are less likely to show stains or dirt. Keep in mind that rats can be chewers, so evaluate the durability of the fabric and avoid anything that is easily torn or shredded.
Before proceeding to the next step, make sure you have enough fabric to create a comfortable-sized hammock for your rat. Measure the dimensions of your rat cage and add a few inches on each side for seam allowance. This will ensure that your hammock fits properly inside the cage.
Now that you’ve selected the fabric, it’s time to move on to step 2: measuring and cutting the fabric for your rat hammock.
Step 2: Measuring and Cutting
With your chosen fabric in hand, it’s time to measure and cut the pieces for your rat hammock. Accuracy is key in this step to ensure a properly fitting hammock that your rats will love.
Start by measuring the dimensions of your rat cage. Take note of the length and width, as these will determine the size of your hammock. Add a few inches on each side to account for seam allowance.
Using a measuring tape, mark the dimensions of your hammock on the fabric. If you want to create a rectangular hammock, you can simply cut a piece of fabric according to the measurements. Alternatively, if you prefer a hammock with two layers, you can cut two identical pieces of fabric.
Once you have marked the measurements, carefully cut along the lines using a pair of sharp scissors. Take your time and make sure to cut in straight lines to ensure neat edges.
If you plan to incorporate any decorative elements like ribbons or pom-poms, now is the time to cut them to the desired length as well.
After cutting the fabric pieces, double-check the size to ensure they fit comfortably inside your rat cage. If needed, make adjustments by trimming the edges until you achieve the desired size.
Now that you have your fabric pieces cut and ready, it’s time to move on to step 3: sewing the hammock pieces together.
Step 3: Sewing the Hammock Pieces Together
Now that you have your fabric pieces cut to the desired size, it’s time to sew them together to create the hammock. Whether you choose to use a sewing machine or sew by hand, this step will bring your rat hammock to life.
If you’re using a sewing machine, start by aligning the two pieces of fabric together, with the right sides facing each other. Pin them in place to prevent any shifting while sewing. Using a straight stitch, sew around the edges, leaving one side open for turning the fabric inside out. Remember to backstitch at the beginning and end of each seam for added durability.
If you’re sewing by hand, you can use a simple running stitch or a whip stitch to join the fabric pieces together. Make sure to securely stitch along the edges, leaving one side open.
Once you have sewn around the edges, carefully trim any excess fabric and clip the corners diagonally. This will help reduce bulk and create sharp corners when you turn the fabric inside out.
Next, turn the fabric right side out through the open side. Use a pencil or a blunt object to gently push out the corners for a neater finish.
Now that you have your sewn hammock, it’s time to move on to step 4: reinforcing the edges for added durability.
When making a rat hammock, use soft, washable fabric and strong, non-toxic materials. Ensure the hammock is securely attached to the cage to prevent accidents.
Read more: How To Make A DIY Hammock
Step 4: Reinforcing the Edges
Reinforcing the edges of your rat hammock is an important step to ensure its longevity and durability. Rats can be quite active and playful, so reinforcing the edges will help prevent fraying and make your hammock withstand their antics.
Start by folding the raw edges of the fabric towards the inside of the hammock. You can fold them over once or twice to create a clean and secure edge. Pinning the folded edges in place will help keep them secure during the next step.
Using a sewing machine or a needle and thread, sew a straight stitch along the folded edge. This will secure the edges and prevent them from unraveling over time.
If you want to add an extra layer of reinforcement, you can also sew a zigzag stitch along the folded edges. This will provide additional strength and stability to your hammock.
Take your time during this step to ensure that the edges are neatly folded and securely stitched. This will not only make your hammock more durable but also give it a professional and polished look.
Now that you have reinforced the edges of your rat hammock, it’s time to move on to step 5: adding rings or hooks to attach the hammock in the rat cage.
Step 5: Adding Rings or Hooks
Adding rings or hooks to your rat hammock is crucial for attaching it securely inside the rat cage. This step will ensure that your hammock stays in place and provides a comfortable resting spot for your rats.
First, decide where you want to position the rings or hooks on your hammock. Typically, two on each corner of the hammock will provide stability and balance.
If you’re using rings, you can sew them onto the corners of the hammock. Make sure to reinforce the stitches to ensure they are securely attached. If you’re using hooks, you can sew small fabric loops onto the corners and attach the hooks through the loops.
It’s important to remember that the size of the rings or hooks should be appropriate for your rat cage. They should be small enough to fit through the cage bars but large enough to hold the weight of your rats.
Before attaching the rings or hooks, test their stability by gently pulling on them. You want to ensure that they are securely attached without any risk of coming loose.
Once the rings or hooks are properly attached, your rat hammock is almost ready to be enjoyed by your furry friends. But before that, let’s move on to step 6: attaching the hammock inside the rat cage.
Step 6: Attaching the Hammock in the Rat Cage
Now that your rat hammock is fully prepared, it’s time to attach it inside the rat cage. Proper placement and secure attachment will ensure that your rats can enjoy their cozy hammock without any accidents or mishaps.
Start by choosing the ideal location within the rat cage to hang the hammock. Consider areas where your rats spend most of their time or where they prefer to sleep. Make sure that the hammock is not too high off the ground, as rats can be curious climbers but also need a safe way to access the hammock.
If the rat cage has horizontal bars, you can thread the rings or hooks through the bars. Ensure that they are positioned securely and cannot slide or detach easily. If the cage has a wire mesh or solid walls, you can use small carabiner clips or S-hooks to attach the hammock to the cage.
Once you have determined the placement, carefully hang the hammock by attaching the rings, hooks, or clips to the appropriate spots in the rat cage. Test the stability and adjust as needed to make sure the hammock is securely attached. Ensure that there is enough space for your rats to comfortably climb in and out of the hammock without any difficulty.
Introduce your rats to their new hammock by gently placing them inside or enticing them with treats or toys. They may need a bit of time to get used to their new hammock, but soon enough, it will become their favorite spot to relax and play.
Now that the rat hammock is successfully attached in the rat cage, it’s time to move on to step 7: cleaning and maintenance tips to keep your hammock in great condition.
Step 7: Cleaning and Maintenance Tips
Keeping your rat hammock clean is essential for the health and well-being of your rats. Regular cleaning and maintenance will ensure that the hammock remains hygienic and comfortable for your furry friends.
Here are some cleaning and maintenance tips to keep your rat hammock in great condition:
- Regularly check the hammock for any signs of wear and tear. If you notice any loose threads or damage, repair or replace the hammock as needed.
- Remove any droppings or debris from the hammock daily. This will help maintain a clean and odor-free environment for your rats.
- Wash the hammock regularly using a mild detergent. Follow the instructions on the fabric for washing and drying. Fleece fabric is typically machine washable.
- Avoid using harsh detergents, bleach, or fabric softeners, as they can irritate your rats’ skin.
- Allow the hammock to fully dry before reattaching it in the rat cage. This will prevent any odors or mold from developing.
- Consider having a spare hammock on hand. This will allow you to rotate them during cleaning or provide a backup in case one needs repairs or is being washed.
- Monitor your rats’ behavior in the hammock. If they chew on the fabric excessively or show signs of discomfort, consider replacing the hammock with a sturdier alternative.
- Keep the surrounding area of the rat cage clean to prevent dirt and debris from getting on the hammock.
By following these cleaning and maintenance tips, you can ensure that your rat hammock remains a safe and comfortable spot for your rats to enjoy.
Congratulations! You have successfully completed all the steps to make and maintain a rat hammock. Your furry friends will surely appreciate the cozy and inviting space you have created for them in their cage. Now sit back, relax, and watch as your rats enjoy lounging in their new hammock!
Happy hammocking!
Read more: How To Make A Cat Hammock
Conclusion
Congratulations on completing your DIY rat hammock! By following the step-by-step instructions outlined in this article, you have successfully created a cozy and comfortable spot for your furry friends to relax and play.
Remember, choosing the right fabric, measuring and cutting accurately, sewing with care, reinforcing the edges, and attaching the hammock securely are all important steps in the process. Additionally, regular cleaning and maintenance will ensure the longevity of your rat hammock.
Providing your rats with a hammock not only enhances their living environment but also adds an extra element of fun and comfort to their days. Rats are naturally curious and social creatures, and a hammock offers them a place to rest, sleep, and observe their surroundings from a peaceful vantage point.
Whether your rats are lounging lazily or engaged in playful antics, their hammock will become a beloved spot in their cage. Plus, it adds a touch of personality and charm to their living space.
So, gather your materials, unleash your creativity, and make a rat hammock that your furry friends will adore. Give them a place to relax and unwind, and enjoy the joy and contentment it brings to their little rattie hearts.
Thank you for embarking on this DIY adventure with us. Happy hammocking and happy rat-keeping!
Frequently Asked Questions about How To Make A Rat Hammock
Was this page helpful?
At Storables.com, we guarantee accurate and reliable information. Our content, validated by Expert Board Contributors, is crafted following stringent Editorial Policies. We're committed to providing you with well-researched, expert-backed insights for all your informational needs.


0 thoughts on “How To Make A Rat Hammock”