Home>Garden Essentials>How To Change Infill On Makerbot
Garden Essentials
How To Change Infill On Makerbot
Modified: August 28, 2024
Looking to change the infill on your Makerbot? Discover our step-by-step guide on how to change infill, with a focus on garden projects.
(Many of the links in this article redirect to a specific reviewed product. Your purchase of these products through affiliate links helps to generate commission for Storables.com, at no extra cost. Learn more)
Introduction
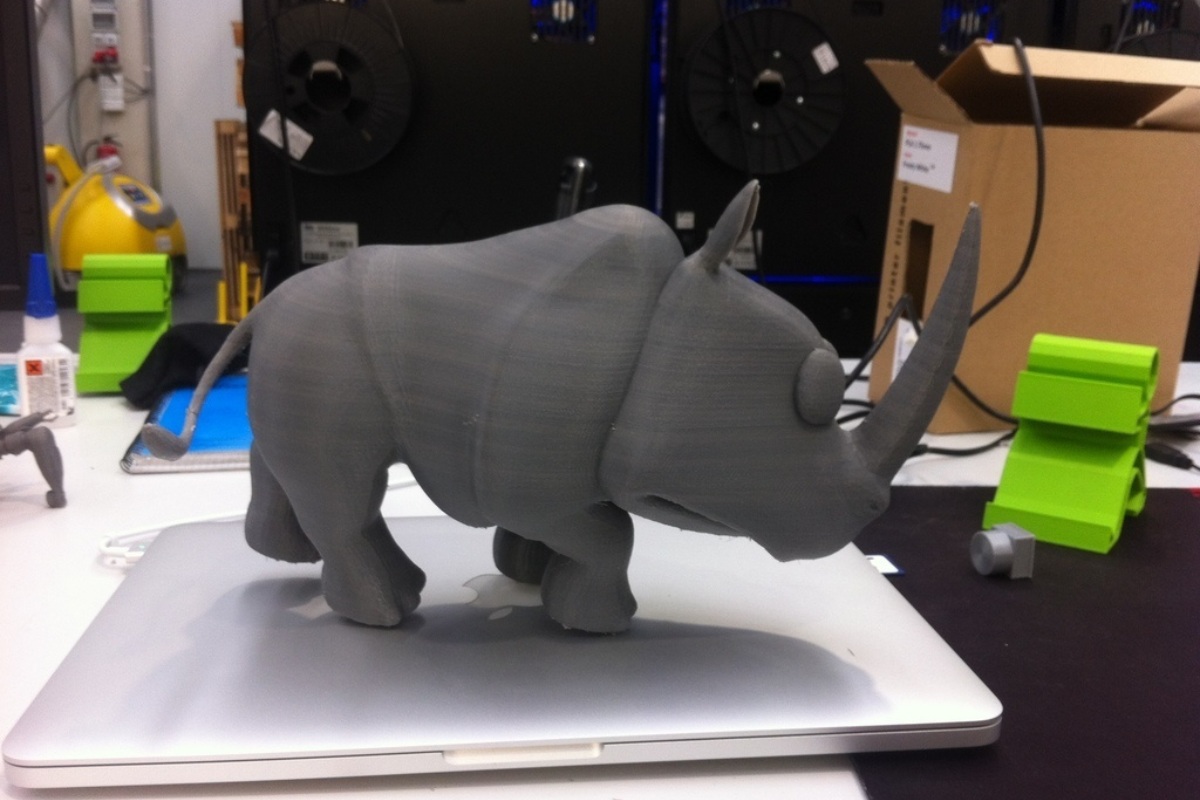
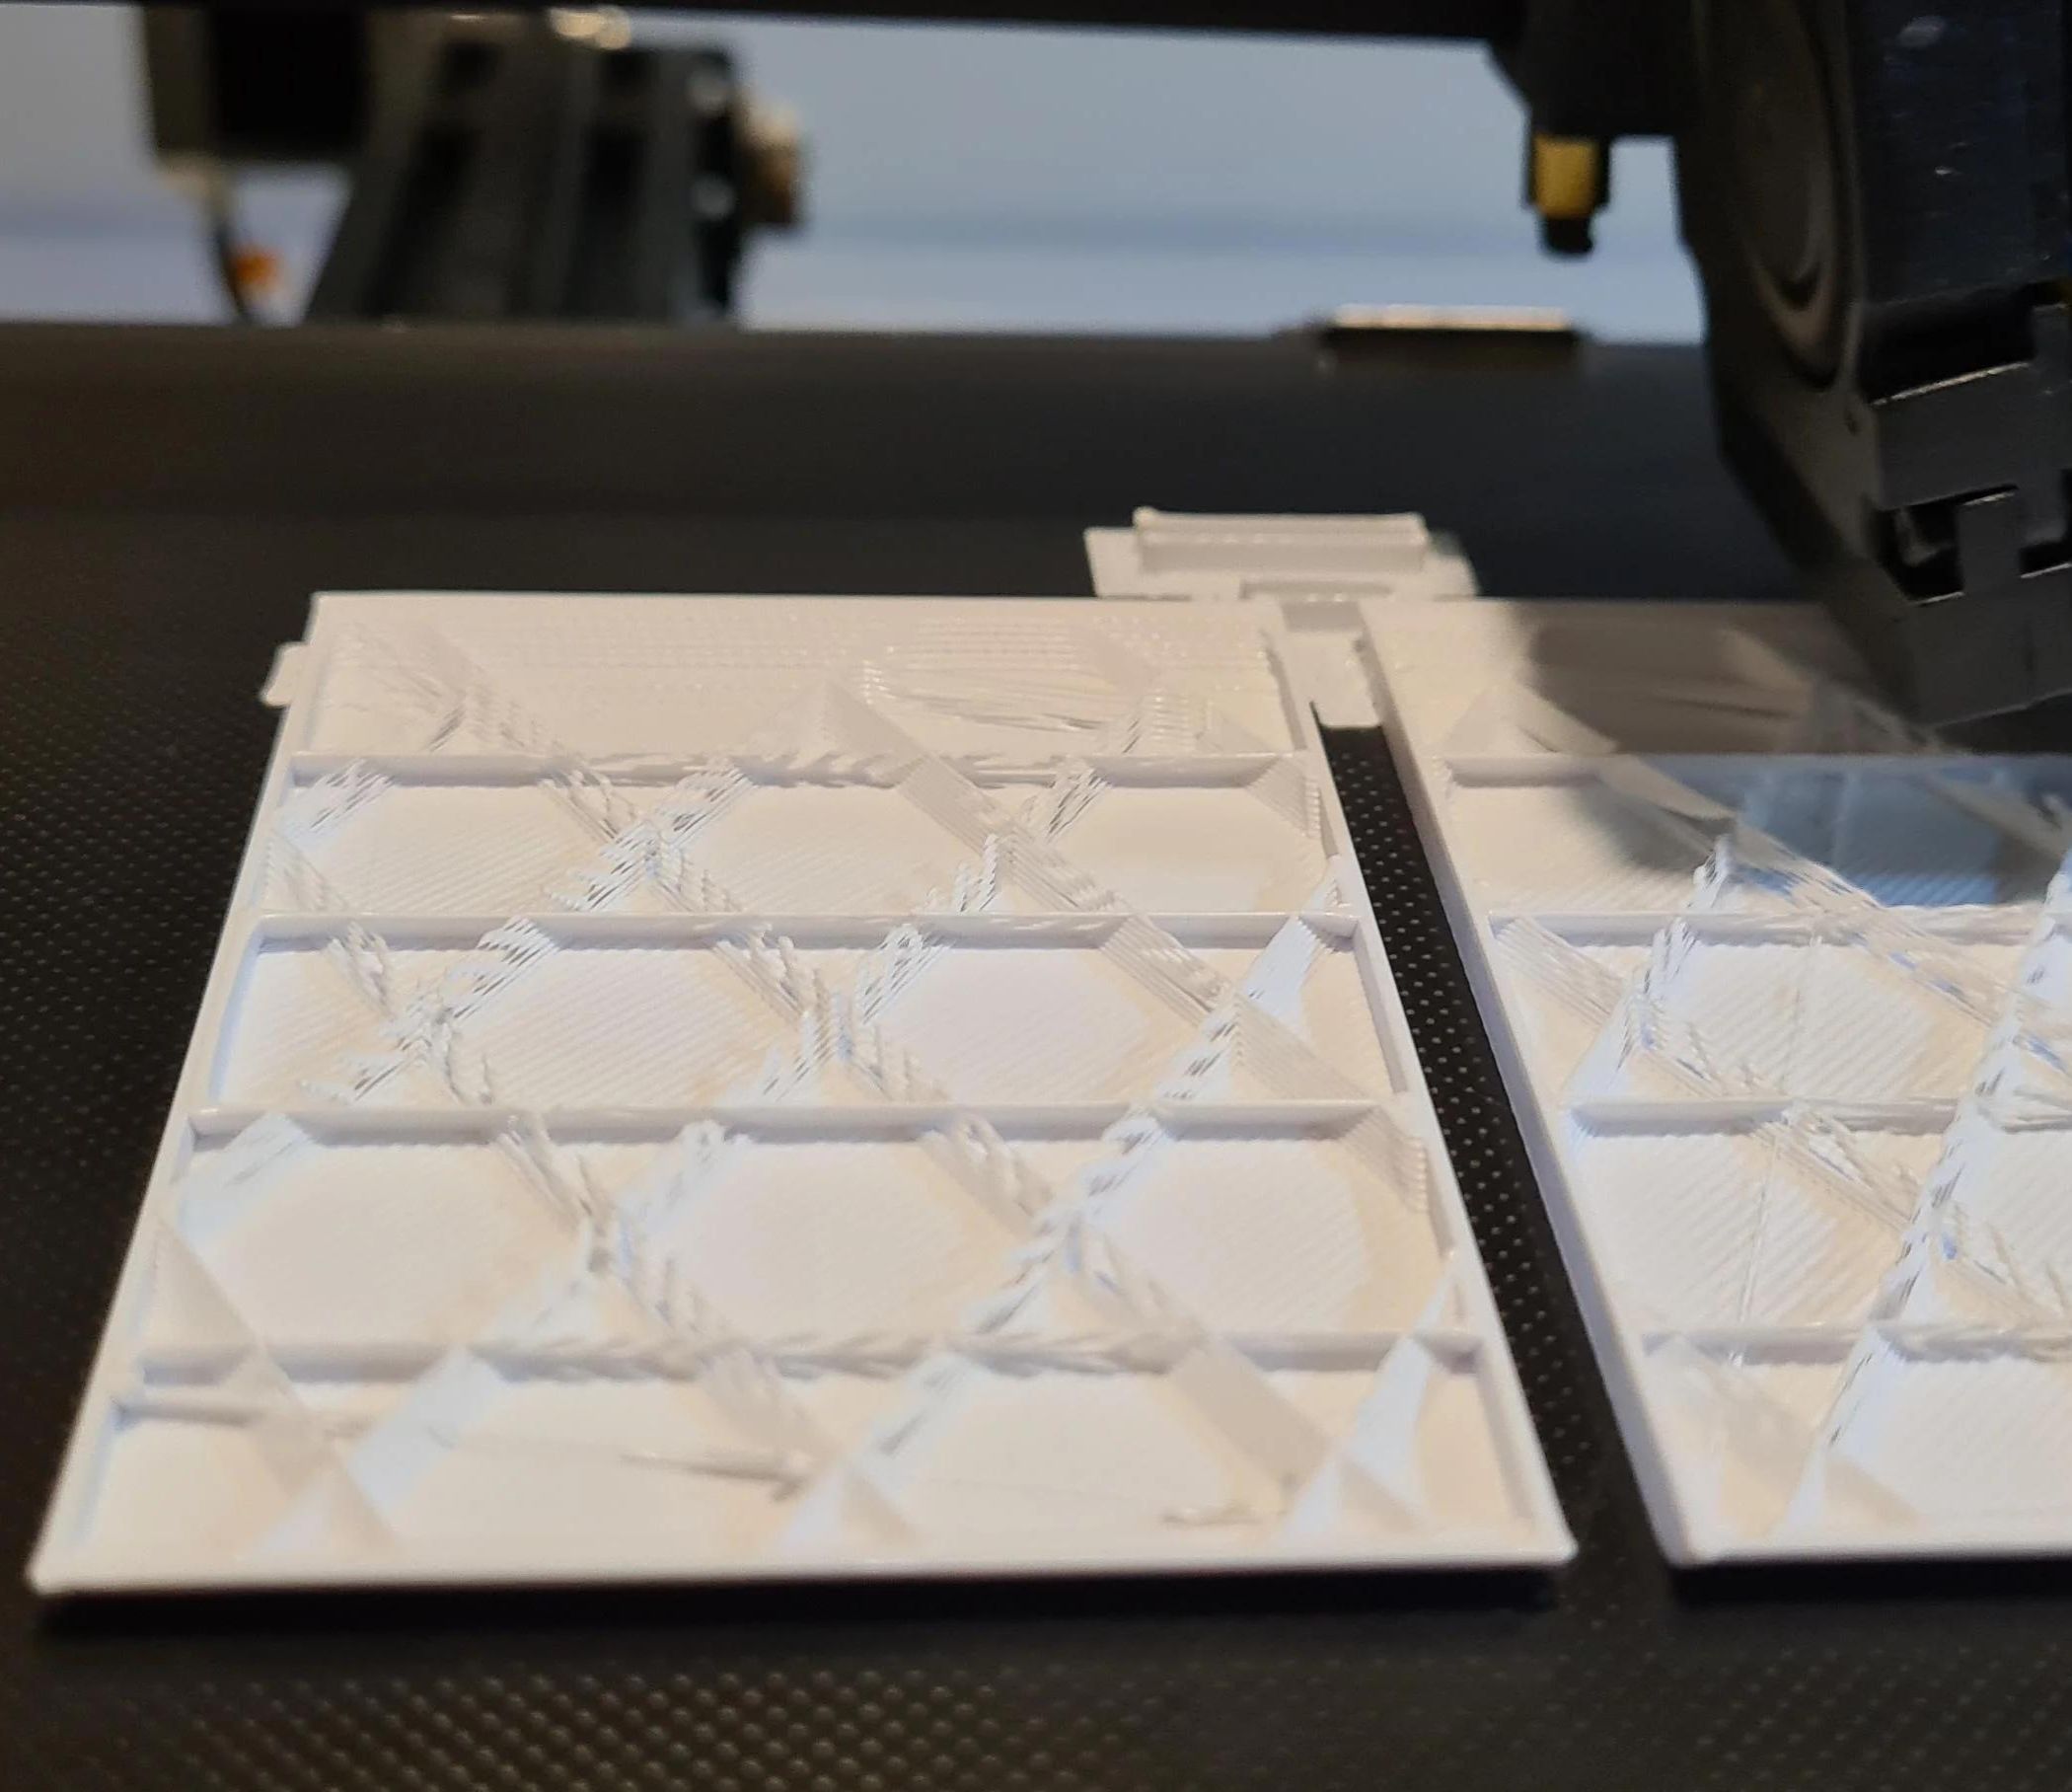
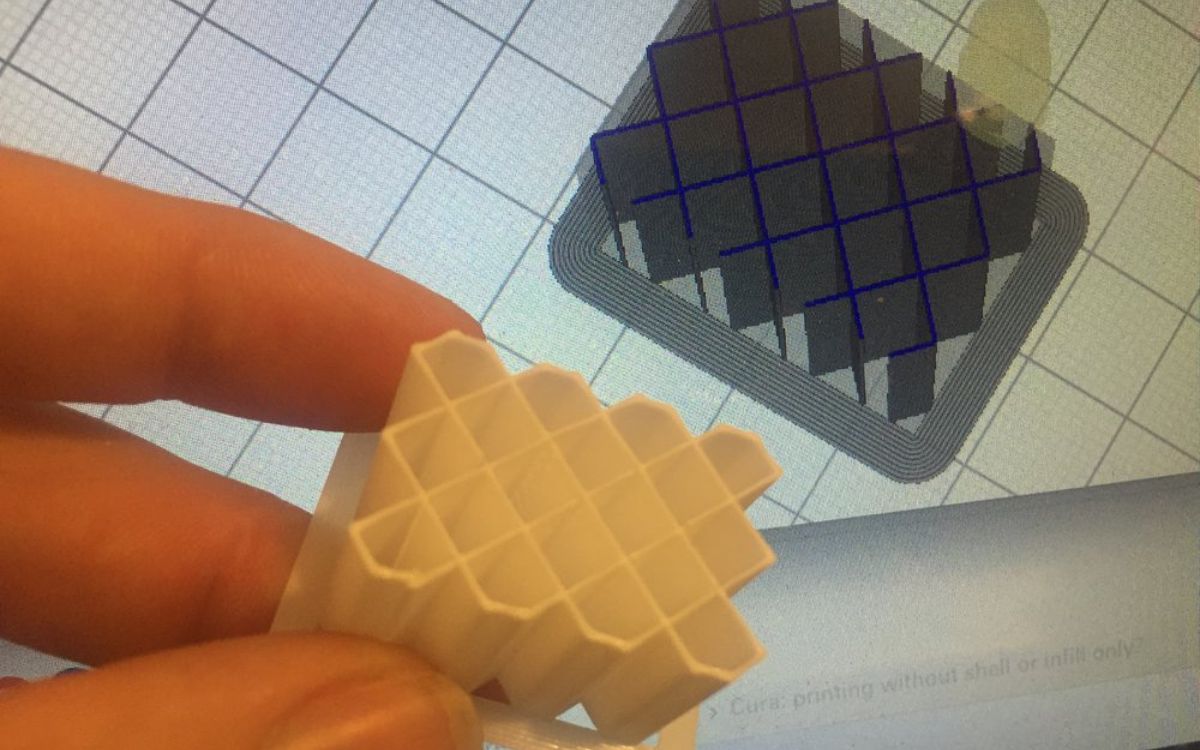
In the world of 3D printing, infill refers to the internal structure of an object that is being printed. It plays a crucial role in determining the strength, weight, and overall quality of the printed item. The infill percentage refers to the amount of space inside the object that is filled with material versus being left empty.
Why is infill important? Well, choosing the right infill percentage can make a significant difference in the strength and durability of your prints. A high infill percentage means that more material is used to fill the object, resulting in a denser and stronger print. On the other hand, a lower infill percentage will use less material, making the print lighter but potentially less sturdy.
Changing the infill percentage is a useful skill to have as a 3D printing enthusiast, as it allows you to customize your prints according to your specific needs and preferences. Whether you want to create a lightweight prototype, a robust functional object, or a decorative piece, modifying the infill can help you achieve the desired results.
In this article, we will walk you through the process of changing infill on a Makerbot 3D printer. We will provide you with step-by-step instructions and highlight the tools you will need to accomplish this task. So, grab your Makerbot and let’s get started on this exciting journey of infill customization!
Key Takeaways:
- Customize your 3D prints by adjusting infill percentage on your Makerbot printer. Increase for stronger prints, decrease for lighter ones, and save on material costs.
- Experiment with infill settings to unleash creativity and achieve desired print characteristics. Modify internal structure for strength, weight, and visual appeal with ease.
Read more: How To Change The Infill In Slic3R
Why Change Infill?
When it comes to 3D printing, infill plays a critical role in determining the characteristics of the printed object. The infill percentage directly affects the weight, strength, and overall quality of the print. So, why should you consider changing the infill percentage? Let’s explore some of the reasons why adjusting infill can be beneficial:
1. Strength and Durability: Increasing the infill percentage will result in a denser and stronger print. This is especially important when printing functional parts that need to withstand stress or support weight. By increasing the infill, you ensure that the internal structure of the object is solid and able to withstand the demands placed upon it.
2. Weight Reduction: On the other hand, reducing the infill percentage can help you create lighter prints. This is particularly useful when designing objects that need to be portable or have weight restrictions. By using less material to fill the object, you can significantly reduce the weight without compromising the overall structure.
3. Material Conservation: Adjusting the infill percentage allows you to optimize the use of your printing material. When printing large objects or prototypes that don’t require high levels of strength, reducing the infill can save you money on material costs. This is particularly relevant if you are using premium or expensive filaments.
4. Print Speed: Higher infill percentages result in longer print times due to the increased material volume being used. By reducing the infill, you can significantly reduce the overall print time. This can be beneficial when you need to complete prints quickly or have multiple objects to print within a limited timeframe.
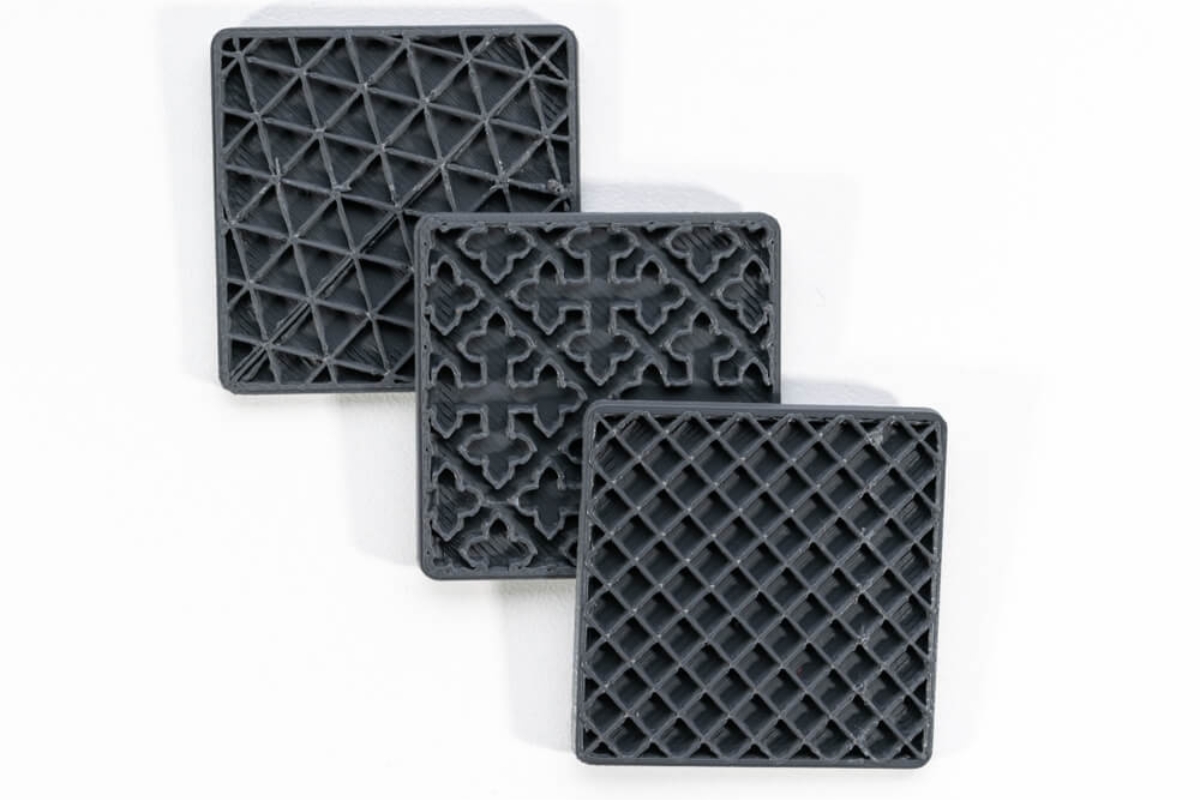
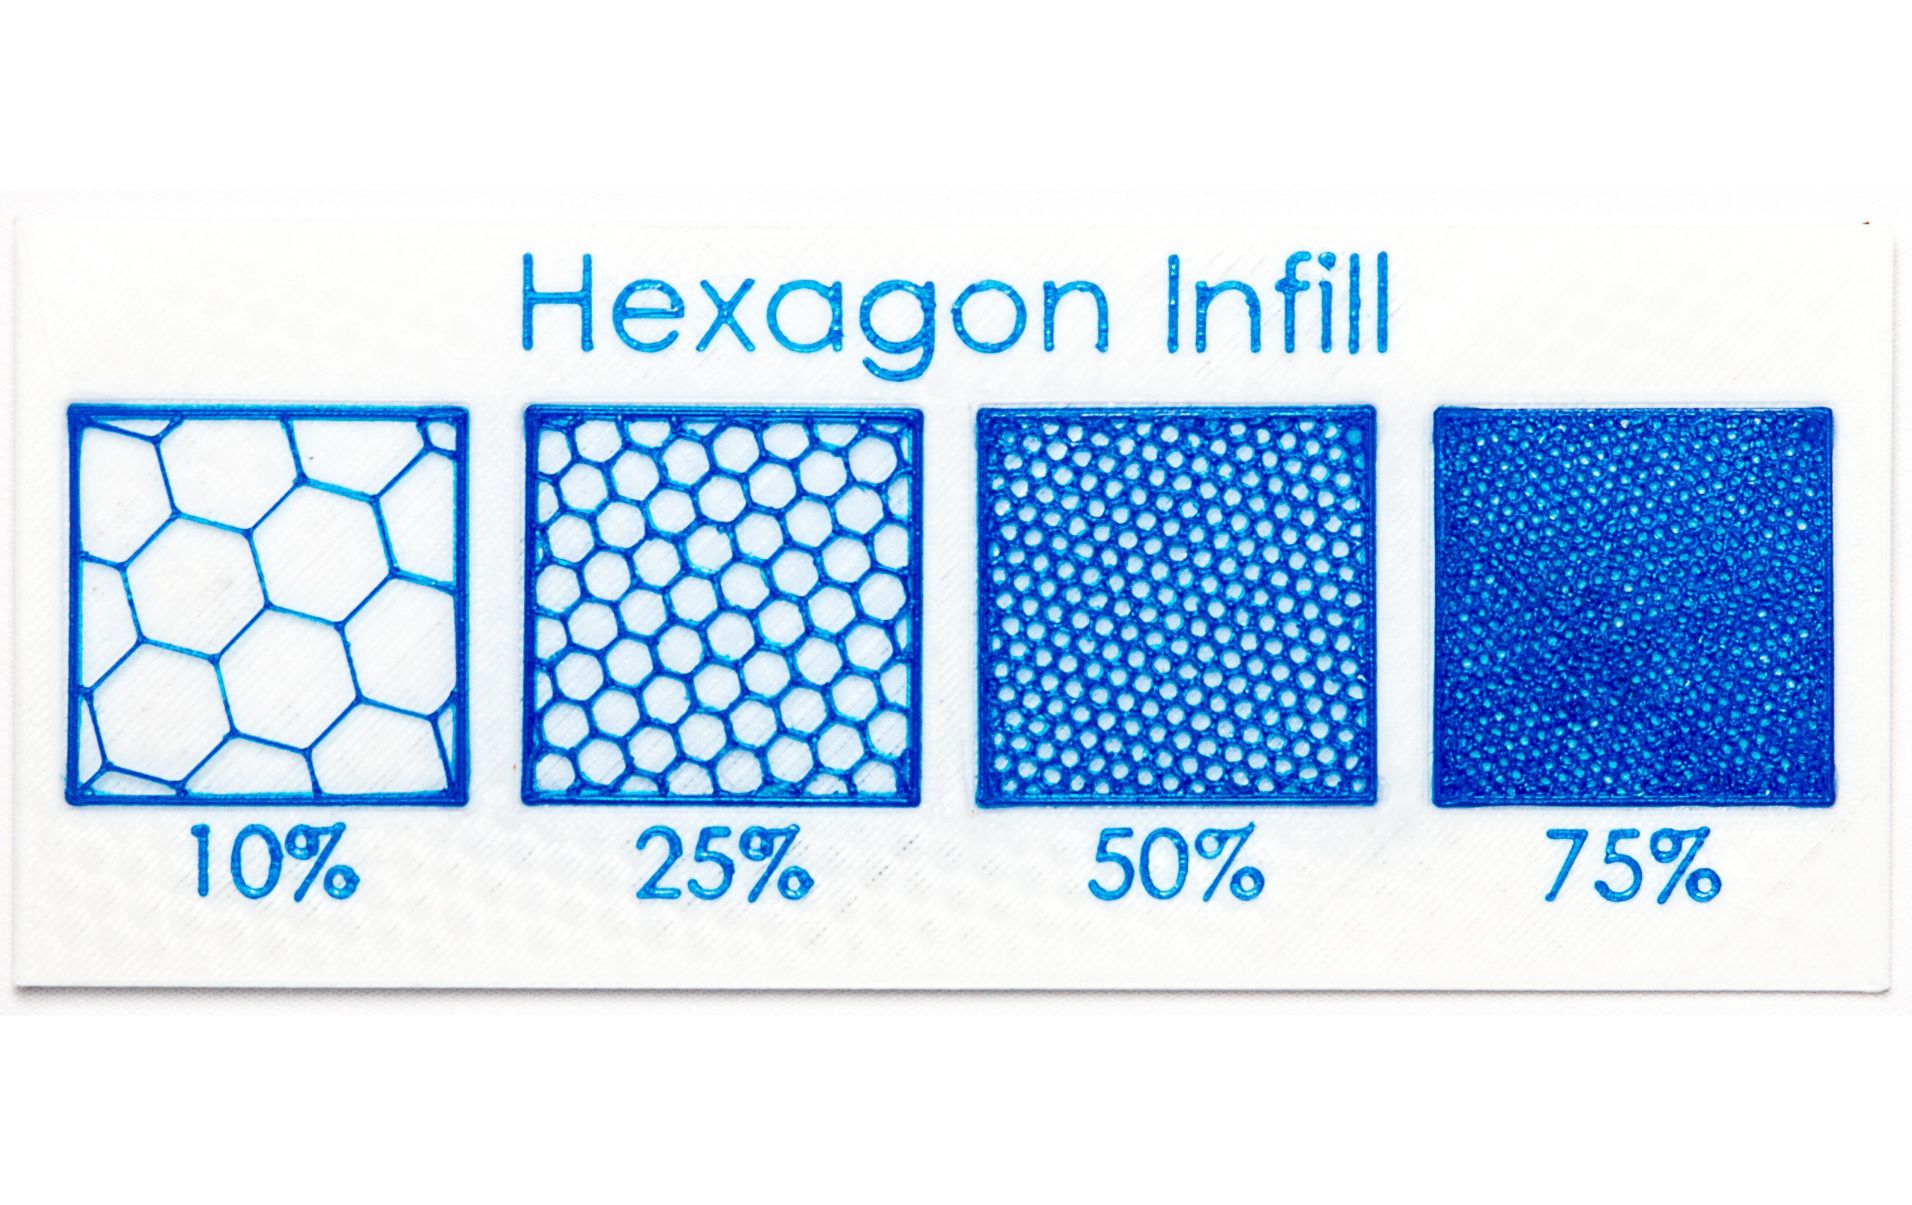
5. Design Aesthetics: Infill can also play a role in the visual appearance of your prints. When printing objects that will be visible or have transparent sections, adjusting the infill percentage can help achieve desired visual effects. For example, using a lower infill can create a more translucent or honeycomb-like structure, adding an extra layer of aesthetic appeal to the final product.
By now, you should understand the importance of changing infill in 3D printing. It allows you to optimize the strength, weight, material consumption, and even the appearance of your prints. Depending on the specific needs of your project, you can adjust the infill percentage to achieve the desired results. In the next section, we will discuss the tools you will need to change infill on a Makerbot 3D printer.
Tools Needed
Before you can change the infill on your Makerbot 3D printer, there are a few tools you will need to have on hand. Don’t worry; these are common items that you likely already have in your 3D printing toolkit. Here’s a list of the tools you will need:
1. Makerbot 3D Printer: Of course, you will need a Makerbot 3D printer to change the infill settings. Makerbot printers are popular in the 3D printing community for their reliability and user-friendly interface.
2. 3D Printing Software: To access and modify the infill settings on your Makerbot, you will need 3D printing software. Makerbot printers often come with their proprietary software, such as Makerbot Print or Makerbot Desktop. Make sure you have the latest version of the software installed on your computer.
3. Computer: You will need a computer to run the Makerbot software and connect to your 3D printer. Ensure that your computer meets the minimum system requirements for the software and has a stable internet connection for downloading updates if needed.
4. USB Cable or SD Card: Depending on the model of your Makerbot printer, you will need either a USB cable or an SD card to transfer the print files to the printer. Check your printer’s documentation to determine the appropriate method of file transfer.
5. Filament: Changing the infill percentage will require you to load the appropriate filament into your Makerbot printer. Make sure you have enough filament of the desired color and type to complete your prints.
6. Cleaning Tools: It’s always a good idea to have cleaning tools on hand to maintain the cleanliness and performance of your printer. This can include a soft cloth for wiping down the printer, compressed air for cleaning dust and debris from the printer’s nozzles and vents, and isopropyl alcohol for cleaning the print bed.
7. Safety Gear: While not directly related to changing infill, it’s essential to prioritize safety when working with a 3D printer. Consider wearing safety glasses or goggles to protect your eyes from any potential hazards. Additionally, ensure that your workspace is well-ventilated to avoid inhaling any fumes released during the printing process.
By gathering these tools beforehand, you can ensure a smooth and hassle-free process when it’s time to change the infill on your Makerbot printer. Now that you have everything you need let’s move on to the step-by-step process of changing the infill settings.
To change the infill on a Makerbot, go to the slicing software and adjust the infill percentage to change the density of the interior structure of your 3D print. A higher percentage means a denser infill, while a lower percentage means a lighter infill.
Steps to Change Infill
Now that you have all the necessary tools, it’s time to dive into the step-by-step process of changing the infill settings on your Makerbot 3D printer. Follow these instructions to customize the infill percentage according to your specific needs:
1. Open 3D Printing Software: Launch the Makerbot 3D printing software on your computer. If you haven’t installed the software yet, visit the Makerbot website and download the latest version compatible with your printer model.
2. Import or Create Model: In the software, import the 3D model you want to print or create a new one using the built-in design tools. Ensure that your model is scaled correctly and positioned as desired.
3. Adjust Layer Height and Print Settings: Before changing the infill settings, you might want to optimize other print settings such as layer height, print speed, and support structures. These settings can impact the overall quality and reliability of your prints. Make any necessary adjustments according to your requirements.
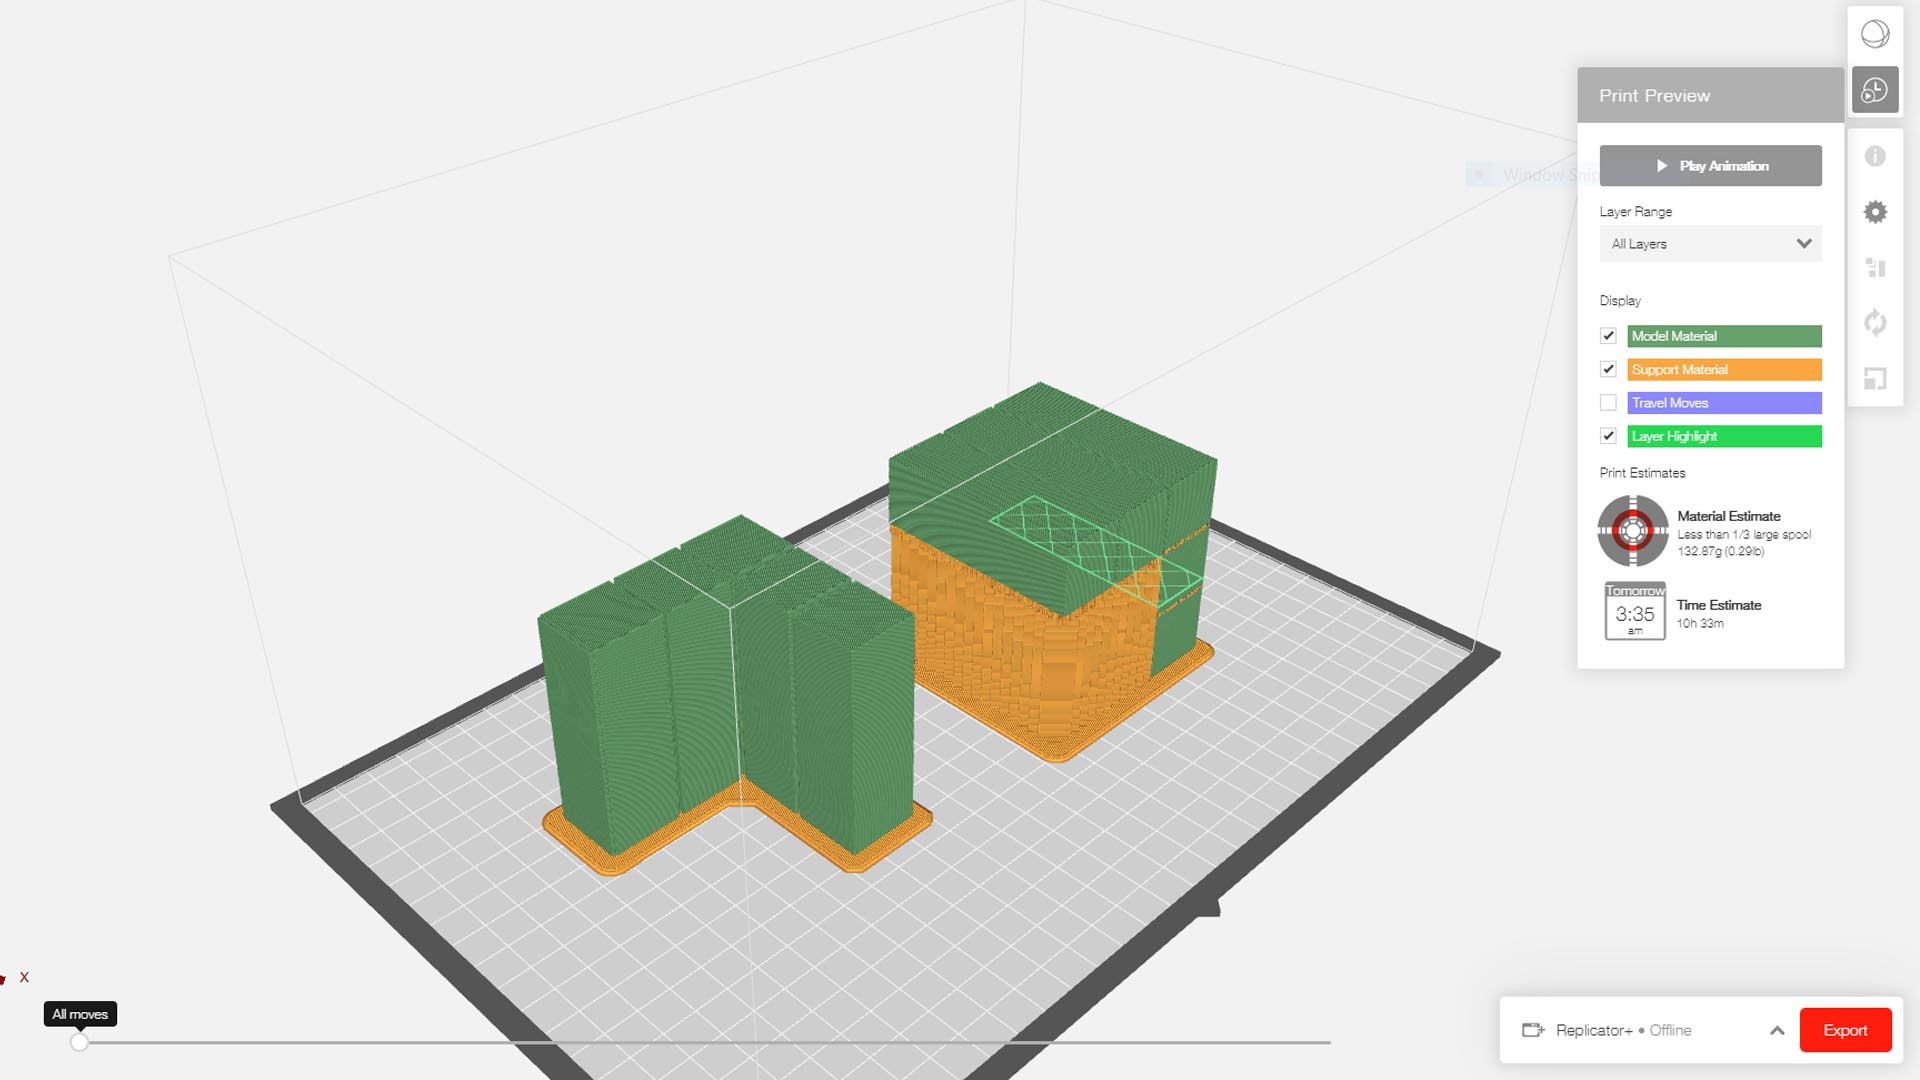
4. Locate Infill Settings: In the software, navigate to the infill settings. This location may vary depending on the software version, but it is typically found under the “Advanced” or “Print Settings” tab. Look for the option that allows you to adjust the infill density or percentage.
5. Modify Infill Percentage: Once you’ve located the infill settings, adjust the infill percentage to your desired value. Most software provides a slider or input box to change the infill density. Increase the percentage for stronger prints or decrease it for lighter prints.
6. Preview and Slice the Model: After modifying the infill settings, preview the sliced model to ensure that the changes are reflected correctly. The preview will show you a visual representation of the internal structure and help you visualize how the infill will affect the print.
7. Save or Export the Print File: Once you are satisfied with the infill settings and the previewed model, save or export the print file. Make sure to choose the appropriate file format compatible with your Makerbot printer.
8. Transfer the Print File: Connect your Makerbot printer to your computer using a USB cable or insert the SD card with the print file. Transfer the print file to the printer using the appropriate method according to your printer model.
9. Load Filament and Start Printing: Load the filament into the printer following the manufacturer’s instructions. Ensure that the filament is properly inserted and that there are no obstructions in the extruder. Set the printer to the correct temperature for the filament type and start the printing process.
10. Monitor the Print: Throughout the printing process, keep an eye on the printer to ensure the quality and progress of the print. Make sure that the infill is being printed correctly and that there are no issues such as under-extrusion or layer adhesion problems.
Congratulations! You have successfully changed the infill settings on your Makerbot 3D printer. By following these steps, you can customize the infill percentage to achieve the desired strength, weight, and overall quality of your prints. Start experimenting with different infill settings to unleash the full potential of your Makerbot printer.
Conclusion
Changing the infill on your Makerbot 3D printer opens up a world of possibilities in terms of strength, weight, and material optimization for your 3D prints. By adjusting the infill percentage, you can customize the internal structure of your prints to meet your specific needs and preferences.
Increasing the infill percentage creates stronger and more durable prints, ideal for functional parts and objects that require robustness. On the other hand, reducing the infill percentage can result in lighter prints, making them suitable for portable applications or reducing material consumption.
By following the step-by-step process outlined in this article, you can easily modify the infill settings on your Makerbot printer. Take the time to experiment with different infill percentages and observe the impact on your prints. It’s through this experimentation that you’ll discover the optimal infill settings for your specific projects.
Remember to consider other print parameters such as layer height, print speed, and support structures when adjusting the infill. These settings complement each other and contribute to the overall quality and performance of your prints.
As you become more comfortable with changing infill, you’ll gain a deeper understanding of how it influences the strength, weight, and visual characteristics of your prints. This knowledge will empower you to make informed decisions when printing various objects and enable you to achieve your desired results with precision.
So, don’t hesitate to explore the capabilities of your Makerbot 3D printer by changing the infill settings. With a little practice and experimentation, you’ll unleash a whole new level of creativity and customization in your 3D printing projects. Happy printing!
Frequently Asked Questions about How To Change Infill On Makerbot
Was this page helpful?
At Storables.com, we guarantee accurate and reliable information. Our content, validated by Expert Board Contributors, is crafted following stringent Editorial Policies. We're committed to providing you with well-researched, expert-backed insights for all your informational needs.


0 thoughts on “How To Change Infill On Makerbot”