Home>Garden Essentials>How To Change Infill Pattern In Cura
Garden Essentials
How To Change Infill Pattern In Cura
Modified: August 16, 2024
Discover how to change the infill pattern in Cura and optimize your garden prints. Enhance strength and efficiency with this step-by-step guide.
(Many of the links in this article redirect to a specific reviewed product. Your purchase of these products through affiliate links helps to generate commission for Storables.com, at no extra cost. Learn more)
Introduction
When it comes to 3D printing, the infill pattern of an object plays a crucial role in determining its strength, durability, and overall quality. The infill refers to the internal structure of a 3D printed object and is composed of a pattern of interconnected lines or solid shapes that fill the empty spaces between the outer walls. By adjusting the infill pattern in a slicer program like Cura, you can customize the strength and weight of your prints according to your specific requirements.
Cura is a popular and user-friendly slicer software widely used by 3D printing enthusiasts. It allows you to configure various settings, including infill patterns, layer height, print speed, and much more. Changing the infill pattern in Cura can enable you to experiment with different designs, optimize material usage, and achieve desired strength and aesthetics for your 3D prints.
In this article, we will explore the process of changing the infill pattern in Cura. We will delve into the different infill patterns available, how to access the infill settings in Cura, and provide step-by-step instructions on how to change the infill pattern to suit your printing needs. So, let’s dive in and unlock the potential of infill customization in Cura!
Key Takeaways:
- Customize the strength and weight of 3D prints in Cura by changing the infill pattern. Experiment with grid, triangles, lines, honeycomb, cubic, and concentric patterns to achieve desired characteristics.
- Access and modify infill settings in Cura to fine-tune the internal structure of 3D prints. Adjust infill density, pattern angle, line distance, overlap, and top/bottom pattern for optimal results.
Overview of Cura
Cura is an open-source slicing software developed and maintained by Ultimaker, which is a leading manufacturer of 3D printers. It is designed to work seamlessly with Ultimaker’s range of 3D printers but is also compatible with various other printers. Cura provides users with a user-friendly interface that allows for easy customization of print settings, including infill patterns.
One of the main features that make Cura stand out is its ability to automatically generate support structures for complex prints. This ensures that overhangs and intricate details are properly supported during the printing process, resulting in high-quality prints.
In addition to support generation, Cura offers a wide range of advanced features such as customizable print profiles, multiple extruder support, and an extensive library of pre-configured material profiles. This makes Cura suitable for beginners who are just starting their 3D printing journey and experienced users who want more control over their prints.
Cura supports a variety of file formats, including the commonly used STL and OBJ formats. It also provides options for fine-tuning print settings such as layer height, print speed, and temperature, allowing users to optimize their prints for different purposes.
With its intuitive interface and powerful features, Cura has become a popular choice among 3D printing enthusiasts and professionals alike. Whether you are a hobbyist looking to print functional parts or an engineer prototyping complex designs, Cura can meet your needs with its versatile functionalities.
Understanding Infill Patterns
Before we delve into changing the infill pattern in Cura, it’s important to understand what infill patterns are and how they can affect your 3D prints.
The infill pattern refers to the internal structure of a 3D printed object. It consists of a pattern of interconnected lines or solid shapes that fill the empty spaces between the outer walls of the object. The primary purpose of infill is to provide structural support and add strength to the print.
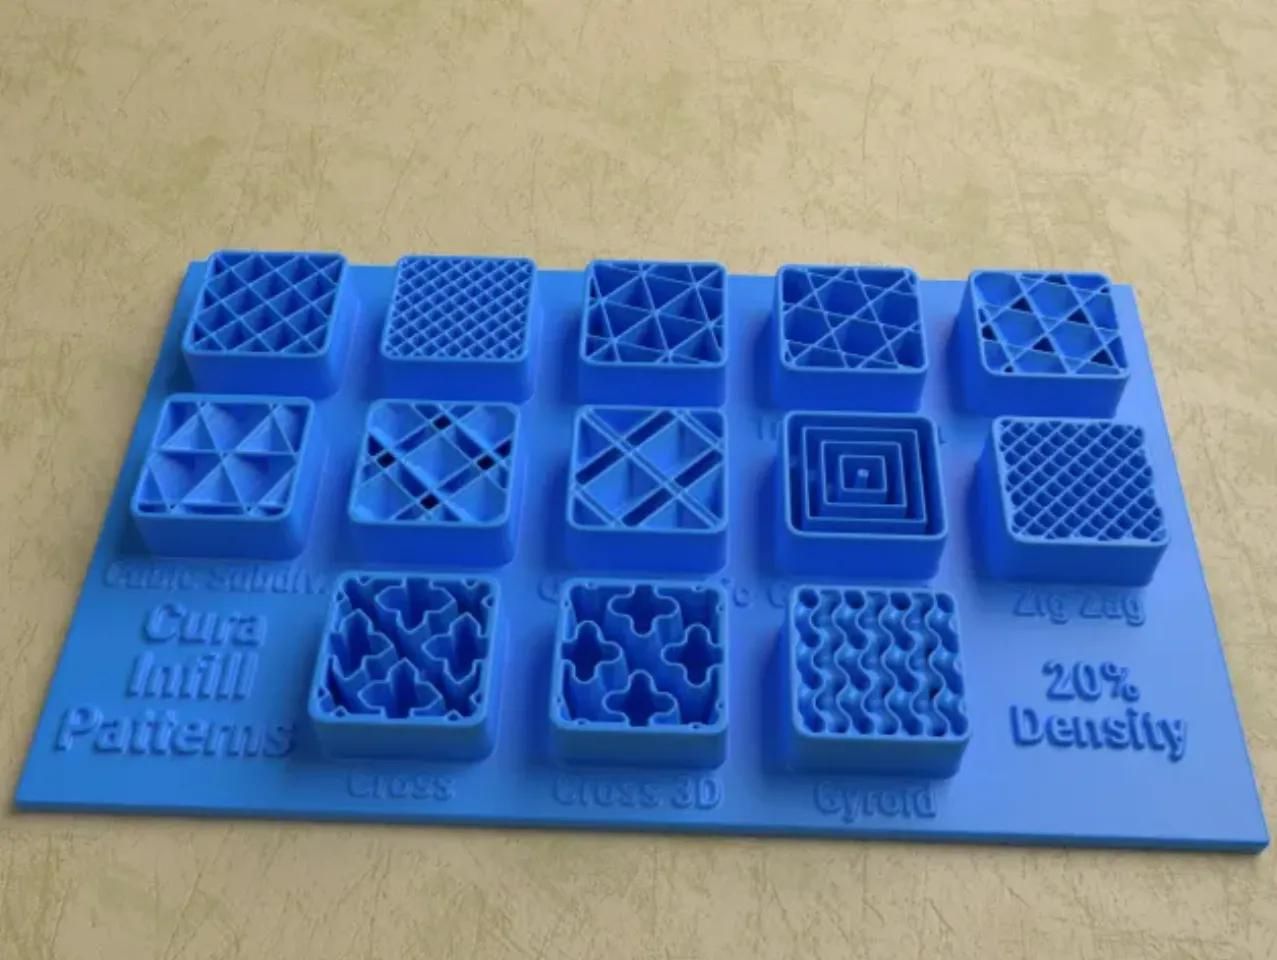
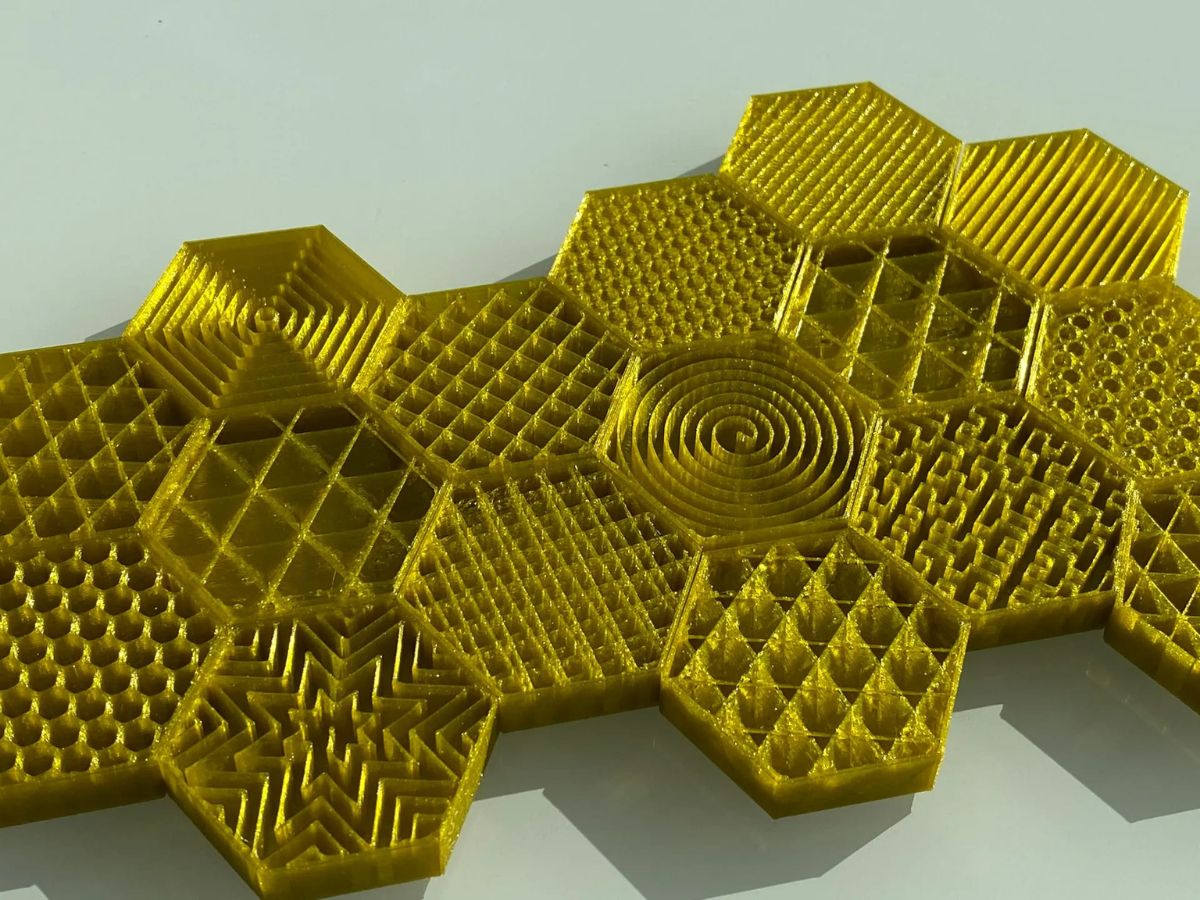
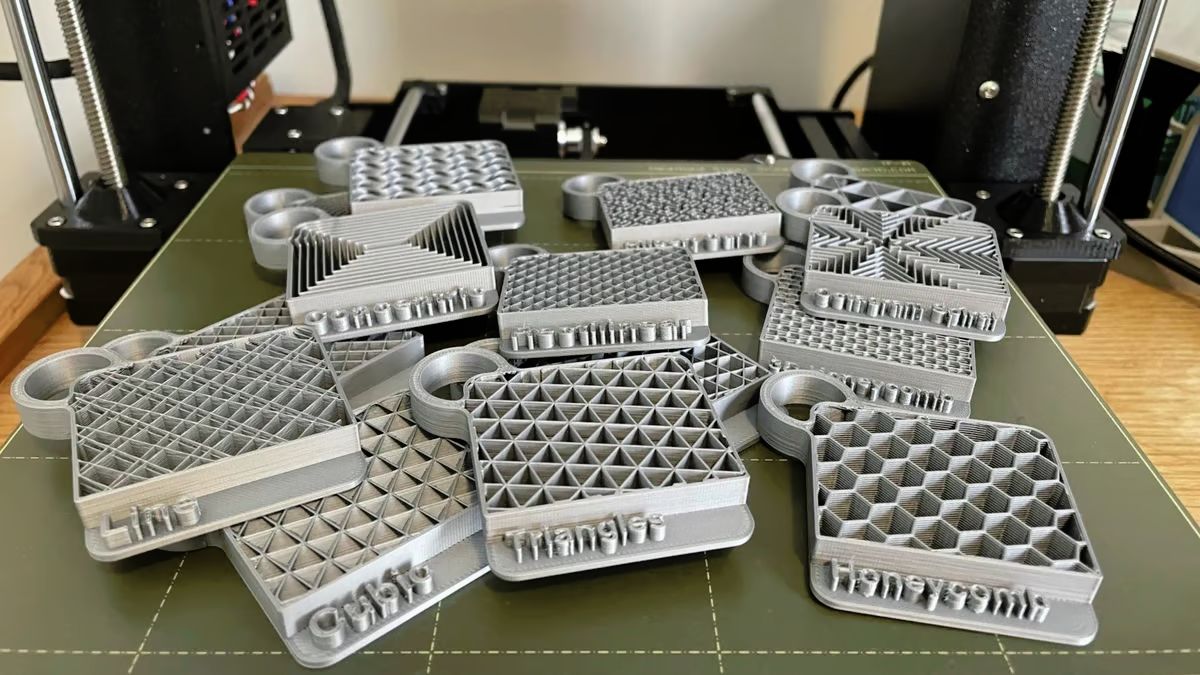
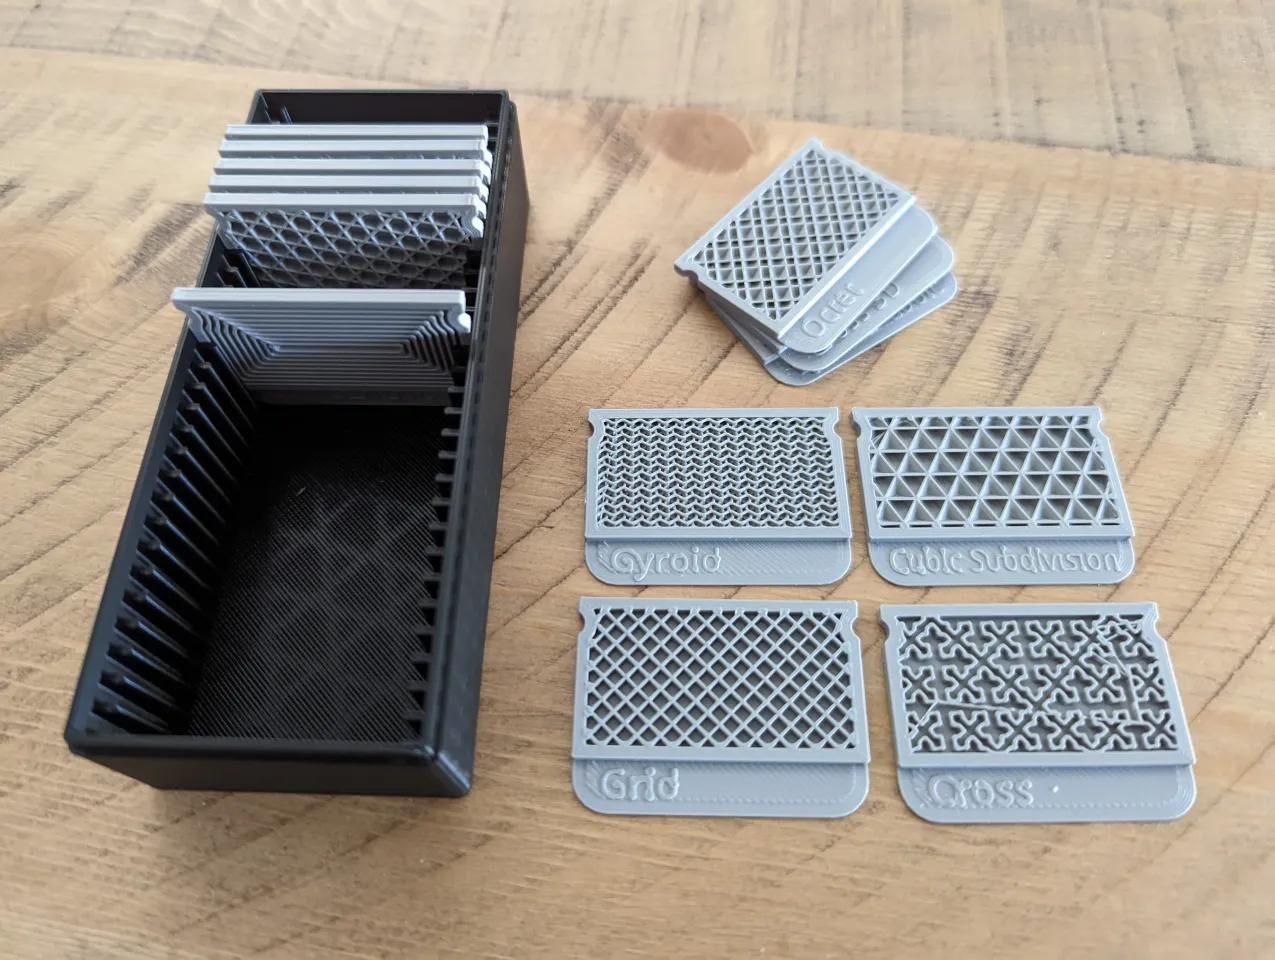
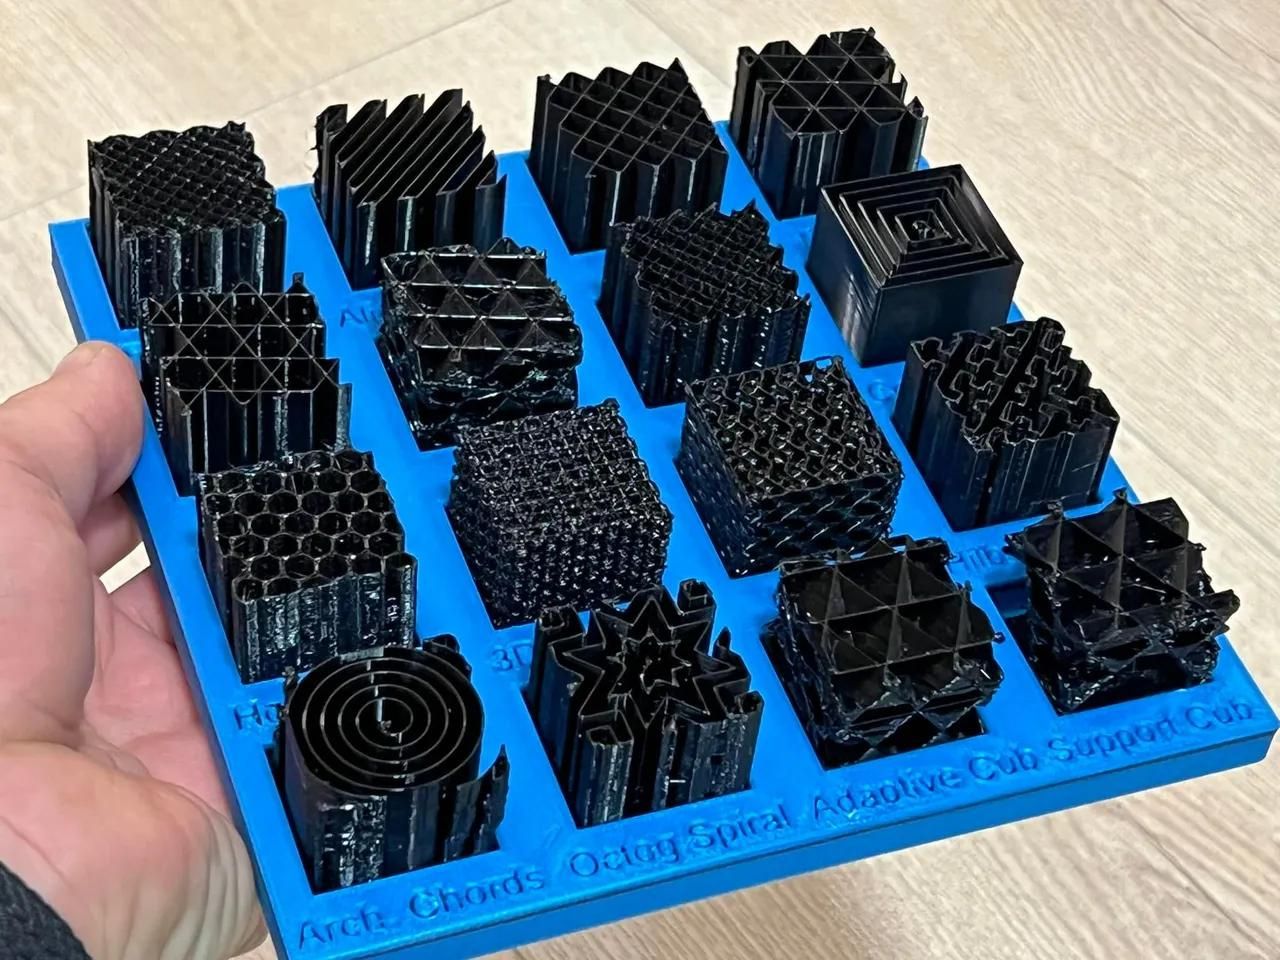
There are several different infill patterns available in Cura, each with its own unique characteristics. The choice of infill pattern depends on the desired strength, weight, and aesthetics of the final print.
Here are some commonly used infill patterns and their properties:
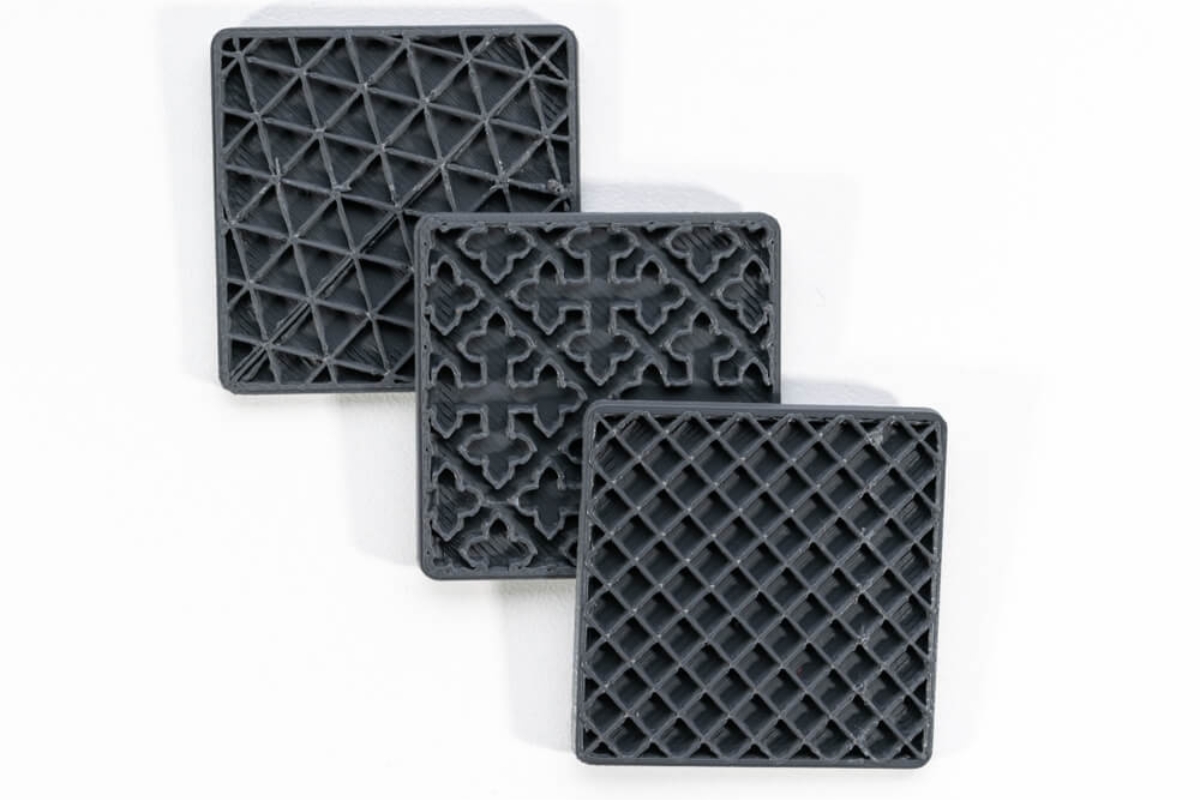
- Grid: This infill pattern features a grid of parallel lines that intersect at 90-degree angles. It provides a good balance between structural integrity and material usage.
- Triangles: Triangular infill consists of a series of interconnected triangles. It offers good strength and stability while minimizing material usage.
- Lines: This infill pattern consists of parallel lines running in a single direction. It is simple and quick to print, making it suitable for less complex prints.
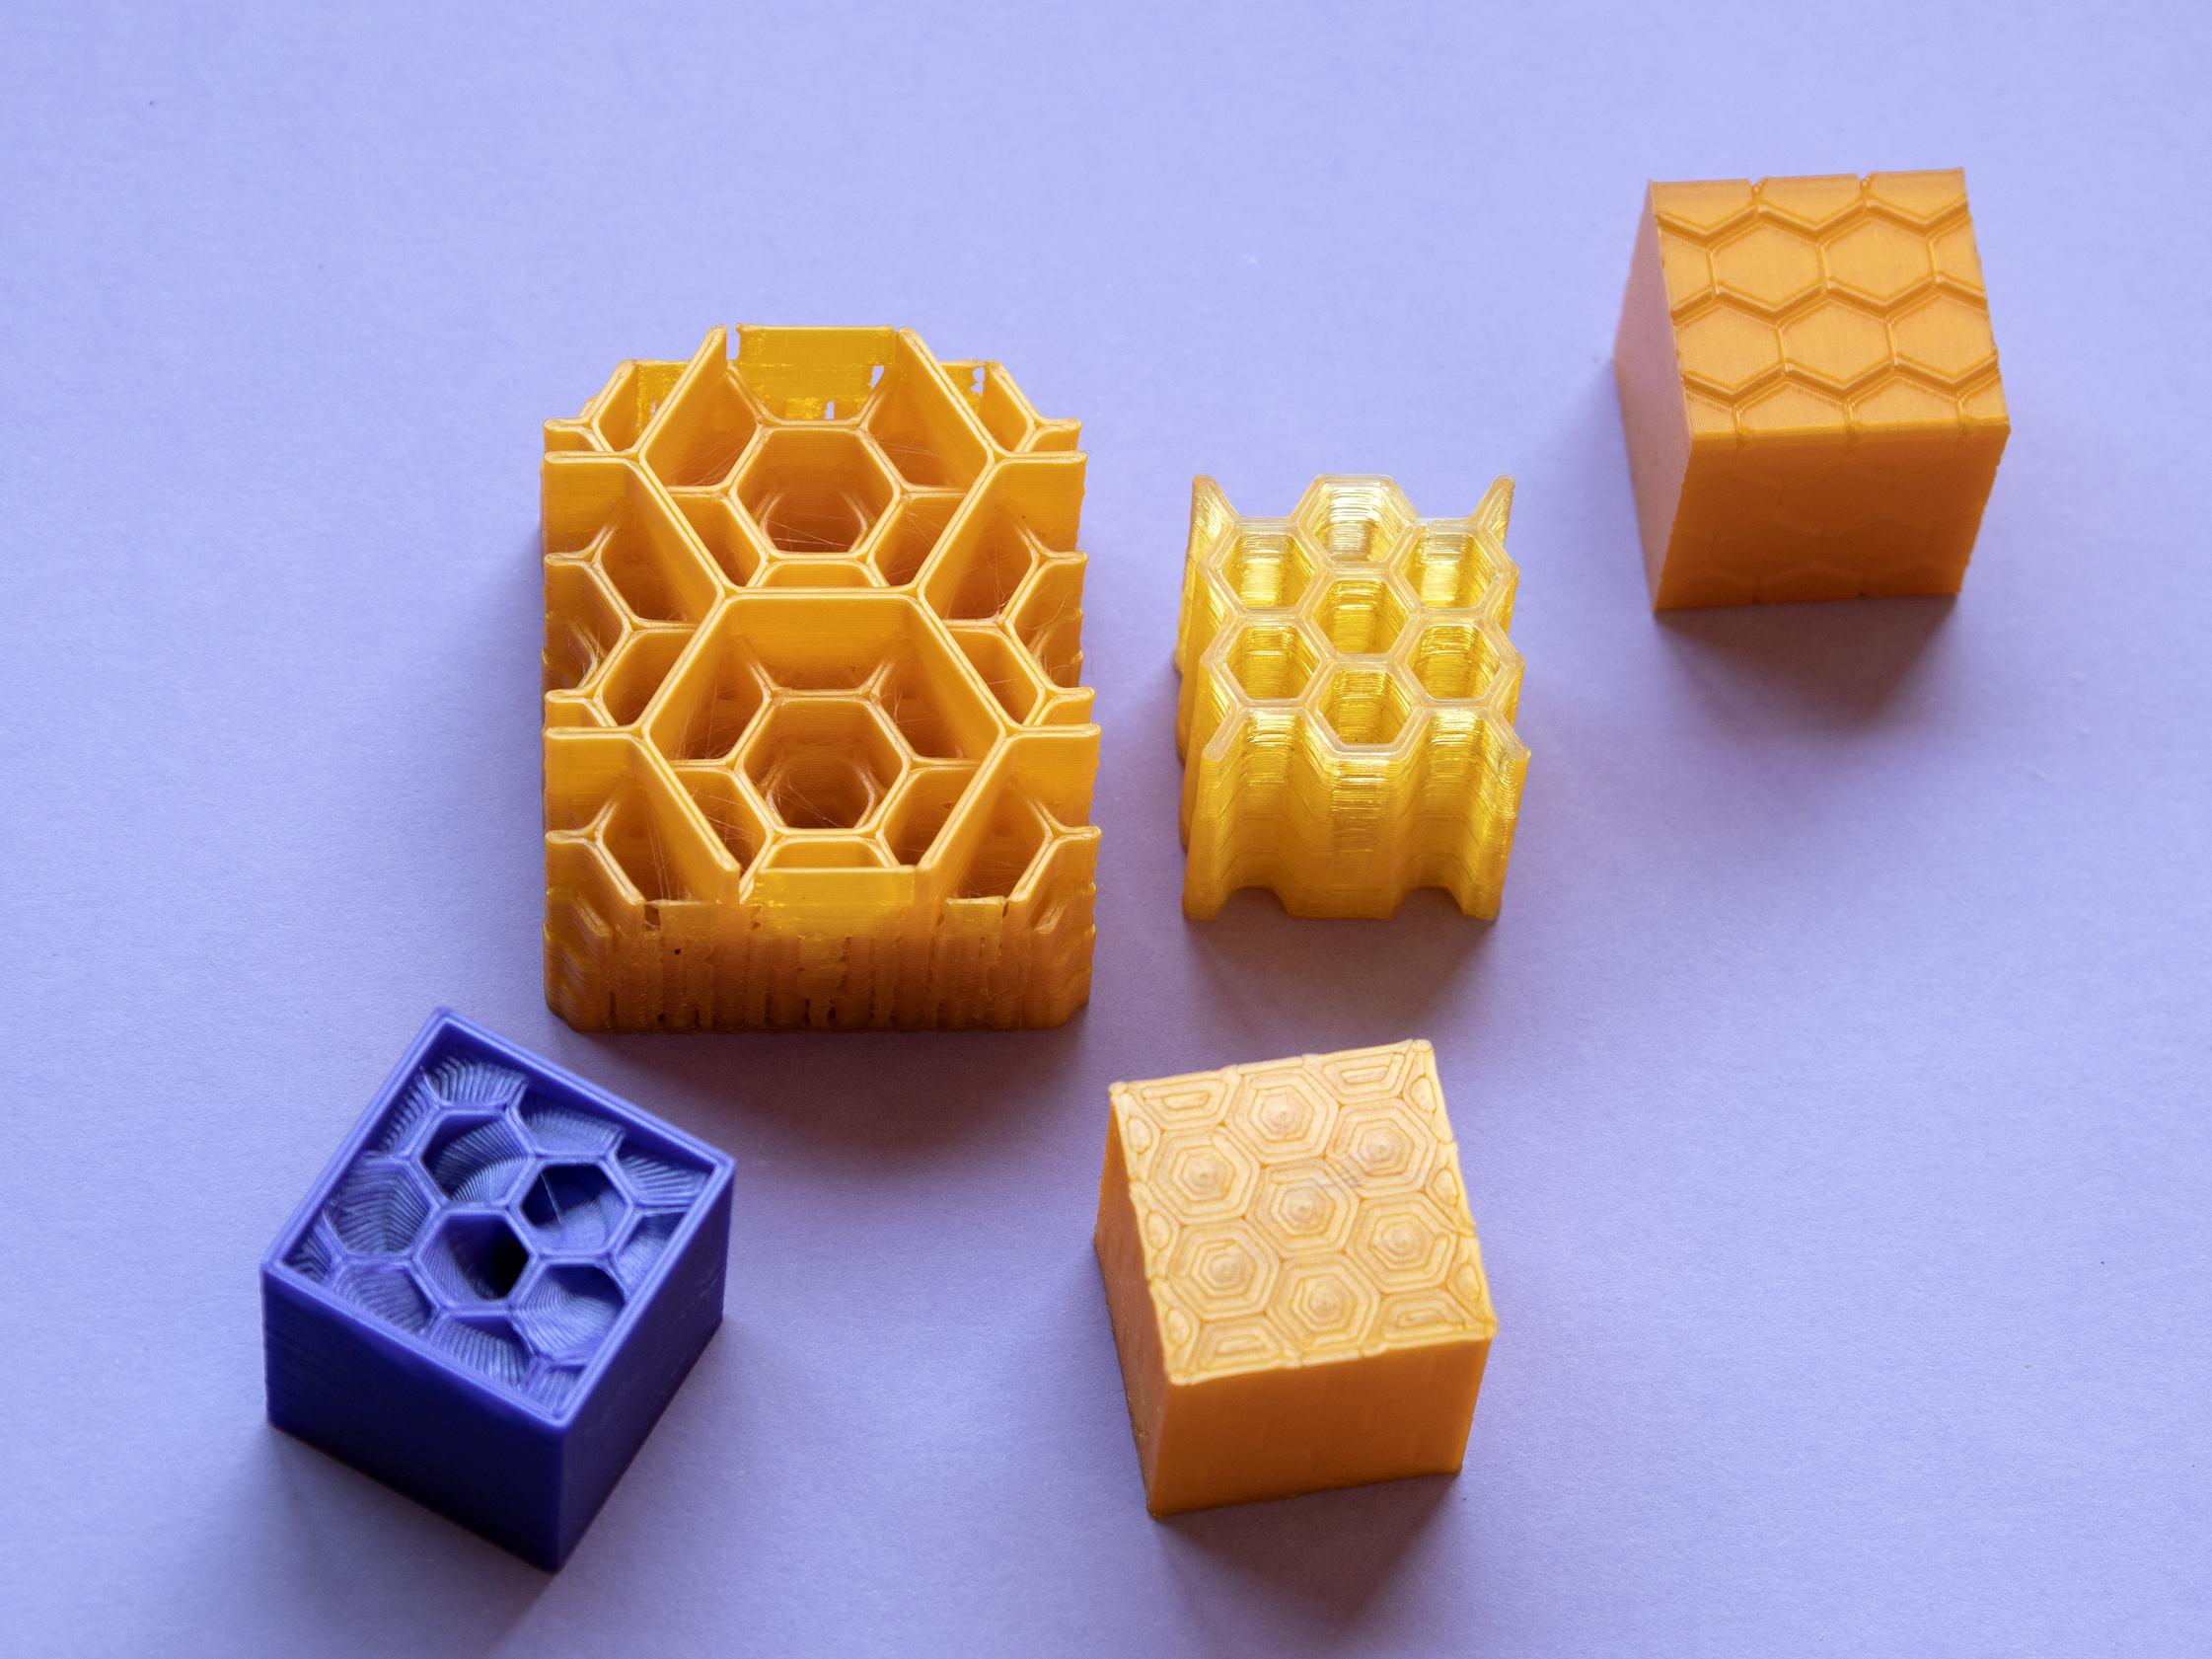
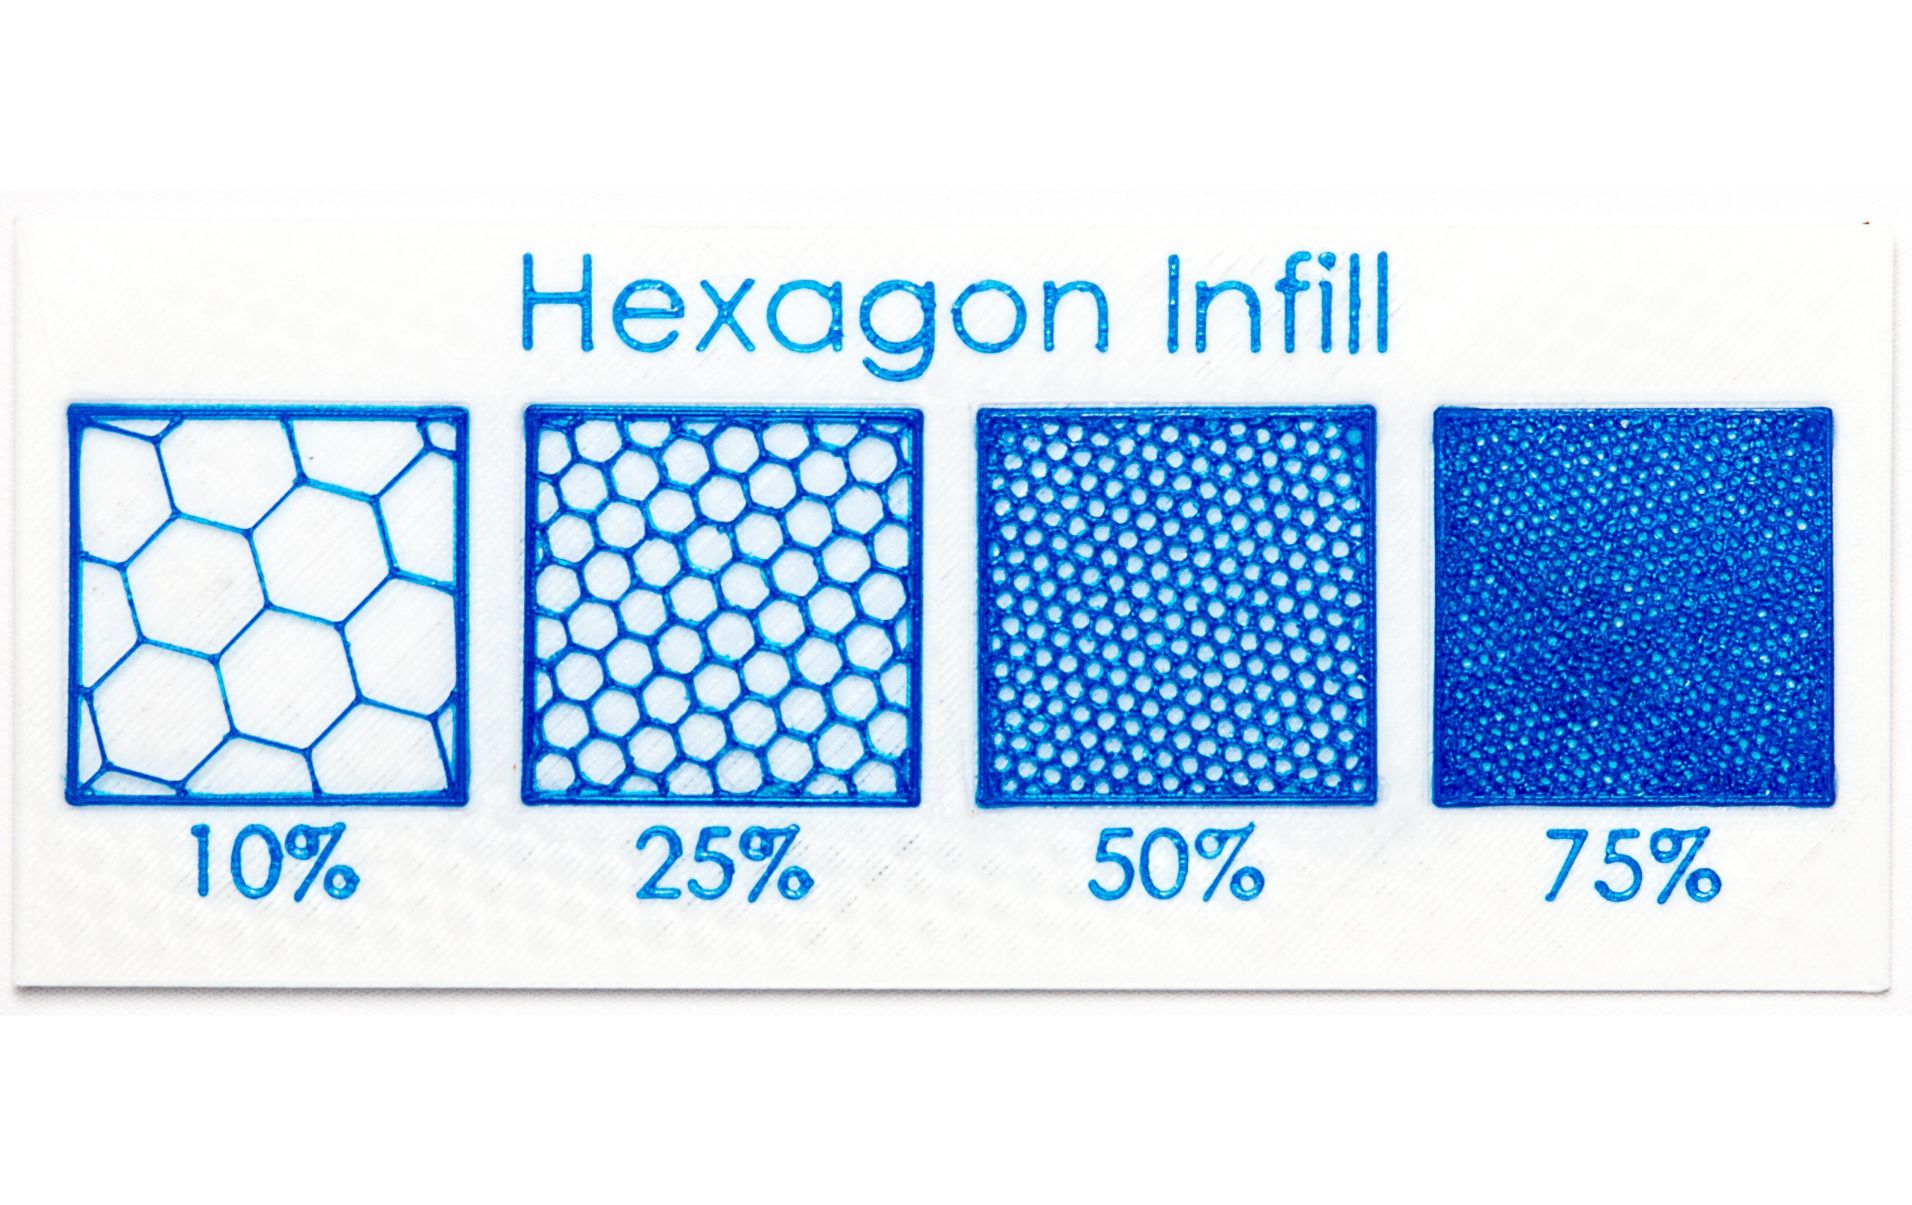
- Honeycomb: The honeycomb infill pattern features a series of hexagonal cells connected to one another. It offers excellent strength and weight distribution.
- Cubic: Cubic infill consists of interconnected cubic shapes. It provides high structural integrity but can be time-consuming to print.
- Concentric: Concentric infill features circular lines that gradually grow smaller towards the center. It provides good strength and prints quickly.
By choosing different infill patterns, you can achieve different levels of strength, flexibility, and weight for your 3D prints. It’s important to consider the specific requirements of your project and the intended use of the printed object when selecting an infill pattern.
Accessing Infill Settings in Cura
Now that we have a basic understanding of infill patterns, let’s explore how to access the infill settings in Cura.
To begin, launch Cura and open the project you wish to modify or create a new project. Once you have your project loaded, navigate to the right-hand panel where you will find a series of tabs and settings. Look for the tab labeled “Infill.”
Clicking on the “Infill” tab will bring up a range of options and settings related to infill patterns. Here, you can customize the infill pattern, infill density, and other parameters to fine-tune your print’s internal structure. You may also find additional settings related to infill, such as infill overlap and initial layer line width.
Within the infill settings tab, you will notice a drop-down menu that allows you to select the infill pattern you want to use. This is where you can experiment and choose the pattern that best suits your needs. Cura provides a preview of each infill pattern to give you an idea of how it will look in your print.
Alongside the infill pattern selection, you will find a slider or input field to adjust the infill density. The infill density determines the percentage of the object’s volume that will be filled with infill material. A higher infill density means a stronger, denser print, while a lower infill density results in a more lightweight print with less material usage.
Additionally, you may have the option to adjust other infill-related parameters, such as infill angle, pattern spacing, or top/bottom infill pattern. These settings can further influence the strength and characteristics of your print’s internal structure.
Once you have made the desired changes to the infill settings, you are ready to proceed with modifying the infill pattern in your 3D print. In the next section, we will explore the steps to change the infill pattern and adjust the settings in Cura.
Steps to Change Infill Pattern
Changing the infill pattern in Cura is a straightforward process. Follow these steps to modify the infill pattern for your 3D print:
- Launch Cura and open the project you want to modify or create a new project.
- Navigate to the right-hand panel and click on the “Infill” tab.
- In the infill settings, locate the drop-down menu labeled “Infill Pattern” and click on it.
- A list of available infill patterns will appear. Scroll through the options and choose the desired infill pattern for your print.
- Adjust the infill density using the slider or input field provided. Higher values create a denser infill, while lower values result in a more lightweight structure.
- Optionally, modify other infill-related parameters such as infill angle, pattern spacing, or top/bottom infill pattern, if available.
- Take a moment to preview the changes in the 3D model preview window to get an idea of how the modified infill pattern will look.
- Once you are satisfied with the infill pattern and settings, save the changes to your project or export the modified print file.
Following these steps will allow you to change the infill pattern in Cura and customize it to suit your specific needs. Keep in mind that experimentation and iteration may be required to find the optimal infill pattern and settings for your desired print results.
Now that you know how to change the infill pattern in Cura, let’s take a closer look at each infill pattern available in Cura and understand their characteristics and best use cases.
In Cura, go to the “Infill” tab and select a different pattern from the drop-down menu. Experiment with different patterns to find the one that best suits your 3D printing needs.
Read more: How To Do Infill Mask In Cura
Selecting a New Infill Pattern
When it comes to choosing a new infill pattern in Cura, you have several options to consider. Each infill pattern offers unique characteristics and strengths, and selecting the right pattern can greatly impact the performance and aesthetics of your 3D print.
Here are some popular infill patterns available in Cura, along with their properties and best use cases:
- Grid: The grid infill pattern consists of a network of intersecting lines at 90-degree angles. It strikes a good balance between structural integrity and material usage. It is a versatile option suitable for a wide range of prints.
- Triangles: Triangular infill features a series of interconnected triangles. It provides good strength and stability while minimizing material usage. This pattern is well-suited for prints that require strong and lightweight internal structures.
- Lines: The lines infill pattern is composed of parallel lines running in a single direction. It is a simple and quick-to-print pattern that works well for less complex prints where strength is not the primary concern.
- Honeycomb: The honeycomb infill pattern features a series of hexagonal cells connected to one another. It offers excellent strength and weight distribution. This pattern is ideal for prints that require maximum strength and stability.
- Cubic: Cubic infill consists of interconnected cubic shapes. It provides high structural integrity but can be more time-consuming to print compared to other patterns. This pattern is suitable for prints that require exceptional strength and rigidity.
- Concentric: The concentric infill pattern features circular lines that gradually grow smaller towards the center. It offers good strength and prints quickly. This pattern is ideal for prints where time is a constraint but strength is still important.
When selecting a new infill pattern, consider the specific requirements of your project. Take factors such as the desired strength, weight, print time, and aesthetics into account. If unsure, it may be helpful to test different patterns on small-scale prints to determine which one works best for your specific needs.
Remember, changing the infill pattern allows you to experiment and customize your prints according to their intended purpose. By selecting the right infill pattern, you can optimize the structural integrity, weight, and overall quality of your 3D prints.
Now, let’s move on to understanding how to adjust infill settings to fine-tune the performance of your prints.
Adjusting Infill Settings
Once you have chosen a new infill pattern in Cura, you may need to adjust additional infill settings to further customize the performance of your 3D print. These settings can help you fine-tune various aspects of the infill pattern to suit your specific requirements.
Here are some common infill settings you may encounter in Cura:
- Infill Density: This setting allows you to adjust the percentage of the object’s volume that will be filled with infill material. Higher values result in a denser print, offering increased strength but using more material. Lower values create a more lightweight print with reduced strength.
- Infill Pattern Angle: Some infill patterns, such as lines or concentric, can be rotated at different angles. This setting allows you to specify the orientation of the infill pattern within your print. Adjusting the angle can affect the overall strength and aesthetics of the object.
- Infill Line Distance: This setting allows you to specify the spacing between the lines or solid shapes in the infill pattern. Adjusting this distance can impact the structural integrity and material usage of your print.
- Infill Overlap: Infill overlap refers to the extent to which the infill pattern overlaps with the outer walls of the print. Increasing the overlap can enhance the bond between the infill and the walls, improving overall strength.
- Top/Bottom Infill Pattern: Cura also provides the option to specify a different infill pattern for the top and bottom layers of the print. This can be useful if you want to prioritize surface quality or strength in specific areas of the object.
Based on your specific needs and the characteristics of your 3D print, you can experiment with these settings to achieve the desired balance between strength, weight, print time, and overall quality.
It’s important to note that adjusting these settings may require some trial and error. Small-scale test prints can help you evaluate the impact of different infill settings on the final print. Through iteration and experimentation, you can fine-tune the infill to achieve optimal results for your project.
Now that you understand how to adjust infill settings, let’s move on to previewing and saving the changes in Cura.
Previewing and Saving the Changes
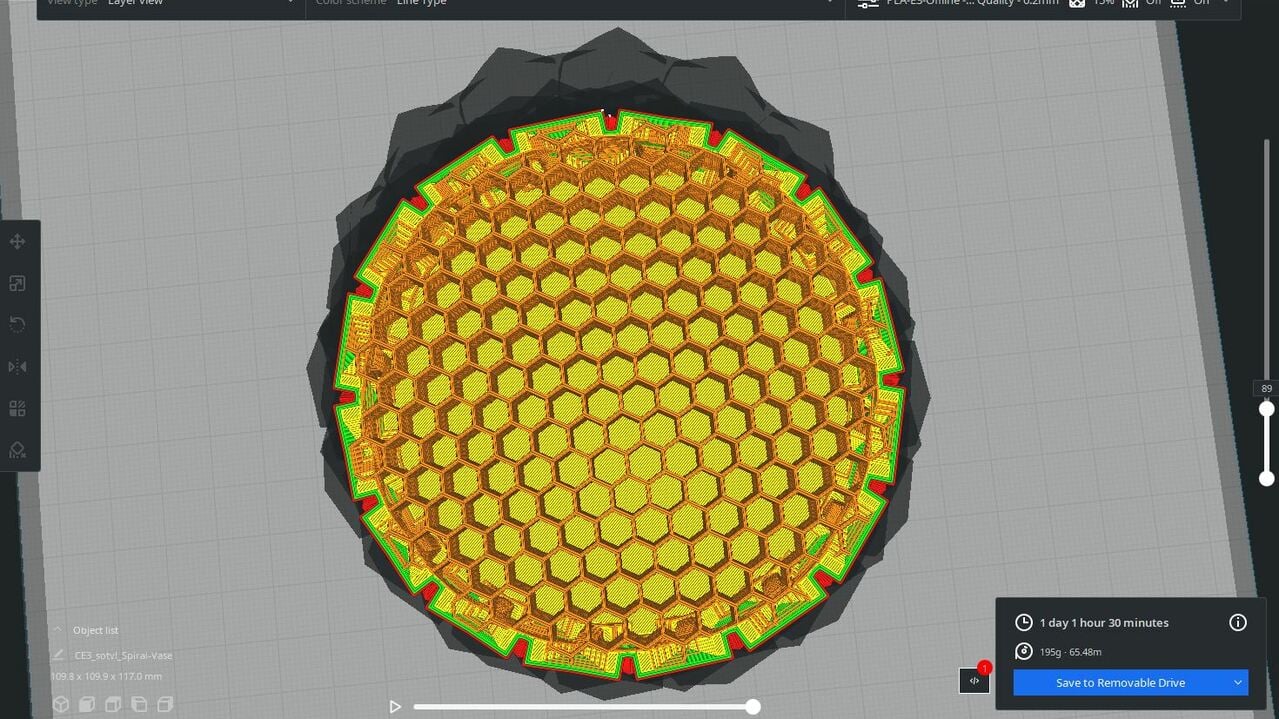
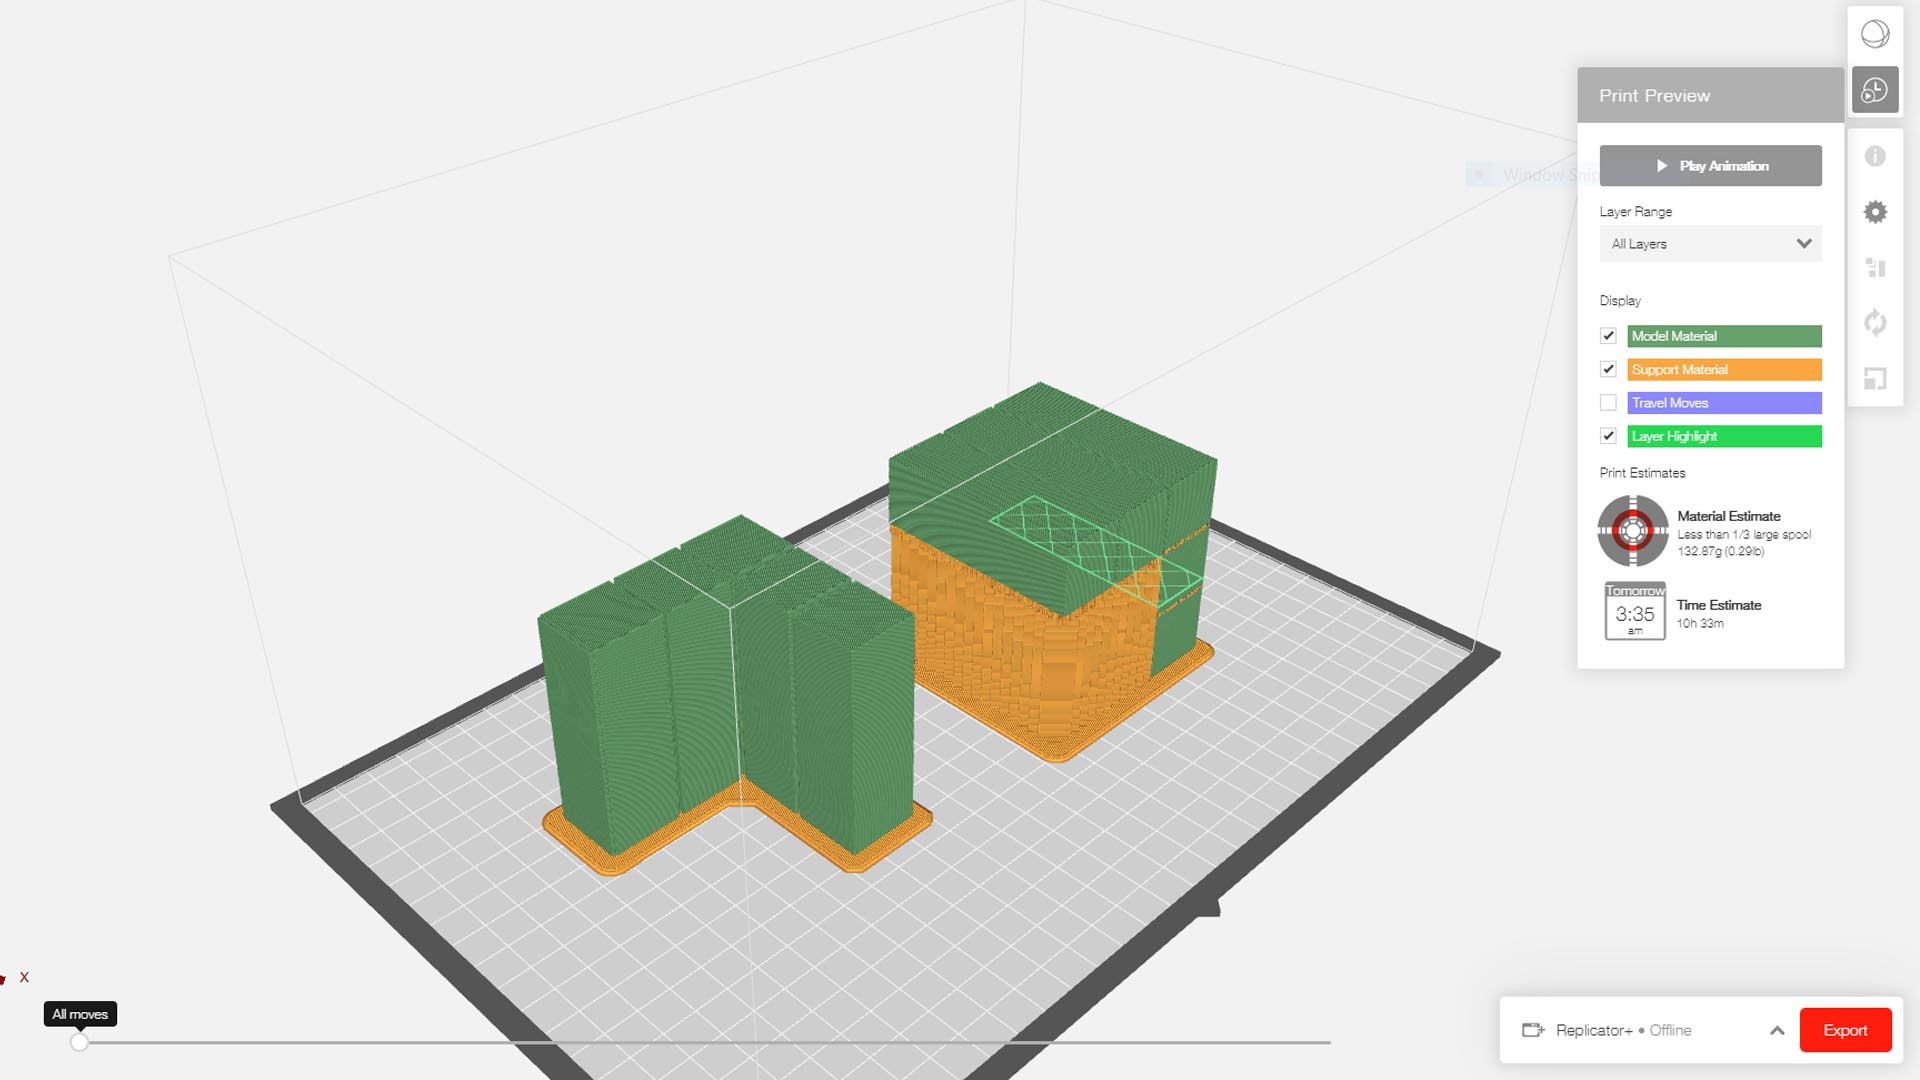
After you have changed the infill pattern and adjusted the desired settings in Cura, it’s essential to preview the changes before finalizing them and saving the modified print file.
To preview the changes, take advantage of the 3D model preview window in Cura. This interactive preview allows you to visualize how the infill pattern and settings will affect the internal structure of your print. It can help you identify any potential issues or areas that may require further adjustment.
Take your time to examine the preview from various angles and zoom in to inspect the details. Verify that the infill pattern aligns with your expectations and that it complements the overall design of your object. Pay attention to any potential gaps, overlaps, or irregularities that could affect the print quality.
If you are satisfied with the changes and the preview looks as desired, it’s time to save the modifications. Cura provides options to save the project settings or export the modified print file.
To save the project settings, go to the “File” menu and choose “Save Project.” This will store the changes within the Cura project file format (.3mf) for future reference. Saving the project allows you to easily revisit and modify the infill pattern and settings without starting from scratch.
If you want to export the modified print file, go to the “File” menu and select “Save as STL” or the appropriate file format for your 3D printer. This will generate a new 3D model file with the updated infill pattern and settings, ready for printing.
Ensure you choose the correct file format and check the export settings to maintain compatibility with your 3D printer and slicer software.
With the changes saved or the modified print file exported, you are ready to proceed with printing your 3D object. Remember to follow proper printing procedures, such as bed leveling, temperature calibration, and filament selection, to achieve optimal results.
By previewing and saving the changes in Cura, you can confidently apply the customized infill pattern and settings to your 3D prints, resulting in prints that meet your specific requirements and expectations.
Next, let’s sum up what we have covered in this article and conclude our discussion on changing the infill pattern in Cura.
Conclusion
In conclusion, changing the infill pattern in Cura provides you with the flexibility to customize the internal structure of your 3D prints. By selecting the right infill pattern and adjusting the infill settings, you can optimize the strength, weight, and overall quality of your prints to suit your specific needs.
Cura, with its user-friendly interface and extensive range of features, allows you to easily access and modify the infill settings. The available infill patterns, such as grid, triangles, lines, honeycomb, cubic, and concentric, offer unique characteristics and strengths, allowing you to achieve the desired balance between structure, material usage, and aesthetics.
Adjusting infill settings allows for further customization, including infill density, infill pattern angle, line distance, overlap, and top/bottom infill pattern, enabling you to fine-tune the performance of your prints. It’s important to experiment, iterate, and validate the changes through previewing before saving or exporting the modified print file.
Whether you are looking to create functional objects that require maximum strength, lightweight models that reduce material usage, or intricate designs that balance aesthetics and internal support, understanding and changing the infill pattern in Cura is a valuable skill for every 3D printing enthusiast.
So, embrace your creativity, explore the possibilities, and discover the endless potential of infill customization in Cura. Take advantage of the different infill patterns and infill settings to unleash the full potential of your 3D prints.
With the knowledge and techniques shared in this article, you can confidently embark on your 3D printing journey, knowing that you have the power to create prints that meet your expectations and surpass your imagination.
Happy printing!
Frequently Asked Questions about How To Change Infill Pattern In Cura
Was this page helpful?
At Storables.com, we guarantee accurate and reliable information. Our content, validated by Expert Board Contributors, is crafted following stringent Editorial Policies. We're committed to providing you with well-researched, expert-backed insights for all your informational needs.

0 thoughts on “How To Change Infill Pattern In Cura”