Home>Garden Essentials>How To Change Infill On Each Model In UP Studio
Garden Essentials
How To Change Infill On Each Model In UP Studio
Modified: August 20, 2024
Learn how to change the infill on each garden model in UP Studio. Enhance your prints with customized infill settings for optimal results.
(Many of the links in this article redirect to a specific reviewed product. Your purchase of these products through affiliate links helps to generate commission for Storables.com, at no extra cost. Learn more)
Introduction
Welcome to our comprehensive guide on how to change the infill on each model in UP Studio. Whether you are a beginner or an experienced 3D printing enthusiast, understanding how to adjust the infill settings can significantly impact the strength, time, and material consumption of your prints.
The infill is the internal structure of a 3D printed object that provides support and stability. By adjusting the infill density, you can control the amount of material used and the strength of the print. It’s an important parameter to consider when striving for optimal print quality and efficiency.
In this guide, we will walk you through the step-by-step process of changing the infill on each model in UP Studio, the user-friendly software that accompanies the UP 3D printers. Before we dive into the details, ensure that you have the latest version of UP Studio installed on your computer and that your UP printer is properly connected.
Now, let’s get started with the first step of accessing the model settings in UP Studio.
Key Takeaways:
- Customize infill settings in UP Studio to make 3D prints stronger or faster. Experiment with different infill patterns and densities for optimal results.
- Save changes to infill settings for each model in UP Studio. Tailor print parameters to suit specific requirements and unleash creativity in 3D printing.
Read more: How To Add Infill To A SketchUp Model
Step 1: Accessing the Model Settings
The first step in changing the infill on each model in UP Studio is to access the model settings. This is where you can make adjustments to various parameters, including infill density, layer height, print speed, and more.
To access the model settings, follow these simple steps:
- Launch UP Studio on your computer.
- Click on the “Open” button to import the model you wish to modify.
- Select the model from the project list and click on the “Settings” tab located at the top of the screen.
By following these steps, you will be able to access the model settings and proceed to the next step of selecting the model.
Step 2: Selecting the Model
After accessing the model settings in UP Studio, the next step is to select the model you want to modify the infill for. This is an important step as it allows you to make specific changes to individual models if you have multiple models loaded in the software.
To select the model, follow these steps:
- In the model settings tab, you will see a list of the models you have imported into UP Studio.
- Click on the model you wish to modify to select it.
- You will notice that the model preview will be highlighted or outlined, indicating that it is currently selected.
By following these steps, you will be able to select the model you want to modify and move on to the next step of changing the infill.
In UP Studio, you can change the infill on each model by selecting the model, clicking on “Edit” and then adjusting the infill percentage under the “Infill” tab. This allows you to customize the infill for each individual model in your print job.
Step 3: Changing the Infill
Now that you have accessed the model settings and selected the specific model you want to modify, it’s time to change the infill. This step allows you to adjust the density of the internal structure of the model, thereby impacting its strength and material consumption.
To change the infill, follow these steps:
- In the model settings tab, locate the “Infill” option.
- Click on the drop-down menu next to “Infill” to reveal a list of available infill patterns.
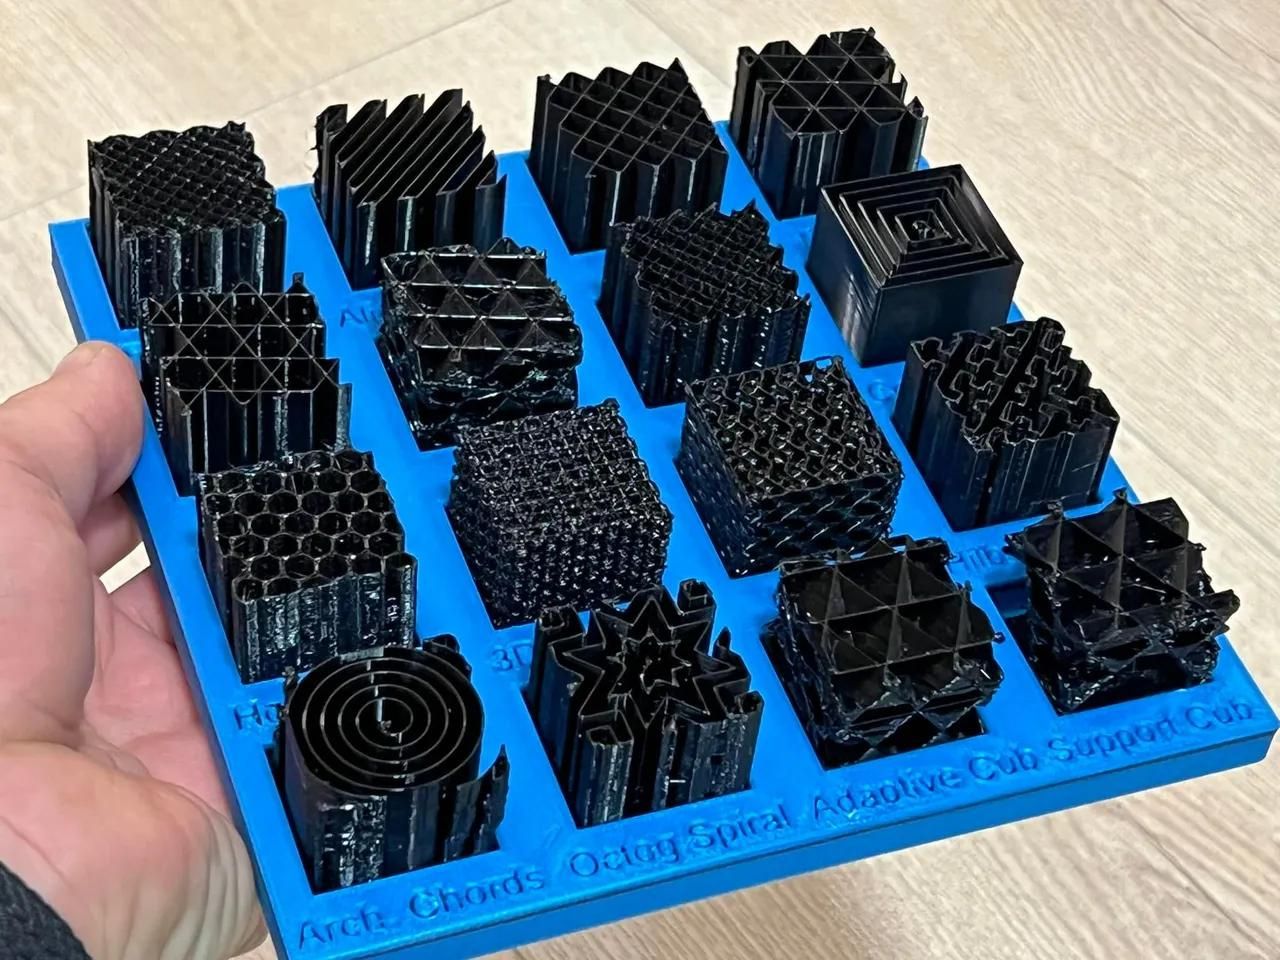
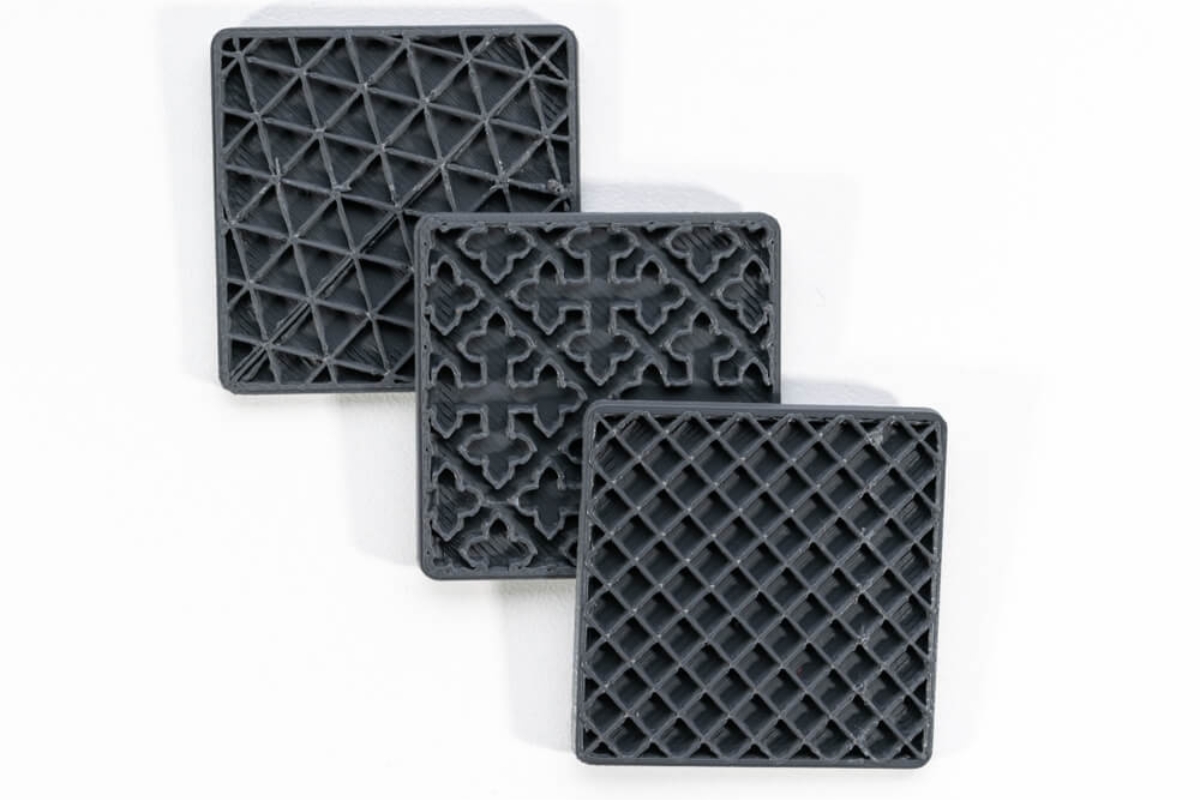
- Select the desired infill pattern from the list. Common options include grid, honeycomb, triangular, and more.
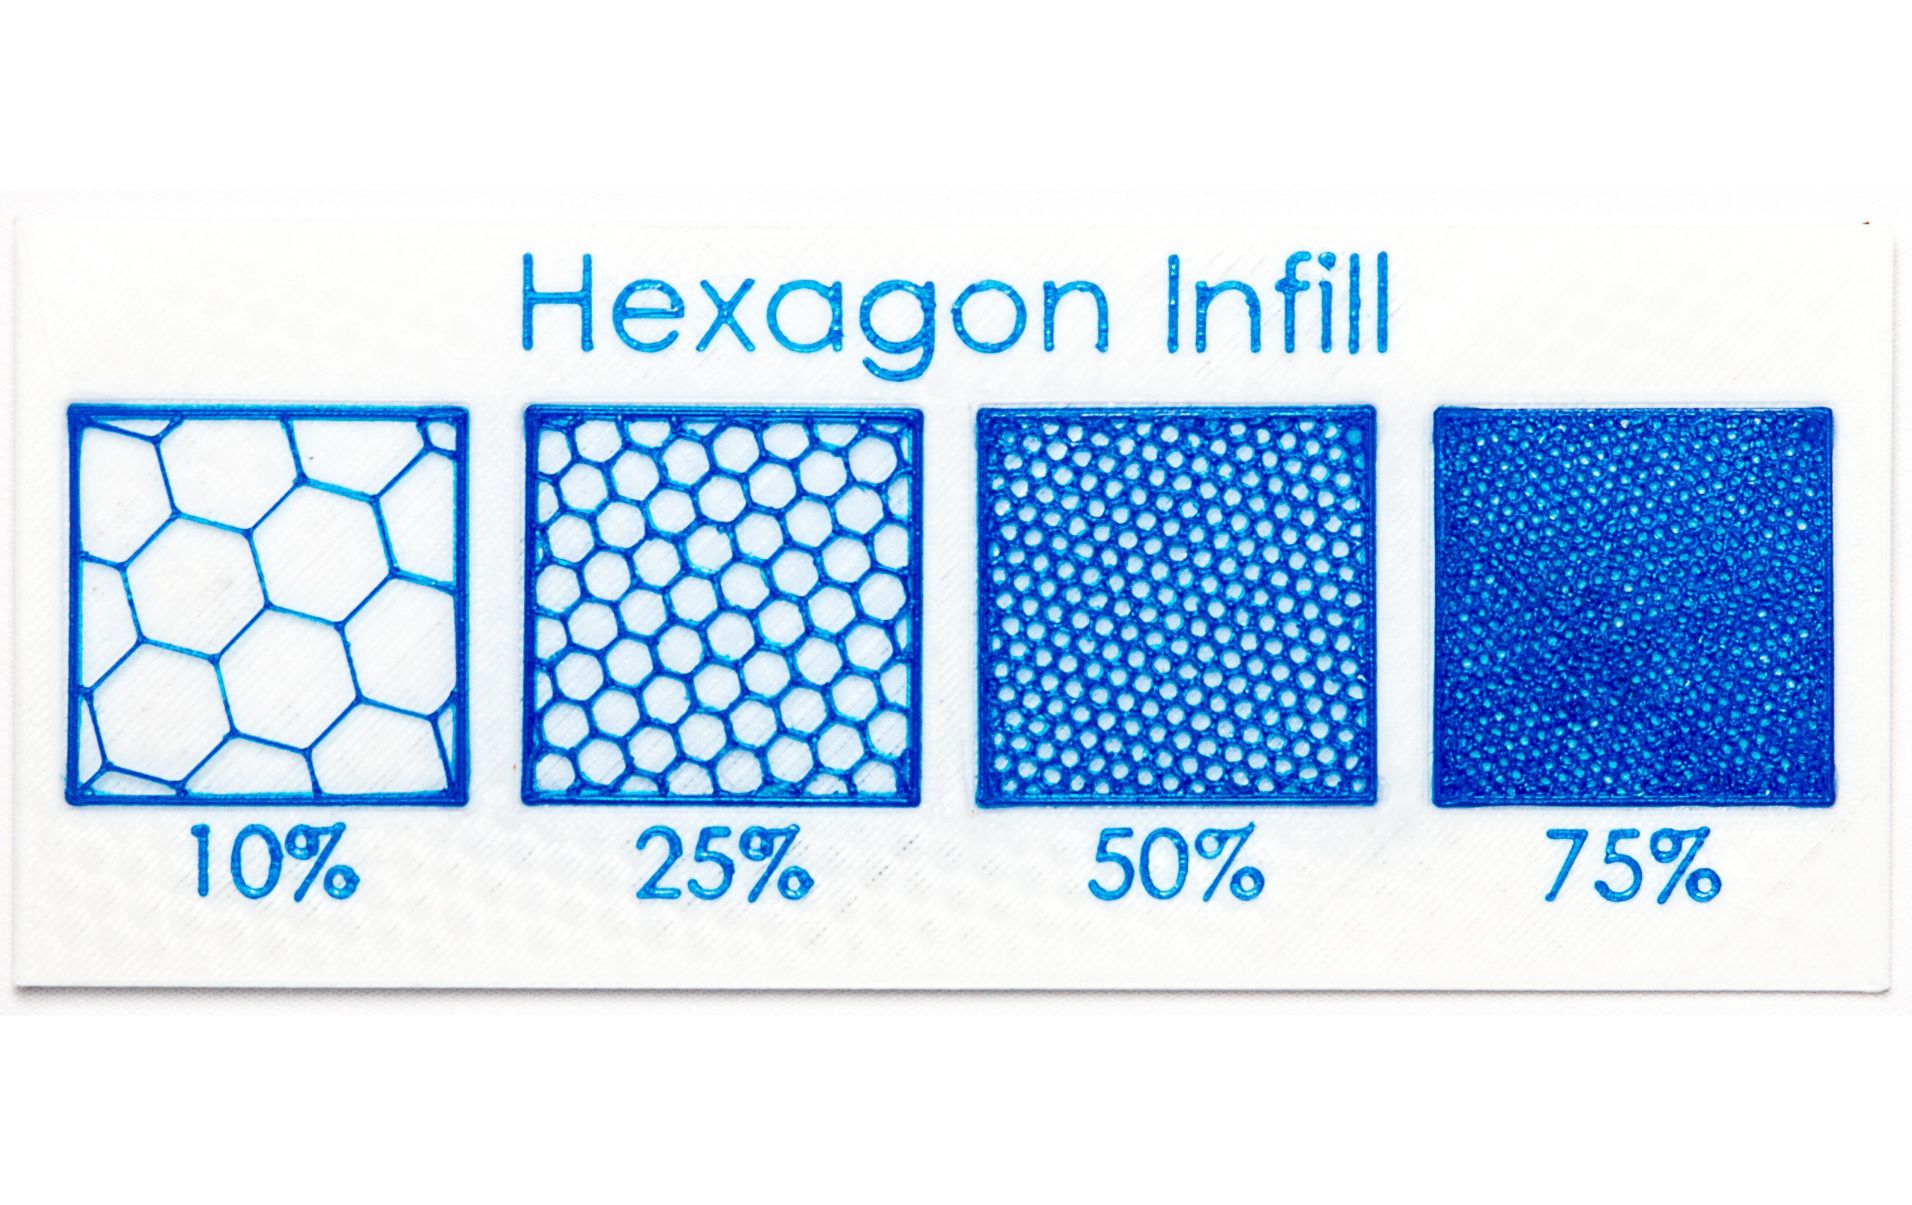
- Next, adjust the “Infill Density” slider to increase or decrease the amount of infill. Higher density results in a stronger print while lower density saves material and reduces print time.
By following these steps, you can customize the infill settings according to your specific needs and preferences. Experimenting with different infill patterns and densities can help you achieve the desired balance between strength, time, and material usage for your 3D prints.
Step 4: Saving the Changes
Once you have made the necessary adjustments to the infill settings, it’s important to save your changes to ensure they are applied to the selected model. Saving the changes will ensure that the modified infill settings are retained even if you close the software or switch to a different model.
To save the changes, follow these steps:
- In the model settings tab, locate the “Save” button. It is usually located at the bottom right corner of the screen.
- Click on the “Save” button to apply and save your modifications to the selected model.
- You may be prompted to choose a location to save the modified model file. Select the desired location and click “Save”.
By following these steps, you have successfully saved the changes to the infill settings for the selected model. The modified model file can now be used for future printing or further modifications if needed.
It is important to note that saving the changes does not affect other models or global settings in UP Studio. Each model can have its own unique infill settings, allowing you to tailor the print parameters to suit your specific requirements.
Read more: How To Change Infill On Makerbot
Conclusion
Changing the infill on each model in UP Studio is a valuable skill that allows you to fine-tune the strength, time, and material consumption of your 3D prints. By adjusting the infill density and pattern, you can optimize the print quality and efficiency for each individual model.
In this comprehensive guide, we have walked you through the step-by-step process of changing the infill on each model in UP Studio. Starting from accessing the model settings to selecting the specific model, and finally adjusting and saving the infill changes, you now have the knowledge and skills to customize the internal structure of your 3D prints.
Remember that infill density can impact the strength and material usage of your prints. Higher densities result in stronger prints but may require more time and material, while lower densities save time and material but may sacrifice some strength. Finding the right balance for your specific needs and requirements is key.
Now, armed with this newfound understanding of how to change the infill in UP Studio, you can unleash your creativity and explore the endless possibilities of 3D printing. Experiment with different infill patterns, densities, and materials to achieve the best results for your projects.
Keep in mind that practice makes perfect, so don’t be afraid to iterate and refine your settings to achieve the desired outcomes. Enjoy the journey of 3D printing as you push the boundaries of what is possible with each printed model.
Happy printing!
Frequently Asked Questions about How To Change Infill On Each Model In UP Studio
Was this page helpful?
At Storables.com, we guarantee accurate and reliable information. Our content, validated by Expert Board Contributors, is crafted following stringent Editorial Policies. We're committed to providing you with well-researched, expert-backed insights for all your informational needs.


0 thoughts on “How To Change Infill On Each Model In UP Studio”