Home>Garden Essentials>How To Set Infill Density In Cura Engine And Repetier Host
Garden Essentials
How To Set Infill Density In Cura Engine And Repetier Host
Modified: April 22, 2024
Learn how to adjust the infill density for your garden projects using Cura Engine and Repetier Host. Create strong and durable structures with the perfect fill ratio.
(Many of the links in this article redirect to a specific reviewed product. Your purchase of these products through affiliate links helps to generate commission for Storables.com, at no extra cost. Learn more)
Introduction
Welcome to the world of 3D printing! As a beginner, you might find yourself overwhelmed with all the settings and options available to create the perfect 3D prints. One crucial setting that often gets overlooked is infill density.
Understanding and setting the right infill density in your prints can significantly impact the strength, durability, and overall quality of your 3D printed objects. In this article, we will explore what infill density is, why it is important, and guide you through the process of setting infill density using popular slicing software such as Cura Engine and Repetier Host.
So, let’s dive in and unlock the secrets to achieving optimal infill density for your 3D prints!
Key Takeaways:
- Infill density is like the skeleton inside a 3D printed object, and adjusting it affects the strength, weight, and cost of the print. Higher density means stronger but heavier prints, while lower density saves material and time.
- Using software like Cura Engine and Repetier Host, you can easily customize infill density to match your specific needs. Consider factors like print function, filament type, and design complexity to find the perfect balance.
Read more: How To Do Infill Mask In Cura
What is infill density?
Infill density refers to the amount of material that is used to fill the inside of a 3D printed object. When you print a 3D model, it is not solid throughout; instead, it consists of a series of layers stacked on top of each other. The infill is the internal structure that provides support and stability to the object, while minimizing material usage and print time.
The infill density is typically represented as a percentage, where 0% means completely hollow and 100% means completely solid. Choosing the right infill density is crucial because it directly affects the strength, weight, and cost of the final print.
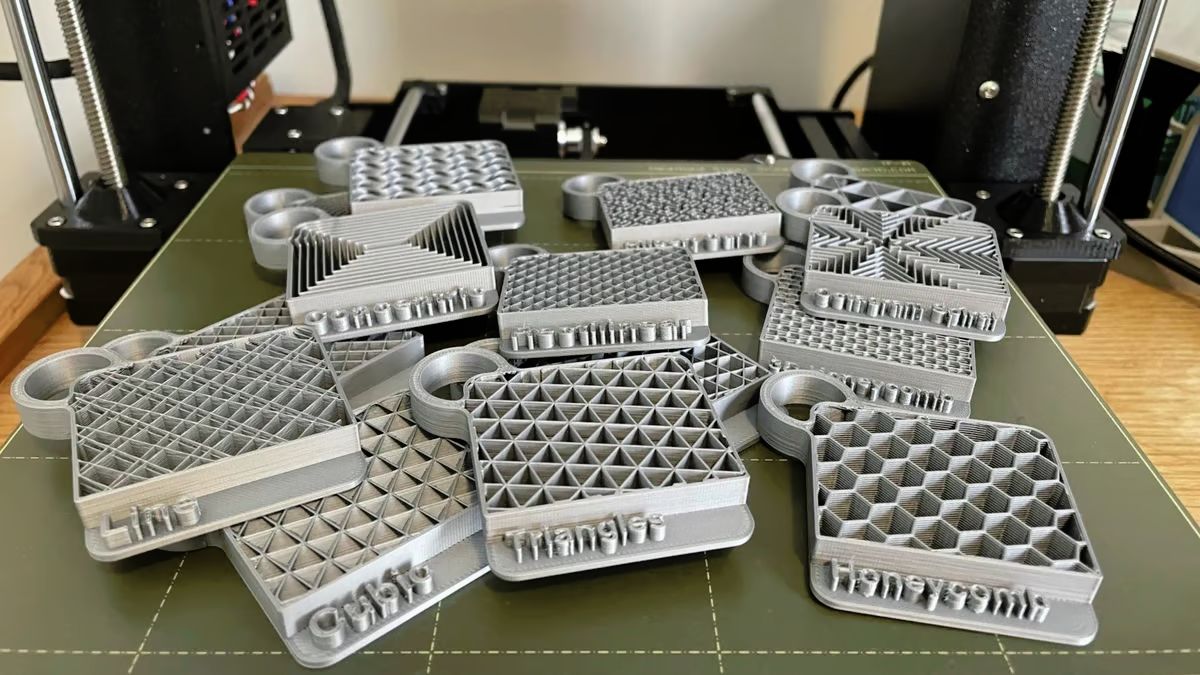
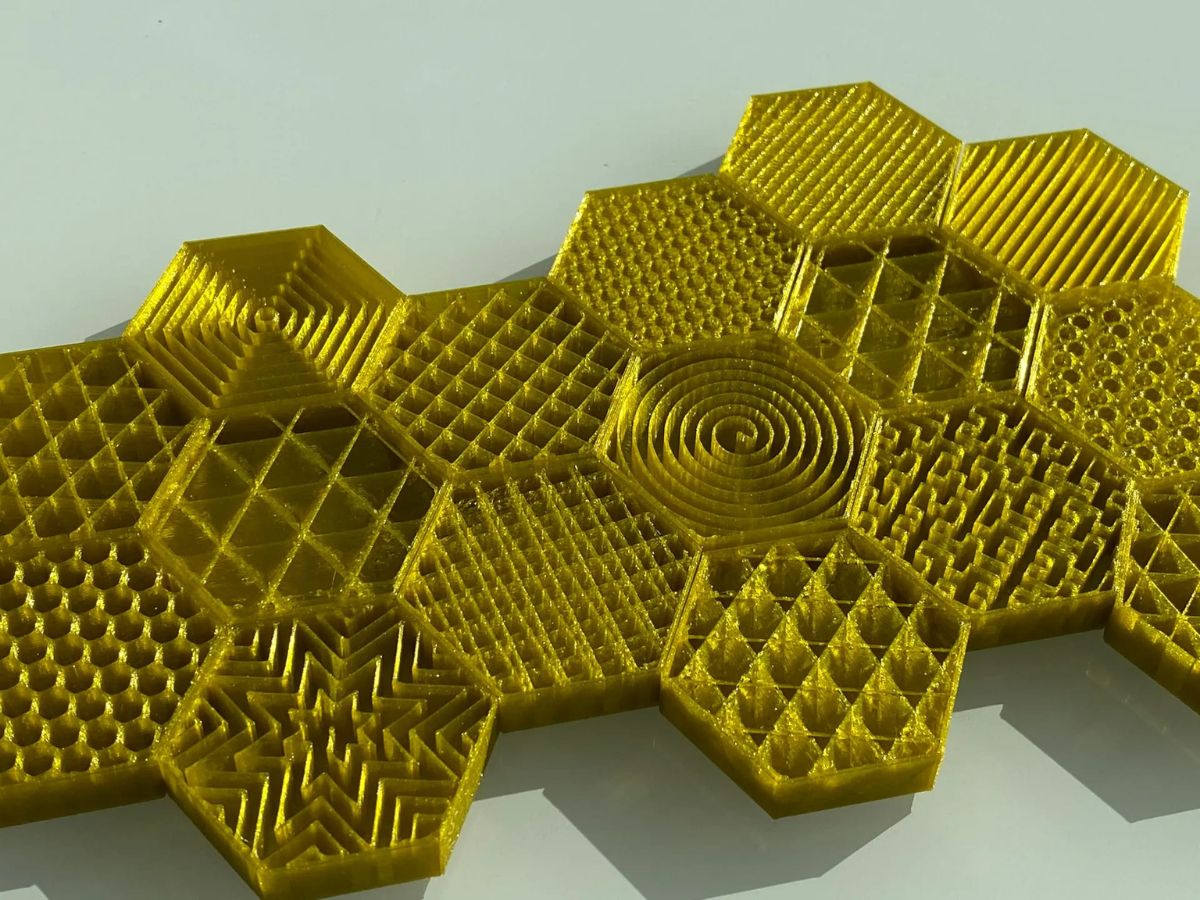
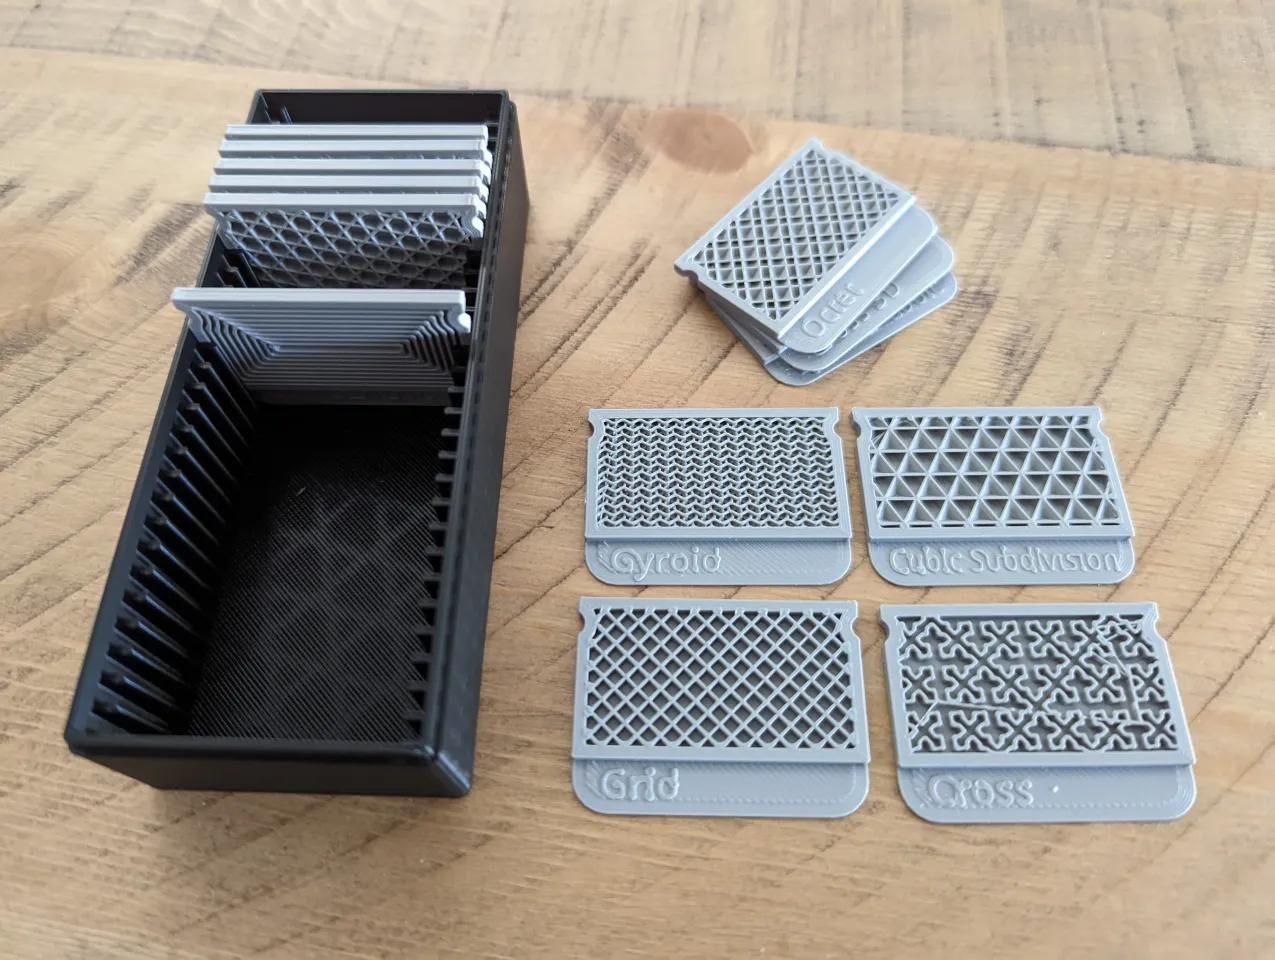
There are a few different types of infill patterns you can choose from, such as honeycomb, grid, and rectilinear. These patterns determine how the infill is arranged within the object, and each has its own benefits and drawbacks. The infill pattern you select will also impact the overall strength and stability of your printed object.
So how do you determine the ideal infill density for your prints? This depends on various factors, such as the purpose of the print, the desired level of strength, and the type of filament you are using. Let’s explore why infill density is important and how it can affect your prints.
Why is infill density important?
Infill density plays a vital role in the structural integrity and functionality of your 3D printed objects. Here are some key reasons why infill density is important:
- Strength and Durability: The infill density directly affects the strength and durability of your prints. A higher infill density results in a more solid and robust object, making it suitable for applications that require structural integrity and load-bearing capabilities. Conversely, a lower infill density creates a lighter object, which may be more suitable for decorative or less demanding uses.
- Time and Material Usage: Choosing the right infill density can significantly impact the amount of time and material required for a print. Higher infill densities increase print time and material consumption but result in stronger prints. On the other hand, lower infill densities reduce print time and material usage, making it more efficient for objects where strength is not the primary concern.
- Weight: Infill density also affects the weight of your printed objects. Higher densities create heavier objects, while lower densities result in lighter objects. This consideration is particularly important for applications where weight is a factor, such as aerospace or robotics.
- Printability: The infill density can influence the printability of certain objects. Complex or intricate designs may require higher infill densities to ensure proper support and prevent sagging or collapse during printing. Balancing the infill density with the design complexity is crucial for achieving successful and accurate prints.
- Economy: By optimizing the infill density, you can achieve a balance between strength and material usage, leading to cost savings in the long run. Fine-tuning the infill density based on the specific requirements of your print can help you achieve the desired results while using the least amount of material necessary.
Now that you understand the importance of infill density, let’s delve into the factors to consider when setting the infill density for your prints.
Factors to consider when setting infill density
When determining the appropriate infill density for your 3D prints, several factors should be taken into consideration. These factors will help you achieve the desired balance between strength, weight, printability, and cost. Here are some key factors to consider:
- Function and Purpose of the Print: The intended function and purpose of your printed object play a crucial role in determining the infill density. For objects that require structural strength and durability, such as mechanical parts or functional prototypes, a higher infill density (around 50-100%) is recommended. On the other hand, for decorative or less demanding objects, a lower infill density (around 10-30%) can suffice.
- Filament Type: Different types of filaments have varying strengths and properties. Some filaments, like PLA, are generally more brittle and rigid, while others, like ABS or PETG, are more flexible and impact-resistant. Consider the characteristics of the filament you are using and adjust the infill density accordingly. For more brittle filaments, it’s beneficial to have a higher infill density to reinforce the object’s strength.
- Print Time: The infill density directly affects the print time. Higher densities increase print time, as more material is being printed. Consider the time constraints you may have for your project and balance the desired infill density with the available time.
- Desired Print Weight: In some applications, minimizing weight is essential. If weight is a significant factor, you can reduce the infill density to create a lighter object. This is particularly important for applications such as drones or wearable devices where weight directly impacts performance.
- Printing Temperature and Cooling: The printing temperature and cooling settings can impact the infill density. Higher temperatures and inadequate cooling can cause filament to over-extrude and lead to increased infill density. Conversely, lower temperatures and effective cooling can result in lower infill density. Adjust your printer’s temperature and cooling settings to achieve the desired infill density.
- Design Complexity: The complexity of your design can influence the infill density. Complex designs with overhangs, bridges, or intricate details may require higher infill densities to provide proper support during printing and prevent sagging or collapse.
Consider these factors when setting the infill density for your 3D prints to ensure you achieve the best results. Now, let’s explore how to adjust the infill density using popular slicing software such as Cura Engine and Repetier Host.
Using Cura Engine to set infill density
Cura Engine is a popular slicing software widely used by 3D printing enthusiasts. It offers a user-friendly interface with advanced options for optimizing your prints, including adjusting the infill density. Here’s a step-by-step guide on how to use Cura Engine to set the infill density:
- Step 1: Opening Cura Engine: Launch Cura Engine on your computer. If you haven’t installed it yet, you can download it from the Ultimaker website and follow the installation instructions.
- Step 2: Navigating to the infill settings: Once Cura Engine is open, navigate to the settings section. Look for the “Infill” tab or category, usually placed under the “Print Setup” or “Print Settings” section.
- Step 3: Adjusting the infill density: In the infill settings, you will find options to modify the infill density. Usually, there is a slider or input field where you can set the infill density as a percentage. Adjust the slider or enter the desired percentage value based on your preferences and the factors we discussed earlier.
- Step 4: Slicing the model with the new infill density: After setting the desired infill density, load your 3D model into Cura Engine by clicking on the “Open File” or “Import” button. Make any additional adjustments to other settings if needed. Once you are satisfied, hit the “Slice” button, and Cura Engine will generate the G-code file for your 3D printer with the updated infill density.
With these simple steps, you can easily adjust the infill density using Cura Engine to achieve the desired balance between strength, print time, and material usage.
Now, let’s explore how to set the infill density using Repetier Host.
Using Cura Engine to set infill density
Step 1: Opening Cura Engine
To get started with Cura Engine, you’ll first need to open the software on your computer. Follow these steps to open Cura Engine:
- Ensure that Cura Engine is successfully installed on your computer. If you haven’t installed it yet, you can download it from the Ultimaker website and follow the installation instructions specific to your operating system.
- Locate the Cura Engine application icon on your desktop or in your Start menu. Double-click on the icon to launch the software.
- After launching Cura Engine, you will be greeted with the main interface. Here, you’ll find various options and settings to configure your 3D prints.
- Take a moment to familiarize yourself with the main screen of Cura Engine. You’ll see different tabs and sections, such as “Print Setup,” “Quality,” “Materials,” and more. These tabs contain settings related to different aspects of your 3D prints.
- Now, you’re ready to proceed to the next step and navigate to the infill settings where you can adjust the infill density for your prints.
By following these steps, you will be able to open Cura Engine and access the main interface, where you can begin configuring your 3D prints and set the infill density according to your requirements. In the subsequent steps, we will explore how to navigate to the infill settings and adjust the infill density in Cura Engine.
Using Cura Engine to set infill density
Step 2: Navigating to the infill settings
Once you have successfully opened Cura Engine on your computer, the next step is to navigate to the infill settings. Here’s how you can find the infill settings in Cura Engine:
- On the main screen of Cura Engine, look for the “Print Setup” or “Print Settings” tab. This tab is typically located at the top or along the sidebar of the interface.
- Click on the “Print Setup” or “Print Settings” tab to access various settings related to your print job.
- Within the “Print Setup” or “Print Settings” tab, you’ll find a list of different settings categories. Look for the category named “Infill” or a similar term.
- Click on the “Infill” category to expand it and reveal the specific options and parameters related to infill settings.
- Within the “Infill” section, you’ll find settings such as “Infill Density,” “Infill Pattern,” and “Line Width.” These settings allow you to adjust the density of the infill, choose the pattern for the infill structure, and set the width of the infill lines.
- Now that you have successfully navigated to the infill settings, you’re ready to proceed to the next step and adjust the infill density according to your preferences.
By following these steps, you will be able to locate the infill settings in Cura Engine, which will allow you to customize the infill density of your 3D prints. In the subsequent steps, we will explore how to adjust the infill density and slice your model with the updated settings.
Using Cura Engine to set infill density
Step 3: Adjusting the infill density
Now that you have successfully navigated to the infill settings in Cura Engine, it’s time to adjust the infill density according to your desired specifications. Follow these steps to modify the infill density:
- Within the “Infill” section, locate the setting labeled “Infill Density” or a similar term.
- You will typically see a slider or an input field next to the “Infill Density” setting. This allows you to adjust the infill density as a percentage. Move the slider or type in the desired value to set the infill density according to your requirements.
- As you adjust the infill density, you will notice the changes reflected in the preview window of Cura Engine. This will give you a visual representation of how the infill density affects the internal structure of your 3D print.
- Consider the factors we discussed earlier, such as the function of the print, desired strength, material usage, and print time, while adjusting the infill density. Find the balance that best suits your needs.
- Take the time to experiment with different infill densities to find the optimal setting for your specific print job. Remember that higher infill densities generally result in stronger but heavier prints, while lower infill densities can save material and reduce print time, albeit with reduced strength.
- Once you have adjusted the infill density to your liking, you’re ready to proceed to the next step and slice your model with the updated infill settings.
By following these steps, you can easily adjust the infill density using Cura Engine to achieve the desired balance between strength, weight, and material usage for your 3D prints. In the subsequent step, we will explore how to slice the model with the updated infill density.
Using Cura Engine to set infill density
Step 4: Slicing the model with the new infill density
After adjusting the infill density to your desired specifications in Cura Engine, the next step is to slice the model with the updated infill density. Slicing is the process of converting a 3D model into a set of instructions (G-code) that your 3D printer understands. Follow these steps to slice the model with the new infill density:
- Ensure that your 3D model is loaded and positioned correctly in the Cura Engine interface.
- Make any additional adjustments to other print settings such as layer height, print speed, or support structures, if necessary. These settings can have an impact on the final print quality.
- Once you are satisfied with the settings, click the “Slice” button or a similar option within Cura Engine.
- Cura Engine will analyze your 3D model and generate the G-code instructions based on the specified infill density and other print settings.
- Depending on the complexity of your model and the speed of your computer, this process may take a few moments.
- Once the slicing process is complete, you will see a preview of the sliced model in the Cura Engine interface. You can use this preview to examine the layers, infill structure, and other details of the sliced model.
- Finally, save the sliced file to your computer in a location of your choice. Typically, this file will have a “.gcode” extension.
- You can now transfer the sliced file to your 3D printer using the appropriate software or method recommended by the manufacturer.
By following these steps, you can successfully slice your model with the new infill density settings in Cura Engine. Now you’re ready to start the 3D printing process with the updated infill density, resulting in a print that aligns with your desired specifications.
Now that you have learned how to set the infill density using Cura Engine, let’s explore how to achieve the same using Repetier Host in the next section.
Read more: What Is A Good Infill Speed In Cura
Using Repetier Host to set infill density
Repetier Host is a popular 3D printing software that allows you to control and manage your 3D printer. It provides a user-friendly interface with various settings, including the ability to adjust the infill density. Here’s a step-by-step guide on how to use Repetier Host to set the infill density:
- Step 1: Launching Repetier Host: Start by launching Repetier Host on your computer. If you haven’t installed it yet, you can download it from the official Repetier website and follow the installation instructions.
- Step 2: Loading the model into Repetier Host: Once Repetier Host is open, click on the “Load” button or navigate to “File” > “Load” to import your 3D model into the software. Select the file from your computer and click “Open.”
- Step 3: Accessing the infill settings: After loading the model, you will see various configuration options on the screen. Look for the “Slicer” tab or similar settings section.
- Step 4: Modifying the infill density: Within the slicer settings, you will find options to modify the infill density. Look for the “Infill density” or a similar term. Adjust the percentage value or use the provided slider to set the desired infill density.
- Step 5: Slicing the model with the updated infill density: Once you have set the desired infill density, click on the “Slice” button or go to “Slicer” > “Slice with Slic3r” (or the slicer software of your choice). Repetier Host will generate the G-code instructions based on the selected infill density and other slicing settings.
- Step 6: Saving the sliced file: After the slicing process is complete, you will see a preview of the sliced model. Verify the infill density in the preview. Next, save the sliced file to your computer by going to “File” > “Save G-Code” or a similar option. Choose a destination folder and provide a file name for the sliced model.
By following these steps, you can use Repetier Host to adjust the infill density for your 3D prints. Remember to consider factors such as the intended function of the print, filament type, print time, and desired print weight when setting the infill density.
Now that you know how to set the infill density using Repetier Host, you can explore the various options provided by the software and tailor the infill density to suit your specific requirements.
Read more: What Is A Good Infill Speed In Cura
Using Repetier Host to set infill density
Step 1: Launching Repetier Host
To begin using Repetier Host to adjust the infill density for your 3D prints, you’ll first need to launch the software on your computer. Follow these steps to open Repetier Host:
- Ensure that Repetier Host is successfully installed on your computer. If you haven’t installed it yet, you can download it from the official Repetier website and follow the installation instructions for your operating system.
- Locate the Repetier Host application icon on your desktop or in your computer’s Start menu. Double-click on the icon to launch the software.
- Once Repetier Host is open, you will be greeted with the main interface. Here, you’ll find a variety of options and settings to configure your 3D prints.
- Take a moment to familiarize yourself with the main screen of Repetier Host. You’ll see different tabs and sections, such as “Manual Control,” “Slicer,” “Printer Settings,” and more. These tabs contain settings related to different aspects of your 3D prints.
- Now that you have successfully launched Repetier Host and have a basic understanding of the main interface, you’re ready to proceed to the next step and load your 3D model into the software.
By following these steps, you can easily open and launch Repetier Host on your computer, getting one step closer to adjusting the infill density for your 3D prints. In the subsequent steps, we will explore how to load your 3D model into Repetier Host and access the infill settings.
Read more: What Is A Good Infill Speed In Cura
Using Repetier Host to set infill density
Read more: What Infill Density Should I Use
Step 2: Loading the model into Repetier Host
Once Repetier Host is open on your computer, the next step is to load your 3D model into the software. Here’s how you can do it:
- Click on the “Load” button within the Repetier Host interface. This button is usually located at the top of the screen or can be accessed through the “File” menu.
- Select the 3D model file you want to print from the file explorer window that appears.
- Click “Open” to load the selected 3D model into Repetier Host.
- Once the model is loaded, you will be able to see it displayed in the Repetier Host interface. You can use the provided tools to rotate, scale, or position the model as needed.
- Take a moment to review the loaded model to ensure that it is correctly positioned and oriented for printing. Make any necessary adjustments using the rotation or transformation tools within Repetier Host.
- Now that your 3D model is loaded and ready for printing, you can proceed to the next step to access the infill settings and adjust the infill density.
By following these steps, you can easily load your 3D model into Repetier Host, making it ready for further configuration, including adjusting the infill density. In the subsequent steps, we will explore how to access the infill settings within Repetier Host.
Read more: What Is A Good Infill Speed In Cura
Using Repetier Host to set infill density
Step 3: Accessing the infill settings
Once your 3D model is loaded into Repetier Host, the next step is to access the infill settings. Here’s how you can do it:
- Look for the “Slicer” tab within the Repetier Host interface. This tab is typically located at the top of the screen or in the sidebar.
- Click on the “Slicer” tab to access the slicing settings.
- Within the slicing settings, you will find a variety of options and parameters related to the slicing process. Look for the setting labeled “Infill” or a similar term.
- Click on the “Infill” setting to expand it and reveal additional options for adjusting the infill density.
- Here, you will typically find a slider or input field that allows you to set the infill density as a percentage. Adjust the slider or enter the desired value to set the infill density according to your requirements.
- Take a moment to review any other available infill settings, such as infill pattern or infill line width. Adjust these settings if desired.
- Once you have adjusted the infill density and any other related settings, you’re ready to proceed to the next step and slice the model with the updated infill density.
By following these steps, you can easily access the infill settings within Repetier Host and make the necessary adjustments to configure the infill density of your 3D prints. In the subsequent steps, we will explore how to modify the infill density and slice the model with the updated settings.
Read more: What Is A Good Infill Speed In Cura
Using Repetier Host to set infill density
Step 4: Modifying the infill density
After accessing the infill settings in Repetier Host, the next step is to modify the infill density according to your desired specifications. Follow these steps to adjust the infill density:
- Locate the setting labeled “Infill Density” or a similar term within the infill settings section.
- You will typically find a slider or an input field next to the “Infill Density” setting. This allows you to adjust the infill density as a percentage. Move the slider or type in the desired value to set the infill density according to your requirements.
- As you adjust the infill density, you may see a visual representation or preview of the infill structure based on your selected settings. Take this opportunity to assess how the changes in density affect the internal structure of your print.
- Consider the factors we discussed earlier, such as the function of the print, filament type, desired strength, and print time, while modifying the infill density. Aim for a balance that meets your specific needs and requirements.
- Take the time to experiment with different infill densities to find the optimal setting for your specific print job. Remember that increasing the infill density will generally result in stronger but denser prints, whereas lowering the infill density can save on material usage and reduce print time, albeit with reduced strength.
- Once you have modified the infill density to your liking, you’re ready to proceed to the next step and slice the model with the updated infill settings.
By following these steps, you can successfully modify the infill density using Repetier Host to achieve the desired level of strength and quality for your 3D prints. In the subsequent steps, we will explore how to slice the model with the updated infill density.
Read more: What Is A Good Infill Speed In Cura
Using Repetier Host to set infill density
Step 5: Slicing the model with the updated infill density
After modifying the infill density to your desired specifications in Repetier Host, the next step is to slice the model with the updated infill density. Slicing involves converting your 3D model into a set of instructions that your 3D printer can understand. Follow these steps to slice the model with the updated infill density:
- Once you have adjusted the infill density and any other desired print settings, click on the “Slice” button within the Repetier Host interface. This button is usually located at the top or bottom of the screen.
- Repetier Host will begin analyzing your 3D model, applying the modified infill density and other slicing parameters.
- Depending on the complexity of your model and the settings you have configured, the slicing process may take a few moments to complete. You may continue to view the slicing progress on the screen.
- Once the slicing process is finished, you will see a preview of the sliced model within the Repetier Host interface. This preview allows you to visualize how the infill density and other settings affect the layers and structure of the print.
- Take this opportunity to examine the sliced model’s layers, infill pattern, and other details to ensure that the infill density meets your expectations and desired results.
- Finally, save the sliced file to your computer by clicking on the “Save G-Code” or similar option within Repetier Host. Choose a location on your computer where you want to save the file and provide a name for the sliced model.
- The sliced file (usually with a .gcode extension) is now ready to be transferred to your 3D printer for printing.
By following these steps, you can effectively slice the model with the updated infill density using Repetier Host. Now, you can proceed to the next stage, where you initiate the printing process with the sliced file and observe the effects of the modified infill density on the final 3D print.
Conclusion
Setting the infill density in your 3D prints is a crucial factor in achieving the desired strength, durability, and quality of your models. By adjusting the infill density, you can optimize your prints for various applications, balancing factors such as strength, weight, print time, and material usage.
In this article, we explored what infill density is and why it is important in 3D printing. We discussed several factors to consider when setting the infill density, including the function of the print, filament type, print time constraints, desired print weight, printing temperature, cooling, and design complexity.
We then provided detailed step-by-step guides on how to adjust the infill density using popular slicing software, Cura Engine and Repetier Host. We covered essential steps from opening the software to navigating to the infill settings, modifying the infill density, slicing the model, and saving the sliced file. These instructions will help you effectively customize the infill density according to your specific requirements.
Remember, finding the optimal infill density may require some trial and error as you experiment with different settings and evaluate the results. Consider the intended use and requirements of your prints when adjusting the infill density to strike the right balance between strength, print time, material usage, and other considerations.
With a good understanding of infill density and the tools to set it correctly, you can achieve high-quality 3D prints that meet your needs and expectations. Continuously experiment, learn, and refine your settings to optimize your 3D printing process.
Happy printing!
Frequently Asked Questions about How To Set Infill Density In Cura Engine And Repetier Host
Was this page helpful?
At Storables.com, we guarantee accurate and reliable information. Our content, validated by Expert Board Contributors, is crafted following stringent Editorial Policies. We're committed to providing you with well-researched, expert-backed insights for all your informational needs.


0 thoughts on “How To Set Infill Density In Cura Engine And Repetier Host”