Home>Garden Essentials>How To Set Honeycomb Infill In Cura
Garden Essentials
How To Set Honeycomb Infill In Cura
Modified: March 7, 2024
Discover how to set honeycomb infill for your garden using Cura, the ultimate 3D printing software. Achieve optimal strength and efficiency in your garden design with this step-by-step guide.
(Many of the links in this article redirect to a specific reviewed product. Your purchase of these products through affiliate links helps to generate commission for Storables.com, at no extra cost. Learn more)
Introduction
Welcome to the world of 3D printing! If you’re a hobbyist or a professional familiar with 3D printing, you probably know the importance of infill patterns in creating sturdy and functional models. Among the various options available, honeycomb infill has gained popularity for its unique properties. In this article, we will explore what honeycomb infill is, its benefits, and how to effectively use it in Cura, one of the popular slicing software for 3D printing.
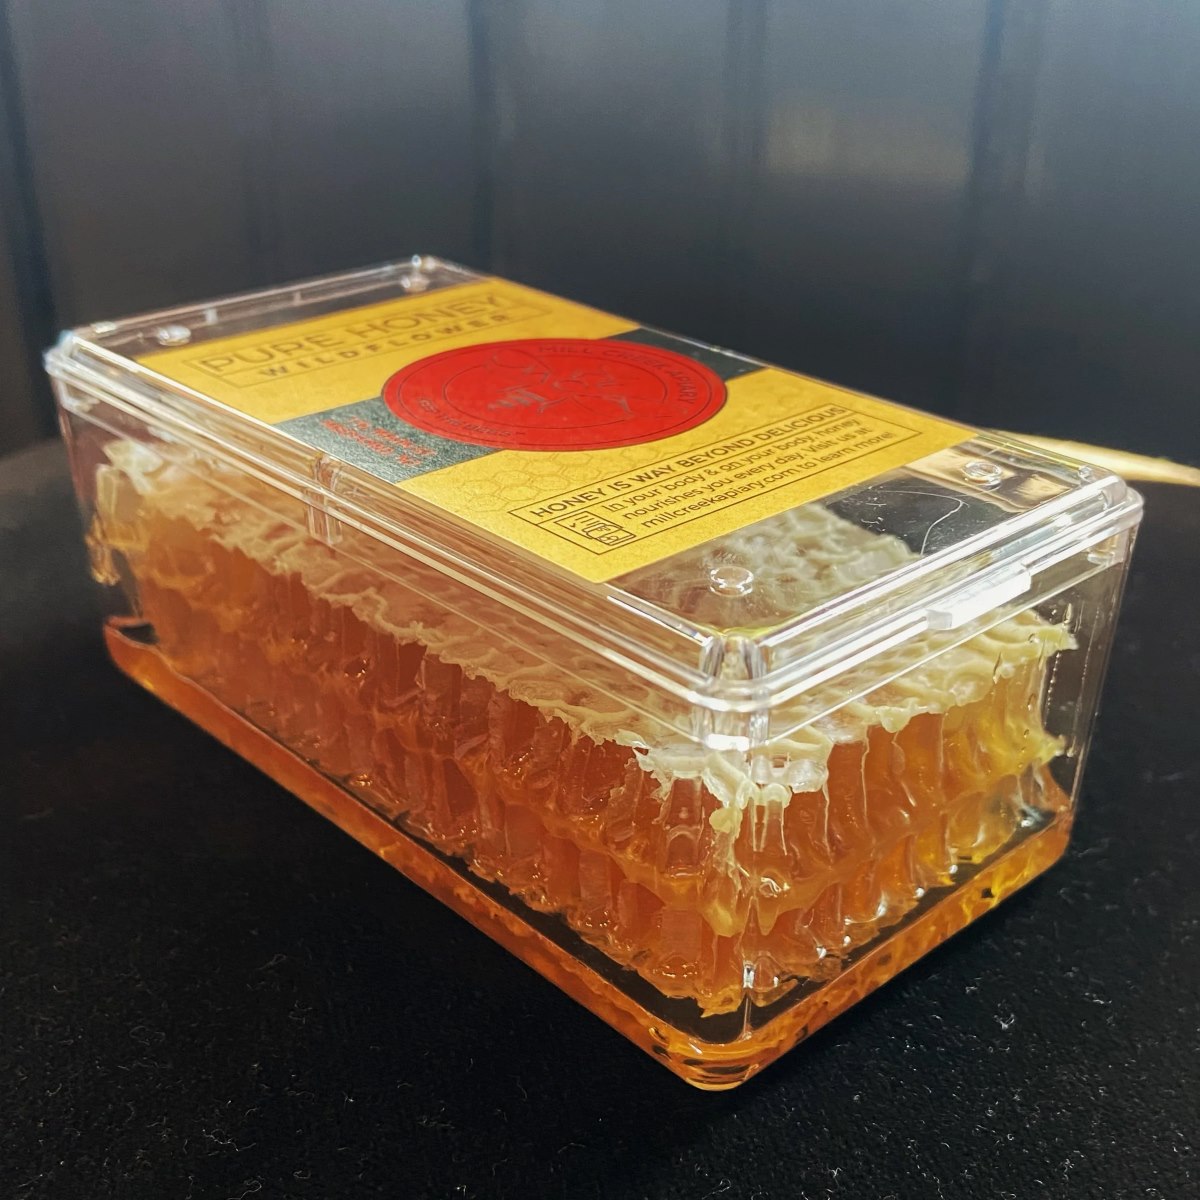
Honeycomb infill refers to a specific pattern used to fill the interior of a 3D printed model. Inspired by honeycombs found in nature, this infill pattern is known for its lightweight nature and structural integrity. The pattern consists of hexagonal cells interconnected with each other, creating a network of strength and stability.
Now, you might wonder why using honeycomb infill is beneficial compared to other infill options. Well, let’s dive into the advantages.
Key Takeaways:
- Honeycomb infill in 3D printing offers lightweight yet sturdy structures, efficient material usage, improved heat dissipation, and enhanced flexibility, making it ideal for various applications.
- Adjusting infill density, pattern, angle, line width, and pattern spacing in Cura allows for optimal strength, print quality, and performance of 3D printed objects with honeycomb infill.
Read more: How To Do Infill Mask In Cura
Benefits of Using Honeycomb Infill
1. Lightweight yet sturdy: Honeycomb infill provides excellent structural integrity while minimizing the overall weight of the 3D printed object. This makes it ideal for applications where weight reduction is essential, such as aerospace or automotive parts.
2. Efficient material usage: The honeycomb pattern optimizes the use of filament by reducing the amount of material required to fill the interior of the model. This not only saves costs but also reduces print time.
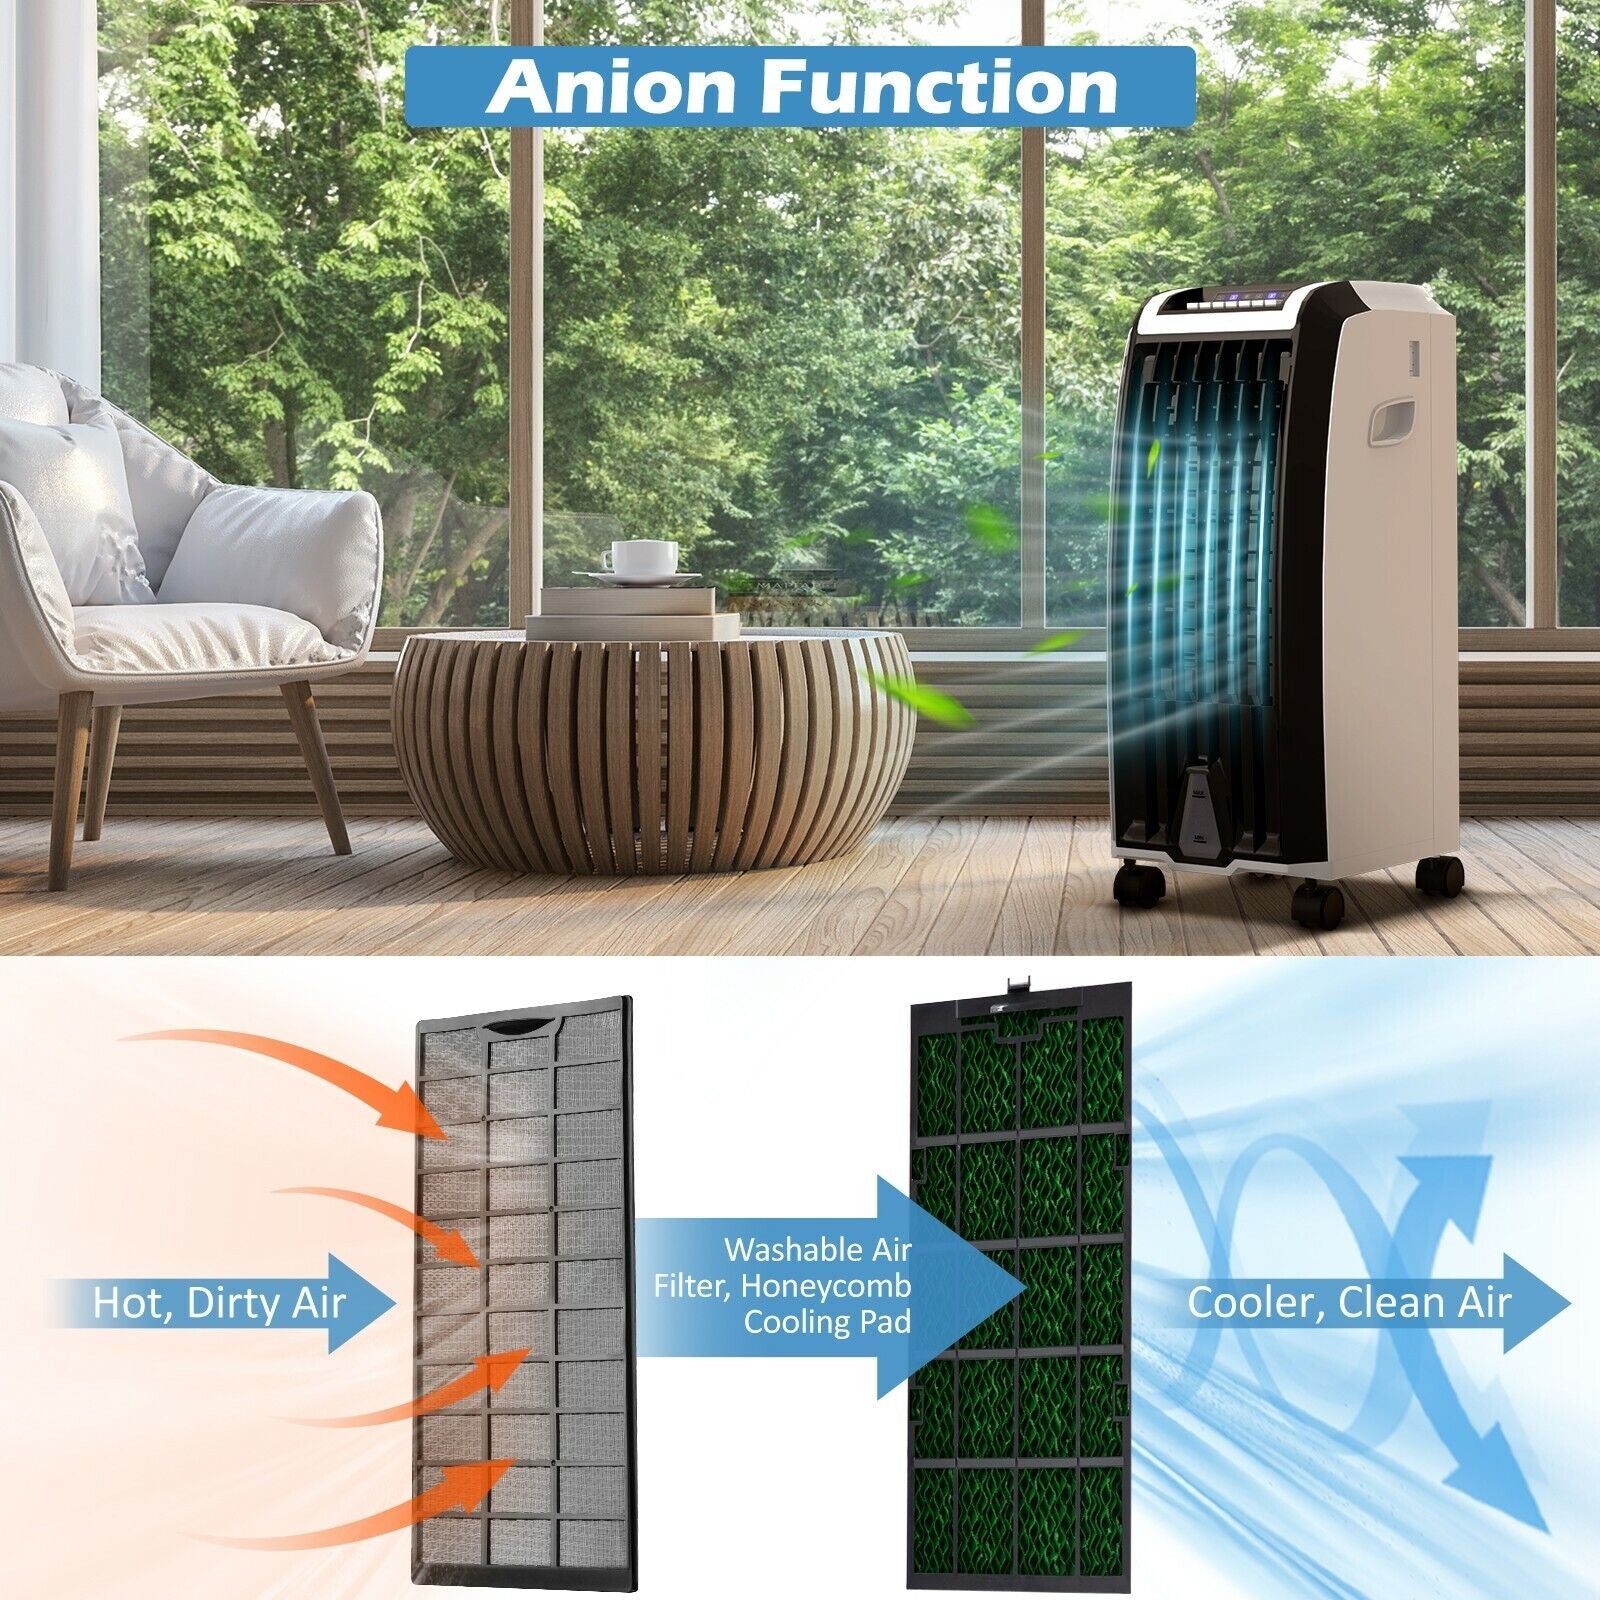
3. Improved heat dissipation: The hexagonal cells in the honeycomb infill pattern allow for better airflow, facilitating efficient heat dissipation during the 3D printing process and improving the overall print quality.
4. Enhanced flexibility: Honeycomb infill offers a good balance of strength and flexibility, allowing for models that can withstand stress and strain without sacrificing durability. This makes it suitable for applications where some degree of flexibility is desired.
Now that you’re familiar with the benefits of honeycomb infill, let’s explore how to prepare your model for this infill pattern and adjust the necessary settings in Cura, the popular slicing software used by 3D printing enthusiasts and professionals.
What is Honeycomb Infill?
Honeycomb infill is a specific pattern used to fill the interior of a 3D printed model. As the name suggests, it is inspired by the hexagonal cells found in natural honeycombs. This pattern consists of a series of interlocking hexagons that create a strong and lightweight structure.
The honeycomb pattern is characterized by its repetitive hexagonal cells, which are arranged in a way that maximizes the strength-to-weight ratio. This means that the infill provides structural stability while minimizing the amount of material used. The result is a 3D printed object with a strong inner structure that is lighter and more cost-effective compared to solid infill options.
The main goal of using honeycomb infill is to strike a balance between strength and weight. By filling the interior of a model with a honeycomb pattern, you can ensure that the object can withstand external forces and pressures while minimizing the overall weight of the printed piece. This is particularly important in applications where weight reduction is critical, such as aerospace and automotive industries.
In addition to its lightweight nature, honeycomb infill also offers other advantages. The interconnected hexagonal cells provide ample room for airflow, allowing for efficient heat dissipation during the printing process. This can help prevent issues like warping or overheating, leading to better print quality.
Furthermore, honeycomb infill allows for efficient material usage. The repetitive pattern optimizes the amount of filament needed, reducing waste and saving costs. Whether you are printing large-scale models or intricate designs, honeycomb infill can help ensure that you are using your filament resources wisely.
Overall, honeycomb infill is a versatile option for 3D printing that offers lightweight strength and structural integrity. It is widely used across various industries and applications, including prototyping, functional parts, and decorative objects.
Now that we have a better understanding of what honeycomb infill is, let’s explore how to prepare your model for honeycomb infill and adjust the necessary settings in Cura to achieve optimal results.
Key Takeaways:
- Honeycomb infill in 3D printing offers lightweight yet sturdy structures, efficient material usage, improved heat dissipation, and enhanced flexibility, making it ideal for various applications.
- Adjusting infill density, pattern, angle, line width, and pattern spacing in Cura allows for optimal strength, print quality, and performance of 3D printed objects with honeycomb infill.
Read more: How To Do Infill Mask In Cura
Benefits of Using Honeycomb Infill
Honeycomb infill offers a range of benefits over other infill patterns when it comes to 3D printing. Let’s take a closer look at why you should consider using honeycomb infill for your projects.
1. Lightweight yet sturdy: One of the key advantages of honeycomb infill is its ability to provide structural integrity while keeping the overall weight of the printed object to a minimum. The hexagonal cells of the pattern create a strong and interconnected network, enabling the model to withstand external forces without adding unnecessary weight. This makes honeycomb infill ideal for applications where weight reduction is crucial, such as aerospace or automotive parts.
2. Efficient material usage: When compared to solid infill patterns, honeycomb infill optimizes filament usage. The hexagonal cells allow for a significant reduction in the amount of material required to fill the interior of the model. By minimizing material usage, you not only save costs but also reduce print time. This is especially important for large-scale prints or projects with multiple iterations.
3. Improved heat dissipation: The unique design of honeycomb infill includes interconnected cells that facilitate efficient airflow. This enhanced ventilation ensures better heat dissipation during the 3D printing process. Effective heat dissipation helps prevent issues like warping, bed adhesion problems, and overheating, leading to improved print quality and reduced print failures.
4. Enhanced flexibility: Honeycomb infill offers a favorable balance of strength and flexibility. The intricate pattern allows the model to have some degree of flexibility, making it suitable for applications where a certain level of bend or give is desired. This flexibility makes honeycomb infill ideal for functional parts that may need to tolerate some degree of stress or strain while maintaining durability.
5. Better visibility for internal details: If your 3D printed model has internal structures or features, honeycomb infill is an excellent choice. The semi-transparent nature of the infill pattern allows for better visibility of the internal details once the print is complete. This is especially advantageous for showcasing intricate or complex designs where the interlocking hexagons add an aesthetic appeal.
By utilizing honeycomb infill, you can harness its lightweight strength, efficient material usage, improved heat dissipation, enhanced flexibility, and better internal visibility. These benefits make honeycomb infill a go-to option for a wide range of 3D printing projects.
Now that we understand the advantages of honeycomb infill, let’s explore how to effectively prepare your model and adjust the necessary settings in Cura to achieve optimal results with honeycomb infill.
Preparing Your Model for Honeycomb Infill
Before diving into the specifics of adjusting infill settings in Cura, it’s important to properly prepare your 3D model to ensure optimal results with honeycomb infill. Follow these steps to get your model ready:
1. Model Orientation: Start by positioning your model in a way that maximizes its stability and minimizes the need for support structures. Consider the shape and features of your model and try to orient it in a way that allows for a smooth and consistent flow of honeycomb infill. This can help reduce the chances of weak spots or unwanted overhangs.
2. Wall Thickness: Check the wall thickness of your model. Honeycomb infill works best when the walls are thick enough to support the infill structure. If the walls are too thin, they may not provide enough support, compromising the overall strength of the printed object. Adjust the wall thickness in your modeling software if necessary.
3. Top and Bottom Layers: Consider the number of top and bottom layers you want in your print. These layers play a crucial role in sealing the honeycomb infill structure and providing a smooth surface finish. Increasing the number of top and bottom layers can improve the overall strength and aesthetic quality of the print.
4. External Perimeters: Determine the number of external perimeters you want for your model. Increasing the number of perimeters creates a thicker outer shell, adding to the overall strength of the object.
5. Support Structures: Evaluate whether your model requires support structures. Depending on the complexity of the design and the overhangs present, you may need to generate support structures to ensure successful printing. Carefully remove the supports after printing, taking care not to damage the honeycomb infill structure.
Once you have prepared your 3D model, it’s time to adjust the infill settings in Cura to achieve the desired honeycomb pattern. We will cover these settings in detail in the next sections.
Keep in mind that the specific steps for preparing your model may vary depending on the modeling software you are using and the requirements of your project. Always refer to the software’s documentation and experiment with different settings to achieve the best possible results.
Next, we will explore how to adjust the infill density in Cura to control the strength and weight of your honeycomb infill.
Read more: How To Change Infill Pattern In Cura
Adjusting the Infill Density in Cura
One of the key factors in achieving optimal honeycomb infill is adjusting the infill density in your slicer software, such as Cura. The infill density determines the amount of filament used to fill the interior of your 3D printed model.
Here are the steps to adjust the infill density in Cura:
- Open Cura and import your 3D model.
- Select the “Quality” tab in the sidebar.
- Locate the “Infill Density” setting and adjust the percentage value according to your desired infill density. Increasing the percentage will add more filament, resulting in a denser infill, while decreasing the percentage will reduce the amount of filament used.
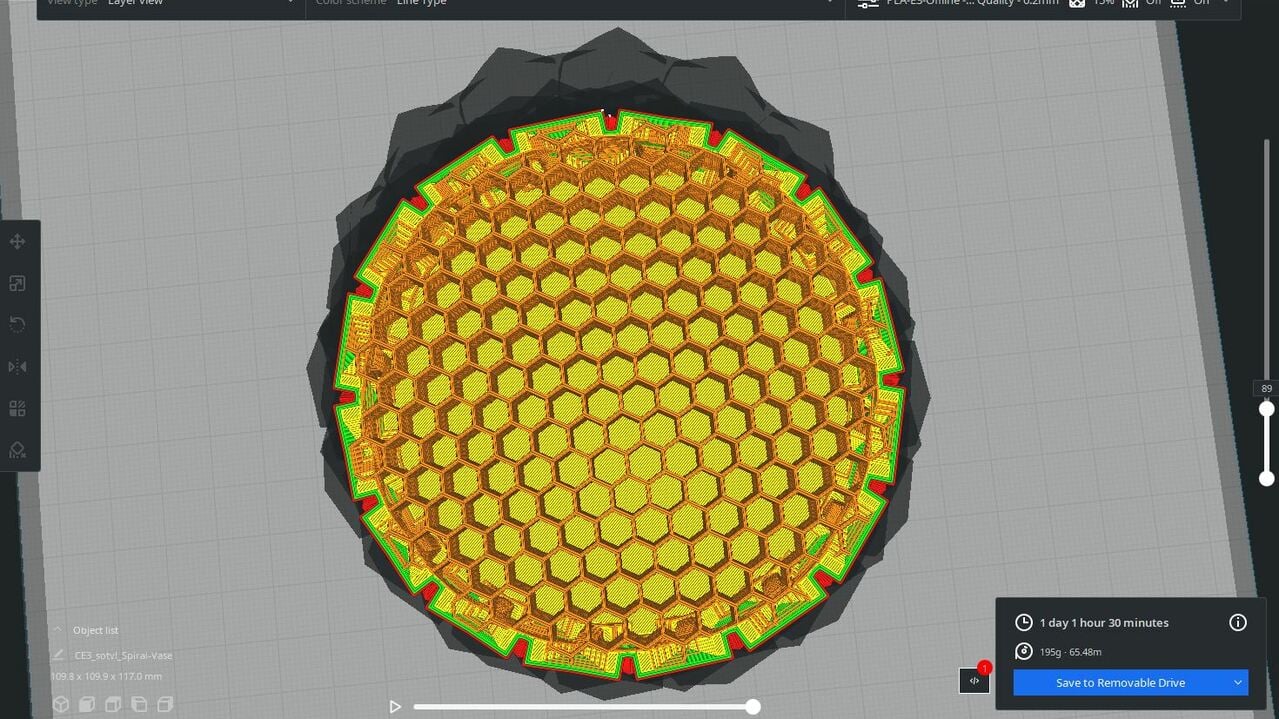
- Preview the infill pattern in the 3D viewer to get a visual representation of the density changes.
- Once you are satisfied with the infill density, proceed to slice your model and save the G-code file.
When choosing the infill density, consider the specific requirements of your print. For models that require maximum strength and durability, a higher infill density, such as 50% to 75%, is recommended. However, keep in mind that higher density may result in a longer print time and higher material usage.
On the other hand, if weight reduction is a priority and structural strength is not the main concern, you can lower the infill density to around 20% to 30%. This will create a lightweight object with a more hollow interior while maintaining a decent level of strength.
Experiment with different infill density percentages to find the balance between strength, weight, and material usage that suits your specific project requirements.
In addition to adjusting the infill density, you can also customize other infill settings in Cura to further optimize your honeycomb infill. These settings include choosing the right infill pattern and adjusting the infill angle, line width, and pattern spacing.
In the next sections, we will explore these settings in detail to help you achieve the best results with honeycomb infill in Cura.
When setting honeycomb infill in Cura, increase the infill density for stronger parts, and decrease it for faster printing. Experiment with different densities to find the right balance between strength and print time.
Choosing the Right Infill Pattern
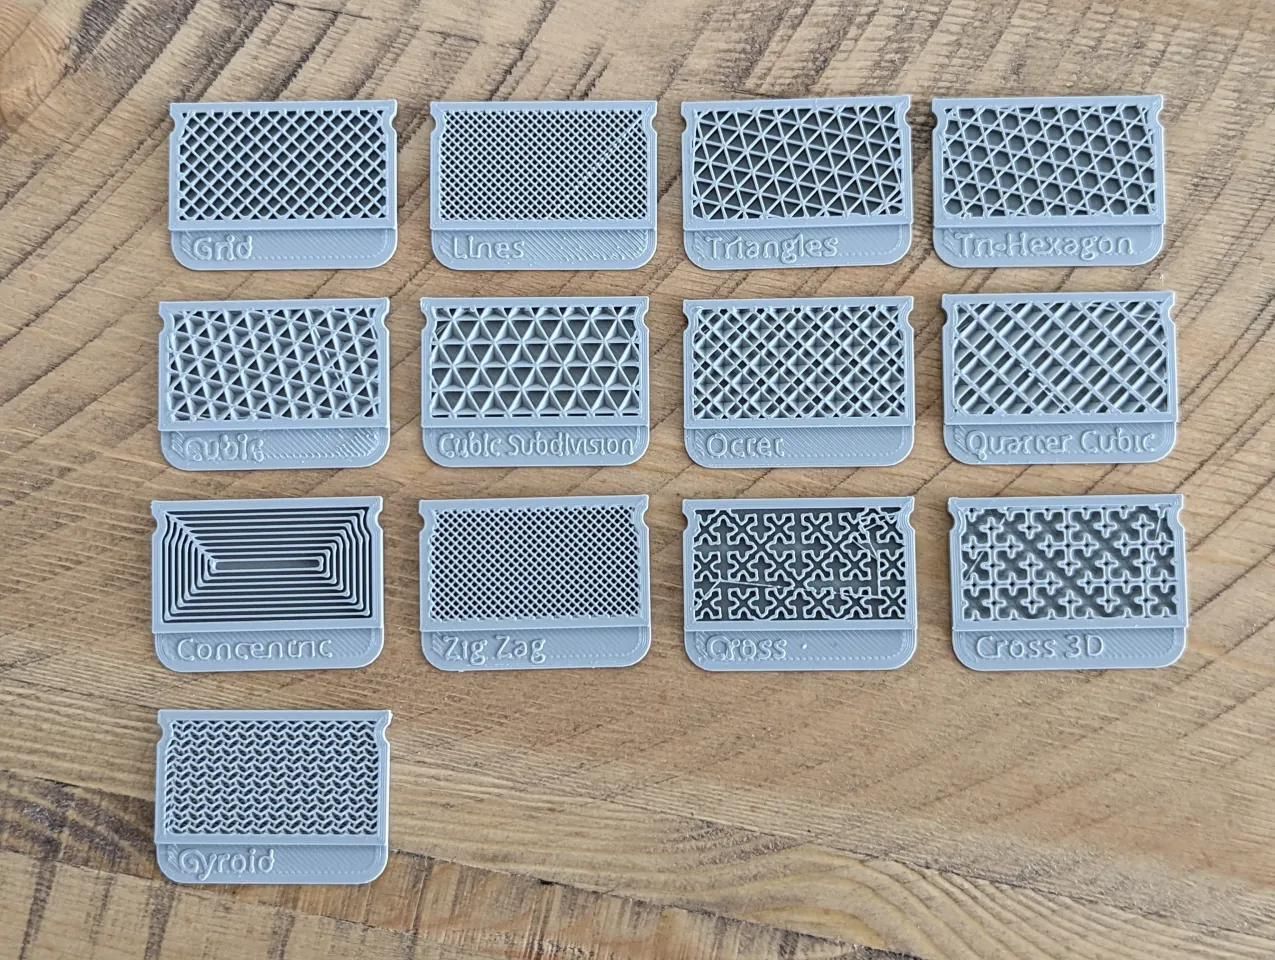
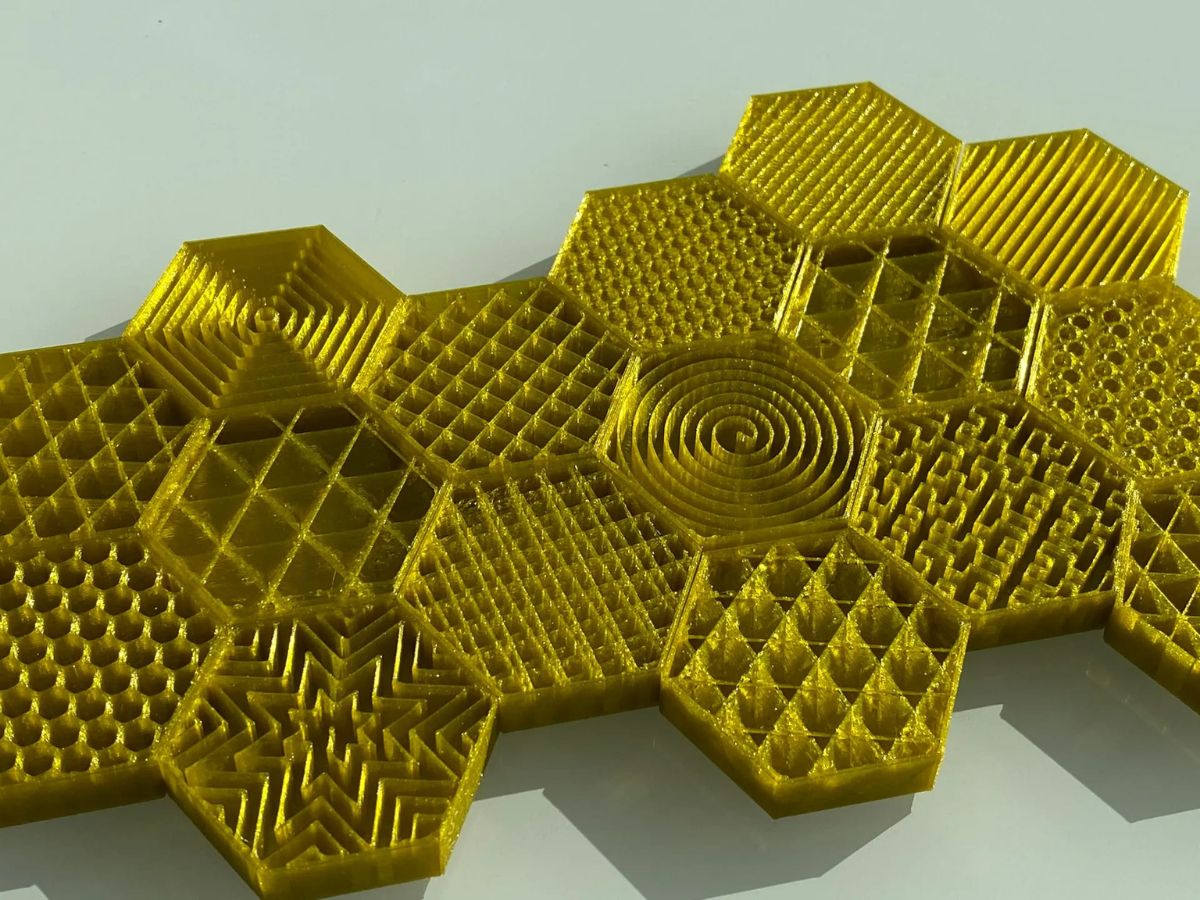
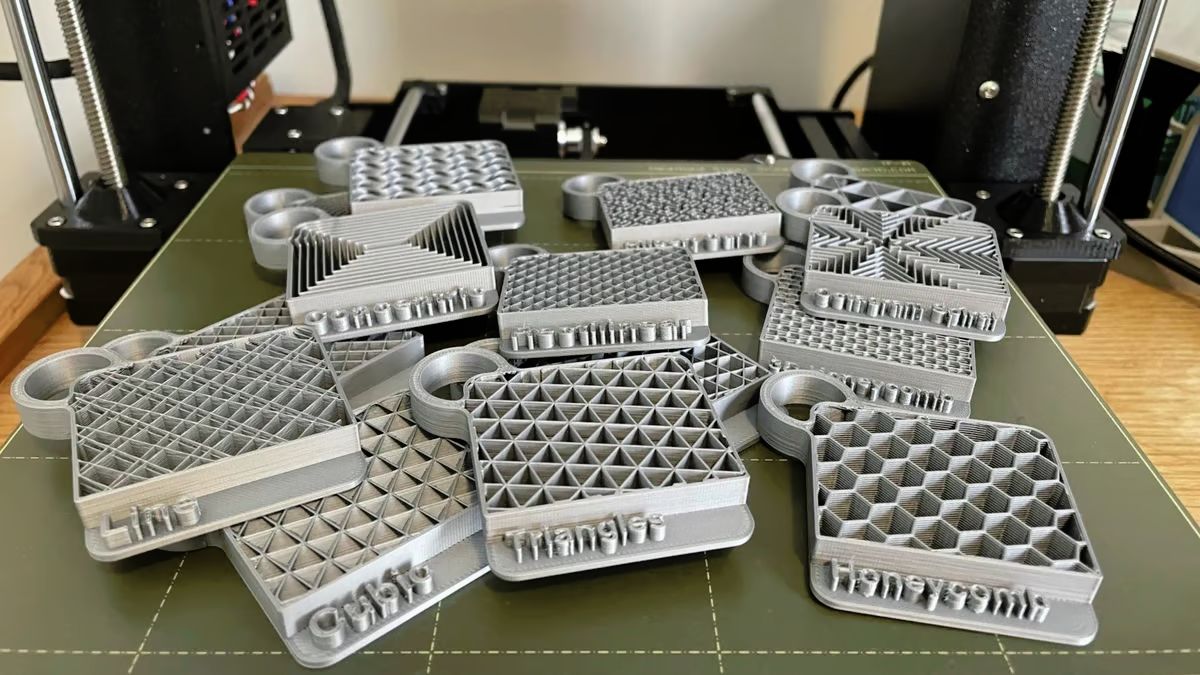
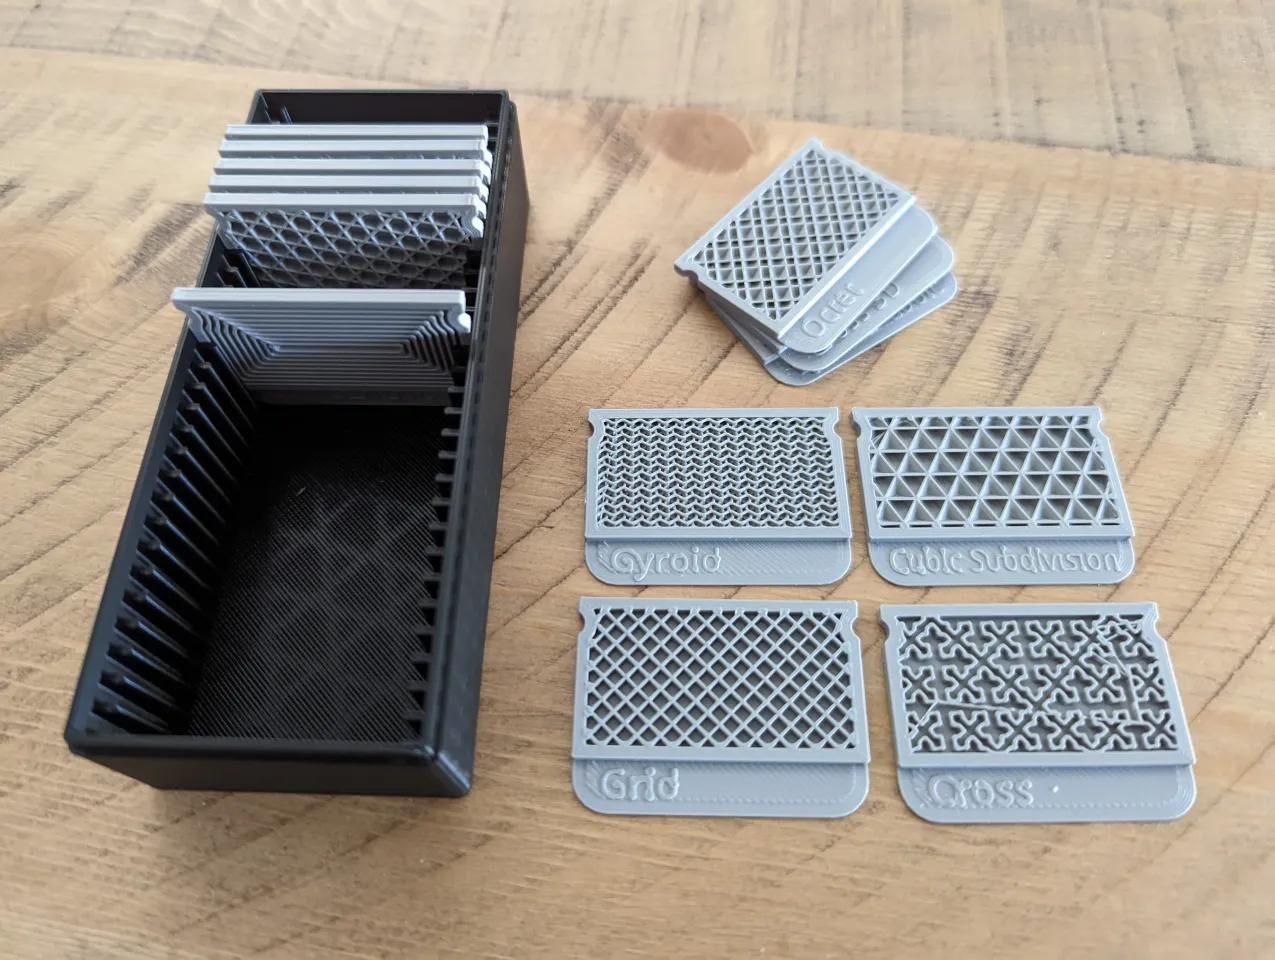
When using honeycomb infill in Cura, you have the option to choose from various infill patterns. Each pattern offers its own set of advantages and characteristics, so it’s important to consider the specific requirements of your 3D printed model before making a decision. Here are some commonly used infill patterns and their characteristics:
- Honeycomb: This is the classic honeycomb pattern that inspired honeycomb infill. It consists of interconnected hexagonal cells that provide excellent strength-to-weight ratio and structural stability.
- Grid: The grid pattern is a simple pattern of straight lines that intersect to create a square or rectangular grid. It is easy to print and offers good rigidity but may not be as strong as the honeycomb pattern.
- Triangles: With triangular-shaped infill, you can achieve a lightweight structure with good strength and stability. Triangular infill patterns are known for their rigidity and resistance to pressure.
- Lines: The line pattern consists of straight lines that run parallel to each other. It provides a basic level of support and can be useful for quick prints or models that require minimal infill.
- Concentric: In the concentric infill pattern, the lines are drawn in a series of concentric shapes, starting from the center and moving outward. This pattern provides a gradual increase in strength towards the perimeter of the model.
To choose the right infill pattern in Cura:
- Open Cura and import your 3D model.
- Select the “Infill” tab in the sidebar.
- In the “Pattern” section, choose the desired infill pattern from the available options.
- Preview the infill pattern in the 3D viewer to visualize how it will look inside your model.
- Adjust the infill density and other settings to fine-tune the strength and weight of the infill.
- Once you are satisfied with the settings, proceed to slice your model and save the G-code file.
The choice of infill pattern depends on factors such as the structural requirements of your model, the desired weight reduction, and the printing time. Consider experimenting with different patterns to find the one that best suits your needs. Remember to balance strength, weight, and print time to achieve the desired result for your 3D printed object.
In the next section, we will explore the importance of adjusting the infill angle for maximizing the strength of your honeycomb infill.
Adjusting Infill Angle for Maximum Strength
When using honeycomb infill in Cura, adjusting the infill angle can significantly impact the strength and structural integrity of your 3D printed model. The infill angle refers to the orientation of the honeycomb cells within the model.
Here’s why adjusting the infill angle is important:
1. Maximizing structural strength: By aligning the honeycomb cells in the direction of the primary forces that the printed object may experience, you can enhance its overall strength. For example, if your model is likely to undergo vertical stress, orienting the infill at a 45-degree angle or perpendicular to the stress direction can provide optimal strength and stability.
2. Promoting layer adhesion: Adjusting the infill angle can promote better adhesion between the infill and the outer walls of your model. When the infill lines align with the outer walls and perimeters, it reduces the chance of delamination and ensures a stronger bond between the infill and the solid shell of your print.
3. Enhancing print quality: The infill angle can also affect the surface finish of your 3D printed object. By aligning the infill in a way that minimizes the visibility of the infill lines on the outer surface, you can achieve a smoother and more aesthetically pleasing print.
To adjust the infill angle in Cura:
- Open Cura and import your 3D model.
- Select the “Infill” tab in the sidebar.
- In the “Infill Angle” section, adjust the angle value to align the honeycomb cells with the desired direction of strength or stress.
- Preview the infill pattern in the 3D viewer to visualize how the cells are oriented.
- Ensure that the infill angle complements the structural requirements and print orientation of your model.
- Once you are satisfied with the settings, proceed to slice your model and save the G-code file.
Keep in mind that the infill angle may vary depending on the specific geometry and orientation of your model. It’s important to consider the intended use and the primary forces that your 3D printed object will encounter. Experiment with different infill angles to find the one that provides the maximum strength and stability for your particular application. Remember to strike a balance between strength, print time, and surface quality to achieve the desired outcome.
In the next section, we will explore how to fine-tune infill line width and pattern spacing to achieve optimal results with honeycomb infill in Cura.
Fine-Tuning Infill Line Width and Pattern Spacing
When using honeycomb infill in Cura, fine-tuning the infill line width and pattern spacing can help you achieve optimal results in terms of strength, durability, and overall print quality. These settings affect the density and integrity of the infill structure. Here’s how to adjust them:
Infill Line Width:
The infill line width determines the thickness of the individual lines that make up the honeycomb infill pattern.
- Open Cura and import your 3D model.
- Select the “Infill” tab in the sidebar.
- Locate the “Infill Line Width” setting and adjust the value according to your desired thickness.
- Preview the infill pattern in the 3D viewer to visualize how the lines appear in relation to the overall model.
- Consider the impact of the line width on the strength and surface finish of your print.
- Once you are satisfied with the settings, proceed to slice your model and save the G-code file.
It’s important to strike a balance with the infill line width. A thinner line width can create a more densely packed infill structure, while a thicker line width can result in a more spaced-out pattern. Experiment with different line widths to find the optimal balance between strength and material usage for your specific print.
Infill Pattern Spacing:
The infill pattern spacing refers to the gap between the infill lines in the honeycomb pattern.
- Open Cura and import your 3D model.
- Select the “Infill” tab in the sidebar.
- Locate the “Infill Pattern Spacing” setting and adjust the value according to your desired gap between the lines.
- Preview the infill pattern in the 3D viewer to visualize how the lines are spaced.
- Consider the impact of the pattern spacing on the strength, weight, and print time of your model.
- Once you are satisfied with the settings, proceed to slice your model and save the G-code file.
Adjusting the infill pattern spacing can affect the structural integrity and overall appearance of your print. A smaller spacing can create a denser and stronger honeycomb structure, while a larger spacing can result in a more lightweight and airy pattern. Consider the requirements of your specific project and experiment with different pattern spacing values to achieve the desired balance.
Remember that fine-tuning the infill line width and pattern spacing is a process of trial and error. It may require multiple test prints and adjustments to optimize the strength, weight, and surface quality of your 3D printed object. Take the time to experiment with different settings and evaluate the results to achieve the best outcome for your project.
In the next section, we will discuss common issues that may arise with honeycomb infill and how to troubleshoot them effectively.
Read more: What Is A Good Infill Speed In Cura
Troubleshooting Common Issues with Honeycomb Infill
While honeycomb infill can provide numerous benefits for your 3D prints, there are some common issues that can arise. By understanding these problems and their solutions, you can troubleshoot and optimize your prints with honeycomb infill. Here are a few common issues and how to address them:
1. Weak or Frail Print: If your 3D printed object with honeycomb infill is coming out weak or fragile, it may be caused by a low infill density. Increase the infill density in Cura to provide more structural support and improve the overall strength of your print. Additionally, consider adjusting other parameters such as wall thickness and the number of top and bottom layers to enhance the overall print strength.
2. Insufficient Adhesion to Outer Walls: In some cases, you may experience poor adhesion between the honeycomb infill and the outer walls of your model. This can result in a weakened structure. To address this issue, ensure that your printer is properly calibrated and that the extrusion is consistent. Adjust the extrusion multiplier in Cura if necessary. Increasing the number of perimeters and the infill overlap percentage can also help improve adhesion.
3. Gaps or Gaps Between Infill Lines: If you notice gaps or spaces between the honeycomb infill lines, it may be due to under-extrusion. Ensure that your printer’s filament is properly loaded, and check the nozzle for any clogs or debris. Increase the extrusion multiplier in Cura to compensate for any under-extrusion issues. You can also try reducing the infill pattern spacing or adjusting the line width to improve line adhesion.
4. Bed Adhesion Problems: Honeycomb infill relies on a solid foundation for proper adhesion to the print bed. If you encounter bed adhesion issues, ensure that your print bed is properly leveled and clean. Use adhesion aids like a heated bed or a suitable bed adhesive such as glue stick or painter’s tape. Increasing the initial layer thickness or adjusting the initial layer print speed can also help improve bed adhesion.
5. Long Print Times: Honeycomb infill can sometimes result in longer print times due to the intricate pattern and increased infill density. To reduce print time, consider decreasing the infill density or adjusting the line width. Keep in mind that reducing the infill density may affect the overall strength of your print, so find the right balance between print time and desired strength.
When troubleshooting issues with honeycomb infill, it’s important to be patient and methodical. Make small adjustments to your settings, test your prints, and evaluate the results. Every printer and filament combination may require slight variations to achieve optimal results.
By addressing these common issues and fine-tuning your settings in Cura, you can ensure successful prints with honeycomb infill and harness its benefits for your 3D printing projects.
Now, let’s conclude this article and summarize the key points we’ve covered.
Conclusion
Congratulations! You have now learned how to effectively use honeycomb infill in Cura to optimize your 3D prints. By understanding the benefits of honeycomb infill, preparing your model, adjusting infill density, selecting the right infill pattern, fine-tuning the infill angle, and adjusting line width and pattern spacing, you are well-equipped to create strong and lightweight 3D printed objects.
Honeycomb infill offers a range of advantages, including lightweight yet sturdy structures, efficient material usage, improved heat dissipation, enhanced flexibility, and better visibility for internal details. These benefits make honeycomb infill an excellent choice for various applications, such as prototyping, functional parts, and decorative objects.
Remember to carefully prepare your model by considering its orientation, wall thickness, top and bottom layers, external perimeters, and the need for support structures. Adjusting the infill density allows you to strike the right balance between strength and weight, while selecting the appropriate infill pattern ensures the desired structural integrity. Fine-tuning the infill angle, line width, and pattern spacing further enhances the strength, print quality, and overall performance of your prints.
Throughout the process, don’t forget to troubleshoot common issues such as weak prints, adhesion problems, or gaps between infill lines. With patience and careful adjustments, you can overcome these challenges and achieve successful prints with honeycomb infill.
As you continue your journey in 3D printing, feel free to experiment and explore other infill options and settings. Each project may have its unique requirements, and adapting your approach accordingly will allow you to unlock even more possibilities.
Now that you have a solid understanding of honeycomb infill in Cura, it’s time to put your knowledge into practice. Enjoy the process of creating intricate and structurally robust 3D printed objects with the power of honeycomb infill!
Frequently Asked Questions about How To Set Honeycomb Infill In Cura
Was this page helpful?
At Storables.com, we guarantee accurate and reliable information. Our content, validated by Expert Board Contributors, is crafted following stringent Editorial Policies. We're committed to providing you with well-researched, expert-backed insights for all your informational needs.


0 thoughts on “How To Set Honeycomb Infill In Cura”