Home>Garden Essentials>How To Grow Butternut Squash From Seed
Garden Essentials
How To Grow Butternut Squash From Seed
Modified: August 28, 2024
Learn how to grow butternut squash from seed in your garden. Discover the step-by-step process and tips for a successful harvest.
(Many of the links in this article redirect to a specific reviewed product. Your purchase of these products through affiliate links helps to generate commission for Storables.com, at no extra cost. Learn more)
Introduction
Welcome to the world of gardening! If you’re a fan of delicious, nutritious vegetables and eager to try your hand at growing them, you’re in the right place. In this article, we’ll guide you through the process of growing butternut squash from seed. Butternut squash is a versatile and flavorful vegetable that is not only a delight to eat but also easy to grow.
Before we dive into the nitty-gritty of growing butternut squash, it’s important to note that starting from seed allows you to have more control over the entire growing process. By choosing the right seeds and providing the optimal growing conditions, you can ensure a bountiful harvest of this delicious vegetable.
Butternut squash belongs to the cucurbit family, which also includes cucumbers, melons, and pumpkins. It is a winter squash variety known for its creamy orange flesh, nutty flavor, and versatility in various culinary dishes. Whether roasted, mashed, or used as a base for soups and stews, the sweet and rich taste of butternut squash always shines through.
Butternut squash prefers a sunny and warm growing environment, making it well-suited for most gardeners. With a little bit of planning and care, you can enjoy the satisfaction of harvesting your very own butternut squash from your backyard.
In this article, we will cover everything you need to know about how to grow butternut squash from seed. From choosing the right seeds to preparing the soil, providing proper watering and sunlight, managing weeds and pests, supporting and training the plants, and finally, harvesting and storing the butternut squash, we’ve got you covered.
So let’s dig in and discover the joy and rewards that come with growing butternut squash from seed!
Key Takeaways:
- Growing butternut squash from seed involves choosing the right seeds, preparing the soil, and providing proper care. With patience and dedication, you can enjoy a bountiful harvest of this versatile and delicious vegetable.
- Harvesting and storing butternut squash requires careful timing and proper curing. By following these steps, you can savor the flavors of homegrown butternut squash for months to come.
Choosing the Right Seeds
Choosing high-quality seeds is the first step towards successful butternut squash cultivation. When selecting seeds, consider the following factors to ensure the best chance of a thriving and fruitful garden:
Variety: There are different varieties of butternut squash available, each with its own unique characteristics. Some popular varieties include ‘Waltham,’ ‘Butterbush,’ and ‘Tiana.’ Research and select a variety that suits your preferences and growing conditions.
Seed Source: Purchase seeds from a reliable source, such as a reputable nursery or a trusted online supplier. This ensures that you acquire fresh, viable seeds that have been properly stored, increasing the chances of germination.
Organic or Non-GMO: Opt for organic or non-genetically modified (non-GMO) seeds if you prefer to grow your butternut squash organically and avoid genetically modified organisms.
Maturity Period: Consider the maturity period mentioned on the seed packet. Butternut squash typically takes around 80-100 days from planting to harvest, but certain varieties may have shorter or longer maturity periods. Choose a variety that aligns with your gardening timeline and the length of your growing season.
Planting Season: Determine the appropriate planting season for butternut squash in your region. While it is a warm-season crop, it is best to start seeds indoors or in a greenhouse a few weeks before the last frost date. Transplant them outdoors when all danger of frost has passed and the soil has warmed up.
Quantity: Consider the amount of butternut squash you intend to grow and the available space in your garden. Plan accordingly and purchase a sufficient quantity of seeds to meet your needs.
Seed Viability: Check the seed viability, which indicates the probability of the seeds germinating successfully. Look for seeds with a high viability rate for optimal germination and seedling establishment.
Remember to read and follow the instructions provided on the seed packet for proper sowing depth, spacing, and other specifications. By choosing the right seeds, you’ll set the foundation for a successful and rewarding butternut squash growing journey.
Preparing the Soil
Preparing the soil is a crucial step in creating a favorable environment for your butternut squash plants to thrive. Here are some key considerations when preparing the soil:
Location: Choose a sunny location for your butternut squash bed. It should receive at least 6-8 hours of direct sunlight daily. Ensure that the area has good air circulation to prevent the development of fungal diseases.
Soil Type: Butternut squash prefers well-draining soil with a pH level between 6.0 and 6.8. Sandy loam or loamy soil is ideal for optimal root development and water drainage. If your soil is heavy or clayey, consider amending it by adding organic matter such as well-rotted compost, aged manure, or peat moss to improve its texture and fertility.
Soil Preparation: Begin by clearing the area of any weeds, rocks, or debris. Loosen the soil to a depth of 12-15 inches using a garden fork or tiller. This allows the roots to penetrate easily and promotes better nutrient and water absorption.
Soil Enrichment: Incorporate organic matter into the soil to enrich its fertility. Mix in compost or well-rotted manure to improve nutrient content and promote healthy plant growth. This also enhances soil structure, moisture retention, and microbial activity.
Soil Testing: Conduct a soil test to determine its nutrient composition and pH level. This will help you identify any deficiencies or imbalances and allow you to make necessary amendments. Soil testing kits are readily available at garden centers, or you can reach out to your local agricultural extension office for assistance.
Soil Drainage: Ensure proper drainage to prevent waterlogging, which can lead to root rot and other diseases. If your soil tends to retain water, consider creating raised beds or adding organic materials like compost or sand to improve drainage.
Weed Control: Remove any existing weeds from the area before planting your butternut squash seeds. Weeds compete with plants for nutrients, water, and sunlight. You can mulch the soil after planting to suppress weed growth and conserve moisture.
By preparing the soil beforehand, you create an optimal environment for your butternut squash plants to establish strong roots and grow vigorously. This sets the stage for healthy and productive plants throughout the growing season.
Planting the Seeds
Now that you have chosen the right seeds and prepared the soil, it’s time to plant your butternut squash seeds. Follow these steps to ensure successful germination and healthy seedling development:
Sowing Method: Butternut squash seeds can be sown directly in the garden or started indoors, depending on your growing season and climate. If starting indoors, sow the seeds in biodegradable pots or seed trays filled with seed-starting mix about 2-3 weeks before the last frost date.
Sowing Depth: Sow the seeds 1 inch deep in the soil or seed-starting mix. Create small depressions with your finger or a dibber, spacing them about 3 feet apart to allow ample room for the plants to grow and spread.
Watering: After sowing the seeds, give them a gentle watering to moisten the soil. Avoid overwatering, which can lead to rotting, and ensure the soil remains consistently moist but not waterlogged throughout the germination process.
Germination Conditions: For successful germination, maintain a warm soil temperature between 70-85°F (21-29°C). You can use a seedling heat mat or place the trays in a warm location, such as near a sunny window or on top of a refrigerator.
Transplanting Seedlings: If you started your seeds indoors, allow the seedlings to reach a height of about 2-3 inches before transplanting them outdoors. Harden off the seedlings by gradually exposing them to outdoor conditions over a period of 7-10 days before transplanting. This helps them acclimate to the change in environment.
Outdoor Planting: When all danger of frost has passed and the soil temperature has reached at least 60°F (15°C), transplant the seedlings into the prepared garden bed. Dig a hole large enough to accommodate the root ball, ensuring that the top of the root ball is level with the soil surface.
Spacing: Space the transplanted seedlings about 3-4 feet apart to allow for healthy growth and airflow between plants. This spacing also helps prevent overcrowding and the spread of diseases.
Watering: After transplanting, provide a thorough watering to settle the soil around the seedlings’ roots. Water them regularly, keeping the soil consistently moist but not waterlogged, especially during dry periods.
Protective Measures: Consider using row covers or protective netting to shield the young seedlings from pests, extreme weather conditions, or any potential damage.
By following these steps, you will give your butternut squash seeds the best chance to germinate successfully and establish healthy seedlings. Soon enough, you’ll witness the emergence of your future squash plants, and the journey to a bountiful harvest will officially begin!
Providing Proper Watering and Drainage
Watering is a critical aspect of caring for your butternut squash plants. Consistent and adequate moisture is essential for healthy growth and the development of delicious squash. Here’s what you need to know about providing proper watering and drainage:
Watering Frequency: Butternut squash plants require regular watering, especially during dry spells. Water deeply, ensuring that the soil is moistened to a depth of at least 6-8 inches. Aim for 1-1.5 inches of water per week, either from rainfall or supplemental irrigation.
Watering Method: Use a soaker hose or drip irrigation system to deliver water directly to the soil around the base of the plants. This helps minimize water waste and reduces the likelihood of foliage diseases caused by overhead watering.
Morning Watering: Water your butternut squash plants in the morning to allow the foliage to dry out during the day. This helps prevent fungal diseases that thrive in damp conditions. Avoid watering in the evening, as the dampness overnight can promote the growth of pathogens.
Soil Moisture: Monitor the soil moisture regularly by inserting your finger or a moisture meter into the soil. Water when the top inch of soil feels slightly dry to the touch. Avoid waterlogging the soil, as excessive moisture can lead to root rot and other fungal diseases.
Drainage: Good soil drainage is crucial for the health of butternut squash plants. Ensure that the garden bed has well-draining soil to prevent water accumulation around the roots. Raised beds or amending the soil with organic matter like compost can improve drainage in heavy or clayey soils.
Mulching: Apply a layer of organic mulch, such as straw or shredded leaves, around the plants. Mulching helps to retain soil moisture, suppress weed growth, and regulate soil temperature. It also acts as a protective barrier, preventing soil erosion and minimizing splashing of water onto the foliage.
Drought Conditions: During periods of prolonged drought, you may need to increase watering frequency to ensure the plants receive enough moisture. Supplemental irrigation may be necessary to prevent stress and maintain healthy growth. However, be cautious not to overwater, as this can lead to root rot.
Leaf-Wilting: Butternut squash leaves may naturally wilt during hot afternoons, even when the soil moisture is adequate. This is a temporary response to conserve water and is not necessarily an indication of drought stress. If the leaves perk up in the evening, it indicates normal plant behavior.
By providing proper watering and ensuring good drainage, you will help your butternut squash plants thrive and produce a bountiful harvest. Remember to strike a balance, avoiding both under-watering and over-watering, to maintain optimal growing conditions for your plants.
Providing Adequate Sunlight
Adequate sunlight is essential for the healthy growth and productivity of your butternut squash plants. Here’s what you need to know about providing the right amount of sunlight:
Sun Exposure: Butternut squash plants thrive in full sun, which means they require a minimum of 6-8 hours of direct sunlight per day. Choose a location in your garden that receives ample sunlight, ideally facing south or west to maximize exposure.
Site Selection: When selecting a site for planting butternut squash, ensure it is free from obstructions that might shade the plants, such as tall trees or buildings. These can block sunlight and reduce productivity. Opt for an open, sunny spot that allows for maximum sun exposure throughout the day.
Shade Protection: While butternut squash loves sunlight, extreme heat can sometimes be detrimental. If you live in an area with scorching temperatures, you can provide some shade protection during the hottest parts of the day. Use shade cloth or provide temporary shade with a trellis, umbrellas, or row covers to shield the plants from intense afternoon sun.
Warning Signs: Insufficient sunlight can lead to weak and spindly growth, reduced fruit production, and susceptibility to diseases. If your butternut squash plants are not receiving enough sunlight, you may notice pale, yellowish leaves, slower growth, or stunted development. If these signs are present, consider relocating the plants to a sunnier spot.
Trellising: To optimize sunlight exposure and airflow, you can train your butternut squash vines to grow vertically on a trellis or sturdy support. This technique allows the leaves and fruits to bask in more sunlight while conserving valuable garden space.
Reallocation of Sunlight: As your butternut squash plants grow, monitor their surroundings. Trim or remove nearby plants or branches that may cast excessive shade on the squash plants. Prune neighboring trees or plants strategically to allow more sunlight to reach your growing butternut squash.
Proximity to Buildings and Fencing: Be mindful of the placement of your butternut squash plants in relation to nearby buildings or fencing. They should be positioned far enough away to prevent shadows cast by these structures from causing shade on the plants.
By providing your butternut squash plants with the right amount of sunlight, you are ensuring optimal growth, strong vines, and abundant fruit production. Don’t underestimate the power of sunlight in the success of your garden, and watch your butternut squash thrive under its warm and nourishing rays.
Plant butternut squash seeds in rich, well-draining soil in a sunny spot. Keep the soil consistently moist but not waterlogged. Provide support for the vines to climb as they grow.
Managing Weeds and Pests
Effective weed and pest management is crucial for the health and productivity of your butternut squash plants. By implementing proper strategies, you can minimize competition from weeds and protect your crops from destructive pests. Here are some tips for managing weeds and pests in your butternut squash garden:
Weed Control:
- Remove weeds regularly and diligently, especially when they are small and easier to pull. Weeds compete with your butternut squash plants for water, nutrients, and sunlight.
- Consider applying a layer of organic mulch, such as straw or shredded leaves, around the base of the plants. This will help suppress weed growth, conserve moisture, and regulate soil temperature.
- Hand pulling, hoeing, or using a cultivating tool can help control weeds. Be careful not to damage the shallow roots of the butternut squash plants when removing weeds.
- Remember to weed on a regular basis to prevent weeds from going to seed and spreading further.
Pest Management:
- Squash Vine Borers: These pests can be a common threat to butternut squash plants. Protect them by monitoring for signs of squash vine borer eggs or larval entry points on the base of the plant. You can wrap the base of the stem with aluminum foil or cover it with a physical barrier like row covers to prevent the adult moths from laying eggs.
- Cucumber Beetles: Cucumber beetles can transmit bacterial wilt and damage the leaves and flowers of butternut squash plants. Use yellow sticky traps or row covers to control adult beetles. You can also introduce beneficial insects like ladybugs or lacewings to help keep their populations in check.
- Squash Bugs: These shield-shaped insects can cause significant damage to the leaves, stems, and fruits of butternut squash. Handpick and destroy adults, nymphs, and egg clusters when found. You can also use insecticidal soap or neem oil as a natural control method.
- Powdery Mildew: Powdery mildew is a common fungal disease that affects butternut squash plants. Keep the foliage dry by watering at the base of the plants and ensuring good air circulation. Remove and destroy any infected leaves to prevent further spread.
- Other Pests: Watch out for other common pests like aphids, cucumber mosaic virus, and spider mites. Regularly monitor your plants for signs of infestation and take appropriate measures to control them.
Companion Planting: Consider interplanting companion plants like marigolds, nasturtiums, or basil, as they can help repel pests and deter weed growth.
By taking proactive measures to manage weeds and pests, you can safeguard your butternut squash plants and ensure a healthy and productive harvest. Regular monitoring, timely intervention, and proper cultural practices will go a long way in maintaining a pest-free and thriving garden.
Supporting and Training the Plants
Supporting and training your butternut squash plants is essential for their proper growth, productivity, and to maximize the available garden space. By providing support, you can prevent sprawling vines, reduce the risk of diseases, and make harvesting easier. Here are some tips for supporting and training your butternut squash plants:
Trellising: Consider growing your butternut squash plants on a trellis or sturdy support structure. This method helps save space, promotes better airflow, and makes it easier to manage the plants. Install a trellis system before planting, ensuring it is strong enough to support the weight of mature vines and fruits.
Vine Training: As the butternut squash plants grow, gently train the main vine to climb up the trellis or support structure. Gradually guide the vine along the trellis, using soft ties or twine to secure it to the frame at regular intervals. Allow the side shoots to trail down naturally.
Pruning: To manage the growth and prevent overcrowding, selectively prune the lateral shoots (side branches) that develop along the main vine. Remove any excessive foliage or side shoots that are crowding the plant, taking care not to remove too much as leaves are essential for photosynthesis.
Fruit Support: Support large, growing fruits to prevent them from resting on the ground. Use slings made from pantyhose, old t-shirts, or netting to cradle the fruits and secure them to the trellis or support structure. This helps prevent rot and damage.
Air Circulation: Proper airflow is crucial for preventing diseases like powdery mildew and enhancing pollination. By training the vines vertically on a trellis, you increase air circulation around the plants, reducing the likelihood of fungal infections and promoting healthy growth.
Regular Checking: Regularly inspect the plants for any signs of damage or stress. Adjust and secure vines as needed, ensuring they are well-supported and not leaning on neighboring plants or structures.
Training Method: There are various training methods you can employ, such as the single stem (main vine) method, or allowing the plant to develop multiple main vines. Choose a method that suits your preferences, available space, and the specific requirements of your butternut squash variety.
Proper Harvesting: When it’s time to harvest, gently detach the mature butternut squash from the vines using sharp pruners or a knife. Support the vine while removing the fruit to prevent any damage to the plant.
By supporting and training your butternut squash plants, you can optimize space, improve airflow, and reduce the risk of diseases. This allows your plants to grow and produce healthy and abundant fruits, resulting in a successful and rewarding harvest. So, get those trellises ready and transform your butternut squash patch into a vertical oasis!
Fertilizing the Plants
Fertilizing your butternut squash plants is essential to provide them with the necessary nutrients for healthy growth and a bountiful harvest. Here are some tips to help you fertilize your plants effectively:
Soil Testing: Before applying any fertilizers, it’s beneficial to conduct a soil test. A soil test will help determine the nutrient levels and pH of your soil. This information will guide you in selecting the appropriate fertilizer and making any necessary soil amendments.
Organic Matter: Prior to planting, enrich the soil with organic matter such as compost, aged manure, or well-rotted leaf mulch. Organic matter improves soil structure, enhances nutrient retention, and promotes beneficial microbial activity.
Slow-Release Fertilizer: Consider using a slow-release fertilizer specifically formulated for vegetables or fruit-bearing plants. Slow-release fertilizers provide a steady supply of nutrients over an extended period, reducing the risk of over-fertilization and nutrient leaching.
Timing: Apply the initial dose of fertilizer when planting or transplanting the butternut squash seedlings. This helps provide a nutrient boost from the start. Subsequent applications can be done during the growing season, following the label instructions for the specific fertilizer you are using.
Nitrogen: Butternut squash plants benefit from a balanced fertilizer with a slightly higher nitrogen (N) content during the early vegetative growth stage. Nitrogen promotes leaf and vine development. Look for a fertilizer with an NPK (nitrogen-phosphorus-potassium) ratio of around 5-10-10 or 10-10-10.
Phosphorus and Potassium: As the plants enter the flowering and fruiting stage, switch to a fertilizer with a higher phosphorus (P) and potassium (K) content. Phosphorus supports flower and fruit formation, while potassium aids in overall plant growth and disease resistance. Look for a fertilizer with an NPK ratio of around 10-20-20.
Application Method: Apply the fertilizer according to the manufacturer’s instructions, whether it’s a granular fertilizer sprinkled around the plant’s base or a liquid fertilizer applied through watering. Keep the fertilizer a few inches away from the base of the plant to avoid direct contact with the stem.
Watering: After applying fertilizer, water the plants to help dissolve and activate the nutrients. Proper watering ensures that the nutrients are absorbed by the roots and readily available to the plants.
Organic Fertilizers: If you prefer organic options, consider using natural fertilizers like fish emulsion, bone meal, or compost tea. These provide a slow-release of nutrients and add organic matter to the soil.
Observation and Adjustment: Monitor the plants for any signs of nutrient deficiencies or excesses, such as yellowing leaves or stunted growth. Adjust the fertilization regimen accordingly based on visual cues and the specific needs of your butternut squash plants.
Remember to follow the instructions provided on the fertilizer package and avoid over-fertilizing, as it can lead to nutrient imbalances and adverse effects on plant health. By providing the right nutrients at the right time, you will support the vigorous growth and productivity of your butternut squash plants, ultimately reaping a delicious and abundant harvest.
Read more: How To Store Butternut Squash In Freezer
Harvesting and Storing Butternut Squash
After months of nurturing your butternut squash plants, the time for harvesting has finally arrived. Here are some important tips for harvesting and storing your butternut squash:
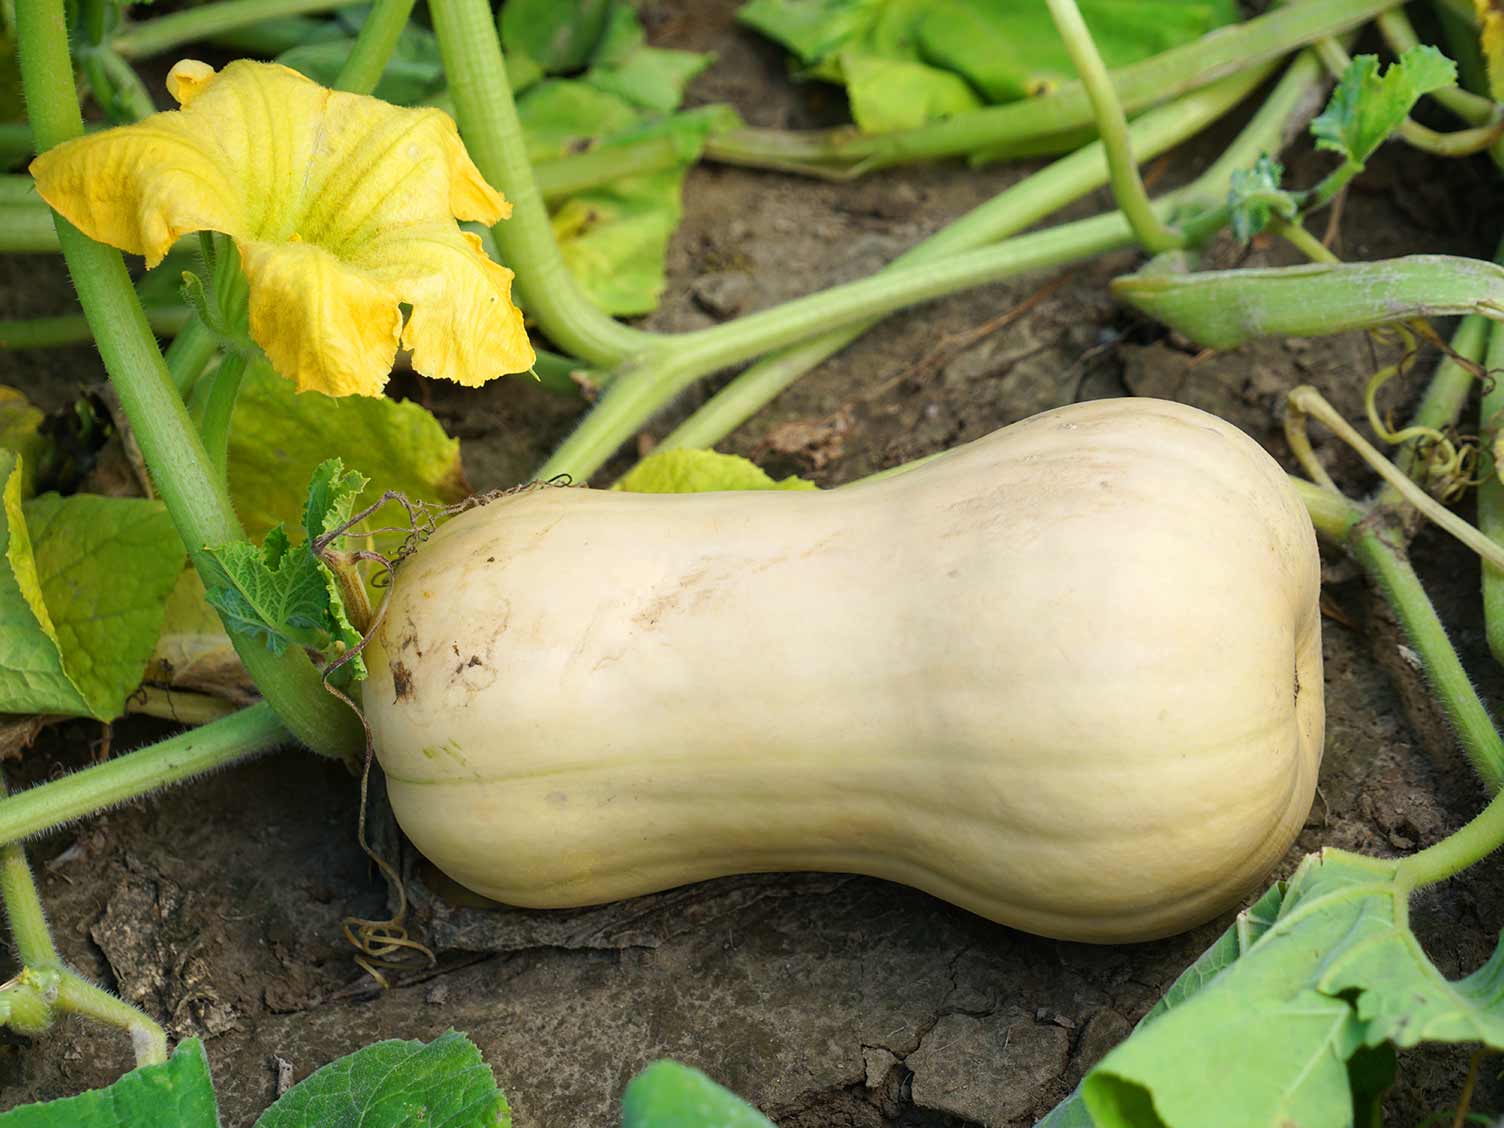
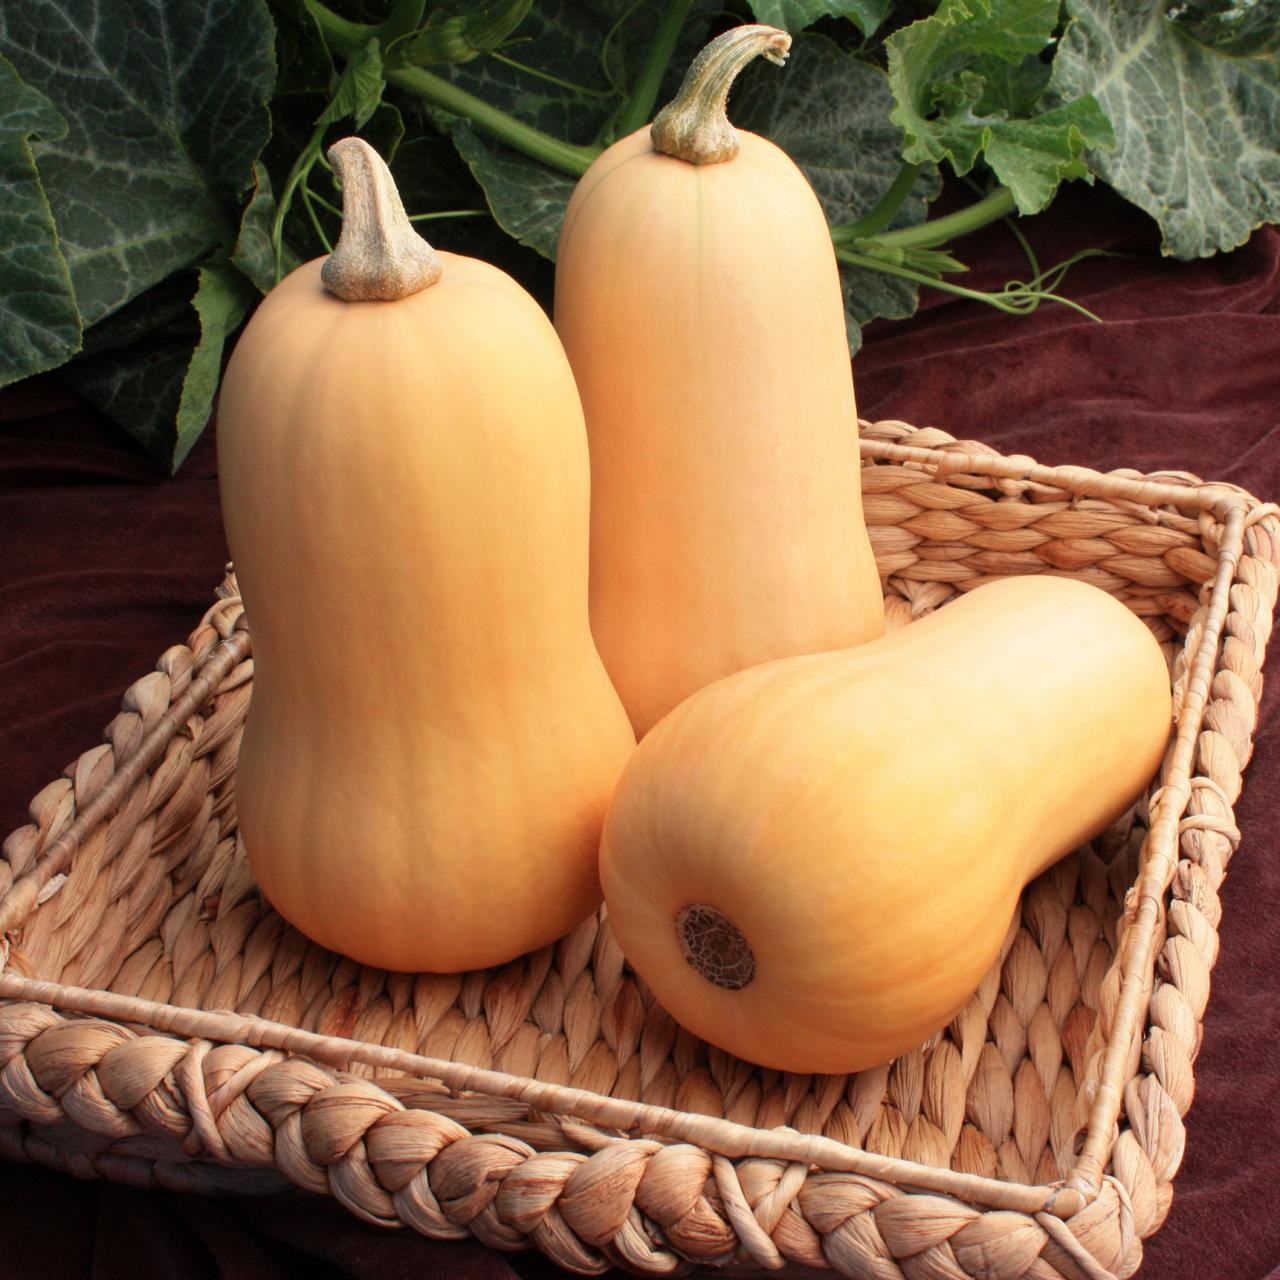
Harvest Timing: Butternut squash is typically ready for harvest when the fruits have reached their full size and the skin has hardened. The rind should be firm and have a uniform tan or cream color. Depending on the variety, this usually occurs around 80-100 days after planting.
Harvesting Method: Use a sharp knife or pruners to cut the squash from the vine, leaving a few inches of stem attached. Be careful not to damage the stem or the fruit during the process. Avoid twisting or pulling the squash forcefully, as it may detach the stem and increase the risk of rot.
Curing Process: After harvesting, let the squash cure for about 1-2 weeks to allow the skin to harden fully and enhance flavor and storage life. Place the squash in a warm, well-ventilated area with a temperature of around 70-80°F (21-27°C). Avoid direct sunlight, as it can cause sunburn.
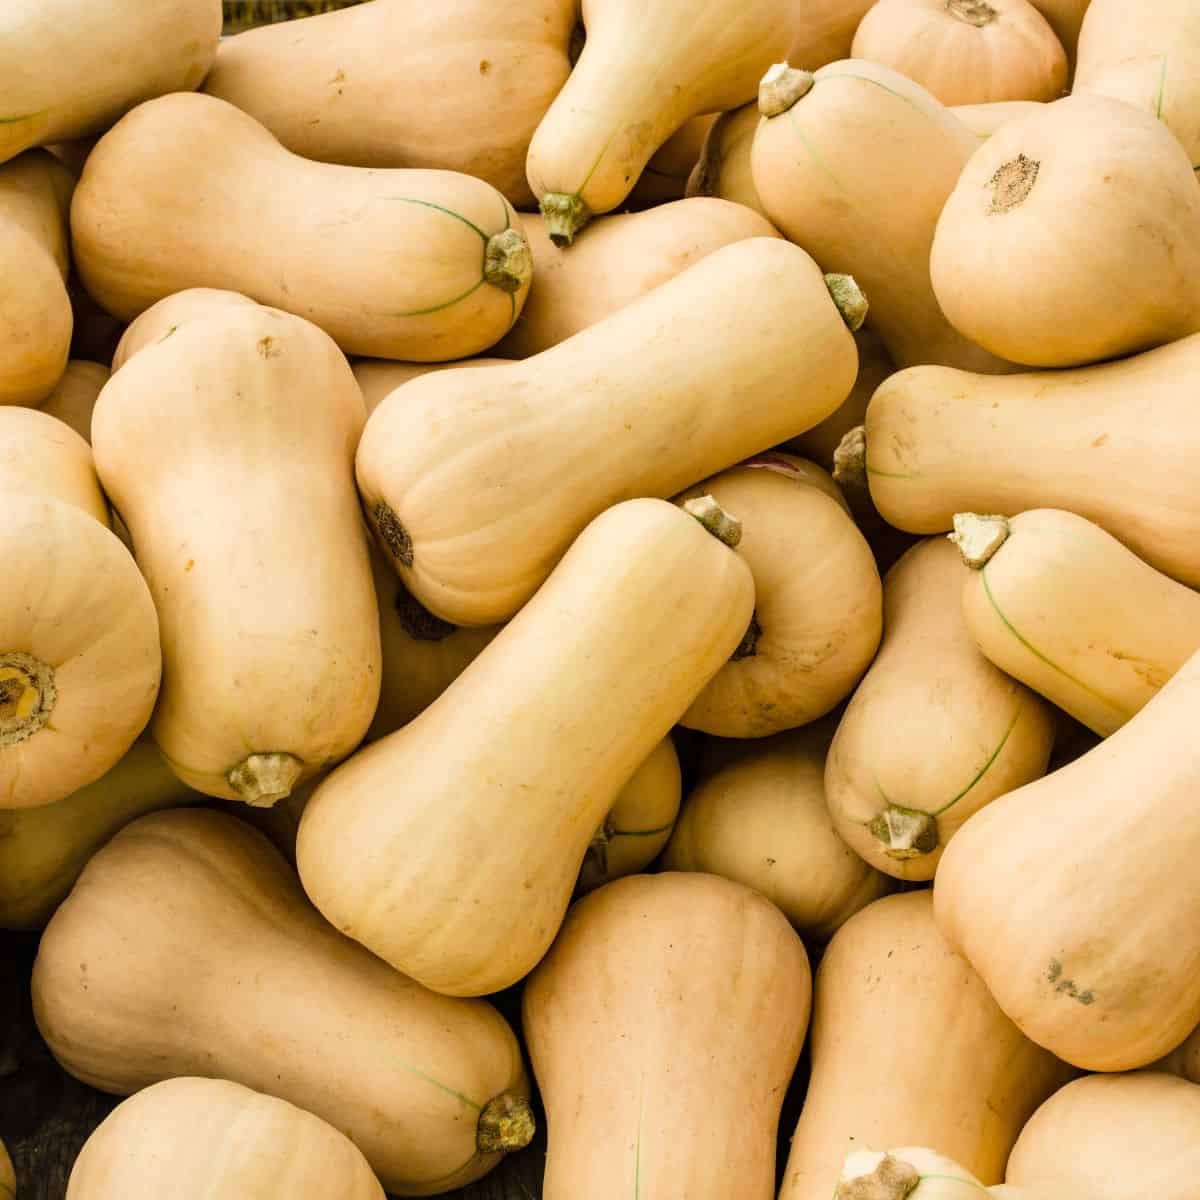
Storage Conditions: Once cured, transfer the butternut squash to a cool and dry storage area with a temperature between 50-55°F (10-13°C). Ensure good air circulation to prevent moisture accumulation and potential rot. Avoid storing them near fruits that release ethylene gas, such as apples and bananas, as it can accelerate spoilage.
Storage Duration: When stored properly, butternut squash can typically last for 2-3 months. Regularly inspect your stored squash for any signs of decay or rot. Consume any damaged or spoiled squash immediately to prevent the fungus from spreading to the rest of the storage.
Freezing: If you have an abundance of harvested butternut squash, you can prepare and freeze it for extended storage. Peel and cube the squash, then blanch it in boiling water for a few minutes. Cool the cubes in ice water, drain, and transfer them to airtight containers or freezer bags. Label and date the containers before placing them in the freezer.
Cooking and Enjoying: Butternut squash is incredibly versatile and can be used in various delicious recipes. Roast it, mash it, or purée it for soups, stews, casseroles, or side dishes. Experiment with different seasonings and flavor combinations to savor the sweet and nutty taste of this winter squash.
Seed Saving: If you’re interested in saving seeds for future plantings, carefully scoop out the seeds from the center of a mature butternut squash. Rinse them in water to remove any remaining pulp, then dry them thoroughly on a paper towel. Store the seeds in a cool, dry place in a labeled envelope or airtight container until the next planting season.
By following these harvesting and storage guidelines, you can enjoy the flavors of your homegrown butternut squash for months to come. So, savor the fruits of your labor and delight in the wholesome goodness that butternut squash brings to your table!
Conclusion
Congratulations! You’ve now learned how to grow butternut squash from seed. By following the steps outlined in this article, you can embark on a rewarding journey of cultivating this delicious and versatile vegetable in your own garden.
From choosing the right seeds and preparing the soil to planting the seeds, providing proper watering and sunlight, managing weeds and pests, supporting and training the plants, fertilizing, and harvesting and storing the butternut squash, each step plays a crucial role in the success of your gardening endeavor.
Butternut squash, with its creamy orange flesh and nutty flavor, offers an abundance of culinary possibilities. Whether you roast it, mash it, or use it as a base for hearty soups and stews, the versatility of butternut squash is truly remarkable.
Remember to provide your butternut squash plants with adequate sunlight, water them consistently, and fertilize them at the appropriate times to ensure healthy growth and maximize yield. Keep a watchful eye on potential pests and diseases that can hinder their progress, and promptly take action to mitigate any issues that arise.
When the time is right, harvest your butternut squash with care, allowing them to fully mature and cure before storing them in a cool and dry location. Properly stored butternut squash can last for several months, providing you with a continuous supply of this delectable winter vegetable.
As you embark on your butternut squash-growing journey, remember to savor every moment, from planting those tiny seeds to watching them grow into robust vines laden with fruits. Take pleasure in the satisfaction of nurturing your own food and relish in the flavors of your homegrown bounty.
So, grab your gardening tools, select your butternut squash seeds, and put your newfound knowledge into practice. With a little bit of patience, dedication, and a green thumb, you’ll soon be enjoying the sweet rewards of your efforts as you savor the delicious taste of homegrown butternut squash.
Happy gardening and bon appétit!
Now that you're on your way to mastering butternut squash growth, why not spruce up their surroundings? Dive into our latest piece on inventive garden fencing options that can transform any outdoor space. Whether you're looking for privacy, charm, or just a way to keep critters out, these fence ideas will surely inspire your next garden project. Don't miss out on elevating your gardening game with some stylish and functional boundary solutions!
Frequently Asked Questions about How To Grow Butternut Squash From Seed
Was this page helpful?
At Storables.com, we guarantee accurate and reliable information. Our content, validated by Expert Board Contributors, is crafted following stringent Editorial Policies. We're committed to providing you with well-researched, expert-backed insights for all your informational needs.


0 thoughts on “How To Grow Butternut Squash From Seed”