Home>Garden Essentials>How To Plant Squash Seeds
Garden Essentials
How To Plant Squash Seeds
Modified: May 6, 2024
Learn how to plant squash seeds in your garden and enjoy a bountiful harvest. Follow our step-by-step guide for successful squash cultivation.
(Many of the links in this article redirect to a specific reviewed product. Your purchase of these products through affiliate links helps to generate commission for Storables.com, at no extra cost. Learn more)
Introduction
Gardening is a rewarding and enjoyable hobby, allowing you to indulge your love for nature and cultivate beautiful plants. One popular vegetable that many gardeners love to grow is squash. With their vibrant colors, delicious taste, and versatility in the kitchen, squash plants can be a wonderful addition to your garden.
In this article, we will guide you through the process of planting squash seeds from start to finish. Whether you are a novice gardener or have some experience under your belt, we will provide you with all the information you need to successfully grow squash in your own backyard.
From choosing the right squash seeds to caring for the seedlings and eventually harvesting the fruits, we will cover it all. So let’s begin this gardening adventure and learn how to plant squash seeds properly.
Key Takeaways:
- Choose the right squash variety, prepare fertile soil, and provide proper care to successfully grow squash from seeds in your garden. Enjoy the delicious harvest by harvesting at the right time and storing the fruits properly.
- Ensure healthy squash plants by controlling weeds and pests, providing adequate sunlight and water, and recognizing and treating common seed problems. With proper care, you can enjoy a bountiful harvest of delicious squash.
Read more: How To Toast Squash Seeds
Choosing the Right Squash Seeds
When it comes to choosing squash seeds, there are a few factors to consider. First and foremost, you need to decide what type of squash you want to grow. Squash comes in various varieties, including summer squash, winter squash, and specialty squash.
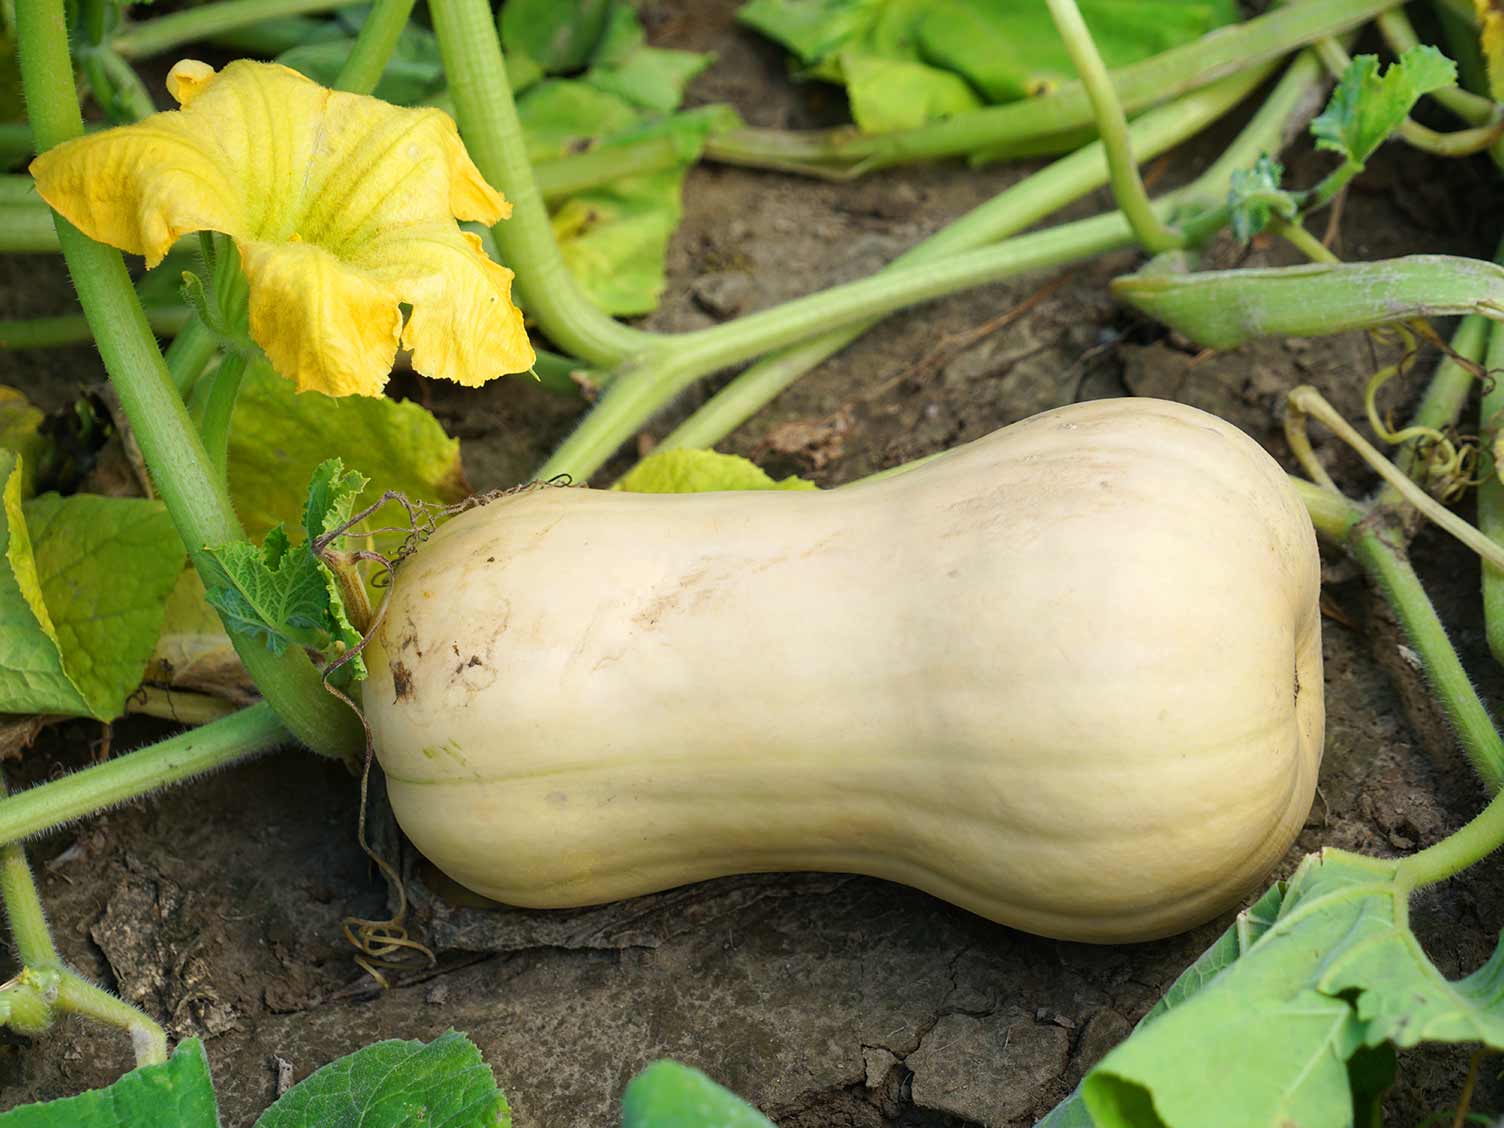
Summer squash, such as zucchini and yellow crookneck, are harvested when the fruits are young and tender. These varieties grow quickly and are best enjoyed when they are small. Winter squash, on the other hand, have a longer maturity period and are harvested when the fruits are fully mature. Examples of winter squash include butternut, acorn, and spaghetti squash.
Once you have determined the type of squash you want to grow, it’s time to choose the specific variety. Consider factors such as taste preference, growing conditions, and disease resistance. Some popular varieties of squash include ‘Black Beauty’ zucchini, ‘Golden Delicious’ acorn squash, and ‘Delicata’ winter squash.
It’s also important to choose seeds from a reputable source. Look for seed companies or nurseries that specialize in high-quality seeds. This ensures that you are getting seeds that are true to the variety and have a higher chance of germination.
Lastly, consider the space you have available in your garden. Squash plants have a sprawling growth habit and can take up a considerable amount of space. If you have a small garden, look for compact varieties or consider growing squash vertically using trellises or supports.
By carefully selecting the right type of squash, the specific variety, and sourcing seeds from a reliable supplier, you are setting yourself up for success in your squash growing endeavor.
Preparing the Soil for Planting
A good foundation is crucial for any successful garden, and preparing the soil properly is an essential step in the process. Squash plants thrive in well-draining, fertile soil that is rich in organic matter. Here are some steps to take when preparing your soil for planting squash seeds:
- Choose the Right Location: Select a sunny spot in your garden for your squash plants. They require at least 6 to 8 hours of direct sunlight daily to grow and produce healthy fruits.
- Clear the Area: Remove any weeds, rocks, or debris from the planting area. These can hinder plant growth and compete for nutrients and water.
- Loosen the Soil: Use a garden fork or tiller to loosen the soil to a depth of at least 12 inches. This promotes good root development and allows for better water drainage.
- Amend the Soil: Add organic matter such as compost, well-rotted manure, or leaf mulch to the soil. Mix it in thoroughly to improve soil fertility and structure. Organic matter also helps retain moisture in the soil and provides essential nutrients for plant growth.
- Test the Soil pH: Squash plants prefer slightly acidic to neutral soil with a pH range of 6.0 to 7.0. Test your soil using a soil testing kit or send a sample to a local extension office for analysis. If the pH is too low or too high, adjust it accordingly by adding amendments such as lime (to raise pH) or sulfur (to lower pH).
Once you have completed these steps, your soil should be ready for planting. It is recommended to perform soil preparation a few weeks before planting to allow the organic matter to decompose and integrate into the soil. This will create a nutrient-rich environment and provide a solid foundation for your squash plants to thrive.
Planting Squash Seeds
Now that your soil is prepared, it’s time to move on to planting your squash seeds. Here are the steps to follow:
- Select the Planting Method: There are two main methods for planting squash seeds: direct seeding and starting seeds indoors. Direct seeding involves planting the seeds directly into the garden bed, while starting seeds indoors allows for earlier planting and a head start on the growing season.
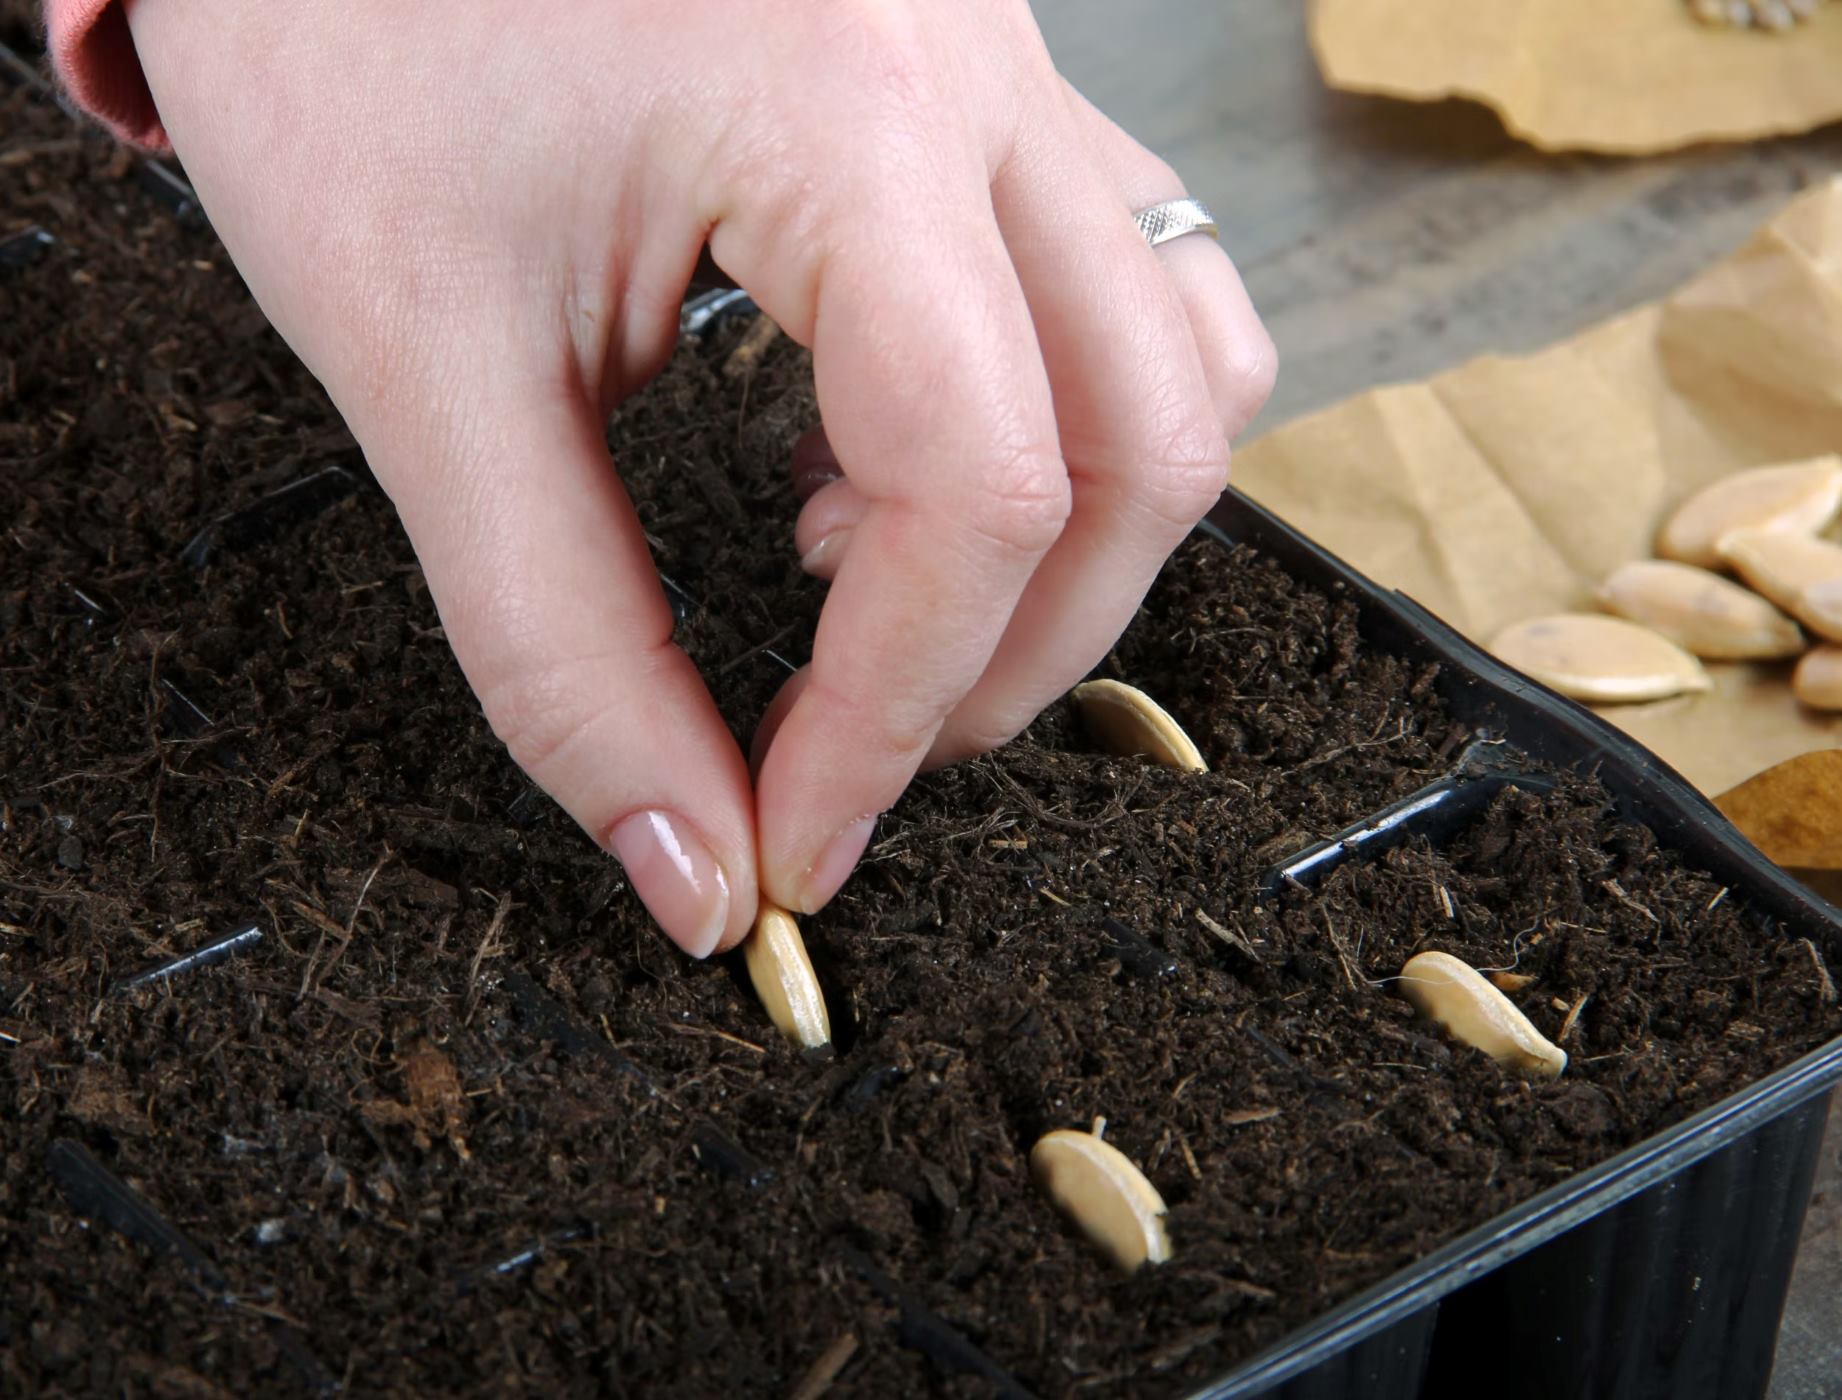
- Direct Seeding: If you choose to directly sow your squash seeds, wait until all danger of frost has passed and the soil temperature has reached around 70°F (21°C). Make small holes in the soil, about 1-2 inches deep and 2-3 feet apart, depending on the variety’s recommended spacing.
- Indoor Seed Starting: For indoor seed starting, plant the seeds in biodegradable pots or seed trays filled with seed starting mix. Keep the soil consistently moist and maintain a temperature of around 70°F (21°C) until the seedlings emerge.
- Planting Depth: Whether planting directly or indoors, sow the squash seeds about 1 inch deep in the soil. Lightly cover the seeds with loose soil, firming it gently to ensure good seed-to-soil contact.
- Watering: After planting, give the newly sowed seeds a gentle watering to settle them in the soil. Be careful not to overwater, as excessive moisture can lead to rotting. Maintain moist soil throughout the germination process.
- Thinning: Once the seedlings have emerged and developed their first true leaves, thin them out to provide enough space for each plant to grow. For large varieties, thin to 3-4 feet apart, while smaller varieties may require 2-3 feet apart.
- Mulching: Apply a layer of organic mulch around the base of the plants, such as straw or shredded leaves. This helps to conserve moisture, suppress weeds, and regulate soil temperature.
By following these steps, you will successfully plant your squash seeds and set the stage for healthy growth. Soon enough, you will see the seedlings sprout and begin their journey towards becoming bountiful squash plants.
Providing Proper Watering and Drainage
Water is a vital element in the growth and development of squash plants. It is essential to provide them with adequate moisture while also ensuring proper drainage to prevent waterlogged soil. Here are some tips for watering your squash plants:
- Watering Frequency: Squash plants require regular watering, particularly during periods of dry weather. Aim to provide about 1-2 inches of water per week. This can be adjusted depending on the weather conditions and the moisture needs of the plants.
- Watering Technique: Water the plants at the base, directing the water towards the soil and avoiding wetting the leaves. This helps to prevent the spread of diseases and allows the roots to absorb the moisture efficiently.
- Early Morning Watering: Water the plants early in the morning to give them time to absorb the moisture before the heat of the day. Avoid watering in the evening, as wet foliage overnight can encourage fungal diseases.
- Consistent Moisture: It’s important to maintain consistent moisture levels in the soil, as fluctuations can lead to issues such as blossom end rot. Monitor the soil moisture regularly and adjust your watering schedule accordingly.
- Drainage: Along with providing sufficient water, it is equally crucial to ensure proper drainage. Squash plants do not thrive in waterlogged soil and are susceptible to root rot. Ensure that your garden beds have good drainage, or consider raised beds to improve drainage if needed.
- Avoid Overwatering: While it’s important to provide enough water, be cautious not to overwater your squash plants. Overwatering can drown the roots and lead to plant stress or disease. Allow the soil to dry out slightly between waterings.
- Mulching: Applying a layer of organic mulch around the plants helps to conserve moisture in the soil and reduce evaporation. Mulch also acts as an insulating barrier, protecting the roots from extreme temperatures.
By following these watering guidelines, you can ensure that your squash plants receive the necessary hydration for healthy growth while preventing water-related issues. Remember to check the moisture levels regularly and adapt your watering routine to the specific needs of your plants.
Read more: How To Save Squash Seeds
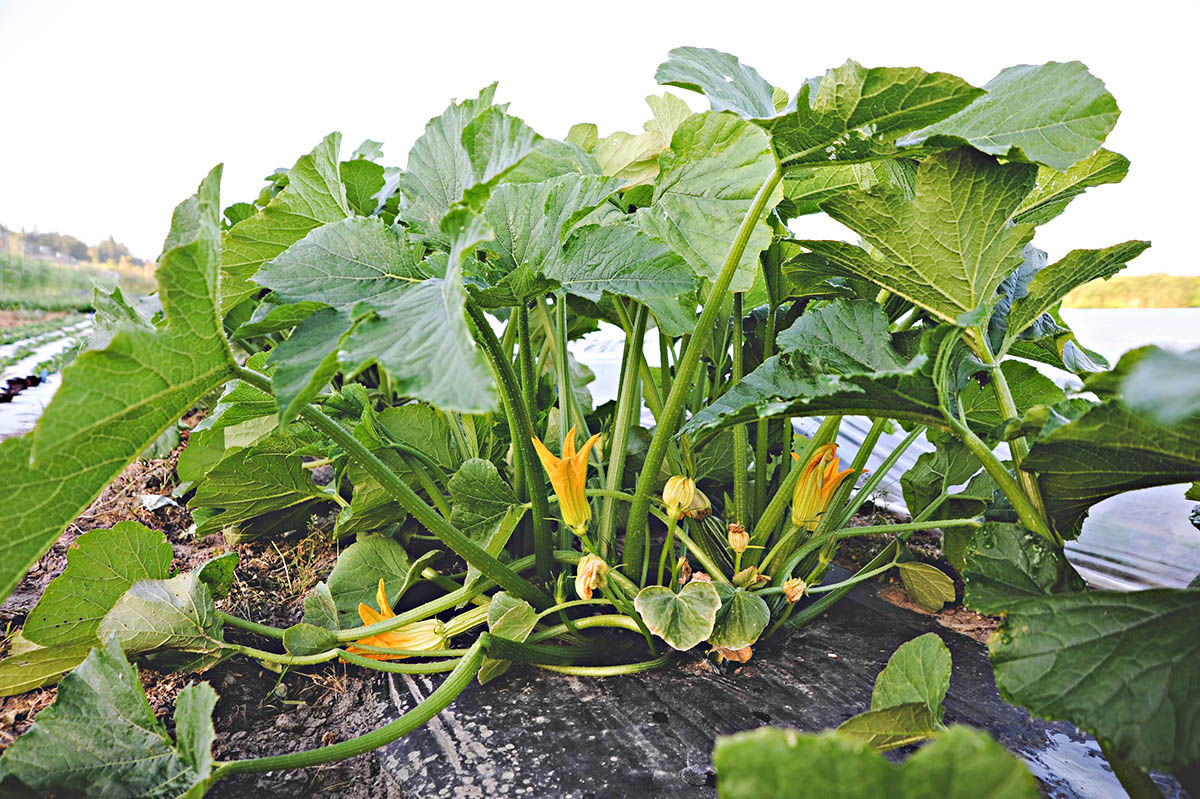
Providing Adequate Sunlight
Sunlight is an essential requirement for the growth and development of squash plants. It plays a crucial role in the photosynthesis process, where plants convert sunlight into energy to fuel their growth. Here are some tips to ensure your squash plants receive adequate sunlight:
- Choose a Sunny Location: Select a spot in your garden that receives at least 6 to 8 hours of direct sunlight each day. Squash plants thrive in full sun, so make sure to avoid areas shaded by buildings, trees, or other tall plants.
- Monitor Sun Patterns: Observe the sun patterns in your garden to determine the areas with the most sunlight. Take note of any shade that may be caused by nearby structures or objects, as this can impact the amount of sunlight your plants receive.
- Prune Nearby Plants: If there are any trees, shrubs, or other plants casting shade on your squash plants, consider pruning them to allow more sunlight to reach your squash. This is especially important during the early morning and late afternoon, when the sun is lower in the sky.
- Use Reflective Surfaces: Reflective surfaces, such as white plastic or aluminum foil, can help redirect sunlight towards your squash plants. Place these materials strategically around the garden beds to maximize sunlight exposure.
- Rotate Plantings: If you are growing squash in a limited space, consider rotating your plantings each year. This helps to prevent shade from building up in the same area and ensures that all plants receive an equal amount of sunlight over time.
- Consider Vertical Gardening: If you have limited space or a shaded garden, consider growing squash vertically using trellises or supports. This allows you to take advantage of the available sunlight and makes efficient use of space.
- Monitor Plant Health: Pay attention to the overall health and growth of your squash plants. If they are receiving insufficient sunlight, they may exhibit signs such as leggy growth, weak stems, or small and pale leaves. If necessary, relocate your plants to a sunnier spot.
By ensuring that your squash plants receive ample sunlight, you are providing them with the energy they need to grow vigorously and produce an abundant harvest. Regular monitoring and adjustments will help you optimize sun exposure and maximize the potential of your squash plants.
When planting squash seeds, make sure to choose a sunny spot with well-drained soil. Plant the seeds 1 inch deep and 2-3 feet apart. Keep the soil consistently moist and watch out for pests.
Controlling Weeds and Pests
Weeds and pests can be a common challenge in any garden, including when growing squash. It is important to implement effective weed and pest control strategies to keep your squash plants healthy and thriving. Here are some tips to help you control weeds and pests in your squash garden:
- Mulch: Apply a layer of organic mulch, such as straw or wood chips, around your squash plants. This helps to suppress weed growth by blocking sunlight and preventing weed seeds from germinating. Mulch also helps conserve soil moisture and regulates soil temperature.
- Hand Pulling: Regularly inspect your garden for weeds and promptly remove them by hand. Be sure to pull out the weeds from the root to prevent regrowth. This method is especially effective for larger weeds that may not be easily controlled by mulch alone.
- Use Weed Barrier: Consider using a weed barrier or landscape fabric around your squash plants. These materials act as a physical barrier that prevents weeds from coming up through the soil. Cut holes or slits in the fabric to accommodate the squash plants.
- Companion Planting: Utilize companion planting by growing plants that naturally repel pests or deter weed growth. For example, planting marigolds or nasturtiums around your squash plants can help deter pests such as aphids or squash bugs.
- Organic Pest Control: Use organic pest control methods to tackle common squash pests. For instance, handpicking and removing pests like squash bugs or cucumber beetles can be effective. Alternatively, introducing beneficial insects like ladybugs or using organic pest control sprays can help manage pest populations.
- Crop Rotation: Practice crop rotation by avoiding planting squash or other related crops in the same spot year after year. This helps to break the life cycle of pests and reduce the risk of disease buildup in the soil.
- Maintain a Clean Garden: Keep your garden clean and free of debris, as this can provide hiding places for pests and potential areas for disease development. Regularly remove fallen leaves, fruits, and plant residues to minimize pest infestations and prevent disease spread.
- Regular Inspection: Inspect your squash plants regularly for any signs of pest damage or disease. Early detection allows for timely intervention and better control of both pests and diseases.
By implementing these strategies for weed and pest control, you can help ensure the health and productivity of your squash plants. Remember to take a proactive approach and address any weed or pest issues promptly to minimize their impact on your garden.
Caring for Squash Seedlings
Once your squash seeds have germinated and the seedlings have emerged, it’s crucial to provide proper care to promote healthy growth and help them thrive. Here are some essential tips for caring for your squash seedlings:
- Watering: Continue to water the seedlings regularly, keeping the soil consistently moist but not waterlogged. Avoid overhead watering, as wet foliage can increase the risk of diseases. Water at the base of the plants to ensure the roots receive sufficient moisture.
- Thinning: If you planted multiple seeds per planting hole, thin out the seedlings once they have developed their first set of true leaves. Gently remove the weaker or overcrowded seedlings, leaving only the strongest one to grow. This allows the remaining seedling to have ample space and resources.
- Fertilizing: Apply a balanced fertilizer or compost around the base of the seedlings to provide them with essential nutrients. Follow the package instructions or recommendations for the specific fertilizer you are using. Avoid over-fertilization, as excessive nutrients can lead to poor fruit development.
- Support: If you are growing vining squash varieties, provide support such as trellises or stakes to help the seedlings grow vertically. This not only saves space but also keeps the fruits off the ground, reducing the risk of rot and pest damage.
- Sunlight: Ensure that the seedlings are receiving adequate sunlight. If they are growing indoors or in a shaded area, consider using artificial grow lights to supplement the natural light. Gradually acclimate the seedlings to direct sunlight if they were started indoors.
- Pruning: As the seedlings grow, pinch off any side shoots or secondary vines that develop. This helps direct the plant’s energy towards main vine growth and fruit production. Remember to use clean and sharp pruners to minimize the risk of disease transmission.
- Mulching: Apply a layer of organic mulch around the seedlings to reduce weed growth, conserve moisture, and regulate soil temperature. Keep the mulch a few inches away from the stems to prevent moisture-related issues or stem rot.
- Monitoring: Regularly monitor your squash seedlings for signs of pests or diseases. Check the leaves for any discoloration, spots, or wilting. Inspect the undersides of the leaves for any pests like aphids or squash bugs. Early detection allows for prompt intervention and better control.
By providing appropriate care, you will give your squash seedlings the best chance of developing into healthy, productive plants. Remember to be attentive and observant, adjusting your care routine based on the specific needs of your seedlings and maintaining a proactive approach to gardening.
Recognizing and Treating Common Squash Seed Problems
Growing squash from seeds can sometimes come with its own set of challenges. However, by being aware of common seed problems and implementing proper treatment measures, you can ensure the success of your squash plants. Here are some common squash seed problems, along with their identification and treatment methods:
- Poor Germination: If your squash seeds fail to germinate or have a low germination rate, it could be due to factors such as improper planting depth, low soil temperature, or poor seed quality. To address this issue, make sure to plant seeds at the recommended depth, provide adequate warmth, and ensure you are using high-quality seeds from reputable sources.
- Damping-off: Damping-off is a fungal disease that can affect squash seedlings, causing them to wilt, collapse, and eventually die. This often occurs in overly moist or poorly draining soil. To prevent damping-off, ensure proper drainage, avoid overwatering, and provide good air circulation around the seedlings. If damping-off occurs, remove the affected seedlings and treat the remaining ones with a fungicide.
- Seedling Diseases: Various other fungal diseases can affect squash seedlings, such as powdery mildew, downy mildew, and leaf spot. These diseases are characterized by the appearance of fuzzy white or grayish growth, yellowing or browning leaves, and spots on the foliage. To prevent and treat seedling diseases, provide good air circulation, avoid overhead watering, remove infected plant parts, and apply organic fungicides if necessary.
- Pest Infestation: Squash plants are susceptible to pests such as aphids, squash bugs, cucumber beetles, and vine borers. Recognize the signs of pest infestation, such as distorted leaves, yellowing or stunted growth, and visible pests on the plants. To control pests, handpick and remove them, apply organic insecticidal soap or neem oil, or introduce beneficial insects that prey on the pests.
- Nutrient Deficiencies: Deficiencies in essential nutrients can cause stunted growth, yellowing leaves, and poor fruit development in squash plants. Common nutrient deficiencies include nitrogen, phosphorus, and potassium. To address nutrient deficiencies, amend the soil with organic fertilizers, supplement with balanced fertilizers, or foliar feed the plants with nutrient-rich solutions.
- Environmental Stress: Squash plants can be sensitive to extreme weather conditions, such as excessive heat or cold. Extreme temperatures can cause wilting, leaf burn, or fruit drop. To minimize environmental stress, provide shade during extreme heat, use row covers or other protective measures during cold snaps, and ensure adequate watering to alleviate drought stress.
- Poor Pollination: Squash plants rely on pollination to produce fruits. If there is inadequate pollination, the fruits may be misshapen or fail to develop altogether. To improve pollination, encourage pollinator activity by planting flowers that attract bees and other beneficial insects, or hand-pollinate the flowers using a small brush or cotton swab.
By recognizing these common squash seed problems and implementing appropriate treatment methods, you can overcome challenges and cultivate healthy, productive squash plants in your garden. Regular observation, proper care, and timely intervention are key to ensuring the successful growth of your squash plants.
Read more: How To Start Squash Seeds
Harvesting Squash
Harvesting squash is an exciting and rewarding moment in your gardening journey. When the fruits have reached their mature stage, it’s time to pick them to enjoy the delicious flavors and textures they offer. Here are some guidelines for harvesting squash:
- Observe Maturity: Each variety of squash has its own specific maturity stage. Refer to the seed packet or variety information to determine when the squash is ready to be harvested. Generally, summer squash should be harvested when the fruits are small, tender, and glossy, while winter squash should be left on the vine until the skin is hard and cannot be easily punctured by a fingernail.
- Size Matters: Pay attention to the size of the squash when harvesting. Summer squash is typically best when harvested at a length of 4-6 inches, although it can vary depending on the specific variety. Winter squash should be left to reach its mature size, which can range from a few pounds to several pounds, depending on the variety.
- Check the Color and Skin Texture: For both summer and winter squash, examine the skin color and texture. Summer squash should have vibrant and glossy skin, while winter squash should have a dull, hard skin. Avoid harvesting squash with blemishes, soft spots, or signs of rotting.
- Use a Sharp Tool: To harvest squash, use a sharp knife or pair of pruning shears. Cut the stem of the fruit carefully, leaving a short stub attached. Avoid pulling or twisting the fruit, as this can damage the plant and lead to potential disease or rot.
- Harvest Frequently: Check your squash plants regularly and harvest the mature fruits frequently. Summer squash, in particular, can grow quickly, so it’s important to keep an eye on the plants to avoid oversized squash. Harvesting regularly also stimulates continuous fruit production throughout the growing season.
- Handle with Care: Handle harvested squash with care to prevent bruising or damage. Place them in a basket or container to avoid dropping or mishandling. Be gentle when transferring the squash from the garden to your storage space or kitchen.
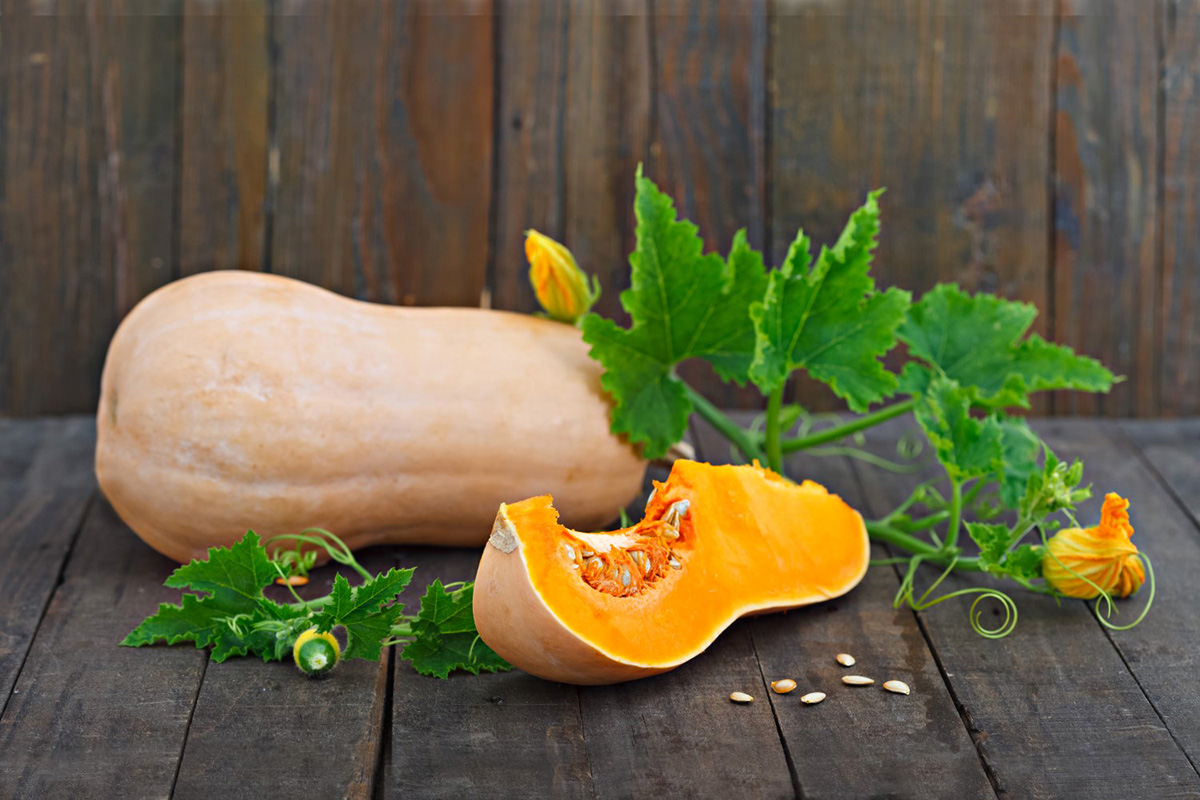
- Store Properly: Summer squash is best consumed soon after harvesting while it is still fresh and tender. Winter squash, on the other hand, requires a curing process where they are stored in a cool and dry location for a few weeks to improve flavor and extend their shelf life. Store winter squash in a cool, well-ventilated area, away from direct sunlight and moisture.
Harvesting squash at the right time ensures peak flavor and quality. By following these guidelines, you can enjoy the fruits of your labor and savor the delicious taste of freshly harvested squash.
Conclusion
Growing squash from seeds is a delightful and rewarding experience that allows you to enjoy the beauty of nature while reaping the benefits of a bountiful harvest. By following the steps outlined in this article, you can successfully plant squash seeds and cultivate healthy, productive plants in your garden.
From choosing the right squash seeds and preparing the soil to providing proper care and addressing common seed problems, each step is vital in ensuring the success of your squash plants. Remember to choose the appropriate squash variety based on your preference and growing conditions, and source high-quality seeds from reliable suppliers.
Preparing the soil by providing adequate drainage and fertility sets a solid foundation for healthy plant growth. Plant the seeds at the correct depth, water consistently, and provide the necessary sunlight. Control weeds and pests diligently, and care for the seedlings by thinning, fertilizing, and monitoring for any signs of issues.
As your squash plants mature, harvest the fruits at the appropriate stage by observing their size, color, and texture. Use sharp tools to avoid damaging the plant, and handle the harvested squash with care. Store winter squash properly to extend their shelf life and maximize their flavor.
Remember that gardening is a continuous learning process. Observe, learn, and adapt as you go, making adjustments based on the specific needs and conditions of your squash plants. Stay vigilant in identifying and addressing any seed problems, nutrient deficiencies, or pest infestations that may arise.
By following these guidelines and showcasing your love for gardening, you can enjoy a plentiful harvest of delicious and nutritious squash. So put on your gardening gloves, grab your seeds, and embark on this wonderful journey of growing your own squash from seeds.
Eager to keep your gardening momentum going? After mastering squash planting, why not enhance your outdoor space with creative barriers? Our guide on unique garden fence ideas offers practical tips and stylish inspirations to protect and beautify your garden. Whether you need privacy, security, or simply an aesthetic upgrade, you'll find designs that resonate with your gardening needs.
Frequently Asked Questions about How To Plant Squash Seeds
Was this page helpful?
At Storables.com, we guarantee accurate and reliable information. Our content, validated by Expert Board Contributors, is crafted following stringent Editorial Policies. We're committed to providing you with well-researched, expert-backed insights for all your informational needs.


0 thoughts on “How To Plant Squash Seeds”