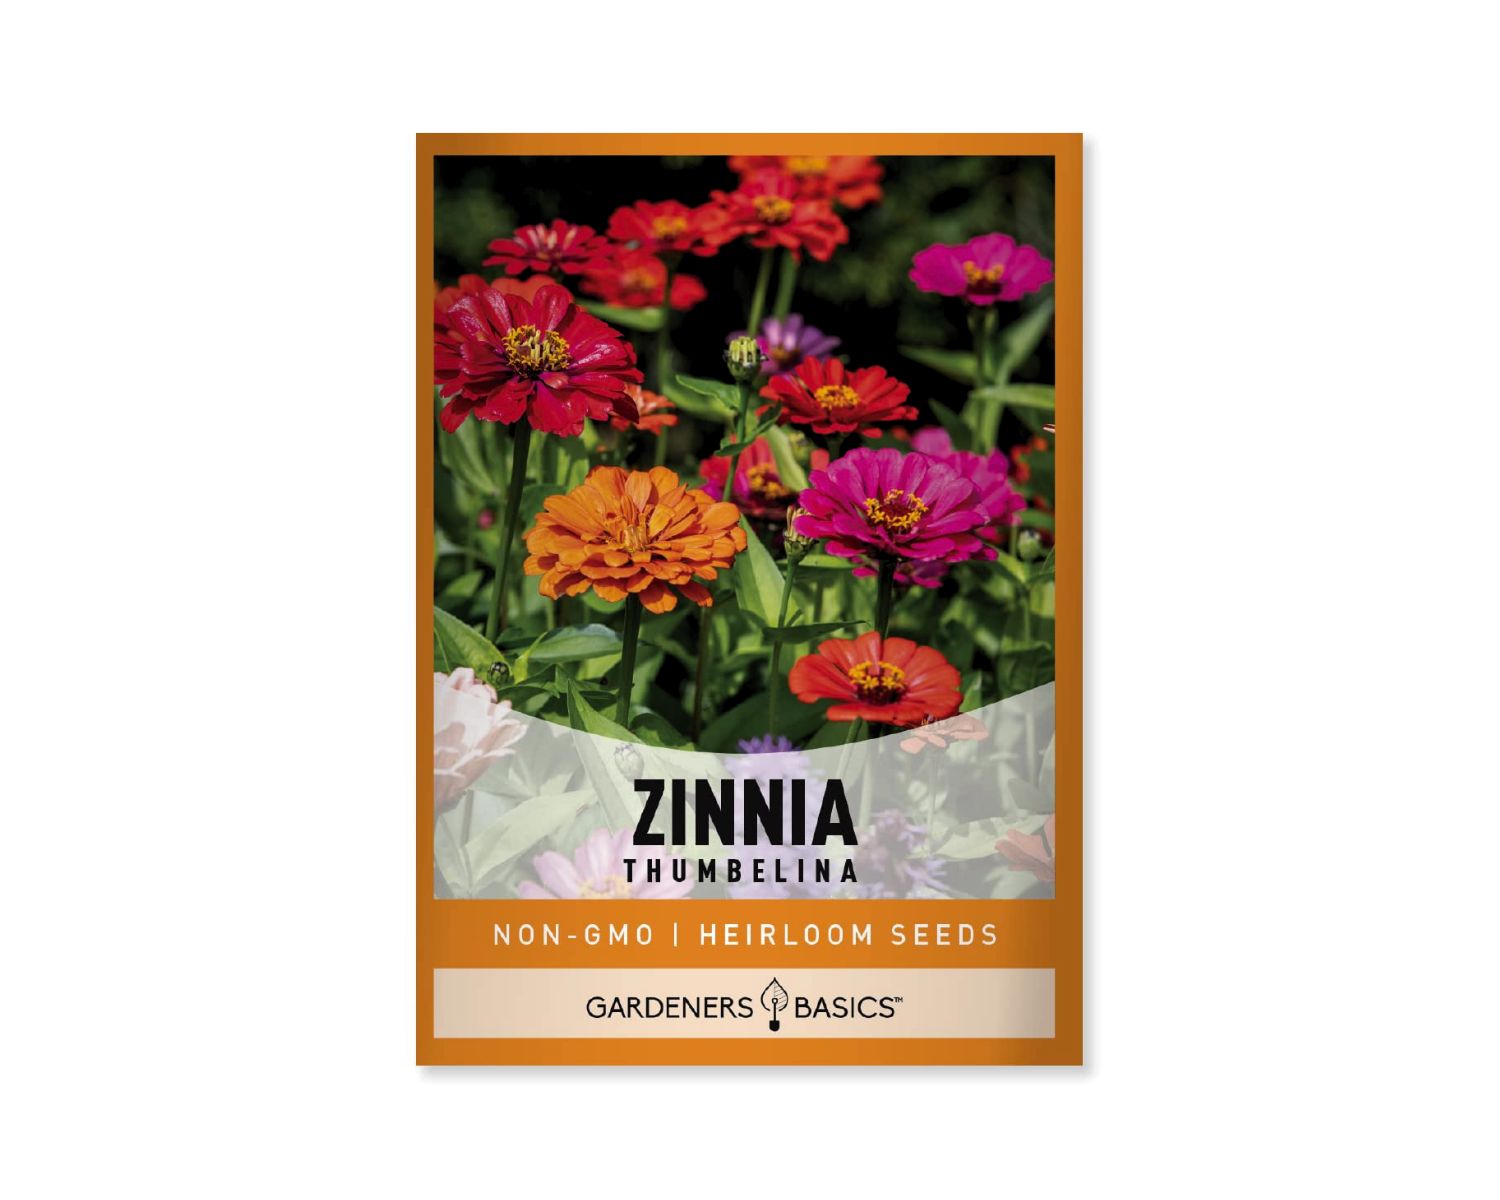
Home>Garden Essentials>How To Seed Zinnias
Garden Essentials
How To Seed Zinnias
Modified: March 15, 2024
Learn how to seed zinnias and create a beautiful garden with our step-by-step guide. Find tips on selecting the best varieties and caring for your zinnias all season long.
(Many of the links in this article redirect to a specific reviewed product. Your purchase of these products through affiliate links helps to generate commission for Storables.com, at no extra cost. Learn more)
Introduction
Welcome to the world of zinnias! These beautiful and vibrant flowers can bring joy and color to any garden. Whether you have a small backyard or a large plot of land, seeding zinnias is a great way to enhance the beauty of your space. In this article, we will guide you through the process of seeding zinnias, from selecting the right variety to caring for the plants until they reach their full blooming potential.
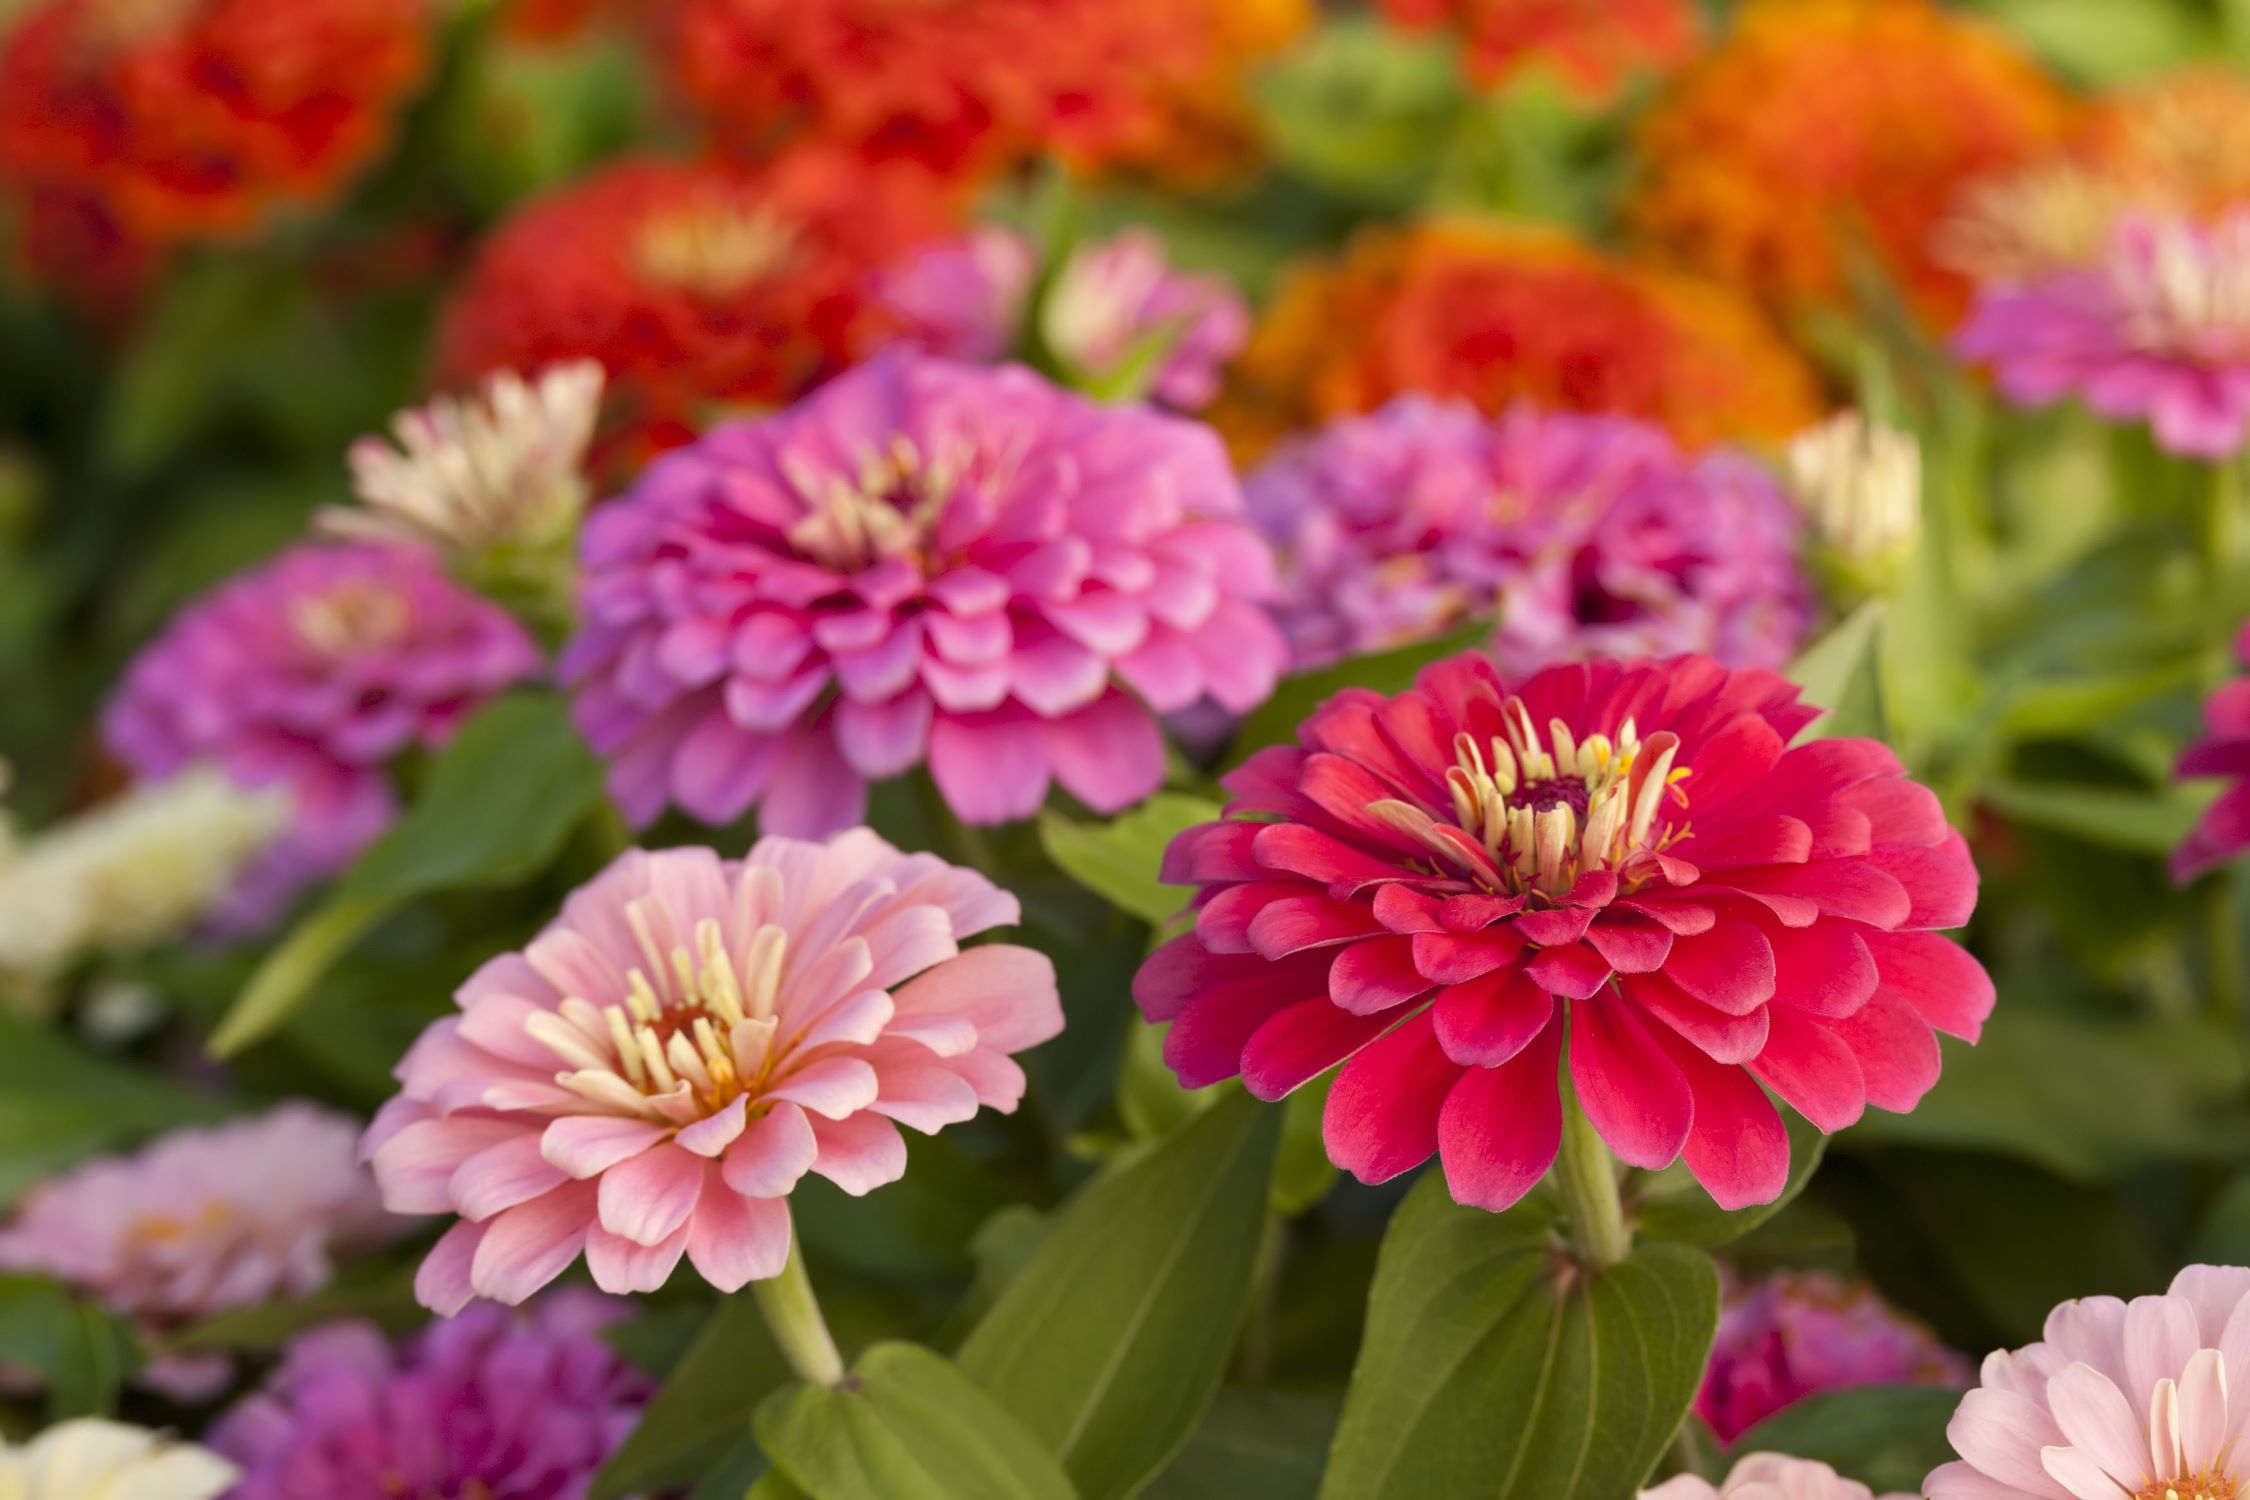
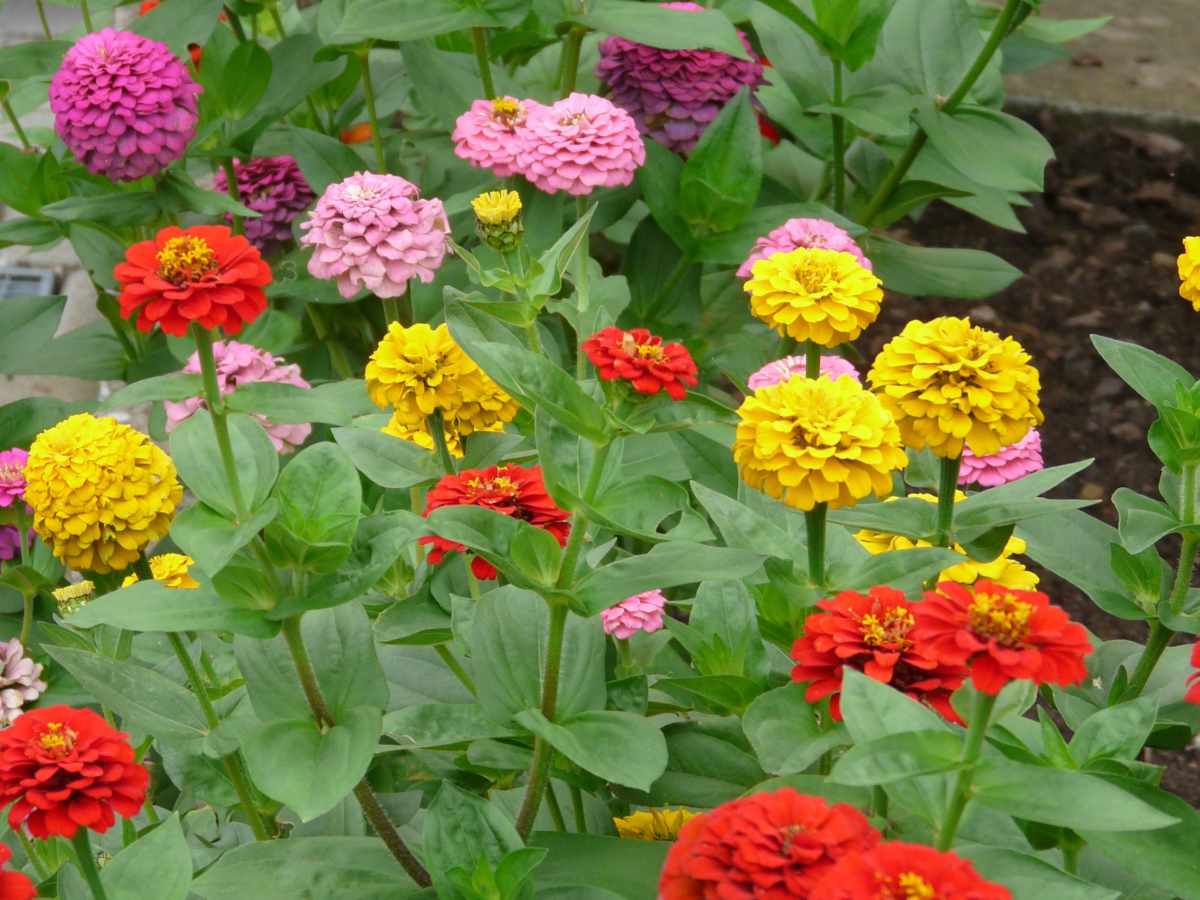
Zinnias are annual flowers that belong to the Asteraceae family. They are native to North and South America and are known for their bright and cheerful blooms. With a wide range of colors and petal varieties, zinnias can add a pop of color to any garden bed, container, or even as cut flowers in a vase.
Seeding zinnias can be a rewarding experience, as it allows you to witness the entire lifecycle of these stunning flowers – from tiny seeds to lush, blooming plants. Whether you’re a seasoned gardener or a beginner, growing zinnias from seeds is a relatively easy and enjoyable process.
Not only do zinnias bring beauty to your garden, but they also attract butterflies and pollinators, making them valuable for supporting biodiversity in your backyard. Plus, zinnias are versatile and can be grown in various climates, making them a popular choice among gardeners worldwide.
Now that we’ve piqued your interest, let’s dive into the fascinating world of zinnias and explore the process of seeding these delightful flowers!
Key Takeaways:
- Zinnias bring vibrant beauty to any garden, attracting pollinators and providing long-lasting blooms. Follow the steps to seed, care for, and harvest zinnias for a colorful and joyful outdoor space.
- From selecting the right variety to harvesting seeds, zinnias require proper care, including watering, fertilizing, and protecting from pests. Enjoy the rewarding process of growing these stunning flowers in your garden.
Read more: How To Collect Seeds From Zinnias
Importance of Seeding Zinnias
Seeding zinnias is not just about growing beautiful flowers; it serves various purposes in your garden. Here are a few reasons why seeding zinnias is important:
- Enhancing Garden Aesthetics: Zinnias are known for their vibrant and eye-catching colors. By seeding zinnias, you can add a touch of charm and beauty to your garden. Whether you choose single-flowered varieties or double-flowered ones, zinnias can create stunning displays in garden beds, borders, or even as potted plants on your patio.
- Supporting Pollinators: Zinnias boast a high nectar content, which attracts various pollinators such as bees, butterflies, and hummingbirds. By seeding zinnias, you provide a valuable food source for these essential creatures, contributing to the overall health and abundance of pollinators in your garden. In turn, this can lead to increased pollination of other plants and improved yields in your vegetable or fruit garden.
- Long-Lasting Blooms: Zinnias are known for their long blooming period, typically lasting from summer to fall. By seeding zinnias, you can enjoy a continuous display of colorful flowers that can brighten up your outdoor space and provide a delightful backdrop for outdoor activities or gatherings.
- Encouraging Biodiversity: Seeding zinnias can support biodiversity in your garden by attracting a diverse range of insects and birds. This can contribute to a healthier and more balanced ecosystem, with beneficial insects helping to control pest populations and birds adding a touch of melodious charm to your garden.
- Cost-Effective Gardening: Seeding zinnias is an affordable way to add beauty to your garden. Zinnia seeds are readily available and relatively inexpensive compared to buying pre-grown plants from nurseries. By starting from seeds, you can grow a large number of zinnia plants and fill your garden with colorful blooms without breaking the bank.
Overall, seeding zinnias is a great way to enhance the aesthetics of your garden, support pollinators, enjoy long-lasting blooms, encourage biodiversity, and save money. So, let’s dive into the next step and learn how to select the right zinnia variety for your garden!
Selecting the Right Zinnia Variety
When it comes to selecting the right zinnia variety for your garden, you’ll be spoiled for choice. Zinnias come in a wide range of colors, sizes, and petal shapes. Here are some factors to consider when choosing the perfect zinnia variety:
- Blooming Time: Zinnias can be classified into three main blooming times – early, midseason, and late. If you want your zinnias to bloom early in the season, opt for early-blooming varieties. On the other hand, if you want to enjoy zinnia blooms later in the season, choose midseason or late-blooming varieties. Consider the timing that best suits your garden’s aesthetic and the climate in your region.
- Plant Height: Zinnias come in various heights, ranging from dwarf varieties that stay compact to taller types that can reach several feet in height. Consider the available space in your garden and the desired visual effect. If you have a small garden or want to grow zinnias in containers, go for dwarf or compact varieties. If you have ample space and want to create a dramatic display, choose taller varieties.
- Flower Size and Shape: Zinnias offer a wide array of flower sizes and shapes. From small, dainty blooms to large, showy flowers, there’s something for every preference. Common zinnia flower shapes include single, semi-double, and double. Single-flowered zinnias have a single layer of petals, while semi-double and double-flowered varieties have multiple layers, giving a fuller appearance. Consider the desired visual impact and choose accordingly.
- Color Palette: Zinnias come in almost every color of the rainbow, including red, orange, yellow, pink, purple, white, and more. Consider the color scheme of your garden or any specific color combinations you want to achieve. You can choose a monochromatic scheme with different shades of the same color or create a vibrant mix by combining contrasting colors.
- Resilience and Disease Resistance: Some zinnia varieties are more resilient and disease-resistant than others. If you live in an area with hot summers or high humidity, consider choosing varieties that are more tolerant to heat and humidity. Look for disease-resistant varieties that can withstand common zinnia diseases such as powdery mildew and bacterial wilt.
Take some time to research different zinnia varieties and read their descriptions and growing requirements. Consider factors such as blooming time, plant height, flower size and shape, color palette, and resilience. By selecting the right zinnia variety, you can ensure a successful and visually stunning garden filled with the captivating beauty of these wonderful flowers.
Now that you know how to choose the perfect zinnia variety, let’s move on to the next step – preparing the soil for zinnia seeds!
Preparing the Soil for Zinnia Seeds
Before sowing zinnia seeds, it’s important to prepare the soil to create the optimal growing conditions for these vibrant flowers. Here are the key steps to follow when preparing the soil for zinnia seeds:
- Choose the Right Location: Zinnias thrive in full sun, so select a location in your garden that receives at least 6-8 hours of direct sunlight per day. Good air circulation is also important to prevent diseases, so choose a well-ventilated area if possible.
- Clear the Area: Remove any existing weeds, grass, or debris from the planting area. Zinnias prefer well-cultivated soil, free from competition with other plants.
- Loosen the Soil: Using a garden fork or a tiller, loosen the soil to a depth of around 6-8 inches. This helps improve drainage and aeration, allowing the zinnia roots to penetrate deeply into the soil.
- Amend the Soil: Zinnias prefer well-draining soil with plenty of organic matter. If your soil is heavy clay or lacks nutrients, amend it with compost or well-rotted manure. Mix in a generous amount of organic matter to improve the soil structure, fertility, and moisture retention.
- Test the Soil pH: Zinnias prefer slightly acidic to neutral soil with a pH range of 6.0-7.0. If your soil is extremely acidic or alkaline, you may need to adjust the pH by adding amendments such as lime or sulfur. Conduct a soil test to determine the pH level and make any necessary adjustments.
- Level the Soil: Smooth out the soil surface with a rake, removing any large clumps or rocks. Aim for a level and even surface to facilitate even germination and growth of the zinnia seeds.
- Consider Raised Beds or Containers: If you have poor soil quality or limited garden space, consider creating raised beds or using containers. This allows you to have more control over the soil quality and drainage. Fill raised beds or containers with a well-draining potting mix enriched with organic matter.
By following these steps, you can create a favorable environment for zinnia seeds to germinate and establish strong roots. The well-prepared soil will provide the necessary nutrients, moisture, and structure for the zinnias to thrive and produce abundant blooms.
Now that you have prepared the soil, it’s time to learn about the best time for seeding zinnias!
Best Time for Seeding Zinnias
The timing of seeding zinnias plays a crucial role in the success of your garden. Zinnias are warm-season annuals that thrive in temperatures between 70°F and 85°F (21°C and 29°C). Here are some important points to consider when determining the best time for seeding zinnias:
- Frost-Free Date: Zinnias are sensitive to frost, so it’s important to wait until the threat of frost has passed before sowing the seeds. Check your local frost-free date, which is typically in spring, to ensure that the weather is consistently warm before planting.
- Soil Temperature: Zinnia seeds germinate best when the soil temperature is around 70°F (21°C) or above. If the soil is too cold, the seeds may not sprout properly or may experience slow germination. Use a soil thermometer to check the soil temperature before sowing zinnia seeds.
- Early Spring Seeding: In regions with mild winters and early springs, you can start seeding zinnias indoors 6 to 8 weeks before the last frost date. This allows the seedlings to grow and become more established before transplanting them outdoors after the threat of frost has passed.
- Direct Seeding: If you prefer to sow zinnia seeds directly into the garden, wait until the soil has warmed up in late spring or early summer. The soil should be workable and the danger of frost should have passed. Direct seeding is a common method for zinnias, as they tolerate transplanting poorly due to their delicate root systems.
- Successive Plantings: To ensure a continuous display of zinnia blooms throughout the season, consider successive plantings. Start by seeding zinnias early in the season and then make additional sowings every 2-3 weeks until midsummer. This staggered planting ensures a longer blooming period and prevents all the flowers from blooming at once.
- Fall Planting: In some regions, zinnias can also be seeded in late summer or early fall for a fall blooming period. Check your specific climate and growing zone to determine if fall planting is feasible in your area.
By timing your zinnia seedings correctly, you can maximize their growth and ensure a continuous display of beautiful blooms throughout the warm months. Remember to consider your local climate, frost-free date, and soil temperature when determining the best time to seed zinnias.
Now that you know when to sow zinnia seeds, let’s move on to the next step – sowing zinnia seeds and getting them off to a great start!
Read more: How To Collect Zinnia Seeds
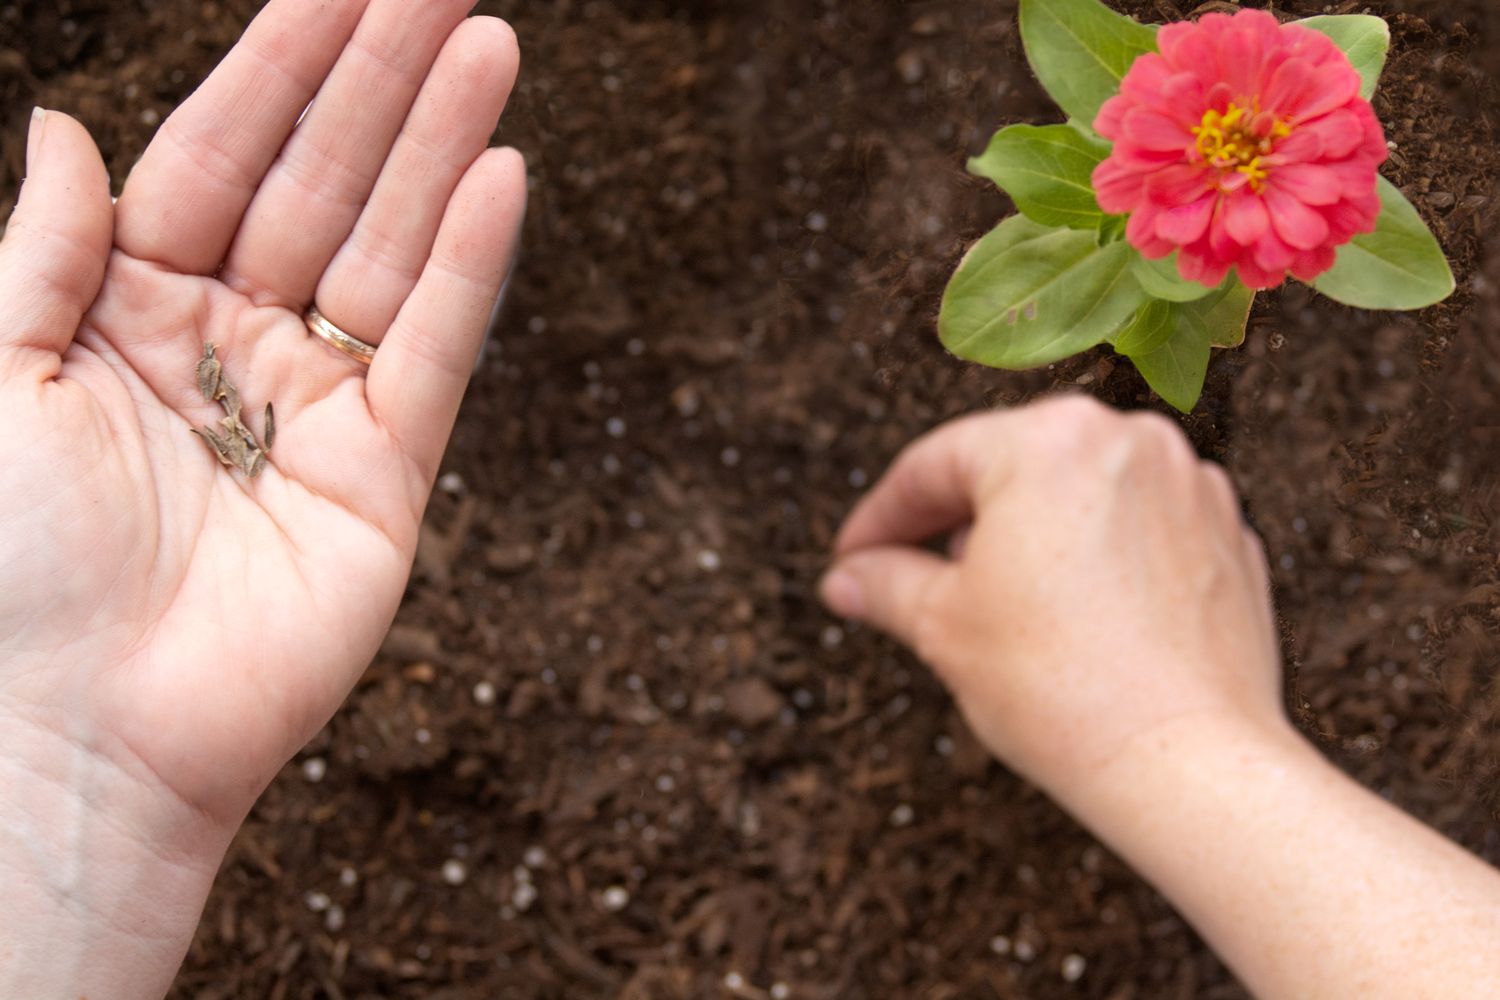
Sowing Zinnia Seeds
Sowing zinnia seeds is an exciting step in the journey of growing these colorful flowers. Whether you choose to start the seeds indoors or sow them directly in the garden, proper techniques and care are essential for successful germination and healthy seedlings. Here’s a step-by-step guide on how to sow zinnia seeds:
- Prepare the Planting Area: If you’re sowing zinnia seeds directly in the garden, ensure that the soil is properly prepared as mentioned before. Clear any debris and weeds from the area and have the soil loosened to a depth of 6-8 inches. For indoor sowing, prepare seed trays or small pots with well-draining potting mix.
- Sow the Seeds: For direct sowing, scatter the zinnia seeds evenly over the prepared soil. It’s recommended to sow the seeds about 1/4 to 1/2 inch (6-12 mm) deep. If starting the seeds indoors, sow them in individual cells or pots, placing one or two seeds in each container.
- Water the Seeds: After sowing, gently water the planting area to ensure that the soil is moistened. For indoor sowing, water the trays or pots from the bottom to provide consistent moisture without disturbing the seeds. Maintain a moist but not waterlogged environment to facilitate seed germination.
- Provide Optimal Conditions: Zinnias require warmth to germinate, so provide a temperature of around 70°F (21°C) for successful seed sprouting. If starting the seeds indoors, place the trays or pots in a warm location, preferably under grow lights or in a sunny window sill. Outdoor sowings should be done when soil temperature and weather conditions are suitable for germination.
- Thin out the Seedlings: Once the zinnia seedlings have grown a few inches tall, it’s important to thin them out to allow proper air circulation and prevent overcrowding. For direct sowings, thin the seedlings to a spacing of about 6-12 inches (15-30 cm) apart. When thinning, choose the healthiest and strongest seedlings, and gently remove the weaker ones.
- Transplanting (if applicable): If you started your zinnia seeds indoors, and the danger of frost has passed, you can transplant the seedlings outdoors once they have developed a good root system and are about 4-6 inches (10-15 cm) tall. Handle the seedlings with care, and plant them at the same soil level as they were in the containers.
- Maintain Adequate Moisture: Zinnia seeds and seedlings require consistent moisture to thrive. Water the seedlings regularly, especially during dry spells, ensuring that the soil stays evenly moist, but not waterlogged. Avoid overhead watering, as this can increase the risk of fungal diseases.
- Protect from Extreme Conditions: Protect young zinnia seedlings from extreme weather conditions such as heavy rains, strong winds, and excessive heat. Consider using plant covers, mulch, or temporary shade structures to shield the seedlings until they become more established.
By following these steps, you can successfully sow zinnia seeds and get them off to a good start. With proper care and attention, your zinnia seedlings will grow into healthy and robust plants, ready to bloom and fill your garden with their vibrant colors and cheerful presence.
Now that your zinnia seeds are sown, let’s move on to the next steps of watering, providing adequate sunlight, and fertilizing the zinnias!
Watering Zinnias
Proper watering is essential for the health and vitality of zinnias. These flowers have moderate water needs and it’s important to provide them with the right amount of moisture to keep them thriving. Here are some important factors to consider when watering zinnias:
- Establish a Consistent Watering Schedule: Zinnias prefer a consistent watering schedule, with regular but moderate watering sessions. Aim to water them deeply once or twice a week, depending on weather conditions and soil moisture levels. Avoid overwatering, as excessive moisture can lead to root rot and other diseases.
- Water at the Base: When watering zinnias, it’s best to water at the base of the plants rather than overhead. This helps to prevent the foliage from getting overly wet, reducing the risk of fungal diseases. Use a watering can, garden hose, or drip irrigation system to deliver water directly to the soil around the base of the plants.
- Monitor Soil Moisture: Keep an eye on the soil moisture content to determine when to water. Stick your finger about an inch (2.5 cm) into the soil, and if it feels dry, it’s time to water. Zinnias prefer well-draining soil, so ensure that the water penetrates deeply into the soil, reaching the root zone.
- Consider Morning Watering: Watering zinnias in the morning is generally recommended. This allows the foliage to dry during the day, reducing the chances of disease development. Morning watering also helps the plants to absorb the moisture properly before the heat of the day, ensuring efficient water uptake.
- Avoid Overhead Watering: As mentioned earlier, zinnias are susceptible to fungal diseases. To minimize this risk, avoid overhead watering methods such as sprinklers, as they can wet the foliage and create a favorable environment for diseases to thrive. Focus on watering the soil directly.
- Consider Mulching: Applying a layer of organic mulch around the base of zinnia plants can help retain soil moisture and regulate soil temperature. This helps to reduce water evaporation and keeps the root zone cooler during hot weather. Use materials like straw, wood chips, or dried leaves as mulch, applying it to a depth of 2-3 inches (5-7.6 cm).
- Adjust for Weather Conditions: During periods of drought or extremely hot weather, zinnias may require additional hydration. Keep a close eye on plants during these conditions and be prepared to increase the frequency of watering or provide supplemental irrigation if necessary.
By following these guidelines, you can ensure that your zinnias receive the proper amount of water to thrive. Remember to establish a consistent watering schedule, water at the base of plants, monitor soil moisture, and adjust watering based on weather conditions. With the right watering practices, your zinnias will stay healthy, vibrant, and ready to showcase their beautiful blooms.
Now that you know how to water zinnias, let’s move on to the next step – providing adequate sunlight for optimal growth!
Providing Adequate Sunlight
Adequate sunlight is crucial for the successful growth and flowering of zinnias. These vibrant flowers thrive in full sun and need several hours of direct sunlight each day. Here’s what you need to know about providing zinnias with the right amount of sunlight:
- Full Sun Exposure: Zinnias require a minimum of 6-8 hours of direct sunlight per day. Look for a location in your garden that receives the maximum amount of sunlight. Avoid planting zinnias in areas that are heavily shaded by trees, buildings, or other structures, as this can result in poor growth and reduced flowering.
- Importance of Sunlight: Sunlight is essential for photosynthesis, the process by which plants convert sunlight into energy to fuel their growth. Adequate sunlight enhances the overall health and vigor of zinnias, promoting strong stems, lush foliage, and abundant blooms.
- Time of Sun Exposure: Morning sun exposure is particularly beneficial for zinnias, as it helps to dry the foliage and reduce the risk of fungal diseases. The intense afternoon sun may cause some zinnias to wilt temporarily, but they will recover once the sun’s intensity subsides. If your region experiences very hot summers, some afternoon shade may be beneficial to prevent the plants from becoming stressed.
- Shade Tolerance: While zinnias prefer full sun, some varieties exhibit a limited tolerance for partial shade. If you have areas in your garden with dappled shade or partial sun, choose varieties that are known for their shade tolerance. Read the seed packet or plant label for specific recommendations on shade tolerance for the zinnia variety you are growing.
- Consider Microclimates: Microclimates are specific areas within your garden that may have different light and temperature conditions compared to the surrounding areas. Observe your garden for variations in sunlight exposure due to factors such as the presence of tall structures, nearby trees, or other landscape features. Place zinnias in areas that receive the optimal sun exposure based on these microclimates.
- Container Gardening: If you’re growing zinnias in containers, ensure that the pots are placed in a spot that receives ample sunlight. Choose a location that provides at least 6 hours of direct sunlight per day for healthy growth and vibrant blooms. Keep in mind that containers can heat up more quickly than garden beds, so monitor soil moisture and adjust watering accordingly.
- Adjust for Intense Heat: In regions with extremely high temperatures or scorching summers, zinnias may benefit from some afternoon shade or protection from intense heat. Consider using shade cloths, temporary shade structures, or positioning zinnias to receive more morning sun and less afternoon sun to prevent heat stress.
By providing zinnias with the right amount of sunlight, you’ll promote optimal growth, vivid blooms, and overall plant health. Ensure that they receive a minimum of 6-8 hours of direct sunlight per day, monitor for any shade or heat-related stress, and adjust their positioning as needed. With the right sun exposure, your zinnias will thrive and greet you with their dazzling colors throughout the growing season.
Now that you know how to provide adequate sunlight for zinnias, let’s move on to the next step – fertilizing zinnias for healthy growth and abundant blooms!
To seed zinnias, choose a sunny spot with well-drained soil. Sow seeds directly into the ground after the last frost. Keep the soil moist until the seeds germinate, then water regularly. Deadhead the flowers to encourage more blooms.
Fertilizing Zinnias
Fertilizing zinnias is an important step in providing them with the necessary nutrients for healthy growth, strong stems, and abundant blooms. While zinnias are relatively low-maintenance, they can benefit from regular feeding to ensure optimal performance. Here’s what you need to know about fertilizing zinnias:
- Choose the Right Fertilizer: When selecting a fertilizer for zinnias, opt for a balanced, water-soluble fertilizer with equal or similar amounts of nitrogen (N), phosphorus (P), and potassium (K). Look for a formulation such as 10-10-10 or 20-20-20. These nutrients are essential for overall plant health and flowering.
- Apply Fertilizer at the Right Time: Zinnias benefit from regular fertilization throughout the growing season. Start by incorporating a slow-release granular fertilizer into the soil or potting mix at the time of planting. This provides a steady supply of nutrients over time. Additionally, begin applying water-soluble fertilizer a few weeks after planting and continue every 4-6 weeks during the growing season.
- Follow the Package Instructions: It’s important to read and follow the instructions on the fertilizer package. Different products may have specific application rates and frequency. Overfertilizing can lead to excessive foliage growth and reduced flowering, so always apply fertilizers according to the recommended dosage.
- Apply Fertilizer to Moist Soil: It’s best to apply water-soluble fertilizers to damp soil or after a watering session. This helps ensure that the nutrients are distributed evenly and absorbed by the roots. Avoid applying fertilizer to dry soil, as it may not dissolve properly or could potentially cause root burn.
- Avoid Fertilizing Newly Planted Seedlings: Newly planted zinnia seedlings do not require immediate fertilization. The initial slow-release fertilizer incorporated at the time of planting should provide sufficient nutrients for the early stages of growth. Wait until the seedlings are more established, with a few sets of true leaves, before beginning a regular fertilization schedule.
- Supplement with Organic Matter: In addition to commercial fertilizers, consider using organic matter to supplement the soil and provide additional nutrients. Compost, well-rotted manure, or organic fertilizers can be added to the soil before planting or as a top dressing during the growing season. This helps enhance soil fertility and enrich the zinnias’ nutrient uptake.
- Monitor Plant Response: Keep an eye on your zinnias for any signs of nutrient deficiency or excess. Yellowing leaves, stunted growth, or poor flowering may indicate the need for additional fertilization. Conversely, excessive foliage growth with few blooms could indicate excessive nitrogen. Adjust your fertilization regimen accordingly to maintain a healthy balance.
By providing zinnias with regular fertilization, you’ll ensure that they have a steady supply of essential nutrients for vigorous growth and prolific flowering. Follow the instructions on the fertilizer package, begin fertilizing a few weeks after planting, and monitor the plants for any signs of nutrient imbalance. With proper fertilization, you’ll enjoy an abundance of vibrant blooms throughout the growing season.
Now that you know how to fertilize zinnias, let’s move on to the next step – protecting zinnias from pests and diseases!
Read more: How Long For Zinnia To Germinate?
Protecting Zinnias from Pests and Diseases
While zinnias are relatively resilient plants, they can still fall victim to pests and diseases. By taking preventive measures and being proactive in monitoring your zinnias, you can minimize the risk and keep these beautiful flowers healthy and thriving. Here are some strategies for protecting zinnias from pests and diseases:
- Monitor Regularly: Regularly inspect your zinnias for any signs of pests, such as aphids, caterpillars, or spider mites. Also, keep an eye out for symptoms of diseases like powdery mildew or bacterial wilt, such as white powdery spots on the foliage or wilting leaves.
- Promote Healthy Plants: Keeping your zinnias healthy and strong is the first line of defense against pests and diseases. Provide optimal growing conditions, including proper sunlight, well-draining soil, and regular watering. Healthy plants are less susceptible to attacks and better equipped to defend themselves.
- Practice Good Sanitation: Remove any dead leaves, spent flowers, or plant debris from around your zinnias. These can serve as breeding grounds for pests and disease-causing organisms. Regularly clean up the garden bed or containers, and dispose of any affected plant material in a sealed bag.
- Encourage Beneficial Insects: Invite beneficial insects, such as ladybugs, lacewings, or parasitic wasps, to your garden to help control pest populations naturally. Plant companion flowers and herbs that attract these beneficial insects, like marigolds, dill, or fennel.
- Use Organic Pest Control Methods: If you encounter pests, try using organic pest control methods before resorting to chemical pesticides. Use insecticidal soaps or neem oil sprays to target aphids, mites, or caterpillars. Follow the product instructions carefully and apply early in the morning or late in the evening when beneficial insects are less active.
- Preventative Approaches: Some gardeners use physical barriers, such as floating row covers or netting, to protect zinnias from common pests like birds or rabbits. Applying a layer of organic mulch around the base of the plants can also discourage certain pests and provide a barrier against soil-borne diseases.
- Proper Watering: Avoid over-watering zinnias, as excessive moisture can create a favorable environment for fungal diseases. Instead, water at the base of the plant to keep the foliage dry. Consistent watering can also help plants recover more quickly from pest attacks.
- Fungal Disease Management: If powdery mildew or other fungal diseases appear, consider using fungicidal sprays specifically formulated for ornamental plants. Be sure to follow the instructions on the product label and apply as directed. Promptly remove and destroy any heavily infected plant parts.
By following these preventive measures and taking prompt action against pests and diseases, you can protect your zinnias and ensure their longevity and beauty. Regular monitoring, promoting plant health, using natural pest control methods, and practicing good sanitation practices all contribute to a healthy and pest-free zinnia garden.
Now that you know how to protect your zinnias from pests and diseases, it’s time to learn about thinning zinnia seedlings for optimal growth and development!
Thinning Zinnia Seedlings
Thinning zinnia seedlings is a necessary step to ensure the healthy growth and development of your plants. When zinnias germinate, multiple seedlings often sprout from a single planting spot. Thinning removes the weaker seedlings, allowing the remaining plants to have enough space, nutrients, and sunlight to thrive. Here’s a guide on how to thin zinnia seedlings:
- Wait for Seedlings to Develop: Allow your zinnia seedlings to grow and develop a few sets of true leaves before thinning. This typically takes about 2 to 3 weeks after germination. This waiting period allows you to identify the stronger and healthier seedlings.
- Inspect the Seedlings: Carefully observe the seedlings and look for the strongest and most robust ones. Healthy seedlings will have sturdy stems, vibrant foliage, and show no signs of damage or disease. Choose seedlings that exhibit the best growth characteristics, and remove the rest.
- Choose the Desired Spacing: Determine the spacing requirements for your specific zinnia variety. Generally, zinnias should be spaced about 6 to 12 inches (15 to 30 cm) apart, depending on the expected mature size of the plants. Refer to the seed packet or plant label for specific recommendations.
- Remove the Weaker Seedlings: Gently grasp the base of the weaker seedlings between your fingers and carefully lift them out of the soil. Be cautious not to disturb the roots of the surrounding seedlings. Alternatively, you can use sterilized garden scissors or small pruners to snip the weaker seedlings at soil level.
- Space Out the Remaining Seedlings: Adjust the spacing between the remaining seedlings to the recommended distance based on your variety. Take care not to overcrowd the plants, as this can lead to poor airflow, increased disease risk, and stunted growth. Aim for uniform spacing to allow each seedling ample room to develop.
- Water the Thinned Seedlings: After thinning, give the remaining seedlings a thorough watering to settle the soil around their roots and help them recover from the disturbance. Water gently to avoid over-saturating the soil, which can lead to waterlogged conditions.
- Dispose of Thinned Seedlings: Properly dispose of the removed seedlings to prevent them from acting as potential sources of disease or pests. Place them in a sealed bag or add them to your compost pile if they are disease-free. Clean any tools used for thinning to prevent the spread of diseases or pathogens to other plants.
Thinning zinnia seedlings may seem counterintuitive, but it’s essential for their overall health and ensures that the remaining seedlings have enough space and resources to flourish. By providing proper spacing, you’ll allow each zinnia plant to receive adequate sunlight, nutrients, and airflow, resulting in stronger and more vigorous growth.
Now that you know how to thin zinnia seedlings, let’s move on to the next step – transplanting zinnias for continued growth and blooming!
Transplanting Zinnias
Transplanting zinnias is a process that involves moving seedlings from their initial growing location to their permanent spot in the garden. This step is important for allowing zinnias to continue growing and ultimately produce their stunning blooms. Here’s a guide on how to transplant zinnias:
- Timing: Wait until the zinnia seedlings are around 4 to 6 inches (10 to 15 cm) tall and have developed a healthy root system before transplanting. This usually takes about 3 to 4 weeks after germination.
- Choose the Right Location: Select a planting site in your garden that receives full sun and has well-draining soil. Consider the mature size of the zinnias and provide sufficient space between each plant based on the specific variety’s recommended spacing.
- Prepare the Planting Hole: Dig holes in the prepared garden bed or container that are slightly larger than the root ball of the zinnia seedlings. Space the holes appropriately based on the recommended spacing for your variety.
- Transplanting Process: Gently remove the zinnia seedlings from their current containers or seed trays, taking care not to damage the roots. Loosen the roots if they are tightly bound. Place each seedling in a planting hole at the same soil level it was previously growing. Backfill the hole with soil, gently firming it around the roots as you go.
- Watering After Transplanting: Give the transplanted zinnias a thorough watering immediately after planting. This helps to settle the soil and eliminate any air pockets around the roots. Continue to water regularly over the following days and weeks, keeping the soil consistently moist but not waterlogged.
- Mulching: Apply a layer of organic mulch, such as straw or wood chips, around the base of the transplanted zinnias. Mulch helps to retain moisture, suppress weed growth, and moderate soil temperature, providing an optimal environment for the plants to establish themselves.
- Provide Support (if necessary): Some taller zinnia varieties may benefit from support to keep their stems upright. Consider installing stakes or plant supports near the transplanted zinnias, taking care to avoid damaging the roots. Attach the stems to the support using soft ties or twine as the plants grow taller.
- Care and Maintenance: Once transplanted, continue to care for your zinnias by providing adequate water, regular fertilization, and monitoring for pests or diseases. Remove any dead flowers or foliage to promote continuous blooming and prevent the spread of diseases.
Transplanting zinnias allows them to establish themselves in their permanent location, maximizing their growth potential and ensuring an abundance of colorful blooms. With proper care and maintenance, your transplanted zinnias will flourish and add beauty to your garden throughout the growing season.
Now that you know how to transplant zinnias, let’s move on to the next step – caring for zinnias to promote optimal growth and blooming!
Caring for Zinnias
Caring for zinnias involves providing them with the necessary attention and maintenance to ensure optimal growth, health, and abundant blooming. With proper care, you can enjoy a stunning display of colorful flowers throughout the growing season. Here are some essential tips for caring for zinnias:
- Watering: Zinnias prefer consistent moisture, so water them regularly. Keep the soil evenly moist, but avoid overwatering, as this can lead to root rot or fungal diseases. Water at the base of the plants to keep the foliage dry and minimize the risk of disease.
- Regular Fertilization: Feed your zinnias regularly with a balanced, water-soluble fertilizer. Follow the package instructions for dosage and frequency. Balanced fertilizers with equal or similar amounts of nitrogen, phosphorus, and potassium are ideal for promoting healthy growth and beautiful blooms.
- Deadheading: Remove spent flowers regularly by deadheading. This process involves removing the faded blooms to encourage continuous blooming and prevent the plant from diverting energy into producing seeds. Pinch or snip off the dead flowers along with a portion of the stem below to promote new growth.
- Staking (if necessary): Some taller zinnia varieties may require staking to keep their stems upright. Install stakes or plant supports near the zinnias early in the growing season to prevent them from bending or toppling over. Tie the stems to the supports using soft twine or plant ties, adjusting as needed as the plants grow taller.
- Pest and Disease Management: Regularly monitor your zinnias for pests like aphids, caterpillars, or spider mites. If needed, employ organic pest control methods such as insecticidal soaps or neem oil sprays. Watch out for common diseases like powdery mildew or bacterial wilt and address them promptly with appropriate treatments.
- Adequate Air Circulation: Proper airflow around zinnias can help reduce the risk of diseases. Avoid overcrowding by providing sufficient spacing between plants. Regularly remove any dead or yellowing leaves that can harbor pests or encourage fungal growth. Prune or thin out dense foliage to improve air circulation.
- Weed Control: Keep the area around your zinnias free from weeds. Weeds compete for nutrients, water, and sunlight, which can negatively impact the growth and health of your zinnias. Regularly remove and prevent the growth of weeds to ensure your zinnias receive all the necessary resources.
- Mulching: Apply an organic mulch, such as straw or wood chips, around the base of your zinnias. Mulch helps conserve moisture, suppress weeds, and regulate soil temperature. Apply a layer of mulch after the soil has warmed up and settled, making sure to keep it a few inches away from the stems to prevent rot.
- Observation and Adjustments: Regularly observe your zinnias for any changes in growth and development. Adjust your care routine as needed, such as increasing or decreasing watering based on weather conditions or adjusting fertilization if plants show signs of nutrient deficiencies or excesses.
By providing regular, attentive care, you can ensure that your zinnias thrive and produce an abundance of vibrant, eye-catching blooms. From proper watering and fertilization to pest management and maintaining proper airflow, following these care instructions will help your zinnias reach their full potential in your garden.
Now that you know the essential care practices for zinnias, let’s move on to the final step – harvesting zinnia seeds for future plantings!
Read more: How Do You Save Zinnia Seeds
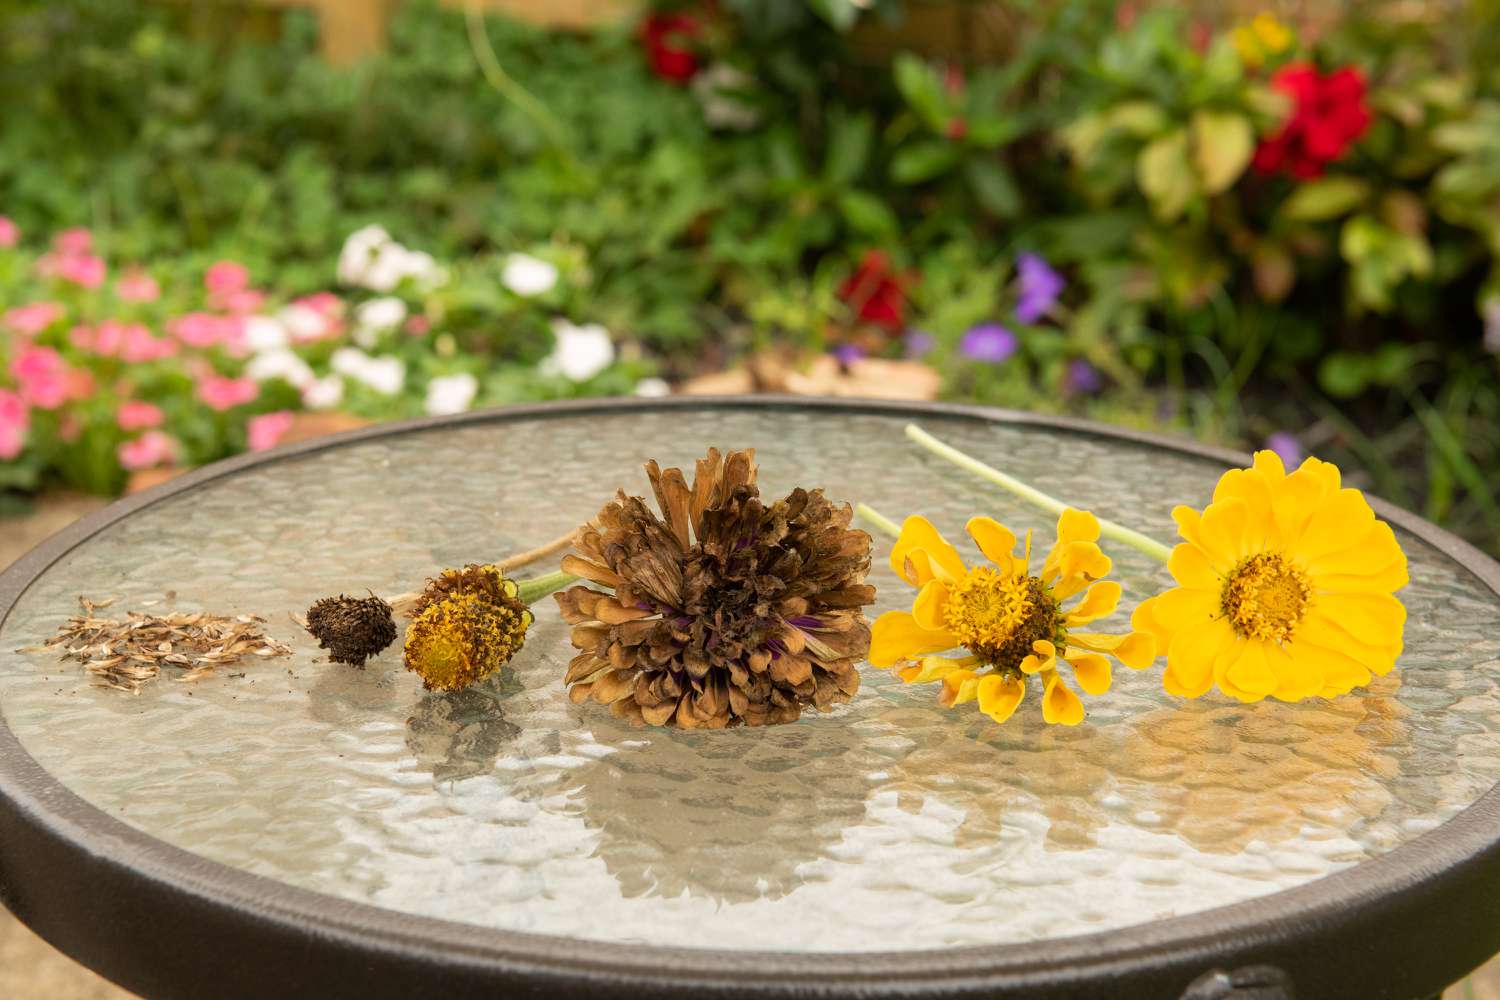
Harvesting Zinnia Seeds
Harvesting zinnia seeds is not only a rewarding process but also allows you to save and store seeds for future plantings. Zinnias produce seeds in their flower heads, and with a little patience and attention, you can collect and preserve these seeds for the next growing season. Here’s a step-by-step guide on how to harvest zinnia seeds:
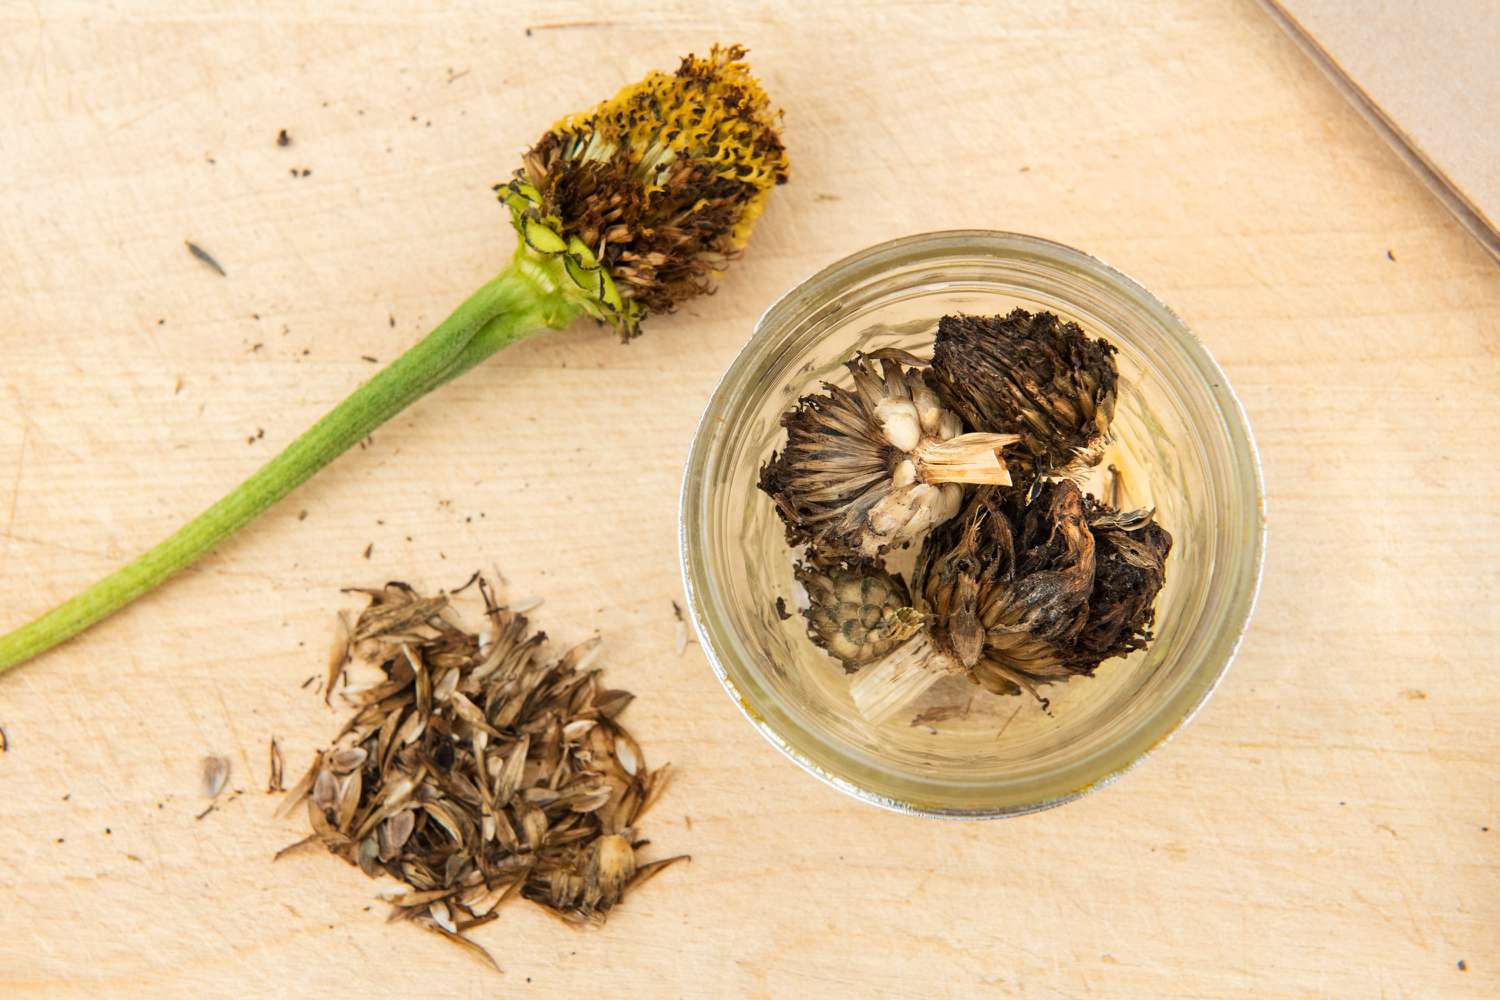
- Allow the Flowers to Mature: Let the zinnia flowers fully mature on the plant. The petals will fade, and the flower heads will dry out, turning brown or tan in color. This indicates that the seeds inside are maturing and ready for harvest.
- Choose the Healthiest Flowers: Select the healthiest and most robust flower heads for seed harvesting. Look for flowers that have retained their shape, as they are more likely to produce viable seeds. Avoid selecting flowers that show signs of disease or insect damage.
- Remove the Flower Heads: Carefully snip off the mature flower heads from the plant, ensuring that the stem is long enough to hold. Keep in mind that each flower head typically contains multiple seeds, so choose several flower heads to maximize your seed collection.
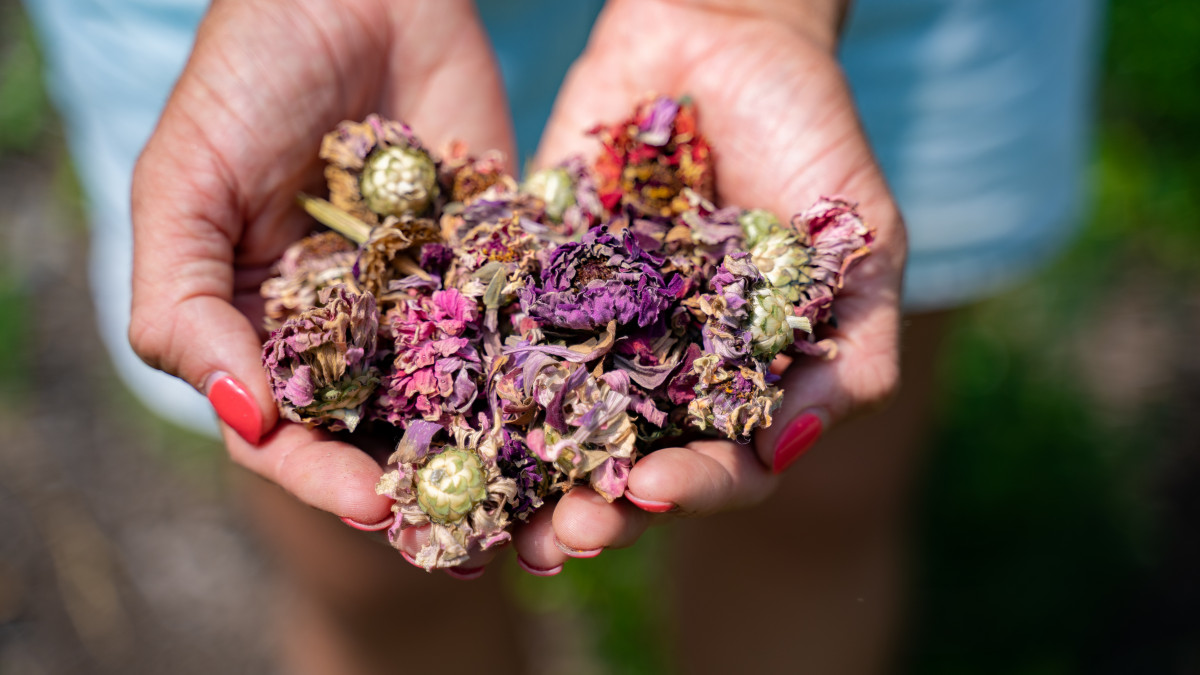
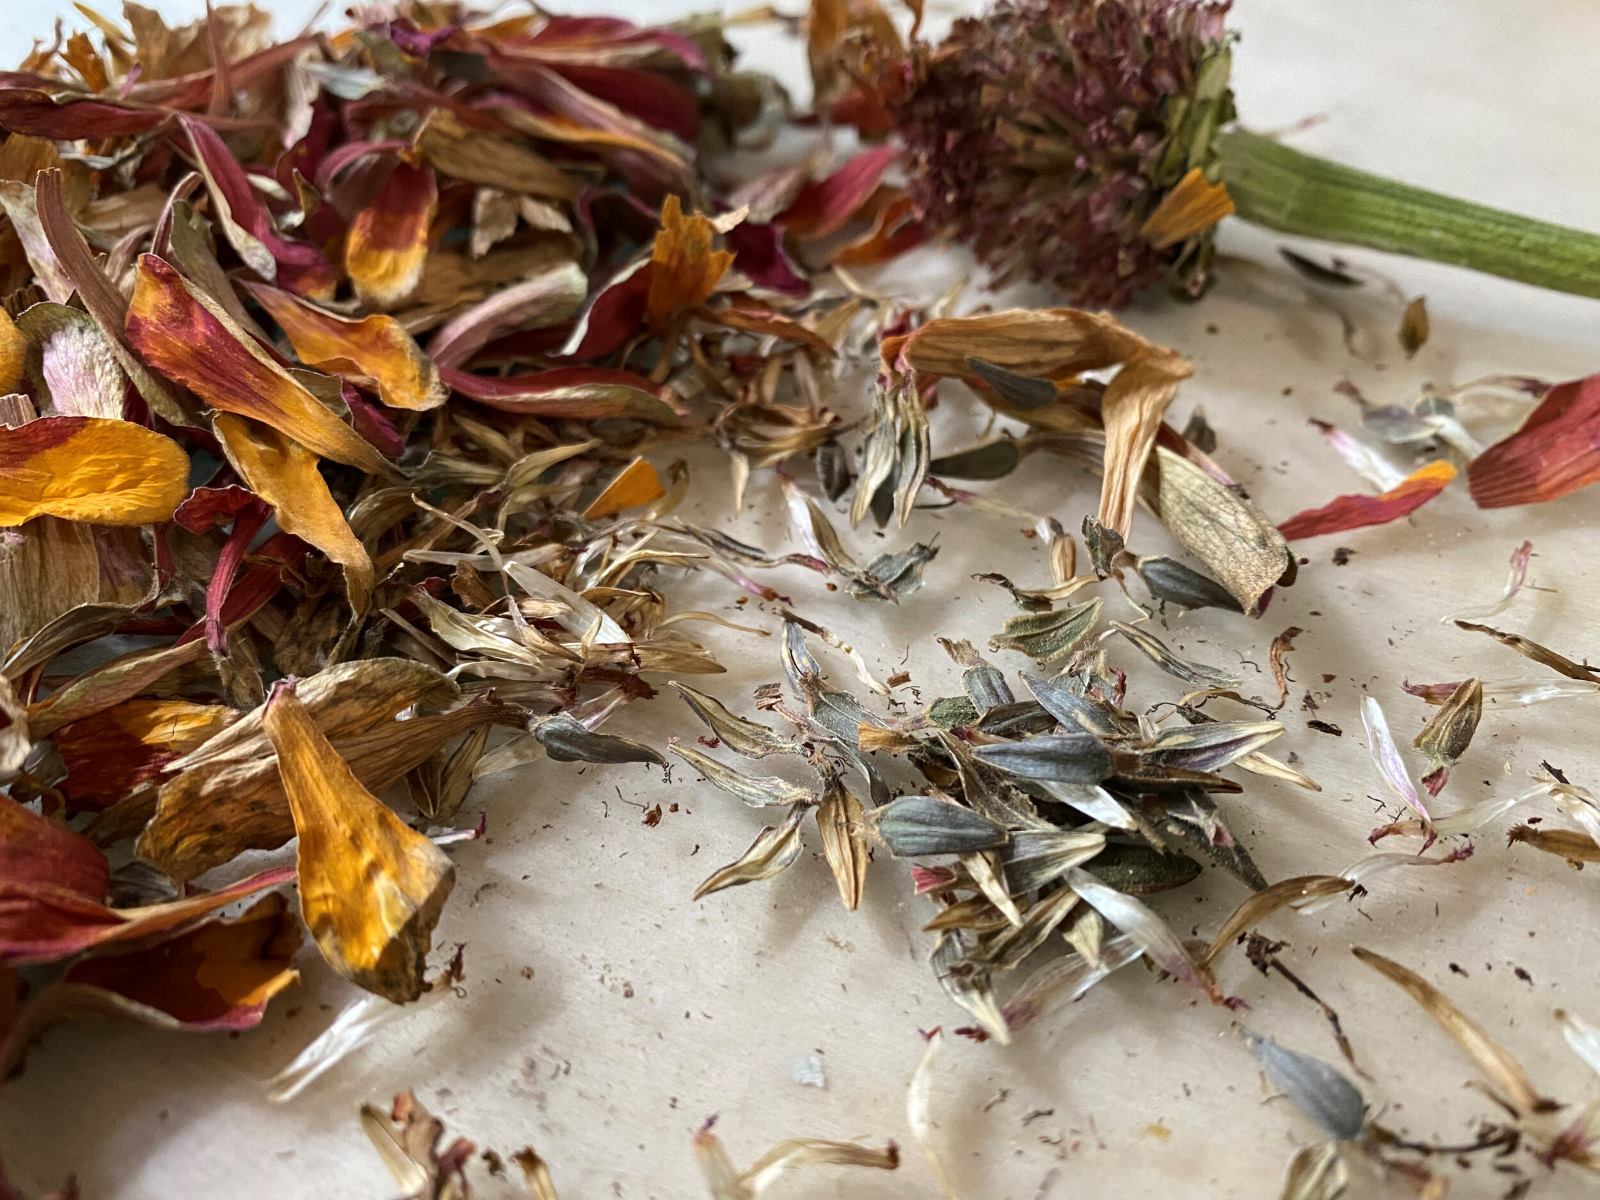
- Dry the Flower Heads: Place the harvested flower heads in a dry and well-ventilated area, away from direct sunlight. You can hang them upside down or spread them out on a clean surface. Allow the flower heads to dry completely for about 1 to 2 weeks. The seeds will be ready for extraction when they become dry and hard.
- Extract the Seeds: Once the flower heads are fully dry, gently rub or roll them between your fingers to detach the seeds. The seeds are usually dark and tear-shaped. Alternatively, you can lightly crush the flower heads and separate the seeds from the chaff by using a sieve or strainer.
- Remove Any Debris: After extracting the seeds, inspect them for any remaining flower parts or debris. Remove any unwanted material to ensure that your collected seeds are clean and ready for storage.
- Store the Seeds: Place the zinnia seeds in a dry, airtight container, such as a glass jar or a labeled envelope. Store the seeds in a cool, dark location to maintain their viability. It’s recommended to include a packet or sachet of desiccant to absorb any moisture and prolong the seed’s shelf life.
By following these steps, you can successfully harvest and store zinnia seeds for future plantings. Remember to label and date the containers holding the seeds for easy identification. With proper storage and care, your harvested zinnia seeds can be used in the next season to bring the beauty of these colorful flowers back to your garden.
Congratulations on completing the journey of seeding, caring for, and harvesting zinnias! Now you have all the knowledge needed to successfully grow these stunning flowers and witness their vibrant blooms year after year.
Conclusion
Congratulations on completing your journey into the fascinating world of zinnias! By following the steps outlined in this guide, you now have the knowledge and techniques to successfully seed, care for, and harvest zinnias in your garden.
Zinnias, with their vibrant colors and stunning blooms, can bring a touch of joy and beauty to any outdoor space. From selecting the right zinnia variety to preparing the soil, sowing the seeds, providing adequate sunlight and water, fertilizing, and protecting the plants from pests and diseases, every step of the process plays a crucial role in their growth and development.
Remember to choose zinnia varieties that suit your preferences, desired bloom time, and garden space. Prepare the soil properly, ensuring good drainage and fertility. Sow the seeds at the right time, monitor their growth, and thin them out to provide ample space for healthy plant development.
Water your zinnias regularly, providing enough moisture without overwatering. Fertilize them regularly with balanced nutrients to promote robust growth and ensure abundant blooming. Watch out for pests and diseases, implementing organic control methods when needed to protect your plants.
Don’t forget to deadhead spent flowers to encourage continuous blooming, provide support for taller varieties, and practice good garden maintenance, removing weeds and maintaining proper airflow.
Finally, the culmination of your efforts will lead to the exciting process of harvesting zinnia seeds. Saving and storing these seeds will enable you to experience the beauty of zinnias year after year, continuing the cycle of growth and blooming in your garden.
Remember, caring for zinnias requires observation, adjustments, and providing care based on their specific needs. With dedication and patience, you can create a vibrant and enchanting zinnia garden that will bring you joy and admiration from garden visitors.
So go ahead, grab your gardening tools, select your favorite zinnia varieties, and embark on the adventure of growing these amazing flowers. Enjoy the magic of zinnias as they bloom and fill your garden with their dazzling colors and captivating beauty!
Frequently Asked Questions about How To Seed Zinnias
Was this page helpful?
At Storables.com, we guarantee accurate and reliable information. Our content, validated by Expert Board Contributors, is crafted following stringent Editorial Policies. We're committed to providing you with well-researched, expert-backed insights for all your informational needs.


0 thoughts on “How To Seed Zinnias”