Home>Garden Essentials>How To Grow Pear Tree From Seed
Garden Essentials
How To Grow Pear Tree From Seed
Modified: March 15, 2024
Learn how to grow a pear tree from seed in your garden and enjoy fresh, homegrown fruits. Step-by-step guide and tips for successful cultivation.
(Many of the links in this article redirect to a specific reviewed product. Your purchase of these products through affiliate links helps to generate commission for Storables.com, at no extra cost. Learn more)
Introduction
Welcome to the world of gardening, where the joy of growing your own plants and trees can be immensely rewarding. In this article, we will explore the fascinating process of growing a pear tree from seed. Whether you are a newbie gardener or a seasoned enthusiast, this step-by-step guide will provide you with the knowledge and tips to successfully cultivate your very own pear tree.
Growing a pear tree from seed is a fulfilling journey that allows you to witness the magical transformation from a tiny seed to a flourishing tree that bears luscious fruits. Not only is it an affordable way to add beauty and abundance to your garden, but it also offers a sense of accomplishment as you nurture and care for your growing plant.
Before we dive into the process, it’s important to know that growing a pear tree from seed requires patience and dedication. It may take several years before your tree reaches maturity and starts producing fruits. However, the journey itself is a fascinating experience that will teach you valuable skills and create a deeper connection with nature.
So, are you ready to embark on this horticultural adventure? Let’s get started by choosing the perfect pear seed to begin our journey towards a bountiful pear tree!
Key Takeaways:
- Growing a pear tree from seed is a patient and rewarding journey, from choosing the right seed to enjoying the bountiful harvest. It requires dedication, attention to detail, and a love for nature.
- Providing proper care, including sunlight, water, and pruning, is essential for nurturing healthy pear seedlings and maximizing fruit production. Preventing pests and diseases is crucial for maintaining the tree’s health and vitality.
Read more: How To Grow A Pear Tree From Seed
Step 1: Choosing a Pear Seed
The first step in growing a pear tree from seed is to select a healthy and viable pear seed. Keep in mind that not all pear seeds will germinate successfully, so it’s important to choose the right seed to maximize your chances of success.
When selecting a pear seed, look for a fully ripe and healthy pear. Avoid using seeds from store-bought pears, as they are often treated with chemicals that can inhibit germination. Instead, opt for seeds from organically grown pears or those obtained from a reliable nursery.
Once you have chosen a ripe pear, carefully extract the seeds from the fruit. Gently wash the seeds to remove any pulp or residue. It’s important to note that pear seeds require a period of cold stratification to break their dormancy and promote germination. To achieve this, follow these simple steps:
- Moisten a paper towel or a clean cloth.
- Place the pear seeds in the damp cloth and fold it to create a packet.
- Put the packet in a zipper bag or a sealed container to retain moisture.
- Label the container with the date to keep track of the stratification period.
- Store the container in a refrigerator for a period of 8 to 12 weeks. This mimics the natural winter conditions that pear seeds require to break their dormancy.
During this cold stratification period, it’s important to regularly check the moisture levels of the paper towel or cloth. If it starts to dry out, sprinkle some water to maintain the dampness.
After the stratification period is complete, move on to the next step of preparing the seedbed for planting your pear seeds. Remember, patience and attention to detail are key as you embark on this exciting journey of growing your very own pear tree!
Step 2: Preparing the Seedbed
Now that you have successfully stratified your pear seeds, it’s time to prepare the seedbed for planting. Creating the right environment for your seeds will greatly increase their chances of germination and healthy growth.
Start by selecting a suitable location for your seedbed. Pear trees thrive in full sun, so choose an area in your garden that receives at least 6-8 hours of direct sunlight each day. Ensure that the soil is well-draining to prevent waterlogging, which can lead to root rot and other plant diseases.
Next, prepare the soil by removing any weeds, rocks, or debris. Loosen the soil using a garden fork or hoe, breaking up any clumps and creating a fine, crumbly texture. This will promote healthy root development and ensure good nutrient absorption.
Consider amending the soil with organic matter such as compost or well-rotted manure. This will improve soil fertility, drainage, and moisture retention, providing a favorable environment for your pear tree seedlings to thrive.
Once the soil is prepared, create furrows or small depressions in the seedbed using a gardening trowel or your fingertips. These furrows should be approximately 1 inch deep and spaced about 3-4 inches apart to allow ample space for the seedlings to grow.
Now, it’s time to plant your stratified pear seeds. Place the seeds in the furrows, spacing them evenly and ensuring that they are covered with a thin layer of soil. Gently press the soil down to make sure the seeds are in contact with the soil, which will help with germination.
Water the seedbed thoroughly, using a gentle spray or a watering can with a fine nozzle. Avoid overwatering, as it can lead to rotting of the seeds. The goal is to keep the soil slightly moist but not waterlogged.
Mark the area where you have planted the pear seeds, either with small plant labels or by creating a simple sketch of the seedbed layout. This will help you keep track of the planted seeds and their progress as they begin to sprout.
Now that your seedbed is prepared, it’s time to move on to the exciting stage of planting the pear seeds and witnessing the miracle of growth. In the next step, we will explore the process of planting the pear seeds and providing them with the right conditions to thrive.
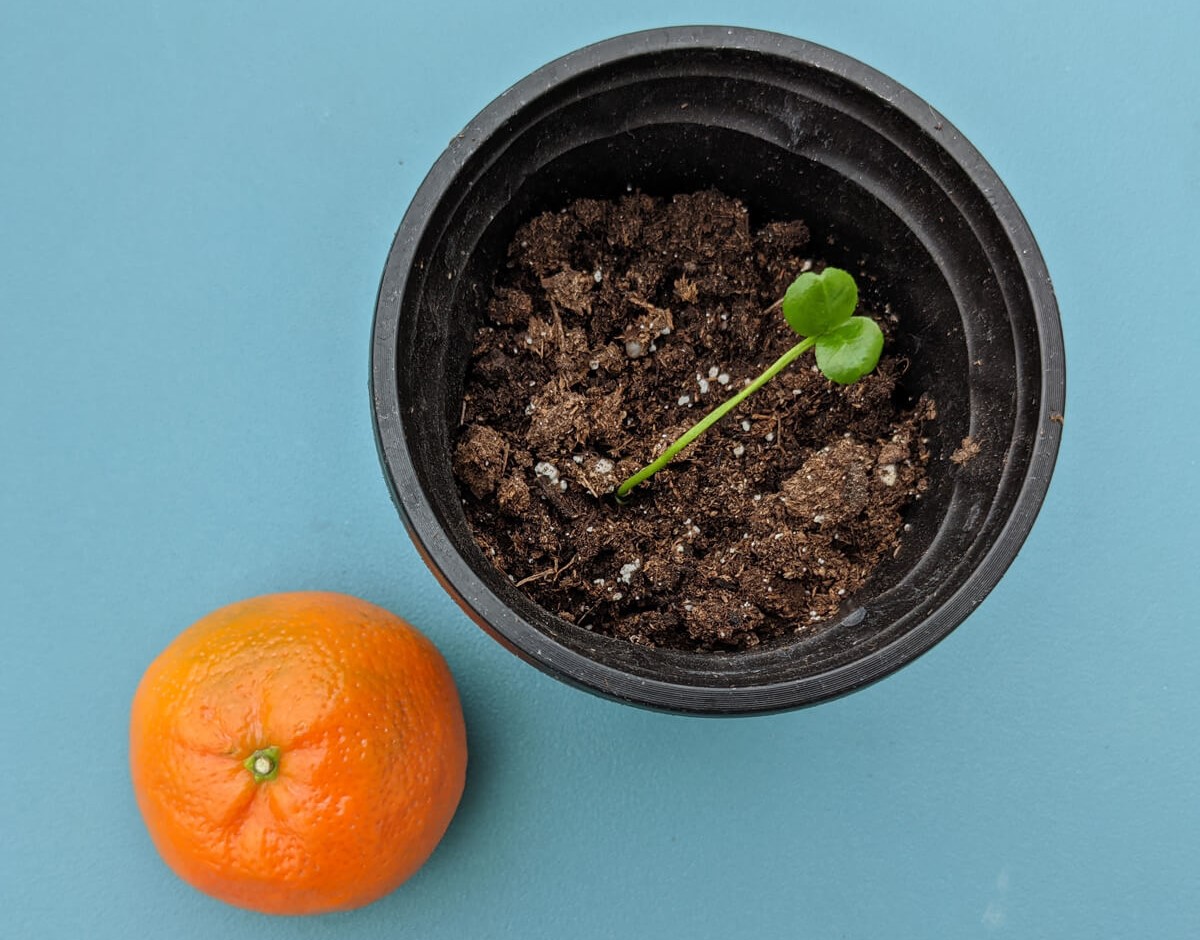
Step 3: Planting the Pear Seed
Now that you have prepared the seedbed, it’s time to plant the stratified pear seeds. This step is crucial to ensure proper germination and the development of healthy pear seedlings.
Start by making a small hole in the prepared seedbed using a dibber or the tip of your finger. The hole should be deep enough to accommodate the pear seed, usually around 1 inch deep. Space the holes at least 3-4 inches apart to provide adequate room for the seedlings to grow.
Take a pear seed from the stratification container and gently place it in each hole, flat side down. Try not to disturb the seed too much, as it may have started to develop rootlets during the stratification process.
Cover the planted seeds with a thin layer of soil, ensuring they are completely covered. Gently press down on the soil to ensure good seed-to-soil contact, which will help with germination.
Water the seedbed immediately after planting, using a gentle spray or a watering can with a fine nozzle. The goal is to provide enough moisture to keep the soil slightly moist but not waterlogged. Avoid overwatering, as it can lead to rotting of the seeds.
Label the area where you have planted the seeds to keep track of their location and variety. This will be helpful when it comes time to transplant or care for the seedlings.
Keep the seedbed consistently moist by watering regularly, especially during dry periods. However, be cautious not to overwater, as this can lead to fungal diseases and root rot. Monitor the soil moisture and adjust your watering accordingly.
Now, it’s time to patiently wait for the pear seeds to germinate. This process can take anywhere from a few weeks to a few months, depending on various factors such as the pear variety, temperature, and moisture levels.
As the days pass, carefully observe the seedbed for any signs of germination. Once the seeds sprout and the seedlings start to grow, it’s time to move on to the next step of providing them with adequate sunlight and water.
Remember, growing a pear tree from seed requires patience and attention to detail. Stay committed to the process, and you will soon be rewarded with healthy and vibrant pear seedlings that will eventually grow into fruitful trees.
Step 4: Providing Adequate Sunlight and Water
Now that your pear seedlings have started to sprout and grow, it’s important to provide them with the right amount of sunlight and water to ensure their healthy development.
Sunlight is crucial for the growth and photosynthesis of plants. Place your seedbed in a location that receives full sun, which is typically 6-8 hours of direct sunlight per day. If your garden doesn’t have a suitable spot with full sun, consider using grow lights to supplement the natural light.
Watering is another essential aspect of caring for your pear seedlings. Proper hydration is crucial for their growth, but overwatering can lead to root rot and other issues. The key is to keep the soil evenly moist, but not saturated.
Regularly check the moisture level of the soil by inserting your finger into the soil up to the first knuckle. If the soil feels dry at this depth, it’s time to water. Use a watering can with a fine nozzle or a gentle spray to water the seedbed, ensuring that water reaches the root zone without forcefully damaging the seedlings.
It’s best to water early in the morning or late in the evening when temperatures are cooler, as this reduces the risk of water evaporation. Avoid watering during the hottest part of the day, as the water may evaporate before being absorbed by the roots.
Observing the condition of your seedlings is also crucial. Moisture requirements may vary depending on weather conditions, so be mindful of any signs of wilting or stress in the seedlings. Wilting is often a sign of underwatering, while yellowing or droopy foliage may indicate overwatering.
As the seedlings continue to grow and develop, it’s important to monitor their growth and adjust their water needs accordingly. Be mindful not to let the soil dry out completely or become waterlogged.
In addition to sunlight and water, it’s important to provide adequate air circulation for your pear seedlings. Good air movement helps prevent the buildup of humidity and reduces the risk of fungal diseases. Avoid overcrowding the seedlings and ensure there is enough space between them for proper airflow.
By providing the right amount of sunlight, water, and air circulation, you are setting the stage for healthy growth and development of your pear seedlings. In the next step, we will dive into the process of taking care of the seedlings and ensuring their overall well-being as they progress into young pear trees.
Read more: How To Grow Pears From Seeds
Step 5: Taking Care of Seedlings
As your pear seedlings continue to grow, it’s important to provide them with proper care and attention to ensure their long-term health and vigor. Taking care of your seedlings involves various aspects, including fertilizing, mulching, and monitoring for pests and diseases.
Fertilizing is essential to provide the necessary nutrients for your seedlings’ growth. Start by applying a balanced, slow-release fertilizer according to the package instructions. This will provide a steady supply of nutrients over an extended period. Avoid overfertilizing, as excessive nutrients can lead to leggy growth and weak plants.
Consider mulching around the base of the seedlings to help retain moisture, suppress weed growth, and regulate soil temperature. Apply a layer of organic mulch, such as wood chips or straw, while being mindful not to pile it up against the stems, as this can cause rotting.
Regularly monitor your seedlings for any signs of pests or diseases. Common pests that may affect pear trees include aphids, caterpillars, and mites. If you notice any signs of pest infestation, such as distorted leaves or sticky residue, consider using organic pest control methods or consult a local gardening expert for advice.
Diseases can also pose a threat to your seedlings. Keep an eye out for fungal diseases like powdery mildew or bacterial infections. Prune away any infected plant parts and ensure proper air circulation around the seedlings to reduce the risk of disease development.
Pruning is another important aspect of caring for your pear seedlings. Regularly inspect the seedlings for any damaged or crossing branches, and prune them back as needed. This helps maintain a desirable shape, improves airflow, and reduces the risk of disease. However, avoid excessive pruning during the early stages of growth, as it may hinder overall development.
Continue to monitor the moisture levels in the soil and adjust your watering frequency as needed. As the seedlings grow, they will require more water to sustain their increased size. Remember to water deeply, providing enough moisture to reach the root zone.
Finally, be mindful of weather conditions, especially during periods of extreme temperatures or drought. Provide some shade or use protective covers to shield the seedlings from intense sunlight or strong winds. This will help prevent stress and promote healthy growth.
By providing proper care and attention to your pear seedlings, you are setting them up for success as they mature into strong and fruitful trees. Stay vigilant, observe any changes in their appearance, and respond accordingly to ensure their overall well-being.
In the next step, we will explore the process of transplanting the seedlings into larger pots or the ground, allowing them to continue their journey towards becoming mature pear trees.
To grow a pear tree from seed, first remove the seeds from a ripe pear and let them dry for a few days. Then plant the seeds in a pot with well-draining soil, water regularly, and keep the pot in a sunny spot. Once the seedlings are big enough, transplant them to a larger pot or into the ground.
Step 6: Transplanting the Seedling into a Larger Pot or Ground
As your pear seedlings grow and develop, they will eventually outgrow their nursery pots or the seedbed. Transplanting the seedlings into larger pots or the ground is a crucial step in their journey towards becoming mature pear trees.
Before transplanting, choose an appropriate time to ensure the best chances of success. The ideal time is during the dormant season, either in early spring before growth resumes or in late autumn after the leaves have fallen. Transplanting during these periods allows the seedlings to focus on establishing their root systems without the added stress of active growth.
If you plan to transplant the seedlings into larger pots, select a pot that is at least 1-2 sizes larger than their current container. Ensure that it has drainage holes to prevent waterlogging. Fill the pot with well-draining potting soil, leaving enough space for the root ball of the seedling.
Gently remove the seedling from its current container, taking care not to damage the delicate roots. Place the seedling in the center of the new pot, ensuring that it is at the same depth as it was in its previous container. Backfill the pot with more soil, gently firming it around the roots to provide stability.
If transplanting into the ground, choose a location that offers full sun and well-draining soil. Dig a hole that is wider and slightly deeper than the root ball of the seedling. Carefully remove the seedling from its pot, gently teasing out any congested or circling roots. Place the seedling in the hole, making sure that the root collar is level with or slightly above the soil surface. Backfill the hole with soil, gently firming it around the roots.
After transplanting, water the seedlings thoroughly, allowing the water to soak deep into the soil. This will help settle the soil and eliminate any air pockets around the roots. Keep the soil consistently moist during the initial establishment period, being careful not to overwater.
Provide support for the newly transplanted seedlings, especially if they are grown in windy areas. Use stakes or tree ties to secure the seedlings and prevent them from bending or breaking in strong winds.
Continue to monitor the moisture levels in the soil and water accordingly. Avoid overwatering, as this can lead to root rot. As the seedlings grow, periodically check for any signs of pests or diseases and take appropriate actions to mitigate any issues.
As the transplanted seedlings settle into their new environment, they will continue their growth journey towards becoming mature pear trees. With proper care, they will flourish and reward you with abundant fruits in the years to come.
In the next step, we will explore the importance of pruning and training the young pear tree to shape its growth and maximize fruit production.
Step 7: Pruning and Training the Young Pear Tree
Pruning and training are essential practices for shaping the growth of your young pear tree and maximizing its fruit production. These steps will help create a strong framework, maintain tree health, and ensure proper fruiting in the long run.
Begin pruning your young pear tree in its second or third year. This allows the tree to establish a good root system and encourages vigorous growth before initiating pruning cuts. The goals of pruning and training are:
- To establish a strong central leader: Choose a main central stem and remove any competing or crossing branches. This helps create a well-balanced tree structure.
- To create well-spaced scaffold branches: Scaffold branches are the main horizontal branches that form the permanent framework of the tree. Select 3-5 strong branches evenly spaced around the central leader and remove any other competing branches.
- To promote good airflow and light penetration: Prune away any overcrowded or inward-facing branches to improve air circulation and ensure that sunlight reaches all parts of the tree. This helps prevent disease and promotes fruit development.
- To remove any dead, damaged, or diseased wood: Regularly inspect your pear tree and remove any branches that show signs of disease, damage, or dieback. This helps maintain tree health and prevents the spread of infections.
When making pruning cuts, use clean and sharp bypass pruners or loppers. Make cuts just above a bud or lateral branch, angling the cut away from the bud to promote outward growth. Avoid leaving stubs, as they can invite disease and slow down the healing process.
After the initial training, continue to monitor the growth of your pear tree and adjust its structure as needed. Regularly prune to maintain good scaffold branch spacing and remove any water sprouts, which are vigorous upright shoots that take away energy from fruit production.
Training your young pear tree also involves limb bending or tying to encourage a more spread-out branch structure. This helps create a well-rounded tree and prevents branches from growing too upright or crowded together.
As your pear tree matures, you may also want to consider thinning the fruit to improve size and quality. This involves selectively removing some immature fruits to prevent over-cropping and promote better fruit development.
Throughout the pruning and training process, be mindful of the natural growth habit of the specific pear variety you are growing. Some varieties have a naturally upright growth habit, while others tend to be more spreading. Adjust your pruning techniques accordingly to maintain a balanced and productive tree.
Remember, pruning and training your young pear tree are ongoing processes that require regular attention and observation. By shaping its growth and structure early on, you are setting the foundation for a healthy and productive tree that will reward you with abundant and delicious pears in the future.
In the next step, we will explore important tips for protecting your pear tree from pests and diseases to ensure its continued health and vitality.
Step 8: Protecting the Tree from Pests and Diseases
Protecting your pear tree from pests and diseases is crucial to ensure its continued health and productivity. By implementing preventive measures and practicing good garden hygiene, you can minimize the risk of infestations and maintain a thriving tree.
Here are some important tips to protect your pear tree from pests and diseases:
- Monitor regularly: Regularly inspect your pear tree for any signs of pest infestation or disease. Look for chewed leaves, discolored foliage, holes in fruits, or unusual growths. Early detection allows for prompt action.
- Practice good sanitation: Keep the area around the pear tree clean and free of fallen leaves, fruits, and debris. This helps minimize hiding places for pests and reduces the risk of disease spread.
- Encourage beneficial insects: Attract natural predators like ladybugs, lacewings, and parasitic wasps that feed on common pests like aphids and caterpillars. Planting flowering plants and avoiding the use of broad-spectrum pesticides can help encourage beneficial insects.
- Use organic pest control methods: If pest infestations do occur, consider using organic pest control methods. These may include introducing beneficial nematodes, handpicking pests, using insecticidal soap or horticultural oil, or implementing physical barriers such as netting.
- Implement proper watering techniques: Avoid overwatering, as excessive moisture can create favorable conditions for fungal diseases. Water the tree at the base, preferably early in the morning, to allow foliage to dry quickly.
- Apply appropriate fungicides: If fungal diseases like powdery mildew or fire blight become problematic, consult with a local gardening expert to identify the disease and recommend appropriate fungicides. Follow the instructions carefully and apply as necessary.
- Prune properly: Remove any dead, damaged, or diseased branches promptly. This helps prevent the spread of diseases and eliminates potential habitats for pests.
- Practice crop rotation: If you have multiple pear trees or other fruit-bearing plants in your garden, rotate their positions each season. This breaks the life cycle of pests and diseases, reducing their impact.
Remember, prevention is key when it comes to managing pests and diseases. By maintaining a healthy and well-cared-for pear tree, you can minimize the risk of infestations and maintain optimal tree vigor.
In the next step, we will explore the exciting stage of harvesting pears from your tree and enjoying the fruits of your labor.
Read more: How To Grow Tree From Seed
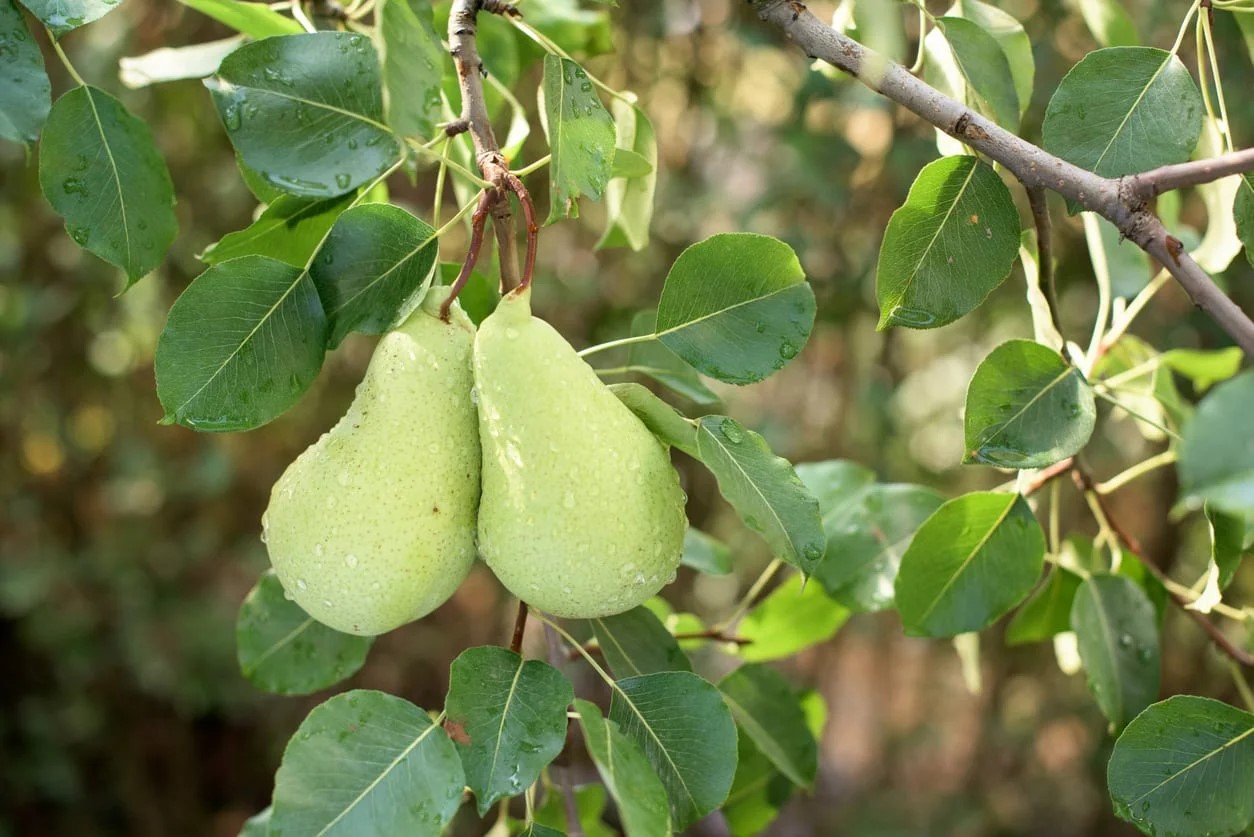
Step 9: Harvesting Pears from your Tree
After patiently nurturing your pear tree from seed to maturity, the time has finally come to harvest the delicious fruits of your labor. Harvesting pears at the right time ensures optimal flavor, texture, and sweetness. Here’s how to know when and how to harvest your pears:
Timing: Pears are usually ready for harvest in late summer to early autumn, depending on the variety. The timing of the harvest can be determined by a combination of factors including fruit color, firmness, and ease of fruit detachment from the tree.
Fruit color: Pears typically change color as they ripen. Pay attention to the color change from green to yellow or brown, depending on the variety. However, note that not all pear varieties exhibit dramatic color changes during ripening, so other indicators should be considered.
Firmness: Pears should be firm but not overly hard when ready for harvest. Gently press the fruit near the stem to check for slight give. If the pear yields to gentle pressure, it is likely ready to be picked.
Detachment from the tree: Pears are considered ripe and ready for harvest when they easily detach from the tree with a gentle twist or by lifting them upward. If the pears are stubborn and do not release easily, they may need more time to mature on the tree before harvesting.
Harvesting technique: When harvesting pears, use a gentle hand to avoid bruising the fruit. Twist each pear slightly while lifting it upwards to detach it from the tree. Handle the pears carefully, holding them by the stem to prevent damage.
Post-harvest care: After harvesting, handle the pears delicately to avoid bruising or puncturing the skin. Sort them based on ripeness and remove any damaged or diseased fruit. Store ripe pears at room temperature for a few days to allow them to fully mature and sweeten. If you prefer a crisper texture, refrigerate the pears.
It’s important to note that not all pears ripen fully on the tree. Some varieties, like Bartlett pears, require post-harvest ripening for optimal flavor and texture. Check the specific requirements of your pear variety to ensure you harvest and store them correctly.
As you enjoy the fruits of your labor, savor the delicious taste of fresh, homegrown pears and share them with family and friends. Your dedication to growing and caring for your pear tree has paid off, and now you can embrace the bounty of nature from your own garden.
Congratulations on successfully growing and harvesting pears from your tree! We hope the entire process has been a rewarding experience for you. In this article, we have covered the step-by-step journey of growing a pear tree from seed, from choosing the seed to the exciting harvest. We wish you many more fruitful seasons and a joyous gardening adventure!
Thank you for joining us on this horticultural journey, and happy pear growing!
Conclusion
Growing a pear tree from seed is a truly rewarding endeavor that allows you to witness the miraculous journey of a tiny seed transforming into a beautiful and fruitful tree. Throughout this comprehensive guide, we have explored the step-by-step process of growing a pear tree, from choosing the perfect seed to enjoying the bountiful harvest.
Starting with the careful selection of a ripe pear seed and providing it with the ideal conditions for germination, we discussed the importance of preparing the seedbed and planting the seed. We then delved into the significance of providing adequate sunlight and water to support the growth of the seedlings.
As the pear tree progresses, we explored the crucial steps of taking care of the seedlings, including fertilization, mulching, and monitoring for pests and diseases. Pruning and training the young tree played a vital role in shaping its growth and maximizing fruit production.
Protecting the tree from pests and diseases was highlighted as a fundamental aspect of maintaining the tree’s health and vitality. By implementing preventative measures and practicing good garden hygiene, the risk of infestation and disease transmission is minimized.
Finally, we discussed the exhilarating stage of harvesting pears from your tree. Timing, color, firmness, and ease of detachment were explored as key indicators to determine when the pears are ripe and ready for picking.
Through your dedication, patience, and care, you have successfully nurtured your pear tree from seed to a flourishing and productive tree. The journey from a humble seed to a tree bearing delicious fruits is a testament to the wonders of nature and your commitment to gardening.
We hope that this guide has provided you with valuable insights and guidance to grow your own pear tree from seed. Remember to adapt these steps to your specific growing conditions and the unique requirements of your chosen pear variety.
Now, armed with knowledge and experience, continue to care for your pear tree, applying the principles of pruning, pest management, and proper watering. With each passing year, your tree will flourish and bring you increasingly abundant and delectable pears.
Thank you for joining us on this journey and for your dedication to gardening. May your pear tree thrive and fill your garden with beauty, aroma, and the joy of homegrown pears.
Happy gardening, and may your pear tree bring you endless satisfaction and delicious moments!
Frequently Asked Questions about How To Grow Pear Tree From Seed
Was this page helpful?
At Storables.com, we guarantee accurate and reliable information. Our content, validated by Expert Board Contributors, is crafted following stringent Editorial Policies. We're committed to providing you with well-researched, expert-backed insights for all your informational needs.


0 thoughts on “How To Grow Pear Tree From Seed”