Home>Garden Essentials>How To Lay Landscaping Fabric
Garden Essentials
How To Lay Landscaping Fabric
Modified: April 22, 2024
Discover how to lay landscaping fabric in your garden for easy weed control and maintenance. Step-by-step guide to achieve a beautiful and hassle-free garden.
(Many of the links in this article redirect to a specific reviewed product. Your purchase of these products through affiliate links helps to generate commission for Storables.com, at no extra cost. Learn more)
Introduction
Welcome to the world of landscaping! If you’re a gardener or homeowner looking to improve the aesthetics and functionality of your outdoor space, you’ve likely come across the term “landscaping fabric.” This versatile material is a secret weapon for creating a beautiful and low-maintenance garden.
Landscaping fabric, also known as weed control fabric or geotextile, is a textile material that acts as a barrier against weeds and helps regulate soil temperature and moisture. It is commonly used under mulch or gravel to prevent weed growth and maintain a clean and tidy garden.
In this article, we will explore the benefits of using landscaping fabric, the necessary supplies, and a step-by-step guide on how to lay it correctly and maintain it for optimal performance. So, grab your gardening gloves and let’s dive in!
But before we start, it’s important to note that there are different types of landscaping fabric available in the market, including woven and non-woven options. Woven fabric is more durable and suitable for heavy-duty applications, while non-woven fabric is lighter and better for areas where flexibility is required.
Now, let’s discover why landscaping fabric is a game-changer in garden maintenance and design!
Key Takeaways:
- Landscaping fabric is a game-changer for garden maintenance, preventing weeds, regulating soil temperature, conserving moisture, and enhancing the garden’s appearance. It’s a low-maintenance gardener’s best friend!
- Properly laying and maintaining landscaping fabric saves time and effort, creating a beautiful, weed-free garden. With the right care, your outdoor space will thrive with minimal maintenance.
Read more: What Is Landscaping Fabric
What is Landscaping Fabric?
Landscaping fabric is a specially designed material that is used in gardening and landscaping projects to suppress the growth of weeds and provide a stable base for mulch or gravel. It is typically made from woven or non-woven polypropylene, a durable and long-lasting material that is resistant to tearing and UV degradation.
The primary purpose of landscaping fabric is to prevent weeds from taking over your garden beds and competing with your plants for nutrients, water, and sunlight. It creates a physical barrier that blocks the growth of weed seeds by preventing them from reaching the soil and germinating.
In addition to weed control, landscaping fabric has several other benefits. It helps in regulating soil temperature by keeping it cooler in hot weather and warmer in cold weather. This helps to create an optimal environment for plant growth and can result in higher yields and healthier plants.
Another advantage of using landscaping fabric is its ability to conserve moisture in the soil. By reducing evaporation, the fabric helps to retain water and prevent over-drying, which is particularly beneficial in dry or arid climates.
Landscaping fabric also acts as a protective barrier against erosion. It helps to prevent soil erosion caused by wind or heavy rainfall, preserving the integrity of your garden beds and preventing the loss of valuable topsoil.
Furthermore, landscaping fabric can enhance the overall appearance of your garden. It provides a clean and tidy look by preventing weeds from sprouting and protruding through the mulch or gravel. This results in a more aesthetically pleasing and well-maintained landscape.
Overall, landscaping fabric is an effective and efficient solution for weed control, temperature regulation, moisture retention, erosion prevention, and improving the visual appeal of your garden. Now that we understand what landscaping fabric is and its benefits, let’s take a look at the necessary supplies you’ll need to get started.
Benefits of Using Landscaping Fabric
Using landscaping fabric in your garden offers numerous advantages that make it a valuable addition to any landscaping project. Let’s take a closer look at some of the key benefits:
- Weed Control: One of the primary benefits of landscaping fabric is its ability to prevent weeds from growing. By blocking sunlight and creating a physical barrier, the fabric inhibits weed seed germination and growth, significantly reducing the need for manual weeding. This saves you time and effort, allowing you to focus on enjoying your garden rather than battling unwanted vegetation.
- Maintenance Reduction: Landscaping fabric simplifies garden maintenance by reducing the need for frequent weeding, watering, and mulching. It minimizes the competition between weeds and desirable plants for nutrients, water, and sunlight, leading to healthier and more robust plant growth. With the fabric in place, you can spend more time enjoying your garden and less time tending to it.
- Moisture Regulation: Another advantage of using landscaping fabric is its ability to regulate soil moisture. It prevents excess water evaporation, allowing the soil to retain moisture for longer periods. This is especially beneficial in dry regions or during hot summer months when water scarcity is a concern. Conserving moisture helps plants stay hydrated, reduces the frequency of watering, and promotes better overall plant health.
- Soil Temperature Control: Landscaping fabric acts as an insulating layer, helping to regulate soil temperature. It keeps the soil cooler in hot weather by reducing heat absorption and prevents it from getting too cold during colder seasons. Maintaining optimal soil temperature promotes healthier root development and improves overall plant growth and productivity.
- Erosion Prevention: By creating a protective barrier, landscaping fabric helps prevent soil erosion caused by heavy rainfall, strong winds, or foot traffic. It holds the soil particles in place and prevents them from being washed away or displaced, thereby preserving the stability and integrity of your garden beds.
- Aesthetically Pleasing: Landscaping fabric gives your garden a clean, well-maintained appearance. By suppressing weed growth, it keeps your garden beds free of unsightly vegetation, allowing your plants to be the focal point. Combined with a layer of mulch or gravel, landscaping fabric provides a neat and organized look, enhancing the overall aesthetic appeal of your outdoor space.
These benefits make landscaping fabric an invaluable tool for gardeners and homeowners looking to create beautiful, low-maintenance outdoor spaces. Now that we understand the advantages, let’s move on to the necessary supplies for laying landscaping fabric.
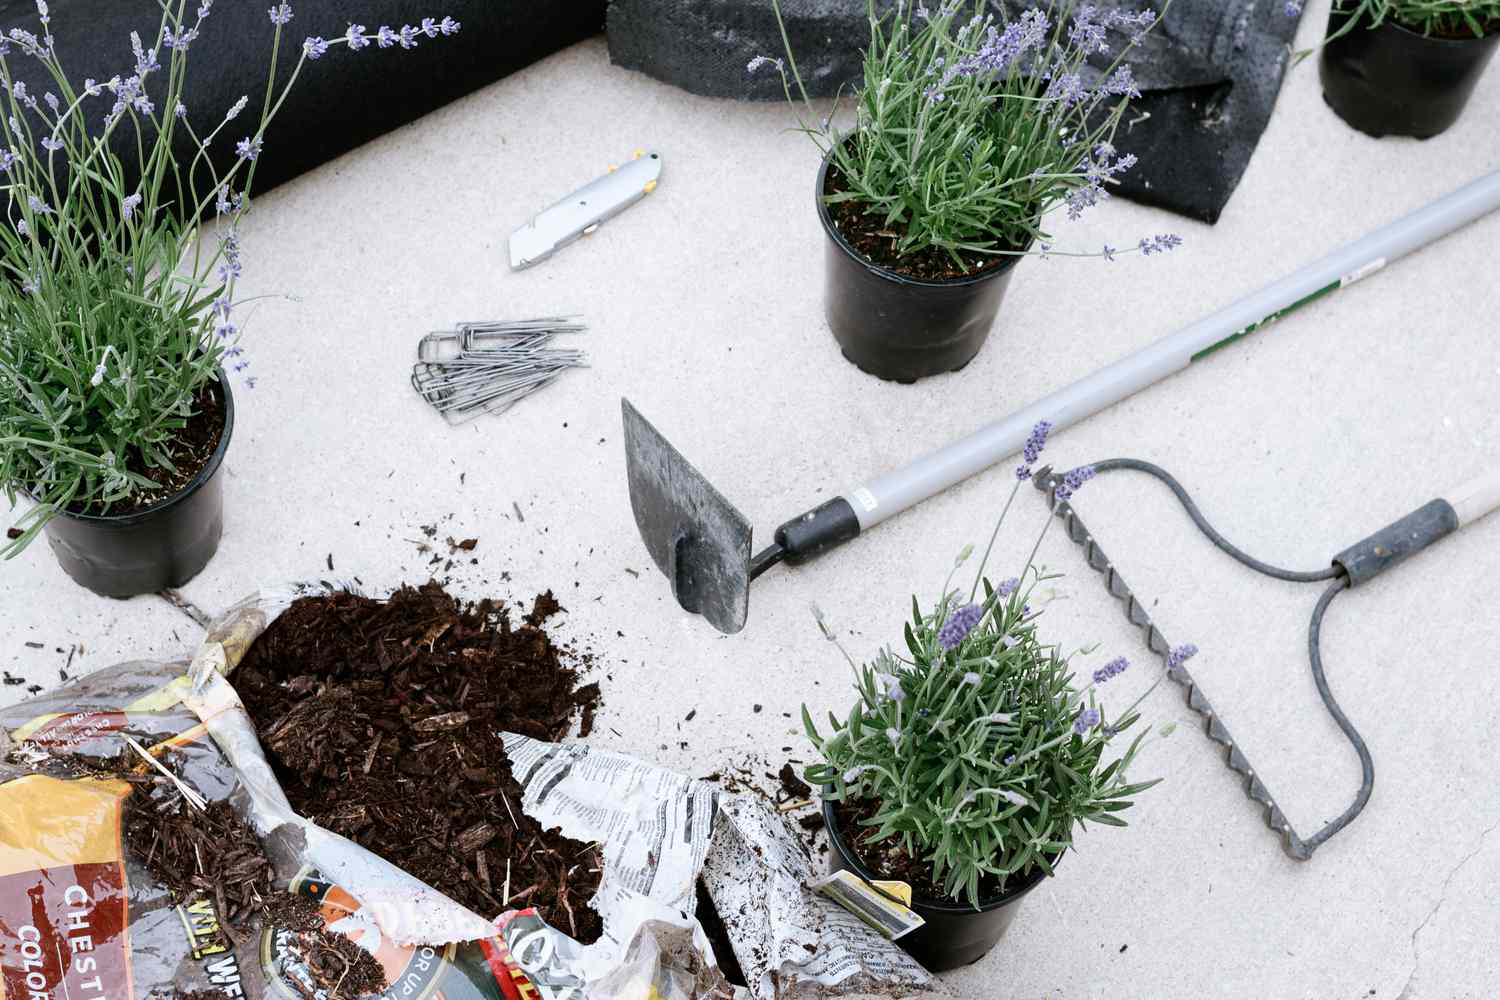
Necessary Supplies
Before you start laying landscaping fabric, it’s important to gather all the necessary supplies to ensure a smooth and efficient installation process. Here are the key items you’ll need:
- Landscaping Fabric: This is, of course, the main component. Choose a high-quality woven or non-woven landscaping fabric that suits your specific needs. The fabric should be strong enough to suppress weed growth while allowing water and air to penetrate the soil.
- Garden Tools: You’ll need basic garden tools such as a rake, hoe, trowel, and garden gloves for preparing the area and securing the fabric.
- Measuring Tape or String: To accurately measure and mark the area where you will be laying the fabric, use a measuring tape or string.
- Sharp Scissors or Utility Knife: You’ll need a sharp pair of scissors or a utility knife to cut the landscaping fabric to the desired size and shape.
- Pegs or Anchor Pins: These are used to secure the landscaping fabric to the ground. Choose sturdy pegs or anchor pins that can withstand weather conditions and hold the fabric firmly in place.
- Mulch or Gravel: Once the landscaping fabric is in place, you’ll need a layer of mulch or gravel to enhance its effectiveness and improve the overall appearance of your garden. Choose an appropriate mulch or gravel material that complements your landscape design.
- Optional: Edging Material: Depending on the layout of your garden beds, you may consider using edging material such as plastic or metal strips to provide a clean and defined border around the fabric. This helps to prevent the fabric from shifting or becoming exposed.
Make sure to gather all these supplies before starting the installation process. Having everything on hand will save you time and ensure a smooth workflow. Once you have all the necessary supplies, it’s time to get your hands dirty and prepare the area for laying the landscaping fabric. Let’s move on to the first step: clearing and preparing the area.
Step 1: Clearing and Preparing the Area
Before you lay landscaping fabric, it’s essential to clear the area and prepare the soil to ensure optimal results. Follow these steps to get started:
- Remove Existing Vegetation: Begin by removing any existing vegetation, such as grass, weeds, and plants, from the area where you plan to lay the fabric. Use a rake or hoe to loosen the soil and remove any roots or debris. This will create a clean and level surface for the fabric.
- Smooth Out the Soil: After removing vegetation, use a rake or garden trowel to smooth out the soil. Remove any rocks or large clumps that could potentially cause unevenness under the fabric.
- Check for Drainage: Ensure that the area has adequate drainage by checking for any low-lying spots or areas prone to water pooling. If necessary, make necessary adjustments to the soil to improve drainage and prevent waterlogged conditions.
- Mark the Edges: Use a measuring tape or string to mark the edges of the area where you will be laying the landscaping fabric. This will serve as a guide during the installation process and help you maintain a straight and even application.
- Optional: Install Edging Material: If you choose to use edging material, now is the time to install it. Place the edging material along the marked edges, ensuring it is firmly secured in place. This will help keep the fabric in position and prevent it from shifting over time.
- Inspect for Any Remaining Debris: Before laying the landscaping fabric, make a final inspection of the area for any remaining debris or unwanted vegetation. Remove any leftover roots, rocks, or debris to create a clean and smooth surface.
By following these preparation steps, you are setting the foundation for a successful installation of the landscaping fabric. Once the area is cleared and prepared, it’s time to move on to the next step: measuring and cutting the fabric.
Read more: How To Lay Landscaping Block
Step 2: Measuring and Cutting the Fabric
Now that you have cleared and prepared the area, it’s time to measure and cut the landscaping fabric to fit your garden beds. Follow these steps to ensure a precise and accurate fit:
- Measure the Area: Use a measuring tape or string to measure the length and width of the space where you will be laying the fabric. Take accurate measurements, allowing for some overlap along the edges.
- Unroll the Fabric: Unroll the landscaping fabric on a flat surface, such as a driveway or patio. Ensure that you have enough space to work comfortably and that the fabric lies flat without any creases or wrinkles.
- Transfer Measurements: Transfer the measurements from your garden beds onto the landscaping fabric using a pen or marker. Make sure to account for any curves or irregular shapes by cutting the fabric into manageable sections.
- Cut the Fabric: Using sharp scissors or a utility knife, carefully cut along the marked lines to create the desired shapes and sizes. Take your time to ensure clean and precise cuts, as this will make the installation process easier and more efficient.
- Trim Excess Fabric: Once you have cut the fabric to the desired sizes, trim any excess material along the edges. This will ensure a neat and tidy appearance when the fabric is laid in the garden beds.
Remember to save any remaining fabric scraps, as they can be used to fill in smaller gaps or for future maintenance or repairs. Once you have measured and cut the landscaping fabric to the appropriate sizes, it’s time to move on to the next step: placing the fabric in the garden beds.
When laying landscaping fabric, make sure to overlap the edges by at least 6 inches to prevent weeds from growing through. Also, secure the fabric with landscape staples to keep it in place.
Step 3: Placing the Fabric
With the landscaping fabric cut to size, it’s now time to lay it in your garden beds. Follow these steps to correctly place the fabric:
- Start from One End: Begin by laying the first piece of fabric in one corner or end of your garden bed. Make sure it extends beyond the edges of the bed, allowing for overlap and proper coverage.
- Smooth out the Fabric: Smooth out the fabric with your hands, removing any wrinkles or folds. Ensure that it lies flat against the soil and covers the entire area you want to protect from weeds.
- Overlap the Edges: If you have multiple sections of fabric, overlap the edges by about 3-6 inches. This helps create a seamless barrier that prevents weed growth between the sections.
- Trim Excess Fabric: If you have any excess fabric that extends beyond the garden bed, trim it using sharp scissors or a utility knife. This helps achieve a neat and tidy appearance while preventing tripping hazards or potential damage.
- Continue Laying the Fabric: Repeat the process of laying and smoothing out the fabric, section by section, until the entire garden bed is covered. Take care not to stretch the fabric too tightly, as this may cause it to tear or pull away from the edges.
- Tuck the Fabric: Wherever possible, tuck the edges of the fabric under any existing borders or edging materials. This helps hold the fabric in place and prevents it from getting displaced over time.
- Align the Fabric: Throughout the process, regularly check that the fabric is aligned with the marked edges or any existing landscape features. This ensures that the fabric is correctly positioned and provides maximum coverage.
By following these steps, you will effectively place the landscaping fabric in your garden beds, creating a barrier against weed growth and promoting a healthier and more manageable garden. Now it’s time to move on to the next step: securing the fabric in place.
Step 4: Securing the Fabric
To ensure that the landscaping fabric stays in place and remains effective, it’s important to secure it properly. Follow these steps to securely anchor the fabric:
- Insert Pegs or Anchor Pins: Start by inserting pegs or anchor pins through the fabric and into the soil at regular intervals. Place the pins along the edges of the fabric and at strategic points throughout the garden bed to prevent shifting or lifting.
- Drive the Pegs into the Soil: Use a hammer or rubber mallet to drive the pegs or pins into the soil. Ensure that they are firmly secured and flush with the ground, providing a secure hold for the fabric.
- Space the Pegs Appropriately: The spacing between the pegs will depend on the size and shape of your garden beds. As a general guideline, place the pegs every 6-12 inches along the edges and every 1-2 feet in the center of the bed to provide adequate support.
- Check for Secure Anchoring: After inserting all the pegs or pins, check for any loose or raised sections of fabric. Adjust the pins as necessary to ensure the fabric is taut and properly anchored. This will prevent the fabric from becoming loose or allowing weed seeds to penetrate.
- Secure Edges with Additional Pins: If you have any exposed edges where the fabric meets an existing border or edging, secure them with additional pins or stakes. This will prevent the fabric from lifting or being exposed to wind or water erosion.
- Trim Excess Fabric Around Pegs: Trim any excess fabric that may be covering the pegs or pins to allow for a flush and secure fit. This will help prevent tripping hazards and ensure a professional-looking finish.
Properly securing the fabric is crucial to its effectiveness in preventing weed growth. By following these steps, you’ll ensure that the fabric remains in place, even during inclement weather or heavy foot traffic. Now that the fabric is secured, let’s move on to the next step: adding mulch or gravel for an enhanced look and added protection.
Step 5: Adding Mulch or Gravel
Now that you have successfully laid and secured the landscaping fabric, it’s time to add a layer of mulch or gravel. This not only enhances the visual appeal of your garden but also provides additional benefits such as moisture retention and weed suppression. Follow these steps to add mulch or gravel to your garden beds:
- Select the Mulch or Gravel: Choose the type of mulch or gravel that suits your garden design and personal preferences. Consider factors such as color, texture, and functionality. Organic mulch options include wood chips, straw, or shredded bark, while gravel options range from pea gravel to larger decorative stones.
- Determine the Thickness: Decide on the desired thickness of the mulch or gravel layer. Generally, a thickness of 2-4 inches is suitable for most garden beds. Thicker layers provide better weed suppression and moisture retention but may require more materials.
- Scoop or Pour the Mulch or Gravel: Using a shovel or garden rake, scoop or pour the mulch or gravel onto the garden beds. Spread it evenly, ensuring full coverage over the entire area.
- Smooth and Level the Surface: Use a rake or garden hoe to smooth and level the mulch or gravel surface. This provides a clean and finished look while also helping to distribute the material evenly.
- Avoid Piling Against Plants: Be mindful not to pile mulch or gravel against the stems or trunks of plants, as this can lead to moisture retention, rot, and pest issues. Leave a small gap around the base of the plants to facilitate air circulation and prevent damage.
- Avoid Covering the Fabric Completely: While applying the mulch or gravel, ensure that the landscaping fabric remains visible and isn’t completely covered. This allows the fabric to function effectively in preventing weed growth while still enjoying the benefits of the mulch or gravel layer.
- Check for Even Distribution: Once you have spread the mulch or gravel, step back and visually inspect the garden beds. Ensure that the material is evenly distributed and that there are no bare spots or excessive accumulation in certain areas.
Adding mulch or gravel not only beautifies your garden but also provides insulation, moisture retention, and further weed suppression. By following these steps, you’ll create a well-maintained and aesthetically pleasing landscape. Now that you’ve completed step 5, let’s move on to the final step: maintaining and replacing the landscaping fabric when necessary.
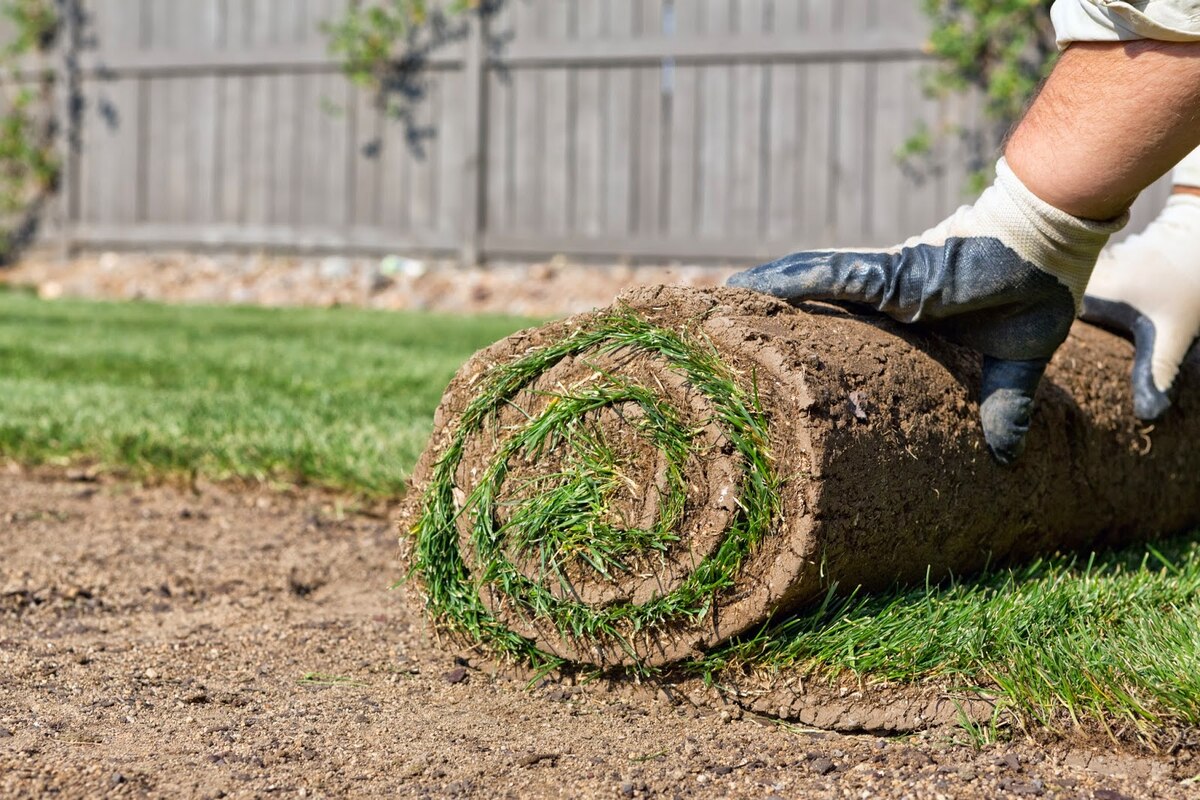
Read more: How To Lay Grass
Step 6: Maintaining and Replacing the Fabric
Once the landscaping fabric is in place and covered with mulch or gravel, it requires regular maintenance to ensure its long-term effectiveness. Follow these steps to properly maintain and replace the fabric when necessary:
- Weed Inspection: Regularly inspect the area covered by the fabric for any signs of weed growth. Remove any weeds that manage to penetrate through the fabric using hand pulling or, if necessary, a weed tool. This will help maintain the integrity of the fabric barrier.
- Mulch or Gravel Refreshment: Over time, the layer of mulch or gravel may break down or become thin. Periodically refresh the layer by adding a new layer of mulch or gravel on top, ensuring that the fabric remains adequately covered.
- Check for Fabric Damage: Monitor the condition of the fabric for any signs of damage or wear. Look for tears, frayed edges, or areas where the fabric has become exposed. Repair any small damages as soon as they are detected by patching them with a compatible fabric patch or adhesive.
- Monitor Soil Moisture: Regularly check the moisture level of the soil beneath the fabric. This can be done by gently lifting a small section of the fabric and feeling the soil with your fingers. Adjust your watering schedule as needed to maintain optimal moisture levels without overwatering.
- Replace Damaged or Worn-out Fabric: Eventually, landscaping fabric may need to be replaced due to extensive damage or natural deterioration. If the fabric becomes severely torn, loses its effectiveness, or is no longer keeping weeds at bay, it’s time to remove and replace it. Follow the steps outlined in the previous sections to clear the area and install a new fabric.
- Replenish Mulch or Gravel During Replacement: When replacing the landscaping fabric, take the opportunity to replenish the layer of mulch or gravel as well. Remove the old layer, install the new fabric, and add a fresh layer of mulch or gravel on top to maintain the aesthetic appeal and benefits of the covering.
Maintaining and replacing the landscaping fabric when needed is essential to ensure long-term weed control and preserve the overall health and appearance of your garden. By following these steps, you’ll be able to enjoy the benefits of landscaping fabric for years to come. With proper care and maintenance, your garden will thrive with minimal effort. Happy gardening!
Conclusion
Congratulations! You have successfully learned how to lay landscaping fabric and create a beautiful, low-maintenance garden. By utilizing landscaping fabric, you can enjoy numerous benefits such as weed control, moisture regulation, soil temperature regulation, erosion prevention, and an overall improved garden aesthetic.
Throughout this guide, we covered the necessary supplies, step-by-step instructions for clearing and preparing the area, measuring and cutting the fabric, placing and securing the fabric, adding mulch or gravel, and maintaining and replacing the fabric when necessary. Following these steps will help you achieve a professional and effective installation.
Remember to select the appropriate type of landscaping fabric for your specific needs, whether it’s woven or non-woven, based on the durability and flexibility required. Ensure that you measure and cut the fabric accurately to fit your garden beds, and take the necessary steps to properly secure and anchor it in place.
Adding a layer of mulch or gravel on top of the fabric enhances not only the visual appeal but also its functionality. The layer of mulch or gravel assists in moisture retention, further weed suppression, and protection against soil erosion.
Regular maintenance is key to the long-term success of your landscaping fabric. Inspecting for weed growth, refreshing the mulch or gravel layer, checking for fabric damage, and monitoring soil moisture are crucial tasks for maintaining the effectiveness of the fabric. Should the fabric become heavily damaged or worn-out, it is essential to replace it promptly to ensure continued weed control.
By following these guidelines and maintaining your landscaped areas, you can enjoy a beautiful, weed-free garden for years to come. Landscaping fabric is a valuable tool that saves time, reduces maintenance, and aids in the overall success of your outdoor space.
Now that you have the knowledge and confidence to lay and maintain landscaping fabric, it’s time to put your new skills into action. Embrace the benefits of a well-maintained garden, with less time spent on weeding and more time spent enjoying your outdoor oasis. Happy gardening!
Frequently Asked Questions about How To Lay Landscaping Fabric
Was this page helpful?
At Storables.com, we guarantee accurate and reliable information. Our content, validated by Expert Board Contributors, is crafted following stringent Editorial Policies. We're committed to providing you with well-researched, expert-backed insights for all your informational needs.


0 thoughts on “How To Lay Landscaping Fabric”