Home>Garden Essentials>How To Make A Stunning Wooden Table With Glow-In-The-Dark Resin Infill

Garden Essentials
How To Make A Stunning Wooden Table With Glow-In-The-Dark Resin Infill
Modified: March 7, 2024
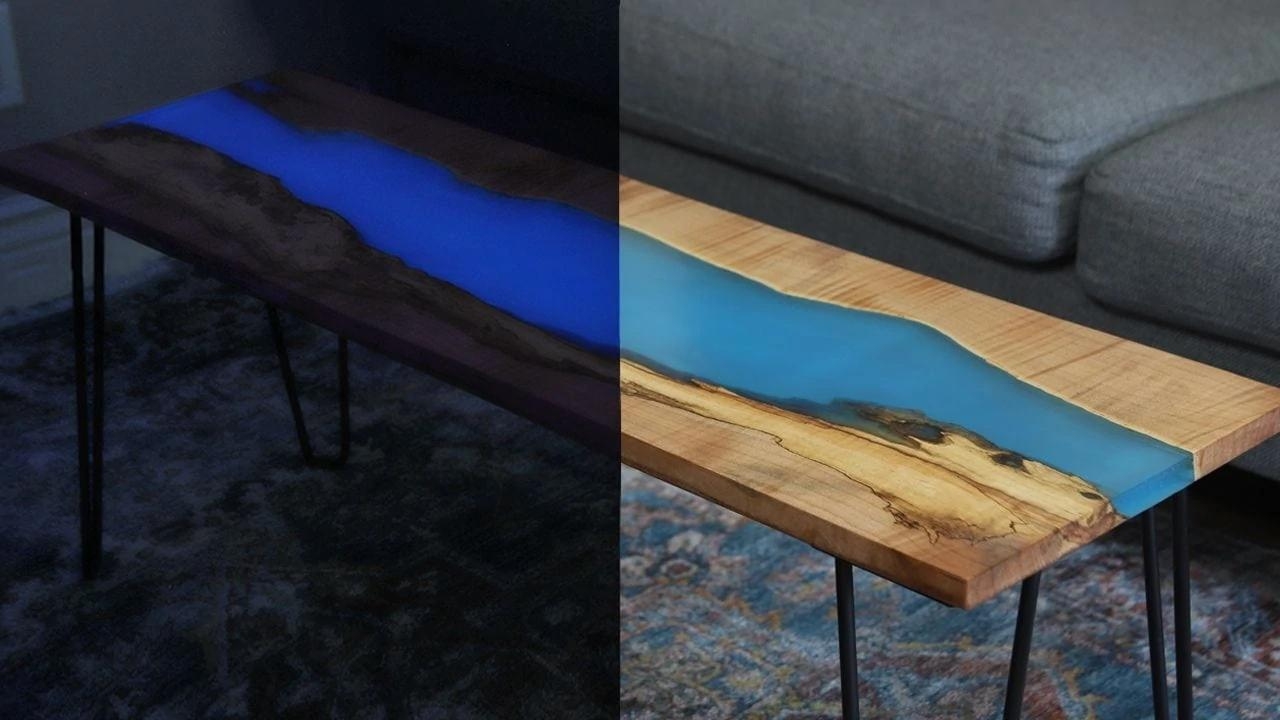
Learn how to create a mesmerizing garden table using glow-in-the-dark resin infill. Craft a stunning wooden centerpiece that will illuminate your outdoor space at night.
(Many of the links in this article redirect to a specific reviewed product. Your purchase of these products through affiliate links helps to generate commission for Storables.com, at no extra cost. Learn more)
Introduction
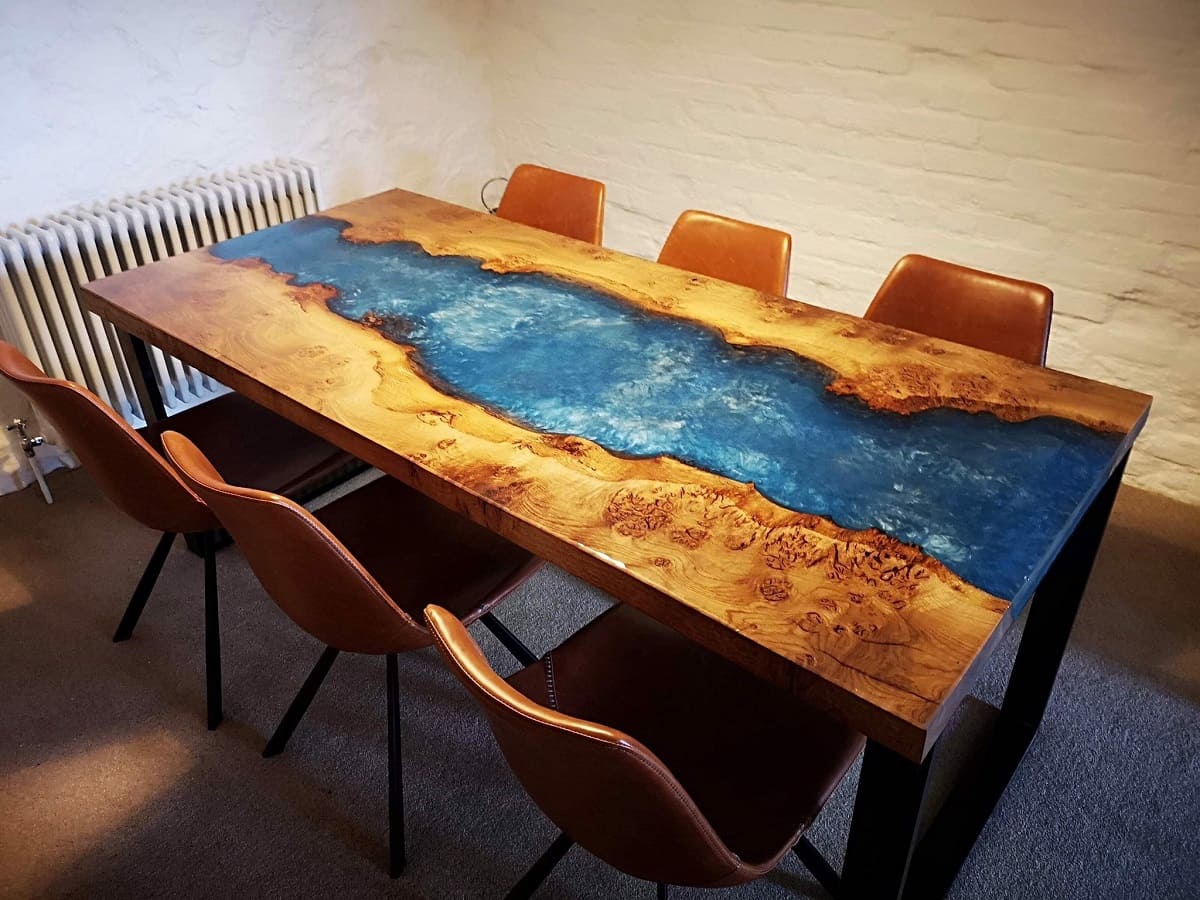
Creating a stunning wooden table with a glow-in-the-dark resin infill is a captivating and unique project that can add a touch of magic and elegance to any space. The combination of natural wood and luminous resin creates a mesmerizing effect that can be both functional and aesthetically pleasing.
In this article, we will guide you through the step-by-step process of creating your own stunning wooden table with a glow-in-the-dark resin infill. Whether you are an experienced woodworker or a beginner looking for a new and exciting project, this guide will provide you with all the information and techniques you need to create a beautiful and functional piece of furniture.
Before we dive into the details, let’s take a moment to talk about the materials and tools you will need for this project.
Key Takeaways:
- Create a stunning wooden table with glow-in-the-dark resin by following step-by-step instructions. Choose the right materials, prepare your workspace, and pour and polish the resin for a magical and elegant result.
- After completing the table, apply a protective finish and add final touches for a polished look. Enjoy the enchanting glow of your unique creation and care for it to preserve its beauty for years to come.
Read more: How To Make A Wooden Table With Resin Infill
Materials and Tools Needed
To create a stunning wooden table with a glow-in-the-dark resin infill, you will need the following materials and tools:
– A solid wood slab for the tabletop
– Glow-in-the-dark pigment
– Epoxy resin
– Mixing cups and stirring sticks
– 120-grit and 220-grit sandpaper
– Random orbital sander
– Chisels and carving tools
– Router
– Clamps
– Disposable gloves and safety goggles
– Disposable brushes for resin application
– Finishing oil or varnish
These materials and tools can be easily found at your local home improvement store or online. Make sure to choose high-quality materials to ensure the durability and longevity of your wooden table.
Now that you have gathered all the necessary materials and tools, let’s move on to the preparation stage.
Preparation
To begin, you will need to choose the wood species for your tabletop. Select a solid wood slab with a size that suits your needs and preferences. Popular choices include oak, walnut, maple, and cherry, but feel free to explore other options based on your personal taste.
Once you have obtained the wood slab, let it acclimate to the room temperature for a few days to prevent warping or cracking during the construction process.
Next, prepare your workspace by setting up a clean and well-ventilated area. Ensure that you have enough space to comfortably work on the table and have access to all your tools and materials.
Cover the floor and any nearby surfaces with drop cloths or plastic sheets to protect them from spills and damage. Additionally, wear protective gloves and goggles to protect yourself during the construction process.
With the materials and workspace ready, it’s time to start building your wooden table. Let’s move on to the next section: Building the Wooden Table.
Key Takeaways:
- Create a stunning wooden table with glow-in-the-dark resin by following step-by-step instructions. Choose the right materials, prepare your workspace, and pour and polish the resin for a magical and elegant result.
- After completing the table, apply a protective finish and add final touches for a polished look. Enjoy the enchanting glow of your unique creation and care for it to preserve its beauty for years to come.
Read more: How To Make A Wooden Table With Resin Infill
Materials and Tools Needed
To create a stunning wooden table with a glow-in-the-dark resin infill, you will need the following materials and tools:
– A solid wood slab for the tabletop: Choose a high-quality wood slab in the desired size and thickness. Popular choices include oak, walnut, maple, and cherry, but you can explore other options based on your preference.
– Glow-in-the-dark pigment: Purchase glow-in-the-dark pigment specifically designed for resin applications. Make sure to choose a color that complements the wood tone and desired aesthetic.
– Epoxy resin: Use a high-quality, clear epoxy resin that is specifically formulated for woodworking projects. The resin should have a low viscosity to ensure easy pouring and proper penetration into the wood.
– Mixing cups and stirring sticks: Select reusable or disposable measuring cups and stirring sticks to mix the resin and pigment thoroughly. Make sure they are clean and free from any contaminants that could affect the resin’s clarity.
– 120-grit and 220-grit sandpaper: These sandpapers will be used for smoothing and preparing the wood surface before applying the resin. The lower grit removes any imperfections or roughness, while the higher grit provides a smoother finish.
– Random orbital sander: A random orbital sander with different grit sandpaper discs will be used for sanding and leveling the tabletop surface.
– Chisels and carving tools: These tools are needed if you want to create intricate designs or patterns on the wood surface before pouring the resin. Choose tools of various sizes and shapes to achieve the desired effect.
– Router: If you plan to create recessed areas on the tabletop for the resin infill, a router with appropriate bits will be required. This tool ensures precise and clean cuts.
– Clamps: Clamps are useful for securing the wood slab during the resin pouring process. They help prevent any movement or shifting, ensuring a smooth and even resin surface.
– Disposable gloves and safety goggles: Protect your hands and eyes with disposable gloves and safety goggles. These will safeguard against any potential resin spills or splashes, as well as any other hazards.
– Disposable brushes for resin application: Use disposable brushes to apply the resin evenly on the wood surface. These brushes should be soft and free from any loose bristles to prevent any unwanted texture on the final result.
– Finishing oil or varnish: After the resin has cured and the table is complete, a finishing oil or varnish can be applied to enhance the wood’s natural beauty, provide protection, and add a final touch of refinement.
These materials and tools are crucial for successfully creating a stunning wooden table with a glow-in-the-dark resin infill. Make sure to gather all the necessary items before beginning your project to ensure a smooth and efficient construction process.
Preparation
Before you start building your stunning wooden table with a glow-in-the-dark resin infill, it’s important to properly prepare your workspace and materials. Taking the time to prepare will help ensure a smooth and successful construction process. Here are some steps to follow for effective preparation:
1. Choose the wood slab: Select a solid wood slab for the tabletop that fits your desired size and aesthetic. Take into consideration the type of wood, such as oak, walnut, maple, or cherry, and choose a slab with a thickness suitable for your project.
2. Acclimate the wood: It’s crucial to let the wood slab acclimate to the room temperature for a few days. This step helps prevent any warping or cracking that could occur as a result of temperature changes during the construction process.
3. Set up your workspace: Designate a clean and well-ventilated area for working on your wooden table project. Ensure that you have enough space to comfortably maneuver the wood slab and have easy access to your tools and materials.
4. Protect the surroundings: Cover the flooring and nearby surfaces with drop cloths or plastic sheets to protect them from any spills or accidental damage. This step will save you time and effort in cleaning up afterward.
5. Safety gear: Wear protective gloves and safety goggles to protect yourself during the construction process. This will safeguard your hands and eyes from any potential harm, especially when working with tools and chemicals.
6. Gather your materials and tools: Ensure that you have all the necessary materials and tools ready before you begin. This includes the wood slab, glow-in-the-dark pigment, epoxy resin, mixing cups, stirring sticks, sandpaper, random orbital sander, chisels, carving tools, router, clamps, disposable gloves, safety goggles, disposable brushes, and finishing oil or varnish.
7. Clean and prep the wood surface: Before applying the resin, it’s important to clean and prep the wood surface. Use a 120-grit sandpaper to remove any imperfections, roughness, or existing finishes. Follow up with a 220-grit sandpaper to achieve a smoother finish. Ensure the surface is clean and dry before moving on to the next steps.
8. Plan your design: If you wish to incorporate any designs or patterns on the wood surface, plan them out in advance. Use chisels and carving tools to create recessed areas or unique textures. If using a router, select the appropriate bits for achieving precise cuts.
By following these preparation steps, you will lay a solid foundation for the construction of your stunning wooden table. Taking the time to prepare will help ensure that the process goes smoothly and that you achieve the desired results. Now that you’ve prepared your workspace and materials, it’s time to move on to the next stage: building the wooden table.
Read more: How To Make A Resin Coffee Table
Building the Wooden Table
Now that you have properly prepared your workspace and materials, it’s time to start building your stunning wooden table. Follow these steps to construct the table and create a sturdy base for the glow-in-the-dark resin infill:
1. Measure and cut the wood slab: Begin by measuring and marking the desired dimensions for your table. Use a measuring tape and a pencil to ensure accuracy. Once marked, carefully cut the wood slab to the desired size using a table saw or a circular saw.
2. Shape the edges (optional): If you prefer a specific edge profile for your tabletop, use a router with the appropriate bit to shape the edges. This step adds a decorative touch and enhances the overall appearance of the table.
3. Create the table base: Depending on your design preference, you can either purchase pre-made table legs or create custom legs from solid wood. Attach the legs to the underside of the tabletop using screws or dowels, ensuring a secure and stable base.
4. Reinforce the joints (optional): To provide additional strength to the table base, consider reinforcing the joints with wooden dowels or metal corner brackets. This extra reinforcement prevents the legs from wobbling and adds durability to the overall structure.
5. Secure the tabletop: Use clamps to secure the tabletop tightly to the base. This step helps prevent any movement or shifting during the resin pouring process and ensures a level and stable surface.
6. Carve intricate designs (optional): If you wish to incorporate carved designs or patterns on the wood surface, use chisels and carving tools to carefully create recessed areas. This step adds a unique and artistic touch to your wooden table.
7. Sand the surface: Use a random orbital sander with 120-grit sandpaper to sand the entire tabletop surface. Start with gentle pressure and gradually increase as needed. This step helps create a smooth and even surface for applying the resin.
With the wooden table construction complete, you now have a sturdy and ready-to-be-transformed base for the glow-in-the-dark resin infill. Next, we will move on to the process of mixing and preparing the resin.
Mixing and Preparing the Resin
After completing the construction of your wooden table, it’s time to move on to mixing and preparing the resin. This step is crucial for achieving a successful and visually stunning glow-in-the-dark resin infill. Follow these steps to properly mix and prepare the resin:
1. Read the instructions: Start by carefully reading and following the instructions provided by the epoxy resin manufacturer. Different brands may have specific guidelines, so it’s important to understand the recommended mixing ratios and curing times.
2. Set up your workspace: Create a clean and well-ventilated area for the resin mixing process. Ensure that you have enough space to work comfortably and that you have all the necessary tools and materials within reach.
3. Wear protective gear: Put on disposable gloves and safety goggles to protect your hands and eyes from any potential contact with the resin. Safety should always be a priority during this step.
4. Measure the resin and hardener: Most epoxy resins consist of two components: the resin and the hardener. Use measuring cups or scales to accurately measure the required amounts of each component based on the manufacturer’s instructions. Maintaining the proper mixing ratio is vital for the resin to cure correctly.
5. Mix in a clean container: Pour the measured resin and hardener into a clean mixing container, preferably one with measurement markings. Use a stirring stick to thoroughly mix the resin and hardener together. Stir slowly and consistently, making sure to scrape the sides and bottom to fully combine the components. Avoid introducing air bubbles during the mixing process.
6. Consider adding pigments (optional): If you want to add color to your resin infill, now is the time to mix in any additional pigments. Use small amounts of compatible epoxy resin pigments or dyes and mix them well into the resin until you achieve the desired color.
7. Allow for degassing (optional): If you notice any air bubbles in the mixed resin, you can let it sit for a few minutes to allow them to rise to the surface and release. Alternatively, you can use a heat gun or a kitchen torch (carefully) to gently remove any visible bubbles.
It’s important to work efficiently during the resin mixing and preparation stage, as epoxy resin has a limited working time before it starts to cure. Make sure to mix only the amount of resin you can comfortably pour within that time frame.
Remember, different epoxy resin brands may have specific instructions and curing times, so always refer to the manufacturer’s guidelines. Once your resin mixture is ready, you can move on to the next step: pouring the resin infill onto the wooden tabletop.
Pouring the Resin Infill
Now that you have mixed and prepared the epoxy resin, it’s time to pour it onto the wooden tabletop to create the stunning glow-in-the-dark resin infill. Follow these steps carefully to achieve an even and beautiful resin surface:
1. Prepare the wood surface: Ensure that the wooden tabletop is clean, dry, and free from any dust or debris. Use a clean cloth or brush to remove any particles that could interfere with the resin pouring process.
2. Level the table: Place the tabletop on a level surface or use leveling tools to ensure that the resin spreads evenly across the entire surface without pooling or forming uneven areas.
3. Trim the edges (optional): If you anticipate any resin overflow during the pouring process, consider applying painter’s tape along the edges of the tabletop. This tape will help create clean edges and make the cleanup process easier.
4. Pour the resin: Slowly pour the mixed resin onto the wooden surface, starting at one end and working your way across the entire tabletop. Pour in a thin, steady stream to minimize air bubbles and ensure an even distribution of the resin.
5. Use a spreader (optional): If needed, gently spread the resin across the surface using a clean and flat spreader or a disposable brush. This technique helps ensure that the resin reaches all corners and crevices of the tabletop.
6. Pop any air bubbles: If you notice any air bubbles forming on the surface, gently run a heat gun or a kitchen torch over them. The heat will cause the bubbles to rise and disappear. Be cautious not to overheat and damage the resin or wood surface.
7. Allow the resin to settle: Leave the resin to settle for a short period, usually around 10 to 15 minutes. During this time, bubbles will continue to rise and escape naturally.
8. Check for low spots: After the settling period, inspect the resin surface for any potential low spots. If you spot any areas that need more resin, carefully pour additional resin onto those spots and use a spreader or brush to level them out.
9. Cover and protect: To prevent dust or debris from settling on the resin surface during the curing process, cover the tabletop with a clean, lightweight sheet or use a dust cover specifically designed for epoxy projects. Ensure that the cover does not touch the resin to avoid any marks or impressions.
10. Allow the resin to cure: Follow the recommended curing time provided by the epoxy resin manufacturer. It typically takes 24 to 72 hours for the resin to fully cure, but this may vary depending on the brand and room temperature. Avoid disturbing or touching the resin surface during the curing period.
By following these steps, you can successfully pour the resin infill onto the wooden tabletop, creating a smooth and visually striking surface. The resin will beautifully combine with the wood, setting the stage for the next step: adding glow-in-the-dark pigment.
When pouring the glow-in-the-dark resin infill for your wooden table, make sure to work in a well-ventilated area and wear protective gloves to avoid skin irritation.
Adding Glow-in-the-Dark Pigment
Now that you have poured the resin onto the wooden tabletop, it’s time to add the magical glow-in-the-dark pigment. This step will transform your table into a captivating centerpiece that emits a soft and enchanting glow during the dark hours. Follow these steps to incorporate the glow-in-the-dark pigment into your resin infill:
1. Choose the glow-in-the-dark pigment: Select a high-quality glow-in-the-dark pigment specifically designed for use with epoxy resin. There are various colors and intensities available, so choose the one that aligns with your vision and complements the overall aesthetic of your table.
2. Mix the pigment into the resin: Start by preparing a small amount of the mixed resin in a separate container. Add a small quantity of the glow-in-the-dark pigment to this resin, following the manufacturer’s instructions regarding pigment-to-resin ratio.
3. Stir the mixture thoroughly: Use a clean stirring stick or disposable brush to mix the pigment and resin together. Stir slowly and consistently to ensure an even distribution of the pigment throughout the resin. Avoid introducing air bubbles during the stirring process.
4. Test the glow effect: Before proceeding with the entire resin infill, it’s advisable to test the glow effect of the pigment mixture. Turn off the lights in the room or dim them to see how the pigment glows in the dark. This will provide an idea of how the final result will look.
5. Evaluate the glow intensity: If you desire a more vibrant glow, you can add more pigment to the resin and repeat the stirring process until you achieve the desired intensity. Remember to mix only a small amount at a time to ensure consistent results.
6. Pour the pigmented resin onto the table: Once you are satisfied with the glow intensity, carefully pour the pigmented resin mixture onto the wooden tabletop. Follow the same pouring techniques mentioned earlier to achieve an even and level resin surface.
7. Spread and distribute the resin: Use a spreader or a brush to spread the pigmented resin evenly across the tabletop. Ensure that the resin reaches all corners and edges, covering the entire surface.
8. Pop any air bubbles: If you notice any air bubbles forming on the surface, gently run a heat gun or a kitchen torch over them, as mentioned in the previous section. Be cautious not to overheat the resin or wood.
9. Allow the resin to cure: Once again, follow the manufacturer’s instructions regarding the curing time for the resin. As mentioned earlier, the curing process typically takes 24 to 72 hours.
With the glow-in-the-dark pigment infused into the resin, your wooden table is now ready to emit its mesmerizing glow during the darkness. The next step involves smoothing and finishing the resin surface to achieve a flawless and polished look.
Read more: How Do I Make Glow-in-the-Dark Ring Toss
Smoothing and Finishing the Resin Surface
After the glow-in-the-dark resin has cured and the tabletop is covered in its enchanting glow, it’s time to focus on smoothing and finishing the resin surface. This step will ensure that your table looks polished and professional. Follow these steps to achieve a smooth and flawless resin finish:
1. Inspect the resin surface: Carefully examine the cured resin surface for any imperfections, such as bubbles, uneven areas, or dust particles. Note any areas that require attention before proceeding.
2. Sand the resin surface: Start by using 220-grit sandpaper to gently sand the resin surface. This step helps smooth out any rough or uneven areas. Sand in a circular motion, applying even pressure. Be cautious not to oversand and remove too much resin.
3. Progress to higher grits: Once you’ve achieved a relatively smooth surface with the 220-grit sandpaper, move on to a higher grit such as 320 or 400. Continue sanding the resin surface in a circular motion to further refine it. This will help to remove any remaining scratches or inconsistencies.
4. Wet sanding (optional): For an exceptionally smooth finish, you may consider wet sanding the resin surface. Wet sanding involves using water or a lubricant, such as mineral oil or soapy water, to dampen the sandpaper. The lubricant helps prevent clogging and creates a smoother sanding experience. Wet sanding also reduces the risk of creating fine airborne dust particles.
5. Clean and dry the surface: After sanding, wipe away any residual dust or debris with a clean cloth. Ensure the surface is completely dry before proceeding to the next step.
6. Check for any missed imperfections: With the resin surface clean and dry, inspect it again for any missed imperfections or uneven areas. If necessary, repeat the sanding process or use a fine-grit sandpaper (800-grit or higher) to address any remaining issues.
7. Apply a polishing compound: To enhance the resin’s shine and bring out its inherent beauty, apply a polishing compound specifically designed for resin surfaces. Use a clean cloth or a foam pad to gently buff the resin in a circular motion. Follow the manufacturer’s instructions regarding the application and buffing process.
8. Evaluate the finish: Once the polishing is complete, step back and assess the resin surface. Look for a glossy, smooth, and mirror-like finish. If desired, you can repeat the polishing process for an even higher level of luster.
By following these steps, you can achieve a perfectly smooth and polished resin surface that will complement the beauty of your wooden table. The next step involves removing any excess resin that may have dripped or pooled during the pouring process.
Removing Excess Resin
During the pouring and curing process, it’s common for some resin to drip or pool along the edges or in unwanted areas of the wooden table. Removing this excess resin is important for achieving a clean and professional finish. Follow these steps to effectively remove any excess resin:
1. Evaluate the resin drips and pools: Carefully examine the tabletop for any areas where resin has dripped or pooled. These areas can be noticeable along the edges or in any unintended spots. Identify the excess resin that needs to be removed.
2. Gather the necessary tools: Prepare the tools you will need for removing the excess resin. These may include a chisel, scraper, or sandpaper, depending on the size and location of the resin buildup. Ensure that the tools are clean and in good condition for optimal results.
3. Remove larger resin drips: Using a chisel or scraper, gently chip away at any larger resin drips or pools. Work carefully and gradually to avoid damaging the wood surface. Be mindful not to remove any desired resin areas or nearby wood grain patterns.
4. Sand down remaining resin: Once the larger drips have been addressed, use sandpaper (120-grit or higher) to further sand down the remaining excess resin. Sand in a circular motion or back and forth, depending on the resin buildup and desired result. Take care not to sand too aggressively, as this may affect the surrounding wood.
5. Smooth the edges: Pay attention to the edges of the tabletop, where resin may have dripped or formed uneven spots. Use sandpaper or a file to gently smooth these areas, ensuring that they blend seamlessly with the rest of the resin surface.
6. Clean the tabletop: After removing the excess resin, clean the tabletop to remove any remaining resin particles or dust. Use a cloth or brush to wipe away the debris, ensuring a clean and smooth surface.
7. Inspect the tabletop: Once the excess resin is removed and the tabletop is clean, carefully inspect the surface to ensure that it appears even and cohesive. Take note of any areas that may require additional attention or touch-ups.
The removal of excess resin is an essential step in achieving a polished and professional finish for your wooden table. By carefully evaluating and addressing any resin drips or poolings, you can ensure that the final result is aesthetically pleasing and meets your expectations. The next step involves sanding and polishing the tabletop to further enhance its appearance.
Sanding and Polishing the Tabletop
After removing any excess resin and ensuring a clean surface, it’s time to focus on sanding and polishing the tabletop. This step will refine the wood and resin surface, creating a smooth and lustrous finish. Follow these steps to achieve a stunning result:
1. Start with a low grit sandpaper: Begin by using a 120-grit sandpaper to sand the entire tabletop surface. Sand with the grain of the wood in smooth, even strokes. This step helps to level any uneven areas and removes any remaining imperfections.
2. Move to a higher grit sandpaper: Once the initial sanding is complete, progress to a higher grit sandpaper, such as 220 or 320. This finer sandpaper further smooths the surface and prepares it for the polishing process.
3. Wet sanding (optional): For an extra level of smoothness, consider wet sanding the tabletop. Wet sanding involves using water or a lubricant, such as mineral oil or soapy water, to dampen the sandpaper. This lubrication helps reduce friction and create a smoother sanding experience. Remember to sand with the grain of the wood.
4. Change sandpaper frequently: As you sand, the sandpaper can become clogged with resin or wood particles, reducing its effectiveness. To ensure optimal sanding performance, change the sandpaper regularly to maintain its abrasiveness.
5. Clean the surface: After sanding, use a clean cloth or a tack cloth to remove any sanding dust or debris from the tabletop surface. Ensure the surface is completely dry before proceeding to the next step.
6. Apply a polishing compound: To enhance the tabletop’s shine and beauty, apply a polishing compound specifically designed for wood and resin surfaces. Use a clean cloth or a foam pad to gently buff the compound onto the tabletop in circular motions. Follow the manufacturer’s instructions regarding the application and buffing process.
7. Evaluate the finish: Step back and assess the tabletop’s smoothness and shine. Look for a glossy and reflective surface that showcases the natural beauty of the wood and enhances the glow-in-the-dark resin. If desired, repeat the polishing process for an even higher level of luster.
8. Final touch-ups (if needed): If you notice any remaining rough spots or imperfections, go back and spot-sand those areas using a fine-grit sandpaper. Then, reapply the polishing compound to achieve a consistent finish across the entire tabletop.
By diligently sanding and polishing the tabletop, you’ll create a smooth and visually appealing surface that showcases the beauty of the wood while enhancing the luminescent glow of the resin. The next step involves applying a protective finish to ensure the longevity and durability of your wooden table.
Applying a Protective Finish
To ensure the longevity and durability of your stunning wooden table with a glow-in-the-dark resin infill, it’s crucial to apply a protective finish. This finish will not only shield the wood and resin from wear and tear but also enhance their natural beauty. Follow these steps to apply a protective finish to your table:
1. Choose the appropriate finish: There are various options for protective finishes, including varnish, polyurethane, or an oil-based finish. Consider the level of shine and protection you desire, as well as the specific product recommendations for resin and wood surfaces.
2. Prepare the workspace: Set up a clean and well-ventilated area for applying the finish. Make sure you have adequate lighting and protection for both yourself and the surrounding environment.
3. Sand the tabletop (optional): If you want to further improve the smoothness of the surface, you can lightly sand the tabletop with a higher grit sandpaper (around 400 or 600) in between the previous step and applying the protective finish. This step helps to create an even smoother surface for the finish to adhere to.
4. Stir or shake the finish: Open the protective finish container and stir or shake it gently according to the manufacturer’s instructions. This ensures that the finish is thoroughly mixed and ready for application.
5. Apply the finish: Using a clean brush or a lint-free cloth, apply a thin and even coat of the finish onto the wooden tabletop, including the resin surface. Follow the wood grain and work systematically to cover the entire surface.
6. Allow the finish to dry: Refer to the manufacturer’s instructions for the recommended drying time. It’s essential to let the finish dry completely between coats to achieve the best results. Keep the tabletop in a dust-free area to prevent any particles from settling on the wet finish.
7. Lightly sand between coats (optional): If desired, you can lightly sand the surface with a very fine grit sandpaper (around 800 or 1000) between coats. This step helps to smooth out any imperfections, bubbles, or debris that may have settled onto the surface during the drying process. Remember to remove any sanding dust before applying subsequent coats.
8. Repeat the application: Apply additional coats of the protective finish as needed, ensuring that each coat is even and smooth. Aim for at least two to three coats, or follow the manufacturer’s recommendations for the specific product you are using.
9. Allow the final coat to cure: Once the final coat has been applied, allow the protective finish to cure fully according to the manufacturer’s instructions. This ensures that it hardens and provides optimal protection for your wooden table.
The application of a protective finish helps to seal and protect the wood and resin, guarding against scratches, moisture, and UV damage. It also enhances the natural beauty of the materials, giving your table a polished and professional appearance. The final step involves adding any desired final touches and completing the cleanup process.
Read more: How To Make Resin Car Coasters
Final Touches and Cleanup
As you near the completion of your stunning wooden table with a glow-in-the-dark resin infill, it’s time to add the final touches and complete the cleanup process. These steps will ensure that your table is truly ready to be showcased in its full glory. Follow these final steps for a polished and finished result:
1. Inspect the table: Take the time to carefully inspect the tabletop, paying attention to details and areas that may need touch-ups. Look for any rough spots, drips, or imperfections that may have been missed during the previous steps.
2. Touch-up any imperfections: If you notice any flaws or areas that require attention, gently sand the affected spots with a fine-grit sandpaper. Feather the edges to merge seamlessly with the surrounding areas. Once smoothed, reapply the protective finish and allow it to dry per the manufacturer’s instructions.
3. Clean up the workspace: Dispose of any used brushes, sandpaper, and other materials responsibly. Remove the protective coverings from your workspace and carefully clean up any residual dust or debris.
4. Properly dispose of waste materials: Follow local regulations and recommendations for disposing of any waste materials from the project, such as used resin containers or sanding dust. Ensure that you dispose of them in an environmentally friendly manner.
5. Organize your tools and materials: Put away your tools and materials in their designated places. This will help maintain a neat and organized workspace for future projects.
6. Showcase and enjoy your table: Once all the final touches and clean-up are complete, proudly display your stunning wooden table in its designated spot. Turn off the lights and watch as the glow-in-the-dark resin illuminates the surroundings, creating an enchanting atmosphere.
7. Maintain and care for your table: To ensure the longevity of your wooden table, follow the care instructions recommended for the specific protective finish you used. Regularly clean the surface with a soft, damp cloth and avoid placing hot objects directly on the table to prevent damage to the resin or wood.
By paying attention to the final touches and completing the cleanup process, your stunning wooden table with a glow-in-the-dark resin infill will be ready to be admired and cherished. Take pride in your creation and enjoy the beauty it brings to your space.
Conclusion
Congratulations on creating your stunning wooden table with a captivating glow-in-the-dark resin infill! This unique and mesmerizing piece of furniture adds a touch of magic and elegance to any space. By following the step-by-step process outlined in this guide, you have successfully combined your woodworking skills with the fascinating world of resin art.
Throughout this journey, you have learned about the essential materials and tools needed for the project. From selecting the perfect wood slab to mixing the epoxy resin and adding glow-in-the-dark pigment, each step has contributed to the creation of a truly remarkable table.
The preparation stage ensured that your workspace was ready for the construction process, and the careful building of the wooden table provided a solid foundation for the resin infill. Pouring the resin allowed you to witness the transformation of the tabletop, as it became a radiant canvas illuminated by the glow-in-the-dark pigment.
You then dedicated attention to perfection by smoothing and finishing the resin surface, followed by removing any excess resin for a clean and polished result. The application of a protective finish guarantees a long-lasting and durable piece that will showcase the beauty of the wood and resin for years to come.
Finally, with the completion of final touches and cleanup, your table is ready to be proudly displayed and enjoyed. Its enchanting glow will create a captivating ambiance, transforming any space into a place of wonder and beauty.
Remember to care for your wooden table by following the maintenance instructions for the specific protective finish you applied. Regular cleaning and proper handling will preserve its luster and ensure it remains a treasured piece for generations.
So, sit back and bask in the accomplishment of creating a stunning wooden table with a glow-in-the-dark resin infill. Your craftsmanship and attention to detail have produced a unique and captivating piece that will undoubtedly be a conversation starter and a source of admiration.
Enjoy the beauty and magic your table brings and continue exploring new creative projects to further enhance your woodworking skills. Let your imagination run wild as you unleash your creativity in the world of resin and woodworking. Happy crafting!
Frequently Asked Questions about How To Make A Stunning Wooden Table With Glow-In-The-Dark Resin Infill
Was this page helpful?
At Storables.com, we guarantee accurate and reliable information. Our content, validated by Expert Board Contributors, is crafted following stringent Editorial Policies. We're committed to providing you with well-researched, expert-backed insights for all your informational needs.











0 thoughts on “How To Make A Stunning Wooden Table With Glow-In-The-Dark Resin Infill”