Furniture
How To Make A Resin Lamp
Modified: January 18, 2024
Learn how to make a stunning resin lamp with this step-by-step tutorial. Add a touch of creativity to your furniture collection with this unique DIY project.
(Many of the links in this article redirect to a specific reviewed product. Your purchase of these products through affiliate links helps to generate commission for Storables.com, at no extra cost. Learn more)
Introduction
Welcome to the world of DIY resin lamps! If you’re looking to add a touch of uniqueness and creativity to your home decor, making a resin lamp is a fantastic project to embark on. Resin lamps are not only stylish and modern, but they also give you the freedom to design and customize your own lighting fixture.
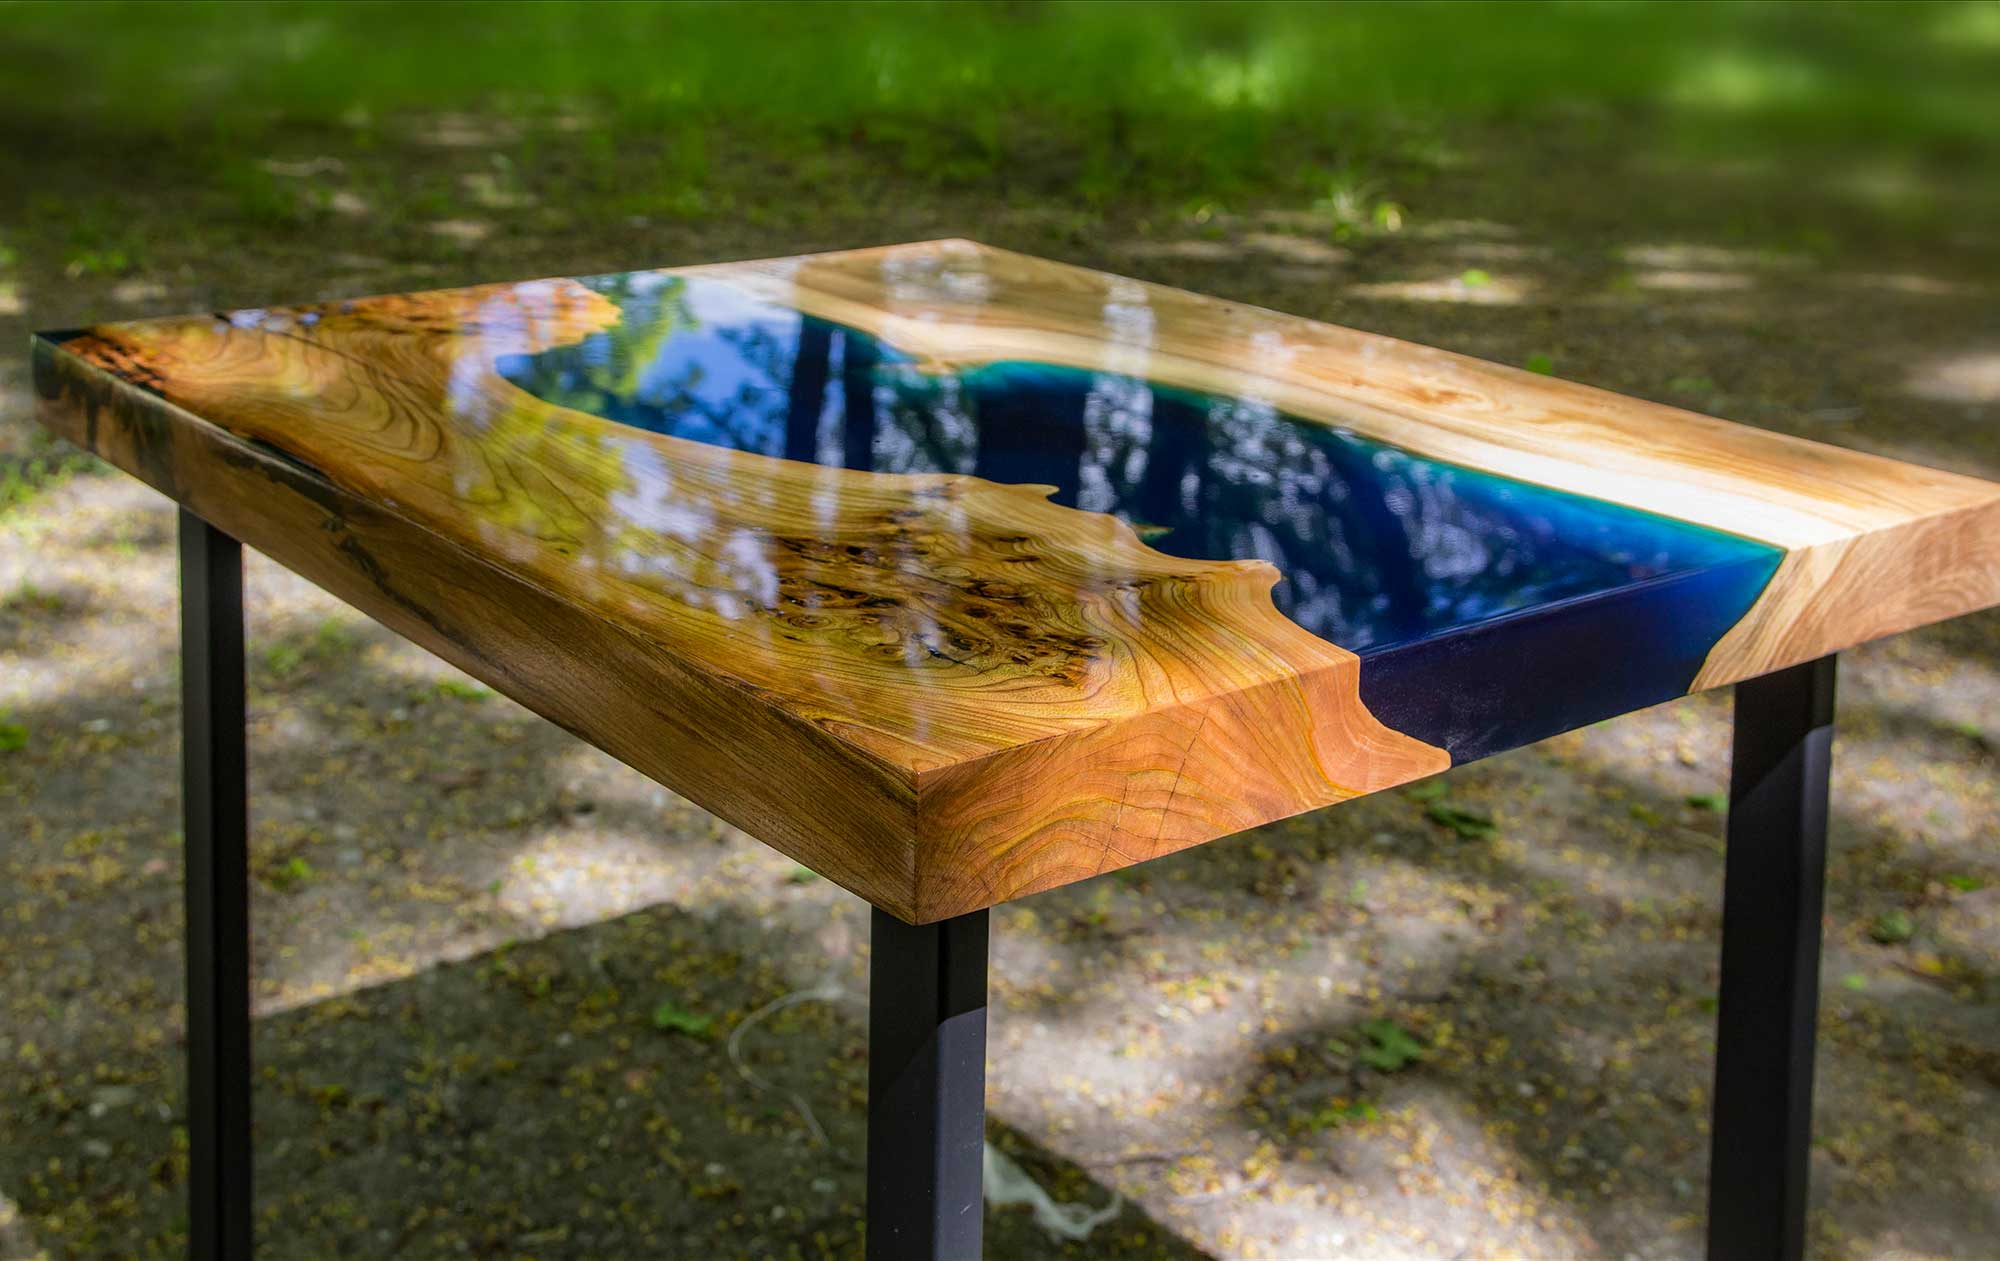
Resin is a versatile material that can be shaped, colored, and molded into a wide array of designs. It offers endless possibilities for creating one-of-a-kind lamps that reflect your personal style. Whether you prefer a minimalist and sleek design or a vibrant and eclectic look, resin lamps can be customized to suit your taste.
In this article, we will guide you through the step-by-step process of making a resin lamp. From preparing the lamp base to adding color or design, curing the resin, and assembling the lamp, we’ll cover everything you need to know to create your own stunning piece of functional art.
Before we dive into the process, let’s take a look at the materials you’ll need to gather for this project.
Key Takeaways:
- Unleash Your Creativity: Making a resin lamp allows you to customize and personalize your lighting fixture, adding a unique touch to your home decor while reflecting your personal style.
- Functional Art at Home: With the right materials and techniques, you can transform resin into a stunning and functional lamp, adding a touch of modern elegance to your living space.
Read more: How To Make A Resin Coffee Table
Materials Needed
Before you start making your resin lamp, make sure you have the following materials ready:
- Resin: Choose a high-quality, transparent epoxy resin suitable for casting. You can find resin specifically made for lamps at craft stores or online.
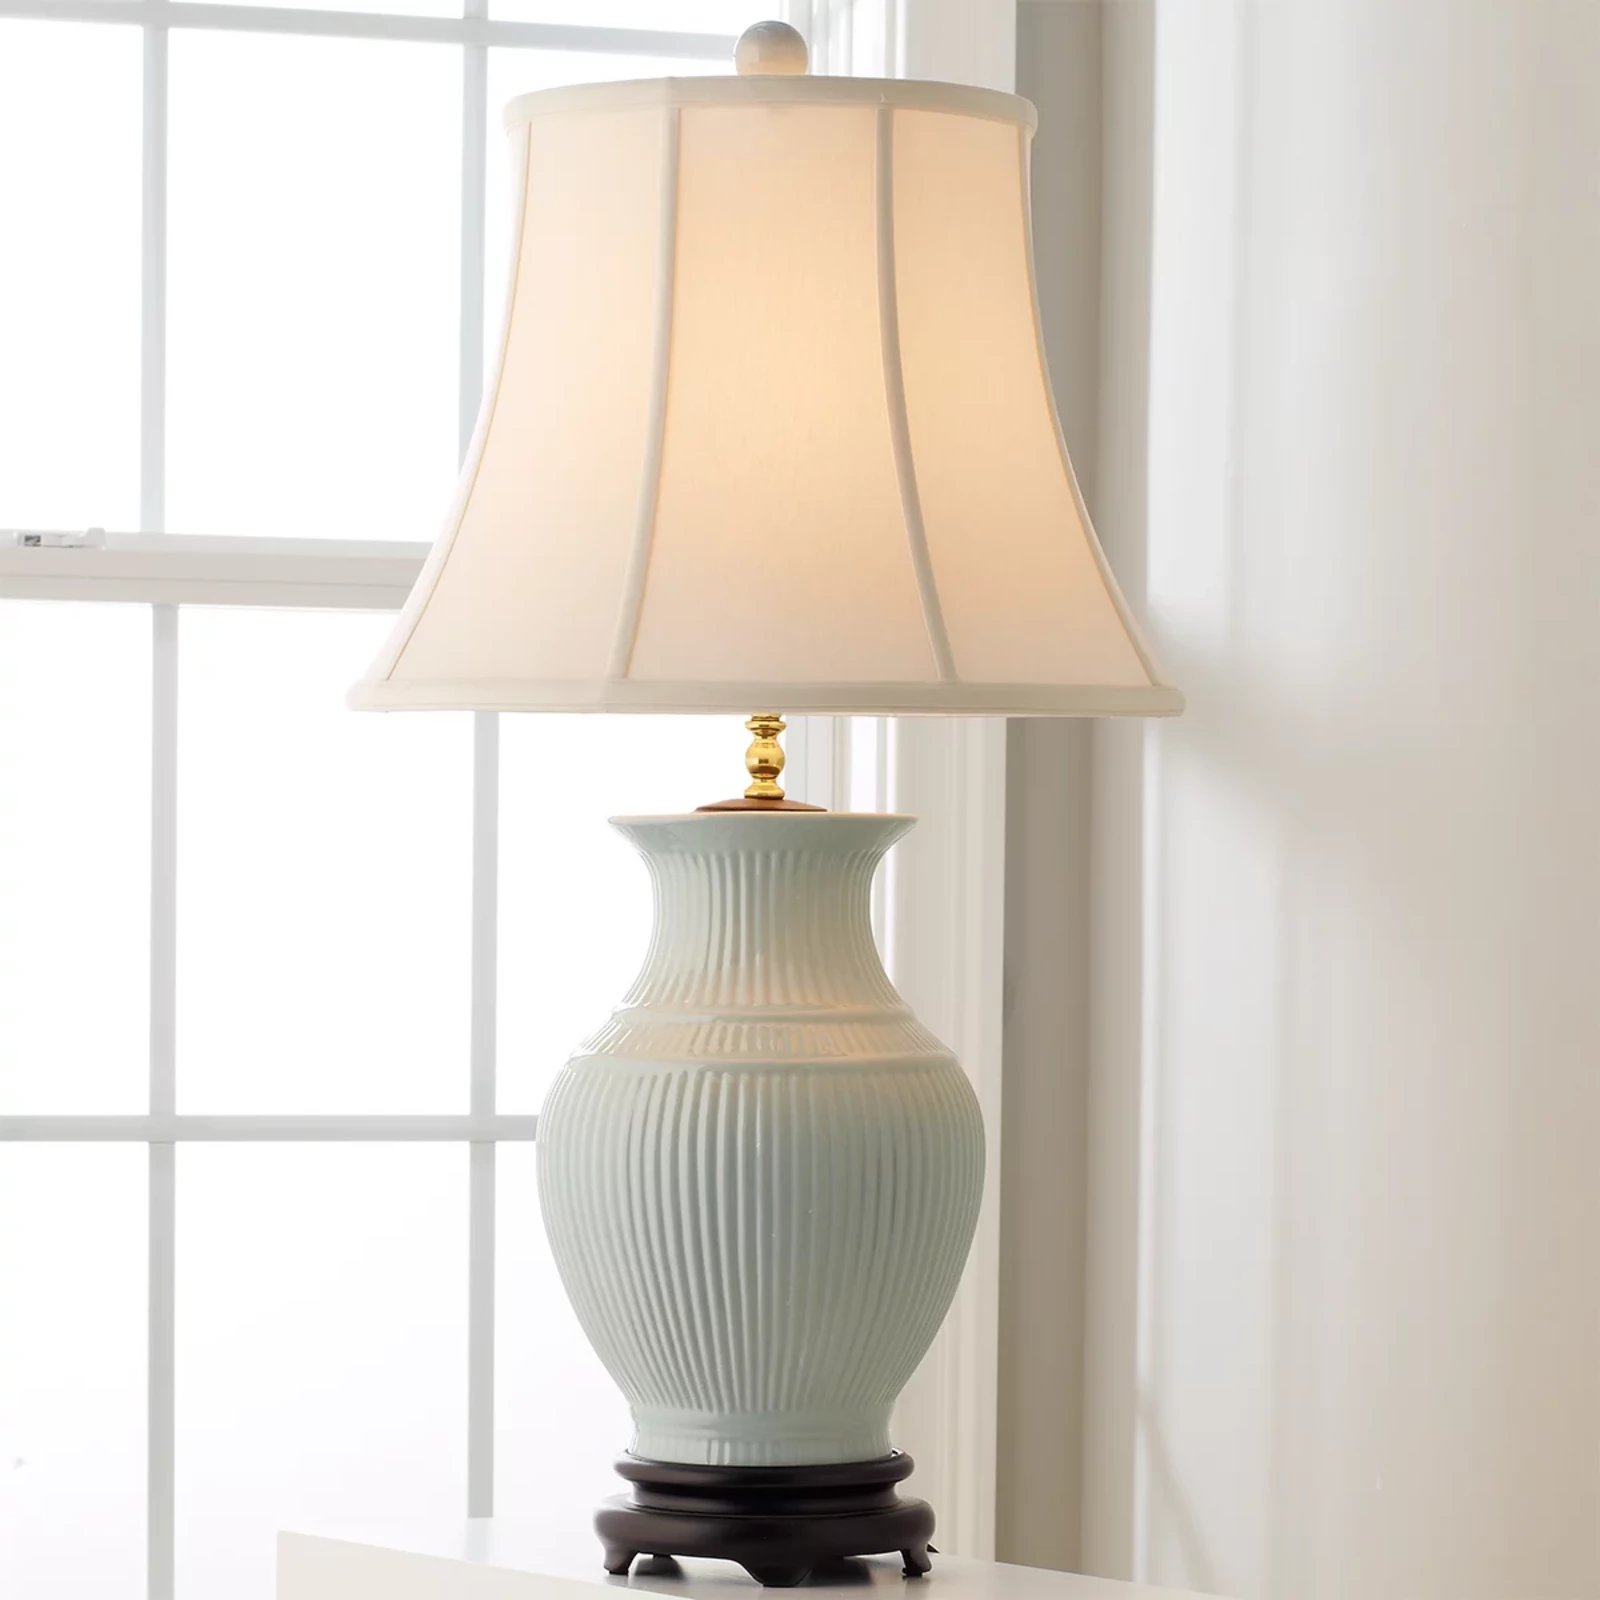
- Lamp Base: This can be a pre-made lamp base or an existing one that you want to repurpose. Consider the size and style of the base to ensure it complements your lamp design.
- Mold: Select a mold that matches the shape and size you want for your lamp. There are various options available, including silicone molds, plastic molds, or DIY molds made from cardboard or other materials.
- Mixing Tools: You’ll need disposable cups or containers for measuring and mixing the resin. Use plastic or silicone spatulas or stir sticks for mixing.
- Colorants: If you want to add color to your resin lamp, consider using resin dyes, pigments, or even alcohol inks. Choose colors that complement your desired aesthetic.
- Protective Gear: For your safety, wear gloves and a mask when working with resin to avoid skin contact and inhalation of fumes.
- Release Agent: To ensure easy removal of the resin from the mold, apply a release agent such as spray-on mold release or a thin layer of petroleum jelly.
- Lighting Fixture: Don’t forget to purchase a lamp kit that includes a socket, cord, and plug. You can find these at hardware stores or online.
- Other Tools: Prepare a heat gun or torch for eliminating air bubbles, sandpaper for smoothing the surface, and a drill if you need to make any holes in the lamp base.
Having all these materials ready will help you work efficiently and ensure a smooth resin lamp-making process. Now that you have everything prepared, let’s move on to the first step: preparing the lamp base.
Step 1: Preparing the Lamp Base
Before you can start pouring resin, it’s important to prepare your lamp base. This step involves cleaning and prepping the base to ensure a smooth surface for the resin to adhere to.
Here’s how you can prepare your lamp base:
- Remove any existing elements: If you’re repurposing an old lamp, dismantle the lampshade, socket, and any other components attached to the base.
- Clean the base: Thoroughly clean the lamp base using soap and water. Remove any dirt, dust, or residue that may hinder resin adhesion.
- Sand the surface: Use sandpaper to roughen the surface of the lamp base. This will create a better bond between the resin and the base, ensuring it adheres properly.
- Wipe off dust: After sanding, wipe off any dust or debris from the lamp base using a clean cloth.
- Protect the socket and cord: If your lamp has an exposed socket or electrical cord, cover them with masking tape to prevent resin from getting on them.
Taking the time to properly prepare the lamp base will help ensure a successful resin pour and a beautiful end result. Once your lamp base is prepped and ready, it’s time to move on to the next step: mixing the resin.
Step 2: Mixing the Resin
Now that your lamp base is prepared, it’s time to mix the resin. Properly measuring and mixing the resin is crucial to achieve a smooth and consistent pour. Follow these steps to mix the resin effectively:
- Read the instructions: Carefully read the instructions provided with your specific resin brand. The resin-to-hardener ratio and mixing time may vary depending on the product.
- Prepare a clean workspace: Find a well-ventilated area with a level surface to work on. Cover your workspace with a plastic sheet or wax paper to catch any spills.
- Wear protective gear: Put on gloves and a mask to protect yourself from resin fumes and potential skin irritations.
- Pour resin and hardener: Measure the resin and hardener according to the instructions. Pour the predetermined amounts into separate disposable cups. Be precise with measurements to ensure proper curing.
- Mix slowly and thoroughly: Use a clean stir stick or spatula to mix the resin and hardener together. Stir slowly and steadily, scraping the sides and bottom of the cup, to ensure complete incorporation.
- Avoid introducing air bubbles: Minimize stirring vigorously, as this can introduce air bubbles into the resin mixture. Gently fold the mixture until the resin and hardener are fully blended.
Remember to follow the recommended mixing time specified by the resin manufacturer. Mixing for too short or too long can affect the curing process and the final outcome of your lamp.
Once your resin mixture is properly blended, it’s time to move on to the next step: pouring the resin into the mold.
Step 3: Pouring the Resin
With the resin mixture ready, it’s time to pour it into the mold. This step requires precision and finesse to ensure a smooth and even distribution of resin. Follow these steps to pour the resin correctly:
- Prepare the mold: Place your prepared mold on a flat surface and ensure it is clean and free from any dust or debris.
- Apply a release agent: To make it easier to release the cured resin from the mold later, apply a thin layer of a release agent such as spray-on mold release or petroleum jelly.
- Start pouring: Slowly pour the resin mixture into the mold, starting from one corner or edge. Avoid pouring too quickly to prevent overflow or air bubbles forming.
- Distribute evenly: As you pour, gently tilt the mold back and forth or use a stirring stick to ensure the resin spreads evenly and reaches all corners of the mold.
- Fill to the desired level: Pour the resin until it reaches the desired depth, keeping in mind any additional design elements or objects you plan to embed in the resin.
Take your time while pouring the resin to achieve a seamless and professional-looking result. If you’re adding any decorative elements, make sure to place them strategically into the resin after pouring but before it starts to cure.
Once you have poured the resin and added any desired design elements, move on to the next step: removing air bubbles.
When working with resin, make sure to work in a well-ventilated area and wear gloves to protect your skin. It’s also important to carefully follow the manufacturer’s instructions for mixing and curing the resin.
Read more: How To Make Flower Resin Coasters
Step 4: Adding Color or Design
Adding color or design to your resin lamp can elevate its aesthetic appeal and make it truly unique. This step allows you to unleash your creativity and personalize your lamp to match your style. Here are some ideas for adding color or design elements to your resin lamp:
- Resin Dyes: Use resin dyes specifically formulated for coloring epoxy resin. These dyes come in a variety of vibrant colors and can be mixed to create custom shades. Add a few drops of dye to the resin mixture and stir thoroughly until the color is evenly distributed.
- Pigments: Powdered pigments can be used to add color to resin. They offer a wider range of colors and effects, such as metallic or pearlescent finishes. Mix the desired pigment into the resin mixture, following the manufacturer’s instructions.
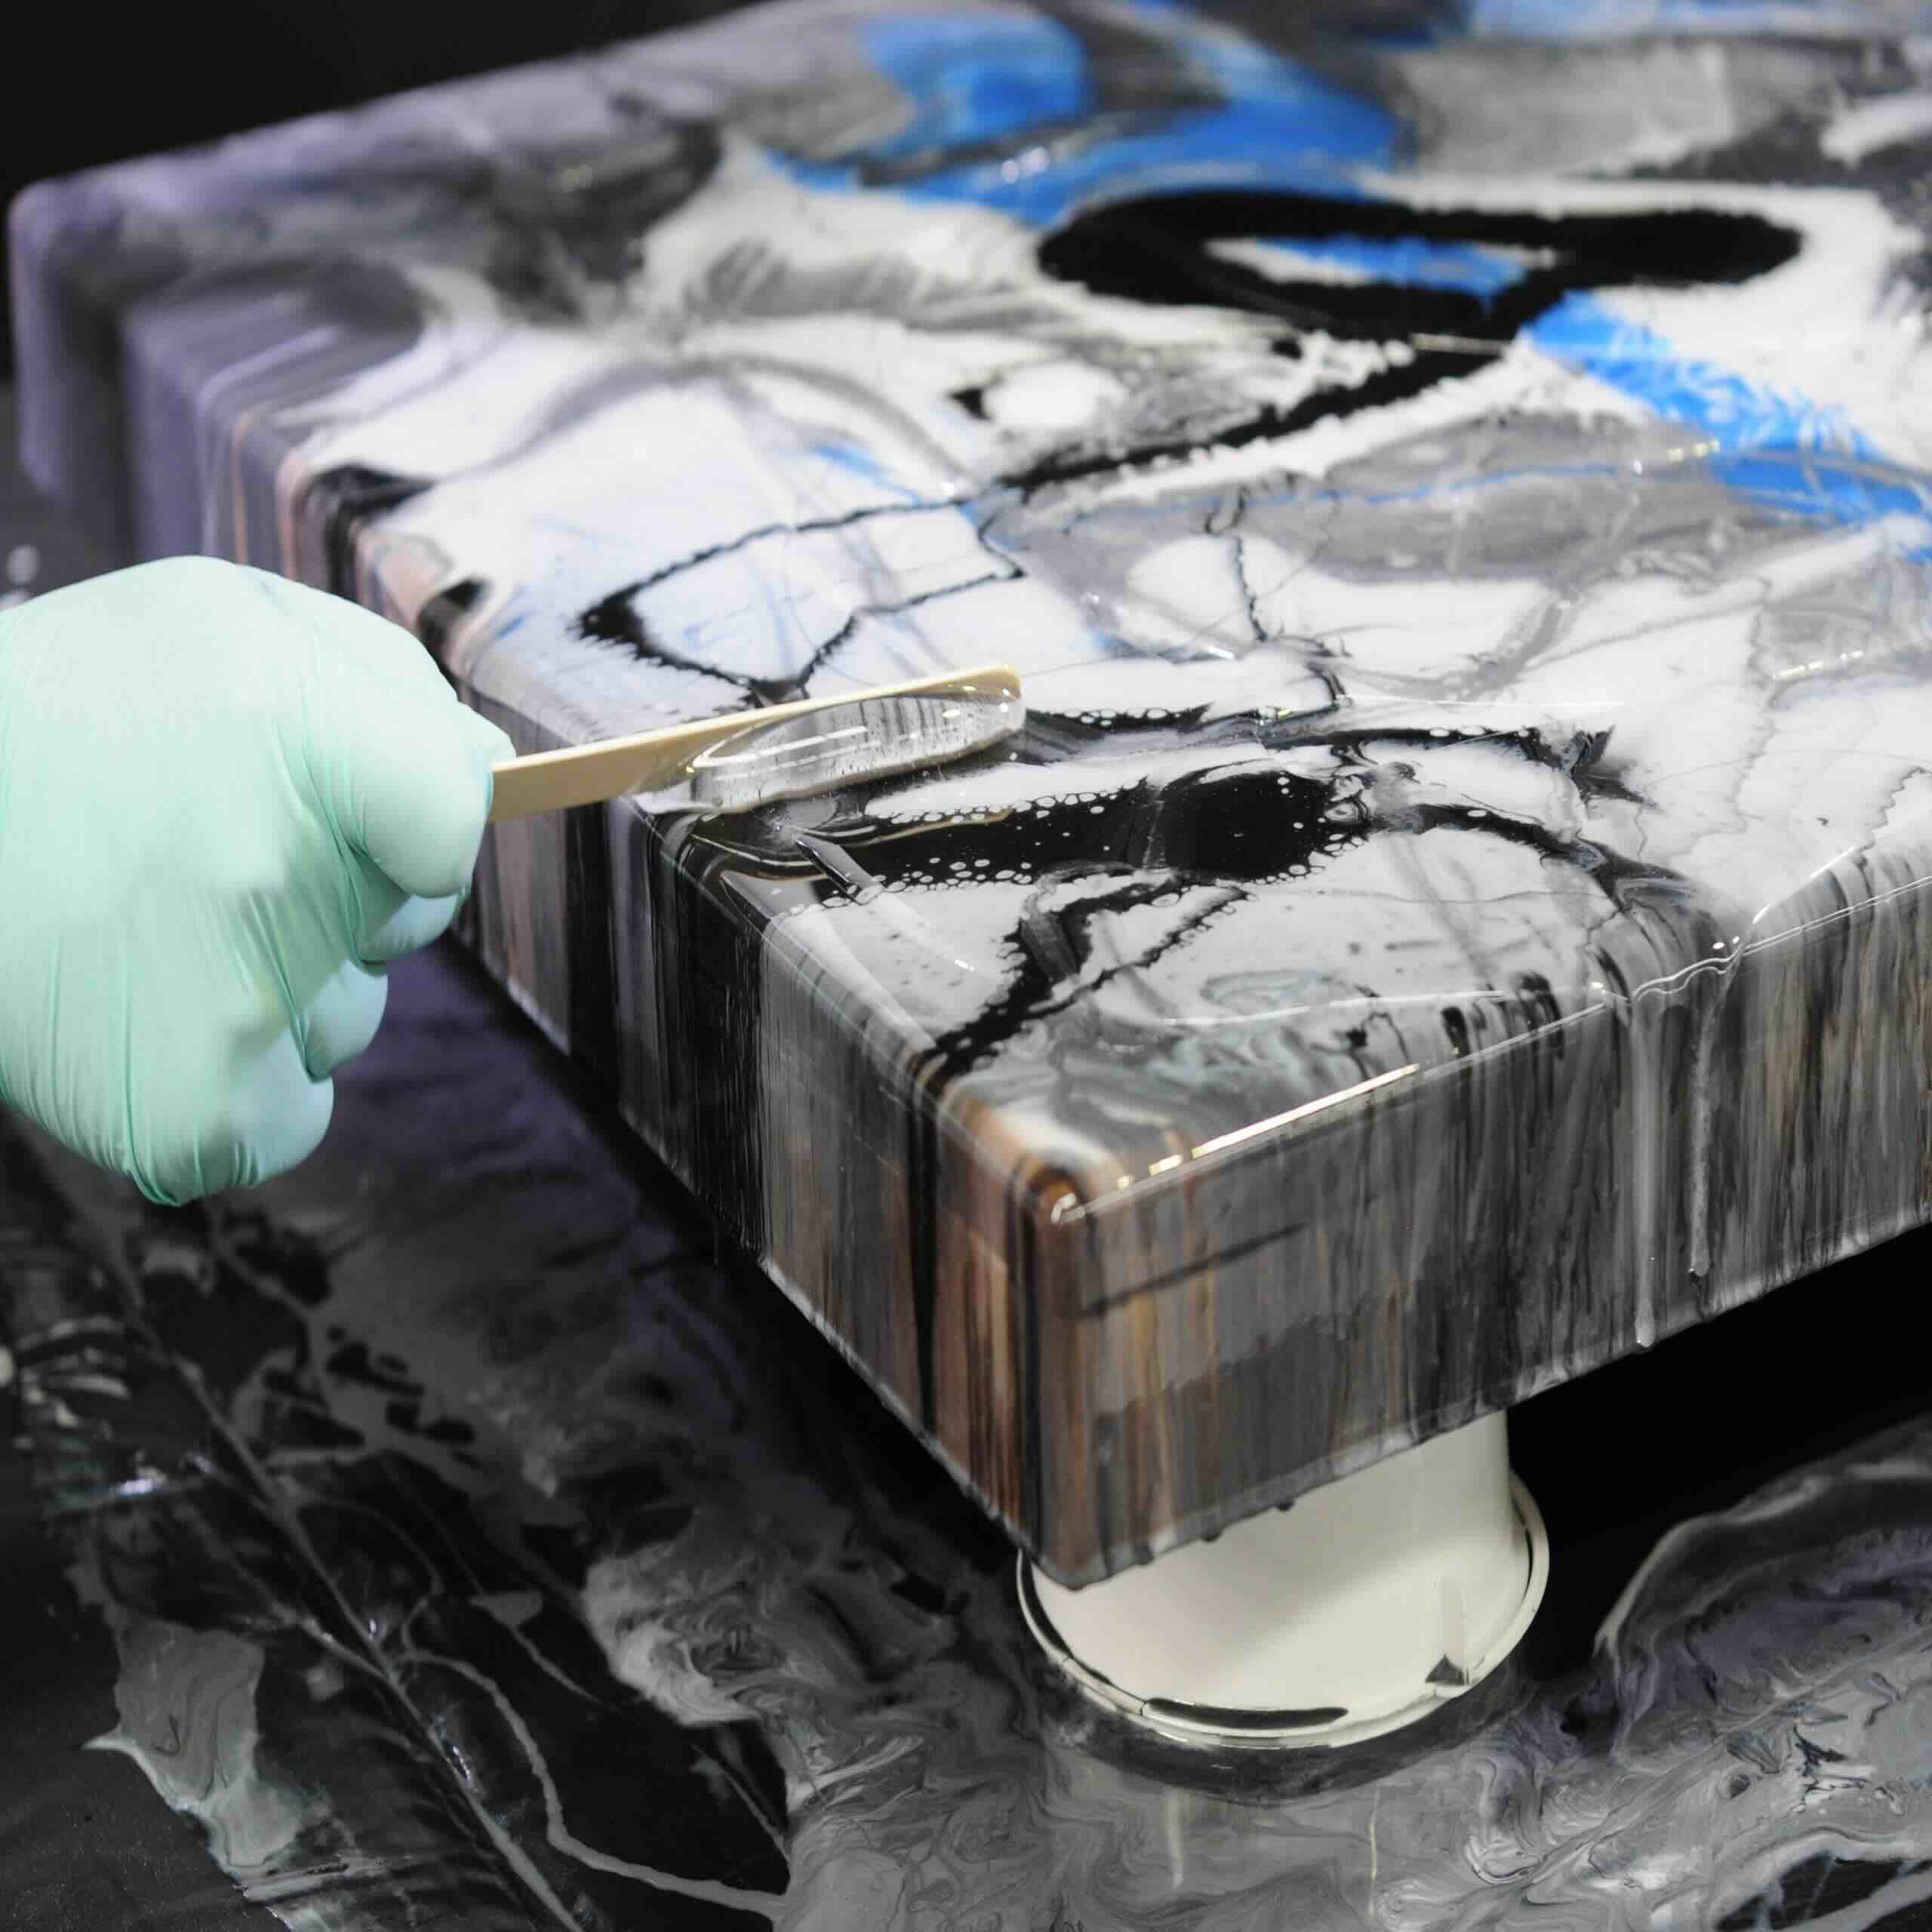
- Alcohol Inks: Alcohol inks are another popular choice for adding vibrant colors and unique designs to resin. These inks are highly pigmented and can create mesmerizing effects when applied to the surface of the resin. Use a brush or dropper to apply the alcohol ink onto the partially cured resin and manipulate it to create desired patterns.
- Mica Powders: Mica powders are finely ground minerals that add shimmer and a metallic sheen to resin. Sprinkle mica powders onto the resin surface or mix them into the resin mixture for a subtle or dramatic effect.
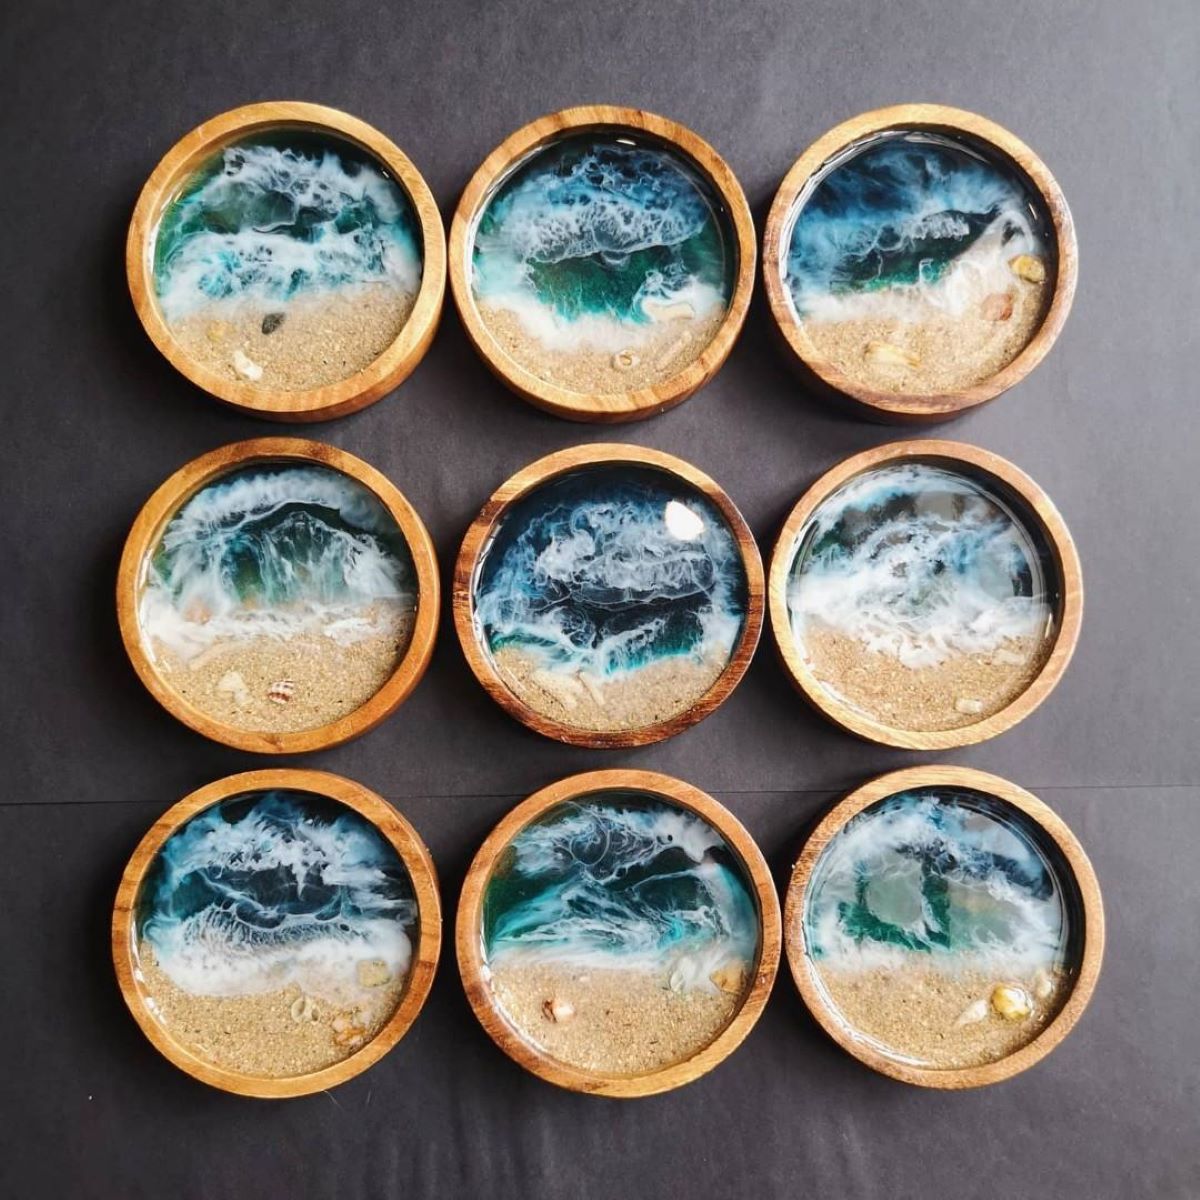
- Embedding Objects: Consider adding small objects or elements to your resin lamp. This could be dried flowers, leaves, shells, or even tiny trinkets. Arrange them on the resin surface or partially bury them within the resin to create visually interesting focal points.
Experiment with different colors, techniques, and design elements to create a resin lamp that reflects your personal style and complements your home decor. Once you’re satisfied with the color or design, move on to the next step: removing air bubbles.
Step 5: Removing Air Bubbles
While pouring resin, air bubbles can get trapped in the mixture, which can affect the overall appearance of your lamp. Removing these air bubbles ensures a crystal-clear and flawless resin surface. Follow these steps to eliminate air bubbles from your resin lamp:
- Use a heat gun or torch: Pass a heat gun or torch gently over the resin surface in a sweeping motion to apply heat. The heat helps to burst the air bubbles by causing the resin to warm and release trapped air. Be mindful not to overheat or stay in one area for too long to prevent damage or discoloration of the resin.
- Use a toothpick or stir stick: Carefully insert a toothpick or a stir stick into the resin to agitate any visible air bubbles. This helps release the trapped air, allowing it to rise to the surface. Be cautious not to disturb the resin too much, as it may affect the overall design.
- Tap the mold: Gently tap the sides of the mold with a soft mallet or your hand. This can help dislodge any stubborn bubbles and encourage them to rise to the surface.
- Wait for natural releasing: Sometimes, air bubbles will naturally rise and release on their own as the resin cures. Leave the mold undisturbed for a short period, allowing the bubbles to escape naturally.
Removing air bubbles is a crucial step for achieving a smooth and professional-looking resin lamp. Take the time to carefully eliminate any bubbles to ensure a flawless end result. Once the air bubbles are addressed, move on to the next step: curing the resin.
Step 6: Curing the Resin
After pouring and removing air bubbles from your resin lamp, it’s time to let the resin cure. Curing is the process of allowing the resin to harden and fully set, ensuring it becomes durable and stable. Follow these steps to properly cure your resin lamp:
- Refer to the manufacturer’s instructions: Different epoxy resins require different curing times and conditions. Consult the instructions provided by the resin manufacturer to determine the optimal curing time for your specific product.
- Allow sufficient time: Generally, epoxy resins take anywhere from 24 to 72 hours to fully cure. During this time, it’s important to keep the lamp undisturbed and in a controlled environment, free from dust, moisture, and extreme temperature changes.
- Protect from UV exposure: If your resin lamp is exposed to sunlight during the curing process, it may cause the resin to yellow or discolor. To prevent this, cover the lamp with a box or place it in a shaded area away from direct sunlight.
- Check for complete curing: After the recommended curing time has passed, carefully touch the resin surface to check for any sticky or tacky areas. If the surface is still tacky, it may require additional curing time. However, if it feels completely hardened and smooth, the resin is cured.
Properly curing the resin ensures that your lamp becomes strong and durable, able to withstand regular use. Once the resin is fully cured, you can move on to the final step: assembling the lamp.
Step 7: Assembling the Lamp
Now that your resin has cured and hardened, it’s time to assemble your lamp and bring it to life. Follow these steps to complete the assembly process:
- Remove the resin from the mold: Carefully peel or flex the mold to release the cured resin from the mold. If needed, use a release agent or gentle twisting motion to help loosen the resin.
- Inspect and clean the resin: Once the resin is out of the mold, inspect it for any imperfections or rough edges. Use sandpaper or a file to smooth out any uneven areas and clean the resin surface using a soft cloth.
- Prepare the lamp kit: Unpack the lamp kit and familiarize yourself with its components, including the socket, cord, plug, and any necessary hardware. Follow the instructions provided with the kit to ensure proper assembly.
- Attach the socket: Depending on the design of your lamp base, you may need to drill a hole to accommodate the socket. Insert the socket into the drilled hole and secure it in place using the hardware provided.
- Thread the cord: Carefully thread the lamp cord through the socket and the lamp base. Follow the instructions provided with the lamp kit to properly route the cord and ensure a secure connection to the socket.
- Secure the lampshade: If you are using a lampshade, attach it to the top of the lamp base following the instructions provided with the lampshade and any additional hardware required.
- Test the lamp: Plug in the lamp and switch it on to ensure that all the electrical connections are functioning properly. If the lamp does not turn on, double-check the wiring and connections.
- Final adjustments: Make any final adjustments to the lampshade, cord, or socket to ensure everything is aligned and secure.
Once you have successfully assembled your resin lamp, place it in your desired location and enjoy the unique beauty and ambiance it adds to your space. Remember to exercise caution and always follow proper electrical safety procedures when using your newly created lamp.
Congratulations! You have completed the process of making a resin lamp from start to finish. With your newfound knowledge and skills, feel free to experiment with different designs, colors, and techniques to create more resin lamps that reflect your creativity and personal style.
Remember to have fun and embrace the artistic possibilities that resin lamp-making offers. Happy crafting!
Read more: What Wattage Should A UV Lamp For Resin Be
Conclusion
Making a resin lamp is a fulfilling and rewarding DIY project that allows you to unleash your creativity and create a unique piece of functional art. With the versatility of resin and the wide range of design options available, you can create lamps that perfectly fit your personal style and complement your home decor.
We started the process by preparing the lamp base, ensuring it was clean and properly sanded to provide a suitable surface for the resin. Then, we moved on to mixing the resin, carefully following the manufacturer’s instructions to achieve the correct resin-to-hardener ratio.
Once the resin was mixed, we poured it into the mold, taking care to distribute it evenly and avoid any air bubbles. Adding color or design elements allowed us to customize our resin lamp, whether through resin dyes, pigments, alcohol inks, or embedded objects.
Removing air bubbles from the resin surface was an essential step in ensuring a smooth and flawless end result. We used techniques such as heat, toothpicks, or gently tapping the mold to eliminate any trapped air.
After the resin cured and hardened, we assembled the lamp using a lamp kit, attaching the socket, threading the cord, and securing the lampshade. Finally, we tested the lamp to ensure all electrical connections were functioning correctly.
By following these steps, you have successfully created your own resin lamp, a beautiful and unique addition to your home decor. The possibilities for resin lamp designs are endless, so feel free to experiment and let your creativity soar.
Remember to always prioritize safety by wearing protective gear and following proper handling procedures when working with resin. Take your time throughout the process and enjoy the journey of turning resin into a functional work of art.
We hope this guide has inspired you to embark on your resin lamp-making journey. Now, it’s time for you to illuminate your space with your own creatively crafted resin lamp. Happy crafting!
Frequently Asked Questions about How To Make A Resin Lamp
Was this page helpful?
At Storables.com, we guarantee accurate and reliable information. Our content, validated by Expert Board Contributors, is crafted following stringent Editorial Policies. We're committed to providing you with well-researched, expert-backed insights for all your informational needs.