Home>Garden Essentials>How To Make A Vertical Garden Pallets
Garden Essentials
How To Make A Vertical Garden Pallets
Modified: March 15, 2024
Learn how to create a stunning vertical garden using pallets. Discover step-by-step instructions and expert tips for transforming your garden space.
(Many of the links in this article redirect to a specific reviewed product. Your purchase of these products through affiliate links helps to generate commission for Storables.com, at no extra cost. Learn more)
Introduction
Welcome to our comprehensive guide on how to make a vertical garden using pallets. Vertical gardening has become increasingly popular in recent years, as it allows you to maximize your garden space and create a stunning display of plants and flowers. By utilizing pallets, which are readily available and can be repurposed, you can create a functional and visually appealing vertical garden without breaking the bank.
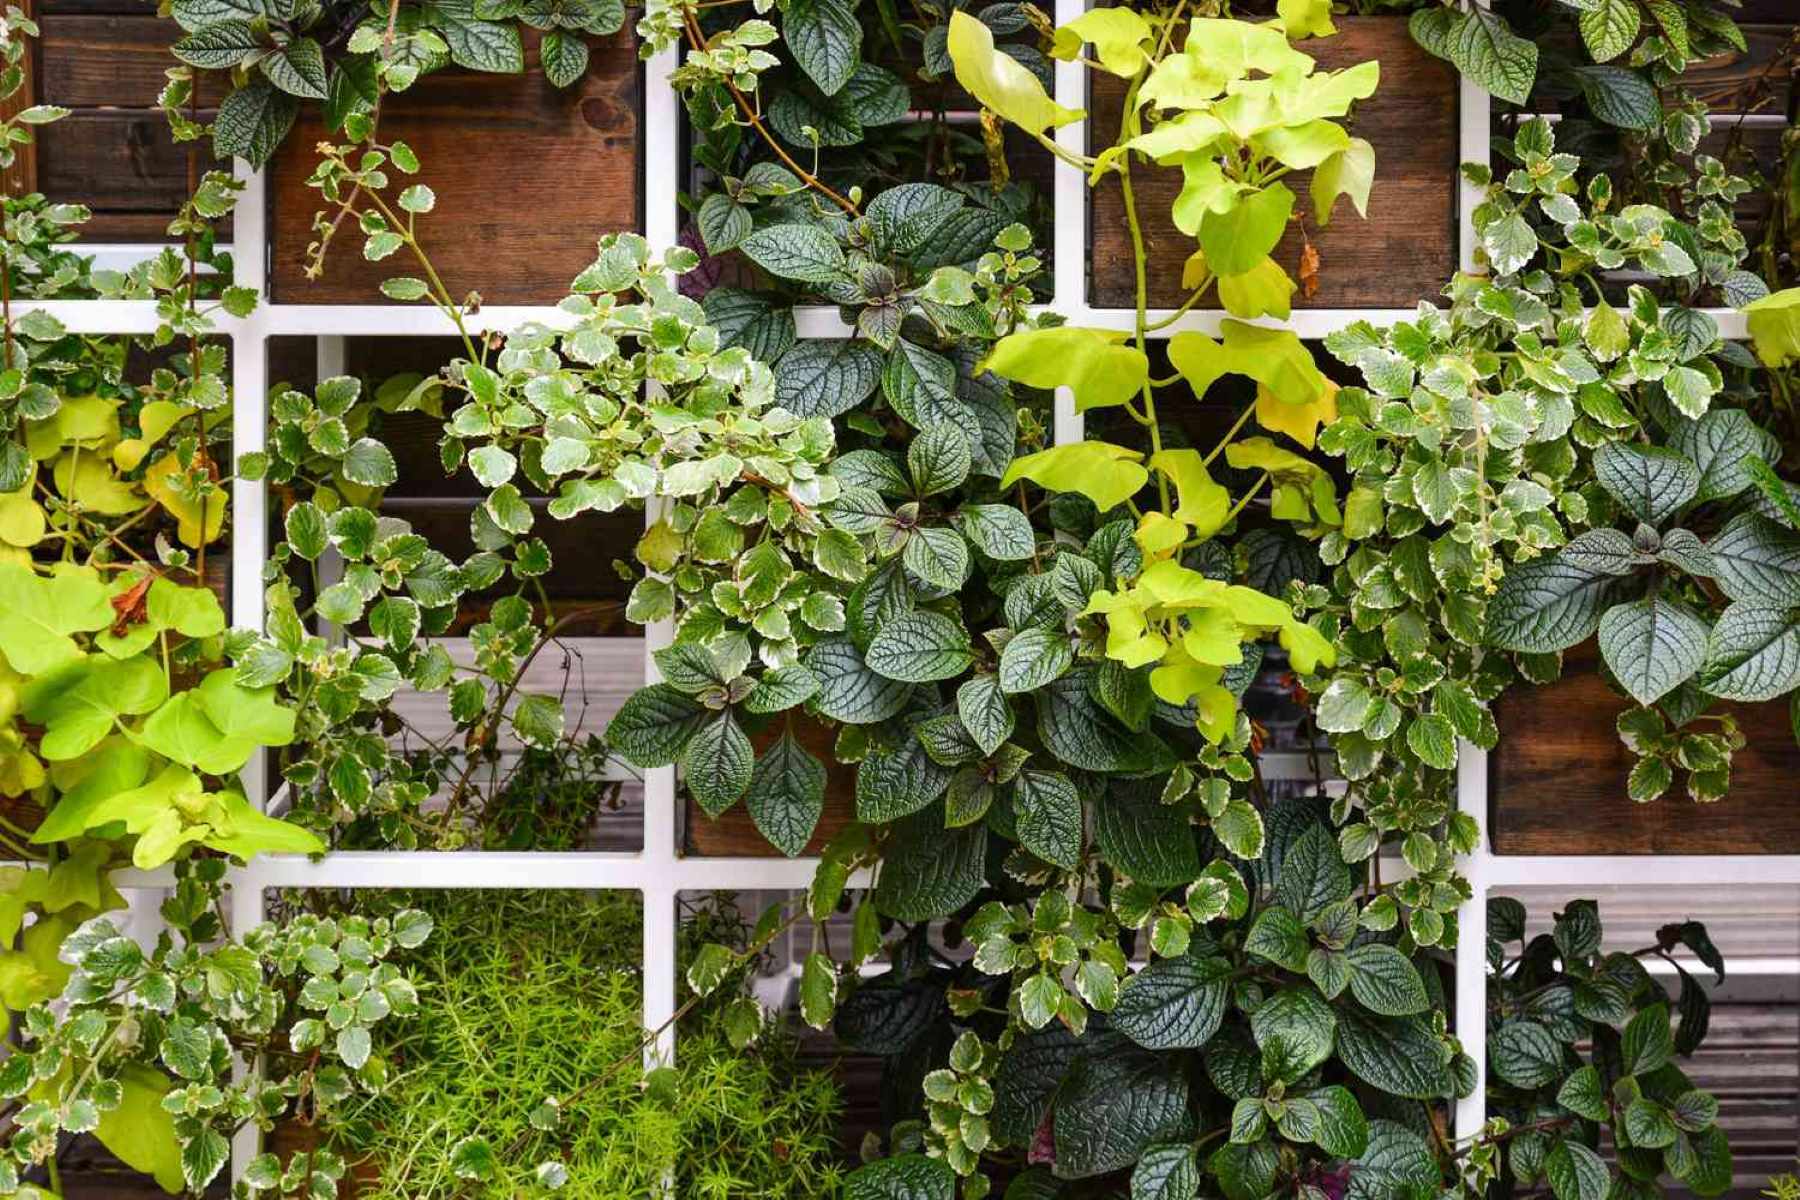
Vertical gardens are a fantastic solution for those with limited space, whether you have a small backyard, a balcony, or even a vertical wall. Not only do they add a touch of greenery to your living space, but they also provide numerous benefits such as improved air quality, reduced heat and noise, and enhanced well-being.
In this guide, we will walk you through the step-by-step process of creating a vertical garden using pallets. We will discuss the materials needed, the preparation of the pallet, the construction of planting pockets, and the mounting of the vertical garden. By following these instructions, you’ll be able to transform a simple pallet into a beautiful vertical garden that will be the envy of your neighbors.
Whether you’re a seasoned gardener or a beginner, this guide is suitable for everyone. So, let’s dive in and bring your gardening dreams to life!
Key Takeaways:
- Transform a simple pallet into a stunning vertical garden by following easy steps. Enjoy the benefits of gardening in limited spaces and contribute to a sustainable lifestyle.
- Create a lush and vibrant oasis with vertical gardening. Experiment with different plants, colors, and textures to personalize your garden and enjoy the tranquility it brings.
Read more: How To Make A Raised Garden Bed With Pallets
Materials Needed
Before we begin creating our vertical garden using pallets, let’s gather the materials we’ll need:
- A wooden pallet: Look for a pallet that is in good condition, without any rot or damage. Ideally, choose a pallet made of untreated wood to ensure the safety of your plants.
- Landscaping fabric: This will be used to line the back and bottom of the pallet to prevent soil from spilling out.
- Staple gun and staples: You’ll need these to secure the landscaping fabric to the pallet.
- Scissors or utility knife: For cutting the landscaping fabric to size.
- Drill and screws: These will be used to add a back and bottom to the pallet.
- Paint and paintbrush (optional): If you want to add some color to your vertical garden, you can choose to paint the pallet before starting the project.
- Potting soil: Select high-quality potting soil that will provide the necessary nutrients for your plants.
- Plants: Choose a variety of plants that are suitable for vertical gardening. Consider using cascading plants, herbs, flowers, or even succulents depending on your preferences and growing conditions.
- Watering can or garden hose: For watering your vertical garden regularly.
- Optional accessories: You may also want to consider adding hooks or brackets for mounting the pallet, as well as any additional decorative elements such as fairy lights or hanging baskets.
Now that you have all the necessary materials, let’s move on to the step-by-step process of creating your vertical garden using pallets.
Step 1: Choosing the Right Pallet
The first step in creating your vertical garden using pallets is to choose the right pallet for your project. While pallets can be found easily and often for free, it’s important to select one that is suitable for gardening purposes. Here are a few things to consider:
- Condition: Look for a pallet that is in good condition, without any rotten or damaged wood. Avoid pallets that have been treated with chemicals, as these may be harmful to your plants.
- Size: Consider the available space where you plan to install your vertical garden. Pallets come in various sizes, so choose one that fits your needs and space limitations.
- Type of wood: Opt for pallets made of untreated wood, such as pine or cedar, as they are less likely to leach chemicals into the soil.
Once you have selected a suitable pallet, give it a thorough cleaning to remove any dirt or debris. You can use a brush or pressure washer to clean the surface. Allow the pallet to dry completely before moving on to the next step.
Note: If you prefer a more decorative look, you can also paint the pallet using outdoor paint. Choose a color that complements your garden aesthetic.
Now that you have a clean and prepared pallet, you’re ready to move on to the next step: preparing the pallet for planting.
Step 2: Preparing the Pallet
Now that you have chosen the right pallet for your vertical garden, it’s time to prepare it for planting. Follow these steps to ensure your pallet is ready to create a thriving garden:
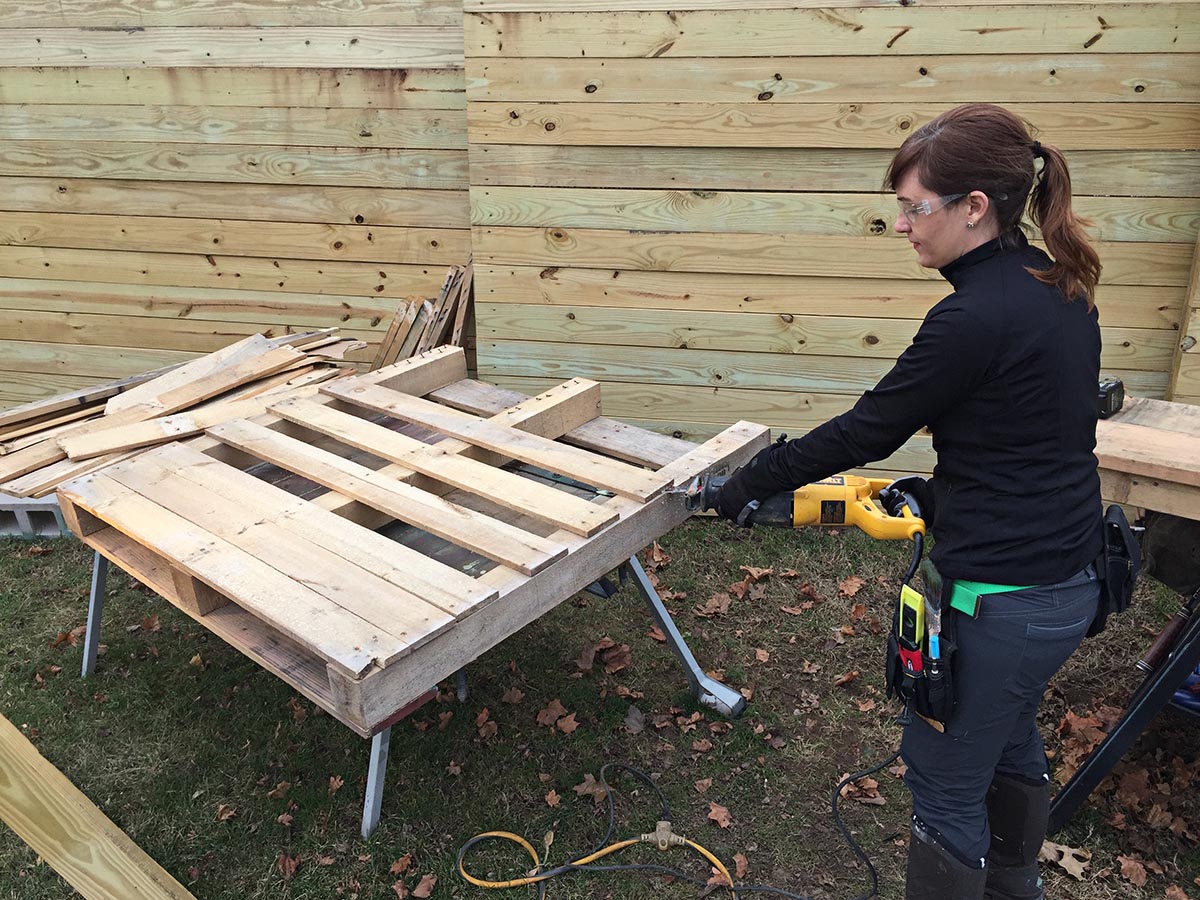
- Inspect the pallet: Check for any protruding nails or splintered wood. Use a hammer or pry bar to remove any nails or staples that could be a hazard to you or your plants.
- Sand the pallet: If the surface of the pallet is rough, you may want to sand it down to prevent any potential injuries from splinters. Sanding will also help the paint adhere better if you decide to paint the pallet.
- Line the back and bottom: Cut a piece of landscaping fabric to fit the back and bottom of the pallet. This will help retain the soil and prevent it from falling out. Secure the fabric to the pallet using a staple gun and staples.
- Create drainage holes (optional): If your pallet does not have gaps between the slats, you may want to drill some small drainage holes in the bottom to ensure proper drainage and prevent waterlogging.
By lining the back and bottom of the pallet with landscaping fabric, you will prevent soil erosion and make your vertical garden more efficient. The fabric allows water to drain while retaining the soil, creating a healthy environment for your plants to thrive.
Once you have completed these steps, your pallet is now prepared and ready to be transformed into a vertical garden. In the next step, we will show you how to create planting pockets to hold your plants.
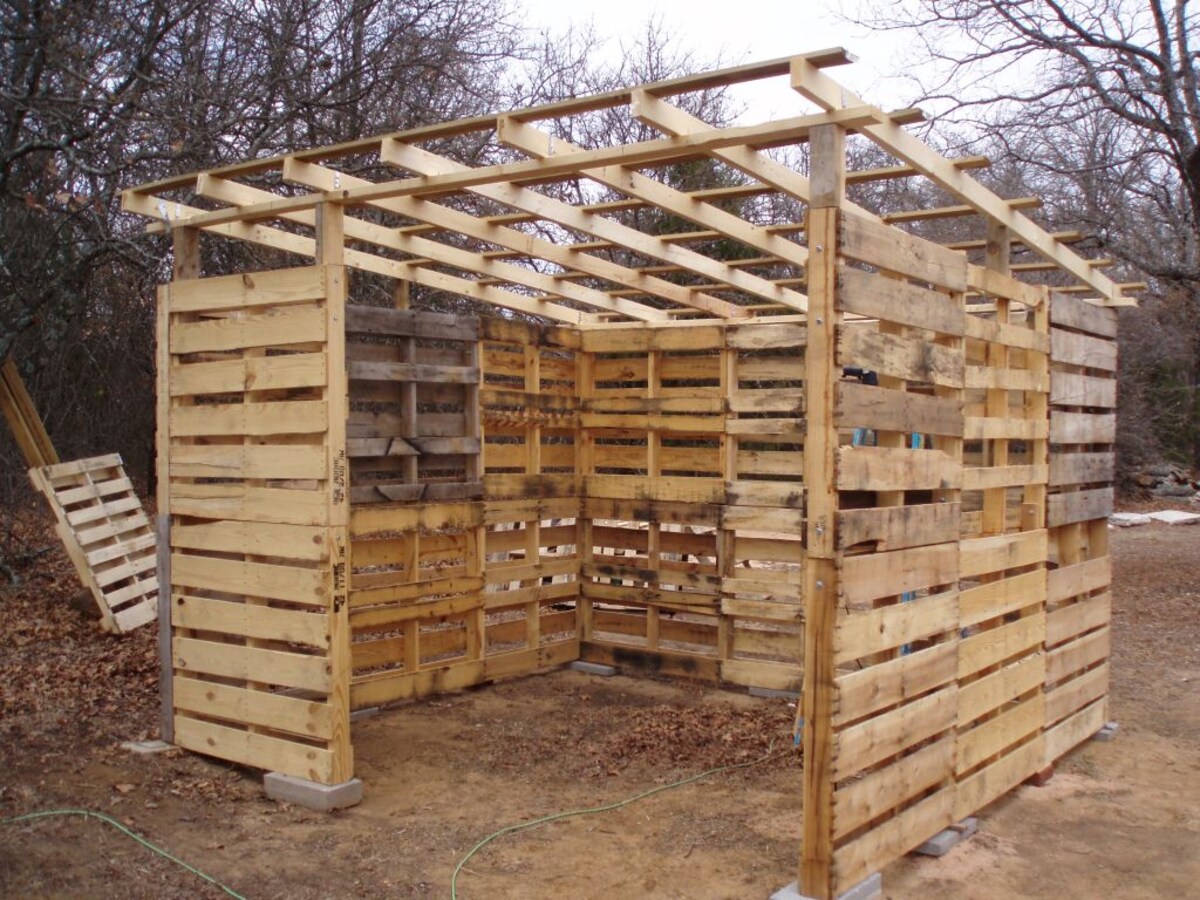
Step 3: Adding a Back and Bottom
Now that your pallet is prepared, it’s time to add a back and bottom to create a sturdy structure for your vertical garden. Follow these steps to ensure your pallet is reinforced:
- Measure and cut a piece of plywood or another sturdy material to fit the back of the pallet. This will provide support and stability to the structure. Attach the back to the pallet using screws or nails.
- If desired, measure and cut another piece of plywood to fit the bottom of the pallet. This will help prevent soil from falling out and provide a solid surface for your plants to grow. Attach the bottom piece to the pallet using screws or nails.
Adding a back and bottom to your pallet will not only strengthen the structure, but it will also create a more secure environment for your plants. The additional support will help to evenly distribute the weight of the soil and plants, ensuring the longevity of your vertical garden. Make sure to use screws or nails that are suitable for outdoor use to prevent rusting or degradation.
Once you have added a back and bottom to your pallet, it’s time to move on to the next step: creating planting pockets for your plants.
When making a vertical garden with pallets, make sure to choose a sturdy pallet and line it with landscape fabric to hold the soil in place. Also, select plants that are suitable for vertical growth and consider the sunlight and watering needs of each plant.
Read more: How To Make Living Wall Vertical Garden
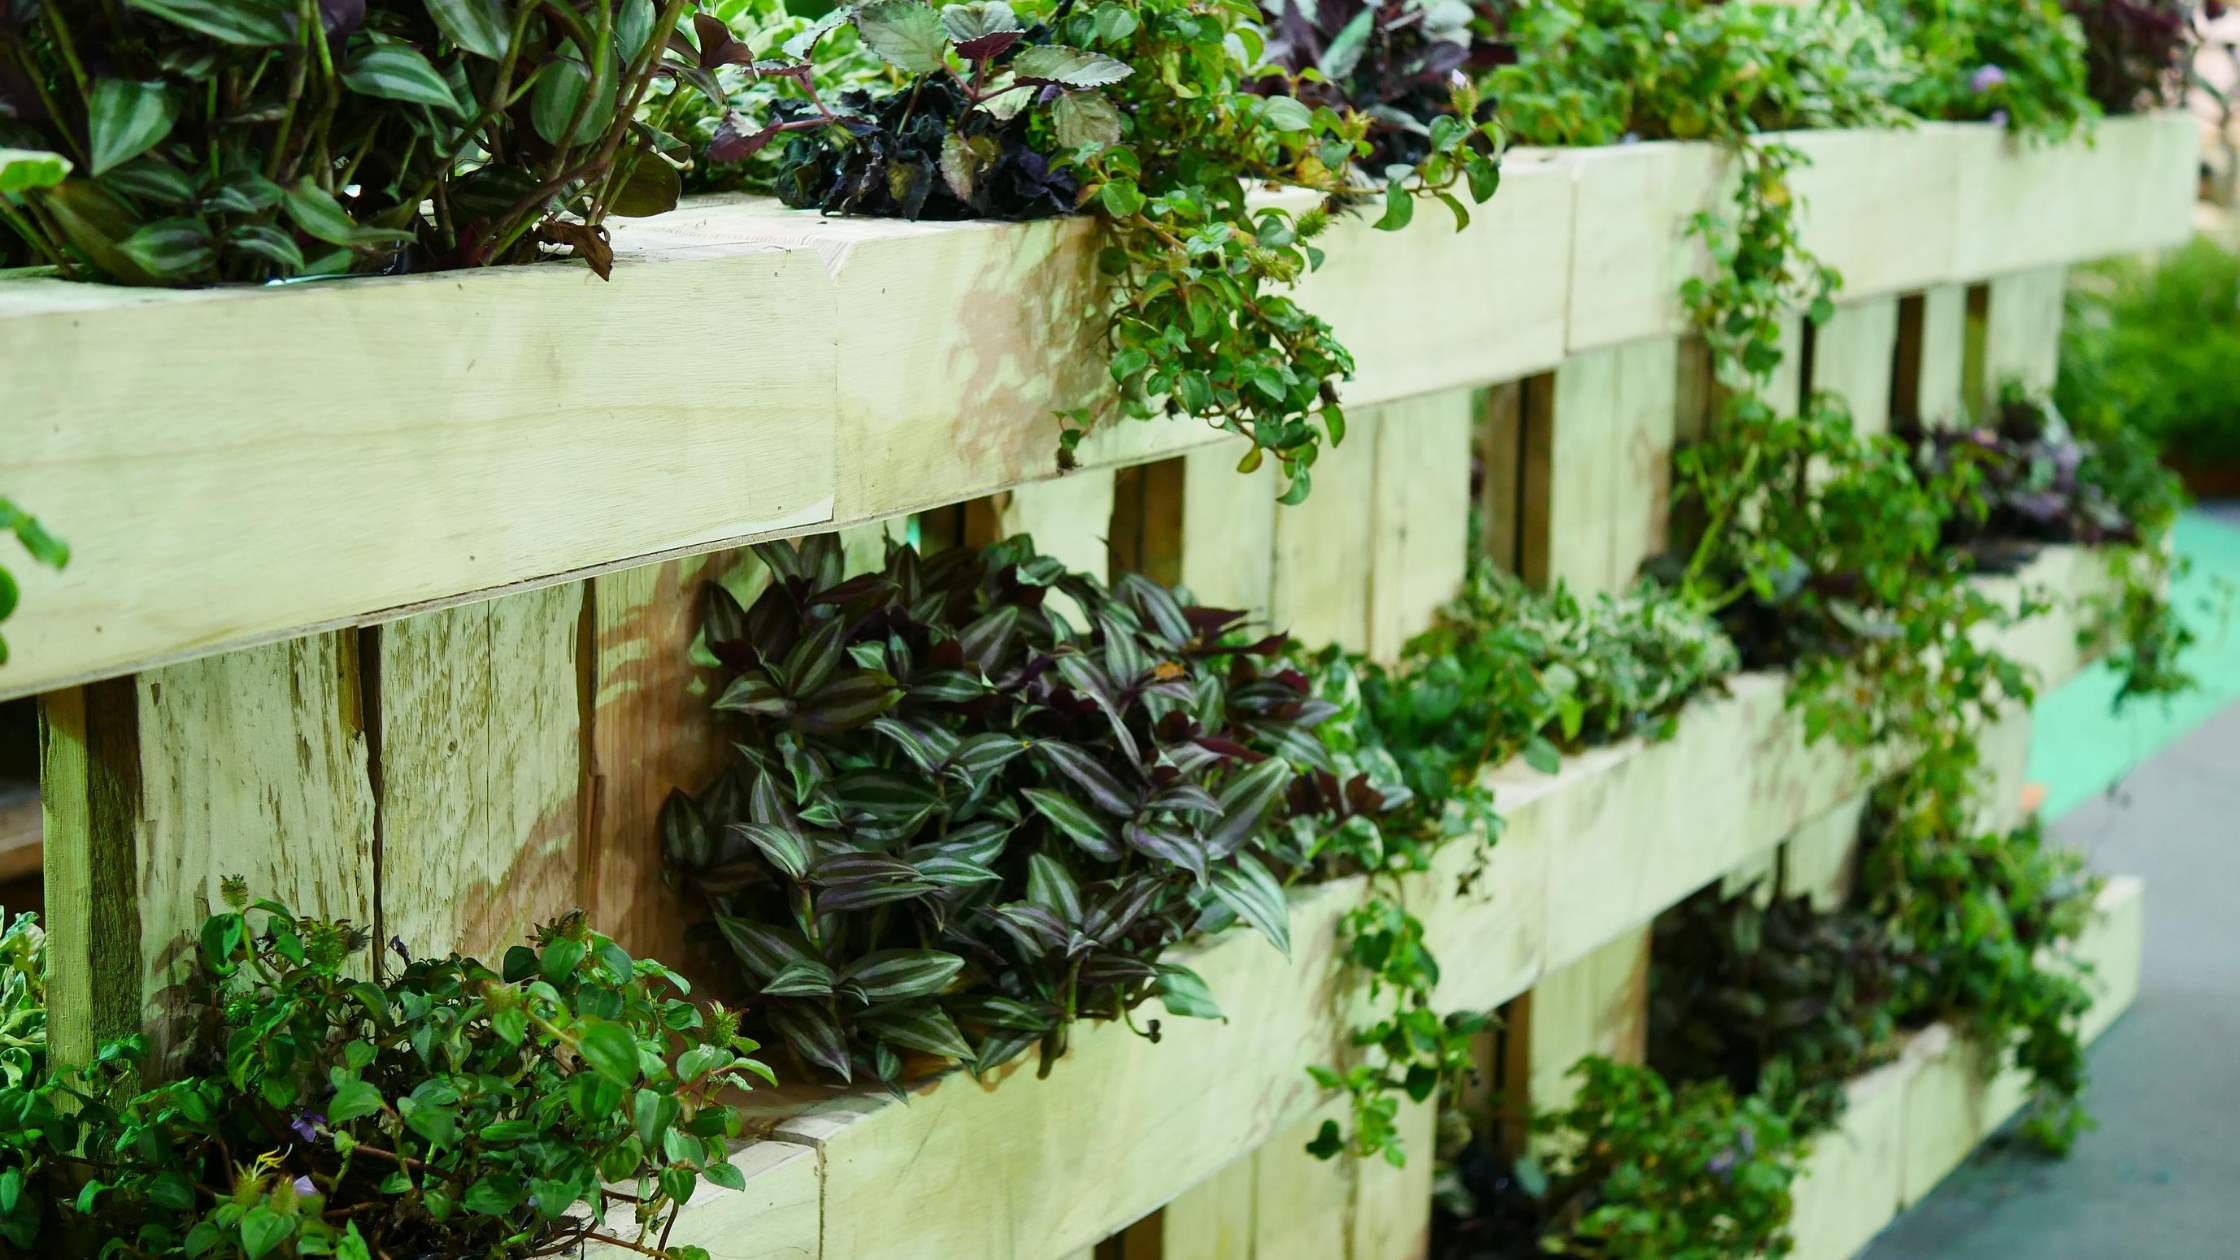
Step 4: Creating Planting Pockets
Creating planting pockets is a crucial step in building your vertical garden. These pockets will hold your plants and allow them to grow vertically. Follow these steps to create the planting pockets:
- Stand the pallet upright or lay it on its back, depending on your preferred orientation.
- Starting from the top, fill each row of gaps between the slats with potting soil. Use your hand or a trowel to firmly pack the soil into the gaps.
- Repeat this process until all the rows are filled with soil.
- Plant your desired plants into the soil-filled gaps, making sure to place them securely and evenly.
- Continue filling the gaps with soil and planting until the entire pallet is filled.
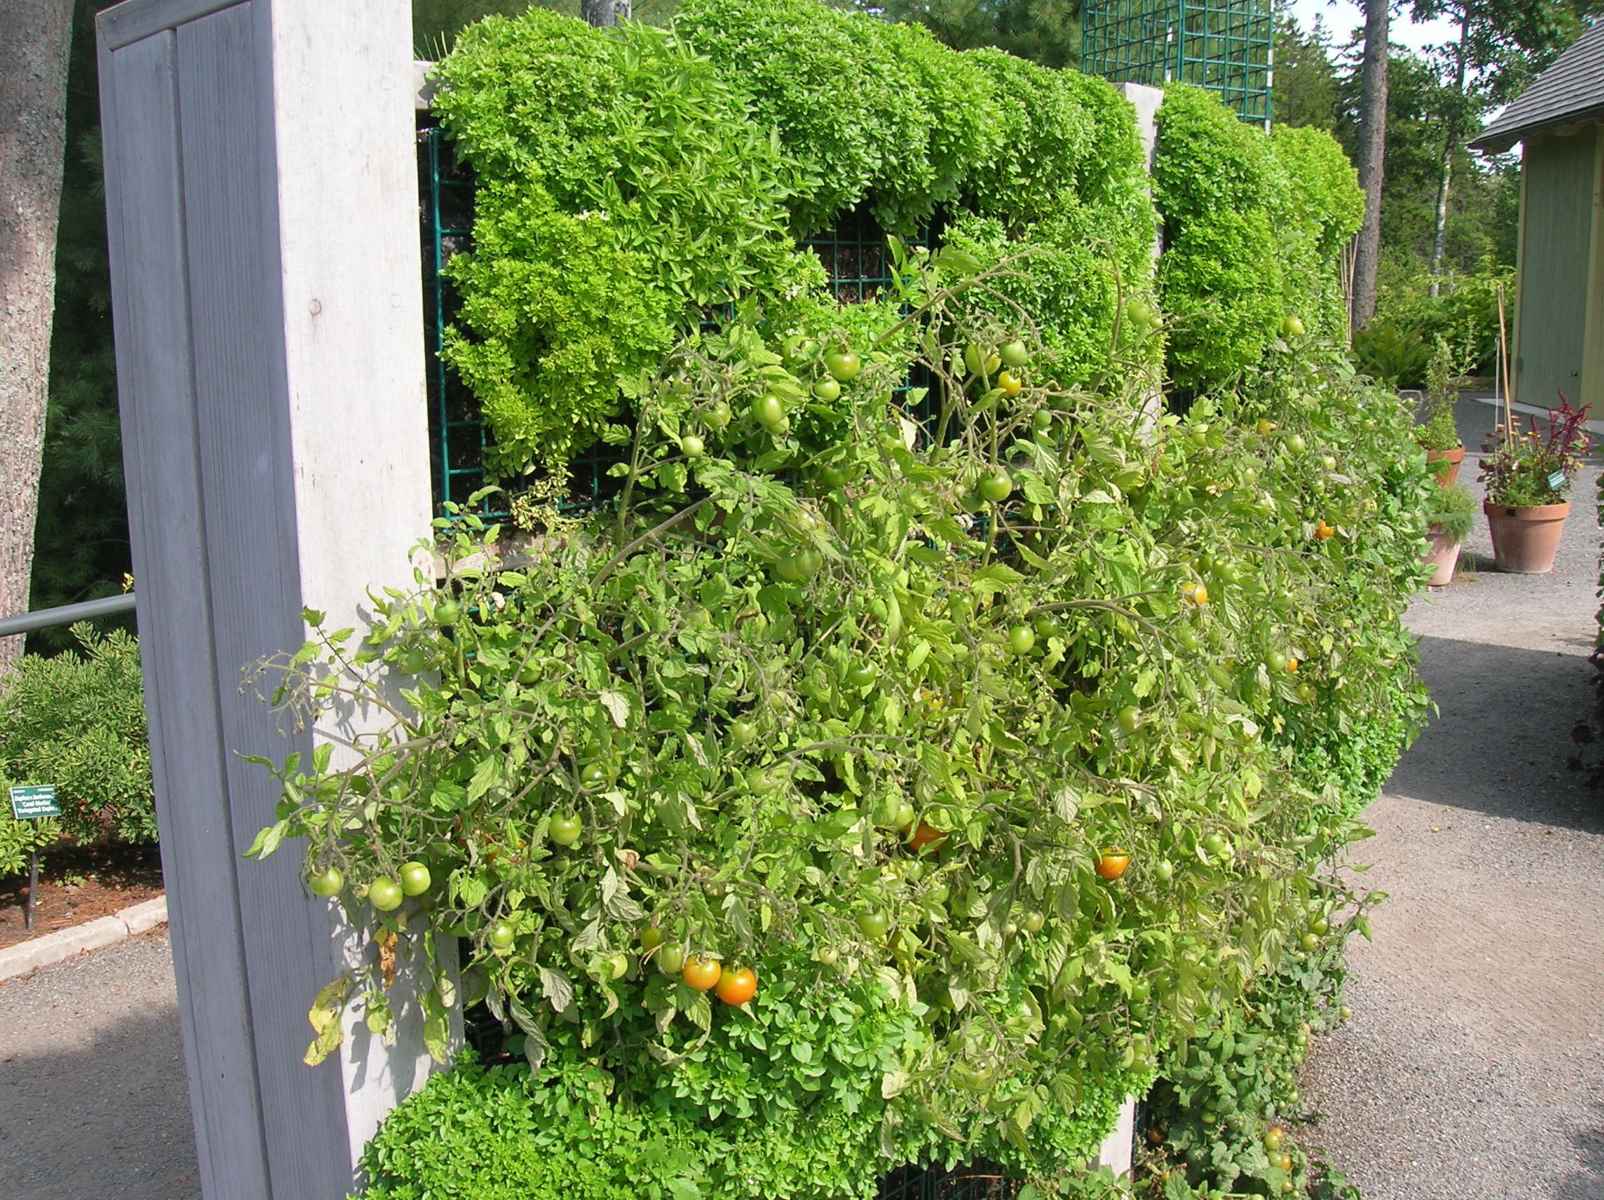
When selecting plants for your vertical garden, consider their growth habits and requirements. Opt for plants that are suitable for container gardening and have a cascading or trailing growth habit. Herbs, succulents, ferns, and small flowers are great options to consider.
Remember to give each plant enough space to grow and spread its roots. Overcrowding the planting pockets may lead to competition for nutrients and limited growth potential. You can also create a visually appealing pattern by strategically placing different plants with varying colors and textures throughout the pallet.
Once you have filled all the gaps and planted your desired plants, your vertical garden is starting to take shape. In the next step, we will guide you on how to mount the vertical garden pallet.
Step 5: Adding Soil and Plants
Now that you have created the planting pockets, it’s time to add soil and plants to your vertical garden. Follow these steps to ensure your plants have the right growing environment:
- Fill each planting pocket with high-quality potting soil. Use a trowel or your hands to gently pack the soil, ensuring it is firmly in place.
- Make a small indentation in the soil of each pocket, deep enough to accommodate the roots of your plants.
- Carefully remove each plant from its container and gently loosen the roots. Place the plant into the indentation, ensuring that the roots are covered with soil and the plant is securely anchored.
- Continue this process for each planting pocket, spacing the plants evenly and giving them room to grow.
When choosing plants for your vertical garden, consider their sun and water requirements. Group plants with similar needs together to make watering and maintenance easier.
After planting, water your vertical garden thoroughly to settle the soil and ensure proper hydration for your plants. Monitor the moisture levels regularly and water as needed, keeping in mind that vertical gardens may dry out quicker than traditional gardens.
It’s important to note that some plants may need additional support as they grow. Consider adding trellises, stakes, or netting to assist plants that require vertical support.
Once your soil and plants are in place, your vibrant and thriving vertical garden is nearly complete. In the next step, we will guide you through the process of mounting the vertical garden pallet.
Step 6: Mounting the Vertical Garden Pallet
Mounting your vertical garden pallet is the next step in bringing your creation to life. Follow these steps to securely and beautifully mount your vertical garden:
- Choose a suitable location for your vertical garden. Consider factors such as sunlight exposure, accessibility for watering and maintenance, and aesthetic appeal.
- If your pallet has holes or hooks already built into it, you can use those to hang it on a wall or fence. Alternatively, you can use brackets or mounting hardware to secure it in place.
- Measure and mark the desired position for your pallet on the wall or fence.
- Using a drill and appropriate anchors or screws, securely attach the pallet to the wall or fence. Make sure it is level and firmly in place.
Ensure that the mounting surface is strong enough to support the weight of the pallet, especially when it is filled with soil and plants. It’s recommended to consult a professional or use proper hardware to ensure the stability of your vertical garden.
Consider the orientation and height of the pallet when mounting. Make sure it is easily accessible for watering, pruning, and maintenance. You may also want to leave a small space between the pallet and the wall or fence to allow for air circulation.
As an alternative, you can also place the vertical garden on a sturdy surface, such as a patio or balcony. In this case, you can add legs or stands to elevate the pallet and provide stability.
Once your vertical garden pallet is securely mounted, it’s time for the final step: maintaining your vertical garden to keep it healthy and thriving.
Step 7: Maintaining Your Vertical Garden
Congratulations on successfully creating and mounting your vertical garden! To ensure its longevity and keep it thriving, it’s important to regularly maintain and care for your garden. Follow these maintenance steps to keep your vertical garden looking beautiful:
- Watering: Check the soil moisture regularly and water your vertical garden as needed. Vertical gardens typically require more frequent watering compared to traditional gardens, as they can dry out faster. Make sure to water thoroughly, ensuring that the entire root zone is adequately hydrated.
- Fertilizing: Depending on the specific requirements of your plants, consider regular fertilization to provide essential nutrients. Use a balanced and water-soluble fertilizer or organic fertilizers. Follow the instructions on the product for proper application and dosage.
- Weeding: Remove any weeds that may grow in your vertical garden to prevent competition for nutrients and space. Be careful when pulling out weeds to avoid disturbing the roots of your plants.
- Pruning: As your plants grow, you may need to trim or prune them to maintain their shape and prevent overcrowding. Regular pruning will promote healthy growth and help prevent disease or pests from taking hold.
- Pest and disease control: Monitor your plants regularly for any signs of pests or diseases. In case of an infestation or disease outbreak, take appropriate measures such as using organic pesticides or consulting with a gardening professional for advice.
- Seasonal care: Depending on the climate and the plants you’ve chosen, you may need to provide additional care during extreme weather conditions. This can include protecting the garden from frost, providing shade during hot summer days, or relocating the pallet to a sheltered area if necessary.
Regular maintenance and care will ensure the long-term success of your vertical garden. Enjoy the beauty and benefits of your creation, and don’t forget to take the time to appreciate and enjoy the fruits of your gardening efforts!
By following these steps and giving your vertical garden the attention it needs, you can create a stunning and flourishing oasis in any space, whether it’s a small balcony or a large backyard. Enjoy the beauty and tranquility of your vertical garden for years to come!
Remember, gardening is a process of experimentation and learning. Don’t be afraid to try new plants, adjust your care routine, and foster your own unique style. Happy gardening!
Conclusion
Congratulations on completing your journey to create a vertical garden using pallets! By following the steps outlined in this guide, you have transformed a simple pallet into a stunning vertical garden that brings life and beauty to your space.
Vertical gardening offers a myriad of benefits, from maximizing your garden space to adding a touch of greenery to your living environment. With the use of pallets, you have not only created a functional and visually appealing garden, but also repurposed a common item and contributed to a sustainable lifestyle.
Throughout this guide, you have learned how to choose the right pallet, prepare it for planting, create planting pockets, add soil and plants, mount your vertical garden, and maintain it for ongoing success. Each step is essential in ensuring the health and longevity of your garden.
Remember to regularly water, fertilize, prune, and monitor your plants for pests and diseases. With proper care and attention, your vertical garden will continue to thrive and bring joy for years to come.
Whether you have a small balcony or a spacious backyard, vertical gardening allows you to unleash your creativity and transform any space into a lush and vibrant oasis. The possibilities are endless, from cascading flowers to aromatic herbs to hanging succulents.
So go ahead, experiment with different plants, colors, and textures. Personalize your vertical garden to reflect your style and preferences. And don’t forget to take the time to enjoy the tranquility and beauty that your vertical garden brings to your everyday life.
Thank you for embarking on this exciting journey with us. We hope that this comprehensive guide has equipped you with the knowledge and inspiration to create your own vertical garden using pallets. Happy gardening!
Frequently Asked Questions about How To Make A Vertical Garden Pallets
Was this page helpful?
At Storables.com, we guarantee accurate and reliable information. Our content, validated by Expert Board Contributors, is crafted following stringent Editorial Policies. We're committed to providing you with well-researched, expert-backed insights for all your informational needs.


0 thoughts on “How To Make A Vertical Garden Pallets”