Home>Furniture>Outdoor Furniture>How To Make A Patio Out Of Pallets
Outdoor Furniture
How To Make A Patio Out Of Pallets
Modified: October 18, 2024
Looking to create an outdoor patio on a budget? Learn how to make a beautiful patio using pallets and transform your outdoor space with stylish and affordable outdoor furniture.
(Many of the links in this article redirect to a specific reviewed product. Your purchase of these products through affiliate links helps to generate commission for Storables.com, at no extra cost. Learn more)
Introduction
Welcome to the world of DIY outdoor furniture! If you’re looking to add charm and functionality to your outdoor space, but don’t want to break the bank, then making a patio out of pallets might just be the perfect solution. Pallets, those wooden platforms used for shipping goods, have become a popular choice for DIY enthusiasts to create unique and affordable outdoor furniture.
In this article, we will guide you through the process of making a patio out of pallets, providing step-by-step instructions and helpful tips along the way. Whether you’re a seasoned DIYer or a novice looking to take on a new project, this guide will help you transform your outdoor space into a stylish and inviting haven.
So why use pallets for your patio project? There are several benefits to consider. First and foremost, pallets are incredibly cost-effective. You can often find pallets for free or at a very low cost, making them a budget-friendly option for outdoor furniture.
Pallets are also versatile. They come in a variety of sizes, shapes, and materials, allowing you to customize your patio to suit your specific needs and design preferences. Whether you want a small cozy corner or a large lounge area, pallets can be arranged and combined to create the perfect space.
Furthermore, making a patio out of pallets is an environmentally friendly choice. By repurposing pallets, you are reducing waste and giving new life to a material that would otherwise end up in a landfill.
Before we dive into the nitty-gritty of building your patio, let’s go over the materials you will need for this project. Gathering all the necessary supplies beforehand will ensure a smoother and more efficient construction process.
Key Takeaways:
- Transform simple wooden pallets into a stylish and budget-friendly patio with DIY creativity. Enjoy an eco-friendly outdoor oasis while reducing waste and repurposing materials.
- Create a personalized and cozy retreat by adding cushions, lighting, and greenery to your pallet patio. Embrace DIY projects and continue exploring the versatility of repurposing pallets for outdoor furniture.
Read more: How To Make A TV Stand Out Of Wood Pallets
Benefits of Using Pallets for Patio Projects
When it comes to creating a patio, using pallets as the primary material offers numerous benefits. Let’s explore some of the advantages of using pallets for your outdoor furniture project:
- Affordability: Pallets are an incredibly cost-effective option for building your patio. They are often available for free or at a minimal cost, making them a budget-friendly choice.
- Versatility: Pallets come in various sizes, shapes, and materials, giving you the freedom to design your patio in a way that suits your taste and space requirements. Whether you want a small intimate space or a large entertainment area, pallets can be easily customized to fit your needs.
- DIY Friendly: Building a patio with pallets is a beginner-friendly DIY project. With basic tools and some creativity, even those with limited DIY experience can successfully complete this project. Pallets are easy to work with, and the construction process is relatively simple.
- Environmental Sustainability: By repurposing pallets, you are giving them a new life and preventing them from ending up in a landfill. Using pallets for your patio is a sustainable choice as it promotes recycling and reduces waste.
- Customization: Pallets offer endless possibilities for customization. You can paint or stain them in any color to match your outdoor aesthetic. Additionally, you can add cushions, pillows, and other accessories to enhance comfort and style.
- Portability: Pallets provide the flexibility to create a portable patio. Unlike traditional patios, which are permanent fixtures, pallet patios can be disassembled and relocated if needed. This is especially useful for renters or those who frequently move.
- Durability: When properly maintained, pallets can withstand outdoor conditions and last for several years. Treat the wood with a protective sealant or paint to enhance its durability and weather resistance.
These benefits make pallets an excellent choice for creating a unique and affordable patio. Not only will you have a functional outdoor space to relax and entertain, but you’ll also have the satisfaction of knowing that you repurposed materials and minimized your environmental impact.
Materials Needed for Making a Patio Out of Pallets
Before you embark on your pallet patio project, it’s essential to gather all the necessary materials. Having everything on hand will make the construction process smoother and more efficient. Here’s a list of materials you’ll need:
- Pallets: The first and most crucial material is, of course, the pallets themselves. The number of pallets you’ll need will depend on the size of your patio. Look for pallets that are in good condition, with sturdy and undamaged wood.
- Gravel or Sand: To create a solid foundation for your patio, you’ll need a layer of gravel or sand. This will help with drainage and prevent the pallets from sinking into the ground. Calculate the amount needed based on the size of your patio.
- Landscape Fabric: A landscape fabric or weed barrier is another essential material to consider. This will prevent weed growth and help maintain a clean and tidy patio area.
- Bricks or Blocks: Bricks or concrete blocks will be used to support and level the pallets. These will provide stability and ensure that your patio remains even and secure.
- Screws or Nails: You’ll need screws or nails to secure the pallets together and attach them to the support blocks. Make sure to choose durable screws or nails that are suitable for outdoor use.
- Power Drill or Hammer: A power drill or hammer will be necessary for driving screws or nails into the pallets. If using screws, consider using a drill to make the process faster and more efficient.
- Measuring Tape: Accurate measurements are crucial for a successful patio construction. Use a measuring tape to determine the dimensions of your patio area and ensure precise placement of the pallets.
- Level: To ensure that your patio is even and level, have a level tool on hand. This will help you adjust the support blocks and pallets to achieve a balanced surface.
- Paint or Stain: While optional, painting or staining the pallets can enhance the aesthetic appeal of your patio. Choose a color that complements your outdoor space and apply a weather-resistant finish for longevity.
- Safety Equipment: Lastly, don’t forget to prioritize safety when working on your patio project. Wear protective gloves, safety glasses, and any other gear necessary to ensure your well-being.
By gathering these materials before you begin, you’ll be well-prepared to make your pallet patio project a success. Now that you have everything you need let’s move on to the next step – planning and design.
Step 1: Planning and Design
The first step in creating a patio out of pallets is to carefully plan and design your outdoor space. This crucial stage will help you visualize the final outcome and ensure that you have a clear roadmap for the construction process. Here are some considerations to keep in mind during the planning and design phase:
- Measure and Assess: Begin by measuring the area where you want to build your patio. Take precise measurements of the length, width, and any specific dimensions you need to accommodate. This will help you determine the number of pallets you will need for the project.
- Sun and Shade: Consider the sun and shade patterns in your outdoor space. Think about where you want to position your patio to make the most of natural light or create a cozy shaded spot. This will help you decide the orientation and placement of the pallets.
- Function and Layout: Determine how you plan to use your patio. Will it be a dining area, a lounging space, or a combination of both? This will influence the layout and configuration of the pallets. Sketch out different layout options to find the best arrangement for your needs.
- Aesthetic and Style: Consider the overall aesthetic and style you want to achieve. Are you going for a rustic, bohemian, or contemporary look? Think about the color scheme, materials, and accessories that will complement your outdoor space.
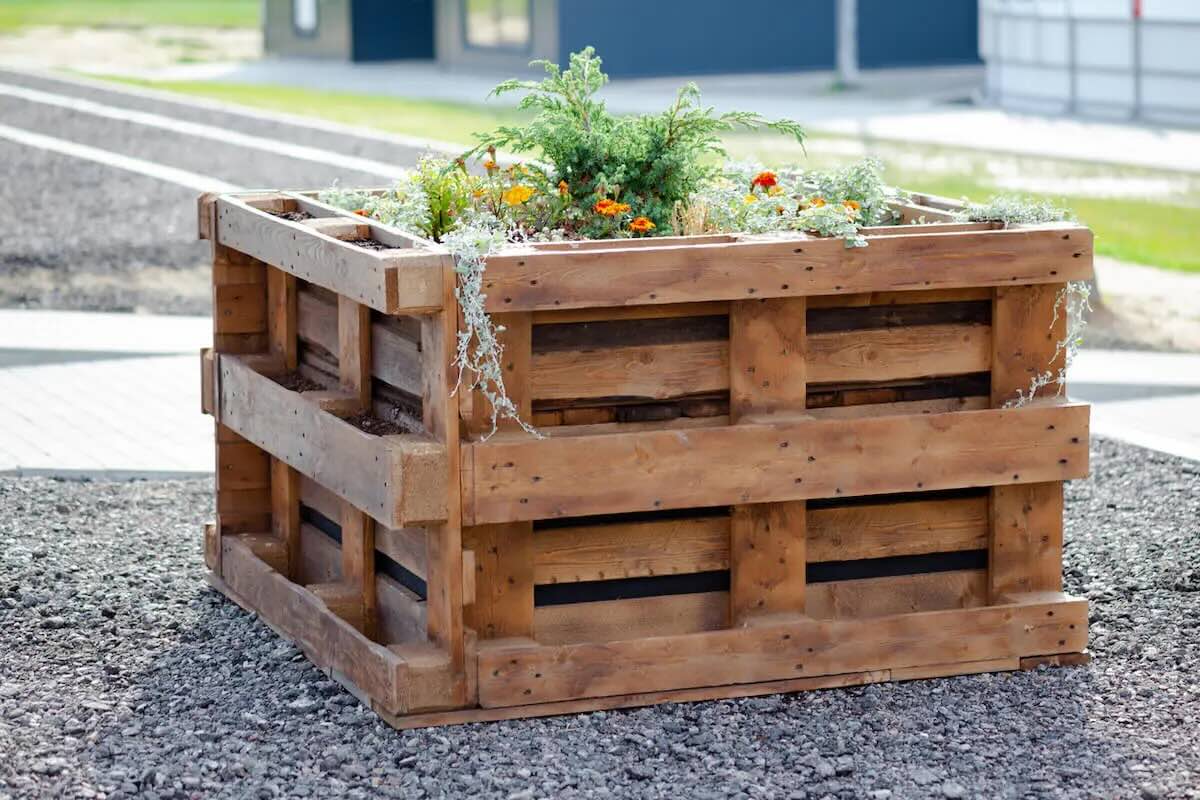
- Add-Ons: Think about any additional features or add-ons you might want to incorporate into your patio design. This could include built-in planters, a fire pit, or a pergola. Consider these elements in your planning to ensure they can be integrated seamlessly into the pallet patio.
- Accessibility: Take into account the accessibility of your patio. Ensure that there is enough space for easy movement and consider any specific needs, such as wheelchair accessibility or stroller-friendly pathways.
Once you have considered these factors and sketched out your patio design, you will have a solid plan to guide you in the construction process. Keep in mind that flexibility is key, and adjustments may be needed along the way. With your plan in place, you are ready to move on to the next step – preparing the area for the patio.
Step 2: Preparing the Area for the Patio
Now that you have your patio design in mind, it’s time to prepare the area where the patio will be installed. Proper preparation is crucial for creating a sturdy and long-lasting foundation. Follow these steps to ensure that your patio area is ready:
- Clean the Area: Begin by clearing the area of any debris, rocks, or vegetation. Remove any obstacles that may interfere with the placement of the pallets.
- Level the Ground: Use a shovel, rake, or trowel to level the ground where the patio will be placed. Make sure the surface is even and free from any bumps or depressions.
- Mark the Area: Use stakes and string to mark the boundaries of your patio area. This will serve as a guide during the construction process and ensure that you stay within the desired dimensions.
- Excavate (if necessary): If your patio area is on uneven ground or needs to be lowered, you may need to excavate the area. Remove the extra soil or grass to create a level surface.
- Add Gravel or Sand: Spread a layer of gravel or sand over the excavated or leveled area. This will provide a stable and firm base for the pallets. Use a rake or shovel to even out the layer.
- Compact the Base: Use a tamper or plate compactor to compact the gravel or sand base. This will increase its stability and prevent any future shifting or settling.
- Lay Landscape Fabric: Install a layer of landscape fabric or weed barrier over the compacted base. This will help prevent weed growth and maintain a clean surface for your patio.
- Secure the Fabric: Use landscape fabric pins or staples to secure the edges of the fabric to the ground. This will ensure that it stays in place during the construction process.
By following these steps and properly preparing the area, you will have a solid foundation for your pallet patio. This will ensure stability and durability for years to come. With the area prepped and ready, you can move on to the next step – preparing the pallets for construction.
When making a patio out of pallets, make sure to sand down the wood to prevent splinters and apply a weatherproof sealant to protect it from the elements.
Read more: How To Build A Dresser Out Of Pallets
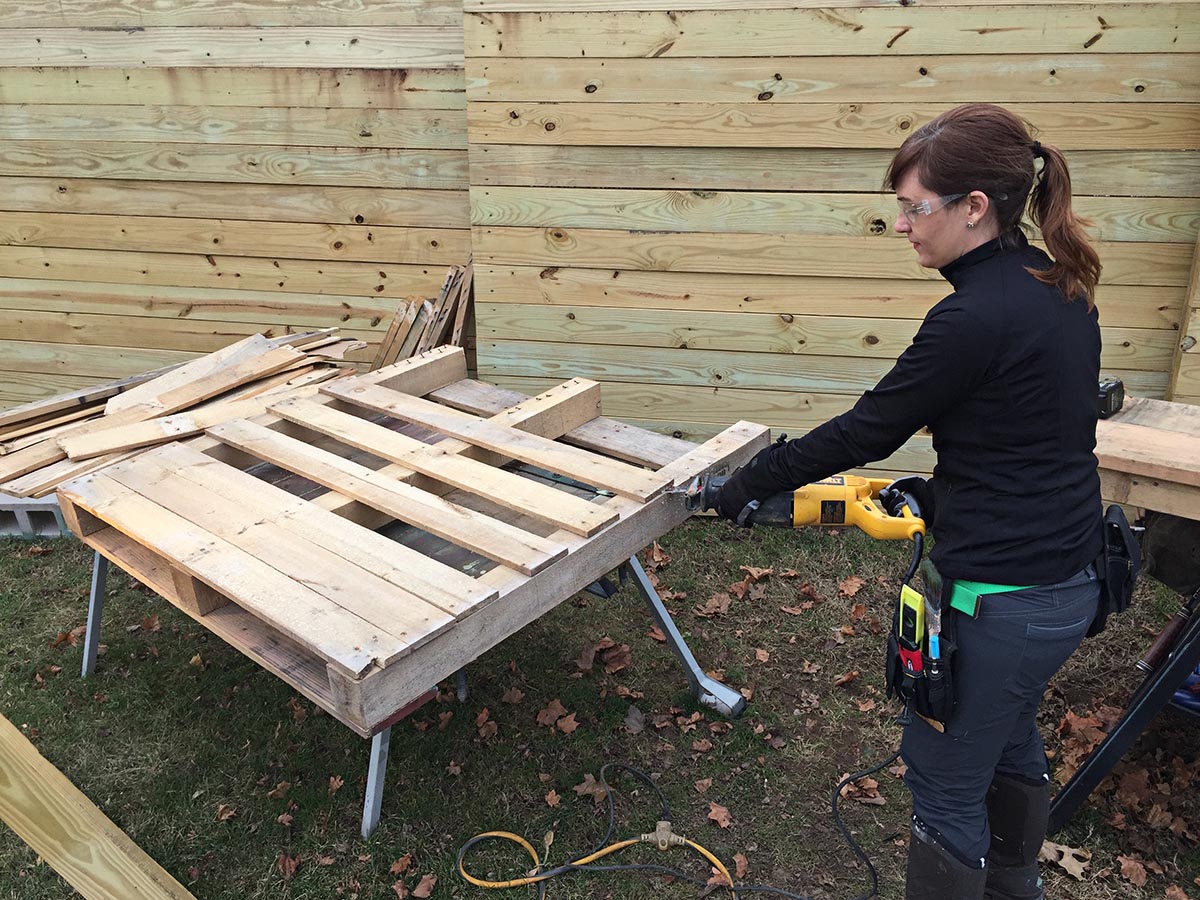
Step 3: Preparing the Pallets
Once you have prepared the area for your pallet patio, it’s time to focus on preparing the pallets themselves. Properly preparing the pallets will ensure that they are safe, sturdy, and ready to be assembled into your patio. Here’s how to prepare the pallets:
- Inspect the Pallets: Carefully examine each pallet to ensure they are in good condition. Look for any damage, rot, or loose boards. Avoid using pallets that are compromised or in poor condition.
- Remove Nails or Staples: Use a hammer, pry bar, or pliers to remove any nails, staples, or metal fasteners from the pallets. Make sure the wood is free from any protruding objects that could cause injury.
- Sand the Pallets: Depending on the condition of the pallets and the desired aesthetic, consider sanding the surfaces of the pallets. This will smooth out any rough edges and create a more polished finish.
- Repair Any Damage: If you come across any broken or damaged boards on the pallets, repair them using wood glue, nails, or screws. Reinforce any weak areas to ensure the pallets are structurally sound.
- Apply a Protective Finish: To enhance the durability and longevity of the pallets, consider applying a protective finish such as paint, stain, or exterior-grade sealant. This will help protect the wood from weathering and ensure a longer lifespan.
- Allow Sufficient Drying Time: If you apply any finishes or sealants to the pallets, allow them to dry completely according to the manufacturer’s instructions before proceeding with the construction.
By taking the time to properly prepare the pallets, you are ensuring that they are safe to use and will provide a solid foundation for your pallet patio. By inspecting, repairing, and applying a protective finish, you are enhancing the longevity and visual appeal of your patio project.
With the pallets prepared and ready, you are now ready to move on to the next step – building the patio base. Stay tuned for the next part of our guide as we continue the construction of your pallet patio.
Step 4: Building the Patio Base
With the pallets prepared, it’s time to start building the base for your pallet patio. The base will provide stability and support for the pallets, ensuring a secure foundation for your outdoor space. Follow these steps to build the patio base:
- Place Support Blocks: Start by placing support blocks at regular intervals along the perimeter of your marked patio area. These blocks will provide stability for the pallets and ensure an even surface.
- Ensure Levelness: Use a level to make sure the support blocks are even and level. Adjust them as needed, adding or removing gravel or sand underneath to achieve an even surface.
- Add Gravel or Sand: Fill the spaces between the support blocks with gravel or sand. This will help distribute the weight evenly and prevent any shifting or movement.
- Compact the Base: Use a tamper or plate compactor to compact the gravel or sand base. This will provide further stability and ensure a solid foundation for the pallets.
- Check Levelness Again: Use the level to double-check that the base is still level after compacting. Make any necessary adjustments before proceeding.
With the patio base constructed, you are now ready to move on to the exciting step of securing the pallets together and creating the structure of your pallet patio. Stay tuned for the next part of our guide where we will guide you through this process and help bring your patio to life!
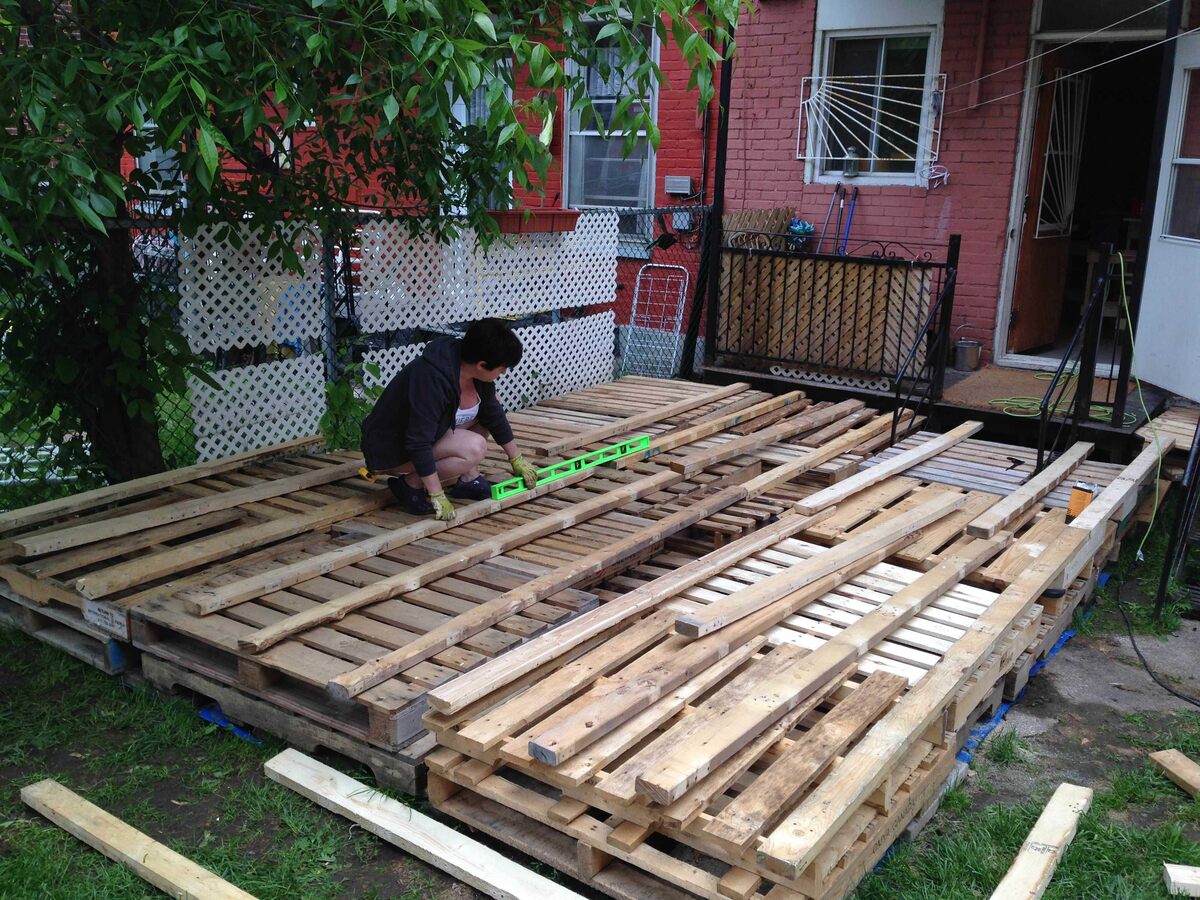
Step 5: Securing the Pallets Together
Now that you have built the base for your pallet patio, it’s time to secure the pallets together to create the structure. This step is crucial for ensuring stability and durability. Follow these steps to properly secure the pallets together:
- Position the First Pallet: Start by placing the first pallet in the desired location on top of the support blocks. Ensure that it is aligned with the perimeter of the patio area.
- Attach the Pallets: Use screws or nails to secure the first pallet to the support blocks underneath. Drive the screws or nails through the pallet boards and into the blocks. Make sure the pallet is securely fastened.
- Add Additional Pallets: Place the next pallet adjacent to the first one, aligning the edges. Secure it to the support blocks using screws or nails. Repeat this process for all the remaining pallets, creating a continuous surface.
- Stagger the Pallets: To create a stronger and more stable structure, stagger the placement of the pallets. This means that the boards on the second row of pallets should overlap the gaps between the boards on the first row. This will add strength and prevent any weak spots.
- Secure the Pallets Together: To further secure the pallets together, you can use L-brackets or metal straps. Attach them to the corners or sides of the pallets, ensuring a tight and secure connection.
- Check for Stability: After securing the pallets, step back and test the stability of the patio structure. Apply pressure to different areas and ensure that the pallets are securely fastened and there are no wobbles or shifts.
- Make any Necessary Adjustments: If you notice any instability or unevenness, make any necessary adjustments by tightening screws, adding support blocks, or leveling the base.
By properly securing the pallets together, you ensure that your patio will be strong, sturdy, and able to withstand the demands of outdoor use. Take the time to double-check the connections and make any adjustments needed to achieve a solid structure.
With the pallets securely fastened together, you’re now ready to move on to the final step – adding the finishing touches to complete your pallet patio. Stay tuned for the next part of our guide as we help you put the final design flourishes on your outdoor space.
Step 6: Adding Finishing Touches
Congratulations! You’re almost done creating your pallet patio. Now it’s time to add the finishing touches that will truly bring your outdoor space to life. These final touches will add comfort, style, and personality to your patio. Follow these steps to complete your pallet patio:
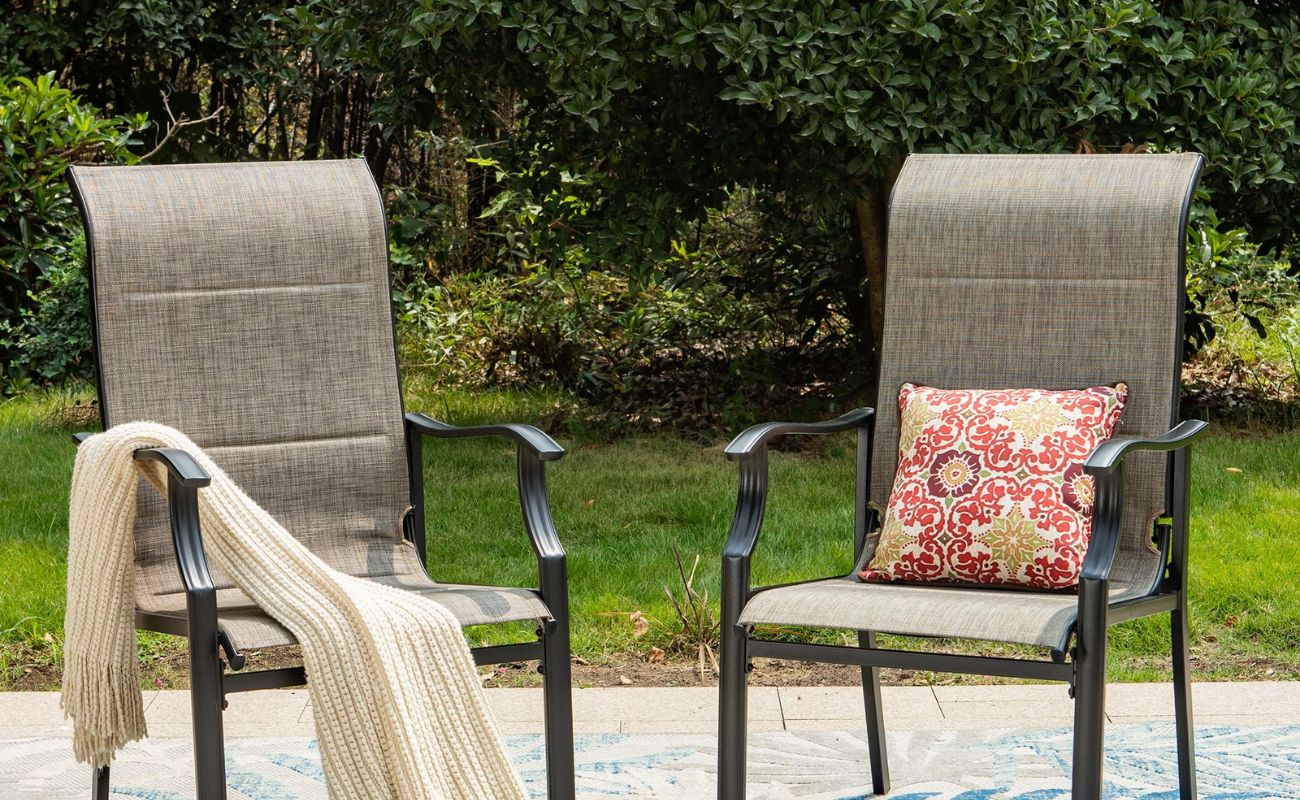
- Add Cushions and Pillows: Enhance the comfort of your patio by adding cushions and pillows to the pallets. Choose weather-resistant materials that will withstand outdoor conditions. Select colors and patterns that complement your outdoor aesthetic.
- Include a Rug: Define the seating area or add a pop of color by placing an outdoor rug on your pallet patio. Make sure the rug is designed for outdoor use and can withstand exposure to the elements.
- Integrate Lighting: Create a warm and inviting ambiance by incorporating outdoor lighting. You can use string lights, lanterns, or even solar-powered lights to illuminate the space and extend your patio’s usability into the evening.
- Consider a Shade Solution: If your patio area is exposed to direct sunlight, consider adding a shade solution such as an umbrella, pergola, or canopy. This will provide relief from the sun and make your patio more comfortable during hot summer days.
- Add Greenery: Incorporate plants and greenery to bring life and freshness to your patio. Consider potted plants, hanging baskets, or a vertical garden. Choose plants that thrive in your climate and require minimal maintenance.
- Accessorize: Add the final touches with outdoor accessories such as lanterns, decorative accents, and outdoor artwork. These details will personalize your patio and make it feel like an extension of your indoor living space.
- Keep it Clean: Regularly clean and maintain your pallet patio to keep it looking fresh and inviting. Remove any debris, wipe down surfaces, and protect the wood with a sealant or paint touch-ups as needed.
By adding these finishing touches, you transform your pallet patio from a simple outdoor space into a cozy retreat that reflects your style and personality. Take the time to curate the perfect accessories and keep your patio clean and well-maintained to enjoy its beauty for years to come.
With the finishing touches complete, step back and admire your stunning pallet patio. It’s now time to relax and enjoy your outdoor oasis, whether it’s hosting gatherings with friends, enjoying a quiet afternoon with a book, or simply soaking up the sunshine.
Thank you for following along with our step-by-step guide to making a patio out of pallets. We hope this article has inspired you to unleash your creativity and create a unique and affordable outdoor space.
Read more: How To Make Furniture With Pallets
Conclusion
Congratulations on successfully creating your patio using pallets! By following the steps outlined in this guide, you have transformed simple wooden pallets into a functional and stylish outdoor space. A pallet patio not only adds charm and character to your backyard but also provides a budget-friendly and environmentally sustainable alternative to traditional patio options.
Throughout this process, you have learned about the benefits of using pallets for patio projects, gathered the necessary materials, planned and designed your space, prepared the area, and built a solid foundation. You have secured the pallets together, added finishing touches, and created a personalized outdoor oasis.
Remember to continuously assess the condition of your patio, make any necessary repairs, and maintain regular upkeep to ensure its longevity. With the right care, your pallet patio will provide you and your loved ones with countless enjoyable days and evenings in the fresh air.
Now that you have successfully completed your pallet patio project, why stop here? Pallets can be used to create various other outdoor furniture pieces such as coffee tables, benches, and even planters. Let your creativity soar and continue exploring the possibilities of repurposing pallets to enhance your outdoor living space even further.
We hope this guide has inspired you to take on more DIY projects and embrace your inner creativity. Whether you’re a seasoned DIY enthusiast or just getting started, remember that the journey is just as rewarding as the end result. Enjoy your newly transformed patio and create lasting memories in the comfort of your own backyard!
Excited by your new patio project and eager for more hands-on tasks? Dive into the world of DIY Projects where creativity meets practicality. For those inspired by today's construction, learn Pallet Furniture techniques to craft unique pieces that add character and functionality to any space. Don't stop there—extend your flair for design to Outdoor Living areas, ensuring they're as vibrant and welcoming as any indoor room. Each guide offers practical steps and imaginative ideas to enhance your home and garden effortlessly.
Frequently Asked Questions about How To Make A Patio Out Of Pallets
Was this page helpful?
At Storables.com, we guarantee accurate and reliable information. Our content, validated by Expert Board Contributors, is crafted following stringent Editorial Policies. We're committed to providing you with well-researched, expert-backed insights for all your informational needs.


0 thoughts on “How To Make A Patio Out Of Pallets”