Home>Furniture>Living Room Furniture>How To Make A Wood Pallet Coffee Table
Living Room Furniture
How To Make A Wood Pallet Coffee Table
Modified: April 22, 2024
Learn how to make a stunning wood pallet coffee table for your living room with this step-by-step guide. Perfect addition to your living room furniture.
(Many of the links in this article redirect to a specific reviewed product. Your purchase of these products through affiliate links helps to generate commission for Storables.com, at no extra cost. Learn more)
Introduction
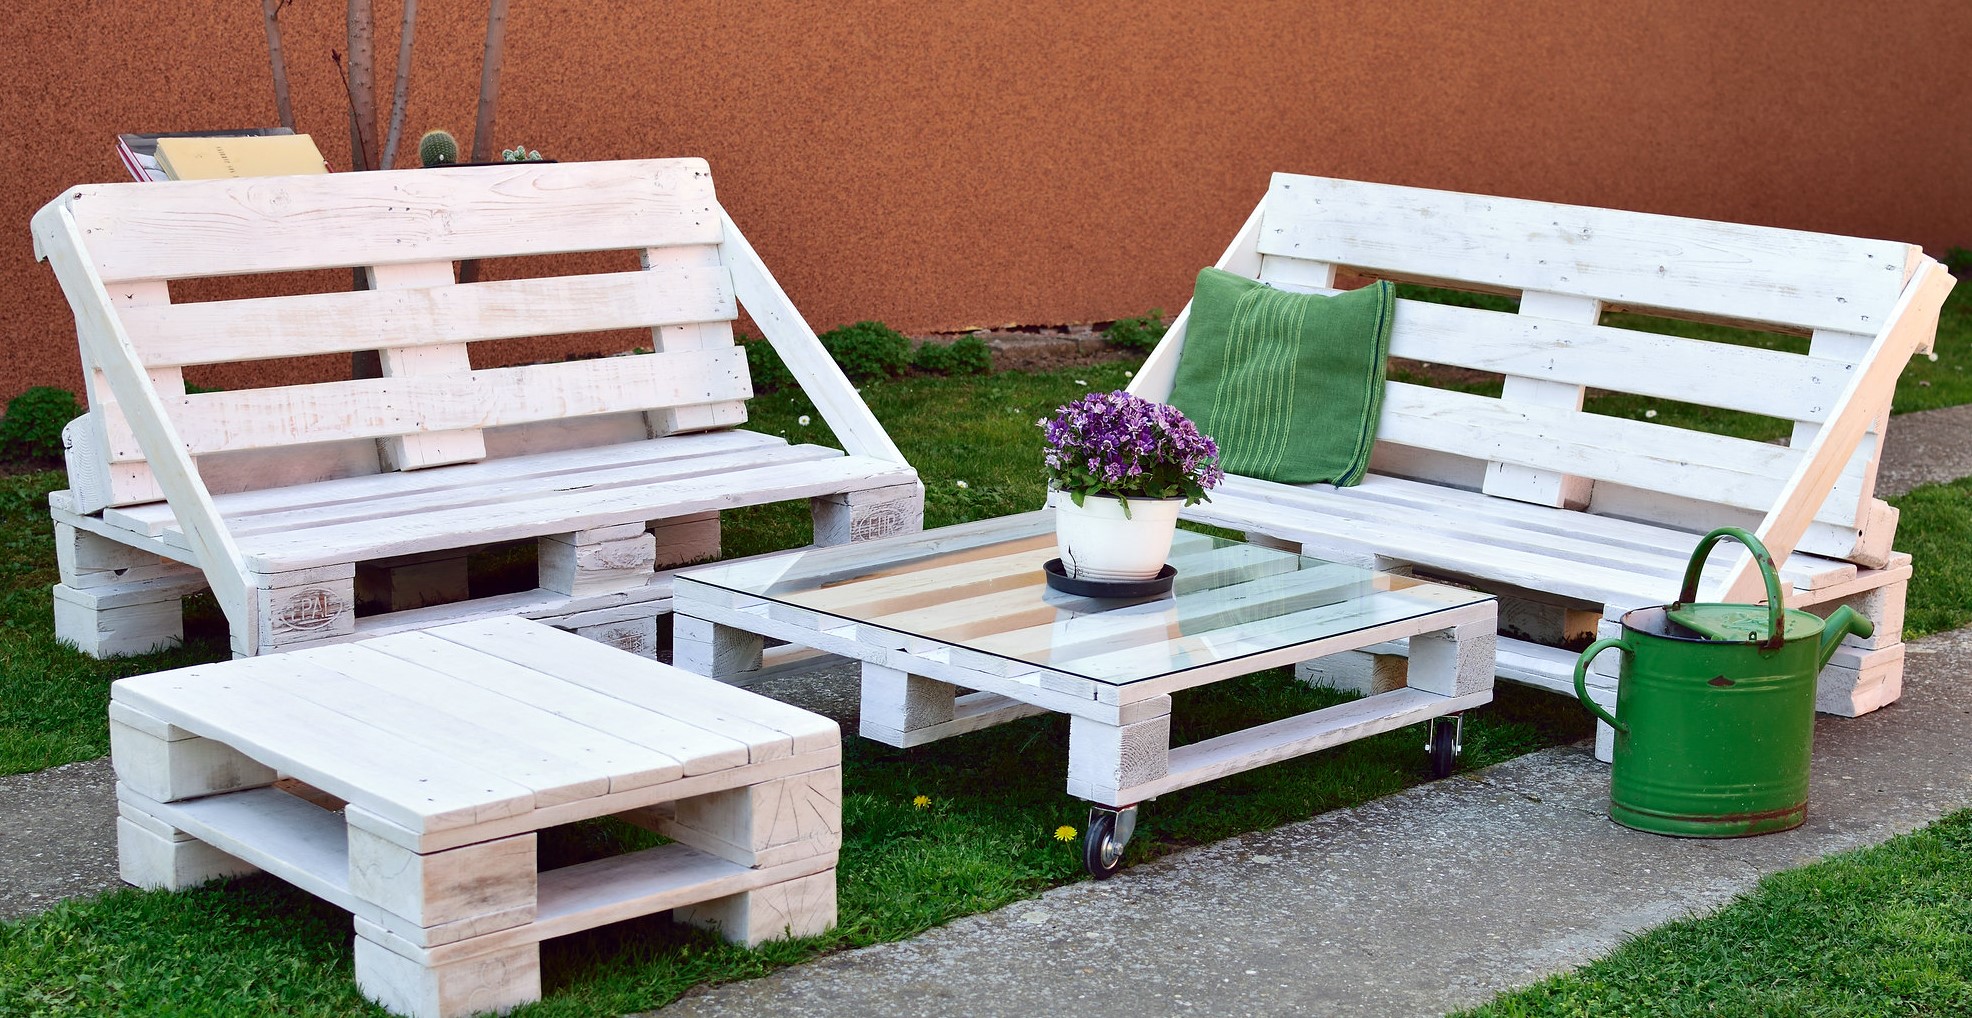
Welcome to our guide on how to make a wood pallet coffee table! If you’re a fan of rustic and unique furniture pieces, then this DIY project is perfect for you. A wood pallet coffee table is not only a great addition to your living room but also an eco-friendly and budget-friendly alternative to buying a new one.
Before we dive into the steps, let’s talk about what exactly a wood pallet coffee table is. Wood pallets are commonly used in shipping, and they provide a sturdy and versatile base for creating furniture. By repurposing a pallet, you can transform it into a functional and stylish coffee table that reflects your personal style.
In this guide, we will walk you through the process of creating a wood pallet coffee table from start to finish. We’ll cover everything from preparing the pallet to adding the finishing touches. Whether you’re new to DIY projects or a seasoned crafter, this guide will provide you with all the information you need to successfully create your own coffee table.
Before we get started, let’s gather the materials you’ll need for this project:
- A wooden pallet
- Sandpaper (medium and fine grit)
- Stain or paint (depending on your preference)
- Paintbrush or sponge
- Protective gloves
- Protective goggles
- Wheels (optional)
- Legs (optional)
- Screws or nails
Now that you have your materials ready, let’s begin the process of creating your own wood pallet coffee table!
Key Takeaways:
- Transform a simple wooden pallet into a unique and eco-friendly coffee table that reflects your personal style and creativity. Add wheels or legs for extra flair and functionality.
- Enjoy the satisfaction of crafting a one-of-a-kind piece of furniture while contributing to sustainable living. Customize your coffee table with paint, decorative elements, and protective finishes.
Read more: How To Make Stained Wood Pallet Wall Art
Materials Needed
Before you start building your wood pallet coffee table, let’s gather all the necessary materials. Having everything ready in advance will make the process smoother and more efficient. Here’s a list of materials you’ll need:
- A wooden pallet: Look for a sturdy pallet in good condition. You can often find them for free at local businesses or online marketplaces.
- Sandpaper: You’ll need both medium and fine grit sandpaper to smooth out the surface of the pallet.
- Stain or paint: Choose a stain or paint color that matches your personal style and the overall aesthetic of your living room.
- Paintbrush or sponge: Use a paintbrush or sponge to apply the stain or paint to the pallet. Make sure to choose a brush or sponge appropriate for your chosen finish.
- Protective gloves and goggles: It’s important to protect yourself while working on this project. Wear protective gloves to shield your hands and safety goggles to protect your eyes from dust and debris.
- Wheels (optional): If you want your coffee table to be mobile, consider adding wheels to the bottom of the pallet. You can find various styles and sizes of wheels at your local hardware store.
- Legs (optional): If you prefer a higher coffee table or want to add a bit of style to your creation, you can attach legs to the bottom of the pallet. Again, you can find a wide range of legs in different materials and styles.
- Screws or nails: Depending on the type of attachment you choose (wheels or legs), you’ll need either screws or nails to secure them to the pallet.
Once you have gathered all the materials, double-check to make sure you haven’t missed anything. With everything in place, you’re ready to move on to the next step: preparing the pallet.
Step 1: Preparing the Pallet
The first step in creating your wood pallet coffee table is preparing the pallet. This involves cleaning it and ensuring it is in good condition for the rest of the project. Follow these steps to prepare the pallet:
- Inspect the pallet: Carefully examine the pallet to make sure it is sturdy and free from any damage or rot. Look for loose boards or nails that may need to be addressed before moving forward.
- Clean the pallet: Remove any dirt, debris, or loose particles from the pallet using a brush or vacuum cleaner. This step is essential to create a clean surface for sanding and finishing.
- Secure loose boards: If you come across any loose or wobbly boards, use screws or nails to reinforce them. This will ensure the structural integrity of the pallet.
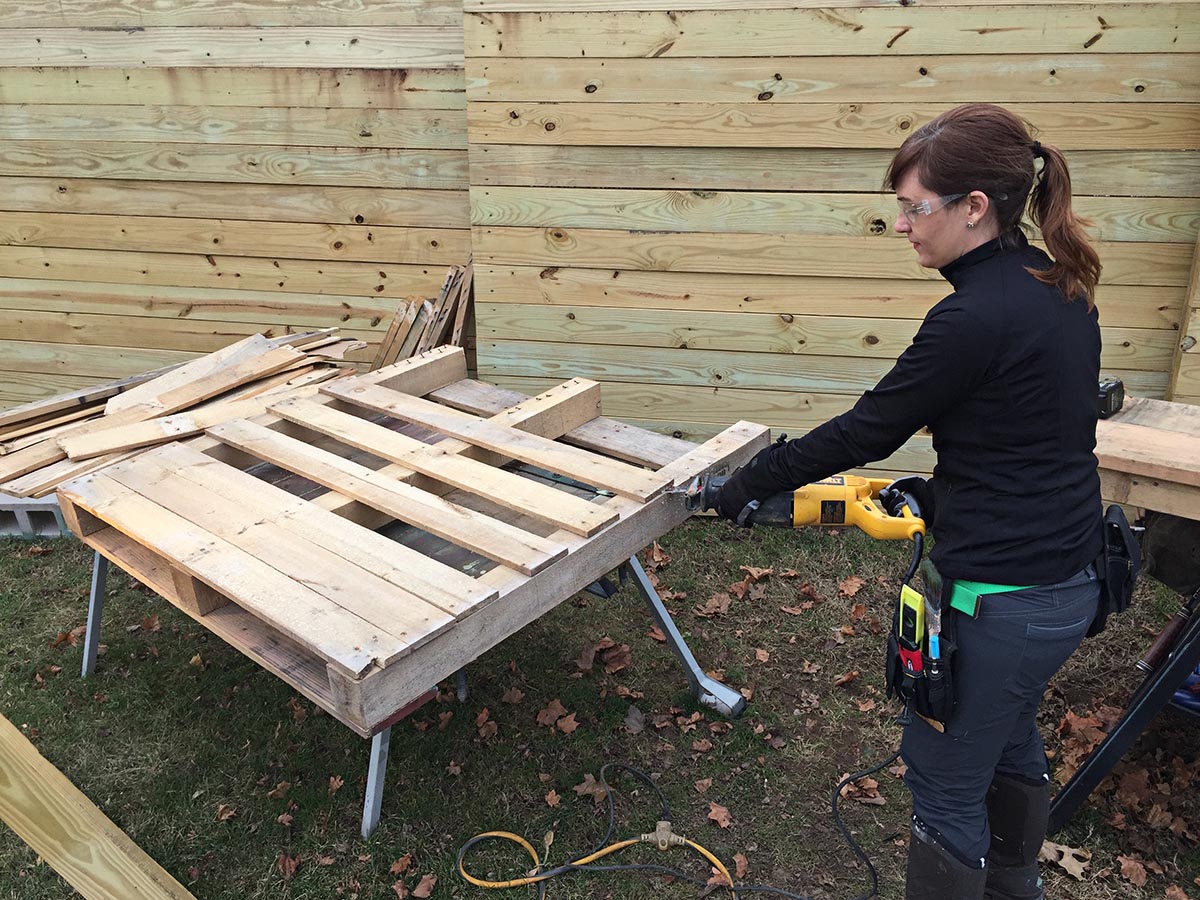
- Trim excess wood: If there are any protruding pieces of wood or splinters on the pallet, carefully trim them using a hand saw or a power saw. This will help create a smooth and even surface.
- Measure and mark: Before moving on to the next step, measure the desired dimensions of your coffee table and mark them on the pallet. This will serve as a guide when cutting or attaching additional elements later on.
By following these steps, you’ll have a cleaned and prepped pallet ready for the next phase of the project. Remember to take your time and be cautious while working with the pallet to avoid any injuries.
Once you have prepared the pallet, you’re ready to move on to the next step: sanding the pallet to create a smooth surface.
Step 2: Sanding the Pallet
Now that you have prepared the pallet, it’s time to move on to the next step: sanding. Sanding the pallet is essential to create a smooth and even surface, preparing it for the staining or painting process. Follow these steps to sand the pallet:
- Start with medium grit sandpaper: Begin by using medium grit sandpaper to remove any rough surfaces, splinters, or imperfections. Sand in the direction of the wood grain to achieve the best results. Pay extra attention to the edges and corners of the pallet.
- Switch to fine grit sandpaper: Once you’ve gone over the entire pallet with the medium grit sandpaper, switch to fine grit sandpaper. This will help further smooth out the surface and prepare it for the finishing touches.
- Sand all sides of the pallet: Make sure to sand all sides of the pallet, including the top, bottom, and sides. This will ensure a consistent and professional look for your coffee table.
- Remove sanding dust: After sanding, use a clean cloth or vacuum cleaner to remove any sanding dust or debris from the pallet. This will prevent it from interfering with the staining or painting process.
- Check for smoothness: Run your hands over the sanded surface of the pallet to check for smoothness. If you come across any rough areas or imperfections, go over them again with the fine grit sandpaper until you achieve the desired smoothness.
Sanding the pallet not only enhances the overall appearance of your coffee table but also ensures a comfortable and safe surface for everyday use. Remember to take breaks in between sanding to avoid straining your hands and arms.
Once you have finished sanding the pallet, you’re ready to move on to the next step: staining or painting the pallet to add the desired finish.
Step 3: Staining or Painting the Pallet
After sanding the pallet to achieve a smooth surface, it’s time to add color and personality to your wood pallet coffee table through staining or painting. This step allows you to customize the look of your table and match it to the existing decor of your living room. Follow these steps to stain or paint the pallet:
- Prepare the work area: Find a well-ventilated area, preferably outdoors or in a well-ventilated room, to avoid inhaling any fumes. Lay down a drop cloth or newspapers to protect the surrounding area from any accidental spills or drips.
- Choose your stain or paint: Select a stain or paint color that complements the style and color scheme of your living room. Keep in mind that staining enhances the natural beauty of the wood, while painting allows for more color options.
- Apply the stain or paint: Use a paintbrush or sponge to apply the stain or paint evenly over the entire surface of the pallet. Follow the instructions on the product label for the recommended application technique and drying times.
- Wait for the first coat to dry: Allow the first coat of stain or paint to dry completely before applying a second coat, if desired. This will ensure a more even and vibrant finish.
- Apply additional coats (optional): If you want a more intense color or a darker shade, apply additional coats of stain or paint. Be sure to let each coat dry before applying the next one.
- Seal the finish (optional): If you prefer a glossy or protected finish, consider applying a clear sealant over the stained or painted surface. This will help preserve the color and provide added durability.
During the staining or painting process, take your time and apply the stain or paint evenly to achieve a professional look. Remember to clean your brushes or sponges thoroughly with the appropriate cleaning agent to maintain their quality for future projects.
Once you have finished staining or painting the pallet, allow it to dry completely before moving on to the next step. This will ensure that the finish is properly set and ready for the optional steps of adding wheels or legs.
Now that you’ve added color to your wood pallet coffee table, you’re ready to move on to the next steps, such as attaching wheels or adding legs, to further customize your creation.
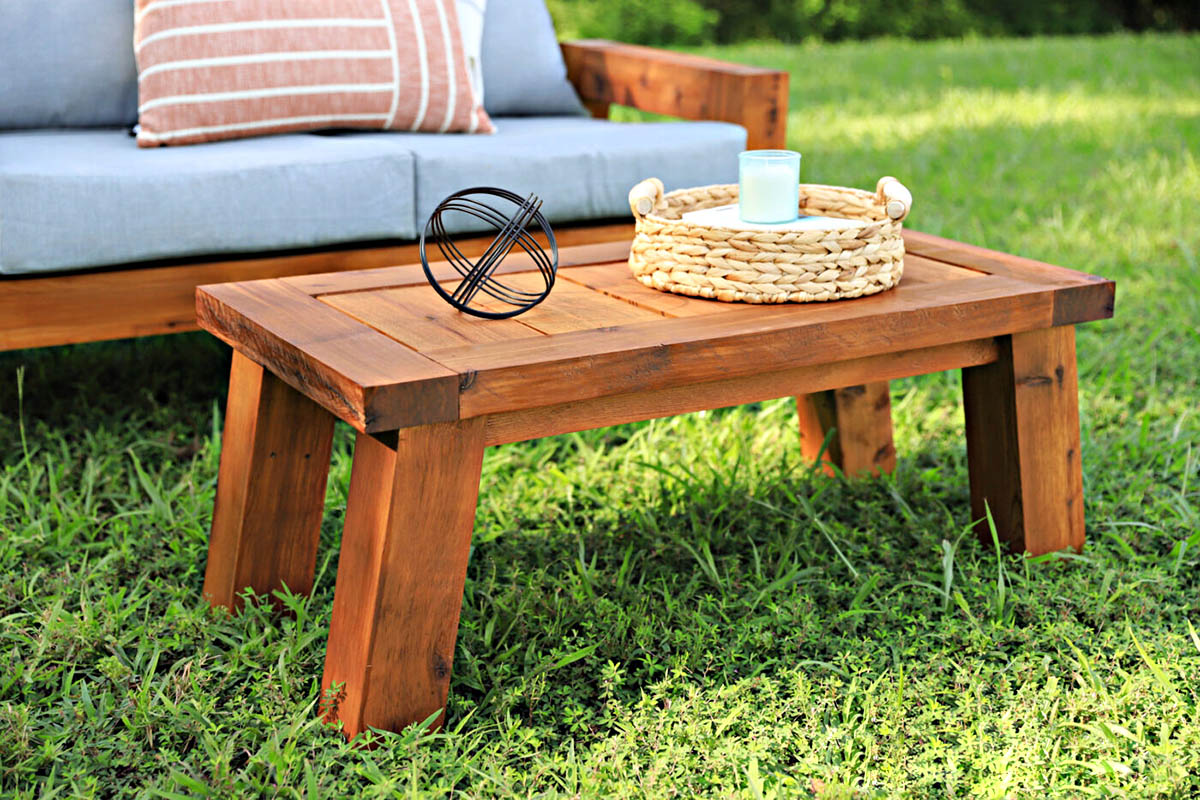
Sand the wood pallet thoroughly before starting the construction to ensure a smooth and even surface for your coffee table.
Read more: How To Make A TV Stand Out Of Wood Pallets
Step 4: Attaching Wheels (optional)
If you want to add mobility and versatility to your wood pallet coffee table, attaching wheels is a great option. This step allows you to easily move your table around or adjust its position according to your needs. Follow these steps to attach wheels to your coffee table:
- Choose the type of wheels: There are various types of wheels available, including swivel casters and fixed casters. Consider your usage and preference to determine which type will work best for your coffee table.
- Mark the wheel placement: Flip the pallet over and mark the desired placement of the wheels on each corner. Make sure to evenly distribute the weight of the table for stability.
- Pre-drill holes: Use a drill and an appropriately sized drill bit to pre-drill holes where the screws for the wheels will go. This will prevent the wood from splitting when attaching the wheels.
- Attach the wheels: Place the wheels in their designated positions and secure them with screws. Make sure to tighten the screws firmly, but be careful not to over-tighten and damage the pallet.
- Test the mobility: Once all the wheels are attached, flip the coffee table back to its upright position and test its mobility. Roll it around to ensure that the wheels are functioning properly and the table moves smoothly.
Attaching wheels to your wood pallet coffee table not only adds functionality but also gives it a unique and industrial look. Just be sure to choose wheels that are appropriate for the weight and size of your table to ensure stability.
Now that you’ve successfully attached wheels to your coffee table, it’s time to move on to the next optional step: adding legs to further enhance its style and functionality.
Please note that if you prefer a stationary coffee table, you can skip this step and proceed to the finishing touches.
Step 5: Adding Legs (optional)
If you want to elevate the style and height of your wood pallet coffee table, adding legs is an excellent option. This step allows you to create a more traditional or modern look and customize the table to your desired height. Follow these steps to add legs to your coffee table:
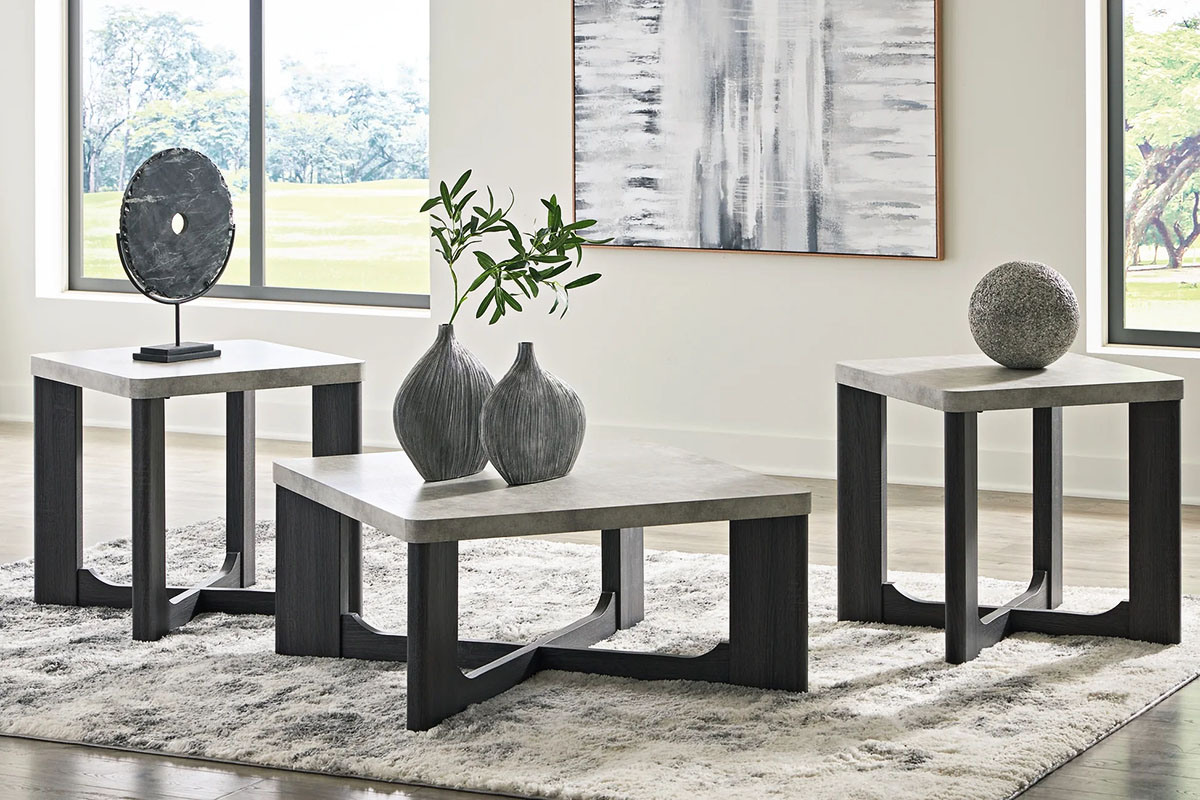
- Choose the type and style of legs: Consider the overall aesthetic of your living room and choose legs that complement it. There are various types of legs available, such as wooden, metal, or tapered legs, so select the ones that best align with your vision.
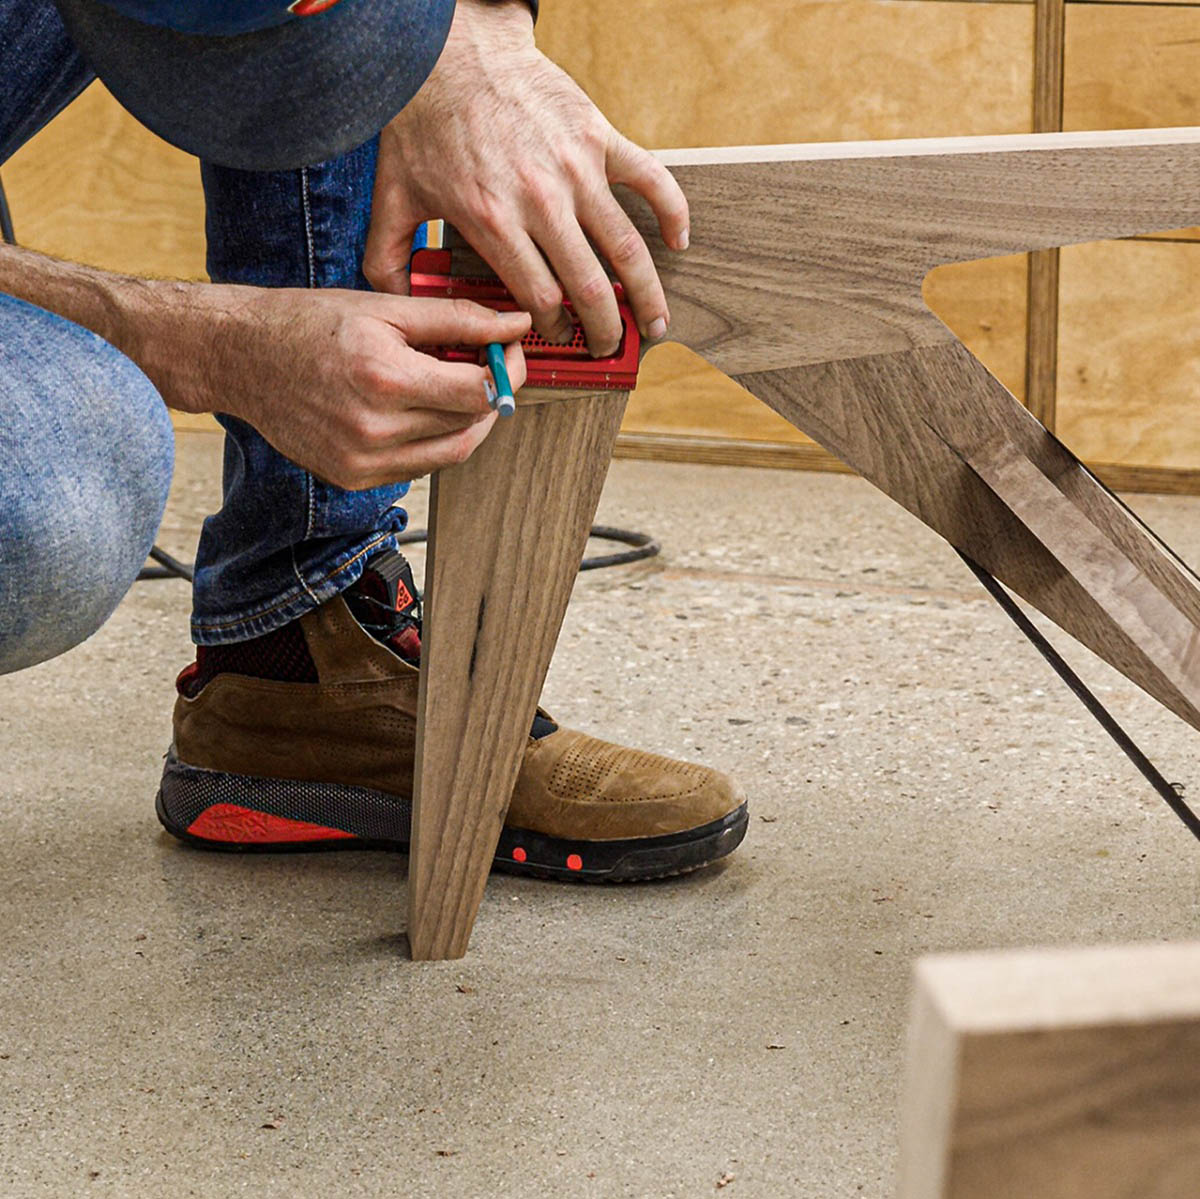
- Measure and mark the leg placement: Flip the pallet over and measure the desired height for your table, taking into consideration the length of the legs. Mark the placement of the legs on each corner of the pallet.
- Pre-drill holes: Use a drill and an appropriately sized drill bit to pre-drill holes where the screws or bolts for the legs will go. This will ensure a secure attachment and prevent the wood from splitting.
- Attach the legs: Place the legs in their designated positions and secure them with screws or bolts according to the manufacturer’s instructions. Make sure to tighten them firmly, but be careful not to over-tighten and cause damage to the pallet.
- Stabilize the table: Once all the legs are attached, flip the coffee table back to its upright position and check for stability. If the table wobbles, adjust the legs accordingly or use shims under the uneven legs to level the table.
Adding legs to your wood pallet coffee table not only raises its height but also gives it a more finished and polished look. Choose legs that match your desired style and ensure they provide the stability you need for everyday use.
Now that you’ve successfully added legs to your coffee table, it’s time to move on to the final step: adding the finishing touches to complete your wood pallet coffee table creation.
Note that if you prefer a coffee table without legs or wheels, you can skip this step and proceed to the finishing touches directly.
Step 6: Finishing Touches
Congratulations on reaching the final step of creating your wood pallet coffee table! Now it’s time to add the finishing touches to complete the look and ensure your table is ready to be enjoyed. Follow these steps to add the final touches:
- Inspect for any imperfections: Take a close look at your coffee table and inspect for any remaining imperfections or rough edges. Use sandpaper to smooth out any areas that require additional touch-ups.
- Apply a protective finish: To protect the surface of your table and enhance its longevity, consider applying a clear protective finish. This can be a varnish, polyurethane, or wax. Follow the manufacturer’s instructions to apply the finish evenly and allow it to dry completely.
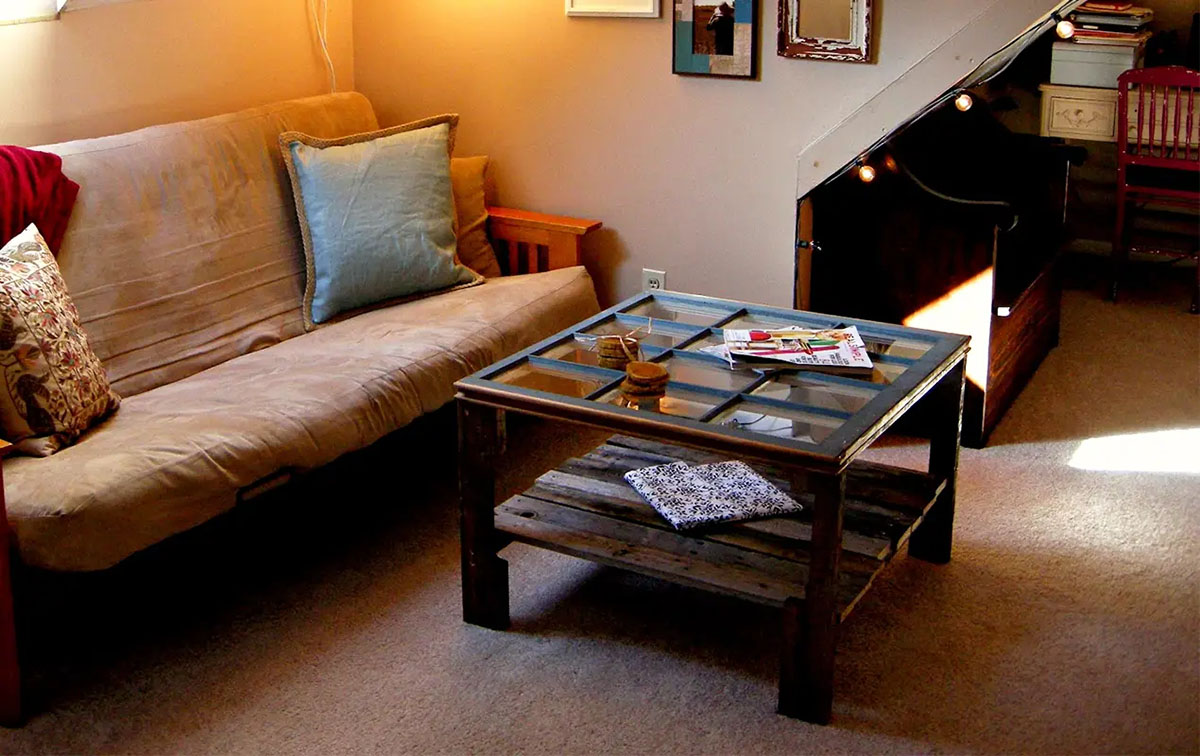
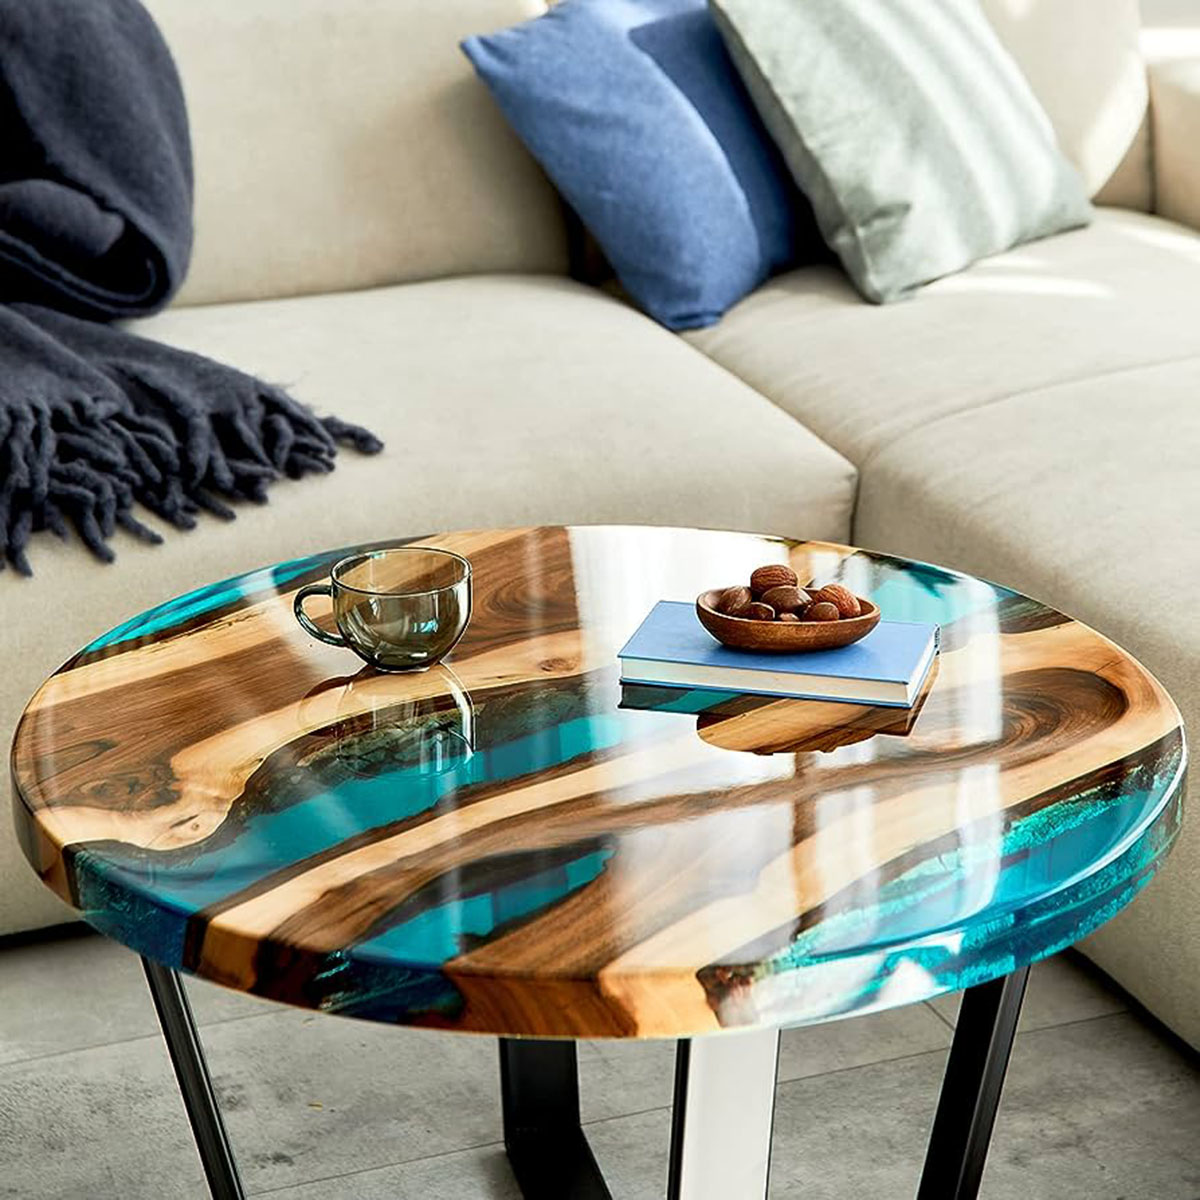
- Add decorative elements (optional): If you want to add a personal touch, consider incorporating decorative elements such as stencils, decals, or even a glass top. This step is optional but can elevate the visual appeal of your coffee table.
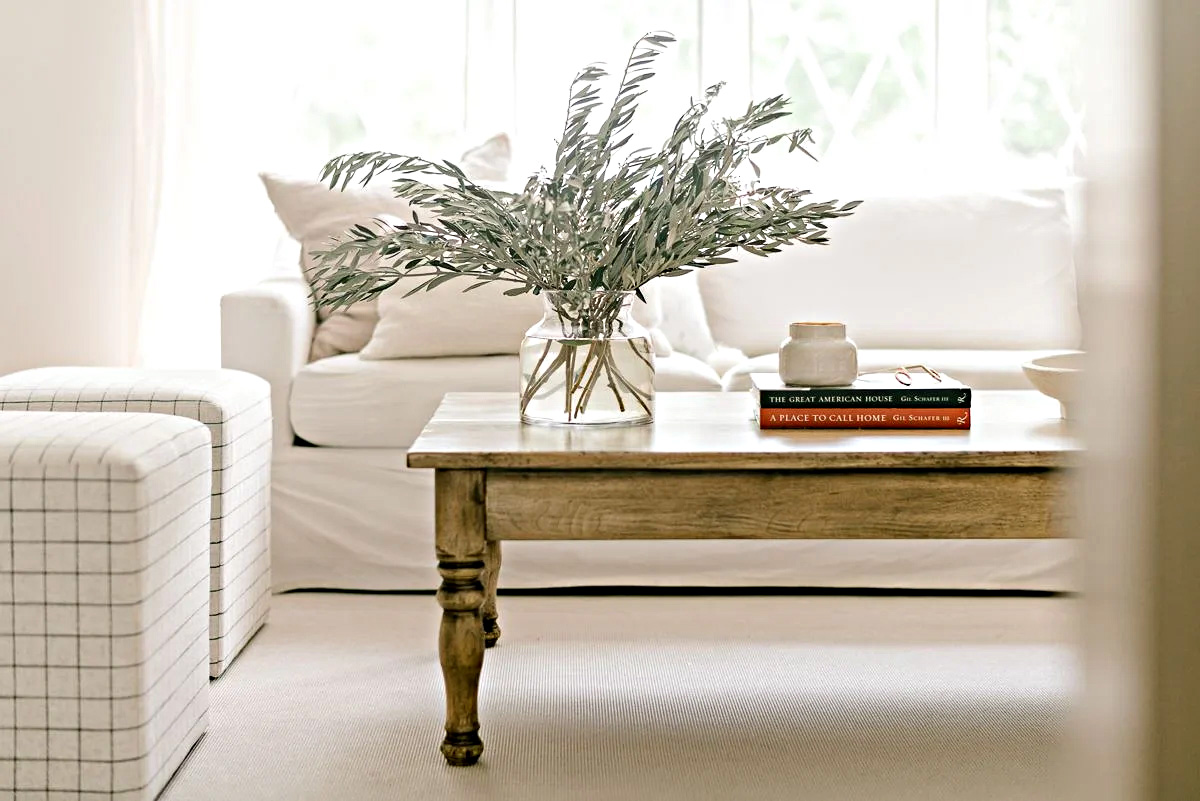
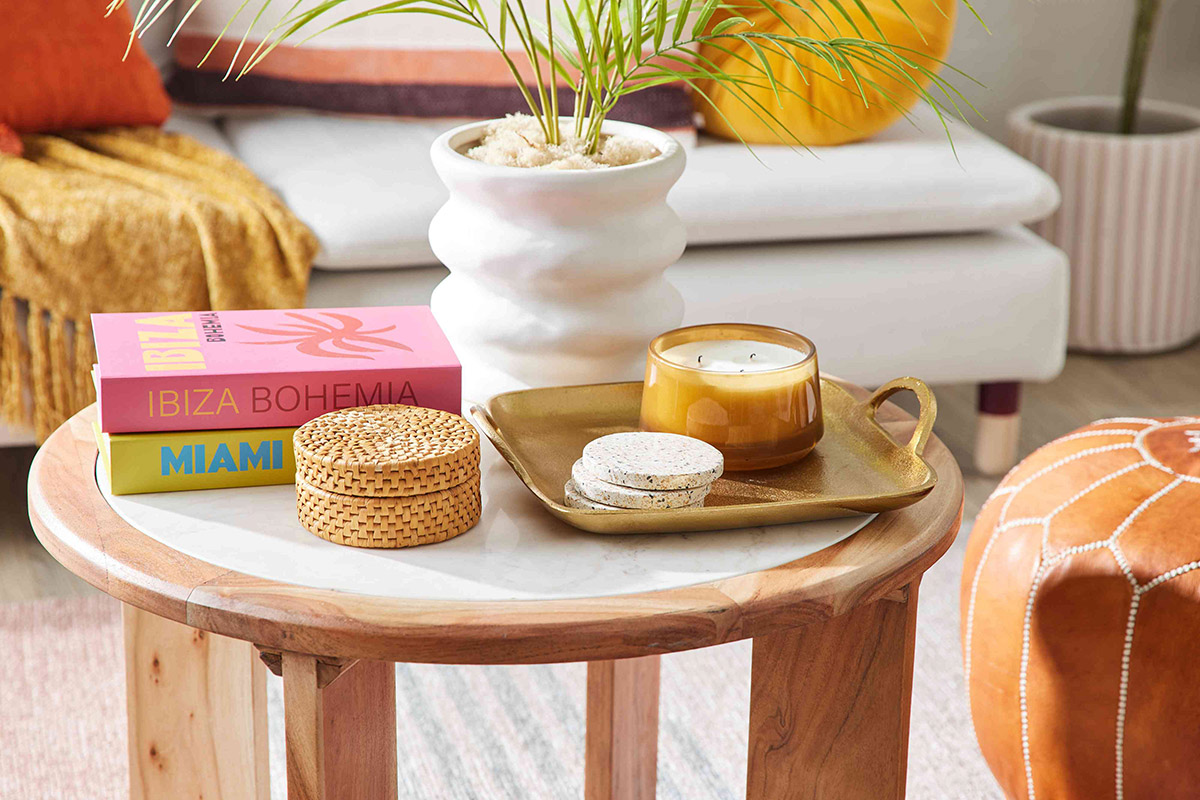
- Arrange and style your table: Once the finish has dried, take a moment to arrange and style your table. Consider adding a tray, books, candles, or plants to create an inviting and personalized display.
- Protect your floor: To prevent any scratches or damage to your flooring, consider adding felt pads or glides to the bottom of the coffee table legs or wheels. This will ensure a smooth and easy movement while protecting your surfaces.
Adding the finishing touches allows you to refine the overall appearance of your wood pallet coffee table, making it a standout piece in your living room. Take your time to carefully complete this step, ensuring a high-quality and professional result.
Now that you have completed all the necessary steps, admire your hard work and enjoy your newly created wood pallet coffee table. Sit back, relax, and relish in the satisfaction of having crafted a unique and functional piece of furniture.
Remember, the beauty of DIY projects lies in the ability to customize and experiment. Don’t be afraid to let your creativity shine and make this project truly your own.
We hope this guide has been helpful in guiding you through the process of making a wood pallet coffee table. Happy crafting!
Conclusion
Congratulations on successfully completing your wood pallet coffee table! By following the steps in this guide, you have transformed a simple wooden pallet into a unique and personalized piece of furniture that adds character and style to your living room.
Through the process of preparing the pallet, sanding it to achieve a smooth surface, and adding a stain or paint finish, you have created a coffee table that reflects your personal taste and complements your existing decor. Additionally, if you decided to add wheels or legs, you have enhanced the functionality and aesthetics of your table even further.
Creating your own wood pallet coffee table not only allows you to showcase your creativity but also presents an eco-friendly and budget-friendly alternative to purchasing new furniture. By repurposing materials, you have contributed to sustainable living and reduced waste.
Remember, the steps provided in this guide serve as a framework, but you can always modify and customize them to suit your preferences. Feel free to experiment with different stains, paint colors, or decorative elements to make your coffee table truly unique.
Now that your wood pallet coffee table is complete, take a moment to appreciate your craftsmanship and enjoy the fruits of your labor. Whether you use it as a place to rest your cup of coffee, display your favorite books, or gather with loved ones, your new coffee table is sure to be a conversation starter and a cherished addition to your living room.
We hope this guide has inspired you to embark on more DIY projects and explore your creative side. Happy crafting and enjoy your beautiful wood pallet coffee table!
Frequently Asked Questions about How To Make A Wood Pallet Coffee Table
Was this page helpful?
At Storables.com, we guarantee accurate and reliable information. Our content, validated by Expert Board Contributors, is crafted following stringent Editorial Policies. We're committed to providing you with well-researched, expert-backed insights for all your informational needs.

0 thoughts on “How To Make A Wood Pallet Coffee Table”