Home>Garden Essentials>How To Start Cilantro Seeds Indoors
Garden Essentials
How To Start Cilantro Seeds Indoors
Modified: October 20, 2024
Learn how to start cilantro seeds indoors and successfully grow your own garden with this step-by-step guide. Start your gardening journey today!
(Many of the links in this article redirect to a specific reviewed product. Your purchase of these products through affiliate links helps to generate commission for Storables.com, at no extra cost. Learn more)
Introduction
Welcome to the world of cilantro! If you have a passion for cooking and love the fresh, aromatic flavors of Mexican, Indian, or Asian cuisine, then growing cilantro in your own garden is a must. This versatile herb not only adds a burst of flavor to your recipes but also provides numerous health benefits. Starting cilantro seeds indoors is an excellent way to ensure a bountiful harvest and enjoy this delightful herb all year round.
In this article, we will guide you through the process of starting cilantro seeds indoors. Whether you are a seasoned gardener or a beginner with a green thumb, we will provide all the necessary information and tips to help you successfully germinate and grow cilantro from seed to harvest.
Why start cilantro seeds indoors, you may ask? Well, one of the primary reasons is that cilantro seeds have a relatively low germination rate when sown directly in the garden. By starting the seeds indoors, you can control the growing conditions, provide optimal care, and increase the chances of successful germination. Additionally, starting seeds indoors allows you to get a head start on the growing season and enjoy fresh cilantro earlier.
So, let’s dive in and discover the joys of growing cilantro right in the comfort of your own home!
Key Takeaways:
- Starting cilantro seeds indoors gives you control over growing conditions, extends the growing season, and ensures higher germination rates, leading to a continuous and cost-effective harvest of this flavorful herb.
- By choosing the right seeds, providing optimal growing conditions, and caring for the seedlings, you can enjoy the satisfaction of harvesting and savoring your homegrown cilantro in a variety of culinary delights.
Read more: How To Grow Cilantro From Seed Indoors
Benefits of Starting Cilantro Seeds Indoors
Starting cilantro seeds indoors offers several advantages for home gardeners. Let’s explore some of the benefits:
- Greater control over growing conditions: When you start cilantro seeds indoors, you have full control over the growing environment. You can adjust factors like temperature, moisture, and light to create optimal conditions for germination and growth.
- Extended growing season: By starting seeds indoors, you can get a head start on the growing season. Cilantro is a cool-season herb, and starting seeds indoors allows you to begin growing earlier. This means you can have fresh cilantro for your culinary creations before it’s even available in stores.
- Higher germination rates: Cilantro seeds have a reputation for low germination rates when sown directly in the garden. By planting them indoors, you can increase the chances of successful germination. This ensures a higher number of viable seedlings for transplanting in the garden.
- Controlled pest and disease management: When you start cilantro seeds indoors, you minimize the risk of pests and diseases affecting your plants. Indoor environments are more controlled and less susceptible to common garden pests like aphids and snails.
- Convenience and accessibility: Having cilantro within arm’s reach is convenient, especially for home cooks who appreciate the herb’s vibrant flavor. Starting cilantro seeds indoors allows you to grow the herb wherever it is most convenient for you, whether it’s on a windowsill, balcony, or kitchen countertop.
- Continuous harvest: By starting seeds indoors, you can stagger your plantings at different intervals. This ensures a continuous supply of fresh cilantro throughout the growing season. As one batch reaches maturity, you can start seeds for the next round, keeping your kitchen stocked with fragrant leaves.
- Cost-effective: Growing cilantro from seed is more cost-effective than purchasing mature plants or pre-cut herbs from the store. Starting seeds indoors allows you to get more plants for your money, as well as explore different cilantro varieties that may not be readily available at local nurseries.
With all these benefits in mind, it’s clear why starting cilantro seeds indoors is a smart choice for any herb enthusiast. Now, let’s move on to the materials you will need for this exciting gardening journey.
Materials Needed
Before you start the process of starting cilantro seeds indoors, gather the following materials:
- Seeds: Purchase high-quality cilantro seeds from a reputable seed supplier. Look for seeds that are fresh and have a high germination rate. Consider choosing varieties that suit your taste preferences or culinary needs.
- Seedling trays or small pots: Use seedling trays or small pots with drainage holes to sow the cilantro seeds. These containers should be at least 2-3 inches deep to allow adequate root development.
- Seed-starting soil mix: Use a well-draining seed-starting soil mix that is specifically formulated for starting seeds. Avoid using regular garden soil, as it can be too heavy and may hinder seed germination.
- Plastic wrap or seedling dome: Cover the seedling trays or pots with plastic wrap or a seedling dome to create a greenhouse-like environment that promotes seed germination. This helps retain moisture and warmth for optimal seedling growth.
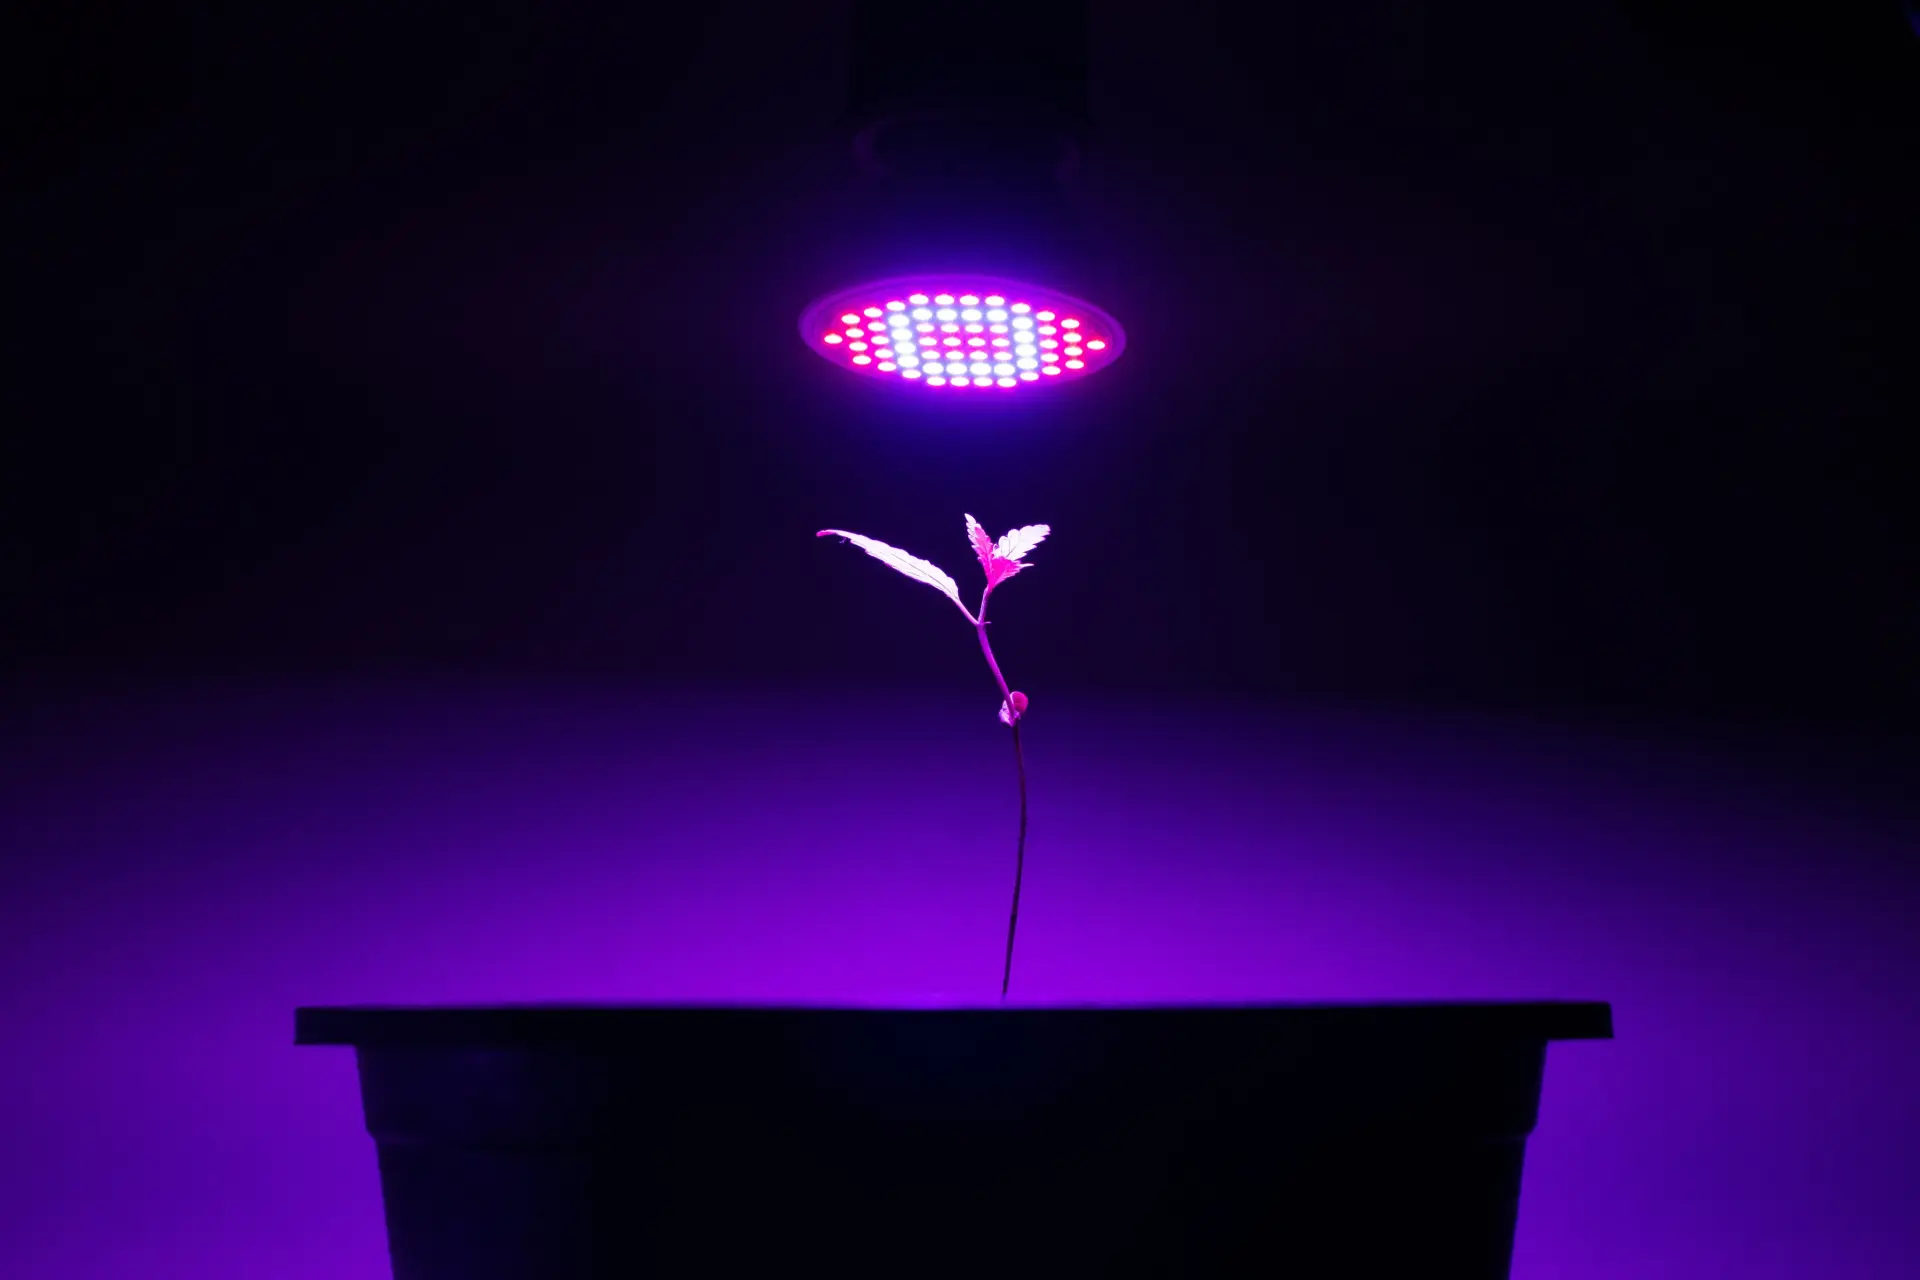
- Grow lights or sunny windowsill: Cilantro seeds require ample sunlight or artificial grow lights for proper growth. If you don’t have access to a sunny windowsill, invest in full-spectrum LED grow lights to provide the necessary light intensity and spectrum.
- Spray bottle: Use a spray bottle filled with water to mist the soil surface and keep it evenly moist during the germination process.
- Watering can: Once the seedlings have emerged, use a watering can with a fine rose head to water the plants gently. Avoid overwatering, as this can lead to root rot.
- Fertilizer: Consider using a balanced liquid fertilizer or organic amendments to provide essential nutrients to the seedlings during their growth phase. Follow the recommended application rates on the fertilizer packaging.
- Plant markers: Use plant markers or small labels to identify the different cilantro varieties or planting dates. This will help you keep track of your plants as they grow.
Having these materials ready will set you up for success as you embark on your cilantro growing journey. In the next step, we will discuss how to choose the right cilantro seeds for starting indoors.
Step 1: Choosing the Right Seeds
Choosing the right cilantro seeds is crucial for a successful indoor growing experience. Here are some tips to help you select the best seeds:
- Choose fresh seeds: Look for seeds that are relatively recent or within their expiry date. Fresh seeds have a higher germination rate and are more likely to produce vigorous seedlings.
- Consider seed variety: Cilantro comes in various varieties, each with its unique flavor profile and growth characteristics. Decide if you prefer the mild and citrusy flavor of the Santo variety or the spicy and pungent flavor of the Calypso variety. There are also slow-bolting varieties available, which are perfect for extended harvests.
- Opt for organic or untreated seeds: If you prioritize organic gardening, choose organic or untreated cilantro seeds. These seeds are not treated with any chemicals or pesticides, making them a healthier choice for both you and the environment.
- Check for high germination rates: Look for seeds that have high germination rates, indicated on the packaging or seed supplier’s website. Higher germination rates ensure a greater chance of successful seed germination and healthy seedlings.
- Consider heirloom varieties: If you are interested in preserving traditional varieties and supporting seed diversity, consider choosing heirloom cilantro seeds. These seeds are open-pollinated and have been passed down through generations, offering unique flavors and characteristics.
When purchasing cilantro seeds, it’s often beneficial to source them from reputable seed companies or local nurseries. They can provide valuable information about the seeds’ origin, characteristics, and the best growing practices.
Once you have selected the right seeds, you are ready to proceed to the next step: preparing the containers for sowing the seeds. Let’s get our hands dirty!
Step 2: Preparing Containers
Properly preparing the containers for sowing cilantro seeds is vital to provide a suitable environment for seed germination and early growth. Follow these steps to prepare your containers:
- Select container type: Choose seedling trays or small pots with drainage holes that are at least 2-3 inches deep. Ensure that the containers are clean and free from any debris or residue.
- Add a sterile seed-starting mix: Fill the containers with a well-draining seed-starting mix. This type of soil mix is designed to provide the right balance of moisture retention and aeration. Avoid using regular garden soil, as it can become compacted and hinder seedling growth.
- Moisten the soil: Before sowing the seeds, moisten the soil in the containers. Use a spray bottle or misting attachment on your watering can to ensure even moisture distribution. The soil should be damp but not soggy.
- Make planting depressions: Using your finger or the end of a pencil, create small planting depressions in the soil. These depressions should be about ¼ to ½ inch deep and spaced around 1 inch apart.
- Sow the seeds: Place one cilantro seed in each planting depression. Gently cover the seeds with a thin layer of soil or vermiculite, ensuring they are not buried too deeply. Lightly pat the soil down to ensure good seed-to-soil contact.
- Label the containers: To keep track of the different varieties or planting dates, label each container with the cilantro variety and the date of sowing. This will help you monitor the growth and harvest times of your cilantro plants.
- Provide proper labeling: Cover the containers with plastic wrap or a seedling dome to create a mini greenhouse effect. This helps retain moisture and create a warm environment to facilitate seed germination.
Remember to place the containers in a warm location with indirect sunlight or under grow lights. Maintain consistent moisture levels by misting the soil surface with water as needed.
Now that your containers are prepared and the seeds are sown, it’s time to move on to step 3: planting the cilantro seeds. Stay tuned for the next part of the journey!
Read more: How To Start Lettuce Seeds Indoors
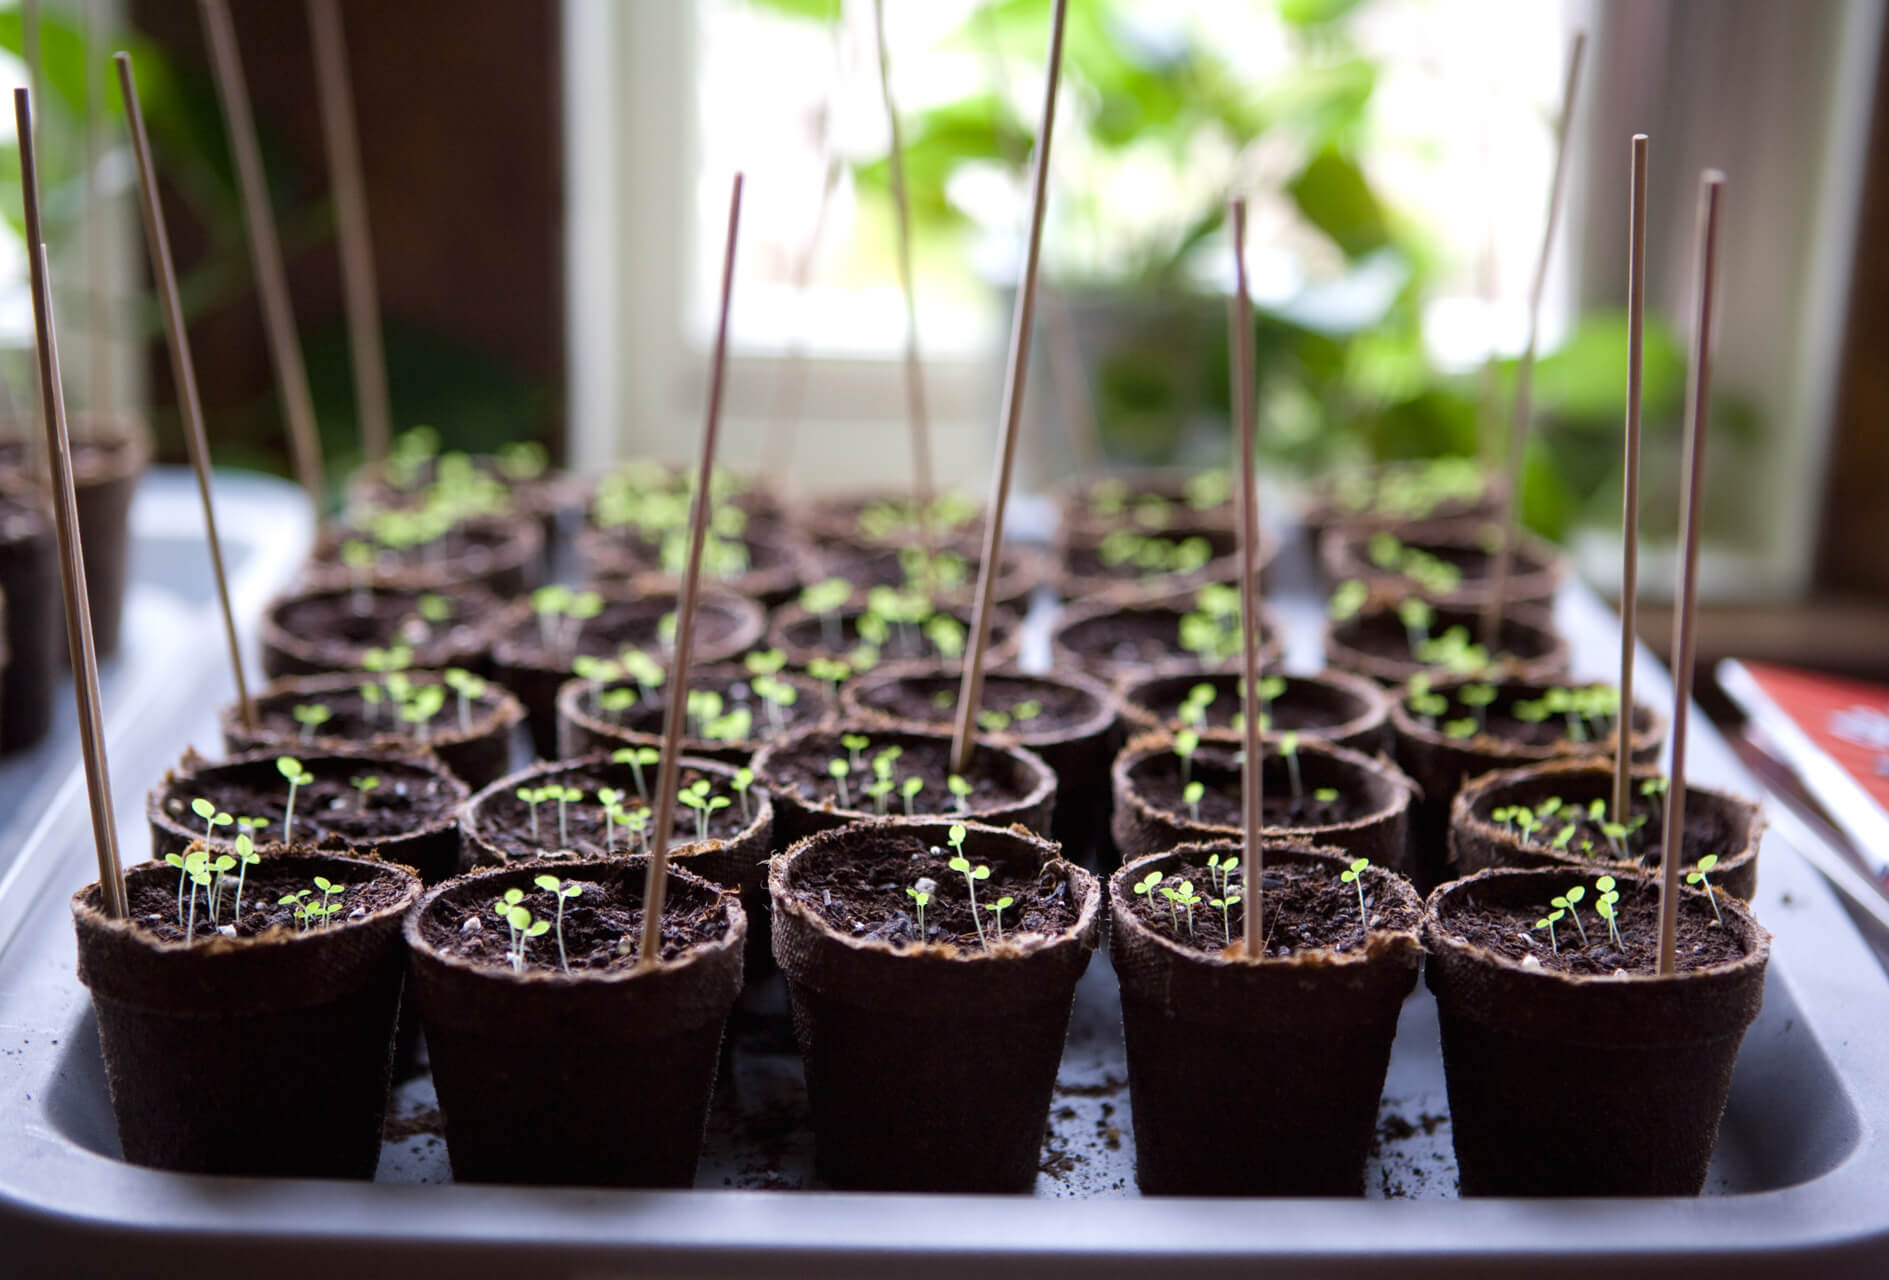
Step 3: Planting the Seeds
Now that you have prepared your containers and created the ideal environment for seed germination, it’s time to plant the cilantro seeds. Follow these steps to ensure successful planting:
- Sow the seeds: Take the prepared containers with moistened soil and make small depressions in the soil using your finger or the end of a pencil. Place one cilantro seed in each depression, ensuring they are spaced about 1 inch apart. Be gentle and careful not to disturb the soil too much.
- Cover the seeds: After placing the seeds in the depressions, lightly cover them with a thin layer of soil or vermiculite. Avoid burying the seeds too deeply, as they need access to light for germination. A general rule of thumb is to cover the seeds with a layer that is no thicker than the seed’s diameter.
- Water the containers: After sowing the seeds, gently water the containers to ensure the soil is evenly moist. Use a fine spray from a watering can with a rose head attachment or mist the surface with a spray bottle. Avoid overwatering to prevent waterlogging and seed rot.
- Cover the containers: Place a plastic wrap or a seedling dome over the containers to create a mini greenhouse effect. This helps retain moisture and warmth, providing an ideal environment for seed germination.
- Provide indirect light: Place the containers in a warm location with indirect sunlight or under grow lights. Cilantro seeds require light to germinate, so ensure they get around 12-16 hours of light per day. Adjust the height of the grow lights to maintain a distance of 3-6 inches above the seedlings.
- Monitor growth and moisture: Check the containers daily to monitor the growth progress and moisture levels. Remove the plastic wrap or dome periodically to allow fresh air circulation and prevent moisture buildup. Ensure that the soil remains consistently moist but not waterlogged.
With proper planting techniques and adequate care, you should start to see cilantro seedlings emerge within 7-14 days. Once the seedlings have grown to a few inches tall and have developed their first true leaves, it’s time to move on to the next step: providing optimal growing conditions for the seedlings. Stay tuned for step 4!
To start cilantro seeds indoors, plant them in a shallow container with well-draining soil, keep the soil consistently moist, and place the container in a warm, sunny location. Once the seedlings have grown a few inches tall, they can be transplanted outdoors.
Step 4: Providing Optimal Growing Conditions
Now that your cilantro seedlings have emerged, it’s important to provide them with the right growing conditions to ensure their health and vitality. Follow these guidelines to create an optimal environment for your growing cilantro:
- Light: Cilantro seedlings require ample light for healthy growth. If you are growing them indoors, place them in a location that receives at least 6-8 hours of bright, indirect sunlight daily. If natural light is insufficient, supplement with full-spectrum grow lights.
- Temperature: Cilantro thrives in cool temperatures around 60-75°F (15-24°C). Maintain a consistent temperature within this range to encourage healthy growth. Avoid exposing the seedlings to extreme temperature fluctuations or drafts.
- Humidity: Adequate humidity levels are essential for cilantro seedling growth. Aim for a relative humidity of around 50-70%. If the air is too dry, place a tray with water near the seedlings to increase humidity. Avoid misting the foliage directly, as this can promote fungal diseases.
- Watering: Water the seedlings whenever the top inch of soil feels dry to the touch. Use a watering can with a fine rose head attachment to avoid excessive force that could dislodge the delicate seedlings. Ensure the soil is moist but not waterlogged, as cilantro prefers slightly drier conditions than many other herbs.
- Fertilizer: Once the seedlings have developed their second set of true leaves, begin fertilizing them with a balanced liquid fertilizer diluted to half the recommended strength. Apply the fertilizer every two weeks to provide essential nutrients for healthy growth. Alternatively, you can use organic amendments like compost or seaweed extract.
- Thinning: If multiple seedlings have germinated in one container, thin them out by carefully removing the weaker seedlings, leaving only the strongest ones spaced about 3-4 inches apart. This allows each seedling to have sufficient space and resources to grow into robust cilantro plants.
- Air circulation: Good air circulation helps prevent fungal diseases and strengthens the seedlings. Ensure there is adequate airflow around the plants by keeping them spaced apart and avoiding overcrowding.
By providing optimal growing conditions, you will encourage vigorous growth and ensure that your cilantro seedlings develop into healthy, robust plants. In the next step, we will discuss how to care for your seedlings as they mature. Stay tuned!
Step 5: Caring for Seedlings
As your cilantro seedlings continue to grow, it’s important to provide them with proper care to ensure their well-being. Follow these steps to care for your cilantro seedlings:
- Watering: Monitor the soil moisture levels regularly and water the seedlings whenever the top inch of soil feels dry. Avoid overwatering, as cilantro prefers slightly drier conditions. Water the soil directly and try to avoid wetting the foliage to prevent fungal diseases.
- Thinning: If you have multiple seedlings in one container, thin them out to give each plant enough space and resources to grow. Carefully remove the weaker seedlings, leaving the strongest ones spaced about 3-4 inches apart.
- Weeding: Keep the area around the seedlings free from weeds, as they can compete for nutrients and affect the growth of your cilantro plants. Gently remove any weeds by hand or with a small gardening tool.
- Pest control: Monitor your seedlings for any signs of pests such as aphids or caterpillars. If you spot any pests, remove them by hand or use organic pest control methods, like neem oil or insecticidal soap, following the instructions on the packaging. Early detection and intervention will help protect your seedlings from damage.
- Support: As the cilantro plants grow taller, they may need support to prevent them from bending or flopping over. Use small stakes or bamboo supports to gently tie the plants upright, being careful not to damage the delicate stems.
- Fertilizing: Continue fertilizing the seedlings every two weeks with a balanced liquid fertilizer or organic amendments like compost or seaweed extract. Follow the recommended dosage on the fertilizer packaging or the instructions for organic amendments.
- Harvesting: Once the seedlings have developed several sets of true leaves, you can start harvesting a few leaves at a time. Be mindful not to harvest more than one-third of the plant at once, as this can stunt its growth. Regular harvesting will encourage bushier growth and ensure a continuous supply of fresh cilantro.
By providing proper care for your cilantro seedlings, you will help them thrive and prepare them for transplanting outdoors. In the next step, we will discuss how to successfully transfer your seedlings to the garden. Stay tuned!
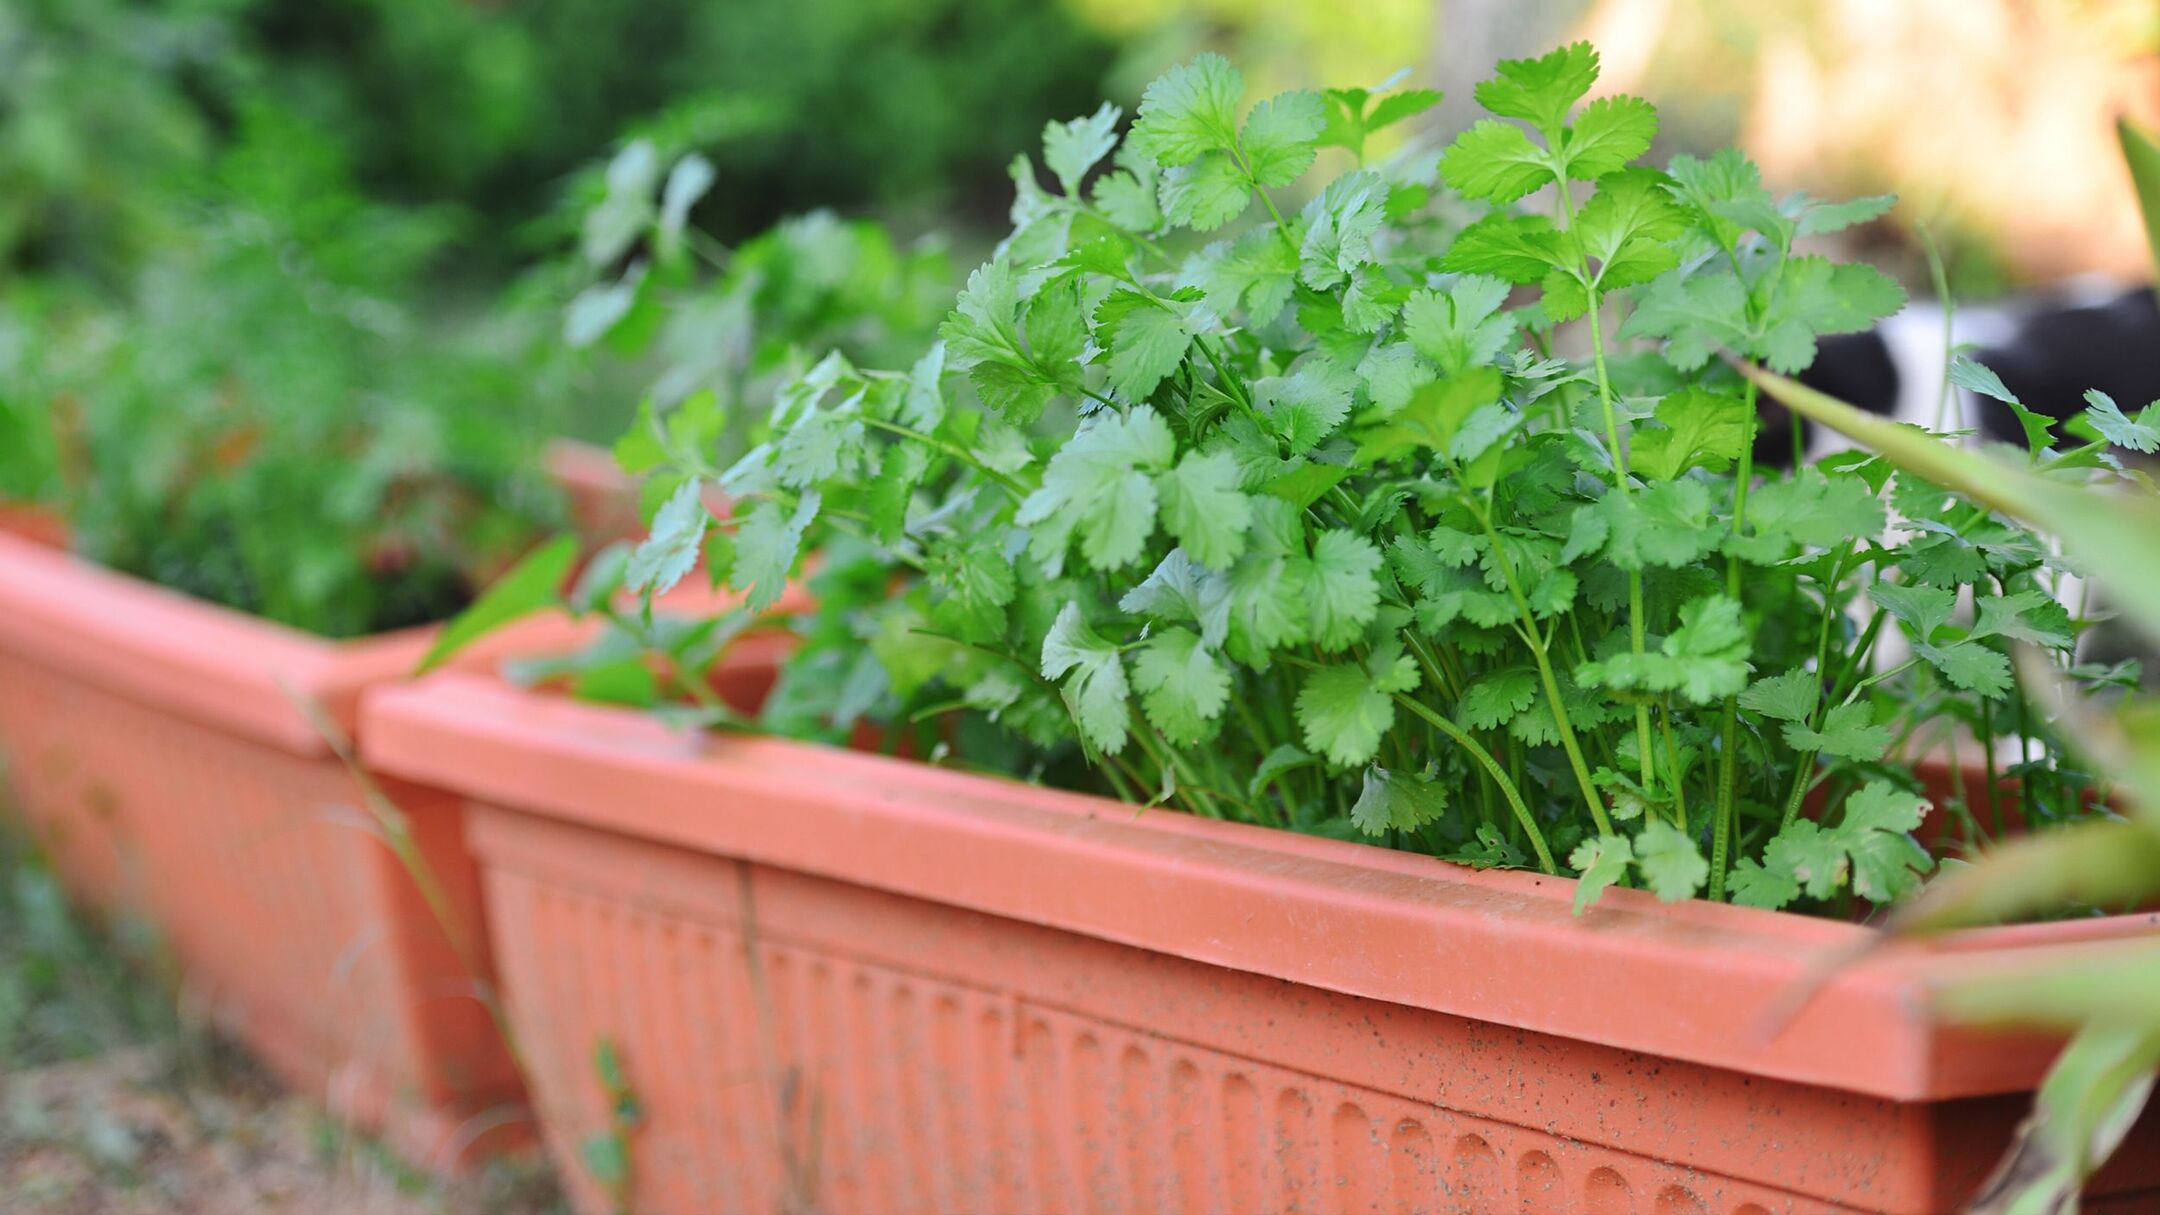
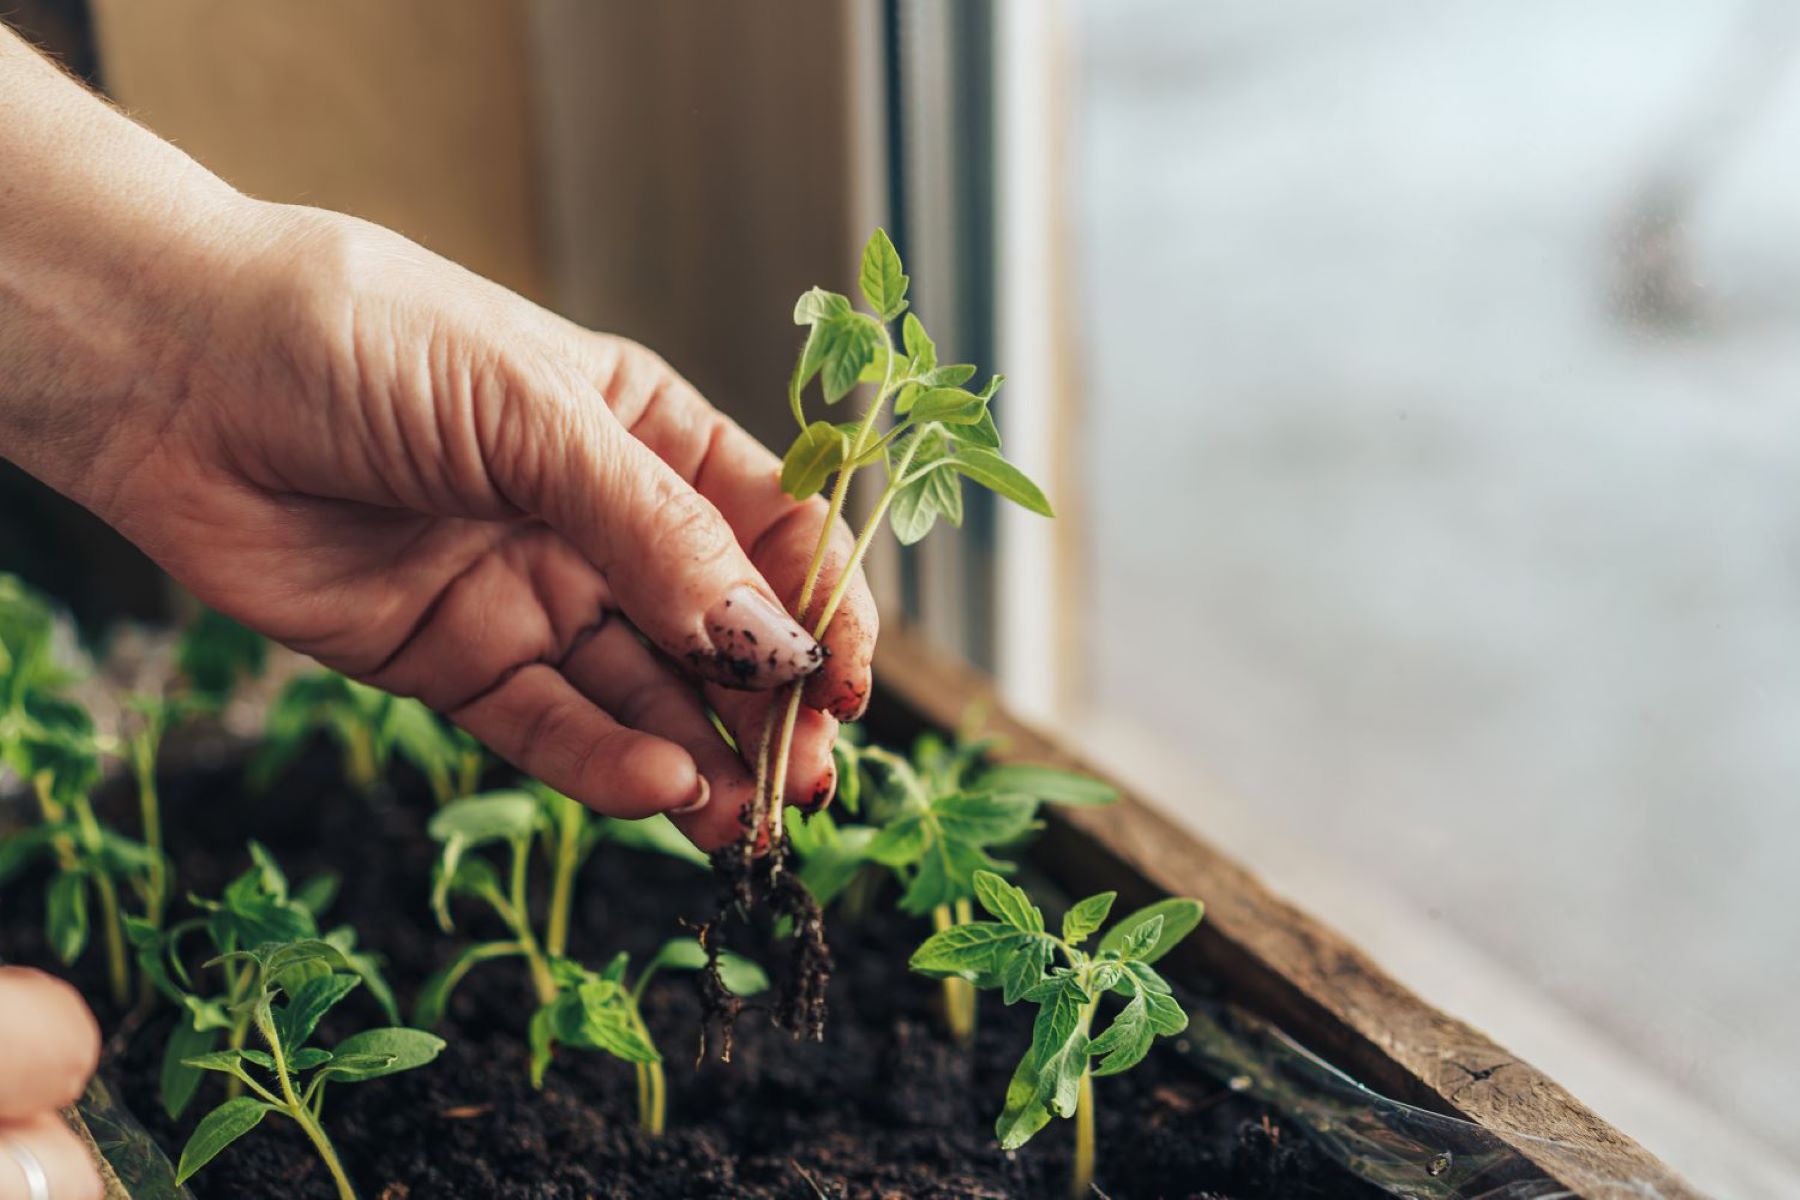
Step 6: Transferring Seedlings Outdoors
Once your cilantro seedlings have grown stronger and matured, it’s time to transplant them outdoors. Follow these steps to successfully transfer your seedlings to the garden:
- Timing: Choose a day to transplant your seedlings when the threat of frost has passed and the soil has warmed up. Cilantro thrives in cooler temperatures, so early spring or fall is often the ideal time for transplanting.
- Choose a suitable location: Select a spot in your garden that receives at least 4-6 hours of direct sunlight daily. Cilantro prefers well-draining soil, rich in organic matter. Prepare the soil by loosening it with a garden fork or tiller and incorporating compost or aged manure, if needed.
- Harden off seedlings: To help your seedlings acclimate to the outdoor conditions, gradually expose them to the outdoor environment. Start by placing them outdoors in a sheltered spot for a few hours a day, gradually increasing the duration over the course of a week.
- Transplanting: Dig holes in the prepared garden bed that are slightly larger than the root ball of each seedling. Gently remove the seedlings from their containers, being careful not to disturb the roots. Place each seedling in a hole, making sure the top of the root ball is level with the soil surface. Backfill the holes with soil and gently firm it around the base of the seedlings.
- Watering: After transplanting, thoroughly water the seedlings to settle the soil and help them establish in their new location. Keep the soil consistently moist for the first few weeks to promote root growth. As the plants become established, decrease the frequency of watering, allowing the soil to dry slightly between waterings.
- Mulching: Apply a layer of organic mulch, such as straw or shredded leaves, around the base of the seedlings. This helps conserve moisture, suppresses weed growth, and moderates soil temperature.
- Spacing: Space the cilantro plants around 6-8 inches apart in rows that are 12-15 inches apart. This allows sufficient air circulation and room for the plants to grow without competing for resources.
As your cilantro plants continue to grow and develop, remember to provide regular watering, monitor for pests and diseases, and harvest the leaves as needed to ensure continuous growth. In the next step, we will discuss the final step of the cilantro growing journey: harvesting and enjoying fresh cilantro!
Read more: How To Start Pepper Seeds Indoors
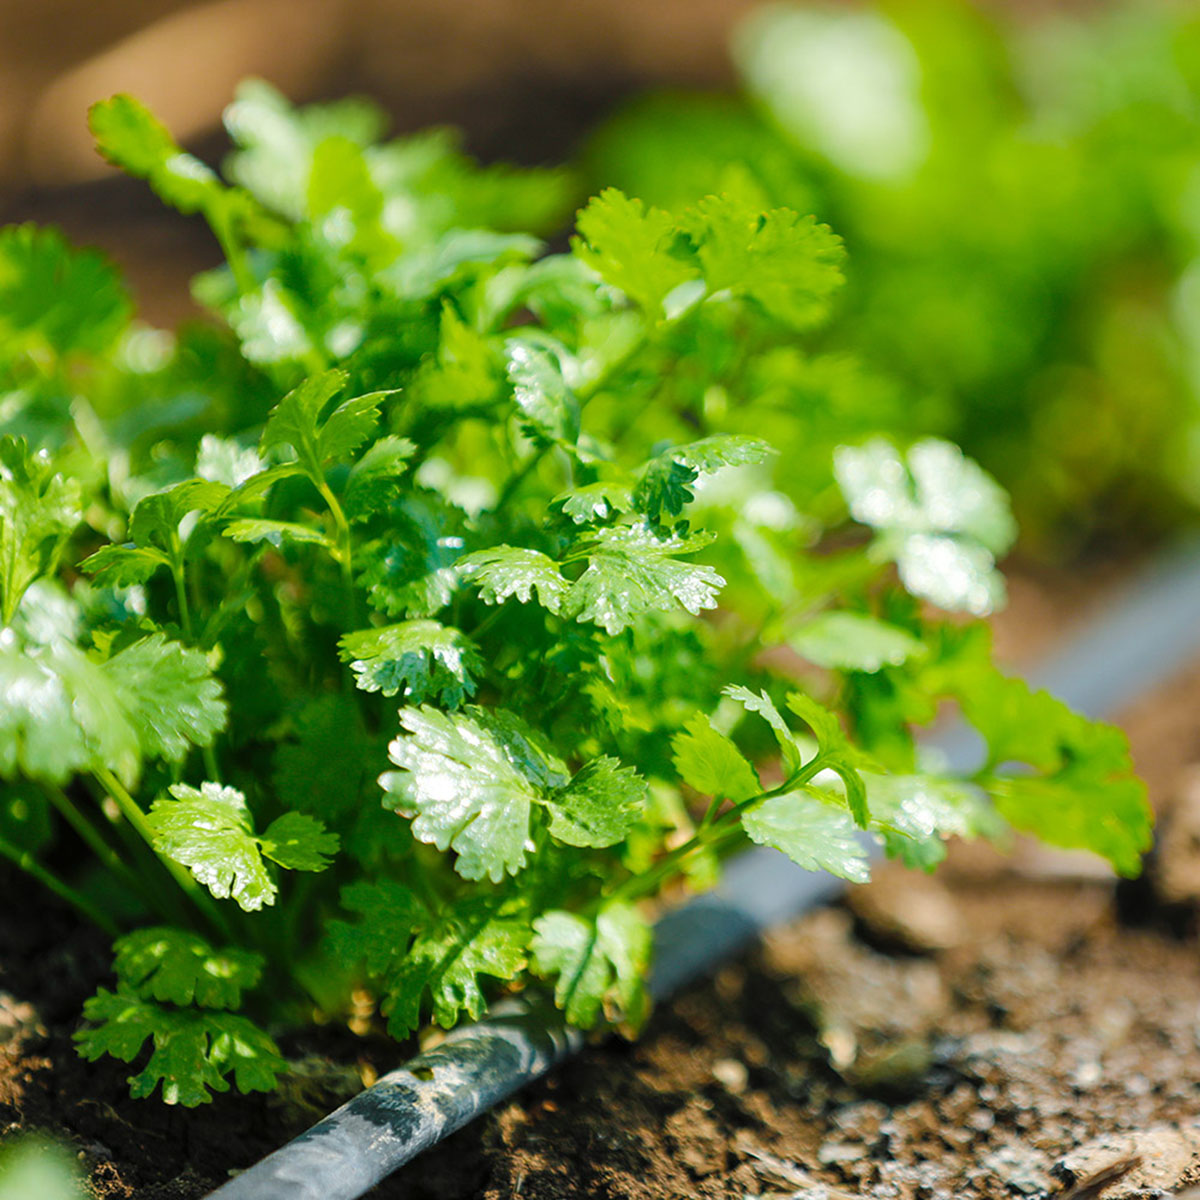
Step 7: Harvesting and Enjoying Fresh Cilantro
The time has come to harvest and savor the fresh flavors of your homegrown cilantro. Follow these steps to harvest and enjoy your bountiful harvest:
- Timing: Cilantro leaves are most flavorful when harvested before the plant starts to bolt or produce flowers. Harvesting during the early morning hours, when the essential oils are at their peak, can enhance the taste and aroma.
- Leaf harvest: Begin by harvesting the outermost leaves of the plant, working your way inward. Use sharp scissors or gardening shears to snip the leaves just above the base of the plant. Aim to harvest no more than one-third of the plant at a time, allowing it to continue growing and producing more leaves.
- Continuous harvesting: Regularly harvest the outer leaves every few days to promote new growth and a bushier plant. This will ensure a continuous supply of fresh cilantro throughout the growing season.
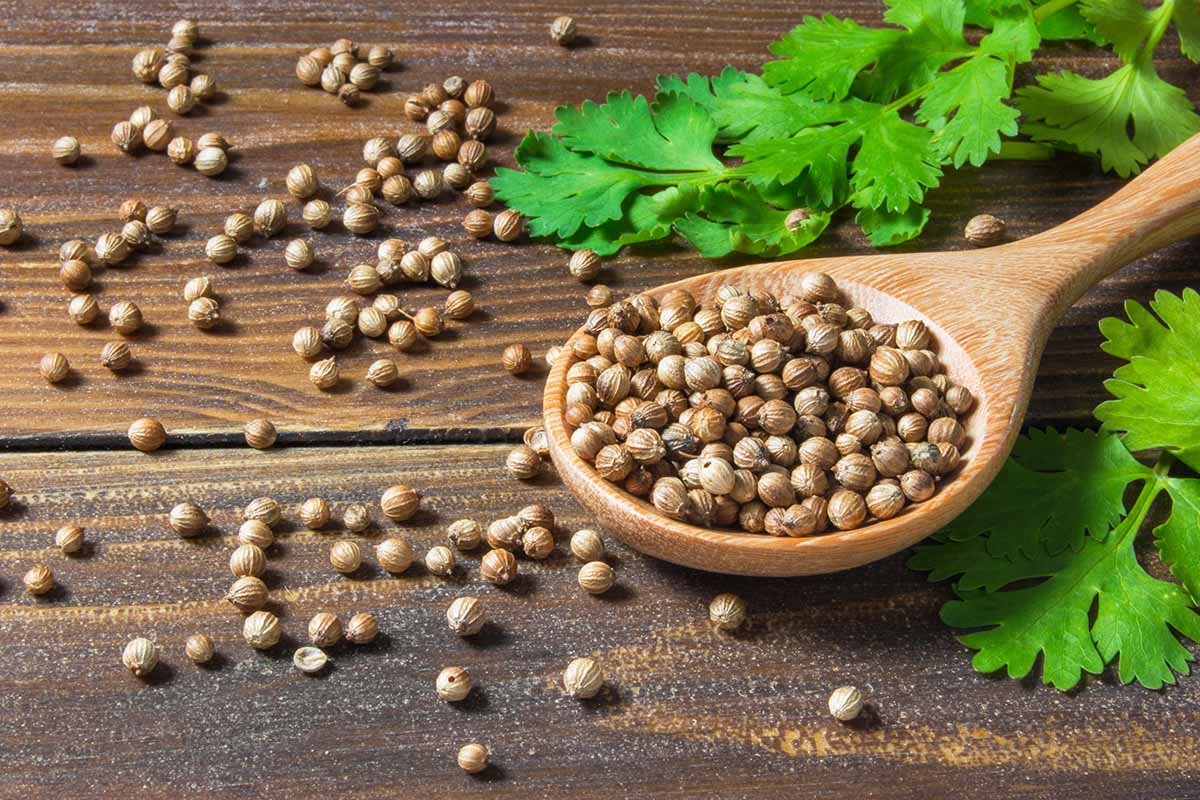
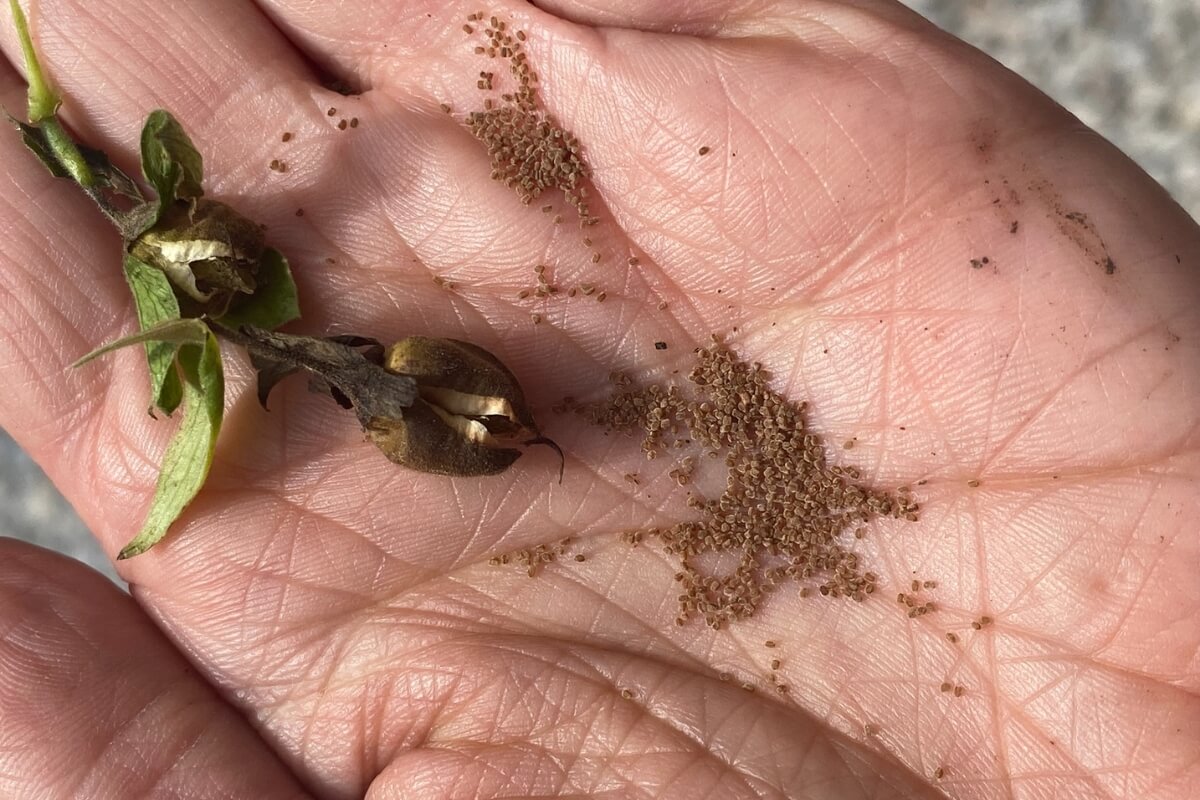
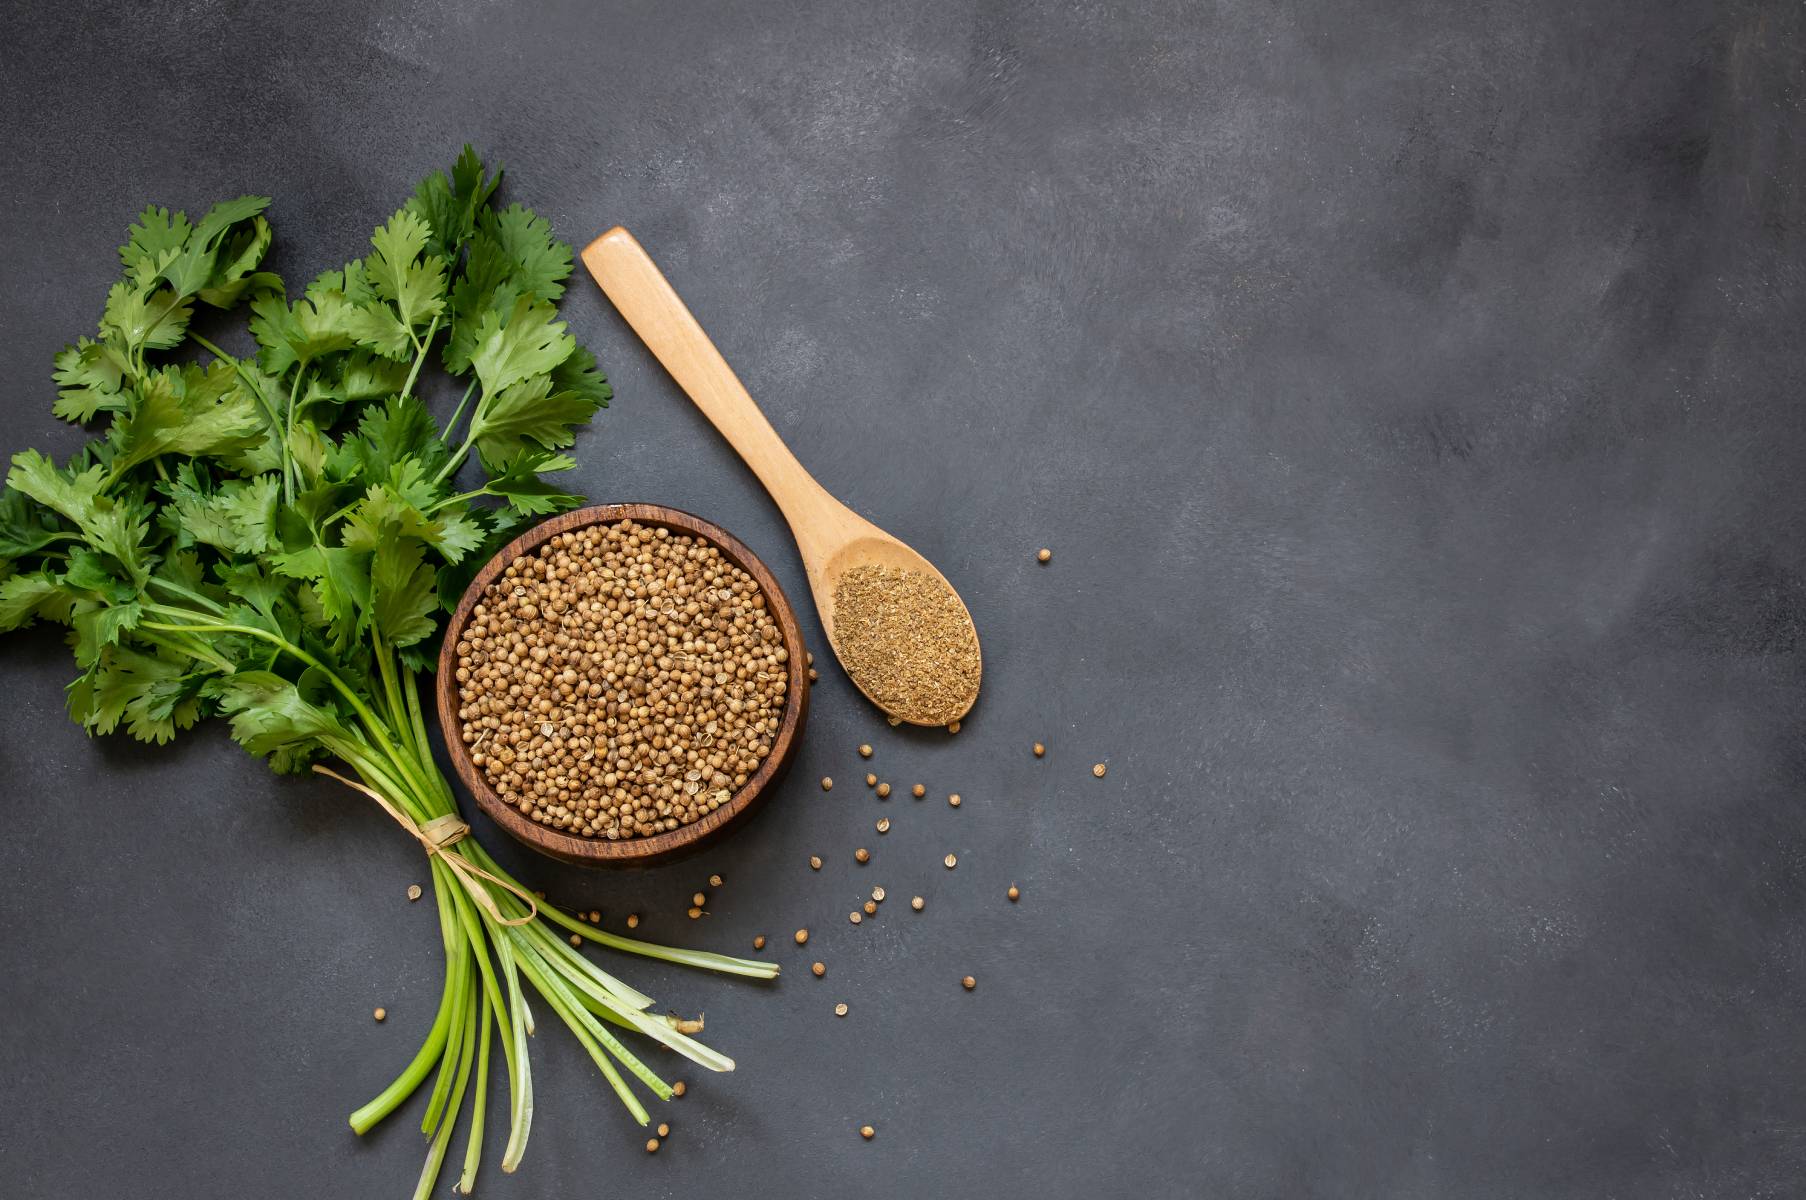
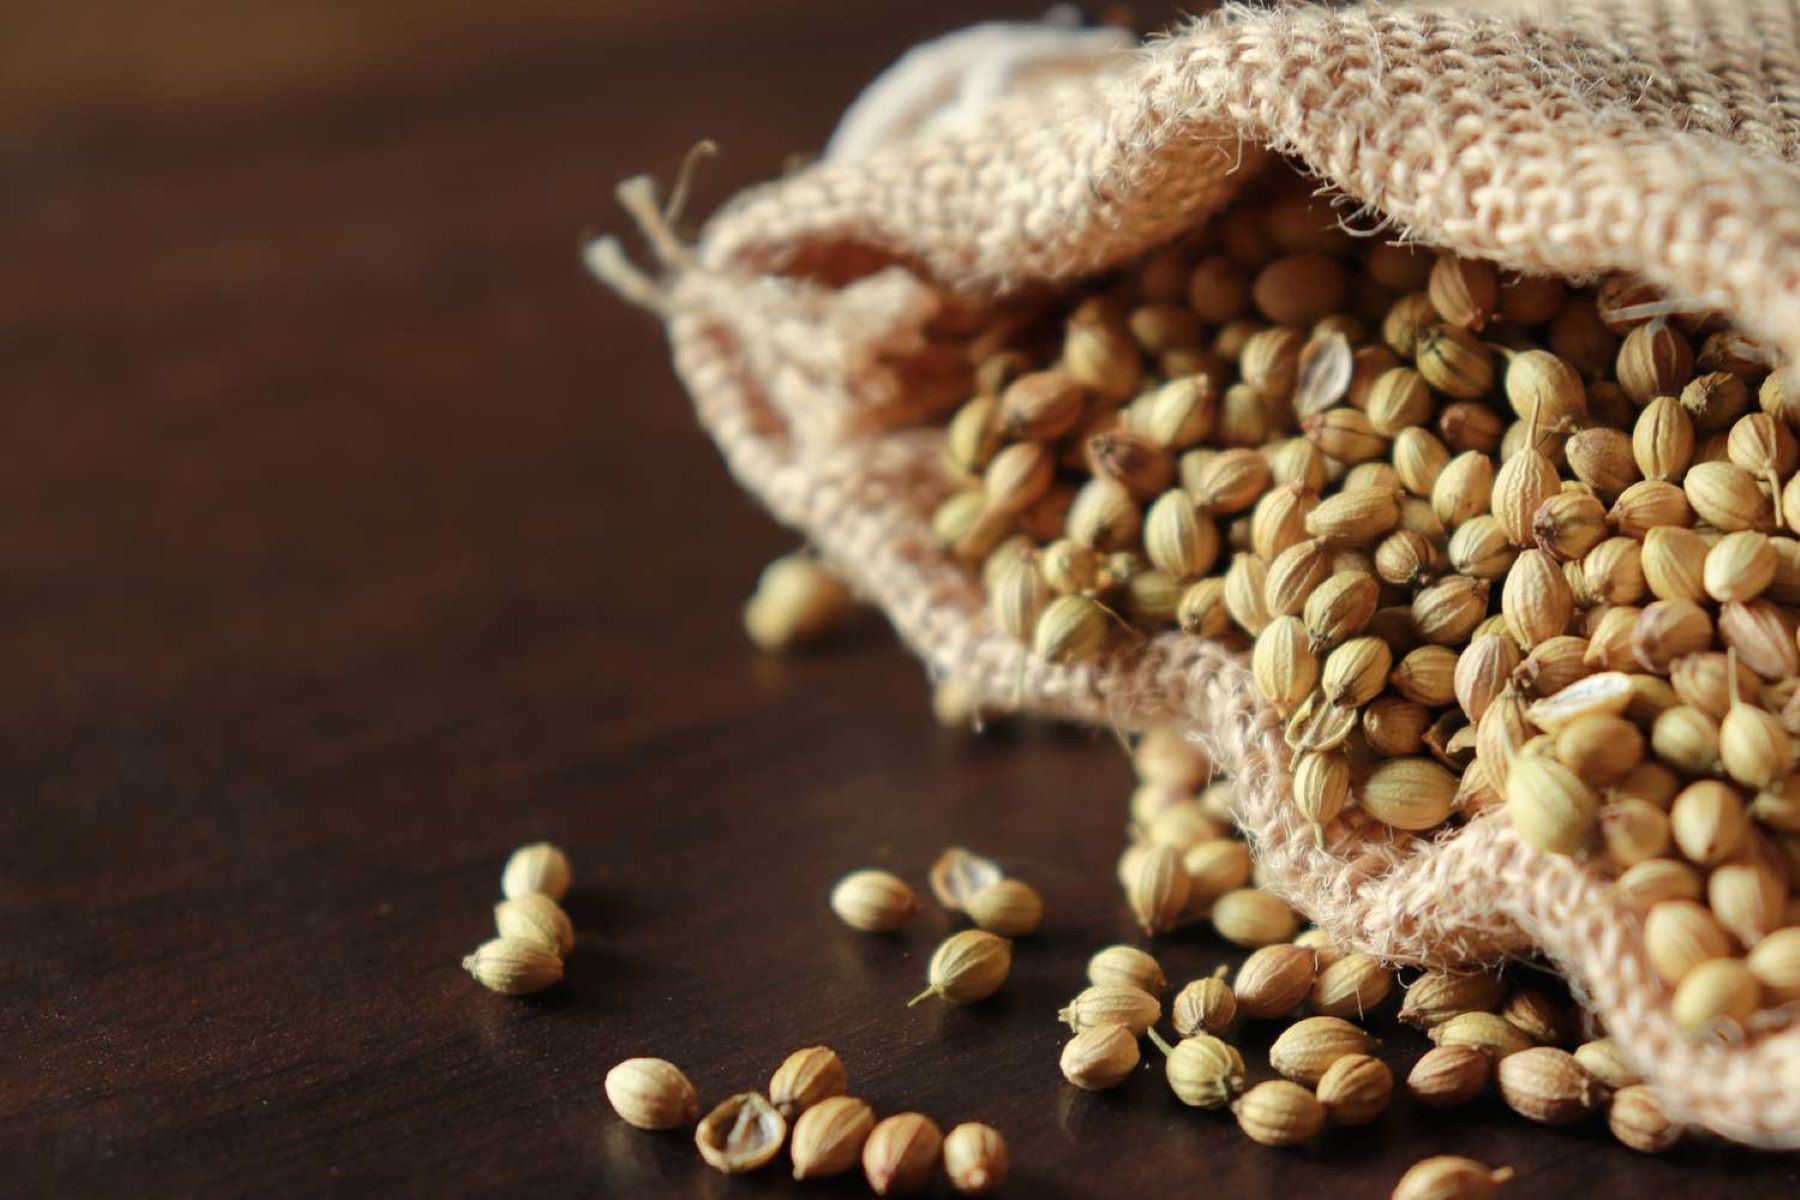
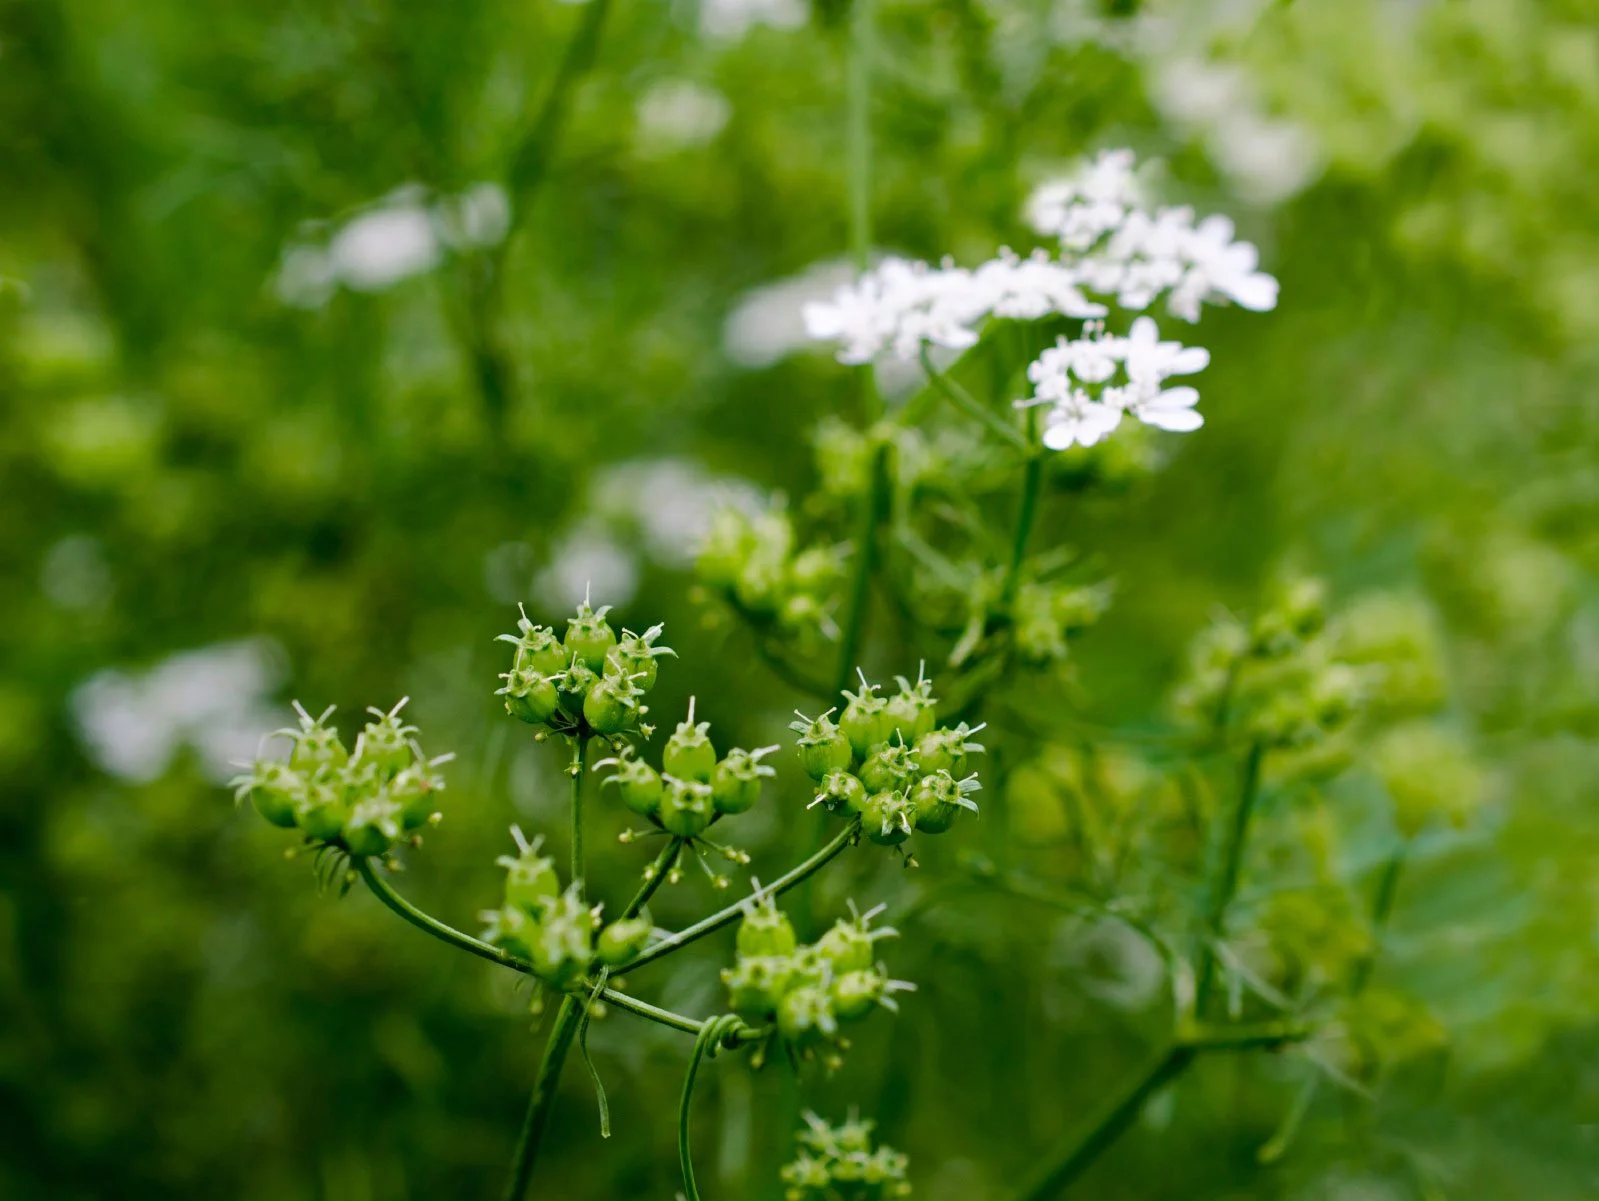
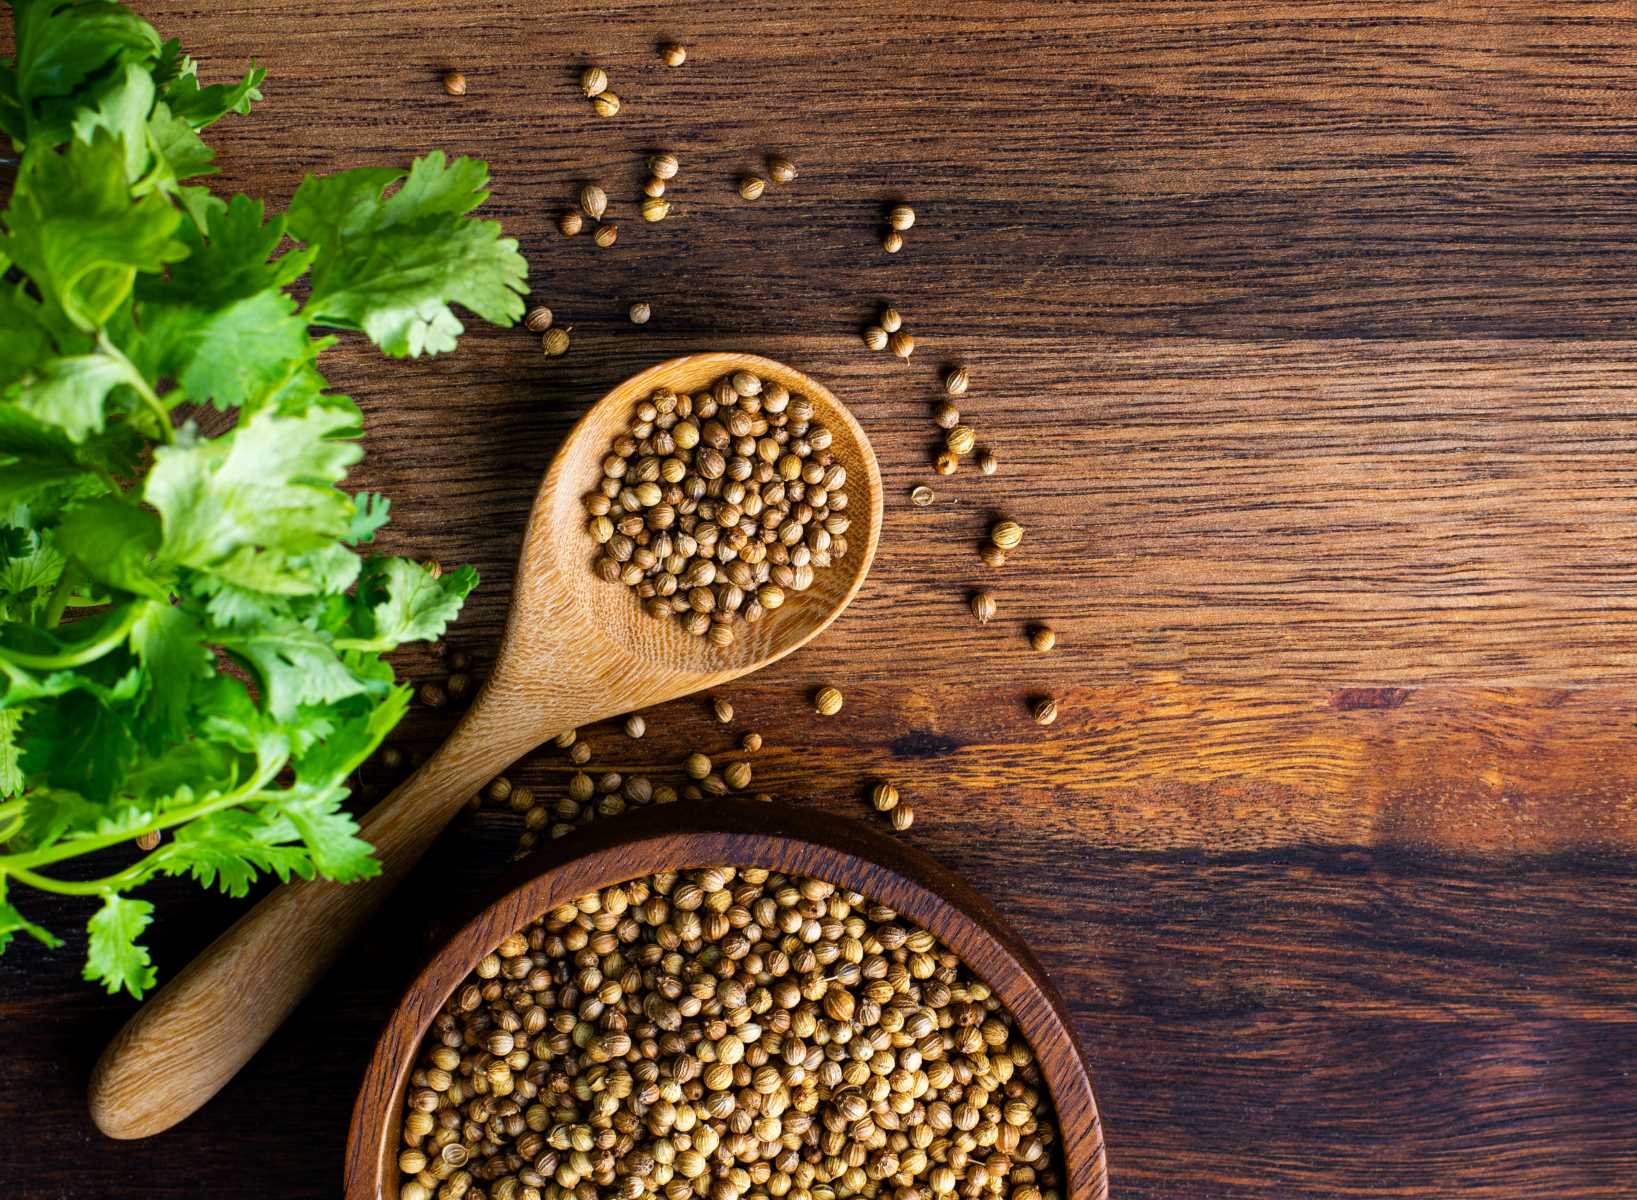
- Seed harvest: If you allow some plants to bolt and produce flowers, you can collect the cilantro seeds, often called coriander. Wait until the flowers fade and the seeds turn brown. Cut the seed heads and place them in a paper bag to dry. Once dry, gently crush the seed heads to release the coriander seeds.
- Storing cilantro: To store fresh cilantro, gently wash the leaves and pat them dry with a paper towel. Store the leaves in a perforated plastic bag or a container lined with a damp paper towel. Place the container in the refrigerator, where the cilantro can stay fresh for up to two weeks.
- Culinary uses: Fresh cilantro is a versatile herb that adds a unique and refreshing flavor to a wide range of dishes. Use it in Mexican salsas, Indian curries, Thai soups, or Asian stir-fries. Cilantro also pairs well with salads, marinades, and dips.
- Drying and preserving: If you have an abundance of cilantro, you can dry the leaves for long-term storage. Tie a bunch of cilantro stems together with twine and hang them upside down in a warm, well-ventilated area. Once dried, remove the leaves from the stems and store them in an airtight container.
Whether you’re harvesting fresh cilantro for immediate use or preserving it for future recipes, the satisfaction of growing and enjoying your own herb supply is truly rewarding.
Congratulations! You have successfully completed the journey of starting cilantro seeds indoors, nurturing the seedlings, transplanting them to the garden, and harvesting fresh cilantro leaves. Enjoy the flavors of your labor and feel the pride of growing your own herbs. Happy cooking and happy gardening!
If you have any further questions, don’t hesitate to reach out. Enjoy your bountiful cilantro harvest!
Conclusion
Congratulations on completing the journey of starting cilantro seeds indoors and growing your own supply of fresh and flavorful cilantro. By following the steps outlined in this guide, you’ve learned how to select high-quality seeds, prepare containers, sow seeds, provide optimal growing conditions, care for the seedlings, transplant outdoors, and finally, harvest and enjoy the fruits of your labor.
Starting cilantro seeds indoors offers several benefits, such as greater control over growing conditions, extended growing seasons, higher germination rates, controlled pest and disease management, convenience, continuous harvest, and cost-effectiveness.
Throughout this process, you’ve discovered the importance of choosing the right seeds, preparing suitable containers, providing the proper growing conditions, caring for the seedlings, and finally transplanting them into the garden. By following these steps, you have set yourself up for success in growing healthy and vibrant cilantro plants.
Remember to continue providing proper care for your cilantro plants as they grow, including watering, fertilizing, thinning, and supporting them. Regular harvesting and enjoying the fresh flavors of cilantro in your culinary creations will be a delightful reward for your efforts.
Thank you for venturing into the world of cilantro and exploring the joys of growing your own herbs. The satisfaction of nurturing a cilantro plant from seed to harvest is a truly gratifying experience. Whether you’re adding cilantro to your favorite dishes, experimenting with new recipes, or sharing the bounty with friends and family, the flavors and freshness of homegrown cilantro will elevate your meals to new culinary heights.
So, grab your scissors, head out to the garden, and indulge in the aromatic and zesty flavors of your homegrown cilantro. Happy harvesting, cooking, and enjoying the vibrant essence of this wonderful herb!
Frequently Asked Questions about How To Start Cilantro Seeds Indoors
Was this page helpful?
At Storables.com, we guarantee accurate and reliable information. Our content, validated by Expert Board Contributors, is crafted following stringent Editorial Policies. We're committed to providing you with well-researched, expert-backed insights for all your informational needs.


0 thoughts on “How To Start Cilantro Seeds Indoors”