Home>Garden Essentials>When Do I Start Planting Seeds Indoors
Garden Essentials
When Do I Start Planting Seeds Indoors
Modified: August 23, 2024
Learn when to start planting seeds indoors for your garden and ensure a successful growing season with our expert tips.
(Many of the links in this article redirect to a specific reviewed product. Your purchase of these products through affiliate links helps to generate commission for Storables.com, at no extra cost. Learn more)
Introduction
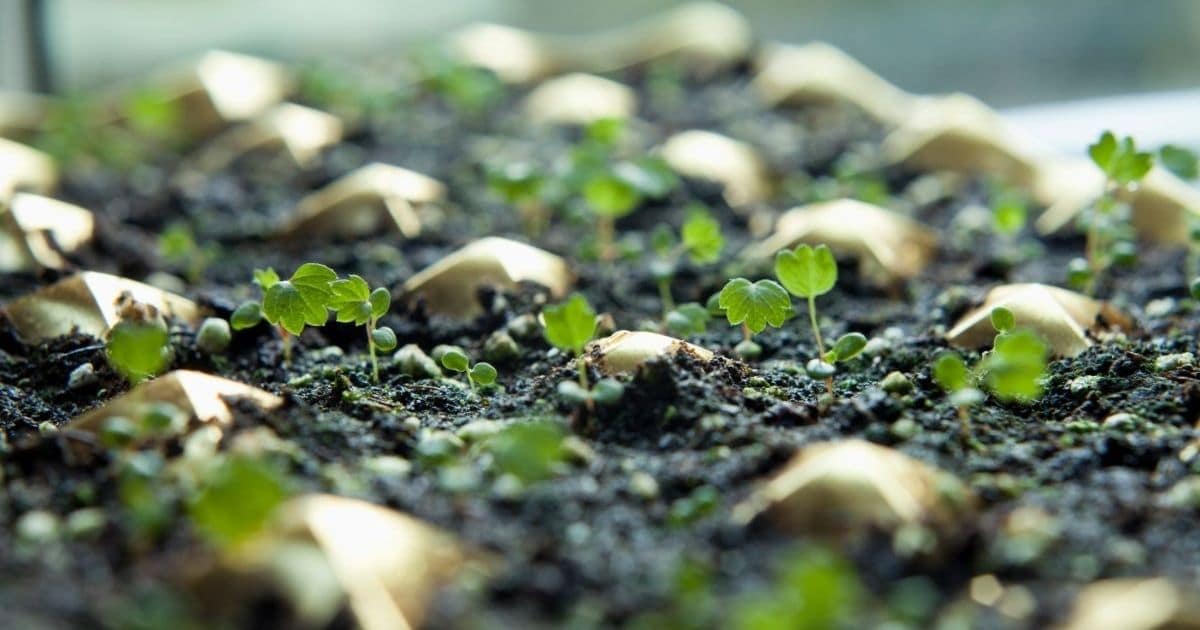
Starting seeds indoors is a wonderful way to get a head start on your garden and ensure a bountiful harvest. Whether you have a small balcony, a backyard garden, or even just a windowsill, starting seeds indoors allows you to extend the growing season and have more control over the growing conditions. Not only does it provide a sense of satisfaction, but it also gives you the opportunity to grow unique and exotic plant varieties that may not be available as seedlings at local garden centers.
In this article, we will explore the benefits of starting seeds indoors, how to determine the right time to start planting, the supplies needed, choosing the right containers, preparing seed starting mix, sowing seeds, providing the ideal growing conditions, caring for seedlings, and ultimately transplanting them outdoors. By following these steps and guidelines, you’ll be well on your way to successful seed starting and a thriving garden.
Key Takeaways:
- Starting seeds indoors extends the growing season, offers a wide variety of plant choices, and saves money, providing a rewarding and cost-effective way to grow a thriving garden.
- By providing the right containers, preparing a high-quality seed starting mix, and caring for seedlings with proper watering, thinning, and support, you can nurture healthy and vibrant plants ready for a successful garden season.
Read more: When Should I Start Seeds Indoors
Benefits of Starting Seeds Indoors
Starting seeds indoors offers a multitude of benefits for both novice and experienced gardeners alike. Let’s explore some of the advantages of this gardening technique:
- Extended Growing Season: By starting seeds indoors, you can start the growing process earlier than if you were to wait until the last frost date in your area. This means you’ll have a longer growing season to enjoy fresh produce or vibrant flowers.
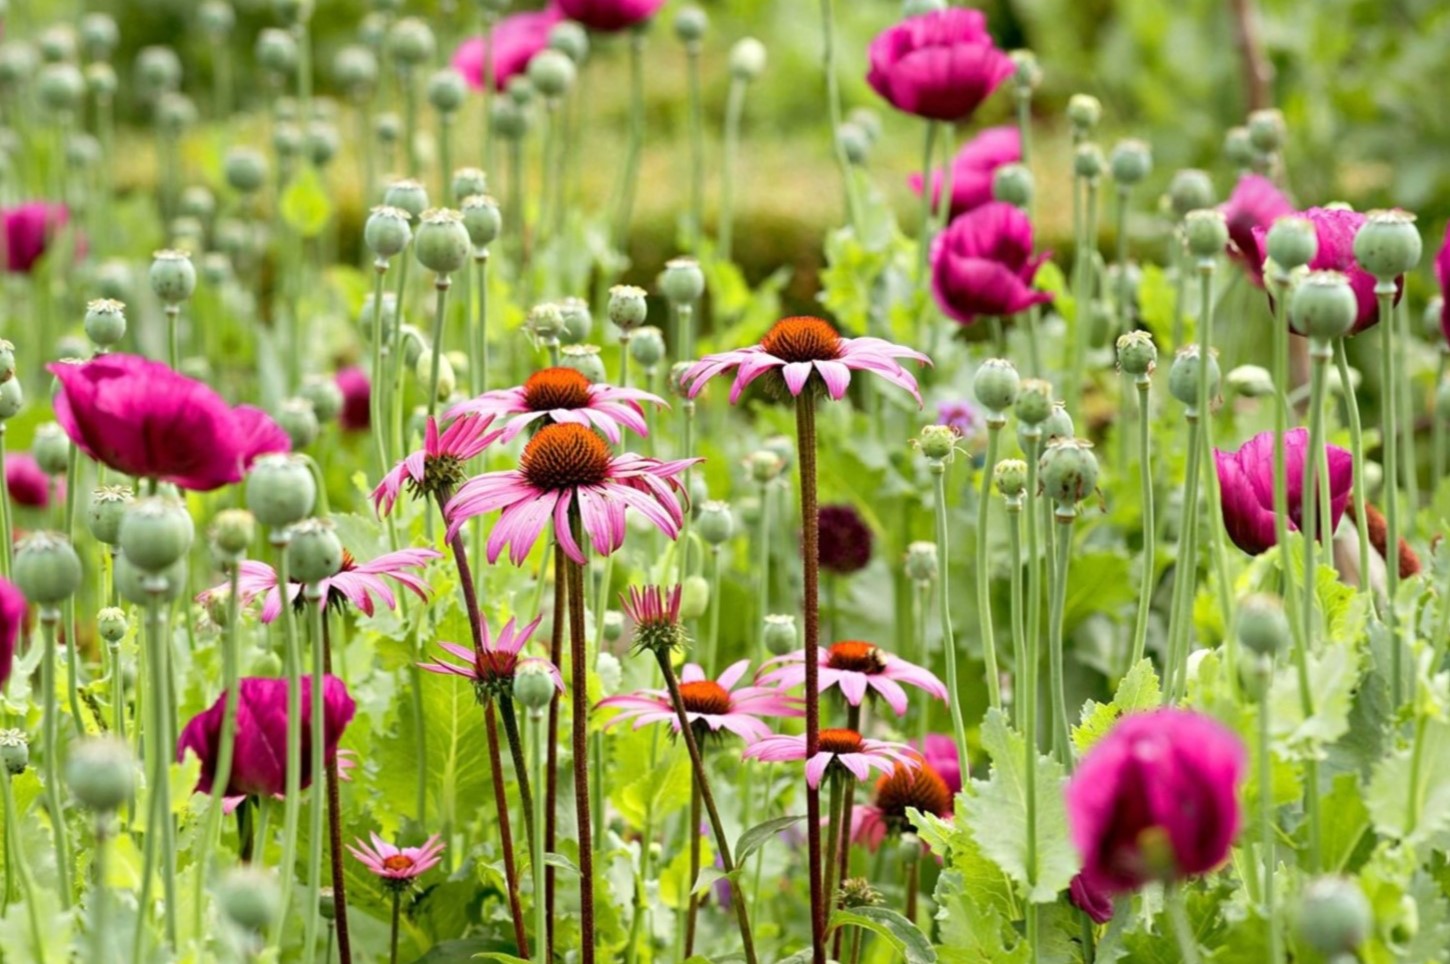
- Greater Variety of Plant Choices: When you start seeds indoors, you have access to a wide variety of plant choices. You can select from countless heirloom, rare, and specialty plant varieties that may not be available as seedlings at your local nursery or garden center. This allows you to experiment with unique flavors, colors, and textures in your garden.
- Cost Savings: Starting seeds indoors is often more cost-effective than purchasing established seedlings. A packet of seeds typically contains numerous seeds, giving you the opportunity to grow many plants for the price of one or two seedlings. This is particularly advantageous for those on a tight budget or with larger gardening spaces to fill.
- Control Over Growing Conditions: By starting seeds indoors, you have complete control over the growing conditions from the very beginning. You can tailor the environment to meet the specific needs of each plant, such as providing optimal temperature, lighting, humidity, and moisture levels. This level of control can greatly increase the success rate of your seedlings.
- Early Harvests: Starting seeds indoors ensures that your plants have a head start and can be transplanted outdoors as soon as the weather permits. This early start can lead to an earlier harvest, allowing you to enjoy the fruits of your labor sooner and for a longer period of time.
- Healthier and Stronger Plants: When you start seeds indoors, you have the opportunity to monitor and care for them from the very beginning. This means you can provide them with optimal conditions to promote healthy and robust growth. Seedlings grown indoors are often stronger, with well-established root systems, making them more resilient to transplant shock.
By harnessing these benefits, starting seeds indoors can elevate your gardening experience and set the stage for a successful and abundant harvest. So, gather your seeds, prepare your containers, and get ready to embark on a rewarding seed starting journey!
Determine the Right Time to Start Planting Seeds Indoors
Knowing the optimal time to start planting seeds indoors is crucial for the success of your garden. It’s essential to understand the specific needs and preferences of each plant, as different plants have different requirements for germination and growth. Here are some factors to consider when determining the right time:
- Last Frost Date: The last frost date in your area is a key indicator of when it’s safe to start planting seeds outdoors. Working backwards from this date, you can calculate the appropriate time to start your seeds indoors. Generally, seeds should be started indoors around 6-8 weeks before the last frost date.
- Seed Packet Instructions: Each seed packet provides valuable information about when to start the seeds indoors. It typically includes details such as recommended indoor start dates, germination time, and the number of weeks before transplanting. Be sure to read and follow these instructions to ensure optimal timing.
- Planting Zones: Familiarize yourself with the plant hardiness zones in your area. These zones are based on average minimum winter temperatures and can help you determine the suitable growing seasons for different plants. Knowing your planting zone can guide you in deciding when to start seeds indoors.
- Growing Conditions: Consider the growing conditions required by the specific plants you wish to grow. Some plants, such as peppers and tomatoes, require a longer growing season and may need to be started indoors earlier. Others, like lettuce and radishes, can tolerate cooler temperatures and can be directly sown into the ground once the soil is workable.
- Succession Planting: If you aim to have a continuous harvest throughout the growing season, consider practicing succession planting. This involves starting new batches of seeds indoors at regular intervals to ensure a staggered harvest. By doing so, you can maximize your garden space and enjoy a steady supply of fresh produce.
Keep in mind that these guidelines are general recommendations, and you may need to make adjustments based on your specific growing conditions and the unique characteristics of each plant. Keeping a gardening journal or using online tools can help you track planting dates, evaluate results, and refine your future sowing schedules.
By considering these factors and taking the time to plan accordingly, you can confidently determine the right time to start planting seeds indoors and lay the groundwork for a successful and productive garden.
Supplies Needed for Starting Seeds Indoors
Before you embark on your seed starting journey, it’s important to gather the necessary supplies to ensure the success of your seedlings. Here are some essential items you’ll need:
- Seeds: Select high-quality seeds from reputable seed companies or save seeds from your own garden. Choose varieties that are suitable for your climate and growing conditions.
- Containers: Look for containers specifically designed for seed starting, such as seed trays, peat pots, or cell packs. These containers provide adequate space for root growth and easy transplanting.
- Seed Starting Mix: Opt for a sterile seed starting mix, which is lightweight, well-draining, and free of diseases and weed seeds. Avoid using garden soil, as it can lead to poor germination and hinder plant development.
- Grow Lights: If you don’t have a well-lit area, consider investing in fluorescent or LED grow lights. These lights provide the necessary wavelengths for plant growth, ensuring strong and healthy seedlings.
- Heat Mat: Some seeds require warmth to germinate. A heat mat placed under your seed trays can provide consistent and optimum germination temperatures, increasing germination rates and speeding up the process.
- Watering Can/Mister: Use a watering can or misting bottle with a fine spray to prevent overwatering and damage to delicate seedlings.
- Labels and Pen: It’s crucial to label your seed trays or containers to keep track of the seeds planted. Use waterproof labels or sticks and a permanent marker to note the plant type and sowing date.
- Plastic Covers/Domes: Plastic covers or domes create a mini greenhouse environment to maintain humidity and moisture levels during seed germination. Remove the covers once the seeds have sprouted to prevent mold or damping-off disease.
- Fertilizer: Seedlings have specific nutrient requirements. Consider using a balanced organic fertilizer or a diluted liquid fertilizer to provide the necessary nutrients for healthy growth.
- Plant Supports: Depending on the plant type, you may need plant supports such as stakes or trellises to help maintain upright growth and prevent bending or breaking as the seedlings mature.
- Clean Water Source: Use filtered or tap water that is free from chlorine or other harmful chemicals. Avoid using softened water, as the excess salts can harm the seedlings.
Having these supplies ready and organized will make the seed starting process more efficient and improve the chances of success for your seedlings. Remember to properly clean and sanitize your containers and tools before use to minimize the risk of diseases or pests.
By gathering these essential supplies, you’ll be well-equipped to start your seeds indoors and nurture healthy, vibrant seedlings that will thrive when transplanted into your garden.
Choosing the Right Containers for Seed Starting
Choosing the appropriate containers for seed starting is crucial as it provides the foundation for healthy seedlings. The containers should provide adequate space for root development, proper drainage, and ease of transplanting. Here are some options to consider:
- Seed Trays: Seed trays or flats are shallow containers with multiple sections or cells. These trays are convenient for sowing a large number of seeds. Opt for trays made of plastic, which are lightweight, reusable, and have good moisture retention.
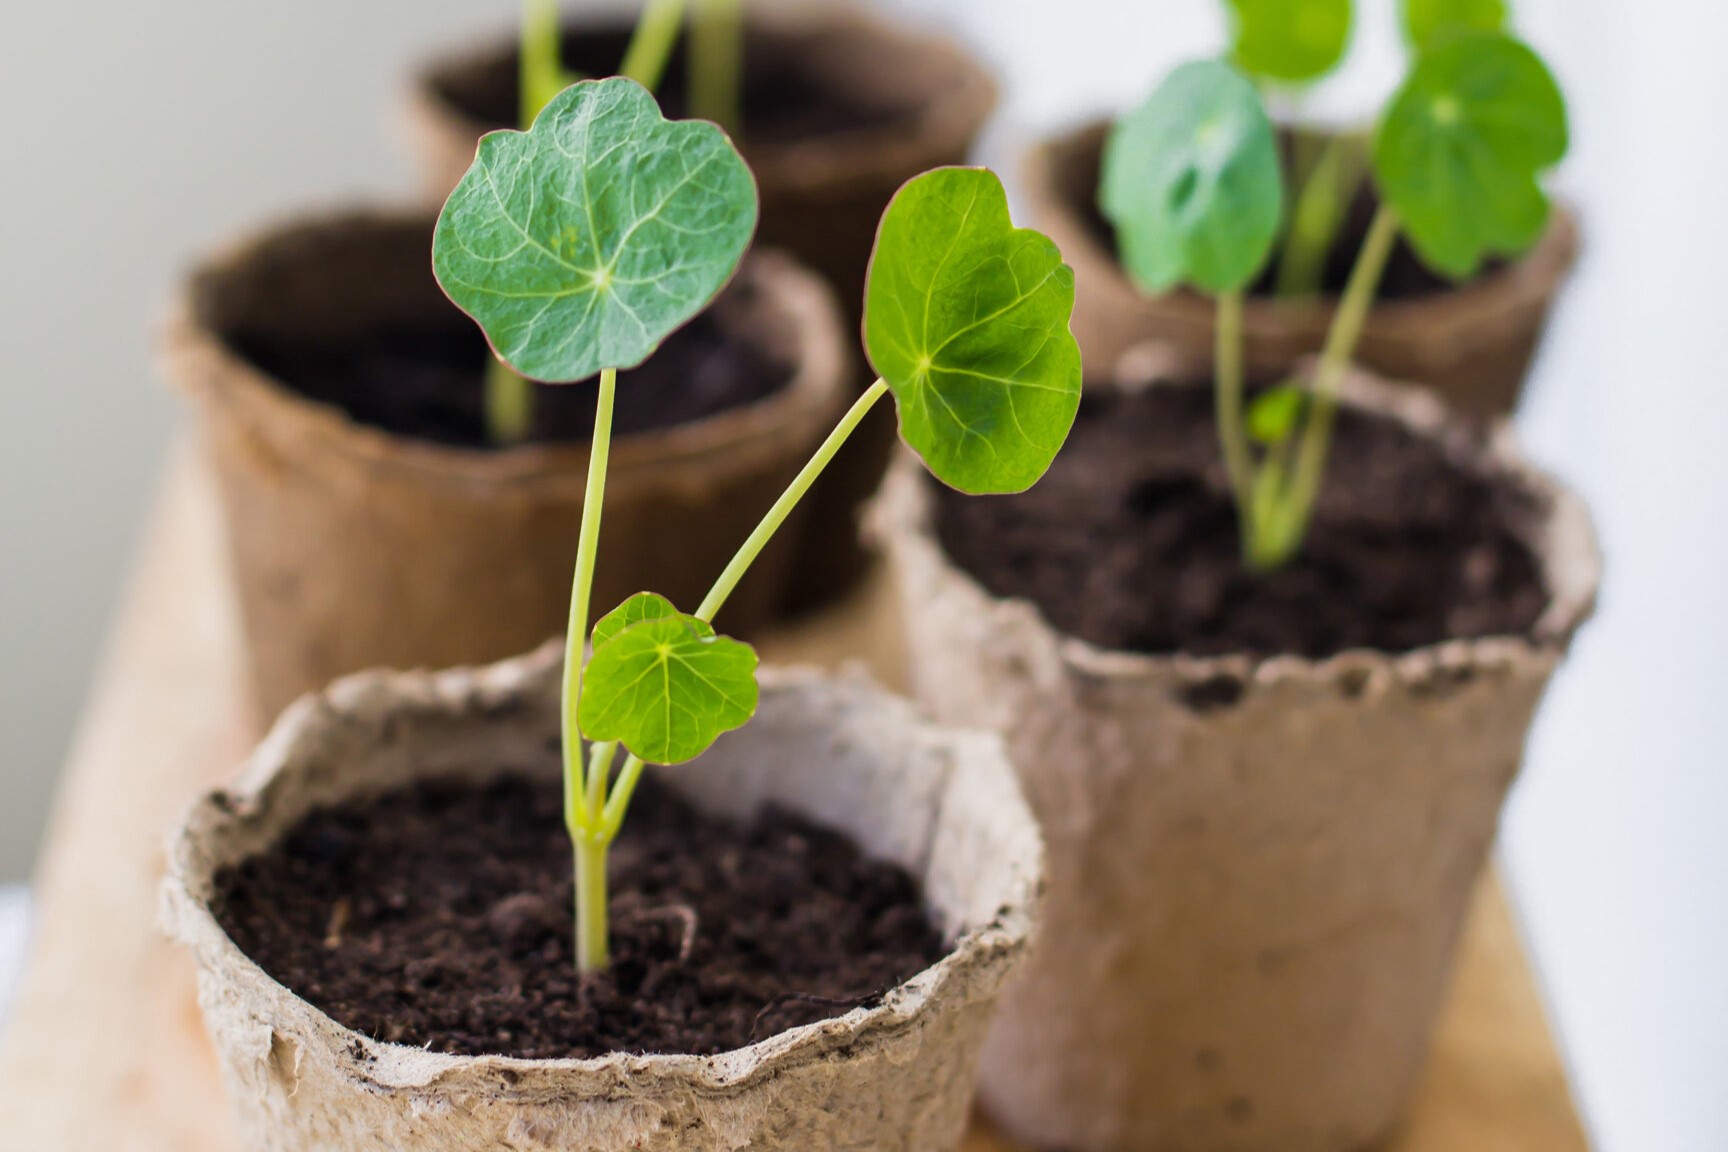
- Peat Pots: Peat pots are biodegradable containers made from compressed peat moss. They can be planted directly into the ground without disturbing the roots, as they will break down naturally. Peat pots allow for good air circulation and root penetration.
- Cell Packs: Cell packs are small individual containers connected in a tray format. Each cell provides space for one seedling. They are often made from plastic or biodegradable materials and are suitable for starting seeds with larger roots, such as tomatoes or peppers.
- DIY Containers: Get creative and repurpose items like yogurt cups, egg cartons, or cut-off milk cartons for seed starting. Just ensure that you create drainage holes at the bottom and provide proper moisture retention. These containers are cost-effective and offer a sustainable option for starting seeds.
- Seed Starting Kits: Seed starting kits are pre-packaged sets that include containers, seed starting mix, and sometimes covers or domes. These kits are convenient for beginners or those who prefer a hassle-free option.
Consider the following factors when choosing containers for seed starting:
- Drainage: Ensure that the containers have adequate drainage holes to prevent waterlogged soil, which can lead to root rot. Good drainage promotes healthy root development and helps prevent mold or fungal diseases.
- Size: Choose containers that provide enough space for the plant’s root system to grow. Seedlings with larger roots will benefit from deeper containers, while those with delicate or shallow roots can thrive in smaller cells.
- Material: Containers made from plastic are lightweight, durable, and easy to sanitize. Biodegradable containers, like peat pots, are an environmentally friendly option as they can be planted directly in the ground, reducing transplant shock.
- Ease of Transplanting: Consider how easily seedlings can be removed from the container without damaging the roots. Containers that can be easily separated or have flexible sides make transplanting smoother.
Remember to clean and sterilize your containers before use to prevent the spread of diseases. Some containers may require additional trays or saucers to collect water runoff and protect surfaces.
By selecting the right containers for seed starting, you’ll provide a suitable environment for your seedlings to thrive and establish strong root systems. This will set the stage for successful transplanting and a flourishing garden.
Read more: When To Start Foxglove Seeds Indoors
Preparing Seed Starting Mix
A high-quality seed starting mix is essential for germination and healthy seedling development. Unlike garden soil, which can be too heavy and compact for delicate roots, a seed starting mix is lightweight, well-draining, and sterile. Here’s a step-by-step guide to preparing your own seed starting mix:
- Gather the Ingredients: To make your seed starting mix, you’ll need a combination of three main ingredients: peat moss, perlite, and vermiculite. You can find these materials at garden centers or online retailers.
- Measure and Mix: Start by measuring out the ingredients in the following ratios: 50% peat moss, 25% perlite, and 25% vermiculite. These proportions provide a lightweight and well-draining mix that retains moisture while allowing for proper root aeration.
- Combine the Ingredients: Place the measured amounts of peat moss, perlite, and vermiculite in a large container or bucket. Mix thoroughly until the ingredients are well-blended.
- Sift the Mix: Sifting the seed starting mix can help break up any clumps and ensure a more uniform texture. Use a sieve or mesh screen to sift the mix into a separate container, removing any large particles or debris.
- Moisten the Mix: Before using the seed starting mix, moisten it by adding water gradually, stirring as you go. The mix should be moist but not soggy. Avoid overwatering, as excessive moisture can lead to fungal diseases.
- Pasteurization (Optional): For an extra layer of precaution against plant diseases, you can choose to pasteurize the seed starting mix. To do this, spread the mix on a baking sheet and place it in an oven preheated to 180°F (82°C) for about 30 minutes. This will help kill off any potential pathogens.
It’s worth noting that you can also purchase pre-packaged seed starting mix from garden centers or online suppliers. These mixes are specially formulated to provide the ideal growing conditions for seedlings, saving you the time and effort of preparing your own mix.
When working with the seed starting mix, remember to use clean containers and tools to prevent the introduction of pathogens. Store any leftover mix in a covered container in a cool and dry place for future use.
By preparing a high-quality seed starting mix, you’ll provide your seeds with the optimal conditions for germination and early growth. This sets the stage for strong and healthy seedlings, ensuring a successful seed starting experience.
Start planting seeds indoors 6-8 weeks before the last frost date in your area. Use seed starting mix, provide adequate light, and keep the soil moist but not waterlogged. Transplant seedlings outdoors after the danger of frost has passed.
Sowing Seeds Indoors
Sowing seeds indoors is an exciting and rewarding step in the seed starting process. Proper sowing techniques ensure good seed-to-soil contact, optimal germination, and healthy seedling development. Follow these steps to sow your seeds indoors:
- Select the Right Containers: Choose containers that are clean, have drainage holes, and are deep enough to accommodate the roots of the seedlings. Peat pots, cell packs, or seed trays are popular options.
- Fill Containers with Seed Starting Mix: Fill your containers with the prepared seed starting mix, leaving a small gap at the top. Gently press down the mix to eliminate any air pockets.
- Moisten the Soil: Before sowing the seeds, lightly moisten the soil by misting it with water. The soil should be damp but not soaking wet. This ensures that the seeds have enough moisture for germination.
- Sow the Seeds: Follow the seed packet instructions for the correct depth and spacing for each type of seed. Use your finger or a small tool to create holes or furrows in the soil, place the seeds in the holes, and cover them gently with soil or vermiculite.
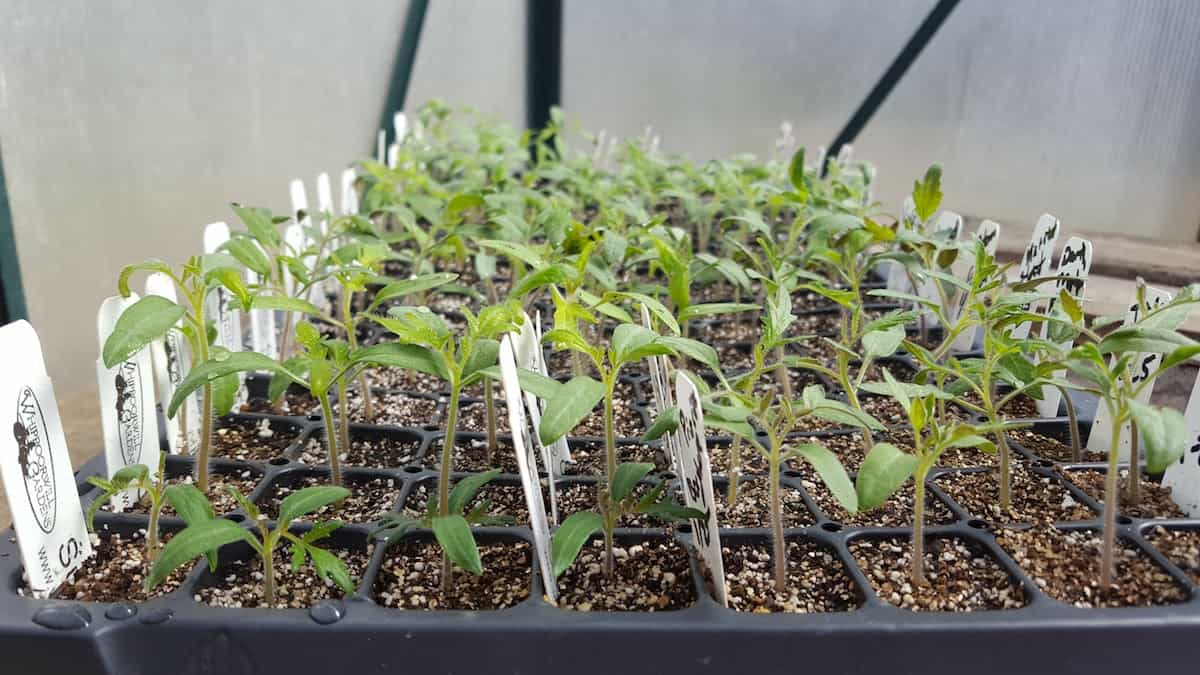
- Label the Containers: To keep track of the seeds you’ve sown, insert plant labels or sticks into the containers. Write the name of the plant and the date of sowing on the labels with a waterproof marker.
- Water the Seeds: Water the containers carefully after sowing the seeds. Use a gentle watering can or misting bottle to avoid dislodging the seeds or causing soil erosion. Keep the soil consistently moist but avoid overwatering, as it can lead to damping-off or root rot.
- Provide the Right Temperature and Light: Place the containers in a warm location with proper lighting. Most seeds require a temperature range between 65°F and 75°F (18°C – 24°C) for germination. If needed, use a heat mat or adjust the room temperature. Seedlings also need sufficient light, so consider using grow lights or placing them near a bright window.
- Monitor and Maintain: Regularly check the containers for moisture levels and ensure that the soil remains evenly moist. Keep an eye on the seeds for signs of germination, such as the emergence of green shoots. Once the seedlings have sprouted, remove any plastic covers or domes to promote air circulation.
Remember to refer to the specific requirements of each plant, as some seeds may need special treatment, such as pre-soaking or chilling, before sowing. As the seedlings grow, provide adequate ventilation to prevent the buildup of moisture and reduce the risk of fungal diseases.
By following these steps, you’ll give your seeds the best chance for successful germination and ensure a strong start for your indoor garden. Enjoy the process and watch as your seeds transform into thriving seedlings ready for transplantation.
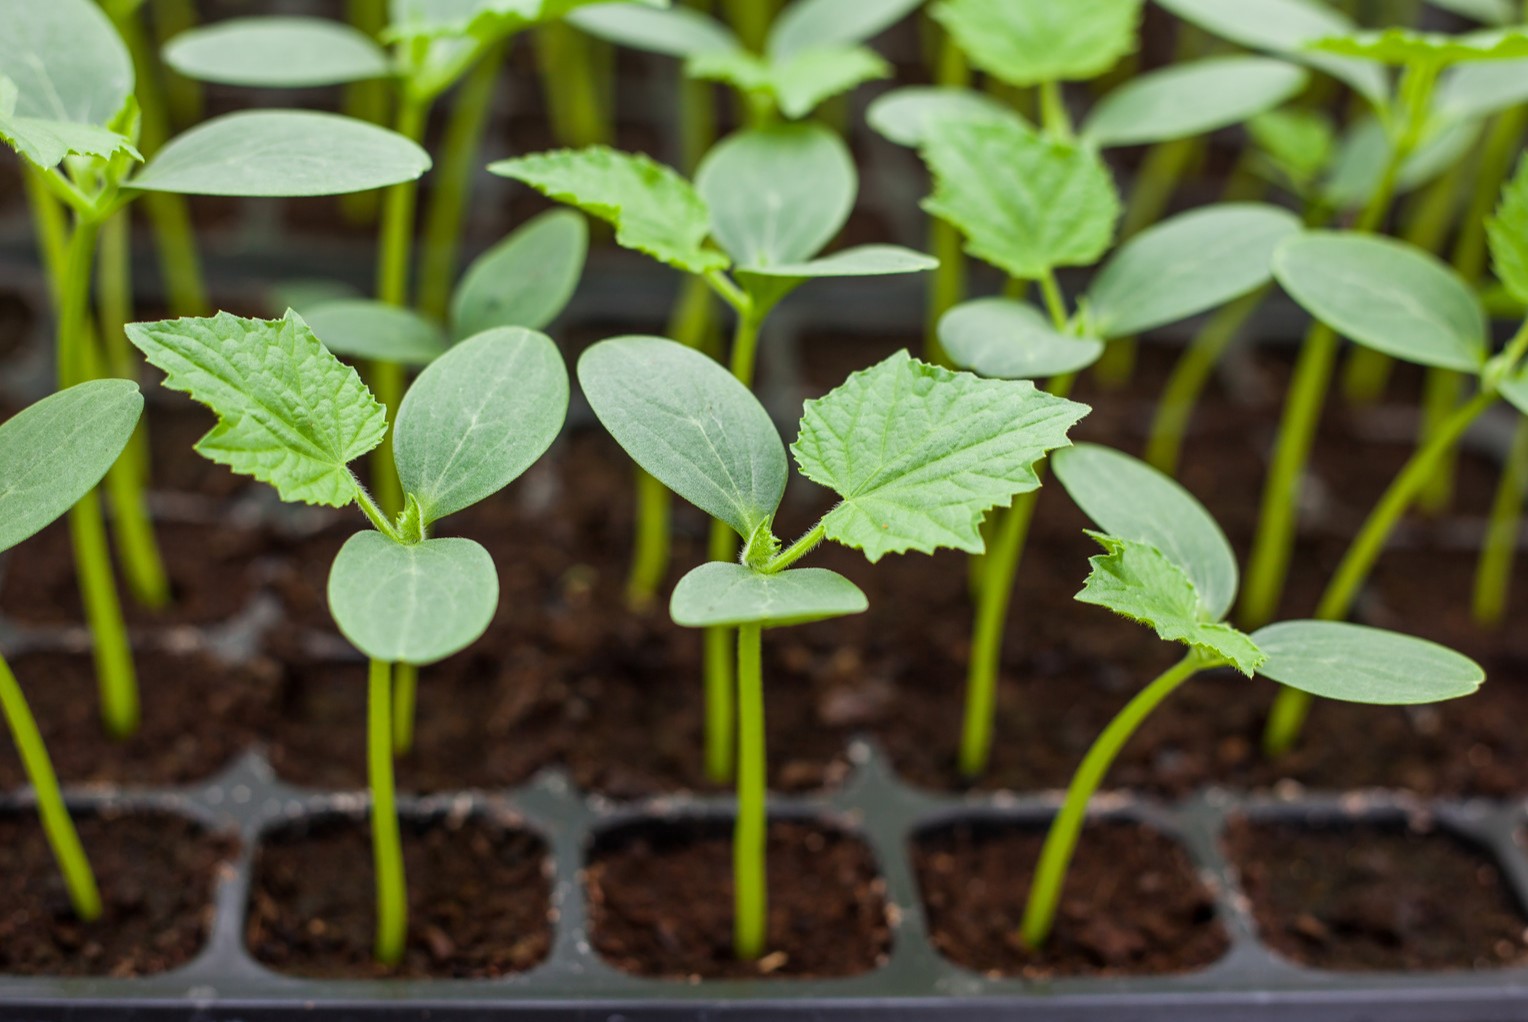
Providing the Ideal Growing Conditions for Seedlings
Once your seeds have germinated and the seedlings have emerged, it’s important to provide them with the ideal growing conditions to support their healthy growth and development. Here are key factors to consider:
- Light: Seedlings require ample light to thrive. Place them in a location where they can receive at least 12-16 hours of bright, indirect light each day. If natural light is insufficient, supplement with fluorescent or LED grow lights positioned 2-4 inches above the seedlings.
- Temperature: Maintain a consistently warm temperature for optimal growth. Most seedlings prefer daytime temperatures of 65°F-75°F (18°C-24°C) and slightly cooler temperatures at night. Avoid exposing seedlings to extreme heat or drafts, as they can wilt or become stressed.
- Air Circulation: Good air circulation helps prevent diseases and strengthens seedlings. Use a small fan on a low setting to provide gentle air movement, which simulates outdoor conditions and helps develop sturdy stems. Avoid placing the fan too close to the seedlings to prevent drying out the soil.
- Humidity: Seedlings thrive in a moderately humid environment. You can increase humidity around the seedlings by covering the trays with clear plastic domes or using a humidifier. Be sure to remove the covers once the seedlings have grown to prevent excessive moisture and reduce the risk of damping-off.
- Watering: Water seedlings carefully to prevent overwatering or underwatering. Aim to keep the soil consistently moist but not saturated. Allow the soil to dry slightly between waterings to encourage strong root development. Water from the bottom by placing the seed tray in a shallow container of water, or use a watering can or misting bottle to water gently from above.
- Fertilization: After the seedlings have developed their first set of true leaves, begin feeding them with a diluted, balanced liquid fertilizer. Follow the package instructions for proper dilution rates and frequency. Avoid over-fertilizing, as it can burn the seedlings and hinder their growth.
- Thinning: If you’ve sown multiple seeds in one container, thinning is necessary to prevent overcrowding. Once the seedlings have grown a few inches tall and are strong enough to handle, selectively remove the weakest seedlings, leaving the healthiest ones to continue growing. Thinning ensures that each seedling has enough space, light, and nutrients to flourish.
Regularly observe your seedlings for any signs of stress, such as yellowing leaves, wilting, or stunted growth. Adjust the growing conditions accordingly to address any issues. It’s important to stay diligent in monitoring and providing the optimal conditions for your seedlings as they continue to grow.
By following these guidelines and providing the ideal growing conditions, you’ll nurture strong and healthy seedlings that are ready for the next stage of transplanting into your garden. Enjoy watching them thrive and develop into flourishing plants!
Caring for Seedlings
Caring for seedlings is a critical part of their development, as it sets the foundation for strong, healthy plants. Paying attention to their needs and providing proper care will ensure their successful transition from seedlings to thriving garden plants. Here are some essential aspects of caring for seedlings:
- Watering: Water seedlings consistently, keeping the soil evenly moist. Water from the bottom by placing the containers in a tray of water or use a watering can with a fine spout to avoid disturbing the delicate seedlings. Be mindful not to overwater, as this can lead to root rot. Aim for a balance, allowing the soil to dry slightly between waterings.
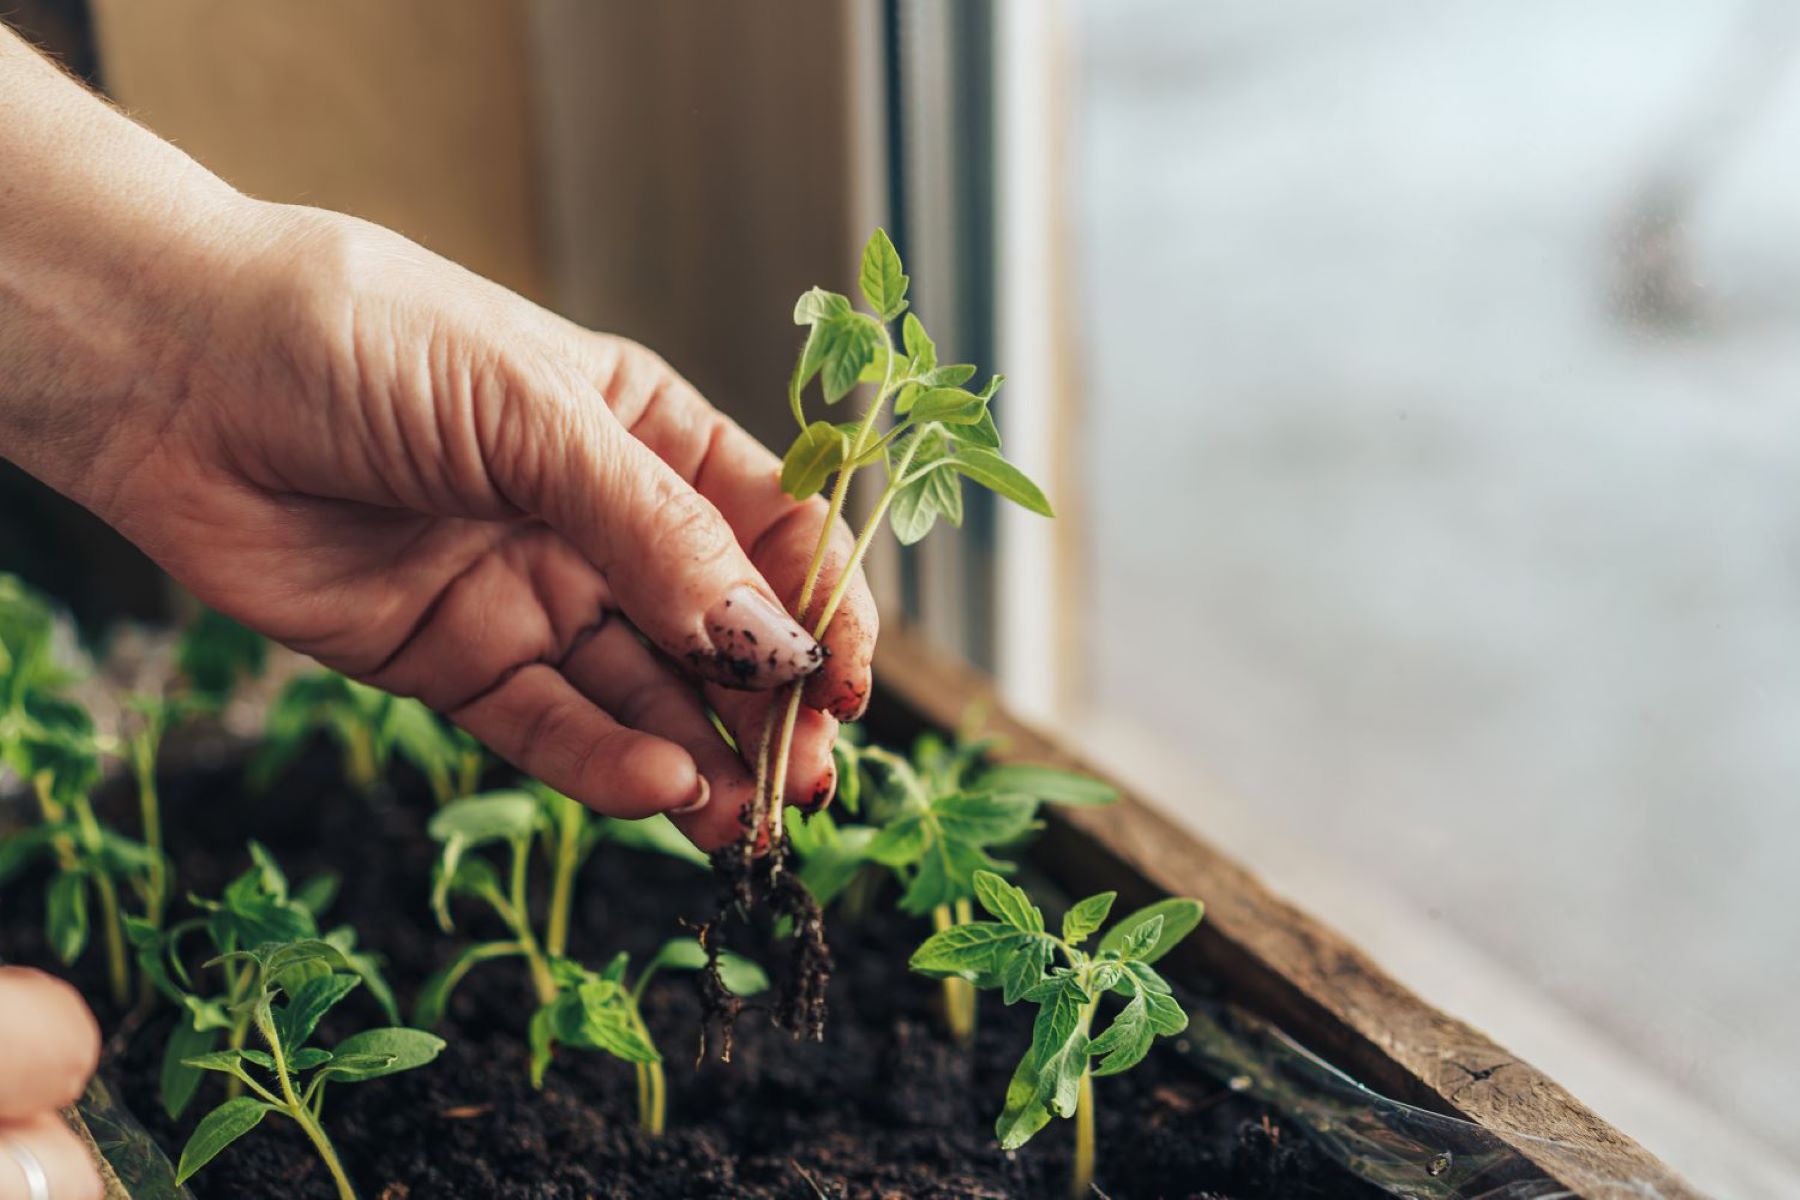
- Thinning and Transplanting: If you’ve sowed multiple seeds in one container, thinning is necessary to provide adequate space for each seedling. Once the seedlings have grown a few inches tall, carefully remove the weaker ones, leaving the strongest and healthiest seedlings to continue growing. Thin seedlings gently to prevent damage to their roots. As they grow further, transplant them into individual containers or into the ground, following the recommended spacing for each plant.
- Support: Some seedlings, such as tomatoes or peppers, may require support as they grow taller. Use stakes or plant supports to prevent bending or breaking of the stems. It’s easier to provide support early on rather than trying to stabilize them later when they are larger and more vulnerable to damage.
- Pruning: Regularly inspect your seedlings for any signs of disease, pests, or weak growth. If you notice any damaged or diseased leaves or stems, prune them promptly to prevent the spread of infection. Pinching off the tops of seedlings can also promote bushier growth and discourage leggy or straggly growth patterns.
- Providing Adequate Light: Be sure to provide enough light for your seedlings to thrive. If using artificial grow lights, adjust their height to keep them 2-4 inches above the foliage. Rotate the containers regularly to provide even exposure to light and prevent one-sided growth. Insufficient light can result in weak, leggy seedlings that are more susceptible to disease.
- Feeding: As the seedlings grow, they will require additional nutrients to support their development. Begin fertilizing with a diluted, balanced liquid fertilizer once they have developed their first set of true leaves. Follow the package instructions for proper dilution ratios and frequency. Avoid over-fertilization, as this can lead to nutrient burn and damage the tender roots.
- Hardening Off: Before transplanting seedlings into the outdoor garden, it’s essential to gradually acclimate them to the outdoor conditions. This process, known as hardening off, involves exposing the seedlings to increasing amounts of sunlight, wind, and cooler temperatures over a period of 7-10 days. Start by placing them in a protected, shady location for a few hours a day and gradually increase their exposure. This helps the seedlings adjust to the outdoor environment and reduces the risk of transplant shock.
In addition to these general care guidelines, it’s important to monitor your seedlings for any specific needs or issues that may arise. Keep an eye out for signs of nutrient deficiencies, pests, or diseases, and take appropriate action to address them promptly. By providing consistent care and attention, you’ll nurture your seedlings into strong, vibrant plants ready for a successful garden season.
Read more: When To Start Seeds For Spring Planting
Transplanting Seedlings Outdoors
Transplanting seedlings outdoors is an exciting stage in the gardening process, as it allows your young plants to establish themselves in the garden and continue their growth towards maturity. To ensure successful transplantation and minimize stress to the seedlings, follow these guidelines:
- Choose the Right Time: Transplant seedlings outdoors when the danger of frost has passed and the soil temperature has warmed up. Consult your local gardening resources or extension service to determine the appropriate timing for each plant based on your specific climate and location.
- Prepare the Soil: Before transplanting, prepare the planting area by loosening the soil and removing weeds or debris. Amend the soil with organic matter, such as compost or well-rotted manure, to improve its fertility and drainage.
- Watering: Thoroughly water the seedlings a couple of hours before transplanting. Moist soil will help the seedlings handle the stress of transplantation and promote better root establishment in the new location.
- Handle with Care: Gently remove the seedlings from their containers, holding them by the leaves or the root ball. Avoid pulling or tugging on the delicate stems, as this can damage the plants. If the roots are tightly bound, gently loosen them to encourage outward growth.
- Dig Proper Holes: Dig holes in the prepared soil that are slightly larger than the root balls of the seedlings. Ensure the holes are deep enough to support the plants at the same depth they were growing in their containers. Place the seedlings in the holes, then gently fill in the soil around them, firming it gently to eliminate air pockets.
- Water Immediately: After transplanting, water the seedlings thoroughly to settle the soil and help the roots establish contact with the surrounding soil. Provide enough water to moisten the root zone but avoid overwatering, which can suffocate the roots.
- Provide Protection: If the weather is still cool or the seedlings are delicate, consider providing protection, such as row covers or plant blankets, to shield the plants from strong winds, extreme temperatures, or direct sunlight. Gradually expose the plants to outdoor conditions over a few days to help them adjust.
- Mulch: Apply a layer of organic mulch, such as straw or wood chips, around the base of the seedlings. Mulching helps conserve moisture, suppresses weed growth, and regulates soil temperatures. Leave a small gap around the stems to prevent excessive moisture and potential rotting.
- Monitor and Maintain: Regularly monitor the newly transplanted seedlings for any signs of stress, such as wilting or yellowing leaves. Water as needed, keeping the soil evenly moist. Remove any weeds that may compete with the seedlings for nutrients and space. Provide additional support, such as stakes or cages, if necessary, to help support the plants as they grow.
Remember, each plant has its own specific needs, so it’s important to research and understand the requirements of the particular species you are transplanting. With proper care and attention, your seedlings will quickly adapt to their new environment and continue their growth towards a productive and beautiful garden.
Conclusion
Starting seeds indoors is a rewarding and fulfilling process that allows you to have greater control over your garden, expand your plant choices, and extend the growing season. By following the steps and guidelines outlined in this article, you can successfully start seeds indoors and nurture healthy seedlings that will thrive when transplanted into the outdoor garden.
From determining the right time to start planting seeds indoors to providing the ideal growing conditions, each step plays a crucial role in the success of your seedlings. By choosing the right containers, preparing a high-quality seed starting mix, sowing seeds with care, and providing adequate light, temperature, and moisture, you’ll give your seedlings the best chance to flourish.
As your seedlings grow, it’s important to continue caring for them through proper watering, thinning, support, pruning, and feeding. By gradually acclimating them to outdoor conditions through hardening off, you’ll ensure a smoother transition when it’s time to transplant them into the garden.
Remember, gardening is both a science and an art, and it’s essential to adapt to the unique needs of each plant and make adjustments as necessary. Observe and monitor your seedlings regularly, addressing any issues promptly, to promote strong, healthy development and minimize the risk of pests, diseases, or nutrient deficiencies.
So, embark on your seed starting journey with confidence and enthusiasm. Enjoy the process of nurturing your seedlings as they transform into thriving plants within your garden. With a little patience, care, and attention, you’ll reap the rewards of your efforts with a bountiful harvest, vibrant flowers, and a beautiful garden to enjoy for seasons to come.
Frequently Asked Questions about When Do I Start Planting Seeds Indoors
Was this page helpful?
At Storables.com, we guarantee accurate and reliable information. Our content, validated by Expert Board Contributors, is crafted following stringent Editorial Policies. We're committed to providing you with well-researched, expert-backed insights for all your informational needs.

0 thoughts on “When Do I Start Planting Seeds Indoors”