Home>Garden Essentials>How To Plant Seeds Indoors

Garden Essentials
How To Plant Seeds Indoors
Modified: October 20, 2024
Learn how to start your garden indoors with our step-by-step guide on planting seeds. Create a thriving garden from the comfort of your home.
(Many of the links in this article redirect to a specific reviewed product. Your purchase of these products through affiliate links helps to generate commission for Storables.com, at no extra cost. Learn more)
Introduction
Welcome to the world of indoor seed planting! Whether you’re an experienced gardener looking to extend your growing season or a newbie with a green thumb, planting seeds indoors is a rewarding and exciting way to start your garden. Not only does it allow you to get a head start on the growing season, but it also provides you with full control over the environment and ensures the best possible start for your plants.
In this comprehensive guide, we will walk you through the entire process of planting seeds indoors, from selecting the right seeds to transferring seedlings to larger pots. We’ll provide step-by-step instructions and valuable tips to help you achieve successful seed germination and develop healthy, robust seedlings. So, let’s dive right in!
Key Takeaways:
- Get a head start on your garden by planting seeds indoors! Choose the right seeds, provide optimal conditions, and watch your seedlings thrive for a rewarding gardening experience.
- Give your seedlings the best start with proper care. From sowing seeds to transferring to larger pots, nurturing your plants indoors sets the stage for a successful garden.
Read more: How To Plant Broccoli Seeds Indoors
Choosing the Right Seeds
When it comes to indoor seed planting, choosing the right seeds is crucial for a successful gardening experience. The first step is to decide what type of plants you want to grow. Are you interested in cultivating vegetables, herbs, flowers, or a combination of them? Consider your personal preferences, available space, and growing conditions.
Once you have a clear idea of the plants you want to grow, it’s time to select the specific seed varieties. Look for seeds that are labeled as suitable for indoor planting. These varieties are often referred to as “indoor” or “container” varieties and are bred to thrive in confined spaces. They tend to have compact growth habits and adapt well to the controlled conditions of indoor gardening.
Furthermore, consider the maturity time of the plants. Some seeds take longer to reach maturity than others. If you have a shorter growing season or limited space, opt for faster-maturing varieties to ensure that you can harvest your plants before they outgrow their containers. Additionally, take into account the specific requirements of each seed variety, such as light, water, and temperature preferences.
Another factor to consider is whether you want to start from seeds or purchase seedlings. Starting from seeds gives you more control and variety options, but it requires more time and effort. On the other hand, buying seedlings can be a convenient option for those who want to skip the early stages of germination and seedling care.
Lastly, consider the quality of the seeds. Choose seeds from reputable suppliers or reliable sources. Look for fresh seeds with high germination rates, as this will greatly increase your chances of success. Take note of the seed packaging date and store them properly to maintain their viability.
By taking the time to choose the right seeds, you are setting the foundation for a successful indoor gardening journey. Once you’ve selected your seeds, it’s time to gather the necessary materials and prepare for the planting process.
Gathering Required Materials
Before you begin planting seeds indoors, it’s important to gather all the necessary materials to ensure a smooth and efficient process. Here’s a checklist of items you’ll need:
- Seed trays or planting containers: Choose containers that have drainage holes to prevent waterlogged soil. Options include peat pots, cell trays, or recycled containers like egg cartons or yogurt cups. Make sure the containers are clean and sterilized before use.
- Seed starting mix: Use a high-quality seed starting mix specifically designed for indoor seed planting. Avoid using regular garden soil, as it can be too heavy and may contain pests or diseases.
- Seeds: Depending on the plants you’ve chosen, gather the seeds of your desired varieties. Consider buying from reputable seed suppliers to ensure quality and variety.
- Watering can or spray bottle: Ensure you have a way to water your seeds without causing damage or displacing them. A watering can with a fine rose or a spray bottle is ideal for providing a gentle mist of water.
- Grow lights: If you don’t have access to ample natural sunlight, consider investing in grow lights to provide adequate light for your seedlings. LED or fluorescent lights specifically designed for plants work best.
- Heat mat (optional): Some seeds benefit from bottom heat to aid in germination. If you’re growing heat-loving plants like peppers or tomatoes, a heat mat can provide the necessary warmth.
- Thermometer and hygrometer: Monitoring temperature and humidity levels is essential for the optimal growth of your seedlings. Invest in a reliable thermometer and hygrometer to keep track of these factors.
- Covering material: Plastic wrap or domes can create a mini-greenhouse effect and help retain moisture during the germination phase. Alternatively, you can use clear plastic bags or cloches to cover individual containers.
- Labels and markers: Keep track of your seeds by labeling your containers. Use waterproof labels or permanent markers to avoid smudging.
Having all these materials on hand before you start planting will save you time and ensure that you have everything you need to provide the best growing conditions for your seeds. Once you’ve gathered your materials, it’s time to prepare the planting containers.
Preparing the Planting Containers
Properly preparing your planting containers is essential for the successful growth of your seeds. Follow these steps to ensure your containers are clean, sterile, and ready to provide a conducive environment for germination:
- Clean and sterilize the containers: If you’re reusing containers, wash them thoroughly with warm, soapy water and rinse well. Alternatively, you can sterilize them by soaking in a solution of 1-part bleach to 9-parts water for about 10 minutes. Rinse thoroughly to remove any residual bleach.
- Add drainage holes: Ensure proper drainage by poking or drilling small holes at the bottom of each container. This will prevent water from pooling and causing root rot in your seedlings.
- Choose an appropriate seed starting mix: Fill each container with a high-quality seed starting mix, leaving about ¼ to ½ inch of space at the top. Avoid compacting the soil, as it can hinder seedling growth.
- Moisten the soil: Before sowing the seeds, lightly water the soil to ensure it is evenly moist. Avoid soaking the soil, as excessive moisture can lead to fungal diseases.
- Sow the seeds: Follow the instructions on the seed packet regarding seed depth and spacing. Make small holes in the soil with your finger or the end of a pencil, place the seeds inside, and cover them with a thin layer of soil. Gently pat the soil down to ensure good seed-to-soil contact.
- Cover the containers: Use plastic wrap, domes, or plastic bags to cover the containers. This helps create a humid environment for germination. Once the seeds have sprouted, remove the cover to allow proper airflow.
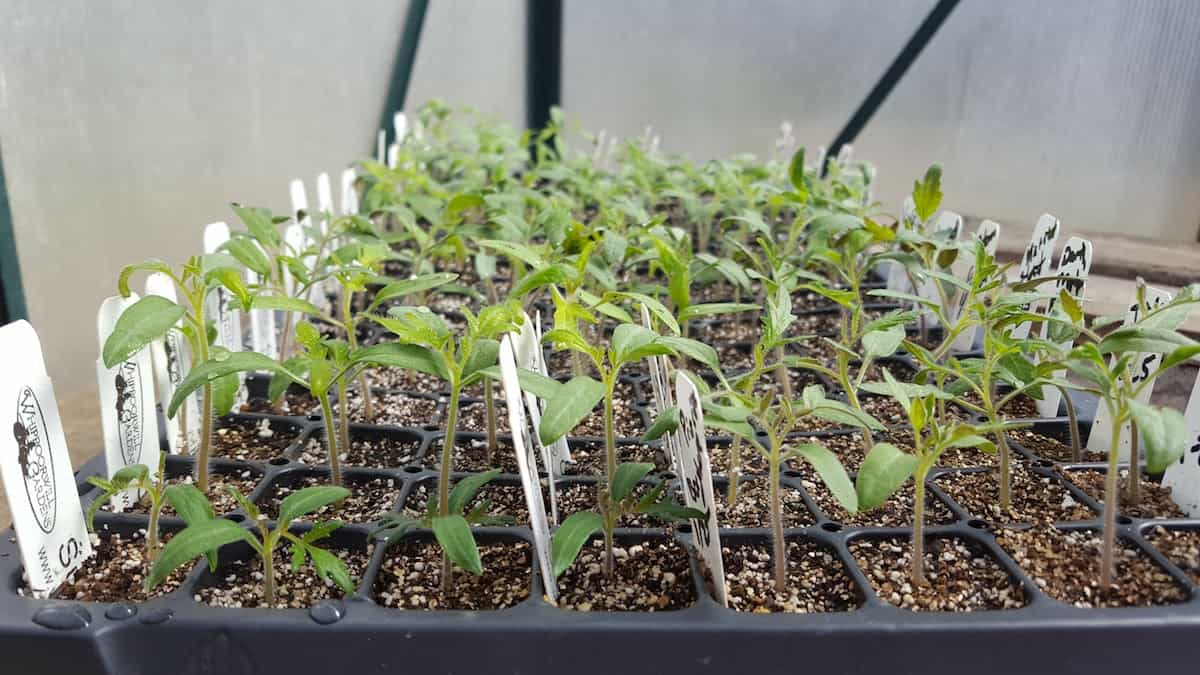
- Label the containers: Use labels or markers to identify the seeds you’ve planted in each container. This will prevent any confusion later on when it’s time to transplant or care for specific seedlings.
- Place the containers in a warm and bright location: Find a spot that receives adequate sunlight or use grow lights to provide the necessary light for seed germination. Maintain a temperature of around 70 – 75°F (21 – 24°C) for optimal germination.
By properly preparing your planting containers and providing the ideal conditions for germination, you’re setting the stage for successful seedling development. In the next section, we’ll discuss the importance of providing adequate light for your seedlings.
Providing Adequate Light
Light is an essential component for the healthy growth and development of your seedlings. When planted indoors, natural light may not always be sufficient, especially during the winter months or if you have limited access to sunlight. Here are some tips to ensure your seedlings receive the adequate light they need:
- Assess your natural light conditions: Find the brightest spot in your home that receives the most sunlight. Ideally, this would be a south or west-facing window. Observe the amount of direct sunlight the area receives throughout the day.
- Rotate your containers: If you’re relying on natural light, rotate your containers every couple of days to ensure even exposure to sunlight. This prevents seedlings from leaning and reaching towards the light source.
- Supplement with grow lights: If natural light is limited or not sufficient, consider using artificial grow lights specifically designed for plants. LED or fluorescent lights are popular options and can be set up to provide the right spectrum and intensity of light.
- Position the grow lights: Hang the lights a few inches above the seedlings and adjust the height as the plants grow. Aim for 14-16 hours of light per day. You can use a timer to automate the light cycle and ensure consistent lighting.
- Keep lights on a schedule: Just like outdoor plants, indoor seedlings need a period of darkness for proper rest. Avoid leaving the grow lights on 24/7 and provide a break of 8-10 hours of darkness each day.
- Monitor light intensity: Different plants have varying light requirements. If you notice that your seedlings are stretching and becoming leggy, it may indicate insufficient light. Adjust the height and intensity of the grow lights accordingly.
- Consider light reflectors: To maximize the light your plants receive, consider using reflectors or mirrors to redirect and bounce light onto your seedlings. This can be especially helpful in areas with limited natural light.
Remember that providing adequate light is essential for healthy seedling growth. Insufficient light can result in weak and spindly plants that are more prone to diseases and pest infestations. By assessing your light conditions and supplementing with artificial lights when necessary, you’ll ensure strong and robust seedlings.
In the next section, we’ll discuss the importance of maintaining the proper temperature and humidity levels for optimal seedling growth.
Read more: How To Plant Sunflower Seeds Indoors
Providing Proper Temperature and Humidity
Temperature and humidity play vital roles in the successful growth of your seedlings. Maintaining optimum levels of both factors creates an ideal environment for healthy germination and growth. Here’s what you need to know:
Temperature:
Most seeds require a consistent temperature range for germination, usually between 65°F (18°C) and 75°F (24°C). Here are some tips to ensure the right temperature for your seedlings:
- Find a warm spot: Place your seed trays or containers in a location with a stable temperature, away from drafty areas or extreme temperature fluctuations.
- Use a thermometer: Monitor the temperature regularly with a thermometer placed near the seedlings. Adjust the room temperature or use a heating pad or heat mat if needed to maintain the desired temperature.
- Research specific seed requirements: Different plant species have different temperature requirements. Some seeds, like tomatoes or peppers, may require higher temperatures to germinate successfully. Be sure to research the specific requirements of the seeds you are planting.
- Keep a day-night temperature difference: Mimic natural conditions by slightly lowering the temperature during the night. A drop of a few degrees can promote healthy growth and help prevent leggy seedlings.
Humidity:
Humidity is essential for germination and the early growth stages of your seedlings. Here’s how to ensure proper humidity levels:
- Use a hygrometer: Measure the humidity levels in the area where you are growing your seedlings. The ideal range for most plants is between 50% and 70% humidity.
- Provide humidity with covers: During the germination phase, cover your containers with plastic wrap, domes, or plastic bags to create a humid microclimate. Once the seeds have sprouted, remove the cover to allow proper airflow.
- Mist your seedlings: Use a spray bottle to mist the air around your seedlings regularly, especially in dry environments. Be cautious not to overwater the soil, as this can lead to fungal diseases.
- Group your containers: Placing containers close together can create a mini-humid zone as the plants release moisture through transpiration. Just make sure there is enough space for air circulation to prevent issues like damping off.
By providing the proper temperature and humidity levels, you’ll create an ideal environment for your seedlings to thrive. Consistency is key, so monitor and adjust as necessary to ensure optimal conditions. In the next section, we’ll discuss the process of sowing the seeds in your prepared containers.
When planting seeds indoors, make sure to use a good quality seed starting mix to provide the right nutrients and drainage for the seeds to germinate and grow successfully.
Sowing the Seeds
Now that you have your prepared containers and the ideal environment set up, it’s time to sow the seeds. Follow these steps to ensure successful seed germination:
- Refer to the seed packet: Each type of seed may have different requirements for sowing depth and spacing. Read the instructions on the seed packet carefully to ensure you’re following the specific guidelines for the seeds you’re planting.
- Make small holes: Use your finger or the end of a pencil to create small holes in the soil. The depth of the hole will depend on the size of the seeds. As a general rule of thumb, sow the seeds at a depth two to three times their diameter.
- Sow the seeds: Place one or two seeds in each hole. If you’re using a larger container, you can sow multiple seeds in each section, as they will be thinned out later. Avoid overcrowding, as it can lead to competition for resources and hinder seedling growth.
- Cover the seeds: Gently cover the seeds with a thin layer of soil. Press the soil lightly to ensure good contact with the seeds, but avoid compacting the soil too much, as this can impede germination.
- Label your containers: Place labels or use markers to identify the seeds you’ve planted in each container. This will help you keep track of the different varieties as they grow and develop.
- Water gently: Use a watering can with a fine rose or a spray bottle to water the containers. Avoid drenching the soil, as this can displace the seeds. Aim to keep the soil evenly moist but not waterlogged.
- Cover for germination: If desired, cover the containers with plastic wrap, domes, or plastic bags to create a humid environment for germination. This helps retain moisture and warmth, promoting faster and more uniform germination.
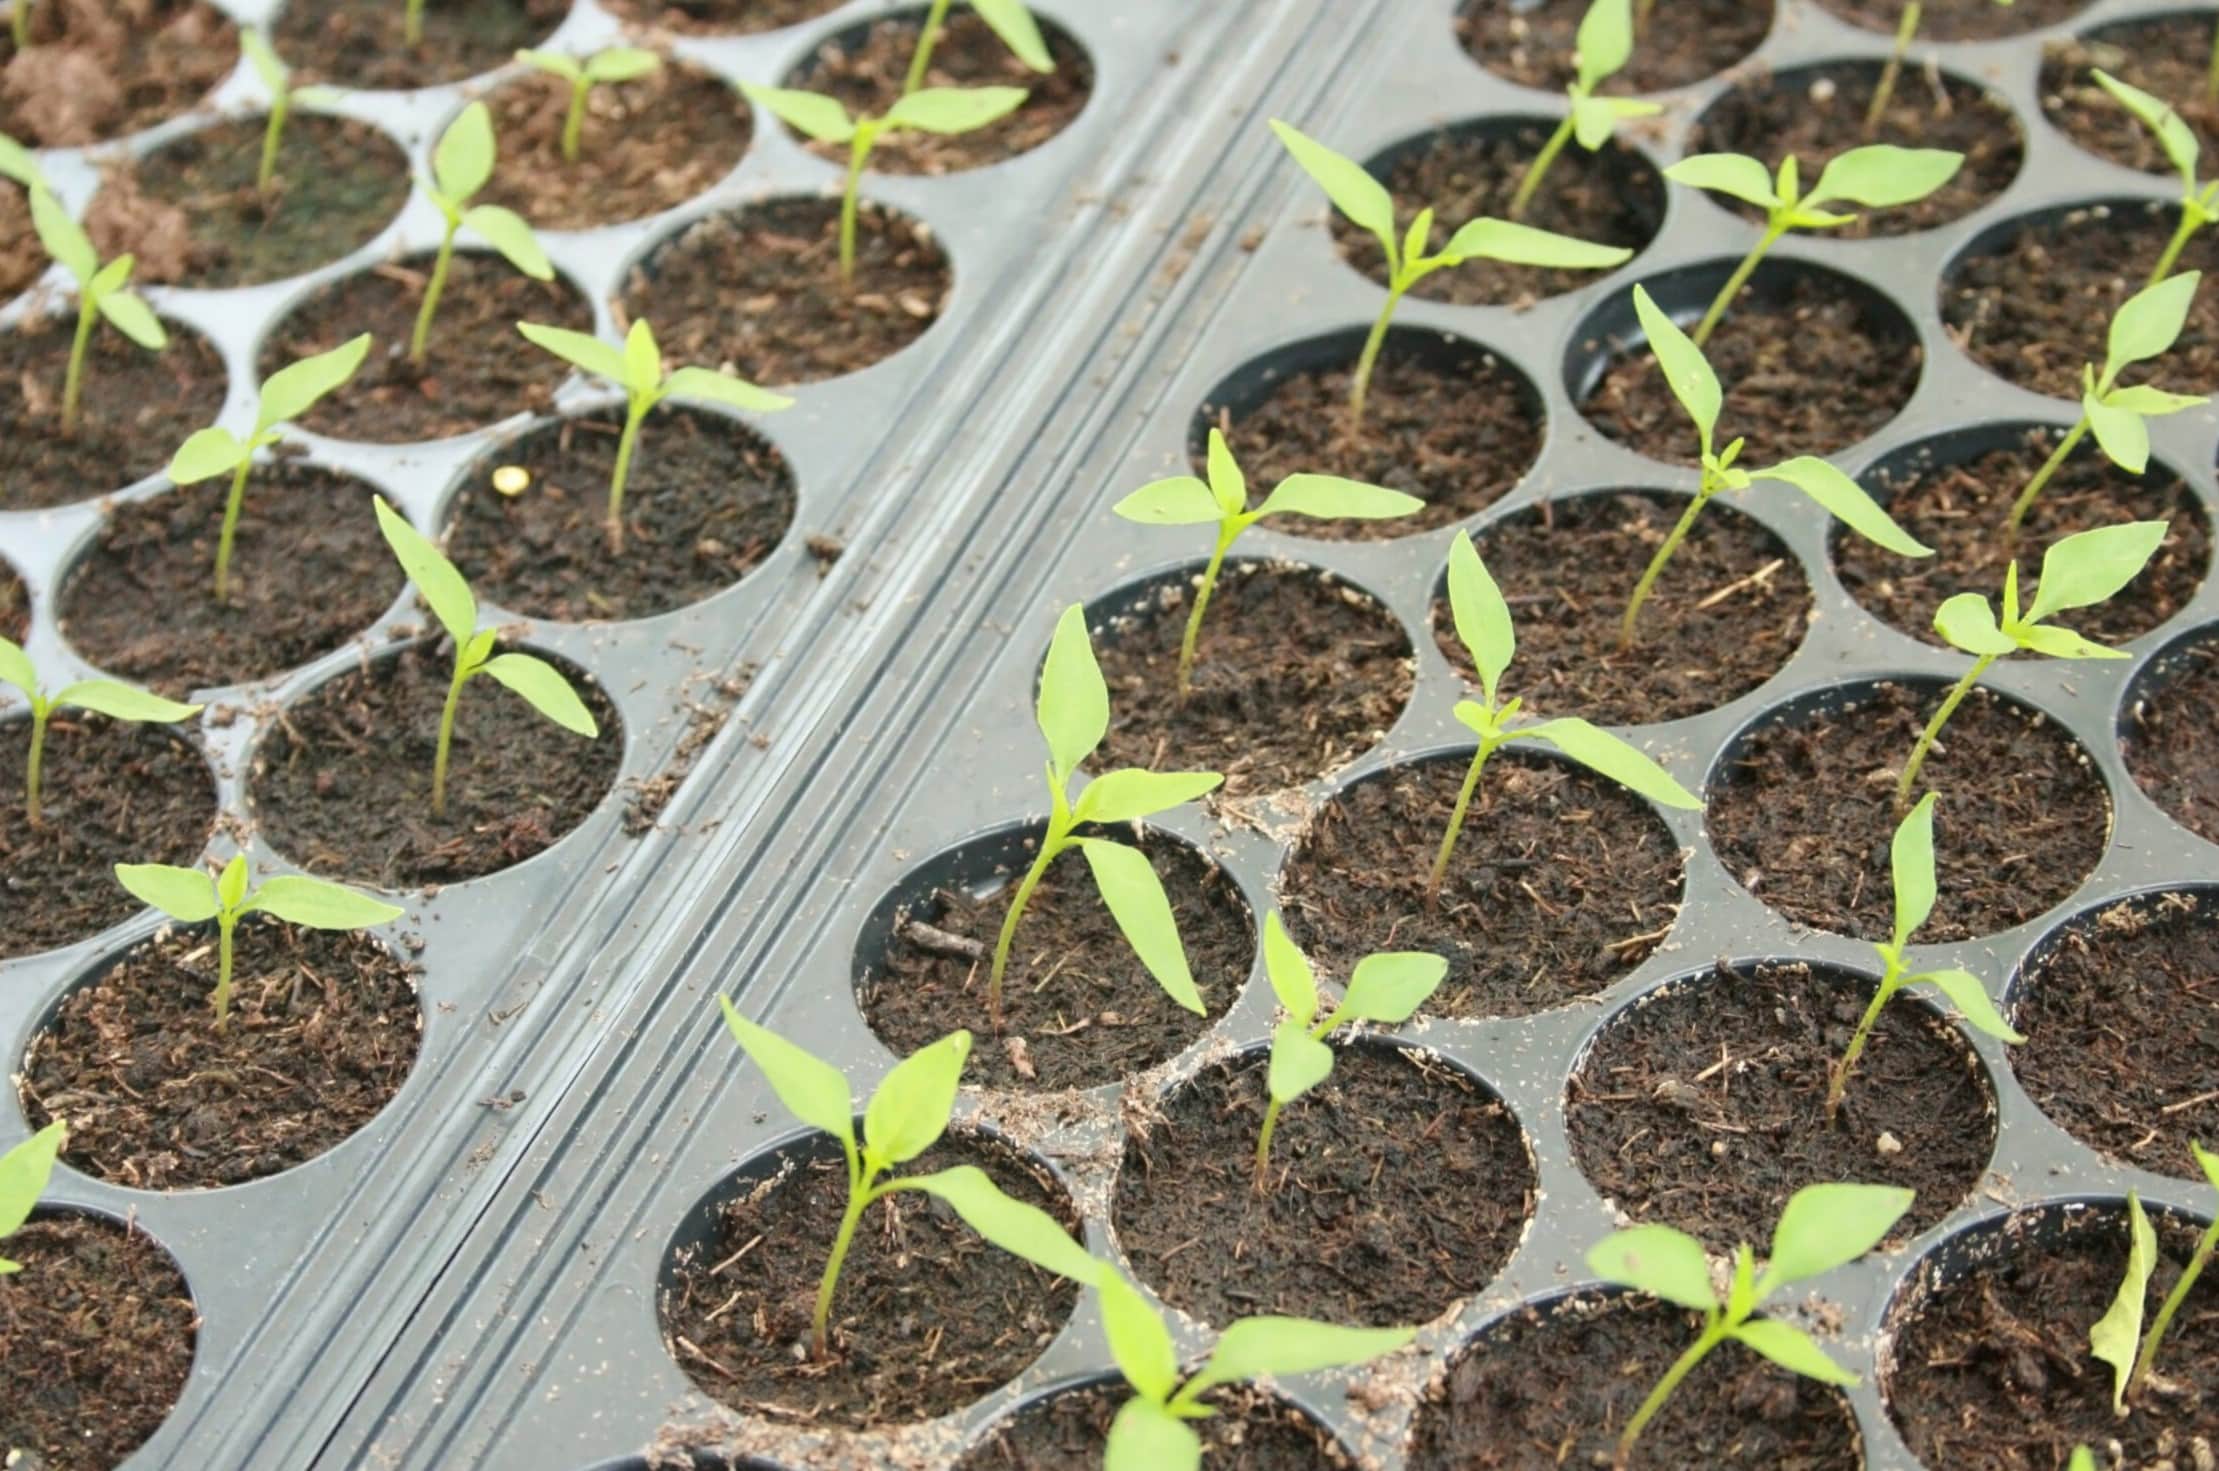
- Place in the designated growing area: Put the containers in the warm and well-lit area you’ve chosen for your seedlings. Ensure they receive the necessary light and maintain the desired temperature.
- Monitor and wait: Germination times vary depending on the type of seeds. Some may sprout in a few days, while others may take weeks. Regularly check the containers for signs of germination, and be patient as your seeds begin their journey to becoming seedlings.
Remember to follow the specific instructions for each seed variety, as some may require special treatment before sowing, such as soaking or scarification. By sowing your seeds with care and providing the right conditions for germination, you’re setting the stage for healthy seedlings to emerge. In the next section, we’ll discuss the important aspects of watering and fertilizing your seedlings.
Watering and Fertilizing
Watering and fertilizing are essential for the healthy growth and development of your seedlings. Here’s what you need to know to provide them with the nutrients and moisture they need:
Watering:
Proper watering is crucial to prevent under-watering or over-watering, which can both harm your seedlings. Follow these tips for effective watering:
- Monitor the moisture level: Regularly check the moisture level of the soil by inserting your finger about an inch deep. If it feels dry, it’s time to water. If it feels moist, you can hold off on watering.
- Watering technique: Use a watering can with a fine rose attachment or a spray bottle to water your seedlings gently. Aim to water the soil directly around the seedlings, rather than overhead watering, which can disturb the delicate sprouts.
- Avoid overwatering: Ensure proper drainage by using containers with drainage holes and emptying any saucers or trays collecting excess water. Overwatering can lead to rotting roots and fungal diseases. It’s better to slightly underwater than to overwater.
- Keep the soil moist but not soggy: Aim to keep the soil evenly moist throughout the germination and early growth stages. It’s important to strike a balance – too much water can lead to damping off, while too little can hinder growth.
- Adjust watering as needed: The watering frequency may vary depending on factors like temperature, humidity, and the moisture retention capacity of your soil. Pay attention to the needs of your seedlings and adjust your watering schedule accordingly.
Fertilizing:
Seedlings generally don’t require fertilization for the first few weeks, as they derive nutrients from the seed itself. However, once they develop their first true leaves, it’s time to start providing them with some extra nourishment:
- Choose a balanced fertilizer: Look for a balanced, water-soluble fertilizer with an NPK ratio (nitrogen, phosphorus, and potassium) of around 10-10-10 or 20-20-20. Avoid high nitrogen fertilizers, as they can promote excessive foliage growth at the expense of root development.
- Dilute the fertilizer: Mix the fertilizer at a quarter or half strength, following the instructions on the package. Over-fertilizing can burn the delicate roots of your seedlings, so it’s better to go for a more diluted concentration.
- Apply the fertilizer: Start by lightly watering the soil to moisten it. Then, pour the diluted fertilizer solution around the base of the seedlings, avoiding direct contact with the leaves. Ensure that the fertilizer is evenly distributed.
- Fertilizing frequency: Fertilize your seedlings every 2 weeks or as instructed on the fertilizer package. Gradually increase the strength of the fertilizer as your seedlings mature and develop more leaves.
- Watch for signs of nutrient deficiencies or excesses: Keep an eye on your seedlings for any signs of yellowing leaves, stunted growth, or other abnormal symptoms. Adjust your fertilization routine and consult a gardening expert if necessary.
Remember that proper watering and fertilizing go hand in hand to provide your seedlings with the necessary nourishment for healthy growth. By adhering to these guidelines, you’ll help your seedlings establish a strong foundation for their development. In the next section, we’ll discuss how to effectively manage your seedlings as they grow.
Managing Seedlings
As your seedlings grow, they require proper care and attention to ensure their continued health and development. Here are some important aspects to consider when managing your seedlings:
Thinning:
If you initially sowed multiple seeds in each container, thinning is a necessary step to prevent overcrowding and allow the strongest seedling to thrive. Here’s how to do it:
- Wait for the seedlings to develop their first true leaves, which are the second set of leaves that appear after the initial sprouting.
- Carefully remove the excess seedlings by gently grasping the stem near the soil line and pulling them out. Be cautious not to disturb the roots of the remaining seedling.
- Discard the excess seedlings or transplant them to another container if they are healthy and you have the space.
- Space the remaining seedlings appropriately, ensuring there is enough room for each plant to grow and receive adequate light and nutrients.
Providing Air Circulation:
Good air circulation is essential for preventing diseases and promoting strong stem development. Take these steps to ensure proper airflow around your seedlings:
- Space your containers appropriately to allow air to flow between them. Avoid overcrowding, as it can lead to increased humidity and a higher risk of fungal diseases.
- Consider using a small fan on a low setting to provide gentle air movement. This helps strengthen the seedling stems and reduces the chance of fungal issues.
- If you notice any excess moisture or condensation on the walls or covers of your containers, allow them to air out for a short period each day to prevent excessive humidity buildup.
Pruning:
Although seedlings don’t require extensive pruning, removing unhealthy or crowded growth can be beneficial for their overall growth and development. Here’s what you can do:
- Look for any damaged, diseased, or yellowing leaves and carefully remove them with clean scissors or pruning shears. This helps prevent the spread of diseases and ensures that the plant’s energy is directed towards healthy growth.
- If you notice any seedlings growing too close to each other, gently remove the smaller or weaker one to give the remaining seedling more space to thrive.
Observation and Monitoring:
Regular observation is vital for catching any potential issues early and ensuring the overall health and development of your seedlings. Here’s what to pay attention to:
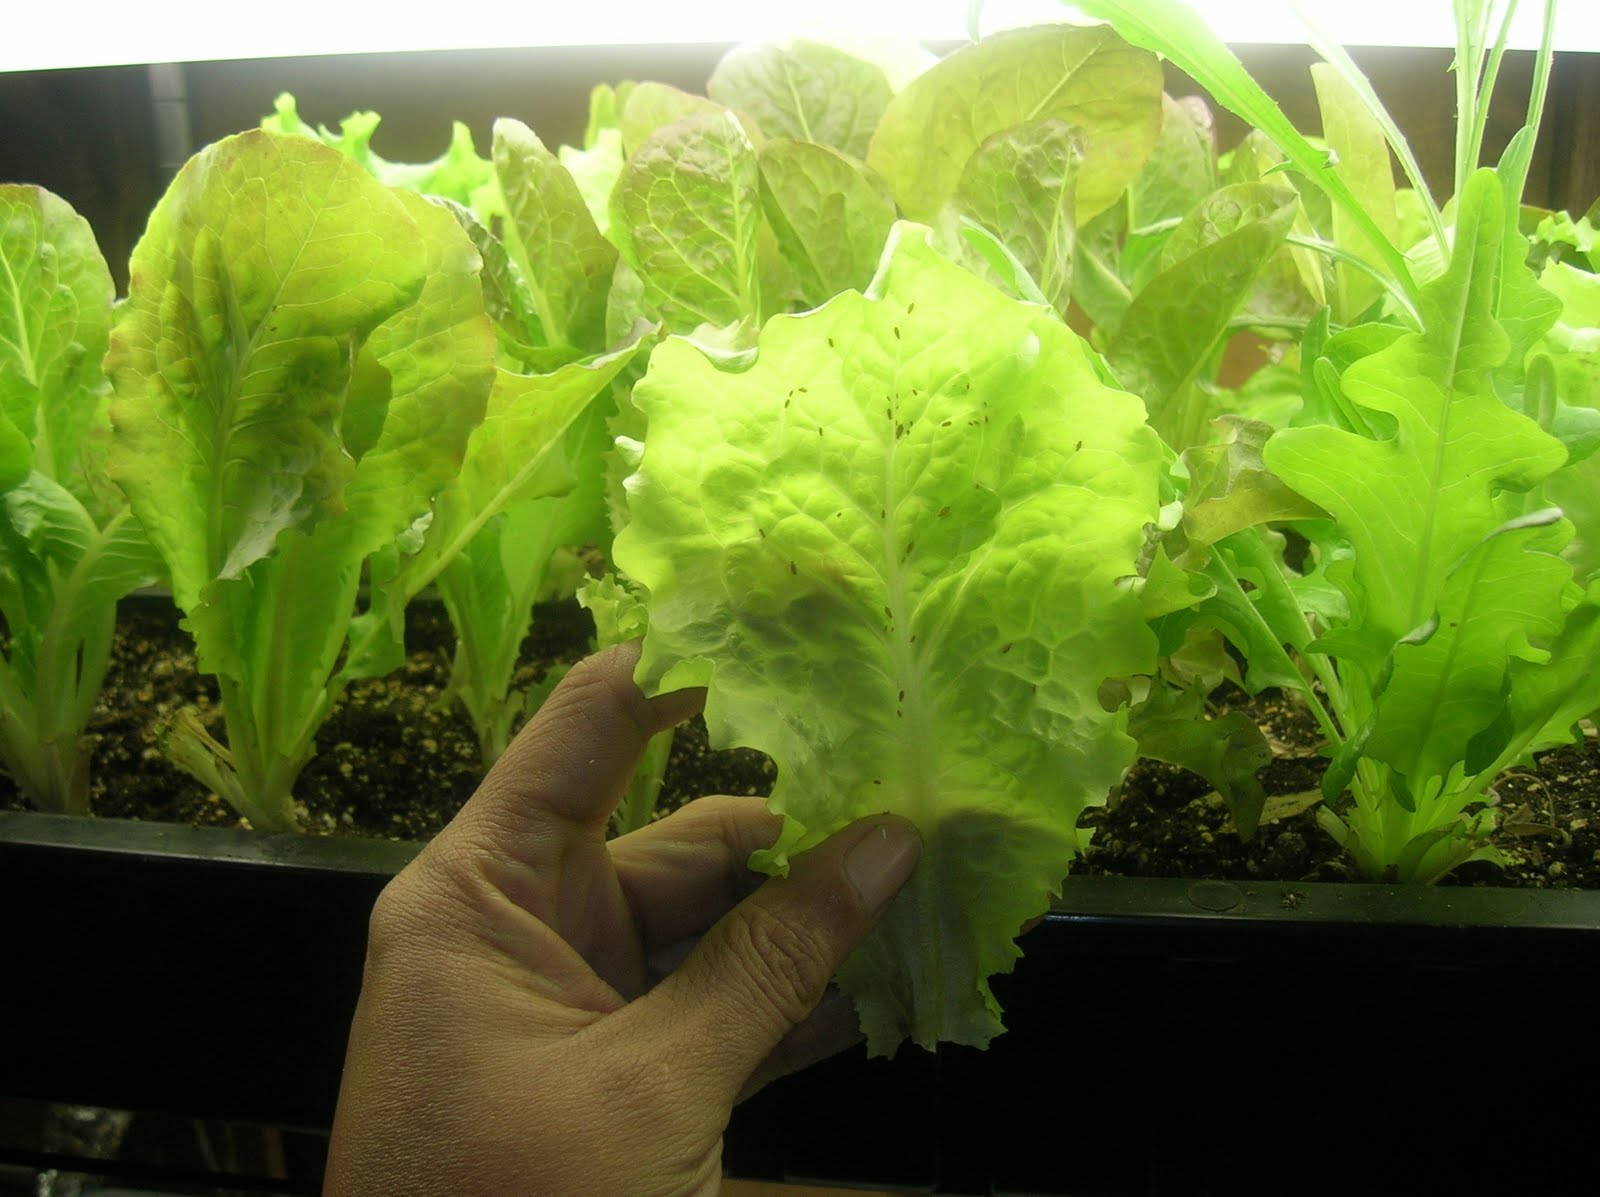
- Observe the growth and development of your seedlings, noting any changes in color, size, or overall appearance. This can help identify nutrient deficiencies, pest infestations, or other problems.
- Check for signs of pests such as aphids, mites, or fungus gnats. Early detection allows for effective intervention to protect your seedlings.
- Keep an eye on the moisture level of the soil, ensuring it doesn’t become too dry or waterlogged. Adjust your watering routine as needed.
- Monitor temperature and humidity levels to maintain optimal conditions for your seedlings.
By actively managing your seedlings and providing appropriate care, you’re setting the stage for their successful transition into the next phase of growth. Next, we’ll discuss the process of transferring your seedlings to larger pots.
Read more: When To Plant Nasturtium Seeds Indoors
Transferring Seedlings to Larger Pots
As your seedlings continue to grow, they will eventually outgrow their initial containers and need more space to thrive. Transferring seedlings to larger pots, also known as “potting up,” is a crucial step in their development. Here’s how to do it:
- Choose the right time: Wait until your seedlings have developed several sets of true leaves and are strong enough to handle the transplanting process. This is usually when they are around 2-3 inches tall.
- Gather the necessary materials: Prepare larger pots or containers that have drainage holes, along with fresh potting soil suitable for the specific plants you are growing. Make sure the new pots are clean and sterilized.
- Prep the new pots: Fill the larger pots with fresh potting soil, leaving enough space at the top to accommodate the seedling’s root ball. Gently firm the soil in the pots to remove any air pockets.
- Water the seedlings: Before transplanting, water the seedlings in their current containers. This helps moisten the soil and makes it easier to remove the seedlings without causing damage.
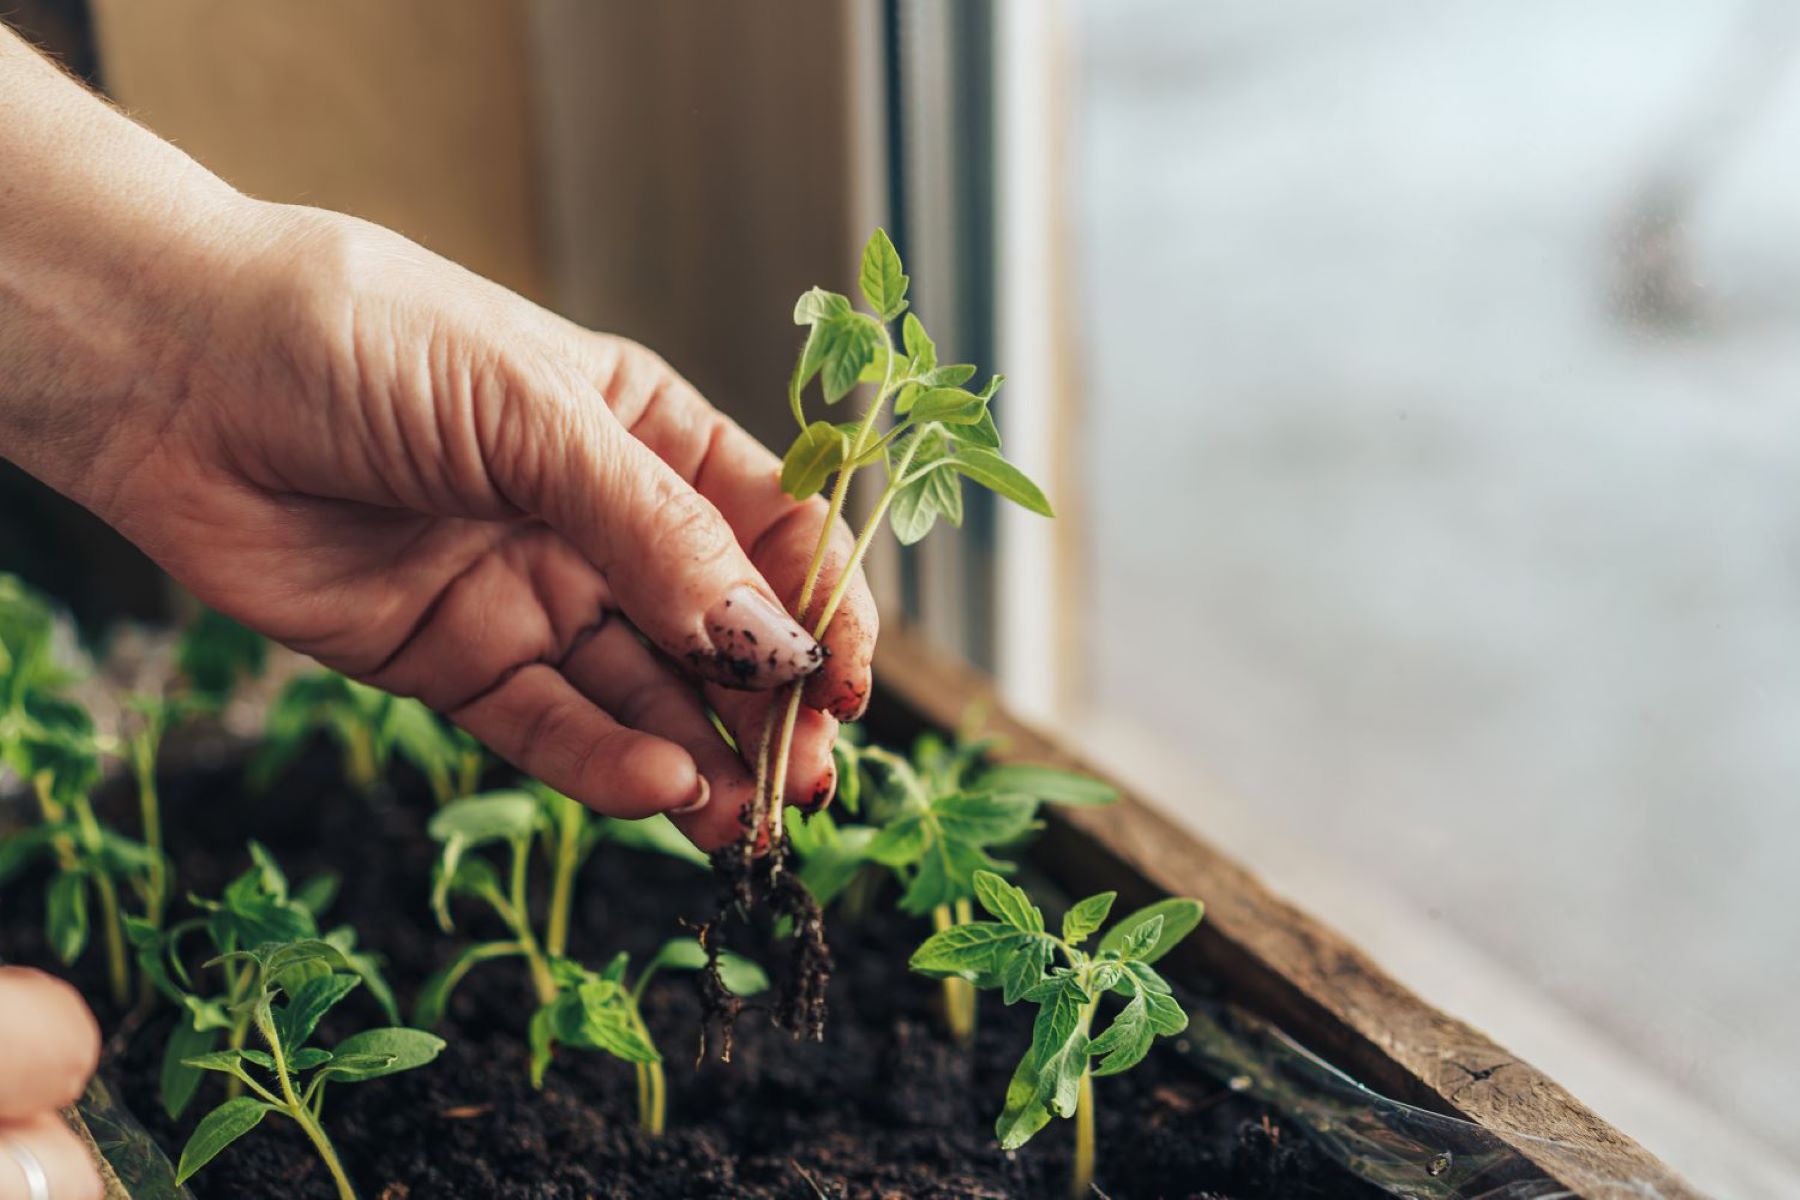
- Remove the seedlings: Carefully loosen the soil around each seedling with a small tool or your fingers. Avoid pulling the seedlings by the stems, as this can damage them. Instead, hold the seedling by its leaves and gently lift it out of the container.
- Place the seedlings in the new pots: Create a hole in the soil of the larger pot that is enough to accommodate the seedling’s root ball. Lower the seedling into the hole, making sure the soil level of the new pot matches the soil level of the original container. Gently press the soil around the seedling to secure it in place.
- Water thoroughly: After potting up, give the seedlings a thorough watering to settle the soil and help the roots establish in the new pot. Ensure that excess water drains out of the bottom of the pot.
- Provide proper care: Place the newly potted seedlings in a suitable location with adequate light and maintain the appropriate temperature and humidity levels. Keep a close eye on the moisture level of the soil and water as needed.
- Monitor and adjust: Observe the seedlings closely after transplanting to ensure they adapt well to their new pots. Watch for any signs of stress or shock, such as wilting or yellowing leaves, and make adjustments to their care as necessary.
Transferring seedlings to larger pots allows their roots to have more room to grow and access to fresh nutrients. It also reduces the risk of overcrowding and enhances overall plant health. With proper care and monitoring, your transplanted seedlings will continue to flourish and prepare for eventual outdoor planting. In the next section, we’ll discuss the process of hardening off the seedlings before they are planted outdoors.
Hardening Off the Seedlings
Hardening off is a crucial step in the seedling journey as it prepares them for the transition from the controlled indoor environment to the sometimes harsher outdoor conditions. This process allows the seedlings to adjust gradually to factors such as temperature fluctuations, wind, and direct sunlight. Here’s how to successfully harden off your seedlings:
- Choose the right time: Start the hardening off process when the threat of frost in your area has passed and the weather is consistently mild. Typically, this is a week or two before you plan to transplant your seedlings to the outdoor garden.
- Start with short exposure: Begin by placing your seedlings outdoors in a sheltered, shady area for a few hours each day. This helps them acclimate to the outdoor temperature and gentle breezes.
- Gradually increase exposure: Over the course of about a week, gradually increase the amount of time your seedlings spend outdoors. Expose them to direct morning sunlight for a short period, gradually increasing the duration each day.
- Protect from extreme weather: Keep a close eye on the weather forecast during the hardening off period. If there is a sudden drop in temperature or inclement weather, bring the seedlings indoors or provide them with temporary protection, such as bringing them under a covered porch or using row covers.
- Monitor the seedlings: During the hardening off process, observe your seedlings closely for any signs of stress, such as wilting or yellowing leaves. Adjust their exposure or provide additional protection if needed.
- Transplant outdoors: After the hardening off period is complete, and your seedlings have adjusted to outdoor conditions, they are ready to be transplanted into the garden. Choose a day with favorable weather and prepare the soil in advance for a smooth transition.
- Continue care in the garden: Once your seedlings are in the garden, provide them with appropriate watering, fertilizing, and ongoing care based on their specific needs. Monitor their growth and address any issues promptly to ensure a successful growing season.
Hardening off your seedlings is crucial for their survival and long-term success in the garden. By gradually exposing them to outdoor conditions, you’re giving them the opportunity to strengthen and adapt to the elements. With proper care and attention, your seedlings will thrive in their new outdoor home. In the final section, we’ll conclude with some final thoughts on indoor seed planting.
Final Thoughts and Conclusion
Congratulations! You have successfully navigated through the process of planting seeds indoors and are well on your way to growing a beautiful and bountiful garden. By choosing the right seeds, gathering the necessary materials, and providing optimal growing conditions, your seedlings have received a strong start.
Remember, indoor seed planting offers numerous benefits, including extended growing seasons, greater control over the environment, and the ability to start plants early. It’s a wonderful way to satisfy your green thumb all year round.
Throughout this guide, we’ve covered key steps such as choosing the right seeds, preparing planting containers, providing adequate lighting, temperature, and humidity, sowing the seeds, and managing and transplanting the seedlings. By following these steps, you have given your seedlings the best chance for success.
As you continue to nurture your seedlings and observe their growth, always monitor their needs and make adjustments accordingly. Whether it’s proper watering, fertilizing, managing and thinning their growth, or hardening them off before transplanting outdoors, your attention and care will pay off in the form of thriving plants.
Remember to stay observant and vigilant against potential issues such as pests, diseases, or nutrient deficiencies. Catching these early can help prevent larger problems down the line.
Lastly, enjoy the journey! Gardening is a rewarding and fulfilling hobby that allows you to connect with nature, indulge in the satisfaction of seeing your efforts come to fruition, and reap the many benefits of fresh homegrown produce or beautiful blooms.
As your seedlings grow and flourish, always continue to expand your gardening knowledge and experiment with new techniques and plant varieties. There is always more to learn and discover in the world of gardening.
Wishing you a successful indoor seed planting experience and a fruitful garden ahead!
Frequently Asked Questions about How To Plant Seeds Indoors
Was this page helpful?
At Storables.com, we guarantee accurate and reliable information. Our content, validated by Expert Board Contributors, is crafted following stringent Editorial Policies. We're committed to providing you with well-researched, expert-backed insights for all your informational needs.


0 thoughts on “How To Plant Seeds Indoors”