Home>Garden Essentials>How To Tell If A Seed Has Germinated
Garden Essentials
How To Tell If A Seed Has Germinated
Modified: March 16, 2024
Learn how to determine if your garden seeds have successfully germinated with these helpful tips and tricks. Ensure a successful garden harvest!
(Many of the links in this article redirect to a specific reviewed product. Your purchase of these products through affiliate links helps to generate commission for Storables.com, at no extra cost. Learn more)
Introduction
Welcome to the wonderful world of gardening! If you’re new to gardening or an experienced green thumb, understanding the process of seed germination is essential. Germination is the process by which a seed develops into a new plant. It’s an exciting and vital stage in the life cycle of a plant, and being able to identify the signs of germination can help you determine whether your seeds are viable and on their way to sprouting.
Seed germination is influenced by various factors, including temperature, moisture, light, and the quality of the seed itself. By understanding these factors and observing certain visual cues, you can gain a better understanding of whether or not your seeds have germinated.
In this article, we will explore how to tell if a seed has germinated and the various signs to look out for. We will also discuss factors that can affect the germination process and offer some tips to help ensure successful seed germination in your garden.
So, let’s dive into the fascinating process of seed germination and equip you with the knowledge you need to become an expert in identifying signs of germination in your seeds!
Key Takeaways:
- Look for signs of seed germination like swelling, cracked seed coats, and root and shoot emergence. Understanding these visual cues helps determine if your seeds are viable and on their way to sprouting.
- Factors like temperature, moisture, light, and seed quality influence seed germination. Providing optimal conditions and monitoring growth increase the likelihood of successful germination.
Read more: How To Tell If Grass Has Fungus
Understanding Seed Germination
Seed germination is the process by which a dormant seed begins to grow and develop into a new plant. It is a critical stage in a plant’s life cycle, as it marks the transition from a seed to a seedling. Understanding this process is key to successful gardening, as it allows you to assess whether your seeds are viable and likely to sprout.
The germination process can be broken down into several stages. First, the seed absorbs water through its outer coat, causing it to swell and become activated. This process is known as imbibition. As the seed takes in water, it triggers metabolic activities that lead to the initiation of growth.
Once imbibition occurs, hormones within the seed, such as gibberellins, auxins, and cytokinins, start to become active, stimulating the growth of the embryonic plant. The root, or radicle, is the first to emerge, followed by the shoot, or hypocotyl, which eventually develops into the stem and leaves.
During germination, the stored nutrients within the seed, such as carbohydrates, proteins, and fats, provide the energy and nourishment needed for the developing seedling. As the roots grow and take in nutrients from the surrounding soil, the seedling becomes self-sufficient and continues to grow into a mature plant.
Understanding the process of seed germination is crucial because it helps you determine whether your seeds are viable and whether you are providing the right conditions for them to sprout. A lack of germination could be due to factors such as incorrect temperature, inadequate moisture, or poor seed quality.
By taking the time to understand seed germination, you can better appreciate the complexity and wonder of plant life. It also allows you to make informed decisions when it comes to selecting, sowing, and nurturing your seeds, increasing your chances of gardening success.
Signs of Seed Germination
When it comes to determining if a seed has germinated, there are several signs to look out for. These signs can vary depending on the plant species, but there are some common visual cues that can indicate successful germination.
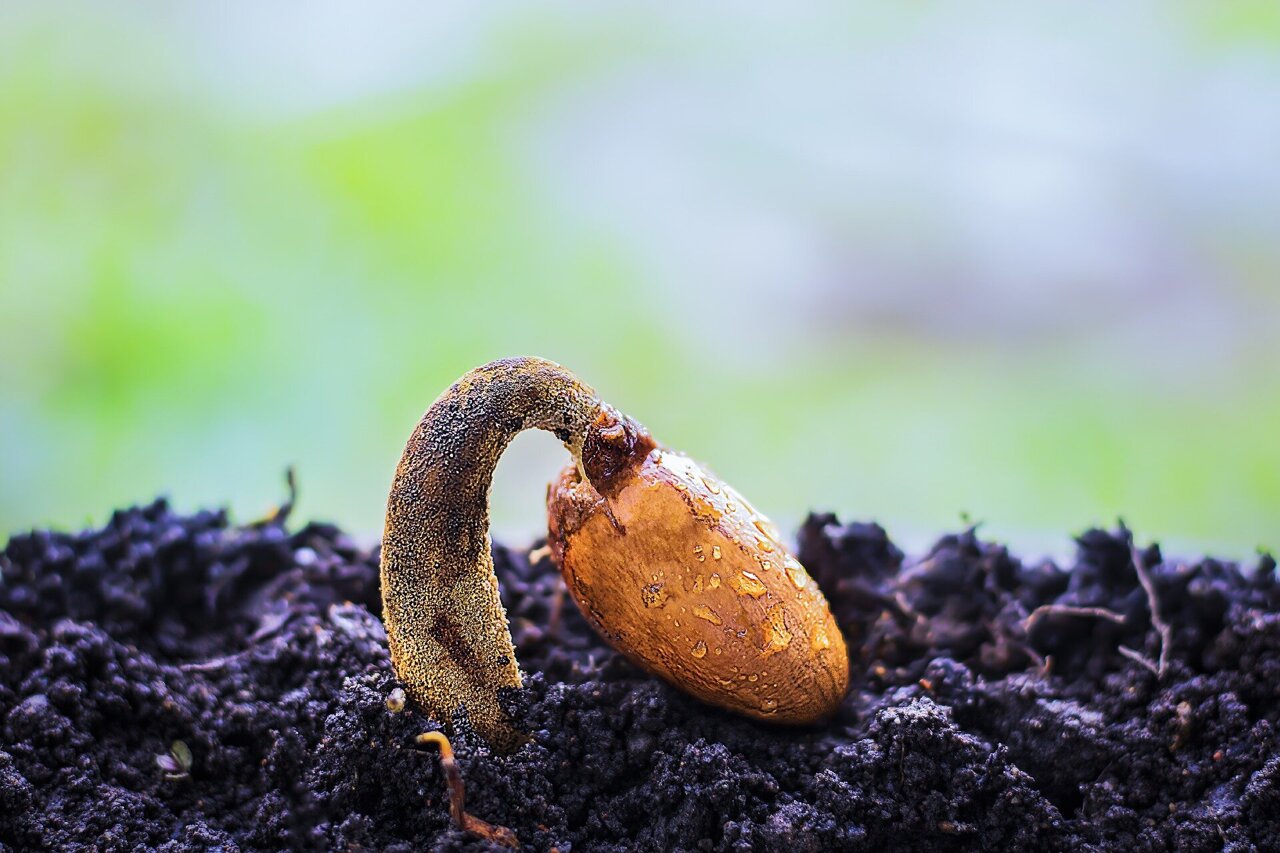
1. Seed Swelling: One of the initial signs of seed germination is the swelling of the seed. As the seed absorbs water, it expands and becomes plump. This is a clear indication that the germination process has begun.
2. Cracked Seed Coat: As the seed swells, the outer shell, or seed coat, may start to crack or split. This is a result of the growing plant exerting pressure on the seed coat, signaling the emergence of the root or shoot.
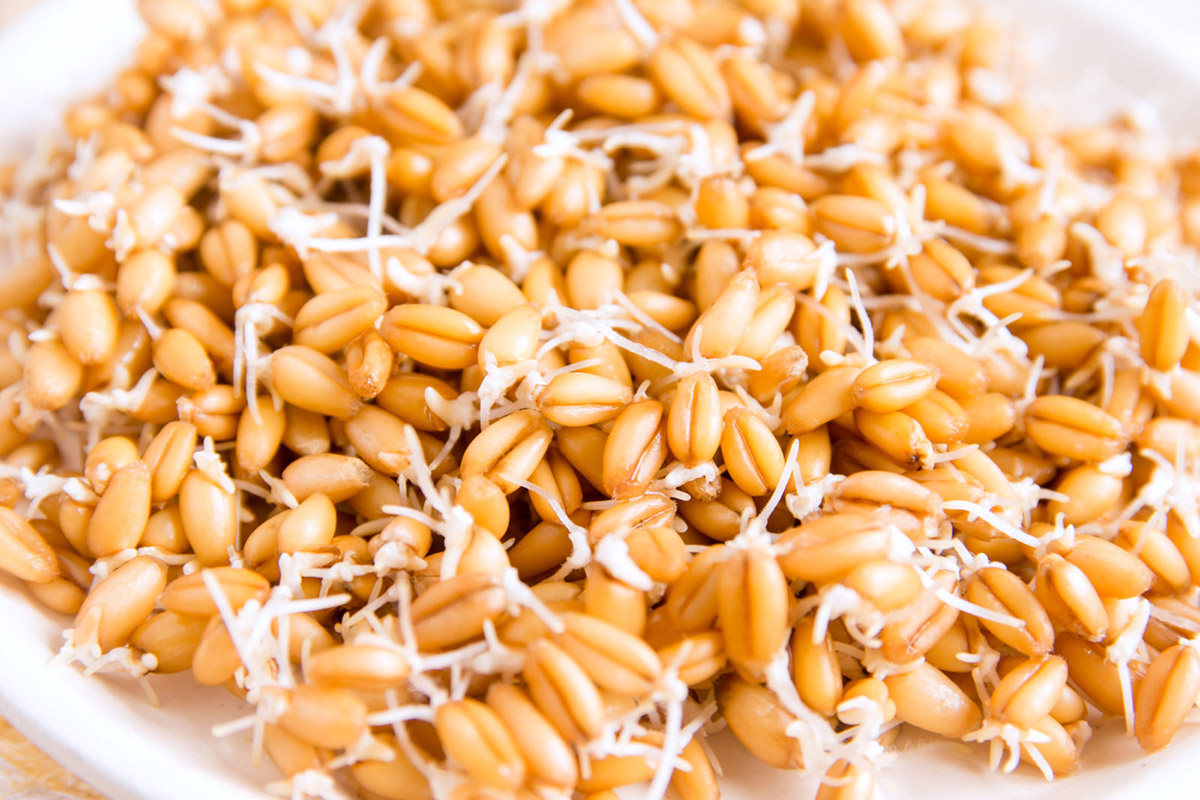
3. Radicle Emergence: The first visible sign of germination is the emergence of the radicle, which is the embryonic root. It usually appears as a small white or green protrusion from the seed, indicating that the root is starting to grow downwards into the soil.
4. Shoot Development: After the radicle emerges, the shoot or hypocotyl begins to develop. This is the first part of the shoot system, and it will eventually give rise to the stem and leaves of the seedling.
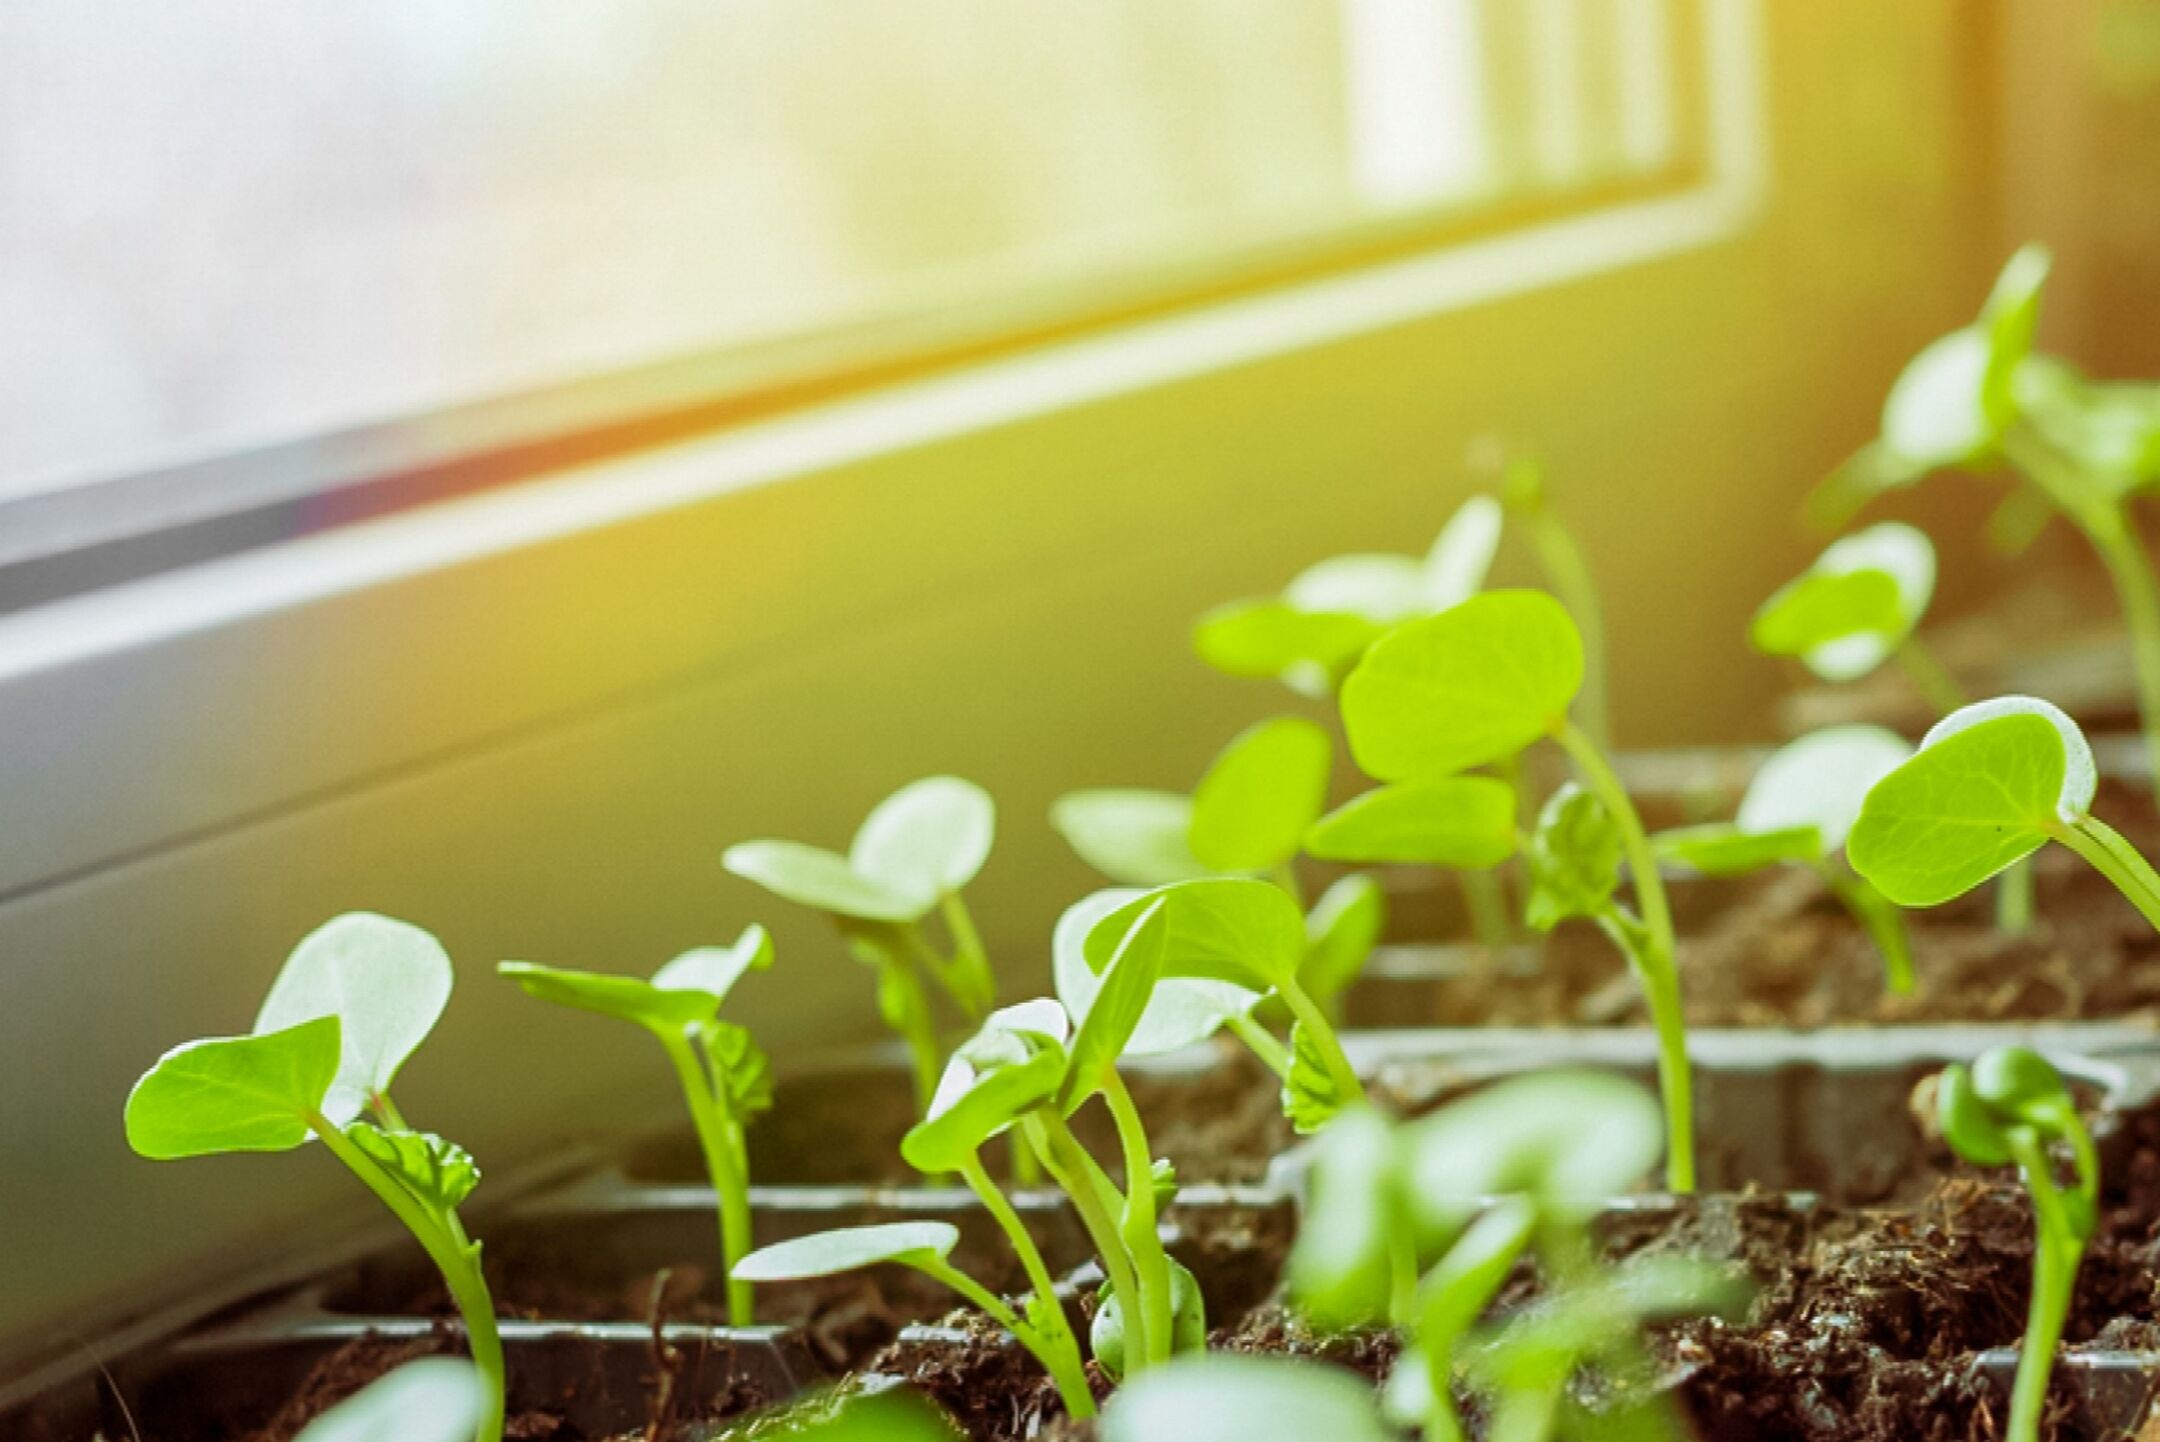
5. Greening of the Cotyledons: In some plants, the cotyledons, which are the embryonic leaves, become green as they emerge from the seed. This is a sign that photosynthesis is taking place, and the seedling is becoming self-sufficient in terms of energy production.
6. Expansion of Cotyledons: As the seedling continues to grow, the cotyledons may expand and become more prominent. This is especially noticeable in plants with large and fleshy cotyledons, such as bean or pea plants.
7. Formation of True Leaves: Once the cotyledons have fulfilled their role, the seedling starts to develop true leaves. These leaves are characteristic of the plant species and differ from the cotyledons in shape and structure.
8. Root Growth: Another sign of germination is the development of a well-established root system. The roots will grow deeper into the soil, anchoring the plant and absorbing water and nutrients from the surrounding environment.
It’s important to note that the time taken for these signs to appear can vary depending on the plant species and the specific environmental conditions. Some seeds may germinate within a few days, while others may take weeks or even months. Patience is crucial when waiting for germination to occur.
By observing these visual cues and monitoring the progress of your seeds, you can determine whether germination has taken place and adjust your gardening practices accordingly.
Visual Cues
When evaluating the progress of seed germination, visual cues can provide valuable information. These cues allow you to assess the health and development of the seedlings, giving you insight into whether germination has occurred successfully. Here are some visual cues to look for:
1. Seed Coat: The appearance of the seed coat can provide important indications. If the seed coat is intact and there are no signs of cracking or splitting, it may suggest that germination has not yet taken place. Conversely, if you see the seed coat starting to break open, it’s a positive sign that germination is underway.
2. Root Development: As the seed germinates, the root will begin to grow and extend into the soil. Look for signs of root elongation and branching. Healthy roots will typically be white or light in color and show clear signs of growth.
3. Shoot Emergence: The emergence of the shoot from the soil is another visual cue of germination. Keep an eye out for the first sign of the shoot pushing upward, indicating that the seedling is beginning to emerge from the soil.
4. Cotyledon Development: Cotyledons are the first leaves to appear in a germinating seed. Monitoring their development can provide insight into the progress of germination. Look for the expansion and greening of the cotyledons as they prepare to support the growth of the seedling.
5. Leaf Formation: Once the cotyledons have fulfilled their role, true leaves will begin to form. These leaves have the characteristic shape and structure of the plant species and are distinct from the cotyledons. The appearance of true leaves further confirms that germination has occurred.
6. Overall Growth and Appearance: Observe the overall growth and appearance of the seedlings. Healthy seedlings will have an erect posture, with stems that are sturdy and not limp or weak. Vibrant green coloration indicates good health, while yellowing or browning may indicate an issue with germination.
7. Size and Vigor: As the seedlings grow, they should display vigor and exhibit a noticeable increase in size over time. Healthy seedlings will demonstrate robust growth, with strong stems and well-developed roots.
It’s important to note that visual cues can vary depending on the plant species and the specific conditions in which they are germinating. Some seeds may have unique characteristics, such as fuzzy coatings or distinct germination patterns, which can further aid in the identification of germination.
By regularly observing these visual cues and comparing them to the expected growth patterns of your specific plant species, you can confidently assess whether seed germination is occurring successfully and adjust your gardening practices accordingly.
Mold or Fungi Growth
While seed germination is an exciting and rewarding process, it can sometimes be accompanied by unwanted guests in the form of mold or fungi. Mold or fungal growth on your seeds or seedlings can indicate poor germination conditions or the presence of pathogens. Here’s what you need to know about mold or fungi growth during seed germination:
1. Moisture and Humidity: Excessive moisture and high humidity levels create a favorable environment for mold and fungi to thrive. If the germination medium or the surrounding environment is overly moist, it can facilitate the growth of molds such as Botrytis or fungi like Pythium or Fusarium.
2. Seed Contamination: Seeds can carry fungal spores, which may become activated during the germination process. Contaminated seeds are more susceptible to mold or fungi growth. It’s important to obtain high-quality seeds from reputable sources to minimize the risk of contamination.
3. Poor Drainage: Inadequate drainage in the germination medium can lead to waterlogged conditions, encouraging the growth of molds and fungi. Make sure your germination containers or trays have sufficient drainage holes and use well-draining soil or growing medium.
4. Overcrowding: Planting seeds too closely together can create crowded and moist conditions, providing an ideal environment for mold and fungi to colonize. Proper spacing ensures good air circulation and reduces the risk of fungal growth.
5. Prevention and Control: To prevent or control mold and fungi growth during seed germination, it’s essential to create optimal growing conditions. Here are some tips:
– Allow for proper air circulation by spacing out seeds and providing adequate room for seedling growth.
– Use sterile growing mediums and containers to minimize the introduction of fungal spores.
– Avoid overwatering and ensure proper drainage to prevent waterlogged conditions.
– Maintain a moderate humidity level in the germination area by ventilating or using a dehumidifier if necessary.
– Consider using organic fungicides or biological control agents to manage fungal growth, following the instructions provided by the manufacturer.
If you notice mold or fungi growth on your seeds or seedlings, take immediate action to prevent further spread. Gently remove affected seeds or seedlings and discard them to prevent the spread of pathogens. Adjust your watering practices, improve ventilation, and consider sterilizing your equipment and growing medium to prevent future occurrences.
Remember, early detection and management are key to ensuring healthy and successful seed germination. By creating the right growing conditions and promptly addressing mold or fungi issues, you can minimize the impact on your germinating seeds and seedlings.
To tell if a seed has germinated, look for a small sprout or root emerging from the seed. You can also gently dig around the seed to check for root growth. Keep the soil moist to encourage germination.
Read more: How To Tell If A Mattress Has Mold
Checking for Root Growth
Root growth is an essential part of seed germination, as it allows the seedling to establish a strong foundation in the soil and absorb nutrients and water. Monitoring root growth is a helpful way to assess the progress and health of your germinating seeds. Here’s how you can check for root growth:
1. Gently Digging: Carefully dig around the base of the seedling, being mindful not to disturb the root system. Use a small gardening trowel or your fingers to create a shallow trench around the seedling, uncovering the roots without causing damage.
2. Systematic Check: Examine the roots systematically, starting from the base of the stem and moving outward. Look for signs of white or pale-colored roots branching out from the main root, also known as the radicle. Healthy roots should be firm, and the tips of the growing roots may appear delicate and feathery.
3. Root Length: Assess the length of the roots. Healthy seedlings will have roots that extend several centimeters or inches into the soil, depending on the plant species. Longer roots indicate vigorous growth and a well-established root system.
4. Root Color: While most healthy roots are pale or white, some plant species may naturally have roots that are darker in color, such as light brown or even reddish. However, roots that appear mushy, slimy, or discolored (dark brown or black) may indicate root rot or other issues with the root system.
5. Root Density: Assess the density of the root system. A healthy root system will have various roots branching out and filling the soil space around the seedling. Sparse or sparse-looking roots may indicate poor root development or inadequate growing conditions.
6. Avoid Excessive Disturbance: While checking for root growth is important, it’s crucial to minimize disturbance to the seedling and its roots. Excessive handling or damage can inhibit growth or even cause the seedling to die. Be gentle and cautious when examining the roots.
7. Record and Monitor: Keep a record of your observations, noting the date, the plant species, and any notable findings. Regularly monitor the growth and development of the roots over time to track progress and identify any potential issues.
Remember that root growth can vary depending on the plant species and environmental conditions. Some plants may have more extensive root systems, while others may have more compact or fibrous roots. Additionally, root growth may also be impacted by factors such as soil quality, moisture levels, and temperature.
Checking for root growth provides valuable insights into the success and health of your germinating seeds, helping you make informed decisions about watering, transplanting, and overall care. By being attentive to root development, you can support strong and resilient seedlings as they continue to grow into mature plants.
Testing for Sprouting
When it comes to determining if a seed has germinated, testing for sprouting is a reliable method. It allows you to directly observe the emergence of the shoot and confirm whether germination has occurred. Here are a few ways to test for sprouting:
1. Paper Towel Method: This method requires a few moisture-absorbent paper towels. Moisten the paper towels without soaking them to the point of dripping. Place the seeds between the folds of the moist paper towel and fold it over to create a packet. Keep the packet in a warm and dark location, checking it daily. Once you see the emergence of the shoot, you can conclude that germination has taken place.
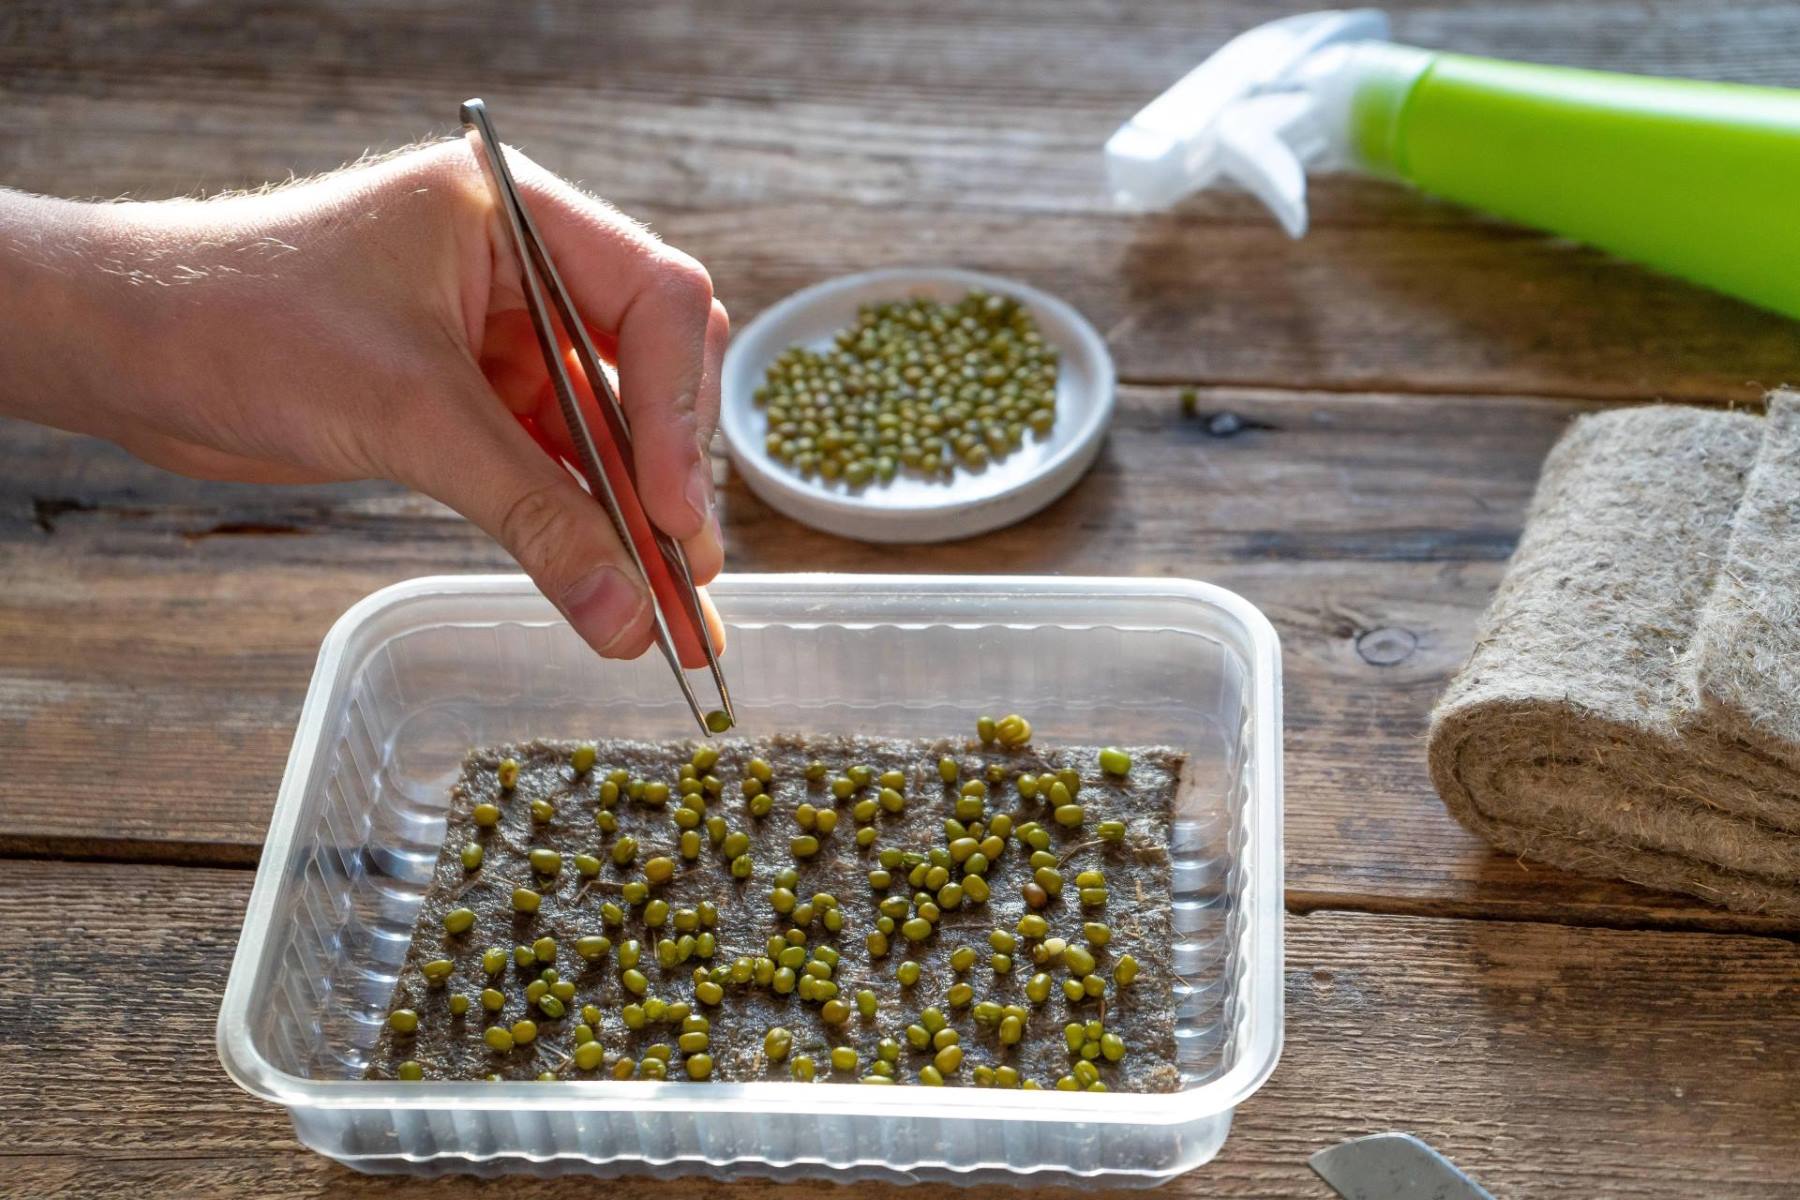
2. Seedling Tray: If you’re using seedling trays, sow your seeds in the tray filled with a well-draining germination mix or seed-starting soil. Keep the soil moist but not waterlogged. Check the tray daily, looking for any signs of sprouting. Gently brush away a small layer of soil to inspect the area around the seeds for emerging shoots.
3. Direct Soil Planting: For larger seeds or those that are best sown directly in the garden, such as beans or sunflowers, plant the seeds directly in the prepared soil. Keep the soil evenly moist and monitor the planting area regularly. Once you notice shoots emerging from the soil, you can be confident that germination has occurred.
4. Germination Time: Different plant species have different germination times. Consult the seed packet or reference guides specific to the plants you are germinating to get an idea of the average germination time. This will give you a general timeframe for when to expect sprouting to occur. If the anticipated germination time has passed without any signs of sprouting, it may indicate that the seeds are not viable or that germination conditions need to be adjusted.
5. Patience and Observation: Germination can take anywhere from a few days to a few weeks, depending on the plant species and environmental conditions. Germination is a gradual process, and small variations in germination times are normal. Be patient and continue to observe your seeds and seedlings regularly, giving them the time they need to sprout.
Remember to provide optimal germination conditions, including proper moisture, temperature, and light levels, as specified for the specific plant species. By testing for sprouting and monitoring the progress of your seeds, you can ensure that you are on track for successful germination.
Once sprouting occurs, continue to care for your seedlings by providing adequate water, light, and nutrients to support their healthy growth. With proper care, your germinated seeds will grow into vibrant and thriving plants in your garden.
Factors Affecting Germination
Several factors can influence the germination process of seeds. Understanding these factors is crucial for successful seed germination and can help you troubleshoot any issues you may encounter. Here are some key factors that can affect germination:
1. Temperature: Temperature plays a vital role in seed germination. Each plant species has an optimum temperature range for germination. Seeds generally require warmer temperatures to initiate the germination process, while excessively low temperatures can inhibit or delay germination. It’s important to provide the appropriate temperature conditions for the specific plant species you are germinating.
2. Moisture: Adequate moisture is essential for seed germination. Seeds need to absorb water to activate their metabolic processes and trigger germination. Dry conditions can prevent or hinder germination, while excessively wet conditions can lead to fungal growth or rot. It’s important to provide consistent moisture levels without overwatering, allowing the seeds to imbibe water and initiate germination.
3. Light: Light requirements for germination vary among different plant species. Some seeds require exposure to light to germinate, while others need darkness. Seeds that require light for germination should be sown directly on the soil surface or lightly covered with a thin layer of transparent soil. Conversely, seeds that require darkness should be buried deeper in the soil, away from direct light.
4. Oxygen: Like all living organisms, seeds require oxygen to initiate germination. Adequate oxygen levels in the soil are necessary for the aerobic respiration of the seeds. Compacted soil or waterlogged conditions can limit oxygen availability and impede germination. Using well-draining soil and avoiding overwatering can help ensure sufficient oxygen levels for germination.
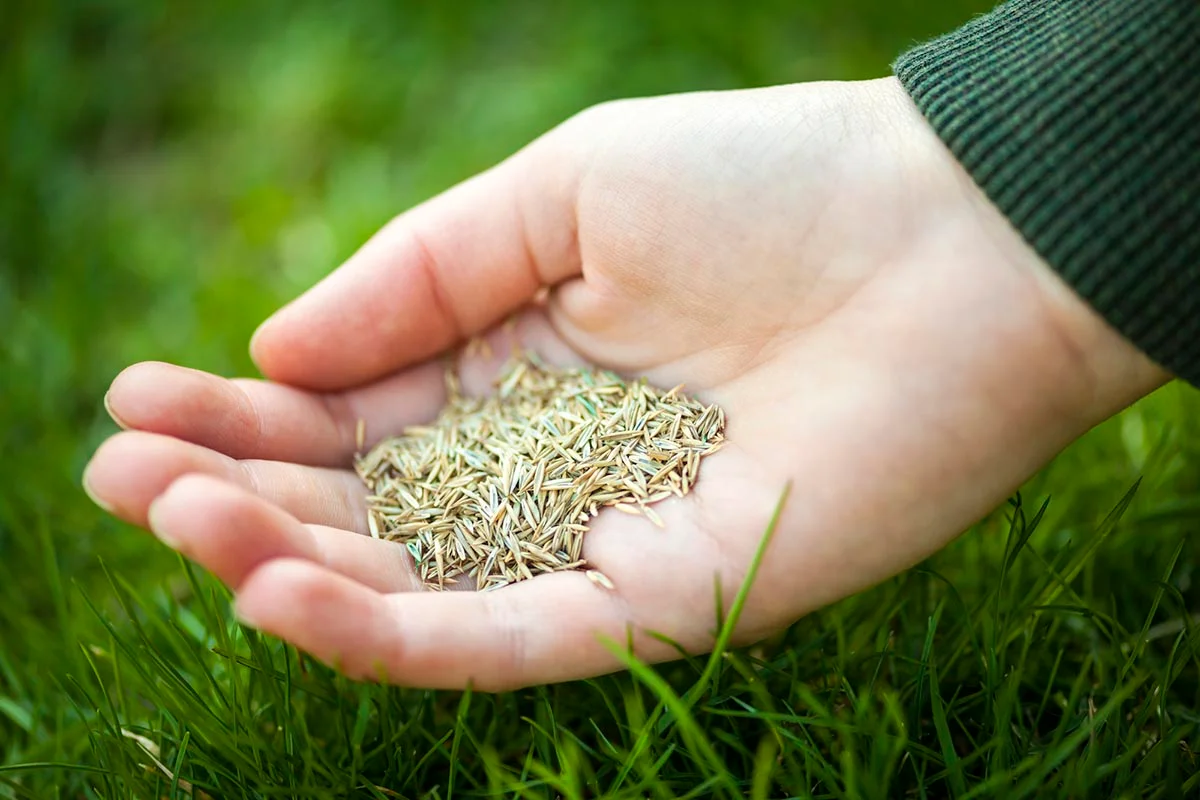
5. Seed Quality: The quality and viability of the seeds themselves can significantly impact germination. Fresh, viable seeds have a higher germination rate compared to old or damaged seeds. It’s crucial to source seeds from reputable suppliers and store them properly to maintain their viability. Conducting a germination test before planting can help determine the viability of the seeds and guide your planting decisions.
6. Seed Treatment: Some seeds may require special treatments to enhance germination. Scarification, stratification, or soaking seeds in water or a diluted solution can help break seed dormancy and improve germination rates. Research the specific requirements of the plant species you are germinating to determine if any pre-germination treatments are necessary.
7. Soil pH and Nutrients: The pH level of the soil, as well as the availability of essential nutrients, can impact seed germination. Different plant species have varying pH preferences, and imbalanced nutrient levels can hinder germination or affect seedling development. Conducting a soil test and amending the soil as required can provide optimal conditions for germination.
By understanding and providing the ideal conditions for germination, you can increase the success rate of seed germination and foster healthy seedlings. Adjusting factors like temperature, moisture, light, oxygen, seed quality, seed treatment, and soil conditions will allow you to optimize the germination process and set the stage for a bountiful garden.
Conclusion
Gardening is a rewarding and fulfilling pursuit, and understanding the process of seed germination is essential for successful gardening outcomes. By recognizing the signs of germination and monitoring the growth of your seeds, you can assess their viability and make informed decisions about their care. Visual cues such as seed swelling, cracked seed coats, root and shoot emergence, and the development of true leaves provide valuable insights into the germination process.
While seed germination is influenced by various factors like temperature, moisture, light, oxygen, seed quality, seed treatments, and soil conditions, providing optimal conditions for germination increases the likelihood of success. Ensuring the right temperature range, proper moisture levels, appropriate light exposure, adequate oxygen supply, and suitable nutrient availability creates favorable conditions for seeds to sprout and develop into healthy seedlings.
Additionally, being aware of potential challenges such as mold or fungal growth and monitoring root growth allows you to address issues promptly to support healthy germination. Testing for sprouting on paper towels or in seedling trays provides a direct visualization of germination progress.
Learning about the factors that affect germination empowers you to make adjustments and optimize the germination process. By providing the right temperature, moisture, light, and nourishment, you set the stage for successful seed germination and ensure the best start for your plants.
Remember, patience and observation are crucial during the germination process. Different plant species have different germination times, so it’s important to give your seeds the time they need to sprout and grow. Regular monitoring, keeping records, and making necessary adjustments will help guide your gardening practices and increase the chances of successful germination.
With a deeper understanding of seed germination and the factors that influence it, you’re well-equipped to embark on your gardening journey with confidence. Enjoy the magic of watching your seeds transform into vibrant seedlings, and may your garden thrive with the fruits of your germination success.
Frequently Asked Questions about How To Tell If A Seed Has Germinated
Was this page helpful?
At Storables.com, we guarantee accurate and reliable information. Our content, validated by Expert Board Contributors, is crafted following stringent Editorial Policies. We're committed to providing you with well-researched, expert-backed insights for all your informational needs.


0 thoughts on “How To Tell If A Seed Has Germinated”