Home>Garden Essentials>When To Start Seeds Indoors
Garden Essentials
When To Start Seeds Indoors
Modified: March 15, 2024
Start your garden early by learning when to start seeds indoors. Find out the best times to sow your garden seeds for a successful and thriving garden.
(Many of the links in this article redirect to a specific reviewed product. Your purchase of these products through affiliate links helps to generate commission for Storables.com, at no extra cost. Learn more)
Introduction
Welcome to the world of indoor seed starting! If you are an avid gardener or someone looking to embark on a new gardening adventure, starting seeds indoors is a wonderful way to get a head start on the growing season. Not only does it allow you to extend your gardening season, but it also offers several other benefits that can elevate your gardening experience.
In this article, we will explore the art of starting seeds indoors and provide you with all the information you need to get started. From determining the right time to start seeds indoors to troubleshooting common issues, we will cover it all!
Starting seeds indoors comes with a multitude of advantages. First and foremost, it gives you control over the entire growth process, right from the very beginning. You have the power to choose the varieties you want to grow, which may not always be available as seedlings at your local nursery. This allows you to experiment with unique and heirloom varieties, adding a touch of diversity to your garden.
Indoor seed starting also gives you a jumpstart on the growing season. By starting seeds indoors, you can have seedlings ready to be transplanted outdoors once the weather is warm enough. This can be especially beneficial for regions with shorter growing seasons, where every extra day of growth counts.
Another advantage of starting seeds indoors is the cost-saving aspect. Buying seed packets is generally more economical than purchasing seedlings, allowing you to grow a large number of plants without breaking the bank. Additionally, starting seeds indoors allows you to reap the rewards of your hard work and dedication, as you witness the entire lifecycle of a plant, from a tiny seed to a thriving mature plant.
Before diving into the world of indoor seed starting, it is essential to determine the right time to start your seeds. This will vary depending on the specific plants you are growing, as each has its own preferred timing for indoor sowing. Understanding this timing will ensure that your seedlings are not started too early or too late, resulting in healthy and vigorous plants.
In the next section, we will discuss how to determine the optimal time for starting seeds indoors, so you can plan your gardening calendar accordingly.
Key Takeaways:
- Starting seeds indoors allows you to extend the growing season, experiment with a wide variety of plants, and save money by growing your own seedlings. It’s a rewarding way to witness the entire lifecycle of a plant.
- Troubleshooting common issues like damping off, leggy seedlings, and poor germination is crucial for successful indoor seed starting. Providing proper light, water, and nutrients is essential for healthy seedling growth.
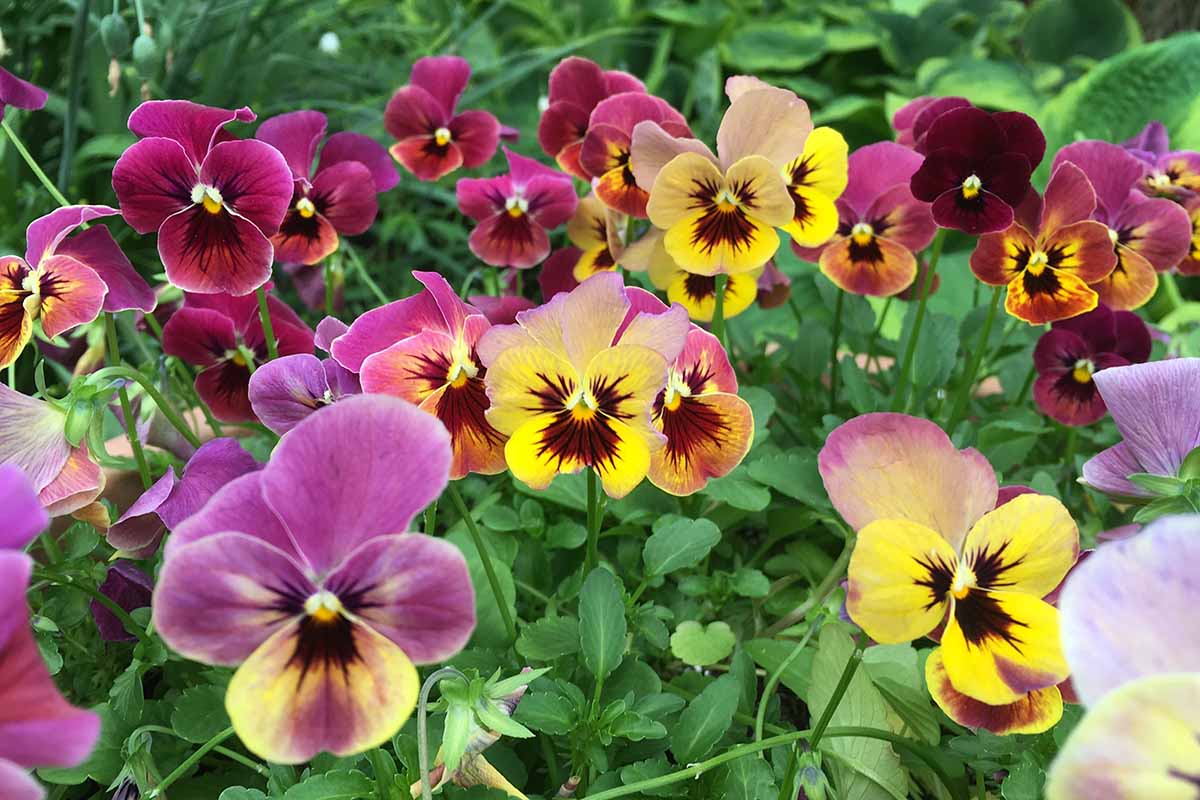
Read more: When To Start Foxglove Seeds Indoors
Benefits of Starting Seeds Indoors
Starting seeds indoors provides numerous benefits that can greatly enhance your gardening experience. Let’s explore some of the key advantages:
- Extended Growing Season: One of the biggest advantages of starting seeds indoors is the ability to extend your growing season. By starting seeds earlier indoors, you can give your plants a head start and enjoy an extended period of harvest.
- Greater Variety: When starting seeds indoors, you have a wide range of options when it comes to plant varieties. You can choose from a vast selection of seeds that may not be readily available as seedlings at your local nursery. This opens up endless possibilities, allowing you to experiment with unique and heirloom varieties.
- Cost Savings: Starting seeds indoors is a cost-effective way to grow your garden. Seed packets are generally more affordable than purchasing fully-grown seedlings. This means you can grow a larger quantity of plants without spending a fortune.
- Control Over Growing Environment: When you start seeds indoors, you have complete control over the growing conditions. You can provide optimal light, temperature, and humidity levels tailored to the specific needs of your plants. This control allows for better germination rates and healthier seedlings.
- Flexibility and Convenience: Starting seeds indoors gives you the flexibility to garden regardless of the weather conditions outside. It also allows you to get a head start on planting, which can be particularly beneficial in regions with shorter growing seasons.
- Learning and Enjoyment: Indoor seed starting offers a unique opportunity to witness the magic of plant growth from the very beginning. You can experience the joy of watching tiny seeds sprout and transform into thriving seedlings. It’s a wonderful learning experience, especially for children who can gain a deeper understanding of the plant life cycle.
These are just a few of the many benefits of starting seeds indoors. Whether you are a seasoned gardener or a beginner, indoor seed starting opens up a world of possibilities and allows you to take your gardening to new heights. Next, we will explore how to determine the right time to start seeds indoors, so you can ensure successful germination and growth.
Determining the Right Time to Start Seeds Indoors
Determining the optimal time to start seeds indoors is crucial for the success of your indoor gardening venture. It can vary depending on various factors such as the specific plant variety, your local climate, and the average last frost date in your area.
A good starting point is to refer to the seed packet or the plant’s specific growing instructions. It often provides guidelines on when to start seeds indoors. However, it’s important to remember that these are general recommendations and may need to be adjusted based on your unique circumstances.
To determine the right time, you need to be familiar with your local climate and the average last frost date. The last frost date is the estimated date when the risk of frost has passed in your area. You can find this information from local gardening resources, agricultural extension offices, or online sources.
Generally, seeds are started indoors 6-8 weeks before the average last frost date. This gives the seedlings enough time to grow and develop before they are transplanted outdoors. However, some plants may require a longer or shorter growing period before they can be moved outside.
For example, cool-season crops such as lettuce, broccoli, and kale can be started indoors as early as 8-10 weeks before the last frost date. These plants can tolerate cool temperatures and can be transplanted outdoors earlier in the spring.
On the other hand, warm-season crops like tomatoes, peppers, and eggplants are generally started indoors 6-8 weeks before the last frost date. These plants require warmer temperatures to thrive and are usually transplanted outdoors once the soil and air have warmed up.
It’s important to consider the specific requirements of each plant and adjust the timing accordingly. Some plants may have specific temperature thresholds for germination or growth, so it’s essential to provide the optimal conditions based on their needs.
In addition to the last frost date, you should also take into account the growing season in your area. If you have a relatively short growing season, starting seeds indoors earlier can give your plants a better chance to mature and produce a bountiful harvest.
By considering the specific requirements of each plant, your local climate, and the average last frost date, you can determine the ideal time to start seeds indoors. This will ensure that your seedlings are well-developed and ready to be transplanted outdoors when the weather conditions are favorable.
In the next section, we will discuss the supplies needed for successful indoor seed starting, so you can gather everything you need before getting started.
Supplies Needed for Indoor Seed Starting
Before you start sowing seeds indoors, it’s important to gather the necessary supplies to ensure successful germination and growth. Here are the essential items you will need:
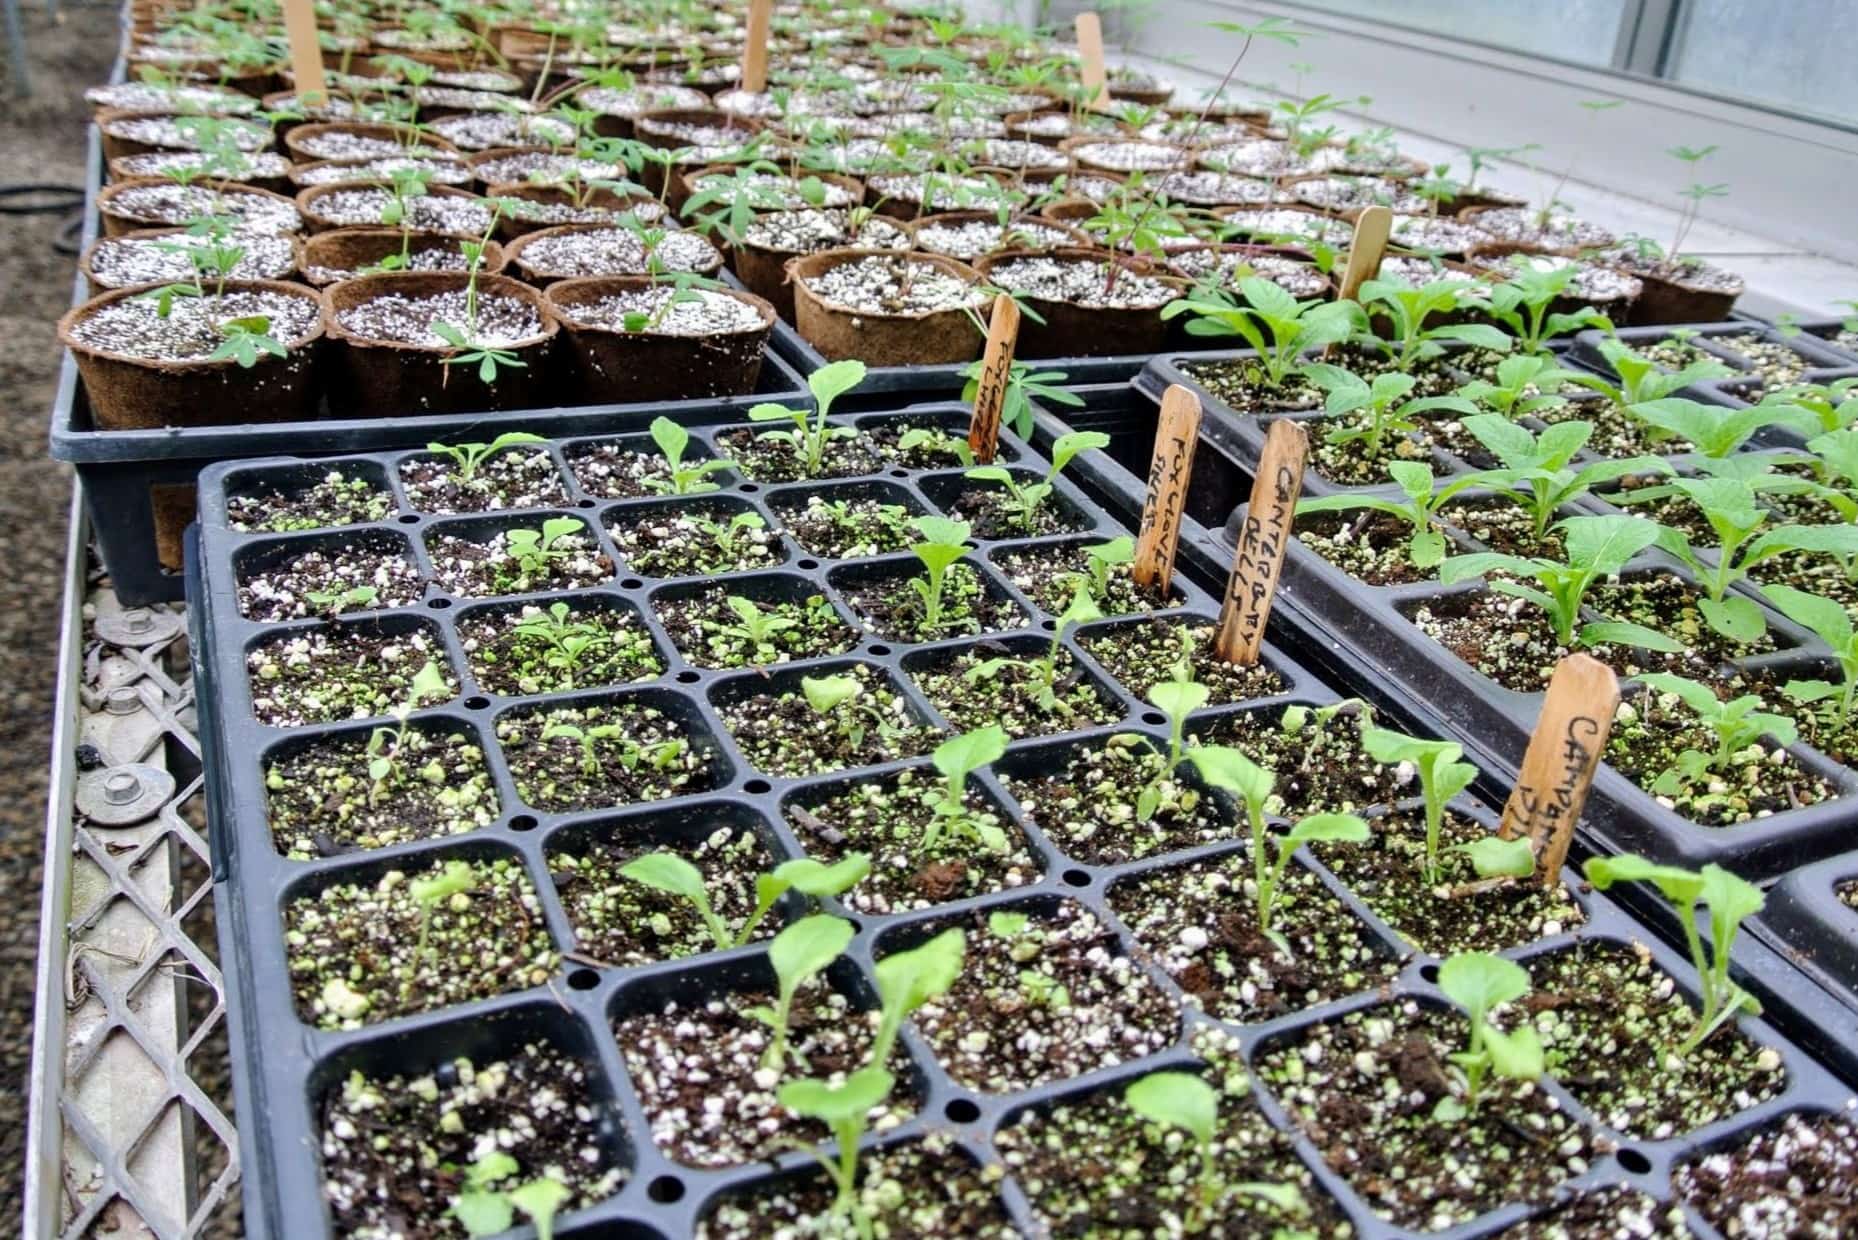
- Seed Trays or Containers: Choose trays or containers that have drainage holes and are deep enough to accommodate the growing roots. You can use plastic or biodegradable options, as long as they are sturdy and can hold the soil mix.
- Seed Starting Mix: Use a high-quality seed starting mix that is well-draining and lightweight. Avoid using regular garden soil, as it can be too dense and may hinder germination. Seed starting mixes provide the ideal conditions for seedlings to thrive.
- Seeds: Select high-quality seeds from reputable sources. Choose varieties that are suitable for indoor sowing and match your preferences and growing conditions.
- Grow Lights: If you don’t have access to sufficient natural sunlight, invest in grow lights to provide the necessary light intensity for healthy seedling growth. LED or fluorescent lights specifically designed for plants work well for indoor seed starting.
- Heat Mat (optional): A heat mat can be used to provide bottom heat, which can promote faster germination for some plant species. This is particularly helpful for warm-season crops that require warmer soil temperatures for optimal growth.
- Dome or Plastic Cover: Using a dome or plastic cover can create a mini greenhouse effect and help retain moisture and warmth, creating an ideal environment for seed germination. Once the seeds have sprouted, remove the cover to allow for air circulation.
- Watering Can or Spray Bottle: A watering can or spray bottle with a fine mist setting is essential for watering and providing moisture to the seeds and seedlings.
- Plant Labels: Use plant labels to identify the different plant varieties you are growing. This is especially important if you are sowing multiple types of seeds.
- Marker or Pen: Use a marker or pen to write on the plant labels and track important information such as seed sowing dates or plant varieties.
- Seed Starting Calendar: Keep track of the sowing dates, plant progress, and transplanting dates on a seed starting calendar. This will help you stay organized and ensure that you are providing the necessary care at each stage of the process.
Having these supplies ready will set you up for successful indoor seed starting. Additionally, it’s important to maintain cleanliness and hygiene during the seed starting process. Clean and sterilize your trays, containers, and tools before use to prevent the growth of diseases or pathogens that can harm the seedlings.
In the next section, we will discuss choosing the right containers for seed starting, so you can select the most suitable option for your indoor gardening needs.
Choosing the Right Containers for Seed Starting
When it comes to starting seeds indoors, choosing the right containers is essential for the successful growth of your seedlings. The containers you select should provide adequate drainage, space for root development, and convenience for transplanting. Here are some container options to consider:
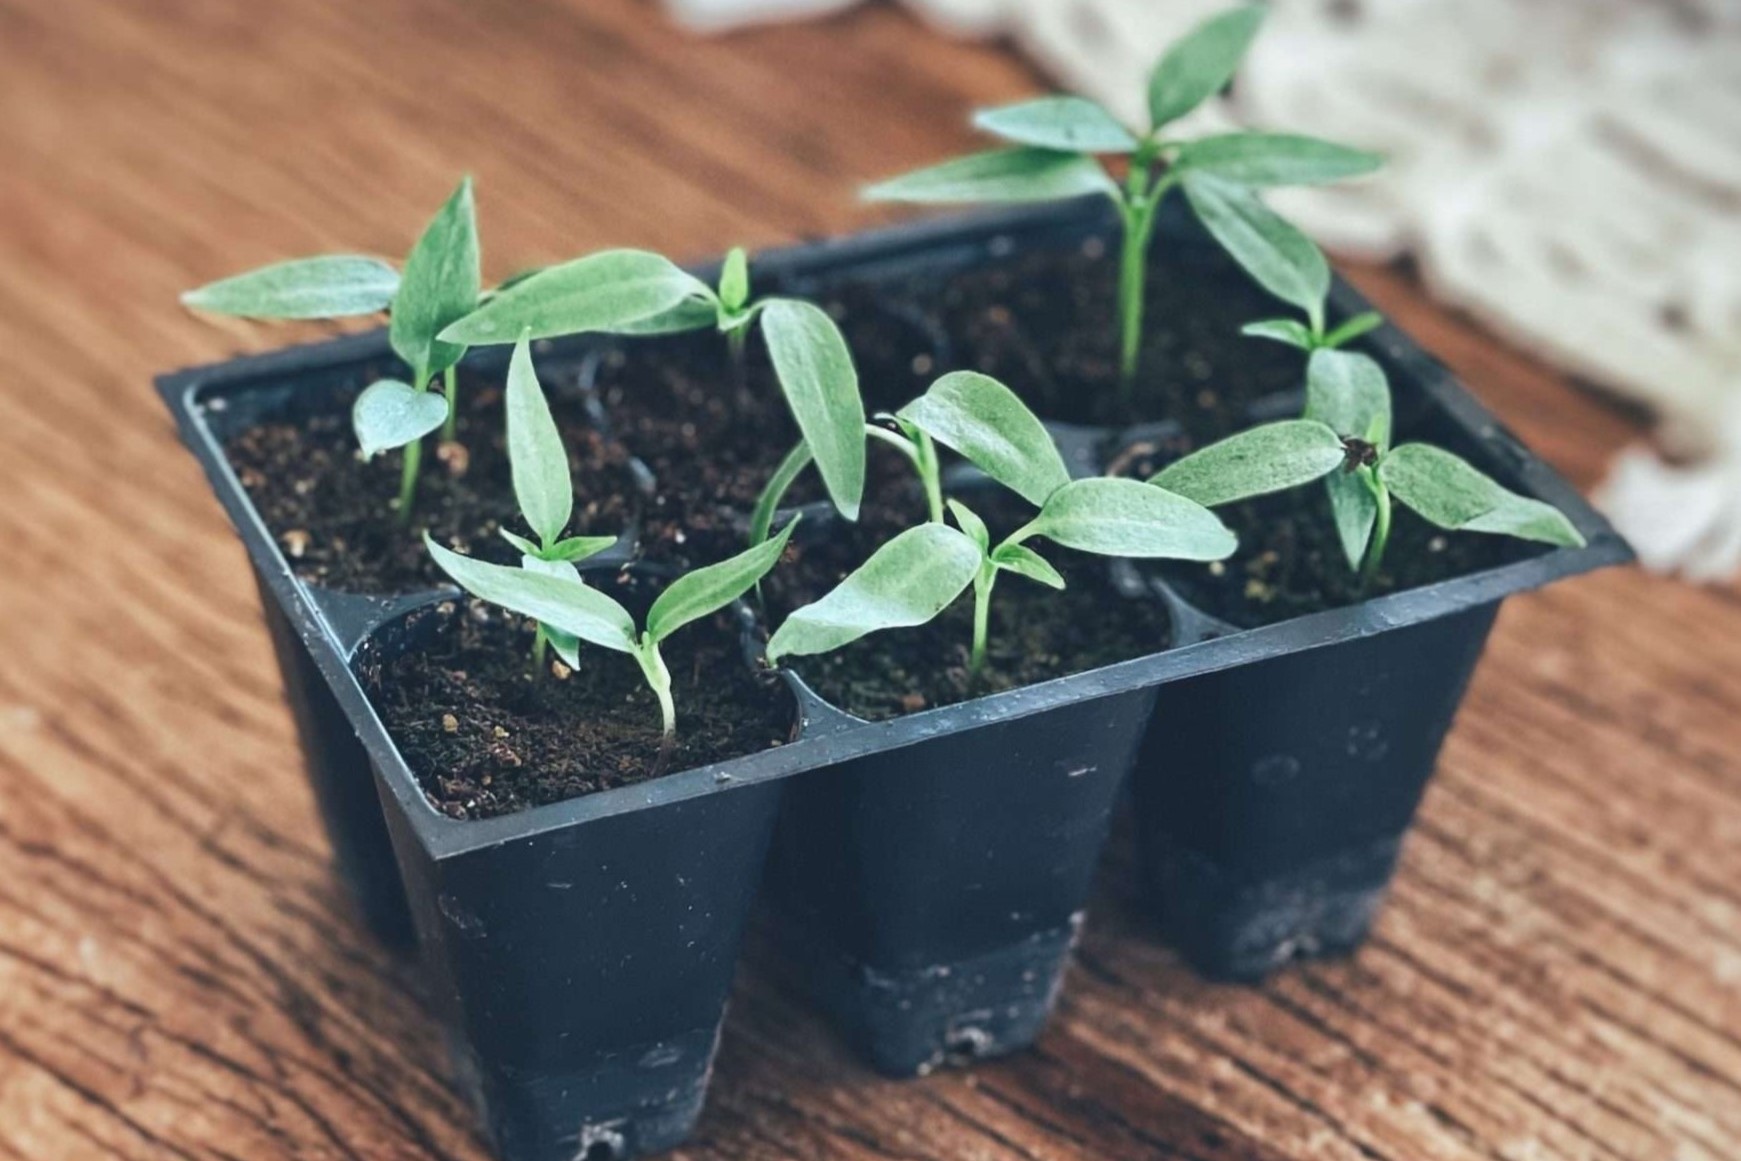
- Seed Trays with Cells: Seed trays with individual cells are a popular choice for starting seeds. These trays usually have compartments that allow you to plant one or multiple seeds per cell. They provide efficient space utilization and make transplanting easier.
- Pots and Flat Containers: Small pots or flat containers are versatile options for seed starting. You can use biodegradable pots made from materials like peat or coconut coir, which can be planted directly into the ground without disturbing the roots. Plastic pots or reusable containers are also suitable choices.
- Egg Cartons or Paper Cups: Recycling items like egg cartons or paper cups can serve as makeshift seed starting containers. Make sure to poke drainage holes in the bottom of these containers before use. While these options are budget-friendly, they may not be as durable or provide optimal space for root growth.
- Recycled Containers: You can repurpose household items such as yogurt cups, milk cartons, or plastic food containers as seed starting containers. Ensure adequate drainage by creating holes in the bottom and wash them thoroughly to remove any residues that could harm the seedlings.
- Self-watering or Bottom-watering Containers: Self-watering containers or containers with bottom watering systems can help maintain consistent moisture levels in the soil. They provide an efficient way of watering and can be particularly useful if you have a busy schedule or are prone to overwatering.
When selecting containers, consider the size and depth of the containers based on the specific needs of the plants you are growing. Some plants, like tomatoes or peppers, develop deep root systems, so taller containers would be more suitable. Smaller, compact plants like herbs or lettuce may require shallower containers.
Regardless of the container type, make sure it has drainage holes to prevent waterlogging, which can lead to root rot. Proper drainage is crucial for healthy seedling development.
Remember, whichever containers you choose, ensure they are clean and sterilized before use to reduce the risk of diseases and pests that could harm the seedlings.
In the next section, we will discuss selecting the right soil mix for seed starting, which plays a vital role in providing the necessary nutrients and a suitable growing medium for your seedlings.
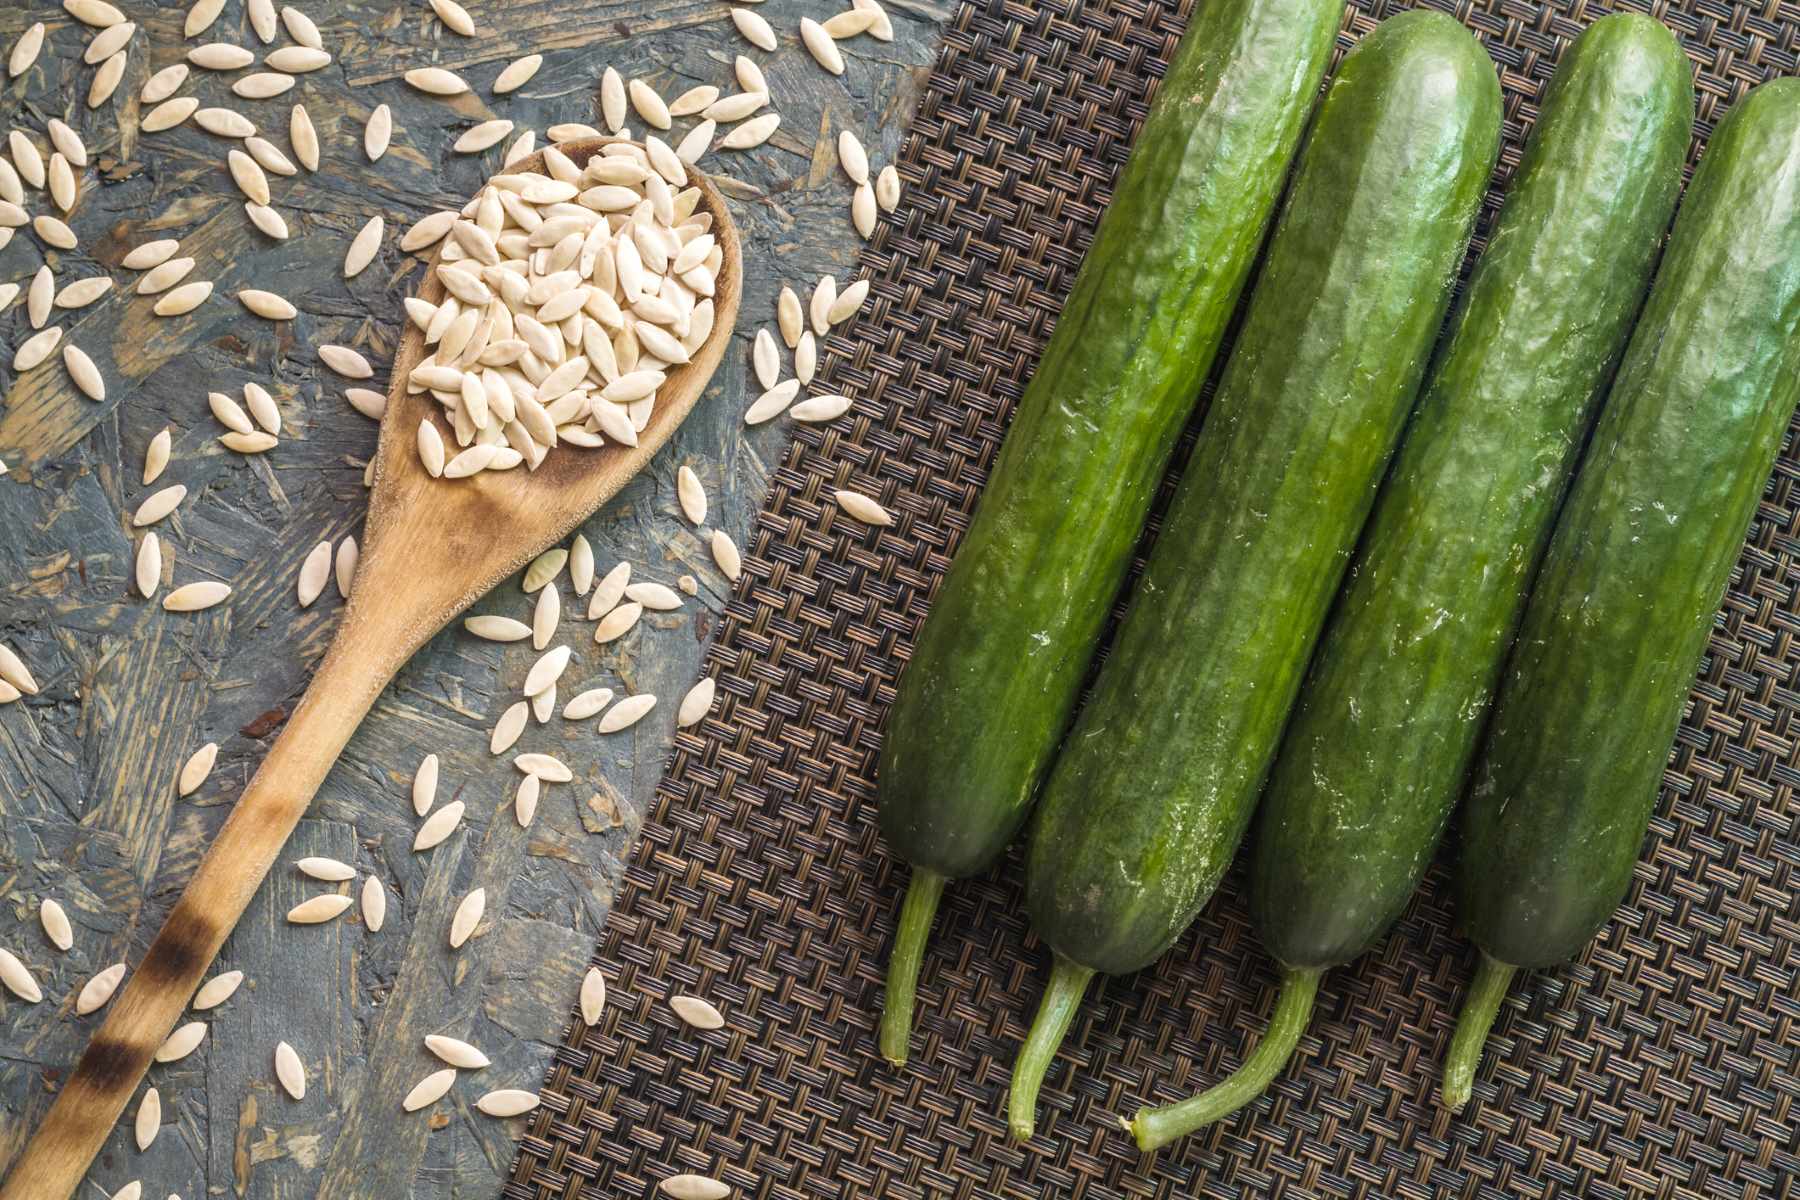
Read more: When To Start Hot Pepper Seeds Indoors
Selecting the Right Soil Mix for Seed Starting
Selecting the right soil mix is crucial for successful seed starting. The soil mix should provide good drainage, retain moisture, and offer a balanced nutrient supply for the young seedlings. Here are some tips for choosing the right soil mix:
- Use a Seed Starting Mix: Seed starting mixes are specifically formulated to provide the ideal growing conditions for seeds and seedlings. They usually consist of a blend of peat moss, vermiculite, and perlite. These mixes are lightweight, sterile, and well-draining, allowing for optimal root development.
- Avoid Using Regular Garden Soil: Garden soil is generally too dense for seed starting and can lead to poor drainage and increased risk of disease. It may also contain weed seeds or pathogens that can harm the seedlings. Therefore, it is best to avoid using garden soil for indoor seed starting.
- Consider Organic Options: If you prefer organic gardening, look for organic seed starting mixes that are certified as organic. These mixes are made from natural and sustainably sourced materials without the use of synthetic chemicals or fertilizers.
- Pre-Moistened Soil: Some seed starting mixes come pre-moistened, eliminating the need to wet the soil before sowing the seeds. This can save time and ensure proper moisture levels from the start.
- DIY Soil Mix: If you prefer to make your own soil mix, you can combine equal parts of peat moss, vermiculite, and perlite. This blend provides good drainage and moisture retention. Additionally, you can add compost or well-rotted organic matter to enrich the soil mix with nutrients.
When using a seed starting mix or creating your own mix, it’s important to moisten the soil before sowing the seeds. This ensures proper hydration of the seeds and helps to initiate the germination process.
Remember to fill the seed trays or containers loosely with the soil mix, leaving some space at the top for watering and seedling growth. Gently pat down the soil to ensure even distribution and firm it slightly to provide support for the emerging seedlings.
By selecting the right soil mix, you are providing your seedlings with the necessary foundation for healthy growth. In the next section, we will discuss preparing seeds for indoor sowing, ensuring that they are ready to germinate and thrive.
Preparing Seeds for Indoor Sowing
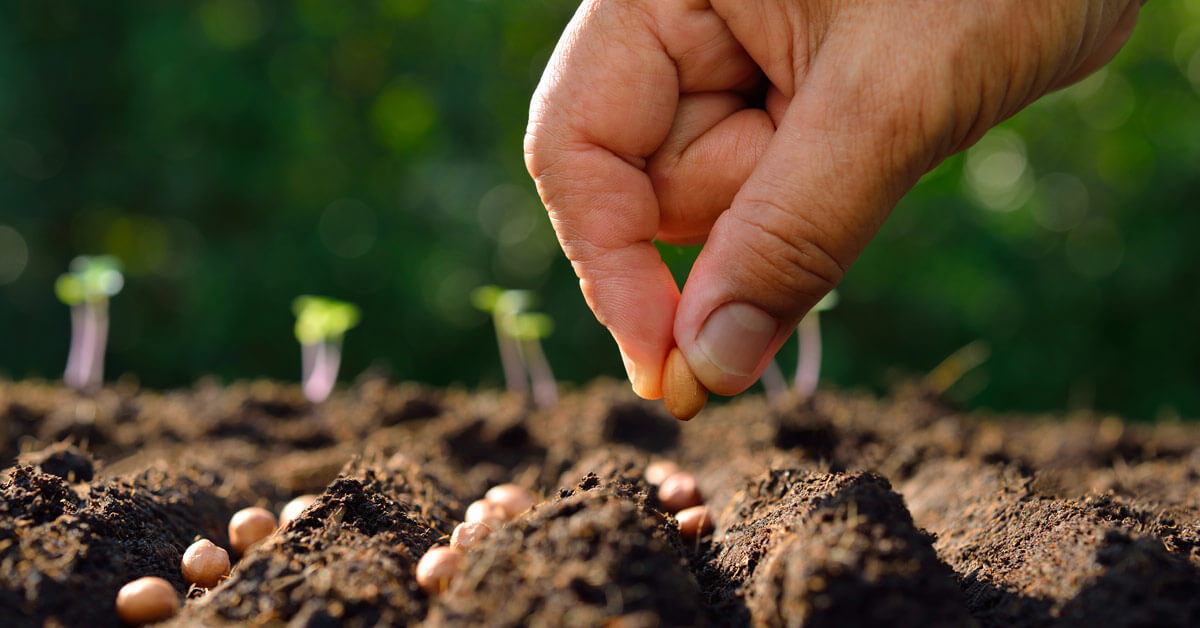
Before sowing seeds indoors, it’s important to properly prepare them to ensure successful germination. Taking the time to prepare seeds can increase their viability and help give your seedlings the best start. Here are some steps to follow when preparing seeds for indoor sowing:
- Check Seed Viability: Before starting the preparation process, it’s a good idea to check the viability of your seeds. Some seeds may have a shorter shelf life or lower germination rates, so it’s important to assess their viability to avoid disappointment. You can perform a simple germination test by placing a few seeds between moist paper towels and observing how many successfully germinate.
- Read Seed Packet Instructions: Each type of seed may have specific requirements for pre-sowing treatment. Take the time to read the information on the seed packet, which often provides instructions on any necessary pre-sowing steps.
- Soak Seed Overnight (If Recommended): Some seeds, especially larger ones like beans or squash, benefit from soaking overnight before sowing. This can help soften the seed coat and promote quicker germination. However, not all seeds require soaking, so be sure to check the recommendations for each variety.
- Cold Stratification (If Needed): Certain plants, especially perennials or native wildflowers, benefit from a period of cold stratification to mimic natural winter conditions. This can be achieved by placing the seeds in a sealed plastic bag with a slightly moistened paper towel and refrigerating them for a specific number of weeks, as specified on the seed packet.
- Scarification (If Necessary): Some seeds have a hard outer seed coat that may hinder germination. Scarification involves nicking or gently abrading the seed coat to help water penetrate and stimulate germination. This can be done with a nail file or by gently rubbing the seeds between sandpaper.
- Clean and Sort Seeds: Remove any debris or non-seed materials from your seed collection. Discard any damaged or discolored seeds as they may have reduced viability. Organize your seeds and label them appropriately to avoid confusion during the sowing process.
By following these steps, you are maximizing the potential for successful seed germination. Each type of seed may have its own specific requirements, so it’s important to be mindful of their individual needs. Preparing seeds before sowing ensures that you are providing them with the best chance at healthy growth and development.
In the next section, we will dive into a step-by-step guide on sowing seeds indoors, taking you through the process from start to finish.
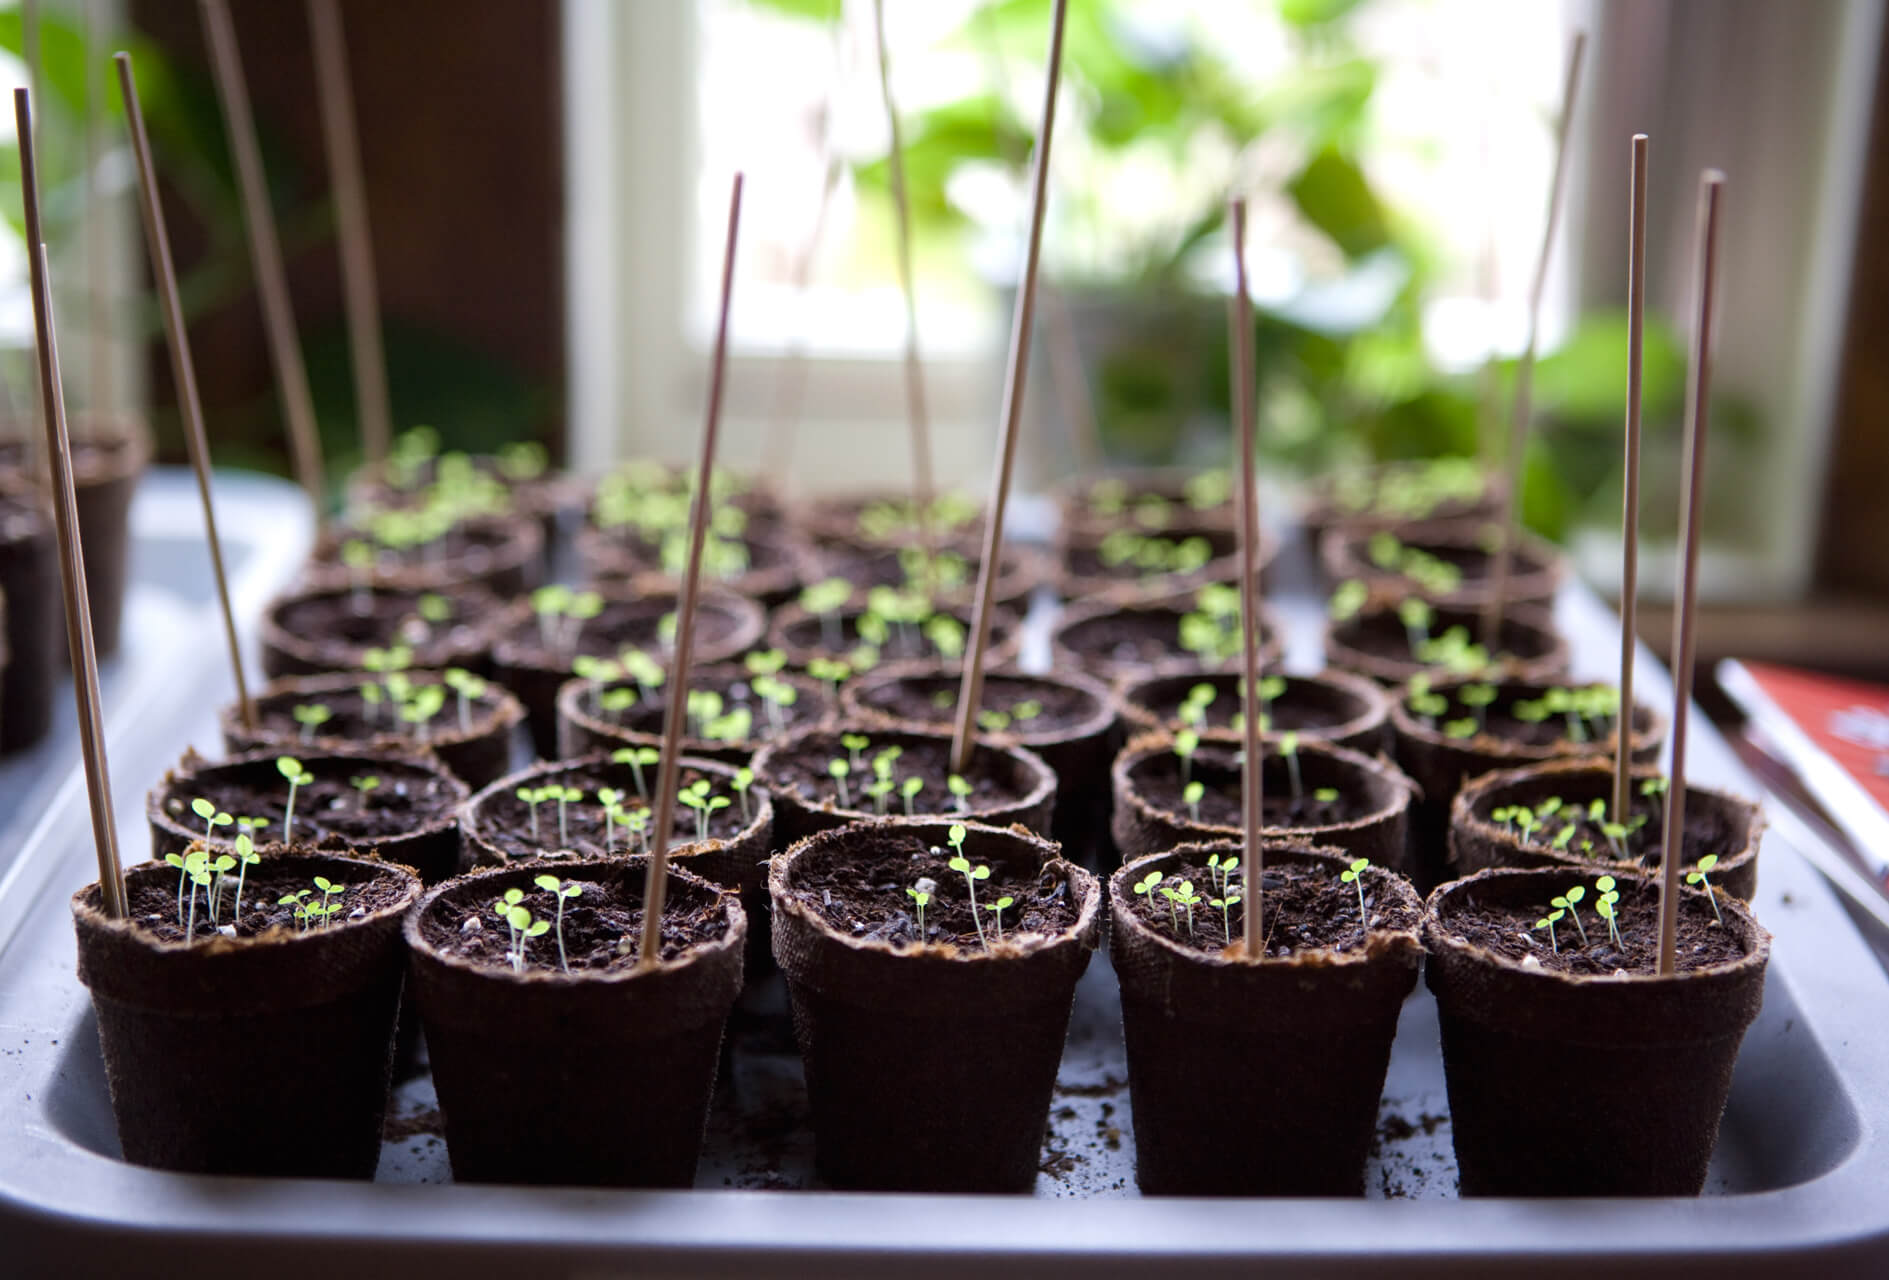
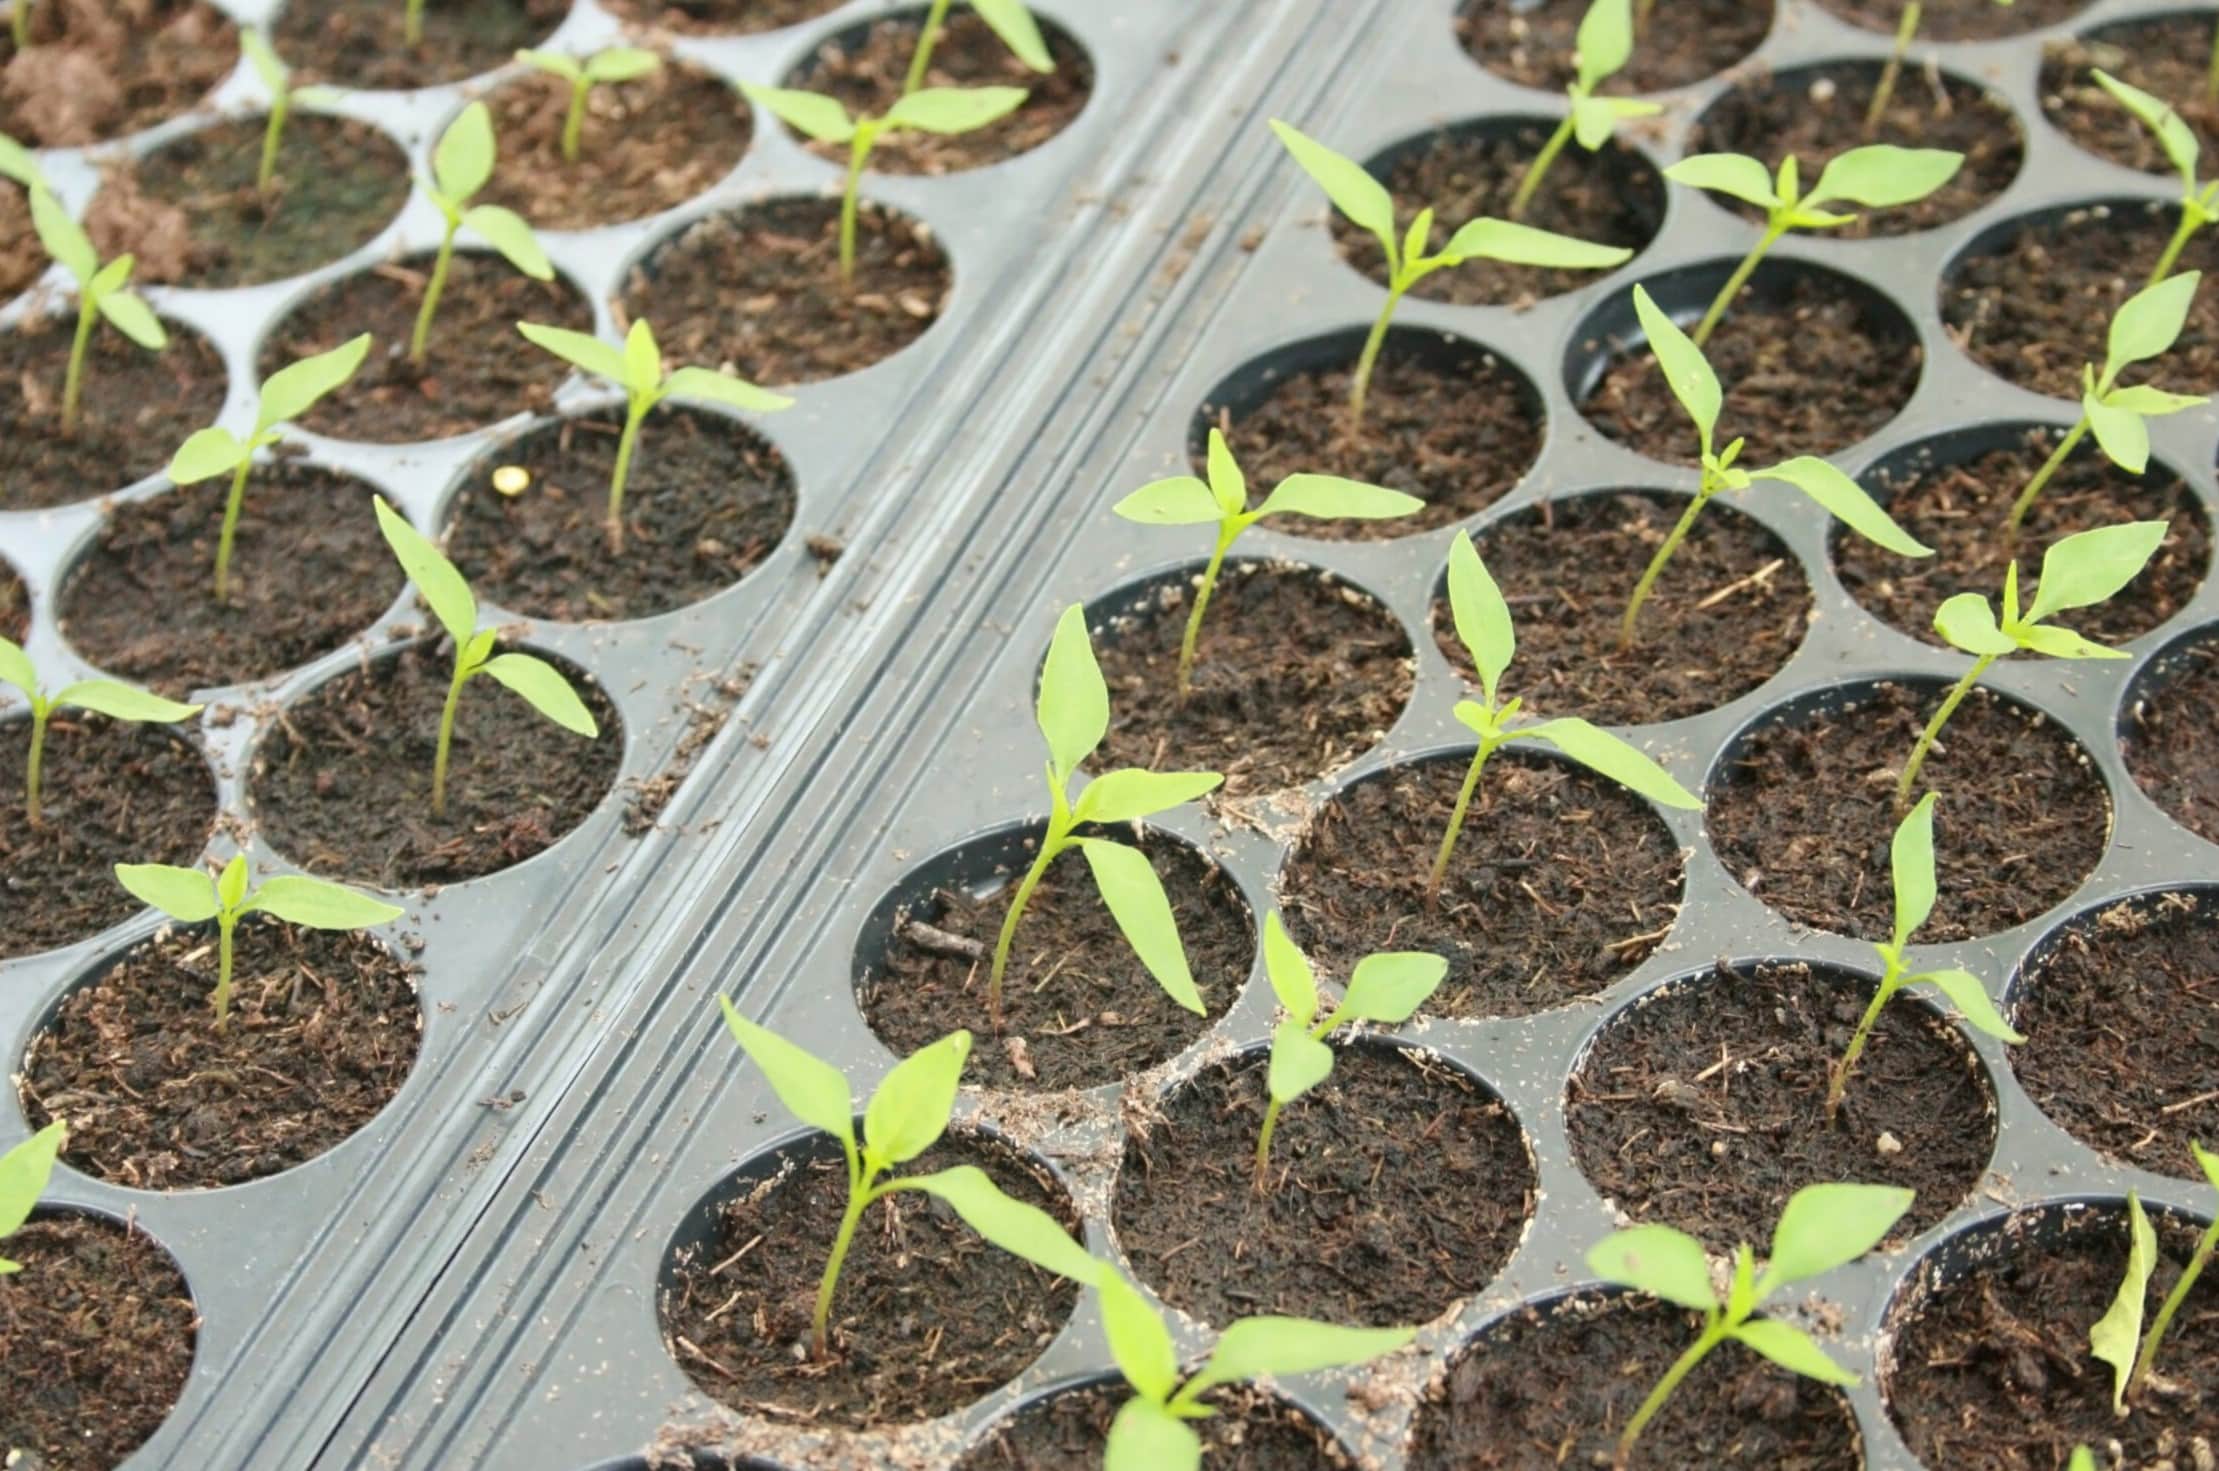
Sowing Seeds Indoors: Step-by-Step Guide
Sowing seeds indoors is an exciting and rewarding process that allows you to nurture and watch your plants grow from tiny seeds into healthy seedlings. Follow this step-by-step guide to ensure successful indoor seed sowing:
- Prepare Your Containers: Select your desired containers and ensure they are clean and have drainage holes. Fill them with your chosen seed starting mix, leaving a bit of space at the top for watering.
- Moisten the Soil: Before sowing the seeds, moisten the soil mix evenly. Ensure that the soil is damp but not overly wet. Excess moisture can lead to poor germination and dampen-off disease.
- Sow the Seeds: Follow the recommended spacing and depth guidelines indicated on the seed packet. Gently press the seeds into the moist soil, making sure they are in good contact with the soil for optimal germination.
- Cover the Seeds: Lightly cover the seeds with a thin layer of seed starting mix, vermiculite, or perlite. This helps retain moisture and provides a stable environment for germination.
- Label and Date: Clearly label each container with the plant variety and the date of sowing. This helps you keep track of the germination progress and transplanting timeline.
- Mist or Water the Seeds: Gently mist the newly sown seeds or use a watering can with a fine spray attachment to avoid displacing the seeds. Ensure the soil remains evenly moist throughout the germination period.
- Provide Proper Lighting: Place your seed trays or containers in a location that receives sufficient light. If natural sunlight is limited, supplement with grow lights positioned a few inches above the seedlings. Adjust the height as the seedlings grow to maintain an optimal light distance.
- Monitor and Maintain Temperature: Most seeds germinate best within a specific temperature range. Ensure the ambient temperature is within the recommended range for the seeds you are sowing. Consider using a heat mat to provide bottom warmth if necessary.
- Keep Moisture Levels Consistent: Check the moisture level of the soil regularly and water as needed to maintain a consistent level of moisture. Avoid overwatering, as excessive moisture can lead to fungal diseases.
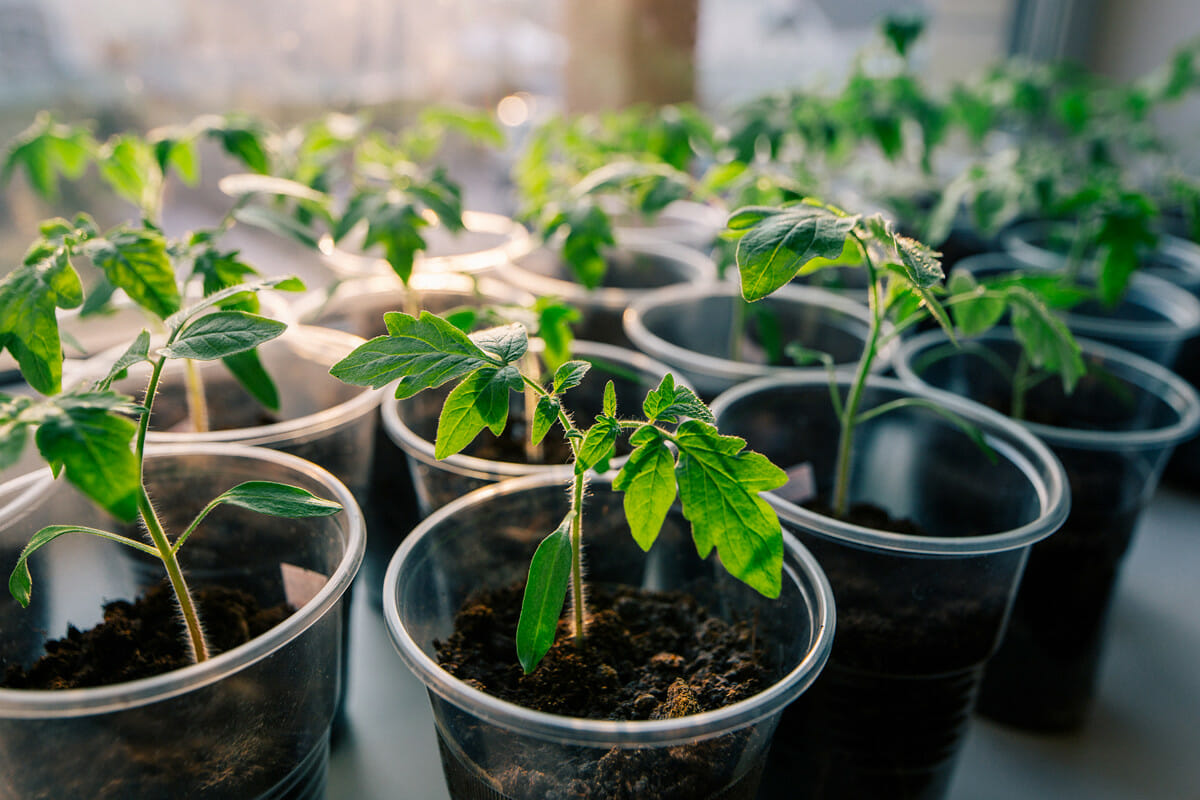
- Thin Out Seedlings (If Necessary): If multiple seedlings emerge in a single cell or container, thin them out by gently removing the weaker seedlings, leaving only the strongest one. This allows adequate space for individual seedling growth.
- Hardening Off: Before transplanting the seedlings outdoors, gradually expose them to outdoor conditions, known as “hardening off.” This involves gradually increasing the amount of time the seedlings spend outdoors, starting with a few hours a day and gradually extending the exposure over a week or two.
- Transplanting: Once the seedlings have been adequately hardened off, it’s time to transplant them into your garden or larger pots. Dig a hole that is slightly larger than the root ball of each seedling and gently place them in the hole. Fill with soil, firm gently, and water thoroughly.
Following these steps will ensure that your seeds have the best chance of germinating successfully and developing into healthy seedlings. Remember to provide proper care, such as regular watering, sufficient light, and appropriate temperature conditions, to promote strong and vibrant growth.
In the next section, we will discuss the importance of providing proper light for your indoor seedlings, as light plays a crucial role in their overall development.
Providing Proper Light for Indoor Seedlings
Proper lighting is essential for the healthy growth and development of indoor seedlings. As soon as the seeds germinate, they need sufficient light to thrive and avoid becoming weak or leggy. Here are some important considerations for providing proper light for your indoor seedlings:
- Natural Sunlight: If possible, place your seedlings near a south-facing window that receives direct sunlight for at least 6-8 hours a day. Natural sunlight provides balanced light spectrum and is beneficial for the overall growth and vigor of the seedlings.
- Supplemental Grow Lights: If you don’t have access to adequate natural sunlight, or if the quality or duration of sunlight is insufficient, supplement with grow lights. LED or fluorescent grow lights specifically designed for plants work well for indoor seed starting. Position the lights 2-3 inches above the seedlings and adjust the height as the seedlings grow.
- Light Duration and Intensity: Seedlings require approximately 12-16 hours of light per day. Maintain a consistent light schedule throughout their growth period. Ensure the light intensity is appropriate for the seedlings, as too much or too little light can negatively affect their development. Consult the specific light requirements for the plant varieties you are growing.
- Rotate the Containers: To ensure even exposure to light, regularly rotate the containers to prevent the seedlings from leaning or bending towards a single light source. This promotes even growth and helps to prevent leggy, weak stems.
- Monitor the Light Distance: Pay attention to the distance between the light source and the seedlings. If the light is too far away, the seedlings may stretch and become weak. If it is too close, it can cause heat stress or leaf burn. Regularly adjust the height of the lights as the seedlings grow to maintain an optimal distance.
- Consider Light Spectrums: Different stages of plant growth require varying light spectrums. Many LED grow lights come with customizable spectrums, allowing you to adjust the light wavelengths to meet the specific needs of your seedlings. Blue light promotes leafy growth, while red light enhances flowering and fruiting.
Remember that maintaining consistent and appropriate lighting is crucial for the success of your indoor seedlings. Without adequate light, seedlings can become weak, leggy, and susceptible to disease. Proper lighting promotes strong stem development, photosynthesis, and overall plant health.
Regularly monitor the seedlings for any signs of light deficiency, such as weak growth or pale leaves. Adjust the light duration, intensity, or distance accordingly to address any issues that arise. Providing the right amount and quality of light will set your indoor seedlings up for success.
In the next section, we will discuss the important aspects of watering and fertilizing indoor seedlings, ensuring they receive the necessary nutrients for healthy growth.
Read more: When Should I Start Seeds Indoors
Watering and Fertilizing Indoor Seedlings
Proper watering and fertilizing are essential for the healthy growth and development of indoor seedlings. Maintaining the right moisture levels and providing necessary nutrients are key to ensuring strong and vibrant plants. Here are some guidelines for watering and fertilizing your indoor seedlings:
Watering:
- Consistent Moisture: Seedlings need consistent moisture, but it’s important not to overwater. The soil should be moist but not waterlogged. Overwatering can lead to root rot and other fungal diseases. Water the seedlings when the top inch of soil feels slightly dry to the touch.
- Bottom Watering: To prevent disturbing the delicate seedlings, it’s best to water from the bottom. Place the seed trays or containers in a shallow tray or saucer filled with water and allow the soil to soak up the moisture from the bottom. Once the soil is adequately moistened, remove the containers from the water and let any excess drain out.
- Misting: Seedlings and newly germinated seeds may benefit from misting to provide moisture without overly wetting the soil. Using a spray bottle with a fine mist setting, lightly mist the foliage and the soil surface. This helps to create a humid environment and prevent drying out.
- Avoid Waterlogging: Ensure proper drainage in your containers to prevent waterlogging. Excess moisture can suffocate the roots and lead to fungal diseases. If you notice water pooling in the saucer or accumulation of water in the container, carefully drain the excess to maintain proper moisture levels.
Fertilizing:
- Wait until True Leaves Emerge: Seedlings initially rely on the nutrients stored in the seed. Once the true leaves have emerged (the second set of leaves that resemble the mature plant’s leaves), it’s time to start fertilizing.
- Organic or Synthetic Fertilizer: You have the option to choose organic or synthetic fertilizers for your indoor seedlings. Organic options include compost, seaweed extract, or well-balanced organic fertilizers. Synthetic fertilizers are available in liquid or granular form and provide specific nutrient ratios. Follow the label instructions for proper dosage and application.
- Fertilizing Frequency: Start with a diluted fertilizer solution and gradually increase the concentration as the seedlings grow. Fertilize every 2-3 weeks, or as recommended by the fertilizer instructions, to ensure a steady supply of nutrients.
- Apply Fertilizer to Moist Soil: To prevent fertilizer burn and ensure proper absorption, apply the fertilizer to moist soil. Water the seedlings before fertilizing and then apply the fertilizer solution to the soil around the base of the plants.
- Watch for Signs of Nutrient Deficiency: Monitor your seedlings for any signs of nutrient deficiencies, such as yellowing leaves or stunted growth. Adjust the fertilizer application accordingly to address any deficiencies and provide the necessary nutrients for healthy growth.
Remember to follow the specific requirements of your plant varieties regarding watering and fertilizing. Some plants may have unique needs and may require specific fertilizers or frequencies. Observation is key, and adjusting your watering and fertilizing practices based on the individual needs of the seedlings will promote robust and thriving plants.
In the next section, we will discuss the important process of hardening off your indoor seedlings before transplanting them outdoors to acclimate them to the outdoor environment.
Hardening Off Indoor Seedlings
Before transplanting your indoor seedlings into the outdoor garden, it is essential to acclimate them gradually to the outdoor environment. This process is known as hardening off and helps the seedlings adjust to the changes in temperature, light intensity, and outdoor conditions. Hardening off ensures that your seedlings can thrive in their new environment without experiencing transplant shock. Follow these steps to successfully harden off your indoor seedlings:
- Select the Right Time: Hardening off should take place when the threat of frost has passed in your area, and the outdoor temperatures are consistently mild. Consult your local gardening resources or extension office to determine the appropriate timing for your specific region.
- Start Gradually: Begin by exposing the seedlings to the outdoor environment for short periods, such as 1-2 hours, during mild weather conditions. Choose a sheltered, shady spot to minimize exposure to direct sunlight and strong winds.
- Increase Exposure Time: Gradually increase the exposure time each day, allowing the seedlings to gradually adjust to longer periods outdoors. Aim to double the time spent outdoors every couple of days, gradually increasing the exposure to full days over the span of a week or two.
- Monitor Weather Conditions: Pay attention to weather forecasts and avoid exposing the seedlings to extreme temperatures, heavy rain, or strong winds during the hardening off process. If adverse weather is expected, move the seedlings indoors or provide protection with row covers or cloches.
- Protect from Direct Sunlight: Seedlings that have been grown indoors are more susceptible to sunburn when exposed to direct sunlight. Gradually expose them to increasing amounts of sunlight by providing shade or using shade cloth to filter the intense rays until the seedlings have adjusted.
- Water and Fertilize Appropriately: During the hardening off phase, adjust your watering and fertilizing practices to suit the outdoor conditions. Monitor the moisture levels in the soil and water as needed, taking into account the higher evaporation rates outdoors. Adjust fertilizer application to meet the nutrient demands of the growing seedlings.
- Observe for Stress or Damage: Keep a close eye on the seedlings during the hardening off process. Watch for any signs of stress, such as wilting, leaf discoloration, or stunted growth. If any damage occurs, take necessary actions like providing shade, increasing or decreasing exposure time, or adjusting watering practices to support recovery.
- Transplant With Care: Once the seedlings have successfully completed the hardening off period, they are ready for transplanting into the outdoor garden. Choose an appropriate planting location, prepare the soil, and gently remove the seedlings from their containers, taking care not to damage the roots. Plant them at the proper depth and water thoroughly.
Remember, the hardening off process is crucial for the successful transition of your indoor seedlings to the outdoor garden. By gradually exposing them to the outdoor environment, you are enabling them to adapt and thrive in their new surroundings. Hardened-off seedlings have a higher chance of survival and are more resilient to changes in weather and other stressors.
In the next section, we will discuss the important final step in the indoor seed starting process: transplanting your indoor seedlings into the outdoor garden.
Start seeds indoors 6-8 weeks before the last frost date for your area. Use a seed starting mix, provide adequate light, and keep the soil consistently moist. Harden off seedlings before transplanting outdoors.
Read more: When Do I Start Planting Seeds Indoors
Transplanting Indoor Seedlings to Outdoor Garden
Transplanting your indoor seedlings into the outdoor garden is an exciting step in the gardening process. It’s the moment where your carefully nurtured seedlings can finally take root in their permanent location. Proper transplanting techniques will help ensure a successful transition for your plants. Here’s a step-by-step guide to transplanting indoor seedlings into the outdoor garden:
- Choose the Right Time: Transplant your seedlings outdoors when the weather conditions are suitable and the risk of frost has passed. Make sure the soil has warmed up sufficiently, typically after the last frost date.
- Prepare the Soil: Before transplanting, prepare the soil in the outdoor garden bed. Remove any weeds, loosen the soil, and incorporate organic matter like compost or well-rotted manure to improve fertility and drainage.
- Harden Off Gradually: Ensure that your seedlings have undergone the hardening off process to acclimate them to the outdoor environment. This will help reduce transplant shock and increase the chances of successful establishment in the garden.
- Water the Seedlings: Before transplanting, water your seedlings thoroughly. This will help support root health and ease their removal from their current containers.
- Dig Proper-sized Holes: Dig holes in the prepared garden bed that are slightly larger and deeper than the root ball of each seedling. Space your plants according to the recommended spacing for each specific variety.
- Remove Seedlings from Containers: Gently remove the seedlings from their containers, being careful not to disturb the roots. If using biodegradable pots, you can leave them intact and plant them directly into the ground.
- Place Seedlings in Holes: Carefully place each seedling into its respective hole, ensuring that it sits at the same depth or slightly deeper than it was in the container. Avoid burying the stem too deeply, as it can lead to stem rot.
- Backfill and Firm the Soil: Backfill the holes with soil, gently firming it around the roots to eliminate air pockets. Avoid compacting the soil excessively, as it can hinder root growth.
- Water Thoroughly: After transplanting, water the seedlings thoroughly to settle the soil around the roots and provide necessary hydration. This will also help to further eliminate air pockets.
- Mulch Around Seedlings: Apply a layer of organic mulch, such as straw or wood chips, around the seedlings. This helps conserve moisture, suppress weeds, and regulate soil temperature.
- Provide Support (if needed): If your seedlings are tall or susceptible to bending or breaking, consider providing support with stakes, cages, or trellises. This will help ensure they grow upright and remain stable in windy conditions.
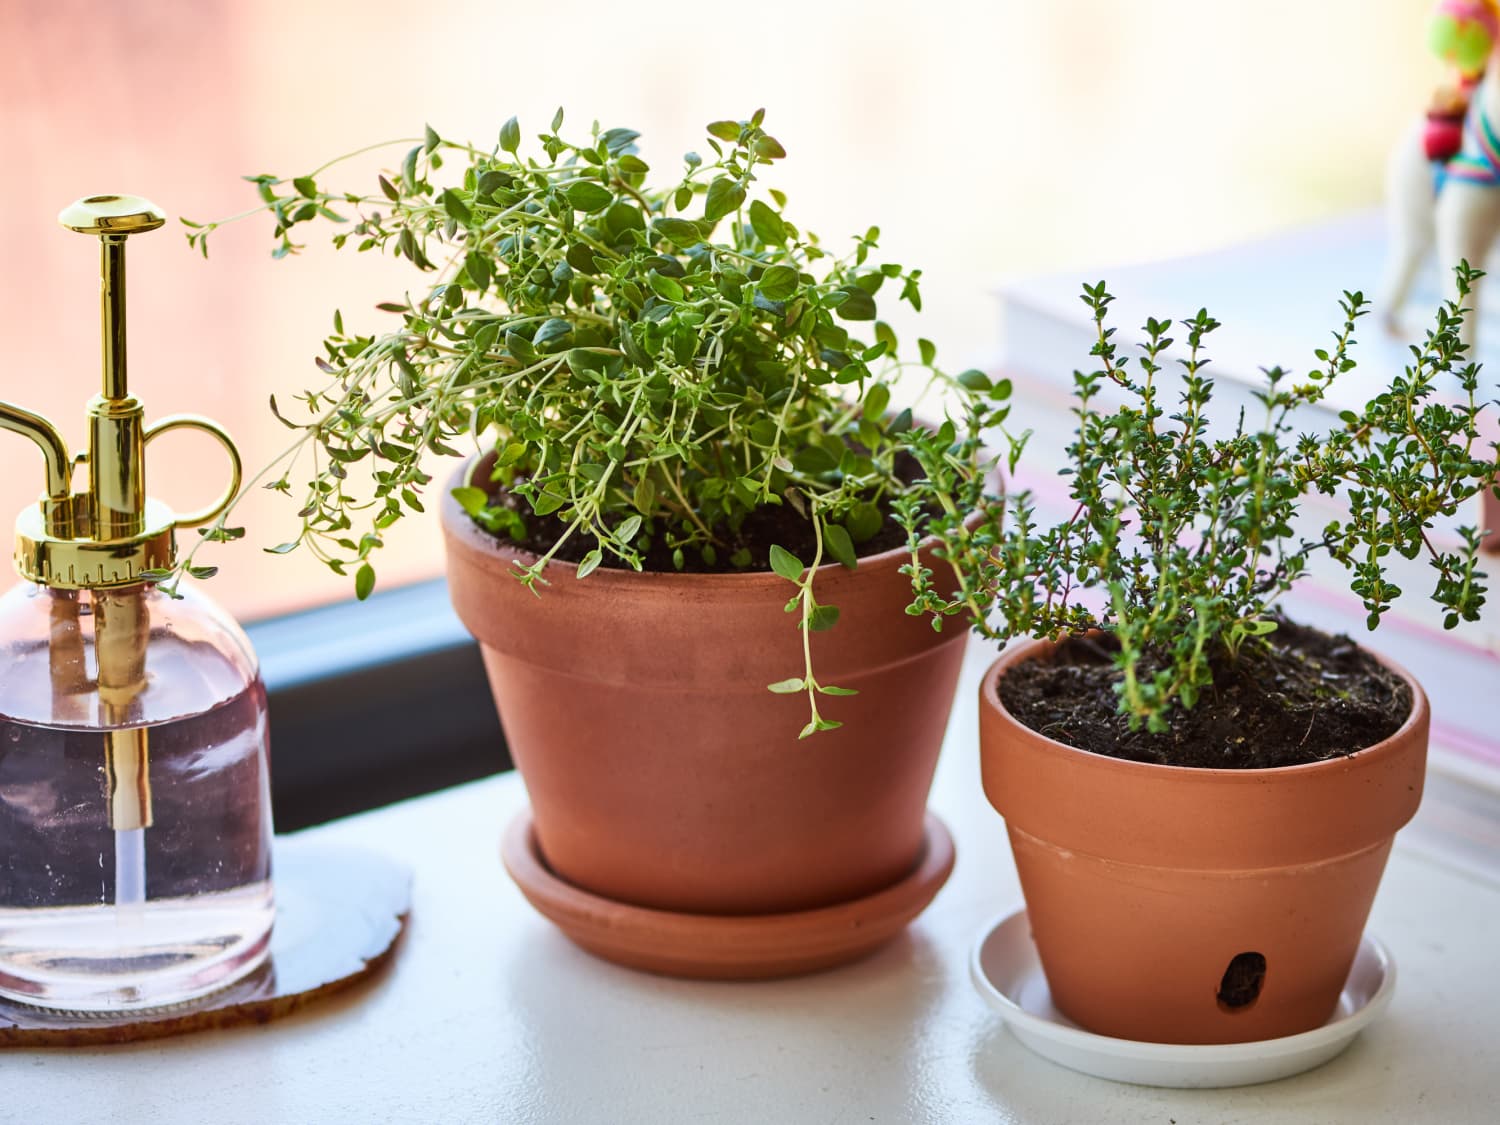
Transplanting can be a critical time for the survival and success of your seedlings. Watch your transplants closely in the following days and weeks, providing regular water and monitoring for any signs of stress or issues. With proper care and attention, your seedlings will steadily establish themselves in their new outdoor home and continue their growth journey towards a bountiful harvest.
In the final section, we will discuss some common issues that may arise during indoor seed starting and how to troubleshoot them.
Troubleshooting Common Issues with Indoor Seed Starting
While indoor seed starting can be an exciting and rewarding process, it is not without its challenges. Various issues can arise that may hinder the growth and development of your seedlings. Here are some common problems encountered during indoor seed starting and how to troubleshoot them:
Damping Off:
Damping off is a fungal disease that causes seedlings to wilt, collapse, and eventually die. To prevent damping off:
- Ensure proper ventilation and air circulation to avoid excessively humid conditions.
- Use sterile seed starting mix and clean containers to minimize the presence of pathogens.
- Avoid overwatering and provide sufficient drainage to prevent waterlogged soil.
- Consider using a fungicide or natural substances like cinnamon powder to control fungal growth.
Leggy Seedlings:
Leggy or spindly seedlings occur when they stretch too much in search of light. To prevent leggy seedlings:
- Ensure sufficient light intensity by placing seedlings near a south-facing window or providing supplemental grow lights.
- Keep grow lights at an appropriate distance from the seedlings, adjusting it as they grow to maintain the optimal light distance.
- Rotate the containers regularly to ensure even light exposure on all sides of the seedlings.
Poor Germination:
When seeds fail to germinate, it can be frustrating. To improve germination rates:
- Check the viability of your seeds before planting. Some seeds may have expired or have low germination rates.
- Ensure that the soil is consistently moist, but not overly wet, during the germination period.
- Provide adequate warmth for seeds that require specific temperature ranges for germination, using a heat mat if necessary.
- Consider scarifying or soaking seeds that have hard seed coats or require special treatments to break dormancy.
Weak or Pale Seedlings:
If your seedlings appear weak or pale, they may be lacking essential nutrients or sufficient light. To address this issue:
- Ensure that seedlings receive sufficient light, either from natural sunlight or appropriate grow lights, for at least 12-16 hours a day.
- Use a high-quality seed starting mix or provide balanced fertilization to supply necessary nutrients.
- Consider adjusting the fertilizer concentration or frequency if the seedlings show signs of nutrient deficiencies.
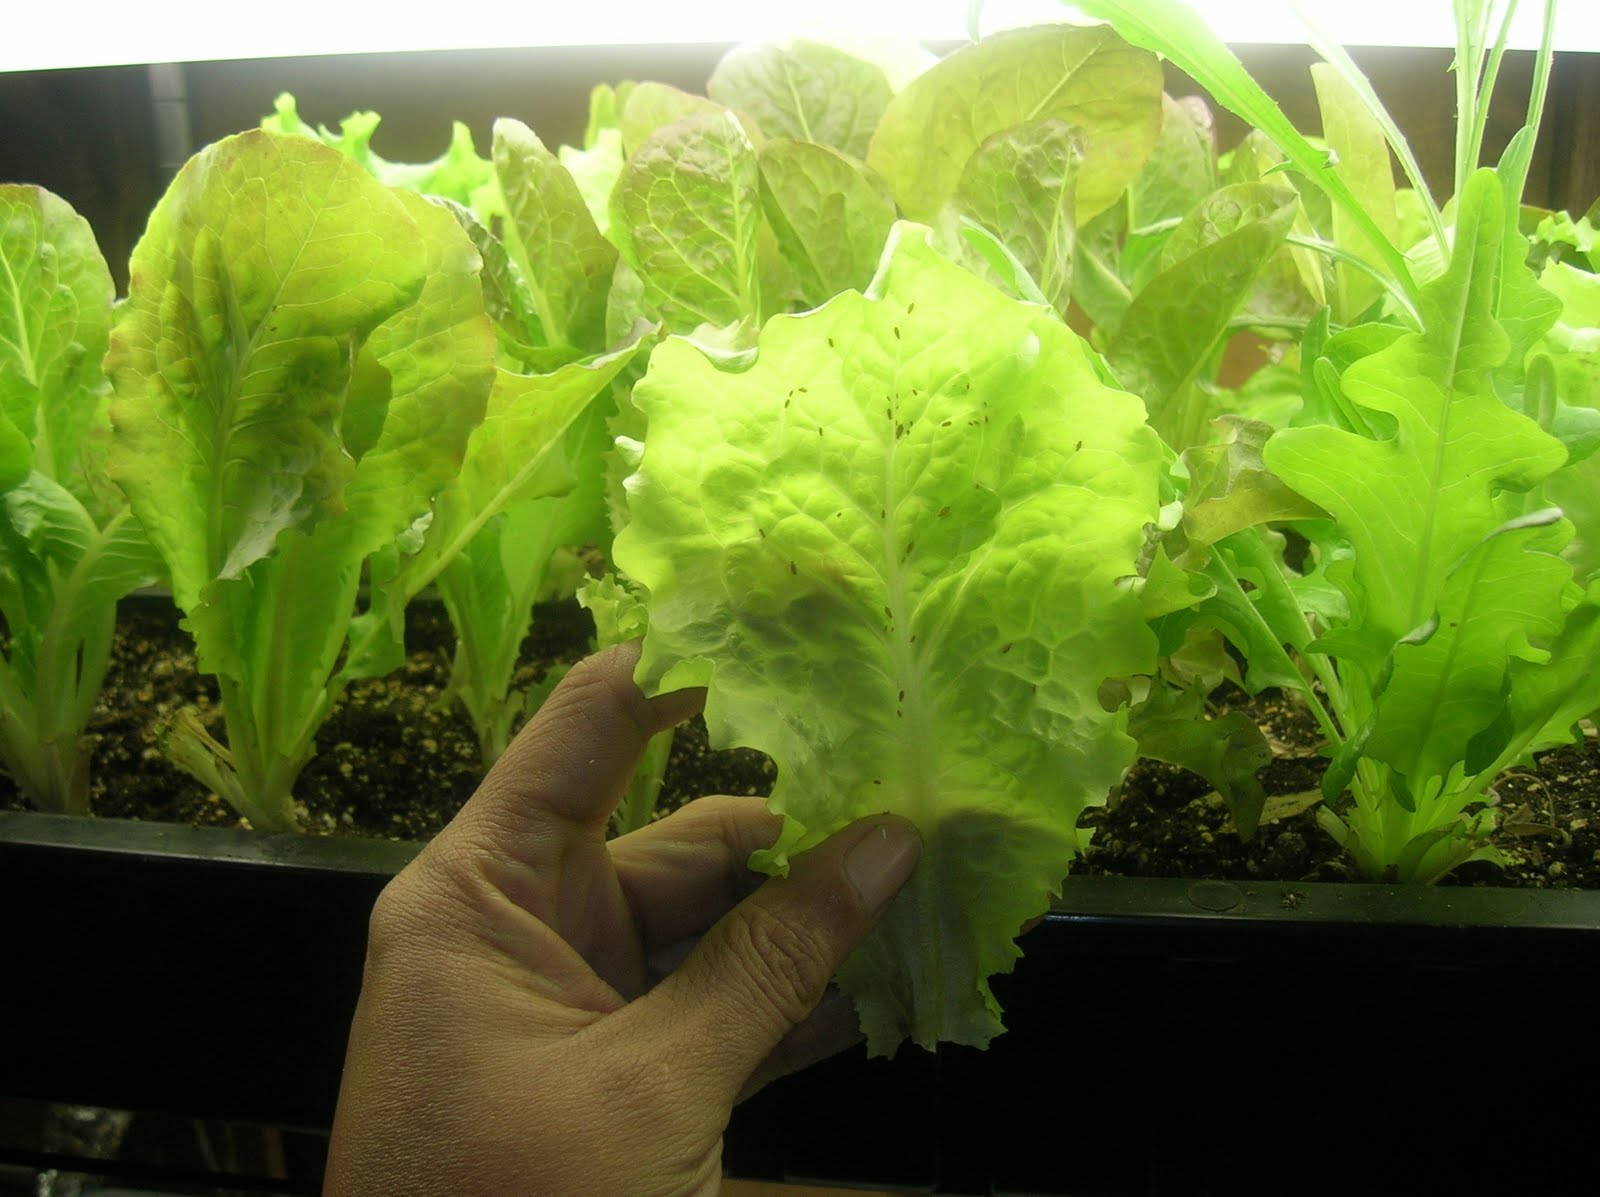
Pest Infestations:
Indoor seedlings are not immune to pest problems. To deal with pests:
- Inspect seedlings regularly for signs of pests, such as holes in leaves, yellowing, or curling.
- Use organic pest control methods such as neem oil or insecticidal soap to manage common indoor pests like aphids or fungus gnats.
- Practice proper hygiene, including cleaning containers and tools, to prevent the spread of pests.
By addressing these common issues promptly and taking preventive measures, you can help ensure the success of your indoor seed starting efforts. Remember that each plant variety may have unique needs and may require specific attention. Stay observant, adjust your care practices accordingly, and enjoy the process of nurturing your seedlings into thriving plants.
Congratulations on your journey with indoor seed starting! With these troubleshooting tips in mind, you are well-equipped to navigate any challenges that may arise. Embrace the learning experience, adapt as needed, and enjoy the satisfaction of watching your seeds flourish into a beautiful and productive garden.
Conclusion
Starting seeds indoors is a fulfilling and rewarding endeavor that allows you to have more control over the growing process and extend your gardening season. By following the steps outlined in this article, you can set yourself up for success and enjoy a thriving garden filled with healthy and vibrant plants.
From determining the right time to start seeds indoors to troubleshooting common issues, every step plays a vital role in the overall success of indoor seed starting. The benefits are numerous, including the ability to choose from a wide variety of plants, extend your growing season, save money, and experience the joy of witnessing the entire lifecycle of a plant.
Remember to provide proper light, water, and nutrients to your seedlings throughout their journey from indoor sowing to outdoor transplantation. Monitoring their growth, along with any signs of distress or nutrient deficiencies, will help you make necessary adjustments and provide the care they need to thrive.
Be diligent in the hardening off process, gradually introducing your seedlings to the outdoor environment. This will toughen them up and reduce the risk of transplant shock, resulting in stronger and more resilient plants.
Indoor seed starting may not be without its challenges, such as damping off, leggy seedlings, or poor germination, but with the right knowledge and troubleshooting techniques, you can overcome these obstacles and enjoy a successful gardening experience.
So go ahead and embark on your indoor seed starting adventure! Prepare your supplies, select your seeds, follow the steps outlined in this article, and watch as your tiny seeds transform into thriving plants that will bring beauty and abundance to your garden.
Happy gardening!
Frequently Asked Questions about When To Start Seeds Indoors
Was this page helpful?
At Storables.com, we guarantee accurate and reliable information. Our content, validated by Expert Board Contributors, is crafted following stringent Editorial Policies. We're committed to providing you with well-researched, expert-backed insights for all your informational needs.
0 thoughts on “When To Start Seeds Indoors”