Home>Garden Essentials>When Should You Start Vegetable Seeds Indoors
Garden Essentials
When Should You Start Vegetable Seeds Indoors
Modified: March 15, 2024
Learn when to start your vegetable seeds indoors and maximize your garden's potential. Find out the ideal time to begin seed germination for a successful vegetable harvest.
(Many of the links in this article redirect to a specific reviewed product. Your purchase of these products through affiliate links helps to generate commission for Storables.com, at no extra cost. Learn more)
Introduction
Starting vegetable seeds indoors is an excellent way for gardeners to get a head start on the growing season. By starting seeds indoors, you can extend the growing season, ensure better germination rates, and have healthier and more robust plants when it’s time to transplant them into the garden.
In this article, we will explore the benefits of starting vegetable seeds indoors, factors to consider before getting started, the ideal timing for starting seeds, selecting the right containers and soil, proper lighting, temperature and humidity requirements, step-by-step instructions for seed starting, transplanting seedlings outdoors, and common challenges and troubleshooting tips for successful indoor seed starting.
So, whether you are a seasoned gardener looking to refine your skills or a beginner just starting out, this article will provide you with valuable insights and guidance on when and how to start vegetable seeds indoors.
Starting seeds indoors offers numerous benefits that can significantly improve your gardening experience. Firstly, it allows you to extend the growing season by giving your plants a head start. This is particularly advantageous in regions with shorter growing seasons, as it enables you to enjoy a wider variety of vegetables and maximize your yield.
Moreover, starting seeds indoors provides favorable conditions for germination. By controlling the environment, you can provide consistent moisture and warmth, which are crucial for successful seed germination. This results in higher germination rates and healthier seedlings compared to direct sowing in the garden.
Another reason to start seeds indoors is the ability to choose from a wider range of vegetable varieties. Many specialty or heirloom varieties may not be readily available as pre-grown seedlings at local nurseries. By starting seeds indoors, you have greater control over the types of vegetables you can grow and can experiment with unique and interesting varieties that might not be found elsewhere.
Additionally, starting seeds indoors allows you to get a head start on pest and disease management. By transplanting strong and healthy seedlings into the garden, you are less likely to face issues with pests and diseases compared to direct sowing, where young and vulnerable plants are exposed from the beginning.
Furthermore, starting seeds indoors can be a cost-effective approach. Instead of purchasing pre-grown seedlings, you can save money by starting seeds from packets or even harvesting your own seeds from previous plants.
In the next sections, we will delve into the factors you need to consider before starting seeds indoors, the ideal timing for seed starting, the selection of containers and soil, proper lighting, temperature and humidity requirements, step-by-step instructions for seed starting, transplanting seedlings outdoors, and common challenges and troubleshooting tips for indoor seed starting.
So, let’s dive in and discover the secrets to successful vegetable seed starting indoors!
Key Takeaways:
- Get a head start on your garden by starting vegetable seeds indoors. Enjoy an extended growing season, healthier plants, and a wider variety of veggies to harvest.
- Overcome challenges like poor germination and leggy seedlings with proper care, high-quality seeds, and optimal growing conditions for successful indoor seed starting.
Read more: When Should I Start Seeds Indoors
Benefits of Starting Vegetable Seeds Indoors
Starting vegetable seeds indoors offers a range of benefits that can greatly enhance your gardening experience. Here are some key advantages of starting seeds indoors:
1. Extended Growing Season: One of the primary benefits of starting seeds indoors is the ability to extend the growing season. By starting seeds indoors, you can get a head start on the growing season and enjoy fresh vegetables earlier in the year. This is particularly advantageous in regions with shorter growing seasons or unpredictable weather patterns.
2. Better Germination Rates: Controlling the environment indoors allows for optimal conditions for seed germination. You can provide consistent moisture, warmth, and protection from the elements, which can result in higher germination rates compared to direct sowing in the garden. Starting seeds indoors increases the chances of every seed successfully sprouting and developing into a healthy seedling.
3. Healthy and Robust Plants: When you start seeds indoors, you have more control over the growing conditions. You can select high-quality soil mixtures and provide ideal nutrition for the seedlings, resulting in healthier and more robust plants. Seedlings started indoors tend to be stronger, better developed, and more resistant to pests and diseases.
4. Greater Variety: Starting seeds indoors allows you to choose from a wider range of vegetable varieties. Local nurseries may have limited options when it comes to specialty or heirloom varieties. By starting seeds indoors, you have the freedom to explore a vast assortment of unique and interesting vegetable varieties that might not be readily available elsewhere.
5. Cost-Effective: Starting seeds indoors can be a cost-effective approach. Instead of purchasing pre-grown seedlings, you can save money by starting seeds from affordable seed packets or even harvesting your own seeds from previous plants. With a little investment in seeds, soil, and containers, you can produce a large number of plants, which would otherwise be costly to purchase as seedlings.
6. Personal Satisfaction: Starting seeds indoors allows you to be intimately involved in the whole gardening process right from the beginning. It is immensely satisfying to witness the transformation of a tiny seed into a healthy seedling and eventually a thriving vegetable plant. The sense of accomplishment and connection to your garden is unparalleled when you start your own seeds indoors.
By starting vegetable seeds indoors, you can take control of your gardening journey, ensure successful germination, and produce healthier and more abundant crops. The extended growing season, improved germination rates, greater variety, and cost-effectiveness are all compelling reasons to give indoor seed starting a try. So, roll up your sleeves, gather your supplies, and embark on the rewarding journey of starting vegetable seeds indoors.
Factors to Consider Before Starting Seeds Indoors
While starting vegetable seeds indoors offers numerous benefits, there are some important factors to consider before diving into the process. By carefully considering these factors, you can ensure a successful seed starting experience. Here are some key factors to keep in mind:
1. Timing: Timing is crucial when it comes to starting seeds indoors. Each vegetable variety has specific requirements for the number of weeks to be started before the last frost date in your region. Research and determine the appropriate timing for each vegetable you plan to grow, as starting seeds too early or too late can lead to issues such as leggy plants or stunted growth.
2. Space: Evaluate the space available for setting up your indoor seed starting area. Consider factors such as the size of your containers, the number of plants you intend to grow, and the space requirements for adequate lighting. Make sure you have enough space to accommodate the seed starting trays or pots and ensure proper air circulation around the plants.
3. Lighting: Adequate lighting is vital for successful seed germination and healthy plant growth. Most vegetable seeds require a minimum of 12-16 hours of bright light each day. Assess the lighting conditions in your home and determine whether natural light is sufficient or if you need to invest in supplemental grow lights. Proper lighting can prevent issues like weak and leggy seedlings.
4. Temperature: Temperature plays a significant role in seed germination. Consider the ambient temperature in your home and identify a warm location for the seed trays. Most vegetables prefer temperatures between 70-80°F (21-27°C). Avoid placing the trays near drafty windows or areas that experience extreme temperature fluctuations.
5. Humidity: Seedlings require adequate humidity for proper growth and moisture regulation. Dry indoor air can lead to issues such as drying out of the soil or stunted growth. Consider using a humidity tray or a small humidifier to maintain the desired moisture levels around the seedlings.
6. Growing Medium: Selecting the right soil or growing medium is essential for successful seed starting. Choose a well-draining seed-starting mix that provides the appropriate balance of moisture retention and aeration. Avoid using regular garden soil, as it may contain pests or diseases that can harm delicate seedlings.
7. Watering: Proper watering is crucial during the seed starting process. Overwatering can lead to damping-off disease, while underwatering can hinder germination and stunt growth. Water the seedlings from below using a tray or by using a gentle misting spray to avoid disturbing the soil. Monitor the moisture levels and adjust watering as needed.
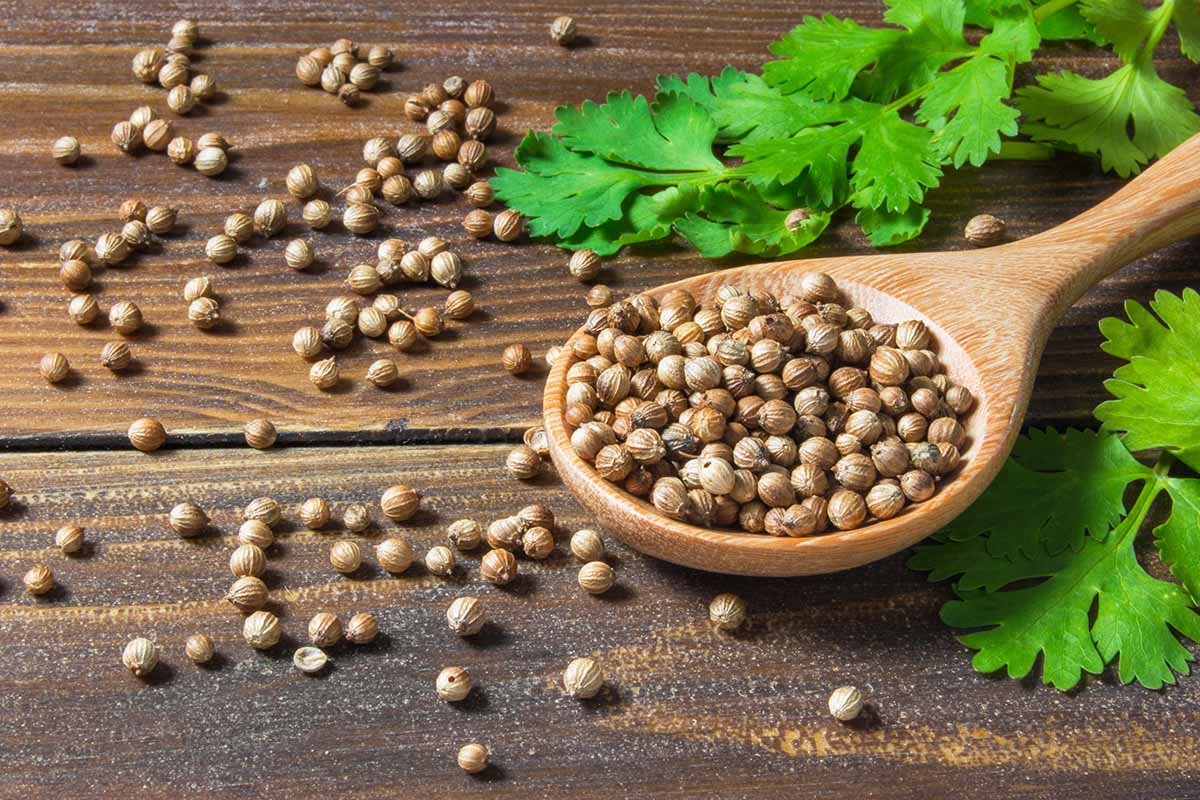
8. Seed Quality: Starting with high-quality seeds greatly increases your chances of success. Choose certified organic or untreated seeds from reputable suppliers. Check the expiration date on the seed packets and ensure that you are using fresh seeds for optimum germination rates.
By considering these factors before starting seeds indoors, you can set yourself up for success and ensure healthy and robust seedlings. Proper timing, adequate space, lighting, temperature, humidity, growing medium, watering, and seed quality are all crucial elements to take into account. With careful planning and attention to detail, you can enjoy a successful seed starting experience and set your garden up for a bountiful harvest.
Ideal Timing for Starting Vegetable Seeds
The ideal timing for starting vegetable seeds indoors is crucial for successful germination and optimal growth. It is essential to consider both the specific requirements of each vegetable variety and the last frost date in your region. Here are some guidelines to help you determine the ideal timing for starting vegetable seeds:
1. Last Frost Date: The last frost date refers to the average date when the risk of frost has passed in your region. It is a crucial factor to consider when planning your seed starting timeline. You can consult local gardening resources, cooperative extension offices, or online tools to determine the estimated last frost date in your area.
2. Sowing Indoors: Most vegetable seeds are typically started indoors 6-8 weeks before the last frost date. This timeframe allows the seeds to germinate and develop into sturdy seedlings ready for transplanting. However, some vegetables, such as tomatoes, peppers, and eggplants, may require a longer indoor growing period of 8-10 weeks due to their slower growth rate.
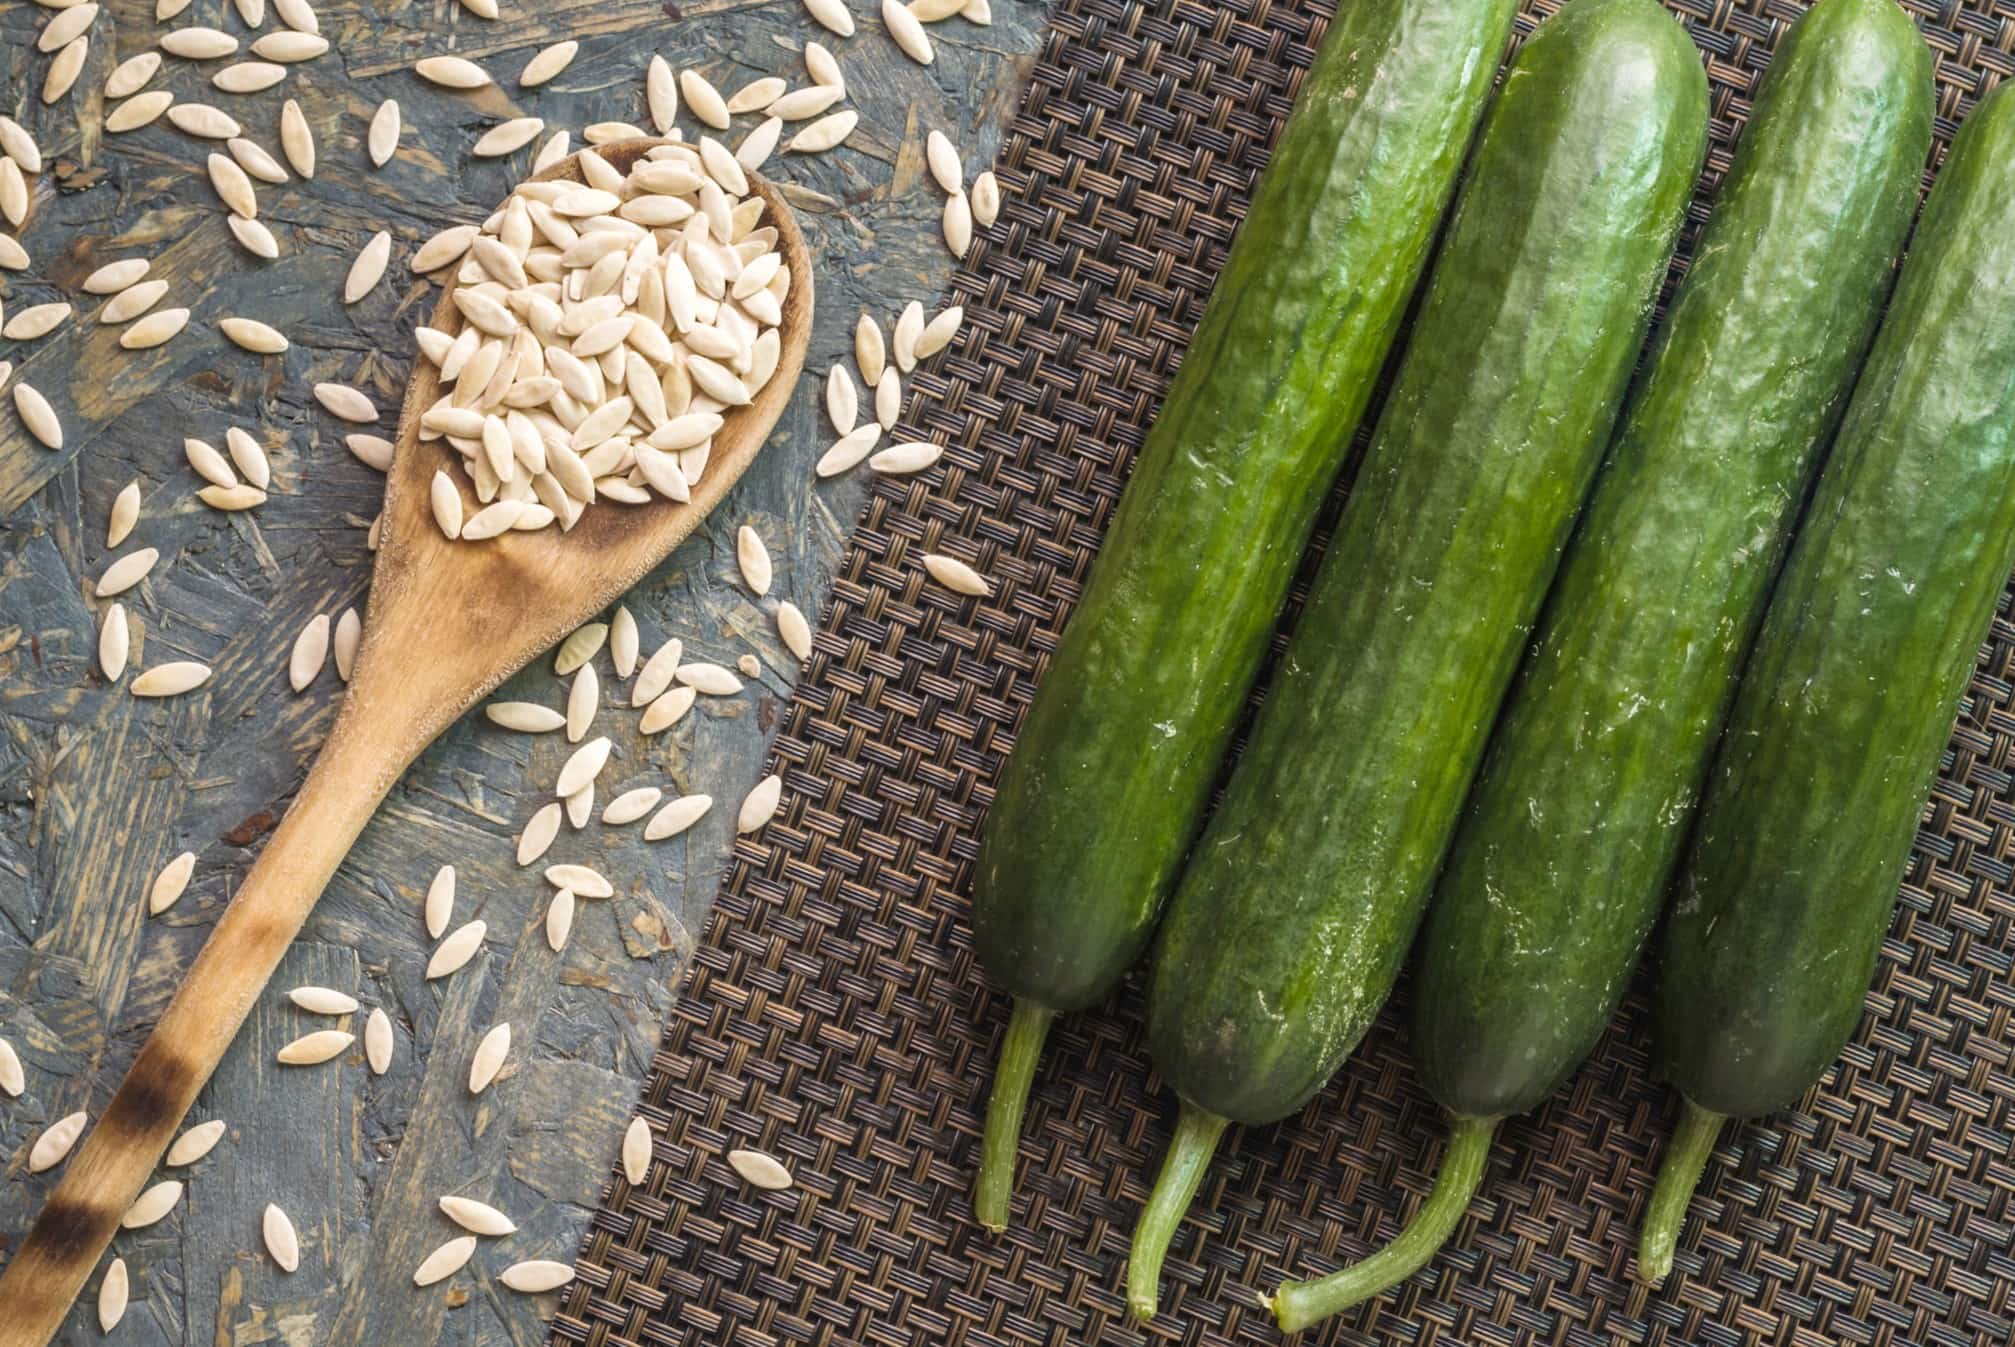
3. Warm and Cool Season Crops: Different vegetable varieties can be categorized as warm-season or cool-season crops. Warm-season crops, such as tomatoes, peppers, cucumbers, and squash, thrive in warmer temperatures and are typically started indoors after the last frost date. Cool-season crops, including lettuce, broccoli, and peas, are more tolerant of cooler temperatures and can be started indoors several weeks before the last frost date.
4. Direct Sowing: While starting seeds indoors offers many advantages, some vegetables are best suited for direct sowing in the garden. These include root crops like carrots and radishes, as well as beans, corn, and melons. These vegetables prefer direct sowing as they do not transplant well and prefer growing directly in the garden soil.
5. Successive Planting: To enjoy a continuous harvest throughout the growing season, consider successive planting of certain vegetables. This involves starting new batches of seeds at staggered intervals. For instance, you can start a batch of lettuce seeds indoors every 2-3 weeks for a steady supply of fresh greens.
6. Seasonal Transitions: As the seasons transition, pay attention to the changing weather conditions and adjust your seed starting accordingly. In regions with mild winters, you may be able to start seeds earlier or extend the growing season using protective measures such as row covers or cold frames.
7. Seed Packet Instructions: Each seed packet provides specific instructions on when to start seeds indoors. Pay close attention to these guidelines as they are tailored to the particular needs of the vegetable variety. The instructions will indicate the number of weeks before the last frost date that seeds should be started indoors for optimal growth.
Taking into account the last frost date, the type of vegetable, and the specific requirements outlined on the seed packets, you can determine the ideal timing for starting vegetable seeds indoors. Planning ahead will help you maximize your growing season, ensure healthy seedlings, and ultimately lead to a successful and bountiful harvest. Happy seed starting!
Selecting the Right Containers and Soil for Starting Seeds
When it comes to starting seeds indoors, selecting the right containers and soil is crucial for the success and healthy growth of your seedlings. The containers you choose should provide adequate space for root development, allow for proper drainage, and be easy to handle. Similarly, the soil or growing medium should offer a balanced combination of moisture retention, aeration, and nutrient availability. Here are some guidelines to help you select the right containers and soil for starting seeds:
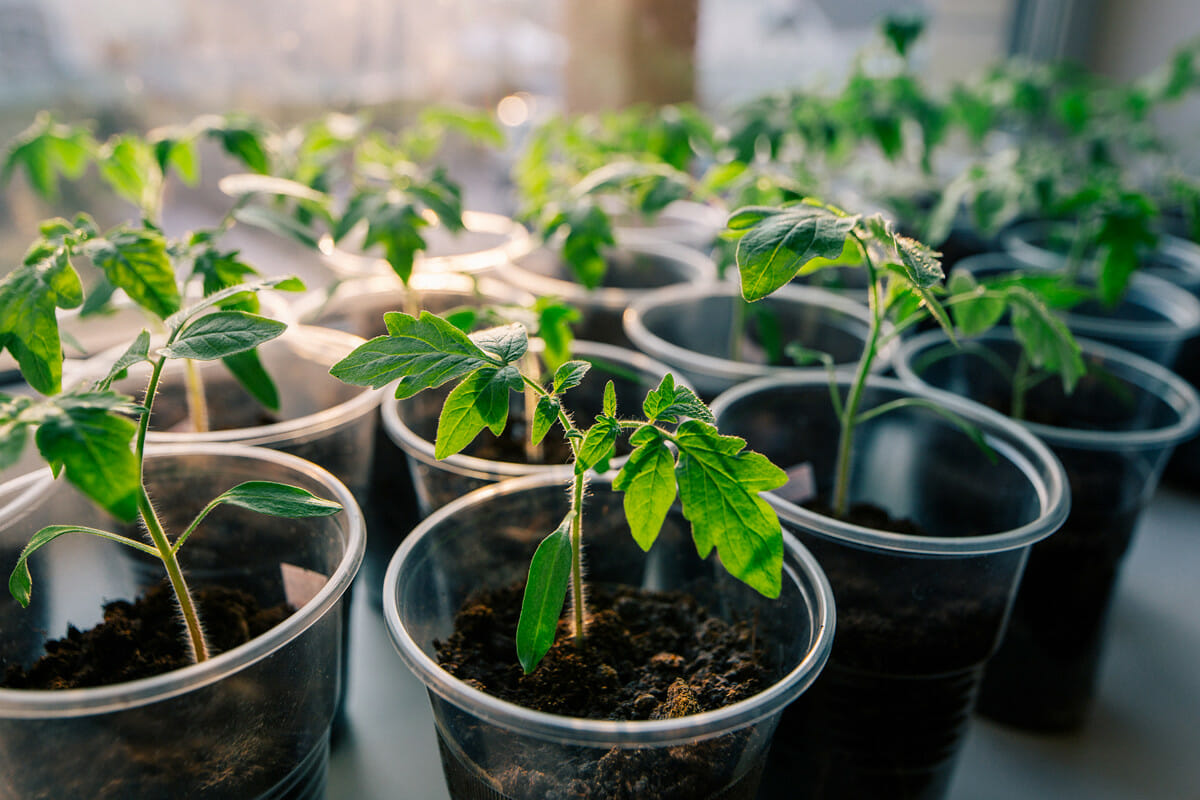
1. Containers: There are various options available for seed starting containers, and the choice depends on personal preference and convenience. Consider the following container types:
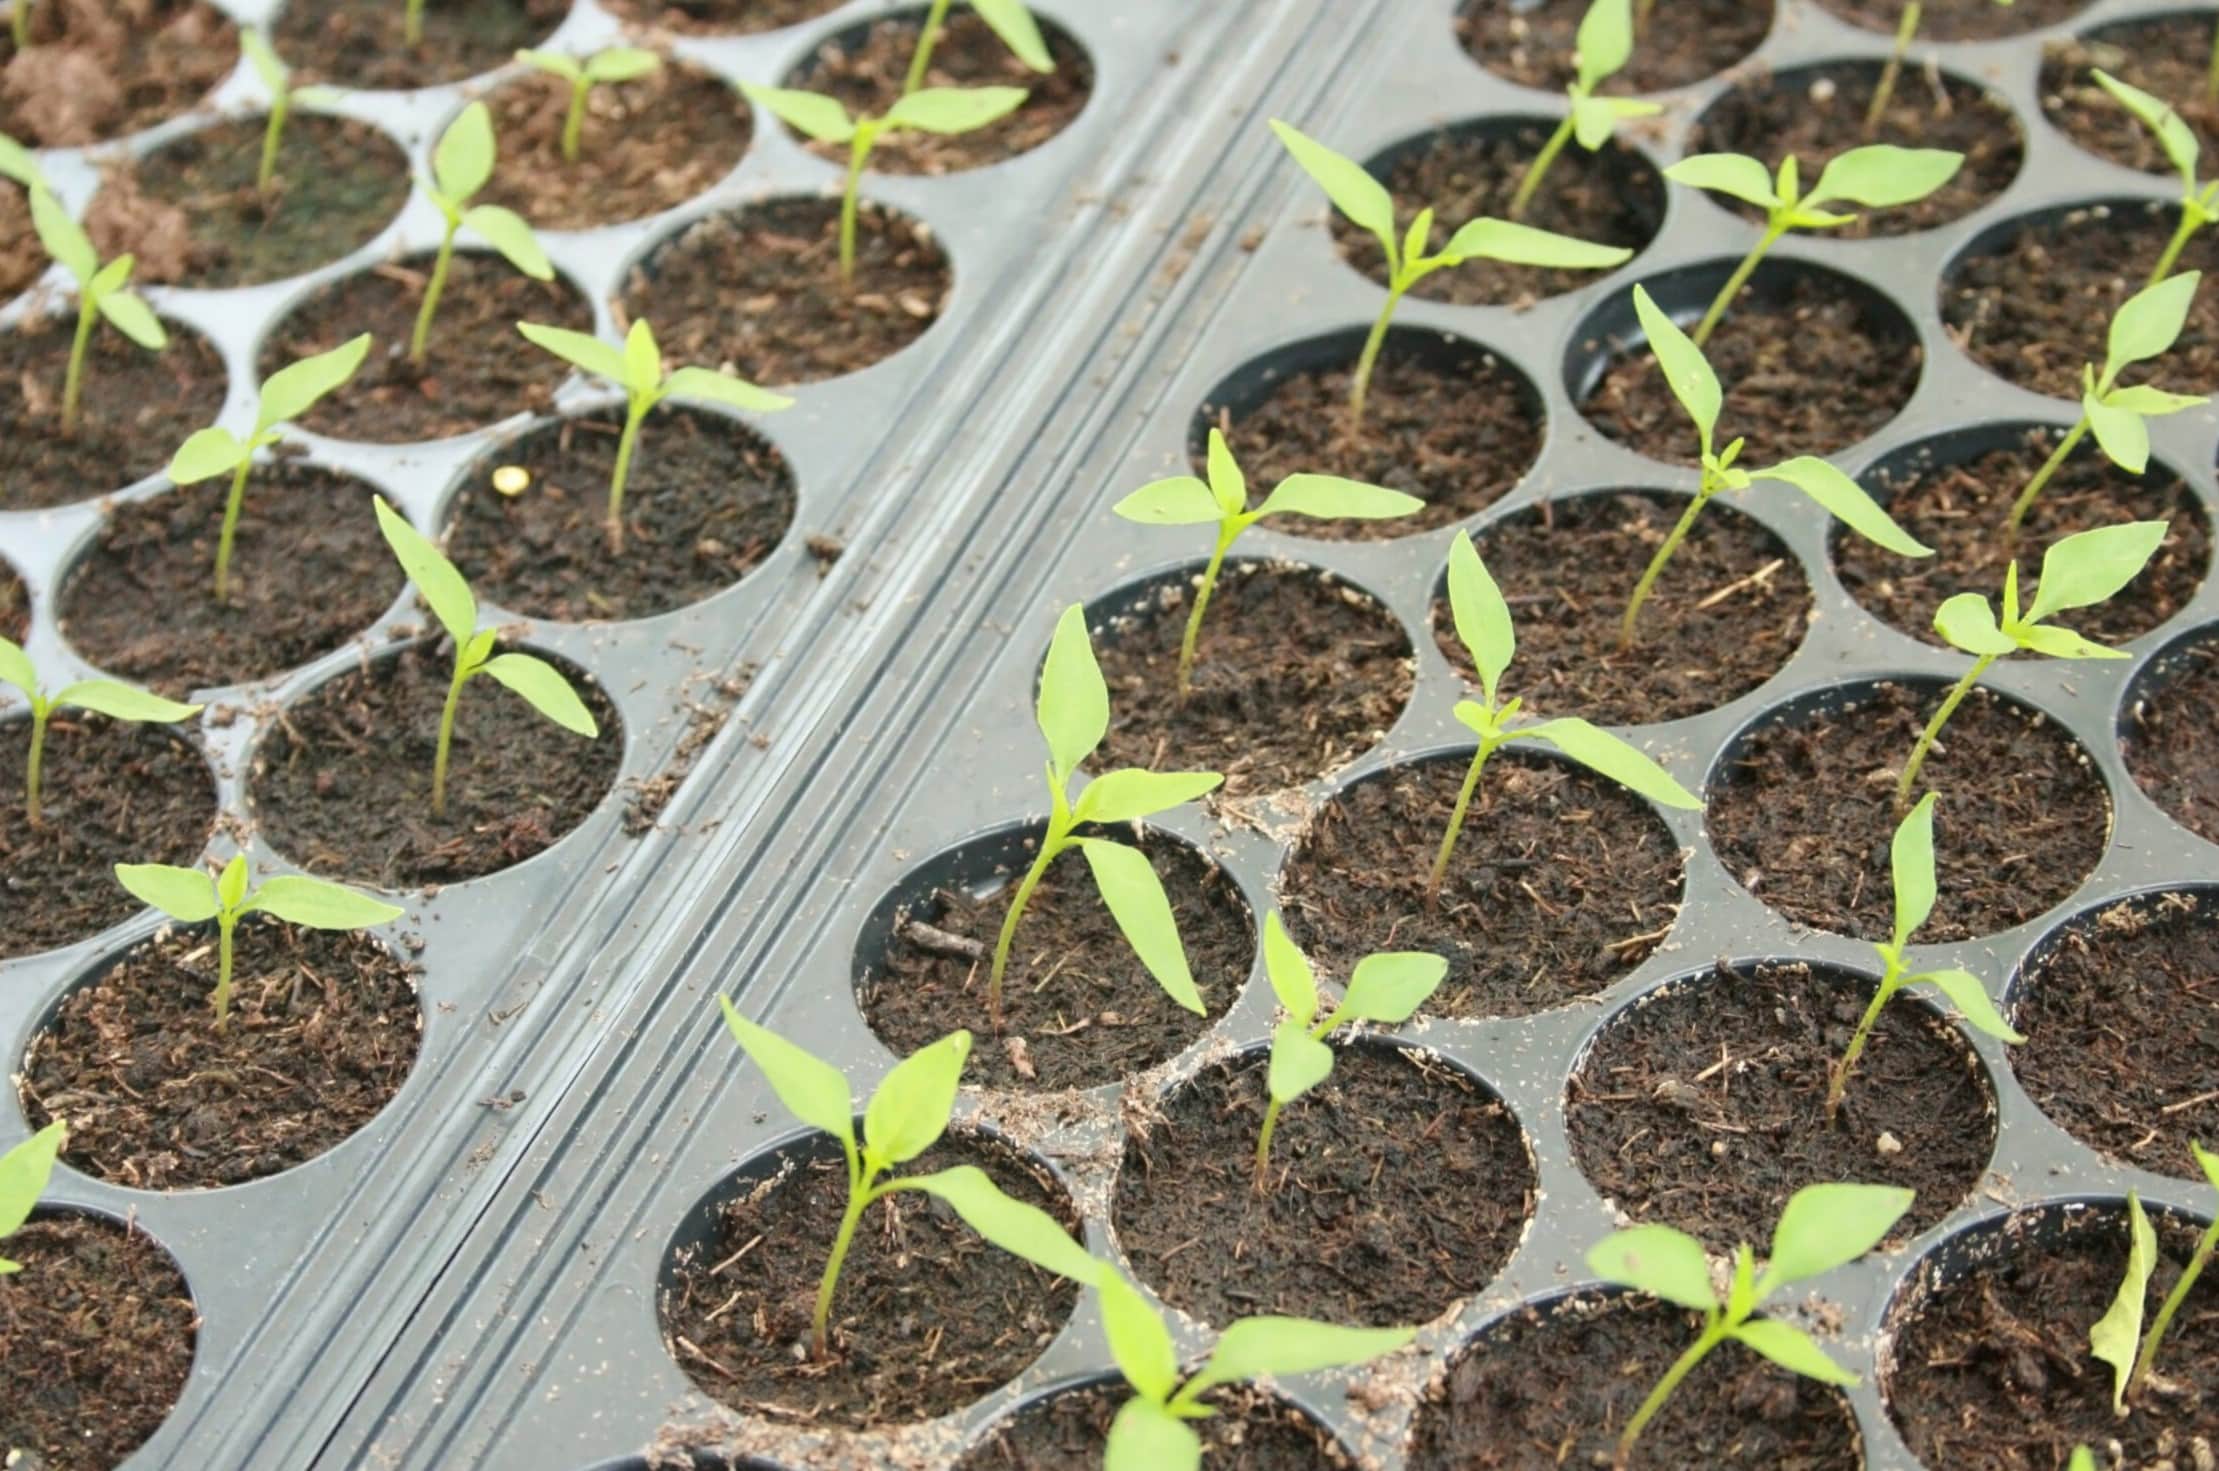
– Plastic Seedling Trays: These trays typically come with individual cells or compartments. They are lightweight, reusable, and provide good drainage. Seedling trays are an excellent choice if you plan to start multiple seeds and want to easily manage and transplant seedlings.
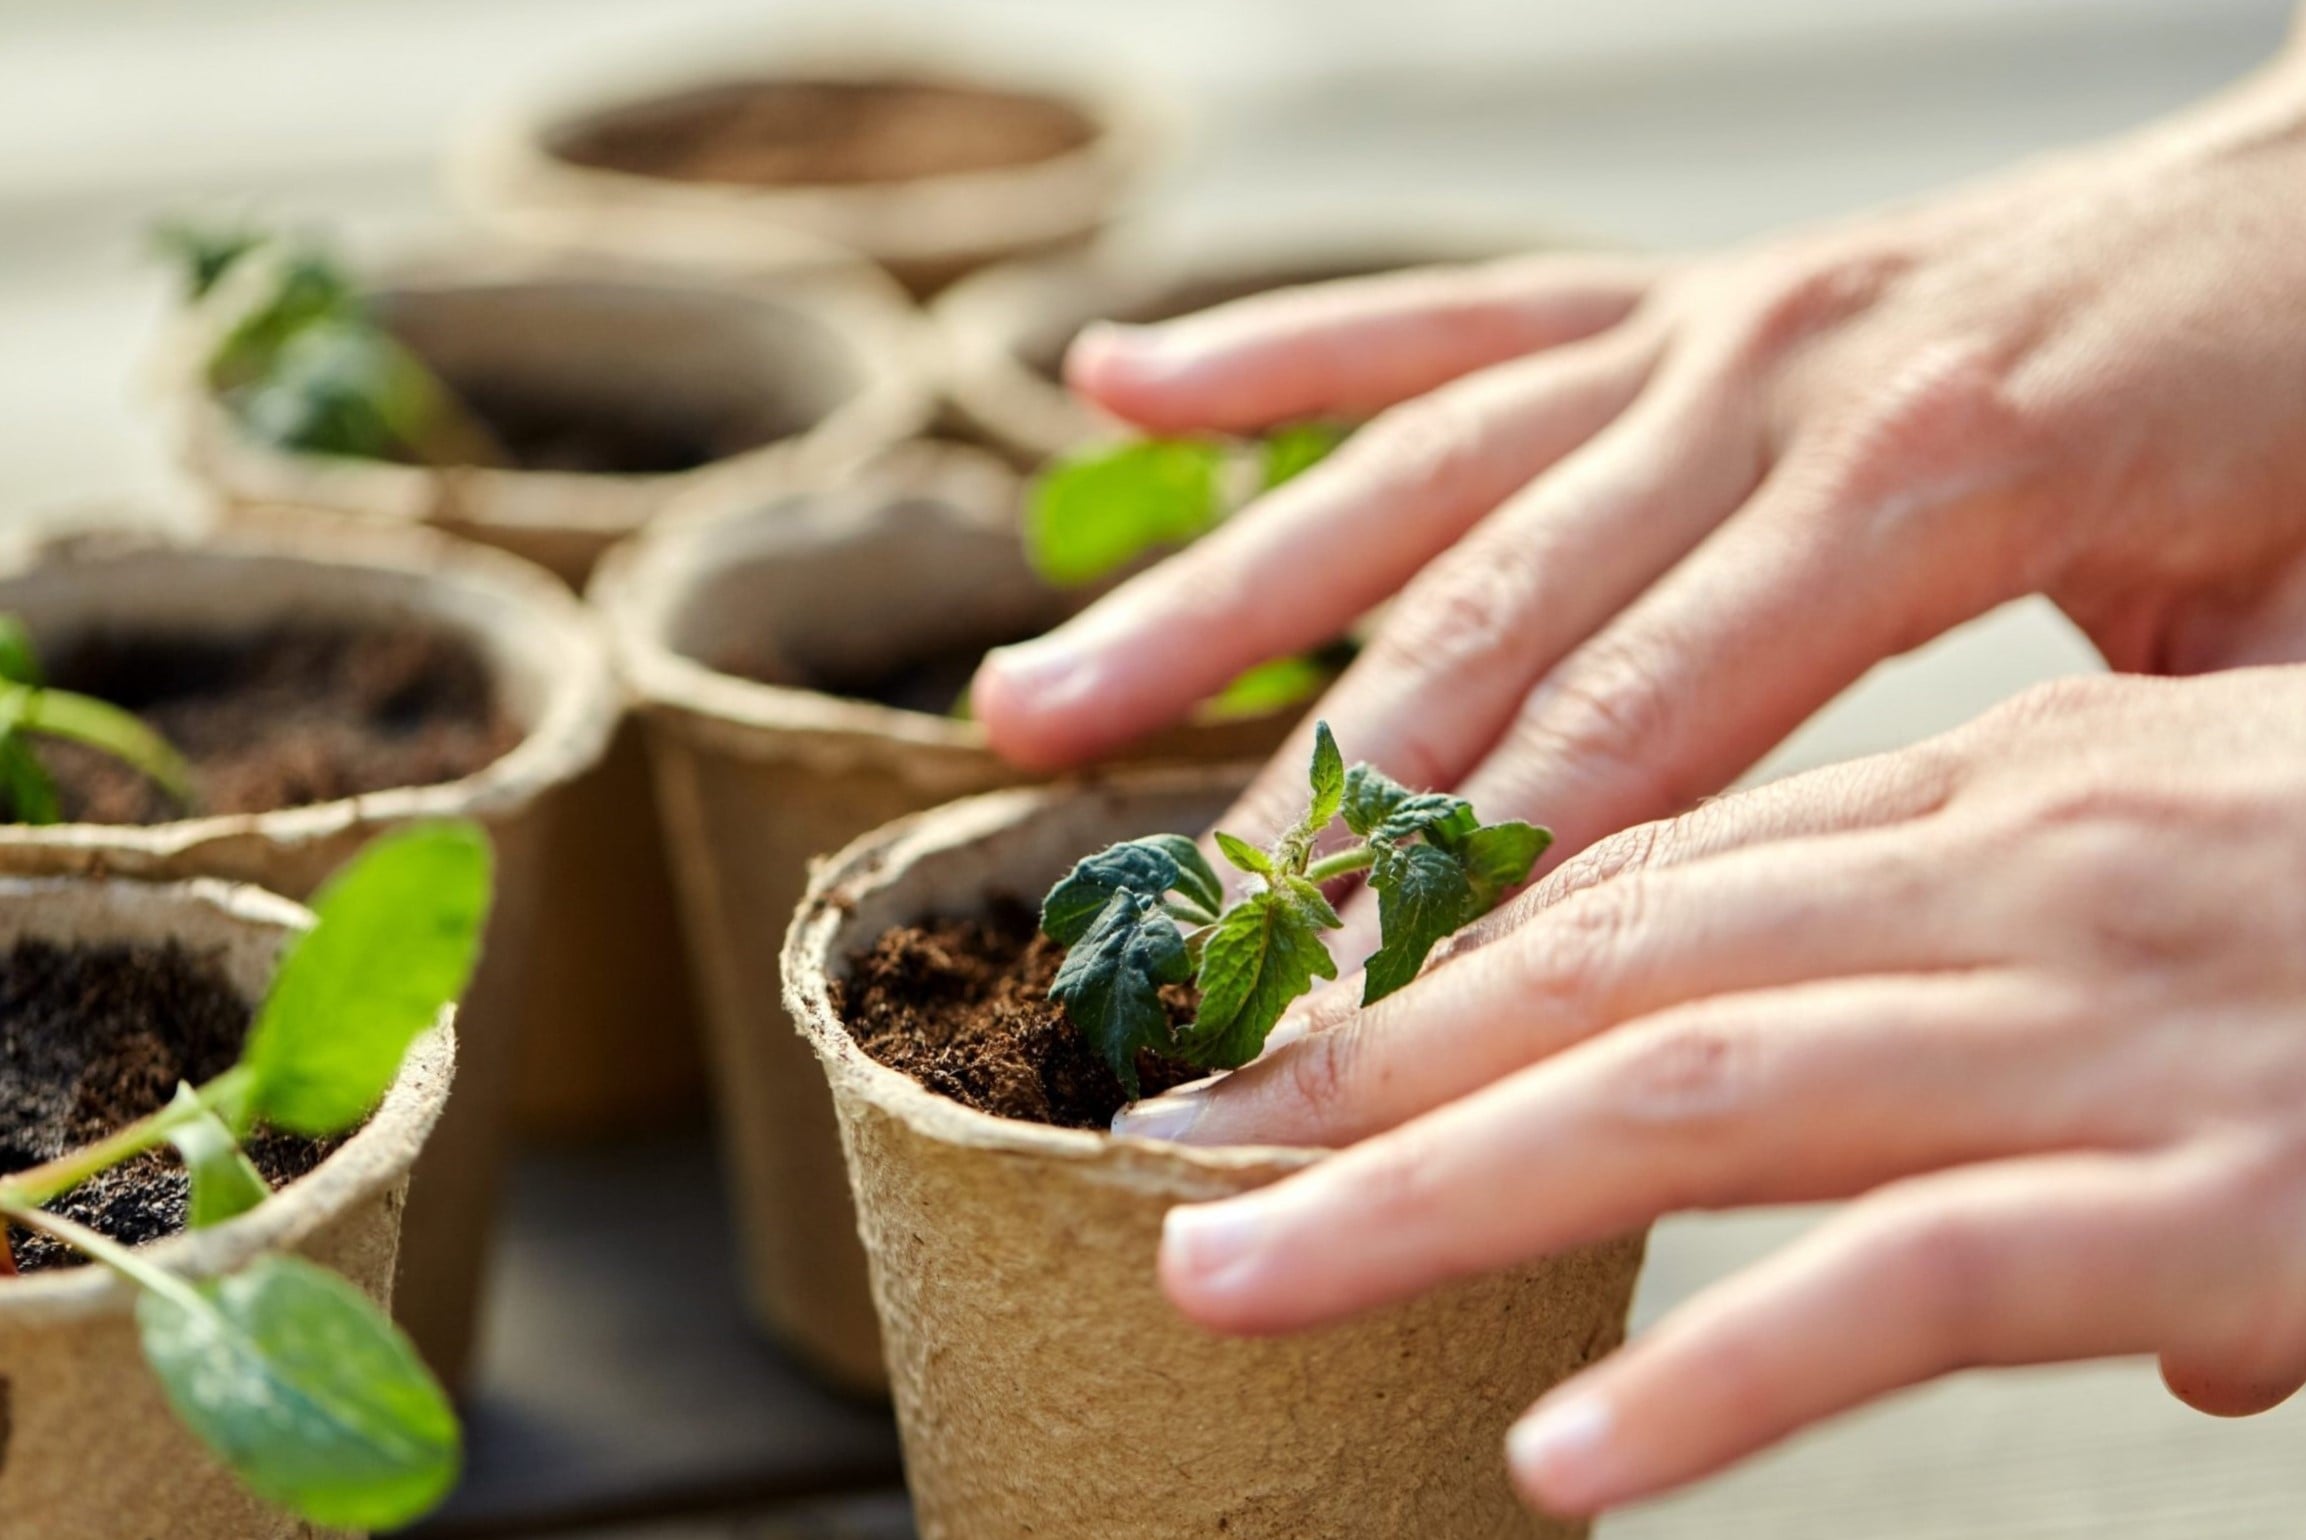
– Pots: You can use small individual pots made of plastic or biodegradable materials, such as peat or cow pots. Pots allow for more space for root development and can be useful for larger or fast-growing seedlings. They are also easy to handle and transplant.
– Paper Pots or DIY Containers: You can make your own seed starting containers using biodegradable materials such as newspaper or cardboard rolls. These containers are eco-friendly and can be planted directly into the soil when it’s time to transplant, reducing transplant shock.
2. Drainage: Whichever type of container you choose, it is crucial to ensure proper drainage to prevent waterlogging and root rot. Look for containers with drainage holes at the bottom or create some yourself if necessary. Good drainage allows excess water to escape, preventing the soil from becoming overly saturated.
3. Growing Medium: When it comes to soil or growing medium for seed starting, it is best to use a well-draining seed-starting mix. Avoid using regular garden soil, as it can be too heavy and may contain pests or diseases. Seed-starting mixes are specially formulated to provide the right balance of moisture retention and aeration.
– Pre-Made Seed-Starting Mix: These mixes are available commercially and are specifically designed for starting seeds. They often contain a blend of peat moss, vermiculite or perlite, and other organic materials that provide the necessary nutrients and moisture retention for seed germination.
– DIY Seed-Starting Mix: If you prefer to make your own mix, you can create a combination of sterilized soil, peat moss, perlite, and compost. The mix should be light, well-draining, and free of clumps or debris.
4. Moisture Retention: The selected soil mix should have the ability to retain moisture without becoming waterlogged. The moisture-holding capacity ensures that seeds have consistent access to water during germination. Look for mixes that strike a balance between retaining moisture and allowing excess water to drain out.
5. Sterility: It is essential to use a sterile growing medium to avoid introducing pests, diseases, or weed seeds into your seedlings. Both commercial seed-starting mixes and DIY mixes can be sterilized by baking them in the oven at a low temperature or by pouring boiling water over the mix.
Remember to label each container with the seed variety and the date of planting to keep track of your seedlings. Place the containers on a waterproof tray or saucer to catch any excess water that drains out.
By selecting the right containers and soil for starting seeds, you provide your seedlings with the optimal environment for healthy growth. Containers with proper drainage and a well-balanced seed-starting mix will ensure that your seedlings have the necessary space, moisture, and nutrients to develop into strong and robust plants. Happy planting!
Read more: When To Start Seeds Indoors
Proper Lighting for Indoor Seed Starting
Proper lighting is essential for successful indoor seed starting. While natural light can be beneficial, it is often insufficient, especially during the early spring when daylight hours are limited. To ensure that your seedlings receive adequate light for healthy growth, supplemental artificial lighting is often necessary. Here are some key considerations for providing proper lighting during indoor seed starting:
1. Light Duration: Seedlings need a minimum of 12-16 hours of bright light each day for optimal growth. This extended duration of light replicates the longer daylight hours of spring and summer, providing the seedlings with the energy they need for photosynthesis and healthy development. Using a timer can help automate the lighting schedule.
2. Natural Light: Place your seed trays near a south-facing window that receives direct sunlight for the maximum amount of natural light. However, keep in mind that the intensity and duration of natural light may vary depending on the time of year and your geographical location. Monitor the light levels and be prepared to supplement with artificial lighting if needed.
3. Supplemental Grow Lights: Fluorescent and LED grow lights are excellent options for providing optimal lighting conditions for seedlings. Choose lights that emit full-spectrum or cool white light, as this closely mimics natural sunlight. Avoid using incandescent bulbs as they produce excessive heat and do not provide the specific light spectrum required for plant growth.
4. Light Distance: Position the grow lights approximately 2-4 inches above the tops of the seedlings. As the seedlings grow, you can gradually raise the lights to maintain an optimal distance of 2-4 inches. This prevents the seedlings from becoming leggy or stretching towards the light source.
5. Light Intensity: Different plants have varying light requirements, so it is important to adjust the intensity of the lights accordingly. If the seedlings appear pale or are stretching towards the light, increase the light’s intensity by lowering the light source or using stronger bulbs. Conversely, if the seedlings appear scorched or brown at the tips, reduce the light’s intensity by raising the light source or using lower wattage bulbs.
6. Light Duration: In addition to providing sufficient light duration, it is important to give seedlings a period of darkness to simulate natural day and night cycles. Turn off the grow lights for 8 hours each day to allow the seedlings to rest and avoid stressing them with constant light exposure.
7. Light Placement: Consider using reflective surfaces, such as aluminum foil or reflective grow tent walls, to maximize light distribution to the seedlings. This helps ensure that light reaches all parts of the plants, promoting even growth. Rotate the trays regularly to prevent seedlings from leaning towards the light and to foster balanced development.
8. Monitoring: Regularly monitor the seedlings for signs of insufficient or excessive light. Leggy seedlings that are stretching towards the light source indicate a need for increased light exposure. On the other hand, burned or stunted seedlings suggest that the light intensity is too high. Make adjustments accordingly to maintain optimal growing conditions.
By providing proper lighting during indoor seed starting, you can ensure that your seedlings receive the necessary light for healthy growth and development. By supplementing natural light with artificial grow lights and paying attention to light duration, intensity, distance, and placement, you will set your seedlings on the path to thriving and flourishing as they prepare for transplanting outdoors. Happy growing!
Start vegetable seeds indoors 6-8 weeks before the last frost date in your area. This gives them enough time to grow into healthy seedlings before being transplanted outside.
Temperature and Humidity Requirements for Successful Seed Starting
Temperature and humidity play vital roles in the success of seed starting. Different plant species have specific temperature and humidity preferences for germination and healthy growth. By understanding and providing the optimal conditions, you can ensure the successful development of your seedlings. Here are some guidelines for maintaining the right temperature and humidity levels during seed starting:
1. Temperature: Most vegetable seeds germinate best within a specific temperature range. While the exact temperature requirements vary depending on the plant species, a general range of 70-80°F (21-27°C) is ideal for the germination of many common vegetable seeds. However, it’s important to note that some specific varieties may have unique temperature requirements, so it’s best to refer to the instructions on the seed packet.
– Germination Temperature: To promote successful germination, providing a consistent and appropriate temperature is crucial. You can use a seedling heat mat or place the seed trays on top of a warm surface to ensure the required temperature is maintained. Once the seedlings have emerged, you can slightly lower the temperature to promote steady growth.
– Day and Night Temperature: It is also important to maintain a slight difference in temperature between day and night to mimic natural environmental fluctuations. Generally, a 10-degree Fahrenheit (5-degree Celsius) drop in temperature at night is sufficient for most seedlings. This temperature variation helps foster stronger and more resilient growth.
2. Humidity: Adequate humidity is essential for seed germination and early seedling growth. The presence of moisture in the air promotes water absorption by the seeds and prevents drying out. Here are some tips to maintain the proper humidity levels:
– Humidity Dome or Plastic Cover: Using a humidity dome or covering the seed trays with plastic wrap can create a humid microclimate around the seeds, which aids in germination. Once the seedlings have emerged, remove the dome or plastic cover to prevent excessive moisture buildup and to promote air circulation.
– Humidity Tray: Placing the seed trays on a humidity tray filled with water can help maintain a higher level of humidity in the immediate vicinity of the seedlings. Be cautious not to allow the trays to sit directly in water, as this can lead to overwatering and root rot.
– Misting: Regularly misting the seedlings with water can provide a temporary boost in humidity and prevent the soil from drying out. Use a fine mist spray bottle and mist the seedlings gently, making sure not to saturate the soil or leaves.
– Air Circulation: While humidity is important, it is equally crucial to provide adequate air circulation to prevent the development of fungal diseases. Proper ventilation helps to reduce excess moisture and promote healthy growth. Use a small fan set on low speed to create gentle airflow around the seedlings.
Monitoring the temperature and humidity levels regularly is essential to ensure they remain within the optimal range. Use a thermometer and hygrometer to measure the temperature and humidity in your indoor gardening space. Make adjustments as needed to maintain the appropriate conditions for successful seed starting.
By providing the right temperature and humidity levels, you can create an environment that promotes optimal germination and healthy growth of your seedlings. This ensures that your seedlings have the best possible start and sets them on the path to becoming strong and thriving plants ready for transplanting outdoors. Happy seed starting!
Steps for Starting Vegetable Seeds Indoors
Starting vegetable seeds indoors is a rewarding process that allows you to get a head start on the growing season and ensure healthy seedlings for transplanting into the garden. To successfully start your vegetable seeds indoors, follow these steps:
1. Gather Your Supplies: Collect all the necessary supplies before you begin. This includes seed trays or pots, a seed-starting mix, seeds, labels, a water source, and any additional equipment such as a humidity dome or grow lights.
2. Select the Right Containers: Choose containers that have drainage holes at the bottom or create drainage holes yourself. Consider using seedling trays, pots, or biodegradable options such as peat or cow pots. Place the containers on a waterproof tray or saucer to catch any excess water.
3. Fill Containers with Seed-Starting Mix: Fill the containers with a well-draining seed-starting mix, leaving a small gap at the top for watering. Avoid using regular garden soil, as it may not provide the necessary aeration and drainage for seed germination and early growth.
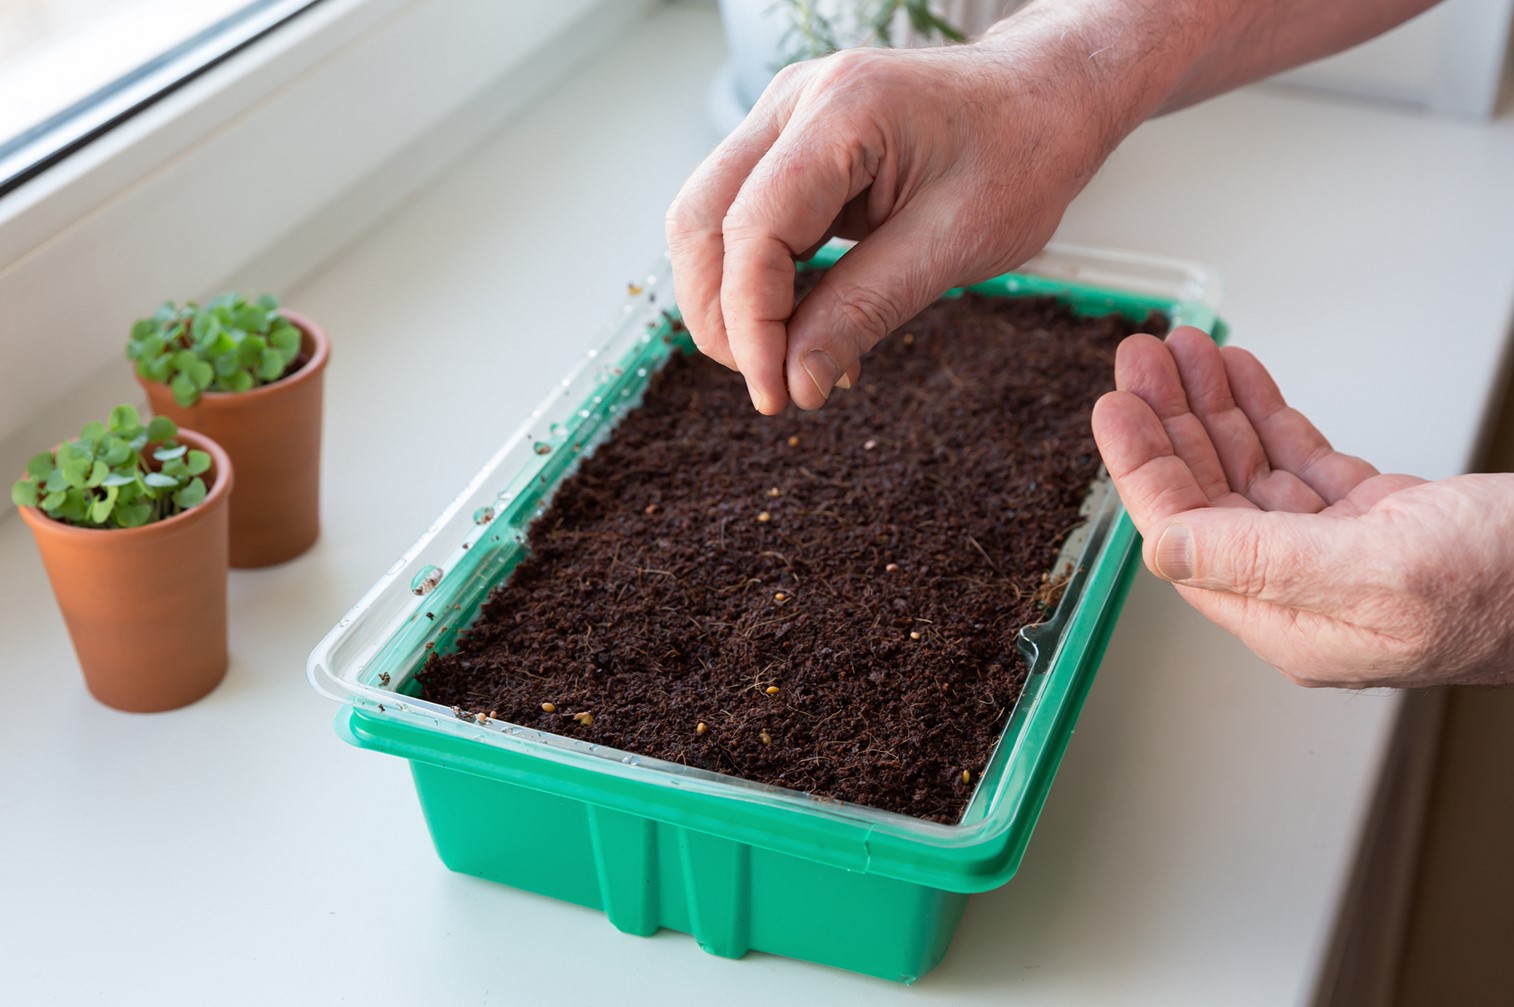
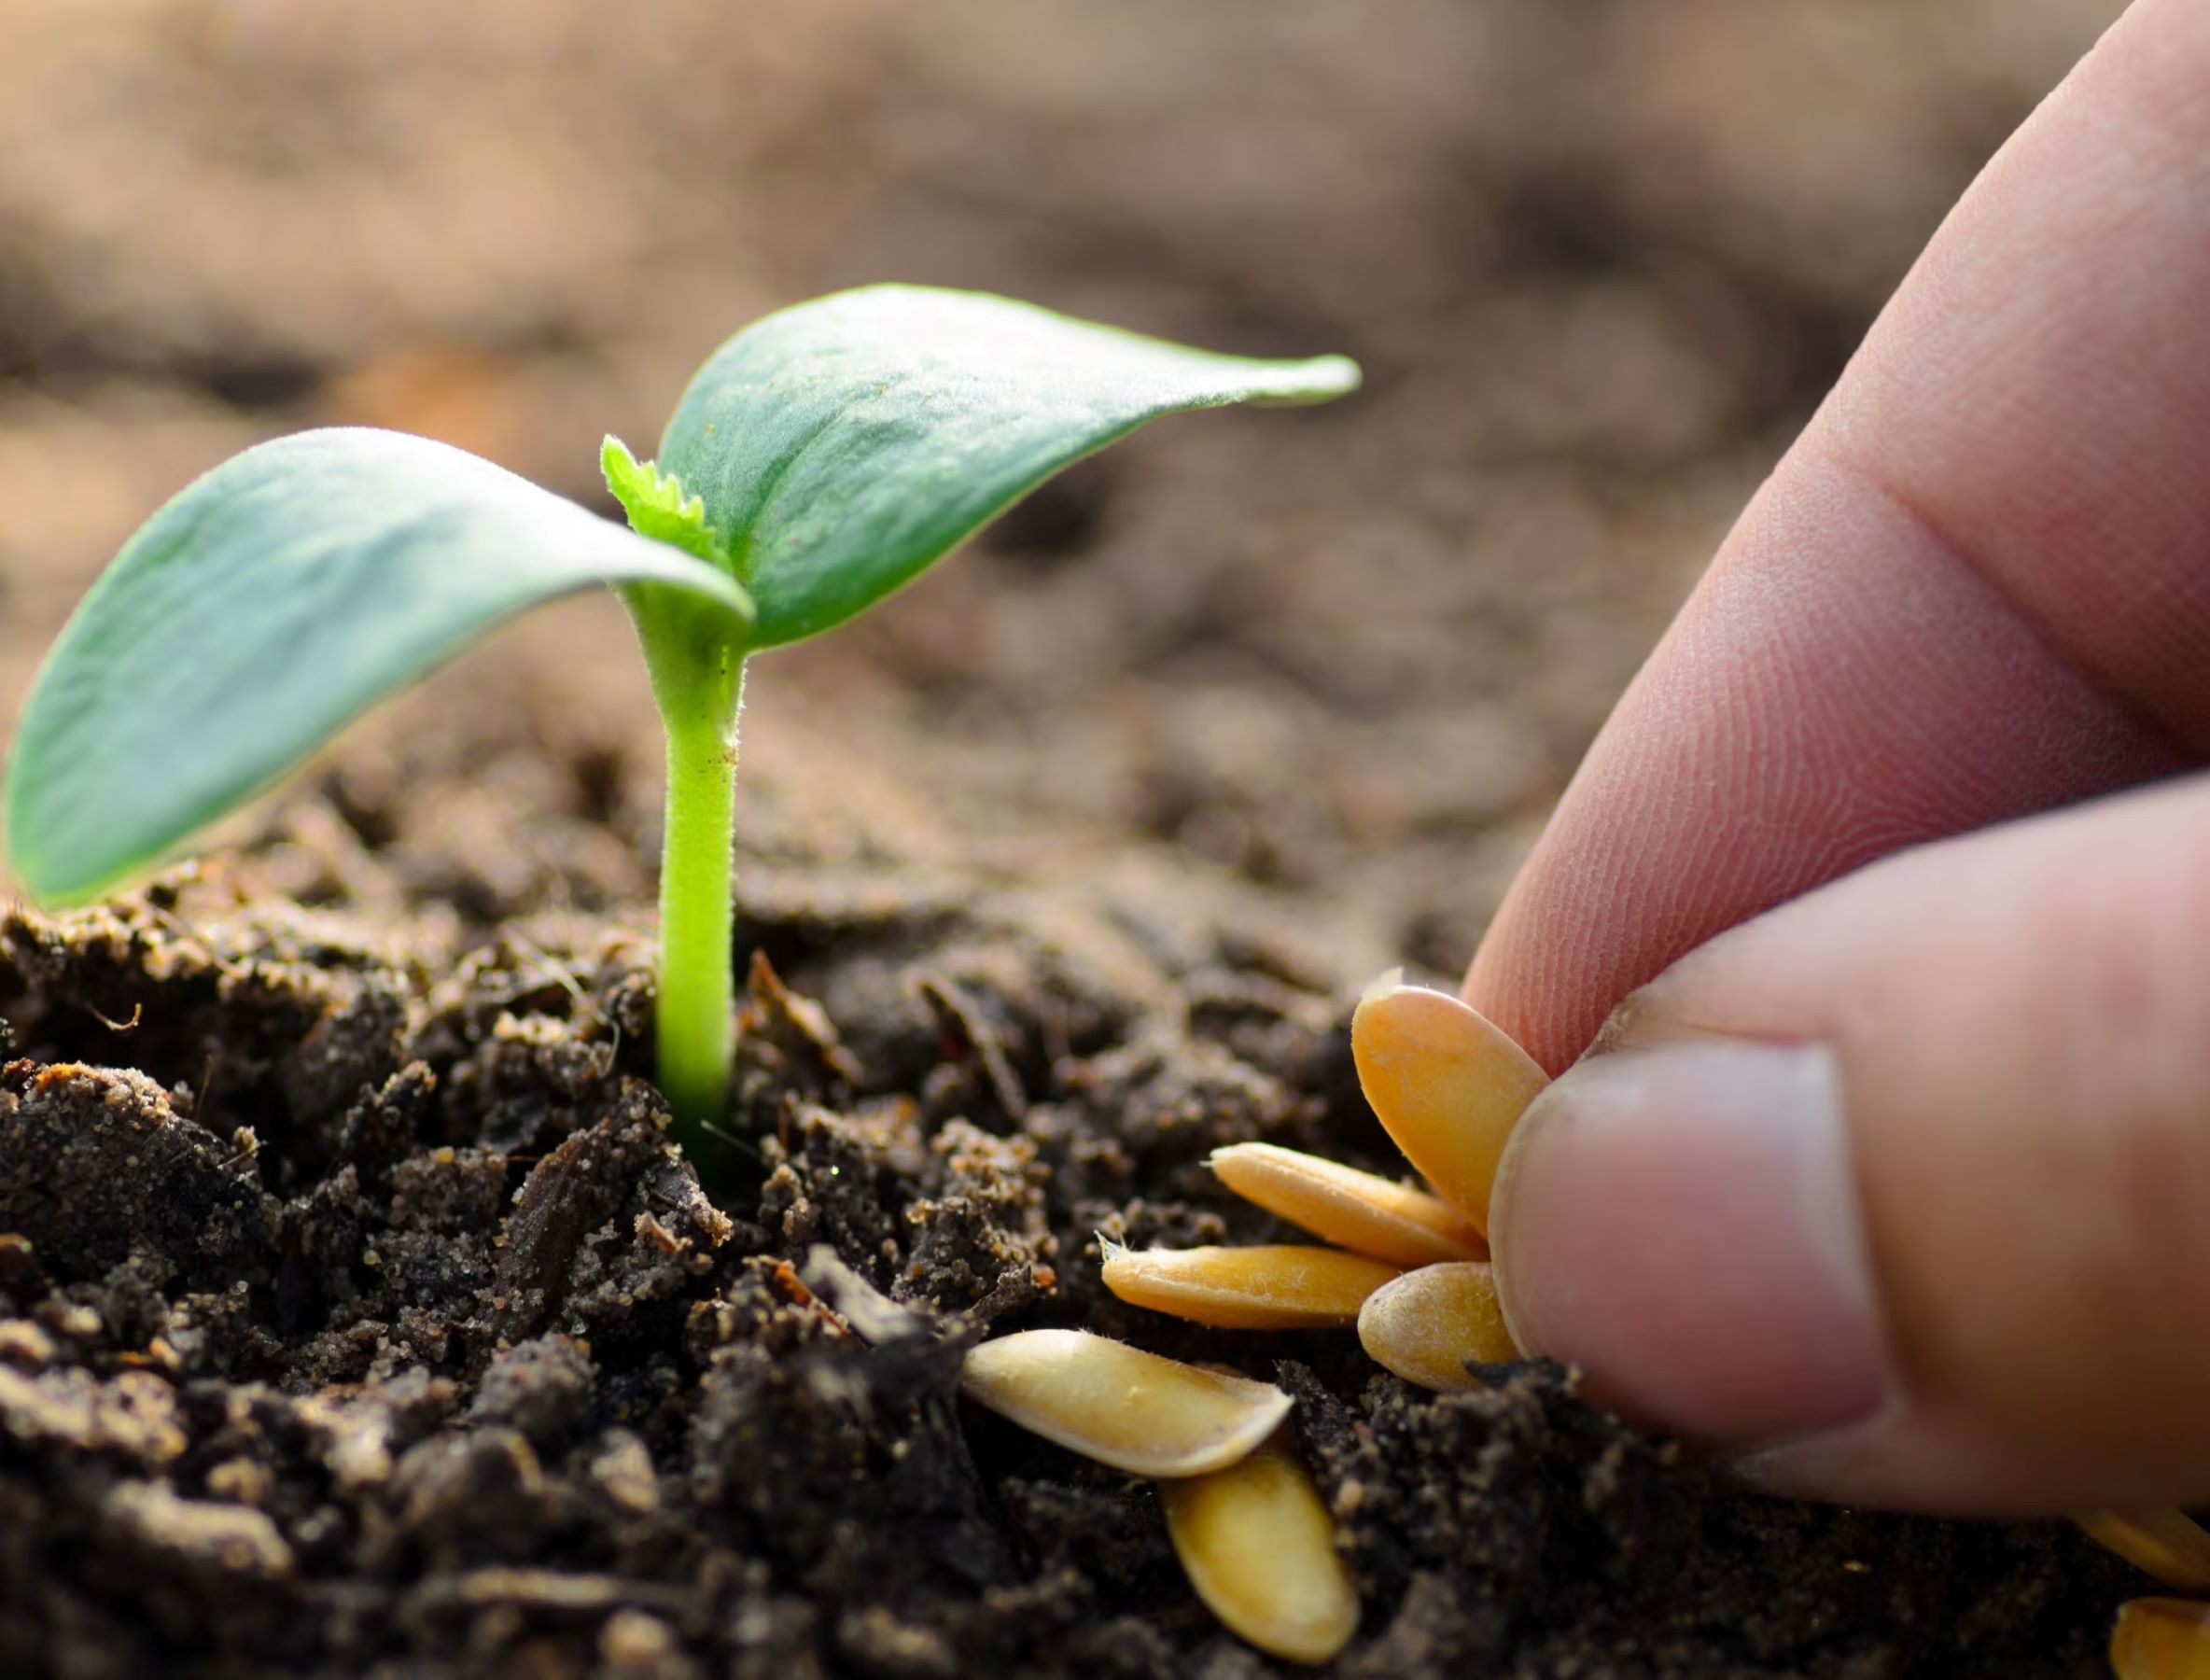
4. Sow the Seeds: Follow the instructions on the seed packet for the appropriate sowing depth and spacing. Generally, plant the seeds at a depth of two to three times their diameter. Place one or two seeds in each container, allowing room for the seedlings to grow. If using seedling trays, label each compartment with the seed variety.
5. Water the Containers: Water the containers gently to moisten the soil. Use a watering can with a fine rose or misting spray bottle to avoid disturbing the seeds. Ensure that the soil is evenly moist but not waterlogged. Place the containers on the waterproof tray to catch any excess water that drains out.
6. Provide Proper Lighting: Place the containers in a well-lit area near a south-facing window. If natural light is not sufficient or available, supplement with artificial grow lights. Position the lights approximately 2-4 inches above the seedlings and adjust the height as the seedlings grow.
7. Maintain Optimal Temperature and Humidity: Ensure that the temperature remains within the appropriate range for each vegetable variety. Use a seedling heat mat or place the containers on a warm surface to provide gentle bottom heat for germination. Monitor the humidity levels and create a humid environment using a humidity dome or tray filled with water.
8. Monitor and Water Regularly: Check the containers daily and water as needed to keep the soil evenly moist. Avoid overwatering, which can lead to damping-off disease, and underwatering, which can hinder germination. Water from below using a tray or misting bottle to prevent disturbing the soil or the delicate seedlings.
9. Rotate the Containers: To promote even growth, rotate the containers regularly to ensure that all sides receive adequate light. This encourages strong and balanced development of the seedlings.
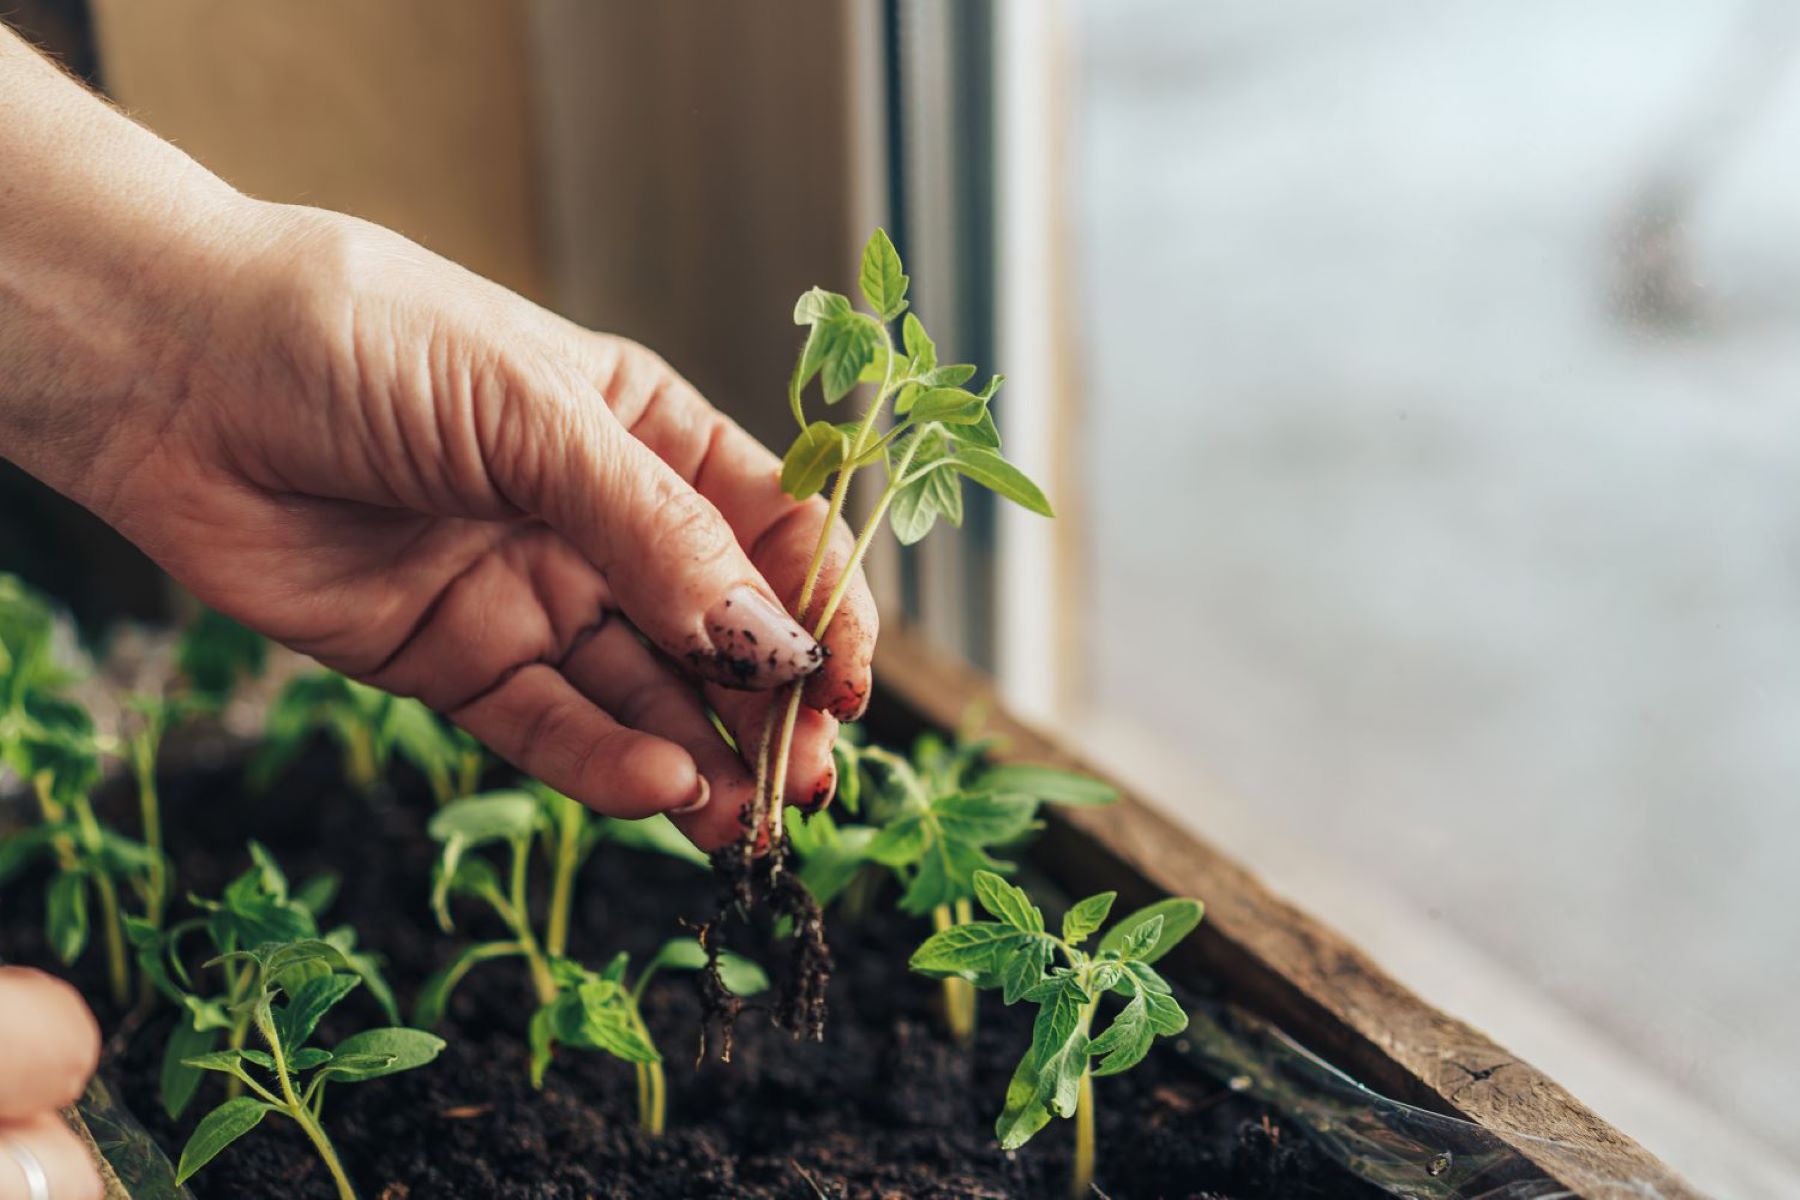
10. Thin and Transplant: Once the seedlings have developed their first true leaves, you may need to thin them out if you planted multiple seeds in each container. Keep the strongest and healthiest seedling in each container and remove the weaker ones. When the seedlings have grown enough to handle, transplant them into larger pots or trays with fresh potting soil before moving them outdoors.
By following these steps, you can successfully start your vegetable seeds indoors and nurture healthy seedlings ready for transplanting into the garden. Remember to provide proper lighting, temperature, and humidity, and to monitor the seedlings’ progress closely. With care and attention, you’ll be rewarded with strong, vibrant plants that will provide a bountiful harvest. Happy seed starting!
Transplanting Seedlings Outdoors
After nurturing your vegetable seedlings indoors, the time will come to transplant them into the garden when the weather and soil conditions are favorable. Transplanting seedlings outdoors requires careful preparation and attention to ensure a smooth transition and promote their continued growth and development. Follow these steps for successful transplanting:
1. Choose the Right Time: Ensure that all risk of frost has passed and the soil has warmed up before transplanting seedlings outdoors. Consult local gardening resources, cooperative extension offices, or online tools to determine the ideal timing for each specific vegetable in your region.
2. Prepare the Garden: Select a sunny location in your garden with soil that is well-drained, fertile, and free from weeds. Prepare the soil by removing any debris, breaking up clumps, and adding compost or organic matter if needed. This will provide a nutrient-rich environment for the seedlings to thrive.
3. Acclimatize the Seedlings: Before transplanting, it is important to gradually acclimate the seedlings to outdoor conditions. This process, known as hardening off, helps the seedlings adjust to fluctuating temperatures, wind, and direct sunlight. Start by placing the seedlings outdoors in a sheltered, shaded area for a few hours each day, gradually increasing their exposure over the course of a week.
4. Prepare the Planting Holes: Dig planting holes in the garden, ensuring they are deep and wide enough to accommodate the root ball of each seedling. Space the holes according to the recommended planting distance for the specific vegetable variety.
5. Transplant the Seedlings: Carefully remove the seedlings from their containers, gently loosening the roots if they are root-bound. Place each seedling in a planting hole, ensuring that the soil level around the stem matches the level of the soil in the container. Fill the hole with soil, gently firming it around the seedling to provide stability.
6. Water the Transplanted Seedlings: Immediately after transplanting, water the seedlings thoroughly. This helps settle the soil around the root ball and provides moisture for the newly transplanted plants. Avoid overwatering, as excessive moisture can lead to root rot or other issues.
7. Provide Support if Necessary: Some vegetables, such as tomatoes, peppers, or tall-growing plants like beans, may benefit from support structures like stakes, trellises, or cages. Install these supports at the time of transplanting to avoid damaging the roots later on.
8. Mulch the Area: Apply a layer of organic mulch, such as straw, shredded leaves, or wood chips, around the transplanted seedlings. Mulching helps conserve moisture, suppress weeds, and regulate soil temperature, promoting overall plant health and growth.
9. Monitor and Care for the Seedlings: After transplanting, monitor the seedlings regularly for signs of stress or any pests or diseases. Water the seedlings deeply when the top inch of soil becomes dry, ensuring that they receive adequate moisture during their establishment period.
10. Provide Additional Protection: If you anticipate unfavorable weather conditions or pests, consider providing additional protection for the transplanted seedlings. Use row covers, cloches, or other protective materials to shield the delicate plants until they become established.
By following these steps, you can successfully transplant your seedlings into the garden and give them the best chance for healthy growth and productivity. Remember to monitor and care for the seedlings diligently, providing adequate moisture, protection, and support as needed. With proper care, your transplanted seedlings will thrive and contribute to a successful harvest in your garden. Happy gardening!
Read more: When Should You Start Planting Seeds
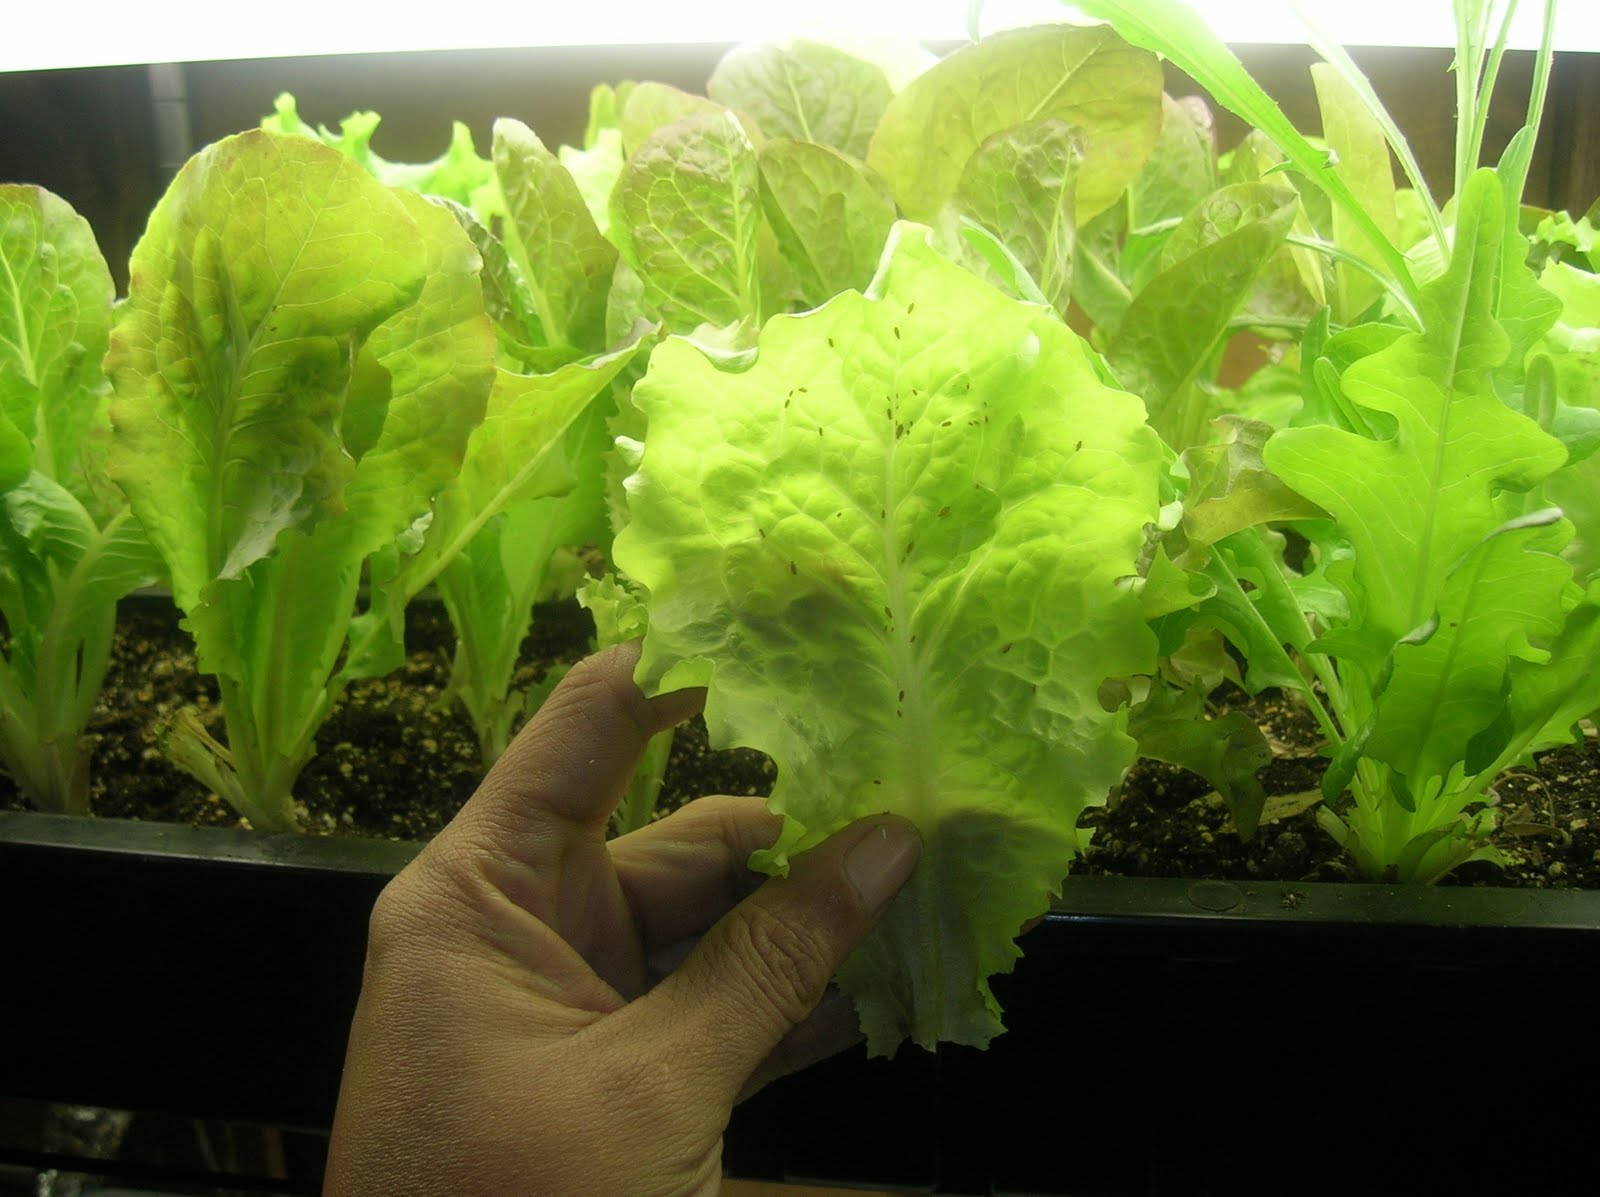
Common Challenges and Troubleshooting Tips for Indoor Seed Starting
While indoor seed starting is a rewarding process, it is not without its challenges. Several common issues can arise during the seed starting journey. However, with proper troubleshooting techniques, you can overcome these challenges and ensure successful seed germination and healthy seedling growth. Here are some common challenges and tips for troubleshooting indoor seed starting:
1. Poor Germination: If your seeds fail to germinate or have low germination rates, there may be several possible causes. Check the following factors:
– Old or Low-quality Seeds: Ensure that you are using fresh, high-quality seeds. Expired or poorly stored seeds may have reduced viability.
– Inadequate Moisture: Check the soil moisture level. Seeds need consistent moisture for germination. If the soil is too dry or too wet, adjust your watering routine accordingly.
– Improper Temperature: Ensure that the temperature is within the recommended range for the specific seeds you are starting. Adjust the temperature if necessary, using a seedling heat mat or adjusting the room temperature.
– Insufficient Light: Inadequate light can hinder seed germination. Ensure that your seedlings are receiving sufficient light, either through natural sunlight or supplemental grow lights.
2. Leggy Seedlings: Leggy or elongated seedlings with weak stems are a common issue that arises when seedlings receive inadequate light or are placed too far from the light source. To address this problem:
– Increase Light Intensity: Move the seedlings closer to the light source or adjust the position of the grow lights to increase the light intensity. This will promote stronger, more compact growth.
– Provide Sufficient Light Duration: Ensure that the seedlings are receiving 12-16 hours of bright light each day. Insufficient light duration can cause seedlings to stretch in search of light.
3. Damping-Off: Damping-off is a fungal disease that causes seedlings to rot at the soil level. To prevent damping-off:
– Use Clean Containers: Start with clean, sterile containers to reduce the presence of disease-causing organisms. Wash containers with soap and water and sanitize them with a diluted bleach solution before use.
– Good Air Circulation: Proper ventilation and air circulation help prevent the buildup of humidity around the seedlings. Use a small fan on a low setting to create gentle airflow and reduce excess moisture.
– Avoid Overwatering: Overwatering can contribute to damping-off. Water the seedlings from below using a tray or misting bottle to avoid saturating the soil or the seedlings themselves.
4. Seedling Transplant Shock: When moving seedlings from indoor conditions to the outdoor garden, they may undergo transplant shock where they struggle to adapt. To minimize transplant shock:
– Harden Off Seedlings: Gradually acclimate the seedlings to outdoor conditions over the course of a week. Start by placing them in a sheltered, shaded area for a few hours per day, gradually increasing their exposure to sunlight and outdoor elements.
– Choose the Right Timing: Transplant seedlings when the weather is favorable and all risk of frost has passed. Transplanting in cool, cloudy weather can help ease the transition for the seedlings.
– Water and Protect: Water the seedlings well before transplanting and provide temporary protection from harsh sunlight, wind, or extreme temperatures using shade covers, row covers, or cloches.
By identifying and addressing these common challenges in indoor seed starting, you can maximize the success of your seedlings and ensure robust plant growth. Pay attention to factors such as seed quality, moisture levels, temperature, light intensity, and disease prevention. With careful planning and troubleshooting, you will enjoy a fruitful and rewarding indoor seed starting experience. Happy gardening!
Conclusion
Starting vegetable seeds indoors is a wonderful way to extend the growing season, ensure better germination rates, and nurture healthy and robust seedlings before transplanting them into the garden. By following the steps outlined in this article and considering factors such as timing, containers and soil, lighting, temperature, and humidity, you can set yourself up for success in indoor seed starting.
The benefits of starting vegetable seeds indoors are numerous. You have the opportunity to enjoy an extended growing season, explore a wider variety of vegetable varieties, save money, and take control of your gardening journey from the very beginning. By starting seeds indoors, you can witness the miraculous transformation of tiny seeds into thriving plants, fostering a deep sense of satisfaction and connection to your garden.
However, indoor seed starting is not without its challenges. Poor germination, leggy seedlings, damping-off, and transplant shock can be common obstacles. The key to overcoming these challenges lies in troubleshooting techniques such as using high-quality seeds, maintaining optimal environmental conditions, providing sufficient light and ventilation, and implementing proper hardening off procedures.
Remember to monitor your seedlings regularly, adjusting watering and lighting as needed, and providing support and protection when necessary. Through careful attention and care, you can ensure the healthy growth and development of your seedlings, setting the stage for a successful transplanting process and a productive garden season.
As you embark on your indoor seed starting journey, keep in mind the joy and fulfillment that come with nurturing plants from tiny seeds to flourishing crops. Embrace the experiments, learn from any setbacks, and celebrate every achievement along the way.
So, whether you’re a seasoned gardener or new to the world of indoor seed starting, armed with the knowledge and tips provided in this article, you can confidently embark on this exciting and rewarding process. Happy seed starting, and may your garden be bountiful with the fruits of your labor!
Frequently Asked Questions about When Should You Start Vegetable Seeds Indoors
Was this page helpful?
At Storables.com, we guarantee accurate and reliable information. Our content, validated by Expert Board Contributors, is crafted following stringent Editorial Policies. We're committed to providing you with well-researched, expert-backed insights for all your informational needs.
0 thoughts on “When Should You Start Vegetable Seeds Indoors”