Home>Gardening & Outdoor>Garden Tools & Equipment>How To Replace A Lawnmower Blade
Garden Tools & Equipment
How To Replace A Lawnmower Blade
Modified: February 18, 2024
Learn how to replace a lawnmower blade with our step-by-step guide. Keep your garden tools and equipment in top condition with our expert tips.
(Many of the links in this article redirect to a specific reviewed product. Your purchase of these products through affiliate links helps to generate commission for Storables.com, at no extra cost. Learn more)
Introduction
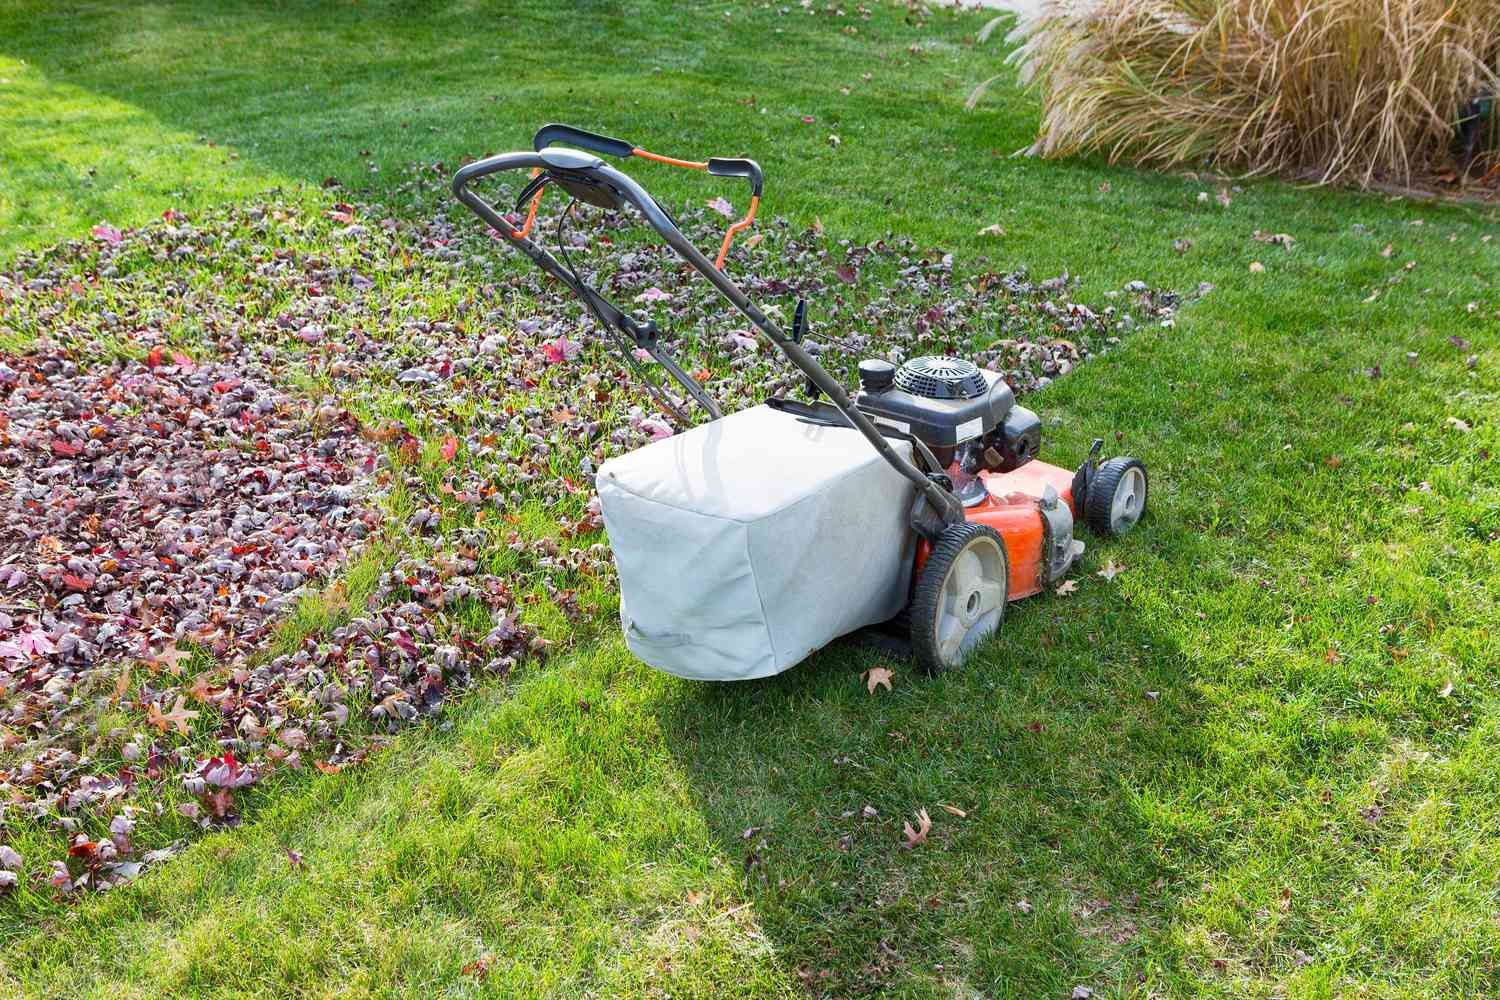
Maintaining a lush, healthy lawn requires regular care and attention, and one essential aspect of lawn maintenance is ensuring that your lawnmower is in optimal condition. A crucial component of a lawnmower is its blade, which can become dull or damaged over time, leading to an inefficient cutting process and an unkempt lawn. Fortunately, replacing a lawnmower blade is a relatively straightforward task that can be accomplished with the right tools and a systematic approach.
In this comprehensive guide, we will walk you through the step-by-step process of replacing a lawnmower blade, providing valuable insights and practical tips to help you tackle this essential maintenance task with confidence. Whether you are a seasoned DIY enthusiast or a novice homeowner looking to expand your maintenance skills, this guide will equip you with the knowledge and expertise needed to keep your lawnmower in peak condition.
Before delving into the blade replacement process, it is crucial to prioritize safety and gather the necessary tools and materials. By adhering to safety precautions and ensuring that you have the required equipment at your disposal, you can approach the task methodically and minimize the risk of accidents or errors. With a focus on safety and efficiency, let's embark on this journey to rejuvenate your lawnmower and elevate the appearance of your outdoor sanctuary.
Key Takeaways:
- Replacing a lawnmower blade is a straightforward task that requires safety precautions, the right tools, and meticulous preparation to ensure optimal cutting performance and a well-maintained lawn.
- Prioritizing safety, precision, and attention to detail throughout the blade replacement process equips you with the knowledge and expertise needed to revitalize your lawnmower and elevate the appearance of your outdoor sanctuary.
Read more: How To Balance A Lawnmower Blade
Safety Precautions
Prior to commencing any maintenance task, including the replacement of a lawnmower blade, it is imperative to prioritize safety to prevent potential injuries and mishaps. By adhering to the following safety precautions, you can create a secure working environment and approach the task with confidence:
- Power Off: Before initiating any work on the lawnmower, ensure that the engine is turned off and that the spark plug wire is disconnected to prevent accidental starts.
- Stabilize the Mower: Place the lawnmower on a level, stable surface to maintain balance and prevent accidental tipping during the blade replacement process.
- Protective Gear: Wear appropriate protective gear, including work gloves and safety goggles, to shield your hands and eyes from potential debris and sharp edges.
- Cool Down Period: If the lawnmower has been recently used, allow it to cool down to prevent burns from hot components.
- Secure the Blade: Use a block of wood or a blade removal tool to stabilize the blade during removal and installation to avoid potential injuries from accidental movements.
- Proper Handling: Handle the blade with caution, as it may be sharp and can cause cuts or lacerations if mishandled.
- Inspect the Blade: Before installation, carefully inspect the new blade for any defects or damage to ensure optimal performance and safety during operation.
By adhering to these safety precautions and exercising vigilance throughout the blade replacement process, you can mitigate potential risks and create a secure working environment. Prioritizing safety not only safeguards your well-being but also contributes to a smooth and successful blade replacement experience, allowing you to enjoy a pristine lawn with peace of mind.
Tools and Materials
Before embarking on the lawnmower blade replacement process, it is essential to gather the necessary tools and materials to ensure a seamless and efficient experience. By assembling the following items, you can approach the task with confidence and tackle each step effectively:
Tools:
- Socket Wrench: A socket wrench is indispensable for loosening and tightening the blade bolt with precision and ease.
- Work Gloves: Durable work gloves provide protection and enhance grip when handling the blade and operating tools.
- Safety Goggles: Safety goggles shield your eyes from debris and potential hazards during the blade replacement process.
- Wood Block or Blade Removal Tool: A wood block or specialized blade removal tool is essential for stabilizing the blade during removal and installation, minimizing the risk of accidents.
- Torque Wrench (optional): A torque wrench can be utilized to achieve precise torque specifications when securing the blade bolt, ensuring optimal blade performance.
- Jack or Lift (if required): Depending on the lawnmower model, a jack or lift may be necessary to elevate the lawnmower for convenient access to the blade.
Materials:
- New Lawnmower Blade: Acquire a compatible replacement blade suitable for your lawnmower model to ensure efficient cutting performance.
- Clean Cloth: A clean cloth or rag is beneficial for wiping any debris or residue from the blade mounting area and surrounding components.
- Penetrating Oil (if needed): In cases where the blade bolt is stubborn or corroded, penetrating oil can aid in loosening the bolt for removal.
- Owner’s Manual: The lawnmower’s owner’s manual provides valuable insights into specific blade replacement procedures and torque specifications, serving as a valuable reference throughout the process.
By ensuring that you have the requisite tools and materials at your disposal, you can streamline the blade replacement process and navigate each step with confidence and efficiency. With a focus on preparation and attention to detail, you are well-equipped to embark on this maintenance endeavor and revitalize your lawnmower’s cutting prowess.
Read more: How To Fix A Bent Lawnmower Blade
Step 1: Preparation
Prior to initiating the lawnmower blade replacement, it is essential to lay the groundwork by preparing the work area and accessing the necessary resources. By following these preparatory steps, you can set the stage for a smooth and effective blade replacement process:
1.1 Clear the Work Area:
Choose a well-lit and spacious area to perform the blade replacement, ensuring ample room to maneuver and access the lawnmower from various angles. Clear any debris, obstacles, or potential tripping hazards from the vicinity to create a safe and unobstructed workspace.
1.2 Review the Owner’s Manual:
Refer to the lawnmower’s owner’s manual to familiarize yourself with the specific blade replacement procedure recommended by the manufacturer. Take note of any model-specific instructions, torque specifications, and safety guidelines outlined in the manual to ensure adherence to the manufacturer’s recommendations.
1.3 Gather Tools and Materials:
Assemble the required tools and materials, including a socket wrench, work gloves, safety goggles, a wood block or blade removal tool, and the new lawnmower blade. Verify that you have all the necessary items at your disposal to facilitate a seamless blade replacement process.
Read more: Where To Get Lawnmower Blades Sharpened
1.4 Elevate the Mower (if applicable):
If your lawnmower model necessitates elevation for blade access, utilize a jack or lift to raise the mower, ensuring stability and secure positioning. This step is crucial for creating convenient access to the blade and simplifying the removal and installation process.
1.5 Inspect the Blade Area:
Visually inspect the blade mounting area and surrounding components for any signs of damage, corrosion, or excessive debris accumulation. Wipe the area clean using a cloth to remove any dirt or grass clippings, enhancing visibility and facilitating smooth blade removal and installation.
By meticulously preparing the work area, familiarizing yourself with the manufacturer’s guidelines, and gathering the essential tools and materials, you can lay a solid foundation for the upcoming blade replacement endeavor. With these preparatory steps completed, you are poised to progress to the next phase of the process with confidence and precision.
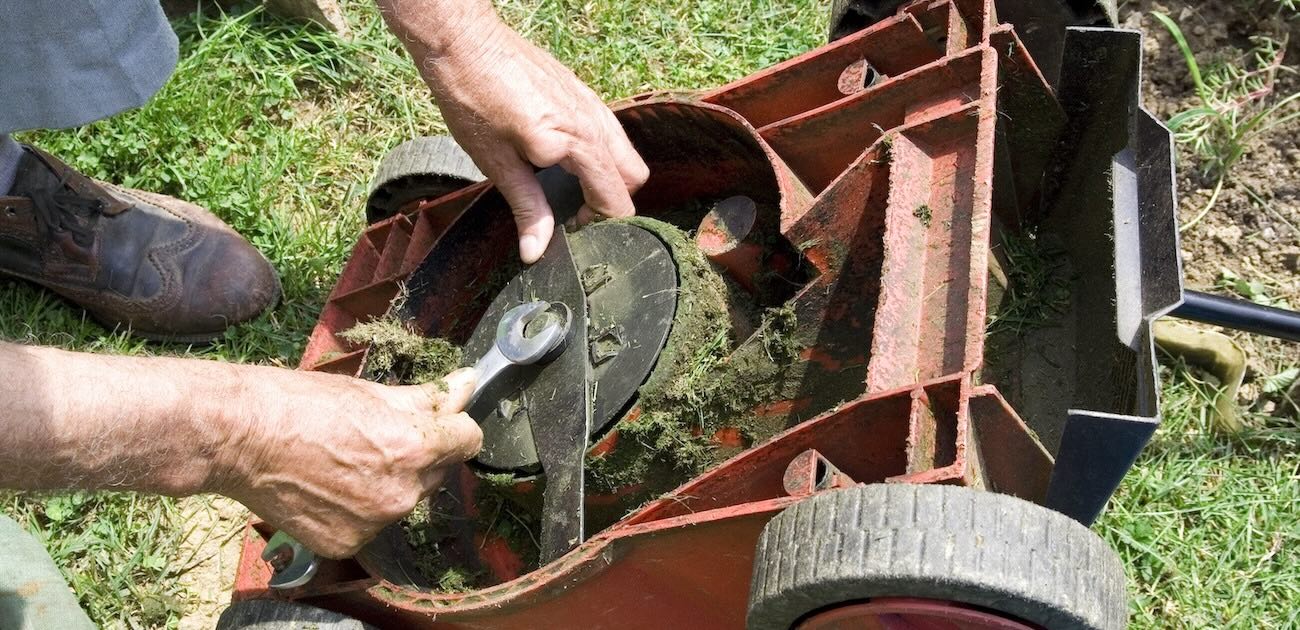
Step 2: Remove the Old Blade
With the groundwork laid and the necessary tools at your disposal, it’s time to embark on the pivotal phase of removing the old lawnmower blade. By following these systematic steps, you can execute the blade removal process with precision and efficiency:
2.1 Secure the Blade:
Prior to initiating the removal process, stabilize the lawnmower blade using a wood block or a specialized blade removal tool. This precautionary measure prevents the blade from rotating during bolt removal and minimizes the risk of accidental injuries.
Read more: Which Way Does A Lawnmower Blade Go On
2.2 Loosen the Blade Bolt:
Position the socket wrench on the blade bolt, ensuring a secure fit, and proceed to loosen the bolt by turning it counterclockwise. Apply steady and controlled force to break the bolt’s resistance, taking care to maintain stability and prevent the wrench from slipping.
2.3 Remove the Blade Bolt and Blade:
Once the blade bolt is sufficiently loosened, carefully detach the bolt, followed by the old lawnmower blade. Exercise caution when handling the blade to avoid accidental cuts or injuries, and place the old blade in a safe location away from the work area.
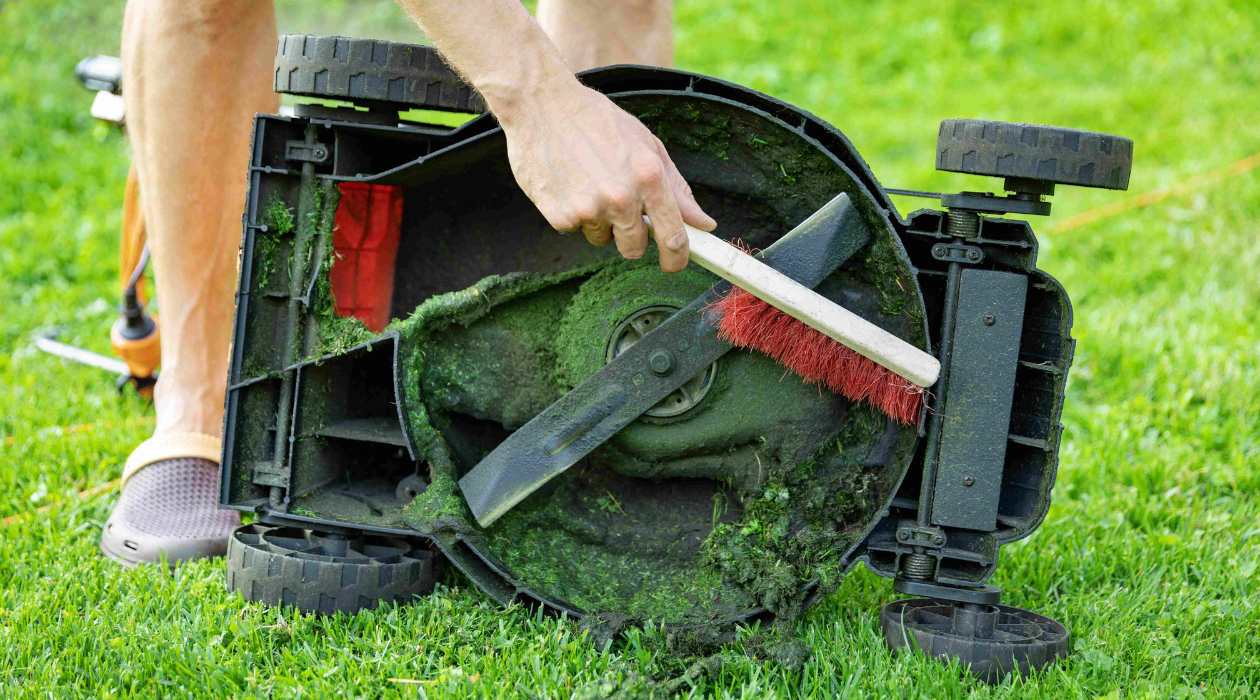
2.4 Inspect the Blade Mounting Area:
With the old blade removed, take a moment to inspect the blade mounting area for any accumulated debris, grass clippings, or signs of wear. Thoroughly clean the mounting area using a cloth to ensure a pristine surface for the installation of the new blade.
2.5 Verify Blade Compatibility:
Prior to installing the new blade, confirm that it is compatible with your lawnmower model and aligns with the manufacturer’s specifications. Compare the new blade with the old blade to ensure that they share identical dimensions and mounting hole configurations, verifying a seamless fit.
By meticulously following these steps, you can successfully remove the old lawnmower blade, prepare the mounting area for the installation of the new blade, and verify the compatibility of the replacement component. With the old blade safely removed, you are now ready to transition to the next phase of the blade replacement process with confidence and purpose.
Read more: How Fast Do Lawnmower Blades Spin
Step 3: Install the New Blade
As you transition to the installation phase of the blade replacement process, meticulous attention to detail and precision is paramount. By methodically executing the following steps, you can seamlessly install the new lawnmower blade, ensuring optimal performance and safety:
3.1 Position the New Blade:
Carefully align the new lawnmower blade with the mounting area, ensuring that the blade’s orientation and positioning correspond to the manufacturer’s specifications and the configuration of the mounting hole. Take care to position the blade correctly to facilitate a secure and accurate installation.
3.2 Secure the Blade Bolt:
Insert the blade bolt through the center hole of the new blade, aligning it with the corresponding mounting hole in the lawnmower’s deck. Utilize the socket wrench to tighten the blade bolt in a clockwise direction, applying controlled force to secure the new blade in place.
3.3 Torque the Blade Bolt (if applicable):
If your lawnmower’s manufacturer specifies a torque value for the blade bolt, utilize a torque wrench to achieve the recommended torque setting. This precision ensures optimal blade retention and operational safety, adhering to the manufacturer’s guidelines for blade installation.
Read more: How To Replace The Pull Rope On A Lawnmower
3.4 Verify Blade Stability:
After securing the new blade, inspect the mounting area to confirm the stability and alignment of the blade. Ensure that the blade sits flush against the mounting surface and that the blade bolt is securely fastened, minimizing the risk of blade misalignment during operation.
3.5 Lower the Mower (if applicable):
If you elevated the lawnmower for blade access, carefully lower the mower to its standard operating position, ensuring stability and balanced placement. This step facilitates a comprehensive assessment of the installed blade and prepares the mower for the final phase of the blade replacement process.
By meticulously executing these steps, you can effectively install the new lawnmower blade, adhere to manufacturer specifications, and verify the stability and alignment of the replacement component. With the new blade securely in place, you are prepared to advance to the concluding phase of reassembling the lawnmower and optimizing its cutting performance.
Step 4: Reassemble the Lawnmower
As the installation of the new lawnmower blade culminates, the final phase involves reassembling the lawnmower and preparing it for operational use. By meticulously following these essential steps, you can complete the blade replacement process and ensure that your lawnmower is primed for optimal cutting performance:
4.1 Reattach the Spark Plug Wire:
Prior to reassembling the lawnmower, reconnect the spark plug wire to restore power to the engine. This step ensures that the lawnmower is ready for operational testing and subsequent use following the blade replacement.
Read more: How To Replace Blade On Ryobi Circular Saw
4.2 Clear Debris and Obstructions:
Inspect the lawnmower’s deck and surrounding areas to remove any accumulated debris, grass clippings, or obstructions that may impede the cutting process or affect the lawnmower’s performance. A clean and unobstructed deck promotes efficient and uniform grass cutting.
4.3 Operational Test:
Start the lawnmower and allow it to run for a brief period, observing the performance of the newly installed blade. Listen for any unusual sounds or vibrations, and visually assess the cutting action to ensure that the blade operates smoothly and effectively.
4.4 Adjust Cutting Height (if needed):
If your lawnmower features adjustable cutting height settings, consider fine-tuning the cutting height to achieve your desired grass length. This adjustment allows you to customize the lawn’s appearance and optimize cutting efficiency based on your preferences.
4.5 Final Inspection:
Conduct a comprehensive visual inspection of the lawnmower, focusing on the blade area, deck, and key components to verify the integrity of the blade installation and the overall condition of the mower. Address any anomalies or concerns to ensure that the lawnmower is in optimal working condition.
By diligently reassembling the lawnmower, conducting operational testing, and fine-tuning cutting height settings, you can conclude the blade replacement process with confidence and meticulous attention to detail. With the lawnmower revitalized and prepared for future lawn maintenance tasks, you have successfully completed the essential endeavor of replacing the lawnmower blade, ensuring a well-maintained and vibrant lawn.
Read also: 10 Best Replacement Fan Blades for 2025
Conclusion
Embarking on the journey to replace a lawnmower blade is a testament to your commitment to maintaining a pristine and well-groomed lawn. By following the comprehensive steps outlined in this guide and prioritizing safety, meticulous preparation, and precision throughout the blade replacement process, you have fortified your lawnmower with a new blade, poised to deliver impeccable cutting performance.
From the initial stages of preparation, where safety precautions were diligently observed and the work area was meticulously arranged, to the pivotal moments of removing the old blade and installing the new one with precision and care, your dedication to the maintenance of your lawnmower has been unwavering. The attention to detail exhibited during the reassembly phase, including operational testing and fine-tuning of cutting height settings, underscores your commitment to optimizing the lawnmower’s functionality and ensuring a flawless cutting experience.
As you stand amidst the verdant expanse of your meticulously manicured lawn, the rhythmic hum of the lawnmower serving as a testament to your dedication, take pride in the knowledge that your lawnmower is now equipped to deliver exceptional cutting performance, contributing to the allure and vibrancy of your outdoor sanctuary.
With the blade replacement process successfully completed, you have not only revitalized your lawnmower but also honed your skills as a discerning and capable steward of your lawn. As the lawnmower effortlessly traverses the emerald terrain, effortlessly shearing the grass with precision and efficiency, revel in the satisfaction of knowing that your meticulous efforts have culminated in a lush and immaculate lawn.
As you savor the fruits of your labor, basking in the allure of your rejuvenated lawn, take pride in the knowledge that your lawnmower stands as a testament to your commitment to excellence and your unwavering dedication to nurturing the beauty of your outdoor oasis.
Frequently Asked Questions about How To Replace A Lawnmower Blade
Was this page helpful?
At Storables.com, we guarantee accurate and reliable information. Our content, validated by Expert Board Contributors, is crafted following stringent Editorial Policies. We're committed to providing you with well-researched, expert-backed insights for all your informational needs.


0 thoughts on “How To Replace A Lawnmower Blade”