Home>Gardening & Outdoor>Garden Tools & Equipment>Where To Get Lawnmower Blades Sharpened
Garden Tools & Equipment
Where To Get Lawnmower Blades Sharpened
Modified: March 21, 2024
Get professional lawnmower blade sharpening services for your garden tools and equipment. Find the best places and tips for maintaining sharp blades.
(Many of the links in this article redirect to a specific reviewed product. Your purchase of these products through affiliate links helps to generate commission for Storables.com, at no extra cost. Learn more)
Introduction
So, you've been diligently mowing your lawn, keeping it neat and tidy, but lately, you've noticed that the grass doesn't look as neatly trimmed as it used to. It might be time to take a closer look at your lawnmower blades. Over time, the blades on your lawnmower can become dull and ineffective, leading to an uneven cut and potentially damaging your lawn. In this article, we'll explore the importance of sharp lawnmower blades and discuss various methods for getting them sharpened.
Having sharp lawnmower blades is crucial for maintaining a healthy and attractive lawn. Dull blades can tear the grass instead of cleanly cutting it, leaving ragged edges that are more susceptible to disease and discoloration. Additionally, a dull blade puts extra stress on the lawnmower's engine, leading to increased fuel consumption and potential mechanical issues.
Regularly sharpening your lawnmower blades is essential for achieving a clean and professional-looking cut. Whether you're a homeowner or a professional landscaper, keeping your lawnmower blades sharp is a key aspect of lawn maintenance. In the following sections, we'll delve into the various methods for sharpening lawnmower blades, including do-it-yourself techniques, professional sharpening services, and online sharpening services. By the end of this article, you'll have a clear understanding of the options available for ensuring that your lawnmower blades are in top condition.
Key Takeaways:
- Keep your lawnmower blades sharp to maintain a healthy, attractive lawn. Dull blades can damage grass and strain the lawnmower’s engine, while sharp blades promote efficient mowing and a professional-looking cut.
- Consider DIY sharpening, professional services, or online options to keep your lawnmower blades sharp. Each method offers unique benefits, from hands-on maintenance to expert precision and modern convenience.
Read more: How To Replace A Lawnmower Blade
Why You Need Sharp Lawnmower Blades
Sharp lawnmower blades are essential for achieving a well-manicured lawn and ensuring the health of your grass. When lawnmower blades are sharp, they cleanly slice through the grass, promoting healthy regrowth and reducing the risk of lawn diseases. Here are some key reasons why maintaining sharp lawnmower blades is crucial:
- Quality of Cut: Sharp blades result in a clean, precise cut, leaving your lawn looking professionally maintained. Dull blades, on the other hand, can tear the grass, leading to an uneven and unkempt appearance.
- Grass Health: Clean cuts from sharp blades promote the overall health of the grass. Ragged edges from dull blades create entry points for pests and diseases, potentially harming the grass and hindering its growth.
- Lawn Aesthetics: A well-maintained lawn enhances the overall aesthetics of your property. Sharp lawnmower blades contribute to a neat and uniform appearance, boosting your curb appeal.
- Lawnmower Performance: Dull blades can strain the lawnmower's engine, leading to reduced efficiency and increased fuel consumption. By keeping the blades sharp, you can optimize the performance of your lawnmower.
- Time and Effort: With sharp blades, you can complete the mowing process more efficiently. Dull blades may require multiple passes to achieve a satisfactory cut, consuming more time and effort.
Whether you're a homeowner who takes pride in a well-groomed lawn or a professional landscaper aiming to deliver top-notch results for clients, the condition of your lawnmower blades directly impacts the quality of the cut and the overall health of the grass. In the following sections, we'll explore different methods for sharpening lawnmower blades, empowering you to maintain a sharp and effective cutting edge for your lawn maintenance needs.
DIY Sharpening Methods
Sharpening your lawnmower blades at home can be a cost-effective and convenient option, especially if you enjoy hands-on maintenance tasks. Here are some DIY methods for sharpening lawnmower blades:
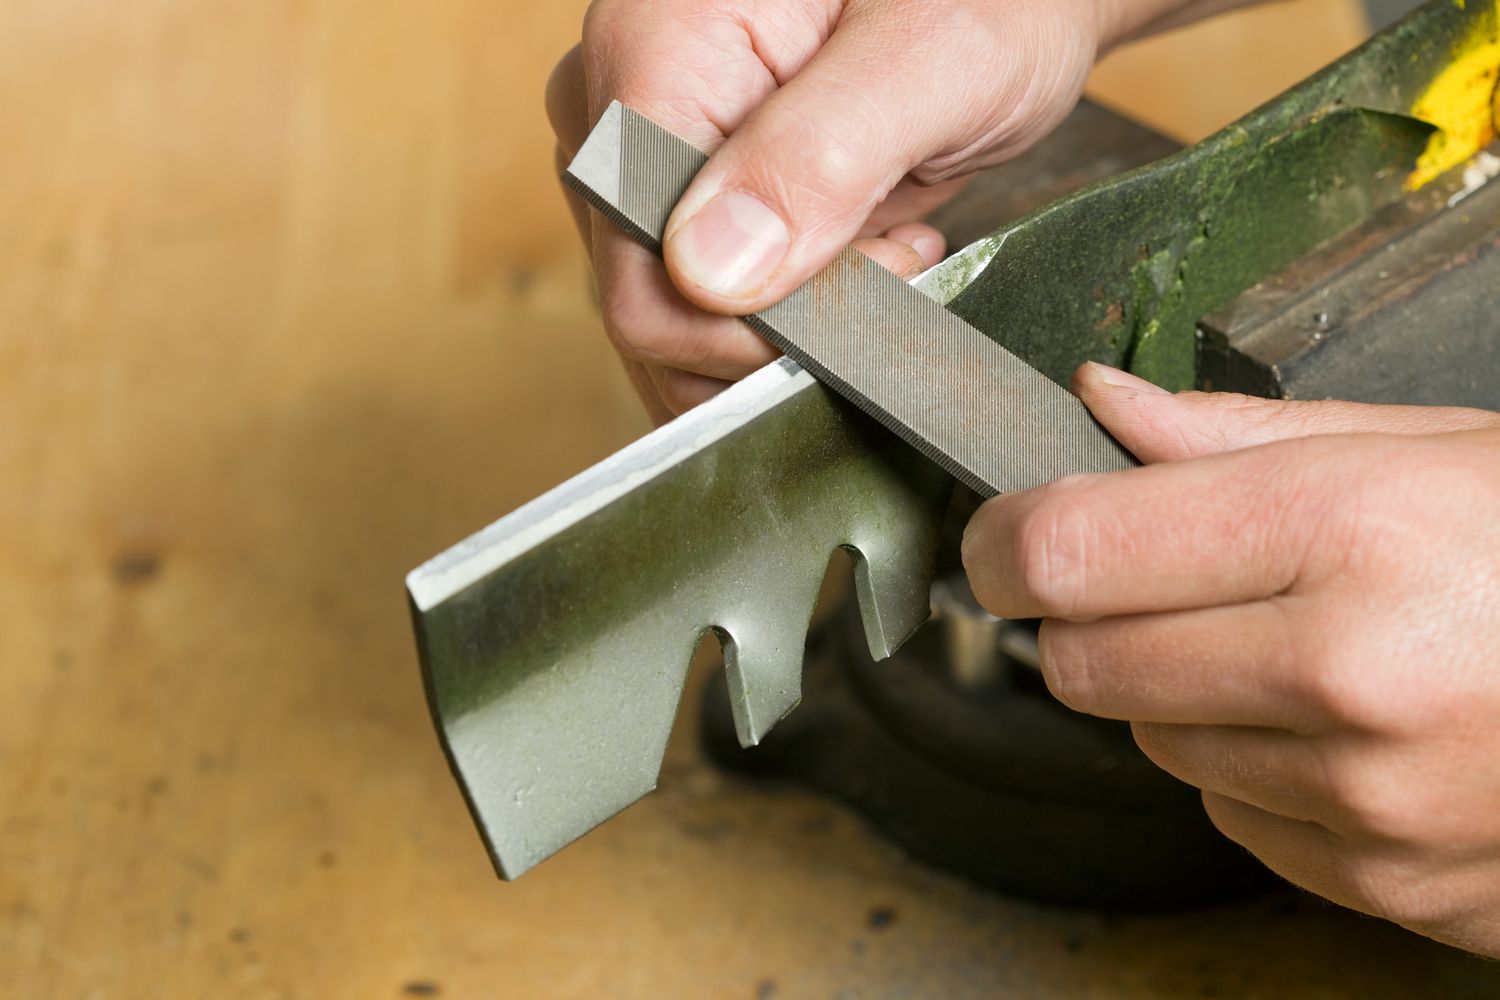
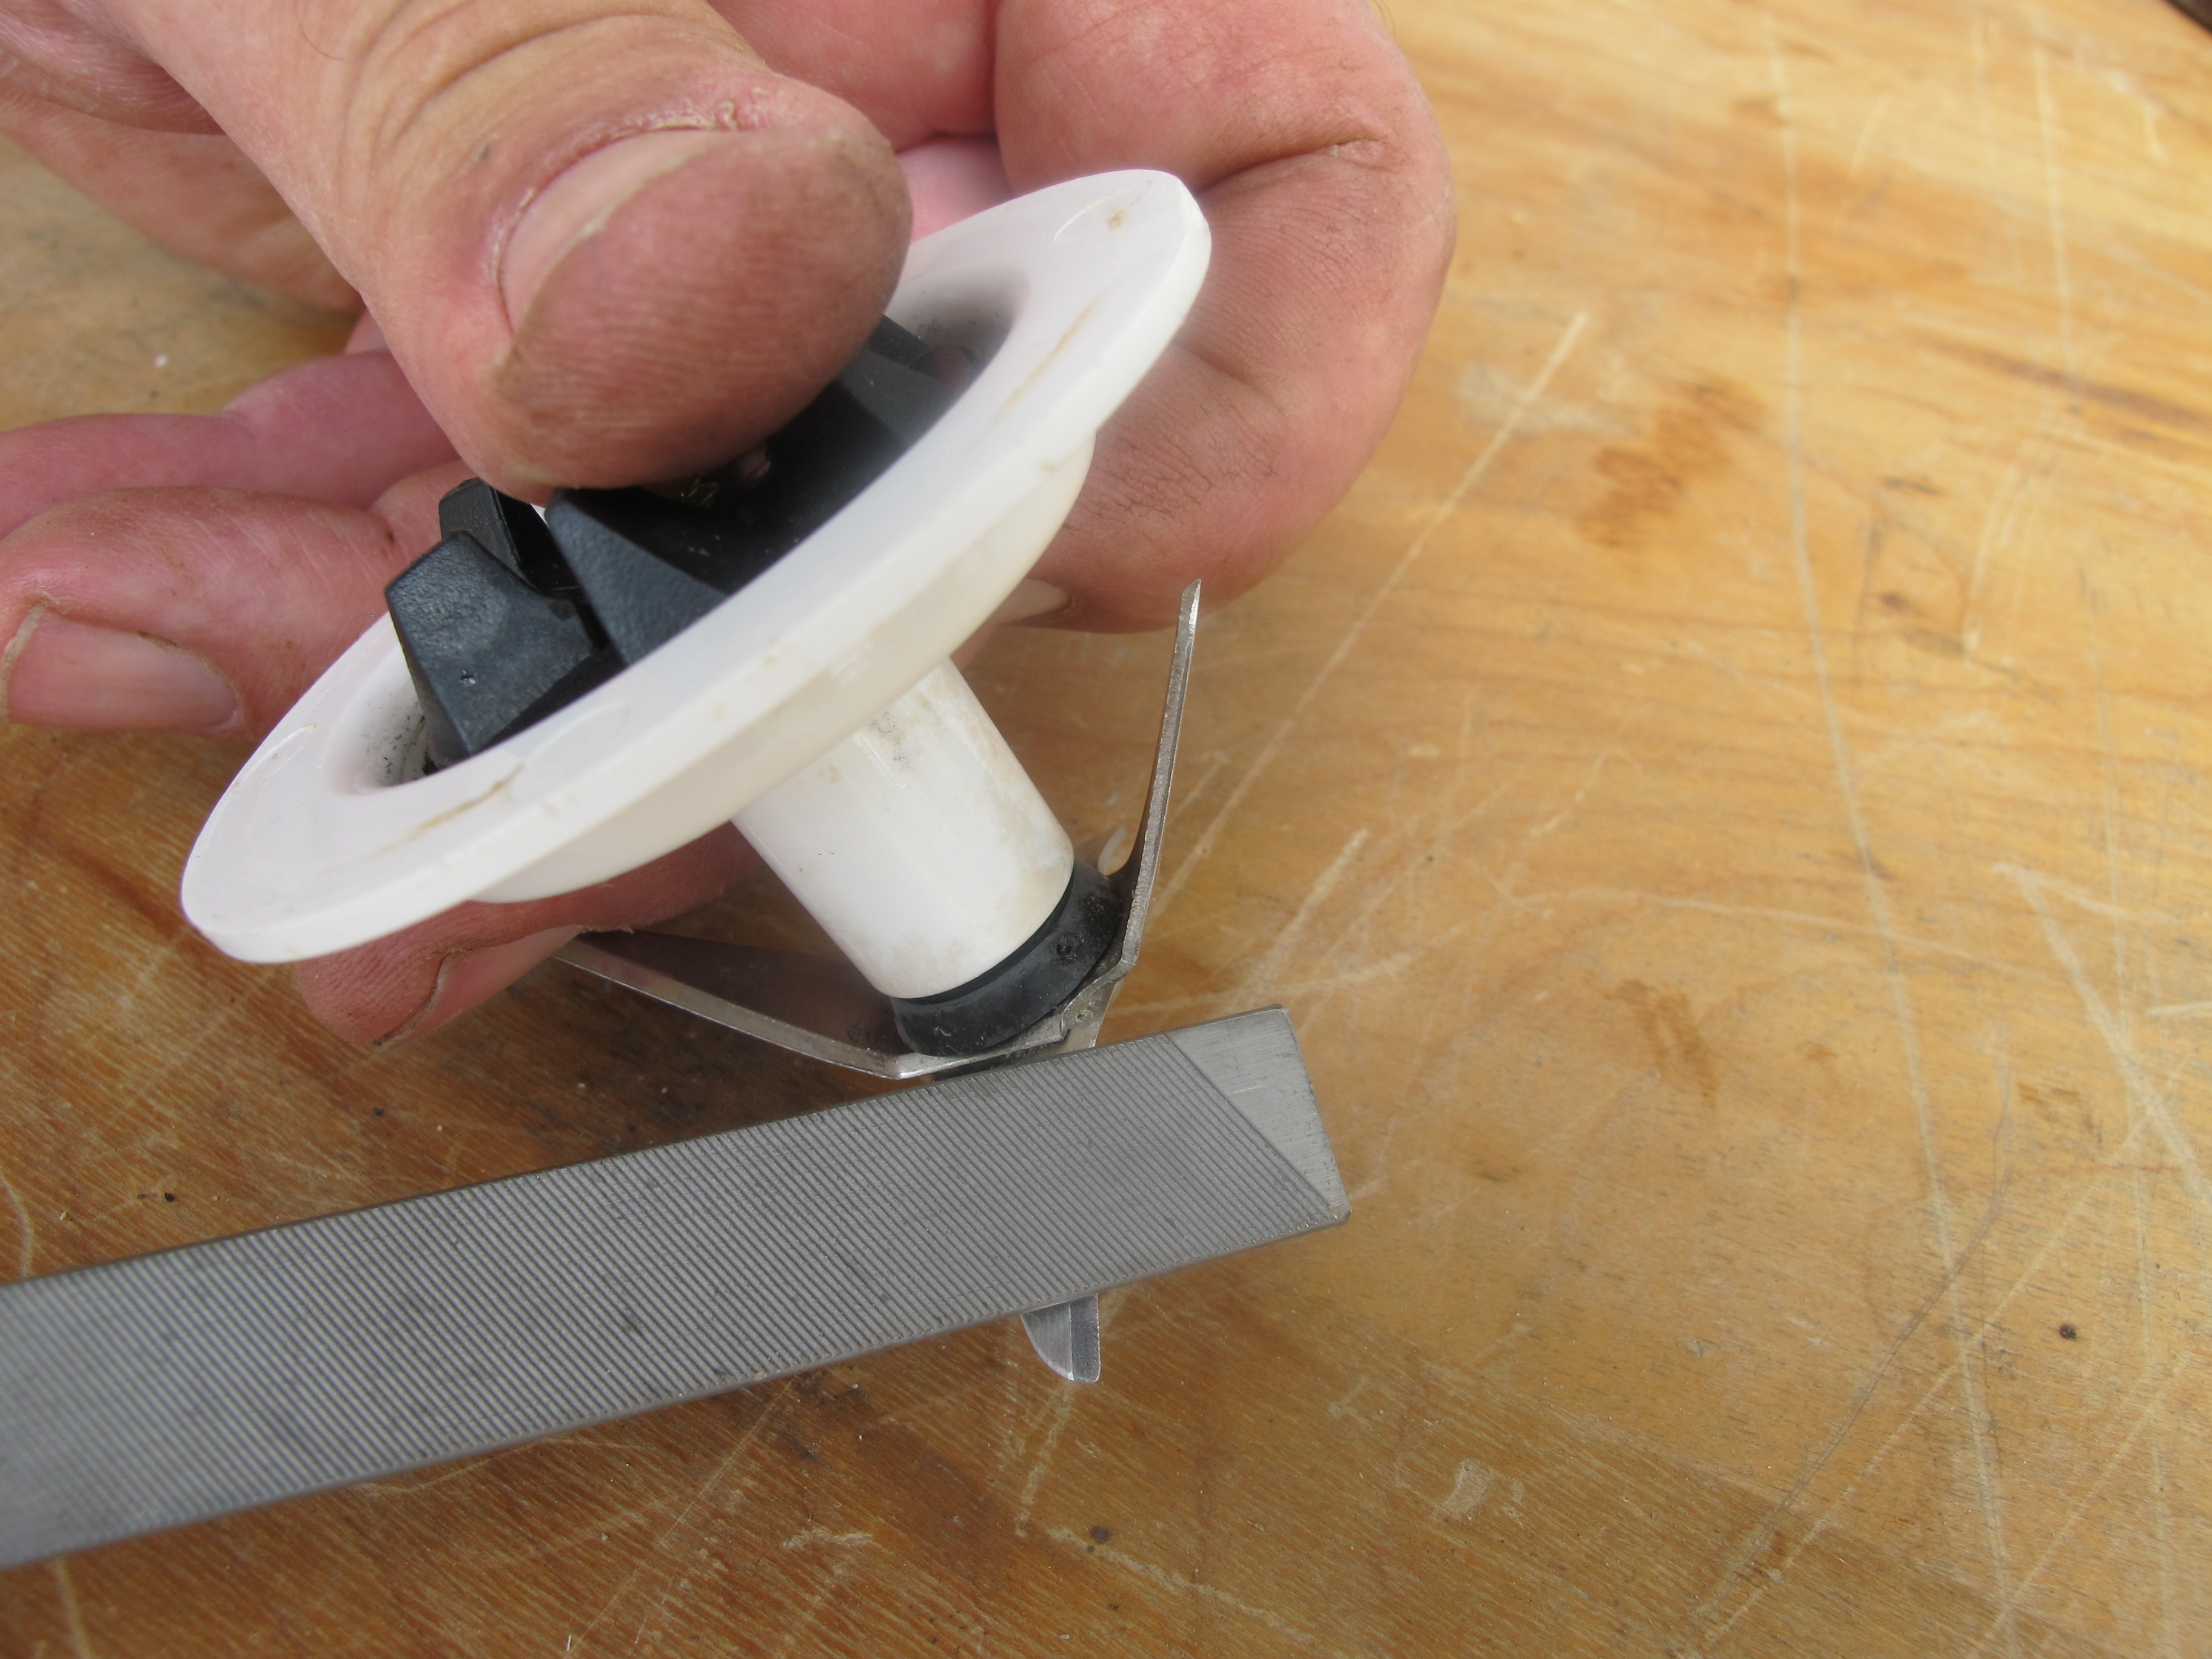
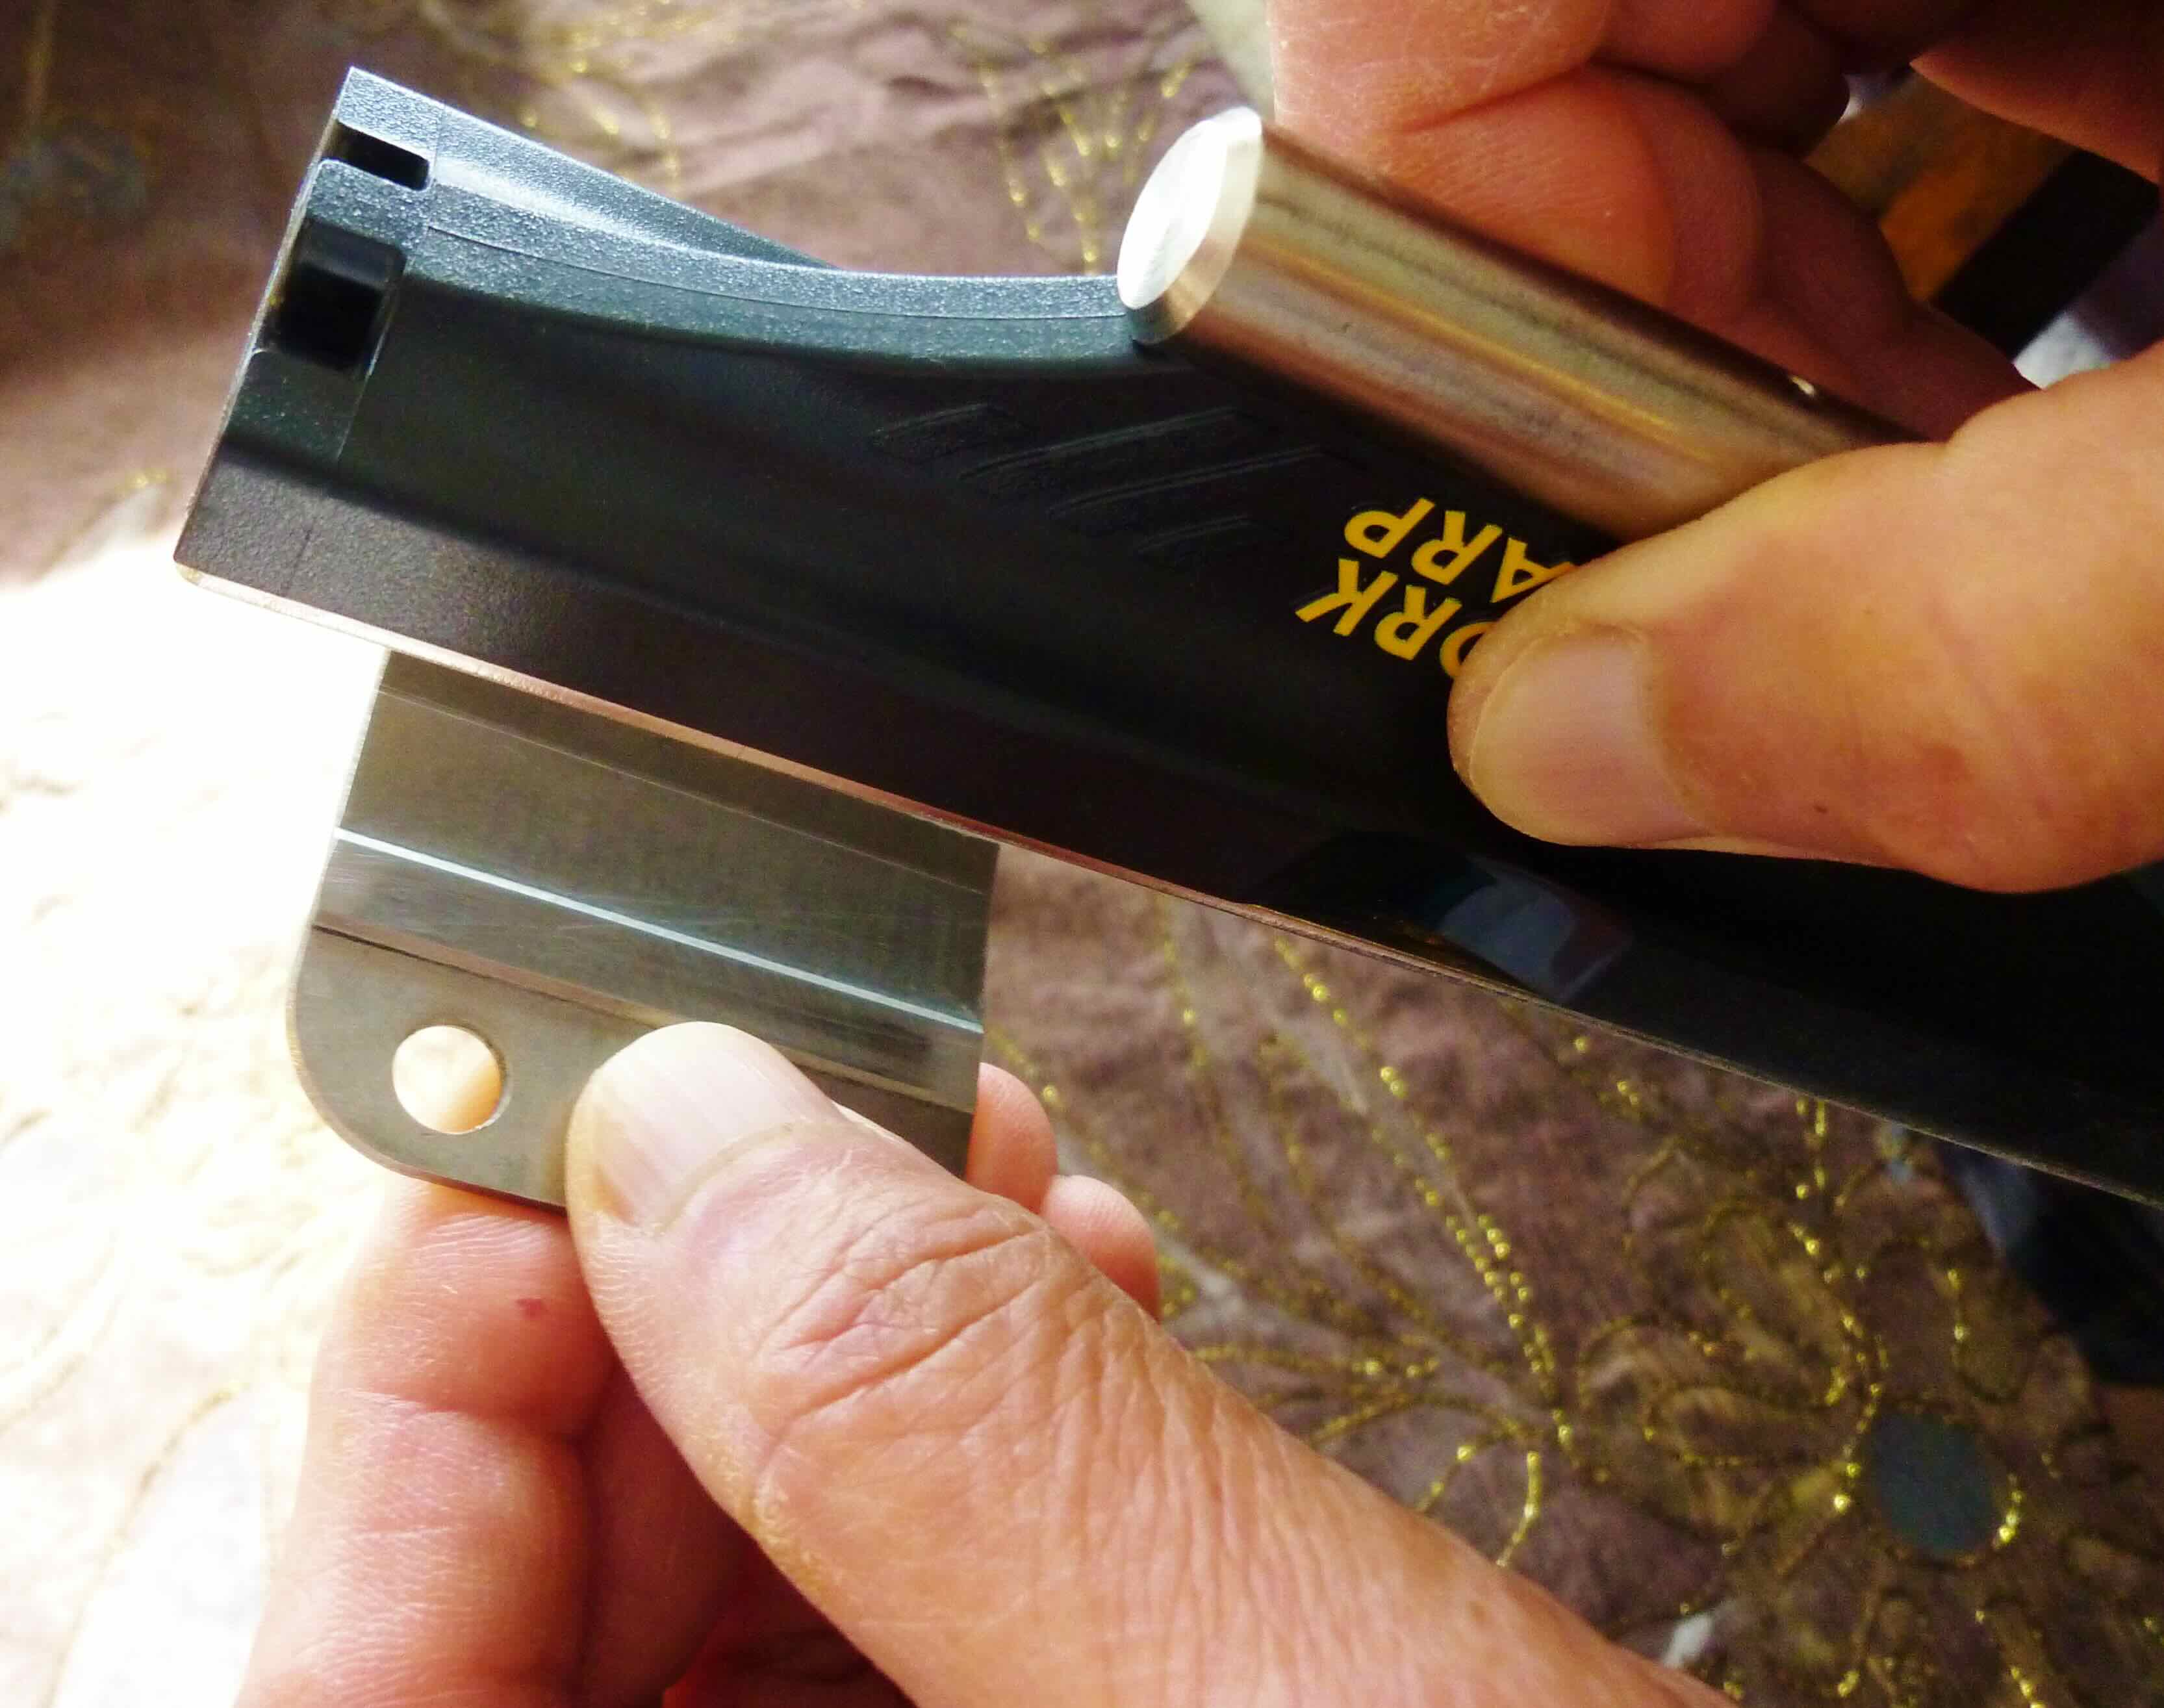
- Using a File: One of the most traditional methods for sharpening lawnmower blades is using a metal file. Secure the blade in a vise to keep it steady, and then use a file to sharpen the cutting edge, following the original angle of the blade. This method requires patience and precision but can be highly effective when done correctly.
- Using a Bench Grinder: A bench grinder can also be used to sharpen lawnmower blades. Carefully run the blade against the grinder wheel, ensuring that you maintain a consistent angle and avoid overheating the blade. It's important to frequently quench the blade in water to prevent it from losing its temper.
- Blade Balancer: After sharpening the blade, it's crucial to ensure that it is properly balanced. A blade balancer can help you determine if the blade is balanced, which is essential for smooth and efficient operation of the lawnmower.
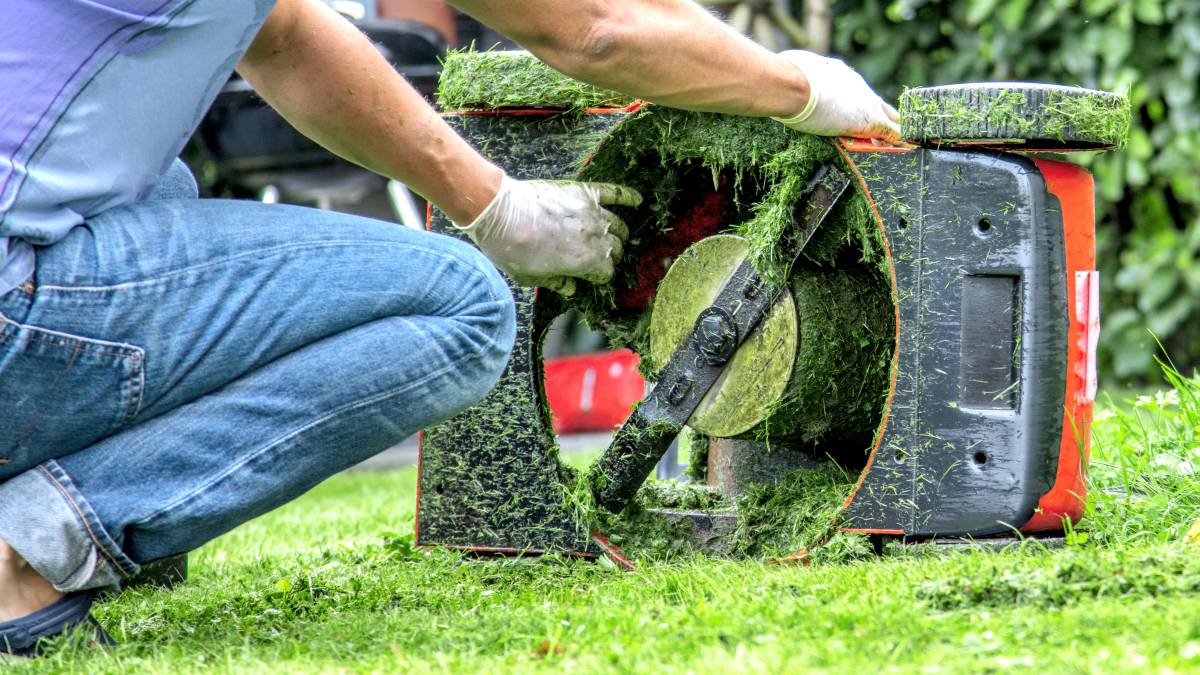
- Checking for Damage: While sharpening the blade, it's also important to inspect it for any signs of damage, such as cracks or significant wear. If the blade is damaged, it may need to be replaced to ensure safe and effective mowing.
- Personal Protective Equipment: When sharpening lawnmower blades, always prioritize safety. Wear protective gloves and eye goggles to prevent any potential injuries from sharp edges or debris.
DIY sharpening methods can be rewarding for those who enjoy hands-on maintenance tasks and have the necessary tools and equipment. However, it's important to approach the process with caution and attention to detail to ensure that the blades are sharpened effectively and safely. In the next sections, we'll explore professional sharpening services and online options for those who prefer to entrust the task to experienced professionals or seek the convenience of online sharpening services.
Many hardware stores and lawn equipment shops offer lawnmower blade sharpening services. Check with your local stores to see if they provide this service.
Professional Sharpening Services
For those who prefer to entrust the sharpening of their lawnmower blades to experienced professionals, professional sharpening services offer a convenient and reliable solution. These services are often provided by hardware stores, garden centers, and specialized blade sharpening businesses. Here are the key benefits of utilizing professional sharpening services:
- Expertise and Precision: Professional sharpening services employ skilled technicians who have the expertise to sharpen lawnmower blades with precision. They understand the specific angles and techniques required to achieve optimal cutting performance.
- Specialized Equipment: Professional sharpening services utilize specialized equipment designed for sharpening lawnmower blades, ensuring a consistent and effective sharpening process.
- Time Savings: Utilizing professional services saves time and effort, as the sharpening process is handled by experienced professionals, allowing you to focus on other aspects of lawn maintenance.
- Blade Inspection: In addition to sharpening the blades, professional services often include a thorough inspection to identify any damage or wear that may require further attention or blade replacement.
- Convenience: Many professional sharpening services offer quick turnaround times, allowing you to get your sharpened blades back promptly, ready for immediate use.
When opting for professional sharpening services, it’s important to choose a reputable provider with a track record of delivering high-quality results. By entrusting your lawnmower blades to professionals, you can ensure that they are sharpened to the highest standard, promoting optimal cutting performance and the overall health of your lawn. In the following section, we’ll explore the option of online sharpening services, providing a convenient alternative for those seeking efficient and hassle-free blade sharpening solutions.
Online Sharpening Services
In today’s digital age, online sharpening services offer a convenient and efficient solution for individuals and businesses seeking professional blade sharpening without the need for in-person visits to traditional brick-and-mortar establishments. Here are the key aspects and benefits of utilizing online sharpening services for lawnmower blades:
- Convenience and Accessibility: Online sharpening services provide the convenience of submitting blade sharpening orders from the comfort of your home or business location, eliminating the need for physical visits to a sharpening facility.
- Shipping Options: Many online sharpening services offer convenient shipping options, allowing you to send your lawnmower blades for sharpening without the hassle of arranging in-person drop-offs.
- Professional Expertise: Reputable online sharpening services are staffed by skilled professionals who possess the expertise and specialized equipment necessary to sharpen lawnmower blades to the highest standard.
- Quick Turnaround: Online services often feature efficient turnaround times, ensuring that your sharpened blades are promptly returned to you, minimizing downtime for your lawn maintenance activities.
- Quality Assurance: Trusted online sharpening services prioritize quality assurance, ensuring that your lawnmower blades are sharpened with precision and attention to detail, resulting in optimal cutting performance.
- Customized Solutions: Some online sharpening services offer customized solutions, accommodating specific blade types, sizes, and sharpening requirements, catering to a diverse range of lawnmower models and configurations.
By leveraging online sharpening services, individuals and businesses can benefit from a streamlined and accessible sharpening process, supported by professional expertise and a commitment to delivering top-quality results. Whether you’re a homeowner with a personal lawnmower or a professional landscaper managing a fleet of equipment, online sharpening services offer a modern and efficient approach to maintaining sharp and effective lawnmower blades. In the next section, we’ll summarize the key insights and options discussed in this article, providing a comprehensive overview of the available methods for ensuring that your lawnmower blades are consistently sharp and ready for optimal performance.
Read more: How To Sharpen Food Processor Blades
Conclusion
Maintaining sharp lawnmower blades is a fundamental aspect of effective lawn care and landscaping. Whether you’re a homeowner dedicated to nurturing a lush, well-groomed lawn or a professional landscaper striving to deliver impeccable results for clients, the condition of your lawnmower blades directly impacts the quality of the cut and the overall health of the grass. In this article, we’ve explored various methods for sharpening lawnmower blades, providing insights into DIY sharpening techniques, professional sharpening services, and the convenience of online sharpening solutions.
DIY sharpening methods offer a hands-on approach for individuals who enjoy maintenance tasks and have the necessary tools and expertise. From using a file to employing a bench grinder, DIY sharpening allows you to take an active role in maintaining the sharpness of your lawnmower blades. However, it’s essential to approach the process with caution and precision to ensure effective and safe results.
Professional sharpening services present a reliable option for those seeking expert precision and convenience. With skilled technicians, specialized equipment, and thorough blade inspections, professional services ensure that your lawnmower blades are sharpened to the highest standard, promoting optimal cutting performance and the overall health of your lawn.
Online sharpening services offer a modern and accessible solution, catering to the needs of individuals and businesses seeking efficient blade sharpening without the constraints of physical visits to traditional sharpening facilities. With convenient shipping options, professional expertise, and quick turnaround times, online sharpening services streamline the process of maintaining sharp and effective lawnmower blades, supporting a diverse range of lawnmower models and configurations.
Whether you choose to sharpen your lawnmower blades through DIY methods, professional services, or online solutions, the key objective is to ensure that your blades are consistently sharp, promoting a clean and precise cut while contributing to the overall health and aesthetics of your lawn. By understanding the available sharpening methods and selecting the approach that aligns with your preferences and requirements, you can maintain a well-groomed lawn and optimize the performance of your lawnmower with confidence and efficiency.
So, as you embark on the journey of maintaining a pristine lawn, remember that sharp lawnmower blades are the cornerstone of a beautifully manicured landscape, and the methods discussed in this article provide you with the tools and insights to uphold that standard with ease.
Frequently Asked Questions about Where To Get Lawnmower Blades Sharpened
Was this page helpful?
At Storables.com, we guarantee accurate and reliable information. Our content, validated by Expert Board Contributors, is crafted following stringent Editorial Policies. We're committed to providing you with well-researched, expert-backed insights for all your informational needs.


0 thoughts on “Where To Get Lawnmower Blades Sharpened”