Home>Gardening & Outdoor>Garden Tools & Equipment>How To Test Ignition Coil On A Leaf Blower
Garden Tools & Equipment
How To Test Ignition Coil On A Leaf Blower
Modified: October 21, 2024
Learn how to test the ignition coil on a leaf blower for optimal performance. Get expert tips and advice for maintaining your garden tools and equipment.
(Many of the links in this article redirect to a specific reviewed product. Your purchase of these products through affiliate links helps to generate commission for Storables.com, at no extra cost. Learn more)
Introduction
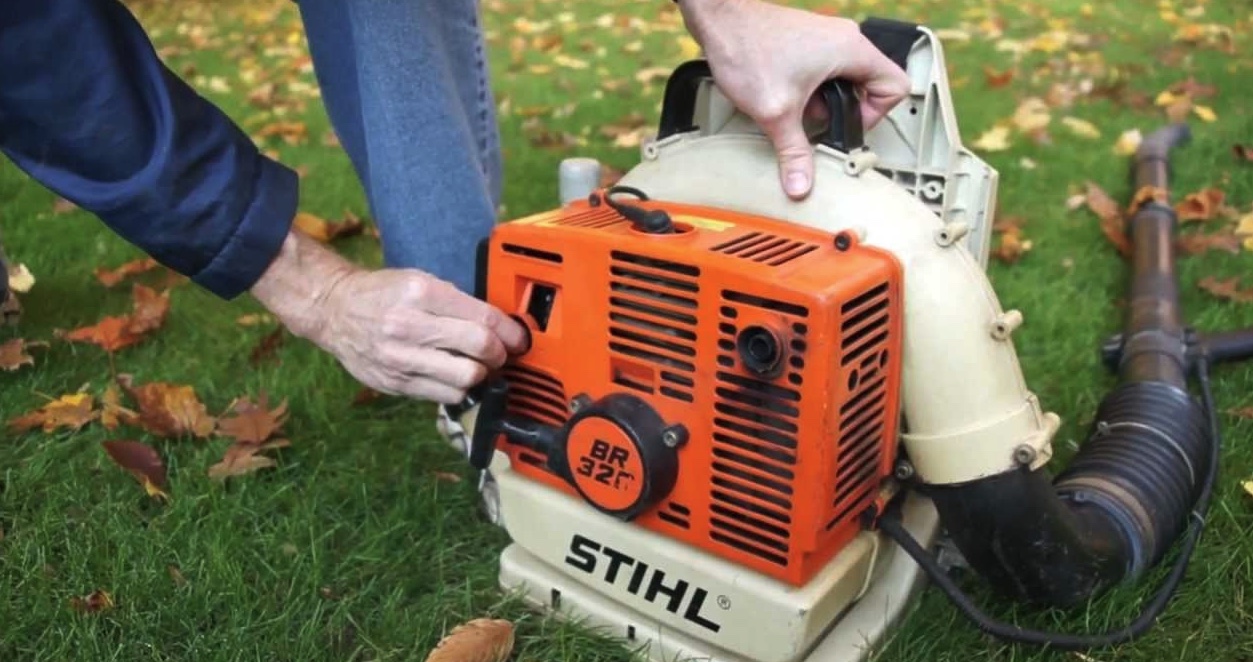
Welcome to the comprehensive guide on how to test the ignition coil on a leaf blower. A leaf blower's ignition coil is a vital component that plays a key role in the engine's performance. It generates the high voltage needed to ignite the air-fuel mixture in the engine's combustion chamber, ensuring smooth and efficient operation. However, over time, the ignition coil may experience wear and tear, leading to decreased performance or complete failure. Therefore, knowing how to test the ignition coil is essential for diagnosing and addressing potential issues.
In this guide, we will walk you through the process of testing the ignition coil on a leaf blower, providing step-by-step instructions and valuable insights. We will also discuss the tools and materials you will need for the testing procedure, as well as safety precautions to ensure a secure and risk-free testing environment. By understanding the ignition coil and learning how to effectively test it, you can troubleshoot potential problems and maintain your leaf blower in optimal working condition.
So, whether you are a seasoned professional or a DIY enthusiast, this guide will equip you with the knowledge and skills to confidently test the ignition coil on your leaf blower. Let's dive in and explore the intricacies of this essential component, empowering you to keep your leaf blower running smoothly and efficiently.
Key Takeaways:
- Safety First!
When testing the ignition coil on a leaf blower, prioritize safety by working in a well-ventilated area, wearing protective gear, and following manufacturer guidelines. This ensures a secure and risk-free testing environment. - Test with Confidence
Gather the necessary tools and materials, then follow the step-by-step instructions to test the ignition coil. By interpreting the results, you can maintain and troubleshoot your leaf blower’s ignition system with confidence.
Safety Precautions
Before embarking on the process of testing the ignition coil on your leaf blower, it is crucial to prioritize safety. Working with small engines and electrical components requires careful attention to prevent accidents and ensure a secure testing environment. Here are some essential safety precautions to keep in mind:
- Work in a well-ventilated area: Choose a spacious and well-ventilated workspace to conduct the ignition coil test. Adequate ventilation helps disperse any fumes or exhaust that may be present during the testing process.
- Wear protective gear: Prioritize personal safety by wearing appropriate protective gear, including safety goggles, gloves, and closed-toe shoes. These items provide essential protection against potential debris, sparks, and other hazards.
- Disconnect the spark plug: Before beginning the testing process, disconnect the spark plug wire from the spark plug to prevent accidental ignition while handling the ignition coil.
- Handle electrical components with care: Exercise caution when working with electrical components. Avoid touching exposed wires and ensure that all connections are secure to prevent electrical shocks.
- Use insulated tools: When handling the ignition coil and related components, use insulated tools to minimize the risk of electrical contact and potential shock hazards.
- Avoid flammable materials: Keep the testing area free of flammable materials, such as gasoline or other fuels, to prevent fire hazards during the ignition coil test.
- Follow manufacturer guidelines: Refer to the leaf blower’s user manual for specific safety instructions and guidelines related to testing the ignition coil. Adhering to manufacturer recommendations is essential for a safe and effective testing process.
By adhering to these safety precautions, you can create a secure and controlled environment for testing the ignition coil on your leaf blower. Prioritizing safety not only protects you from potential hazards but also ensures a smooth and focused testing experience, allowing you to accurately assess the condition of the ignition coil with confidence and peace of mind.
Understanding the Ignition Coil
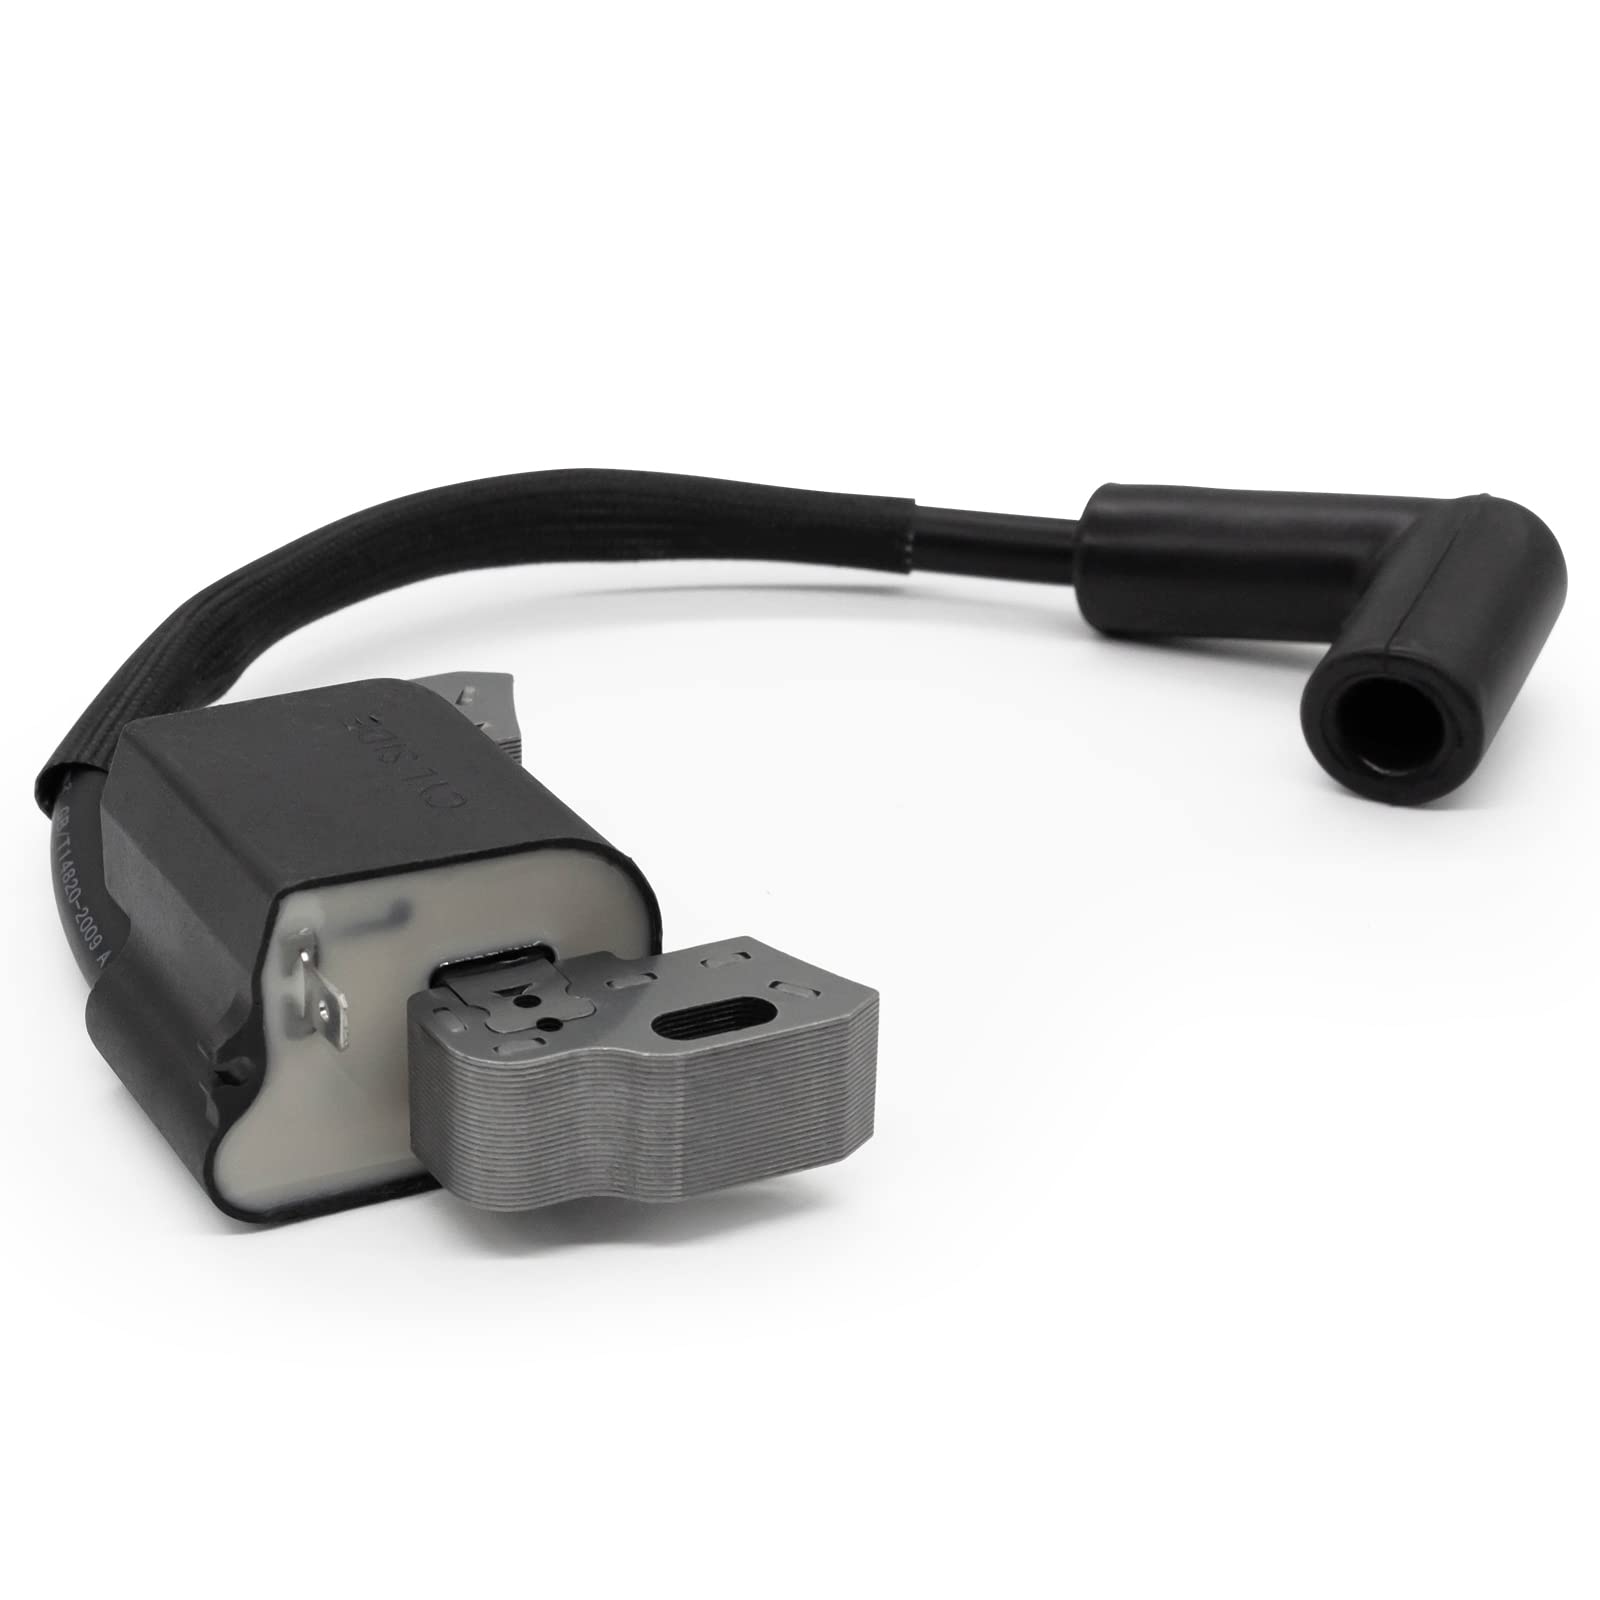
Before delving into the testing process, it’s essential to grasp the fundamental role of the ignition coil in the operation of a leaf blower. The ignition coil is a crucial component responsible for transforming low-voltage electricity from the battery into the high-voltage spark required to ignite the air-fuel mixture within the engine’s combustion chamber.
Typically, the ignition coil consists of two sets of wire coils – the primary and secondary windings. When the primary winding receives an electric current from the leaf blower’s battery, it generates a magnetic field. This magnetic field, in turn, induces a high-voltage current in the secondary winding, which is then transmitted to the spark plug, ultimately igniting the fuel and initiating the engine’s combustion cycle.
Understanding the ignition coil’s function is integral to diagnosing potential issues and conducting an effective test. A faulty ignition coil can lead to weak or inconsistent sparks, hindering the engine’s performance and overall functionality. By gaining insight into the ignition coil’s operation, you can better comprehend the significance of accurate testing and the impact of a well-maintained ignition system on the leaf blower’s performance.
Moreover, recognizing the symptoms of a failing ignition coil, such as difficulty starting the engine, rough idling, or reduced power output, can prompt timely testing and maintenance, preventing further damage and ensuring optimal leaf blower performance.
With a solid understanding of the ignition coil’s role and significance, you are well-equipped to proceed with the testing process, armed with the knowledge needed to assess the ignition coil’s condition and address any potential issues effectively.
Tools and Materials Needed
Before initiating the ignition coil testing process, it’s essential to gather the necessary tools and materials to ensure a smooth and efficient testing experience. Here’s a comprehensive list of the items you will need:
- Spark Plug Tester: A spark plug tester is a vital tool for assessing the ignition coil’s performance. It allows you to simulate the spark plug’s function, providing a clear indication of the ignition coil’s output.
- Socket Wrench Set: A socket wrench set is essential for accessing the spark plug and ignition coil, enabling you to remove and reinstall these components with ease.
- Insulated Pliers: Insulated pliers are crucial for handling electrical components safely. They provide a secure grip and minimize the risk of electrical shock during the testing process.
- Ohmmeter or Multimeter: An ohmmeter or multimeter is indispensable for measuring the resistance and continuity of the ignition coil’s primary and secondary windings. This tool provides valuable insights into the coil’s electrical properties.
- Manufacturer’s Manual: The leaf blower’s manufacturer manual contains specific instructions and guidelines for testing the ignition coil, making it an invaluable reference throughout the testing process.
- Safety Gear: Prioritize safety by wearing protective gear, including safety goggles, gloves, and closed-toe shoes, to safeguard against potential hazards during the testing procedure.
Additionally, it’s advisable to work in a well-lit and adequately ventilated area to facilitate a focused and secure testing environment. By ensuring that you have all the necessary tools and materials at your disposal, you can streamline the testing process and proceed with confidence, knowing that you are well-prepared to assess the condition of the ignition coil on your leaf blower.
To test the ignition coil on a leaf blower, use a multimeter to check for resistance between the spark plug wire and the coil’s metal armature. If the reading is outside the specified range, the ignition coil may need to be replaced.
Testing the Ignition Coil
Now that you have gathered the essential tools and materials, it’s time to embark on the process of testing the ignition coil on your leaf blower. Follow these step-by-step instructions to conduct a thorough and accurate assessment of the ignition coil’s performance:
- Disconnect the Spark Plug: Begin by disconnecting the spark plug wire from the spark plug to prevent accidental ignition during the testing process. This step is crucial for ensuring a safe and controlled testing environment.
- Locate the Ignition Coil: Identify the location of the ignition coil within the leaf blower’s engine compartment. Refer to the manufacturer’s manual if necessary to pinpoint the precise location of the ignition coil assembly.
- Inspect the Wiring: Thoroughly examine the wiring connected to the ignition coil for any signs of damage, wear, or corrosion. Ensure that the connections are secure and free of debris or obstruction.
- Use the Spark Plug Tester: Connect the spark plug tester to the spark plug wire and the spark plug. This device simulates the spark plug’s function, allowing you to assess the ignition coil’s output and the presence of a strong, consistent spark.
- Observe the Spark: With the spark plug tester in place, pull the starter cord or activate the leaf blower’s ignition system. Observe the spark plug tester for the presence of a bright, blue spark. A strong and consistent spark indicates that the ignition coil is functioning correctly.
- Measure Resistance: Using an ohmmeter or multimeter, measure the resistance of the ignition coil’s primary and secondary windings. Compare the measured values to the specifications outlined in the manufacturer’s manual to ensure that the coil’s electrical properties are within the recommended range.
- Interpret the Test Results: Based on the observations and measurements obtained during the testing process, assess the overall performance of the ignition coil. A strong spark, coupled with appropriate resistance values, indicates a healthy ignition coil, while weak or inconsistent sparks and abnormal resistance readings may signify a faulty coil in need of replacement.
By meticulously following these steps, you can effectively test the ignition coil on your leaf blower, gaining valuable insights into its condition and performance. The testing process empowers you to diagnose potential issues and take appropriate measures to ensure that the ignition system operates optimally, contributing to the leaf blower’s overall efficiency and reliability.
Read more: What Is A Leaf Blower
Interpreting the Test Results
Upon completing the testing process for the ignition coil on your leaf blower, it’s essential to interpret the test results to determine the overall condition and performance of the ignition coil. The observations and measurements obtained during the testing phase provide valuable insights that can guide your next steps. Here’s how to interpret the test results:
- Presence of a Strong, Consistent Spark: If the spark plug tester displayed a bright, blue spark during the testing process, it indicates that the ignition coil is generating a robust and consistent spark. This is a positive indication of the ignition coil’s functionality, suggesting that it is operating within the expected parameters.
- Abnormal or Weak Spark: In contrast, if the spark observed during testing was weak, inconsistent, or absent, it may signify an issue with the ignition coil. A weak spark can lead to engine misfires, difficulty starting the leaf blower, and overall performance issues, indicating that the ignition coil requires further inspection and potential replacement.
- Resistance Measurements: When measuring the resistance of the ignition coil’s primary and secondary windings, compare the obtained values to the manufacturer’s specified range. Deviations from the recommended resistance values may indicate electrical irregularities within the ignition coil, warranting further attention and potential corrective action.
- Consulting the Manufacturer’s Manual: Refer to the leaf blower’s manufacturer manual to cross-reference the observed test results with the specified performance criteria for the ignition coil. The manual provides valuable guidelines for interpreting the test results and determining whether the ignition coil meets the required standards for optimal operation.
- Next Steps: Based on the test results and their interpretation, consider the appropriate course of action. If the ignition coil demonstrates consistent and strong spark output, along with resistance values within the specified range, it is likely functioning correctly. However, if the test results indicate potential issues, such as weak sparks or abnormal resistance, consider seeking professional assistance or replacing the ignition coil to restore the leaf blower’s performance.
By carefully interpreting the test results, you can gain a comprehensive understanding of the ignition coil’s condition and performance, enabling you to make informed decisions regarding maintenance, repairs, or replacements. This proactive approach ensures that the leaf blower’s ignition system operates optimally, contributing to reliable and efficient performance during operation.
Conclusion
Congratulations! You have successfully navigated the process of testing the ignition coil on your leaf blower, gaining valuable insights into this critical component’s performance and condition. By following the step-by-step instructions and interpreting the test results, you have equipped yourself with the knowledge and skills needed to maintain and troubleshoot the ignition system, ensuring that your leaf blower operates at its best.
Understanding the fundamental role of the ignition coil and recognizing the significance of a strong, consistent spark are integral to maintaining optimal engine performance. Whether you observed a robust spark and within-spec resistance values or identified potential issues requiring further attention, your proactive approach to testing the ignition coil demonstrates a commitment to preserving the leaf blower’s reliability and efficiency.
Remember, regular maintenance and periodic testing of the ignition coil, along with other essential components, are key to prolonging the life of your leaf blower and preventing unexpected breakdowns. By prioritizing safety, staying attentive to performance indicators, and leveraging the insights gained from the testing process, you are well-positioned to uphold the leaf blower’s functionality and enjoy seamless operation during your outdoor maintenance tasks.
Should you encounter challenges or uncertainties during the testing process, don’t hesitate to consult the manufacturer’s manual or seek assistance from qualified professionals. Your dedication to thorough testing and interpretation of results reflects a proactive approach to equipment maintenance, ultimately contributing to a reliable and efficient leaf blower performance.
With your newfound knowledge and hands-on experience in testing the ignition coil, you are empowered to uphold the optimal functionality of your leaf blower, ensuring that it remains a dependable ally in maintaining your outdoor spaces with ease and efficiency.
Happy testing, and may your leaf blower continue to serve you well for years to come!
Frequently Asked Questions about How To Test Ignition Coil On A Leaf Blower
Was this page helpful?
At Storables.com, we guarantee accurate and reliable information. Our content, validated by Expert Board Contributors, is crafted following stringent Editorial Policies. We're committed to providing you with well-researched, expert-backed insights for all your informational needs.


0 thoughts on “How To Test Ignition Coil On A Leaf Blower”