Home>Gardening & Outdoor>Outdoor Entertaining>How To Make A Picnic Table
Outdoor Entertaining
How To Make A Picnic Table
Modified: February 26, 2024
Learn how to make a picnic table for your outdoor entertaining needs with our easy step-by-step guide. Enjoy al fresco dining with a custom-built table.
(Many of the links in this article redirect to a specific reviewed product. Your purchase of these products through affiliate links helps to generate commission for Storables.com, at no extra cost. Learn more)
Introduction
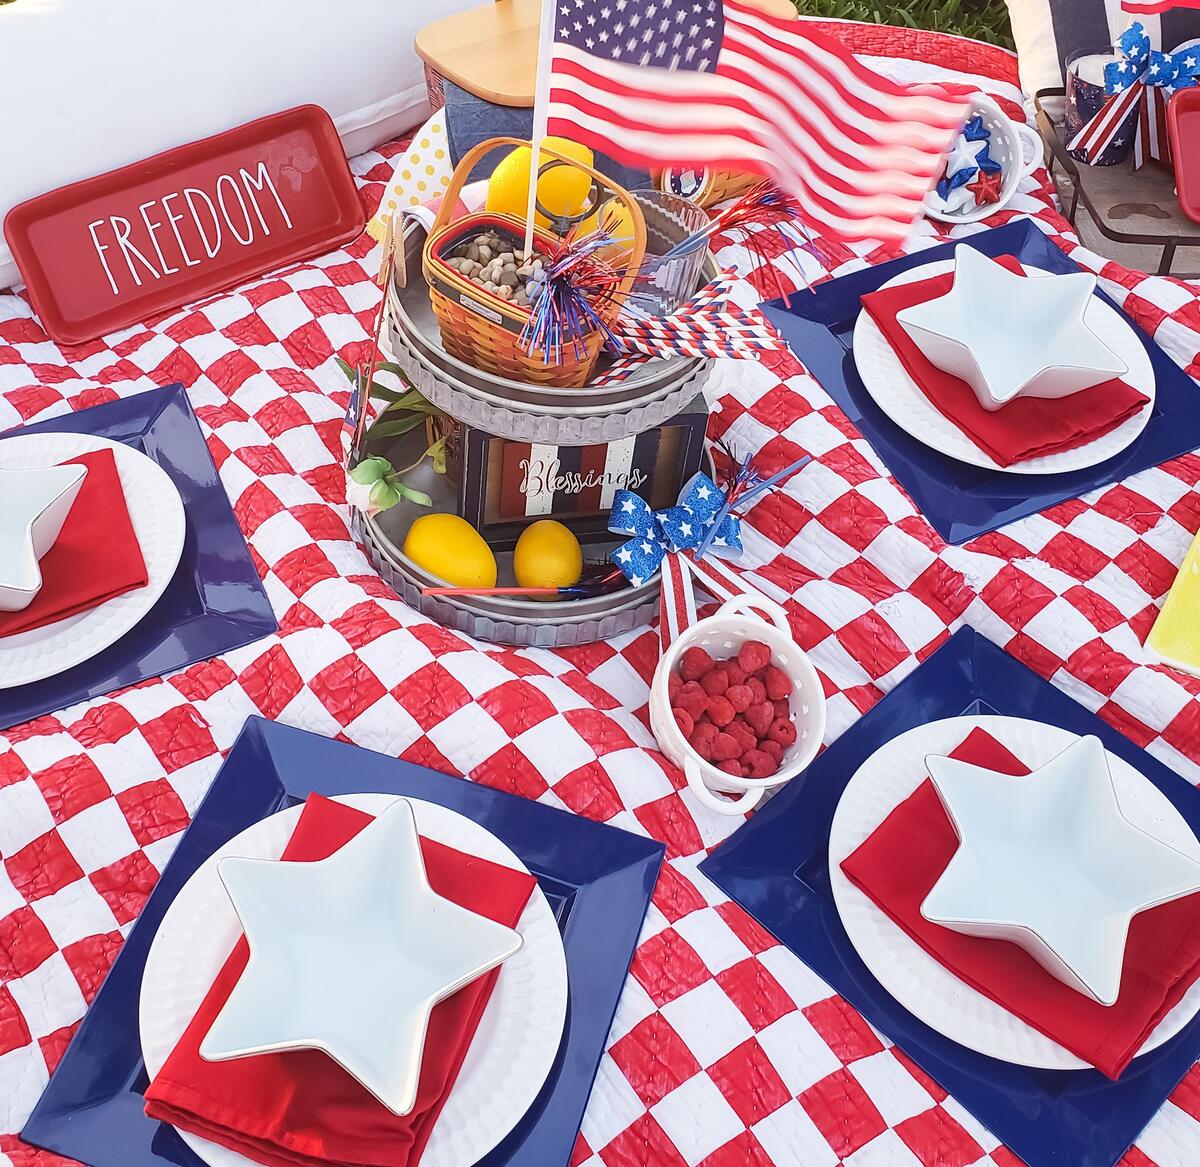
Are you ready to elevate your outdoor entertaining game with a touch of do-it-yourself craftsmanship? Building a picnic table is not only a rewarding woodworking project, but it also offers the perfect centerpiece for memorable gatherings with family and friends. Whether it's a sunny afternoon picnic in the park or a cozy backyard barbecue, having a sturdy and stylish picnic table can transform any outdoor space into a welcoming haven for socializing and indulging in delicious meals.
In this comprehensive guide, we'll walk you through the step-by-step process of creating your own picnic table. From selecting the right materials to mastering essential woodworking techniques, you'll gain the knowledge and confidence to embark on this fulfilling DIY venture. So, roll up your sleeves, gather your tools, and let's dive into the enriching world of crafting a beautiful and functional picnic table that will be cherished for years to come.
Key Takeaways:
- Crafting a picnic table involves precise wood-cutting, sturdy assembly, and meticulous finishing. Embrace DIY creativity to build a durable and visually appealing centerpiece for outdoor gatherings.
- Sanding, staining, and sealing are essential for enhancing the picnic table’s beauty and durability. Embrace the satisfaction of creating a welcoming haven for outdoor entertaining.
Read more: How To Make A Picnic Romantic
Materials and Tools
Before you begin crafting your picnic table, it’s essential to gather all the necessary materials and tools. Here’s a comprehensive list to ensure you’re well-prepared for this woodworking endeavor:
Materials:
- Pressure-treated lumber or cedar for outdoor durability
- Wood screws
- Wood glue
- Wood stain or paint
- Weather-resistant sealer
Tools:
- Tape measure
- Circular saw or table saw
- Electric drill with screwdriver bits
- Clamps
- Sandpaper or electric sander
- Paintbrushes or paint sprayer
- Safety goggles and ear protection
- Work gloves
By ensuring you have all the required materials and tools at your disposal, you’ll be ready to tackle each step of the picnic table construction process with confidence and precision.
Step 1: Cutting the Wood
The initial step in creating a sturdy and visually appealing picnic table is cutting the wood to the appropriate dimensions. This phase requires careful precision and attention to detail to ensure that all components fit together seamlessly. Here’s a breakdown of the key wood-cutting tasks involved:
Read more: How To Make A Picnic Blanket
Tabletop and Seats:
Using a circular saw or table saw, carefully cut the pressure-treated lumber or cedar to create the tabletop and seat planks. It’s crucial to measure and mark the wood accurately before making the cuts to achieve uniformity in size and a polished final appearance.
Supporting Beams and Braces:
Next, cut additional pieces of lumber to serve as supporting beams and braces for the tabletop and seats. These components play a vital role in enhancing the structural integrity of the picnic table, so precise measurements and cuts are essential to ensure a stable and durable final product.
Throughout the wood-cutting process, prioritize safety by using appropriate safety gear, such as goggles and gloves, and adhering to all recommended safety practices for working with power tools and wood materials.
By meticulously cutting the wood to the required dimensions, you’ll set the stage for the subsequent assembly steps, bringing you one step closer to completing your custom-built picnic table.
Step 2: Assembling the Tabletop
With the wood cut to precision, it’s time to embark on the assembly phase, starting with the construction of the tabletop. This pivotal step involves bringing together the individual planks to form a robust and visually appealing surface for the picnic table. Here’s a detailed guide to help you navigate this phase with ease:
Arranging the Planks:
Begin by arranging the cut tabletop planks in the desired order, ensuring a balanced distribution of wood grain patterns and colors. This thoughtful arrangement can contribute to the table’s aesthetic appeal and create a cohesive visual impact.
Read more: How To Make A Picnic Basket
Applying Wood Glue:
Once the planks are positioned to your satisfaction, apply wood glue along the edges of each plank before joining them together. The wood glue serves as a strong adhesive, promoting a secure bond between the planks and enhancing the overall stability of the tabletop.
Securing with Screws:
After applying the wood glue, use wood screws to reinforce the bond between the planks. Position the screws strategically to ensure even distribution and reliable fastening, thereby minimizing the risk of warping or separation over time.
By following these assembly steps diligently, you’ll witness the transformation of individual planks into a unified and resilient tabletop, laying the foundation for the next stages of constructing your custom picnic table.
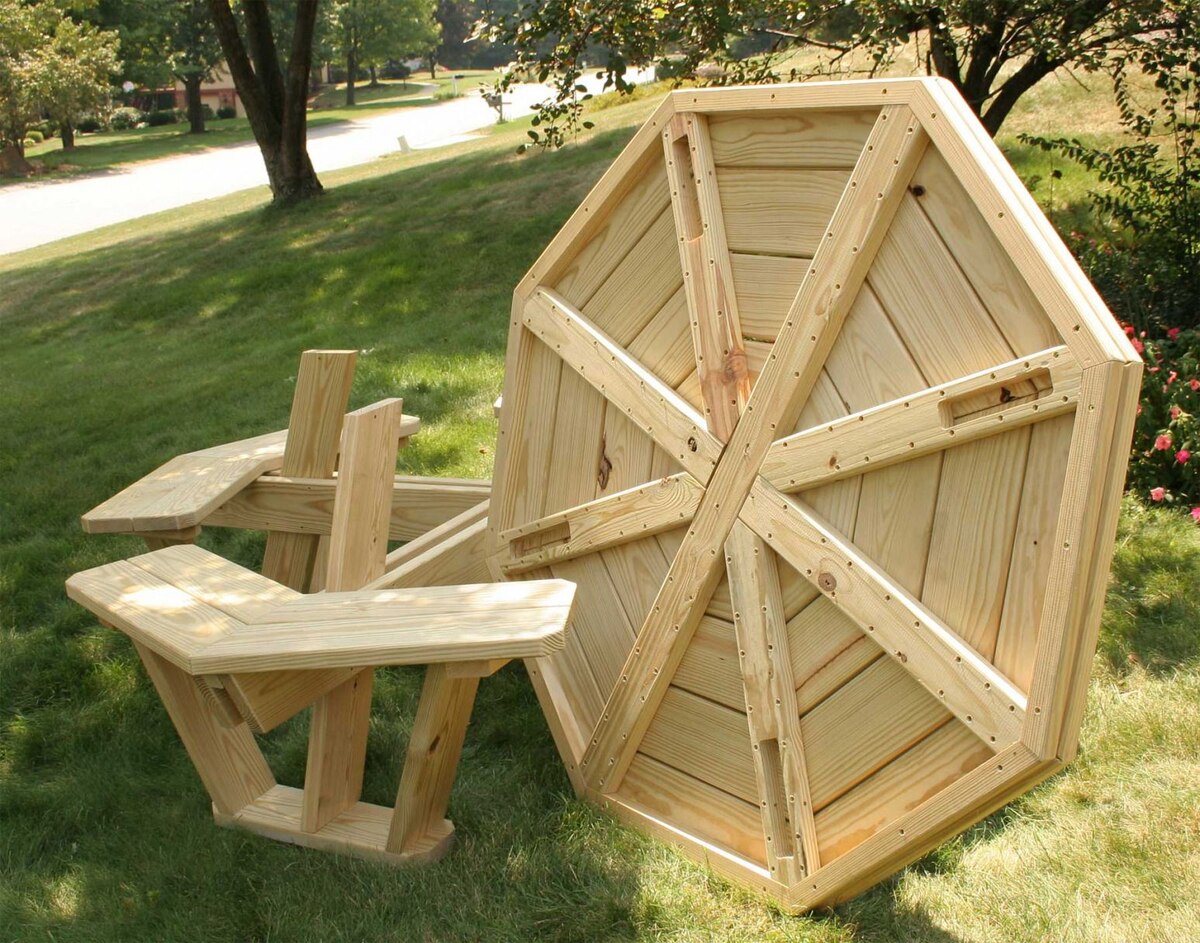
Step 3: Building the Legs and Frame
As you progress with the construction of your picnic table, the next crucial phase involves crafting the legs and frame, which provide essential support and structural integrity to the entire assembly. This step demands meticulous attention to detail and precision to ensure the table’s stability and longevity. Here’s a comprehensive guide to aid you in this pivotal stage:
Leg Construction:
Begin by cutting the lumber to create the legs of the picnic table, ensuring that all pieces are uniform in length and width. Consistency in dimensions is key to achieving a balanced and stable foundation for the table.
Read more: How To Make A Picnic Basket Liner
Frame Assembly:
With the legs prepared, proceed to assemble the frame that will connect the legs and provide additional reinforcement for the tabletop and seats. Carefully align the frame components and use wood screws to secure them firmly, creating a robust and reliable support structure.
Bracing for Stability:
Integrate bracing elements into the frame design to enhance the overall stability of the picnic table. Well-placed braces contribute to the table’s resistance to lateral forces, ensuring a secure and wobble-free dining experience for years to come.
By dedicating attention to crafting sturdy legs and a well-constructed frame, you’re laying the groundwork for a picnic table that embodies both durability and aesthetic appeal, setting the stage for the final assembly and finishing touches.
Step 4: Attaching the Legs to the Tabletop
As you approach the final assembly phase of your picnic table construction, the integration of the legs with the tabletop marks a pivotal moment in bringing the project to fruition. This step requires precision and attention to detail to ensure a seamless and sturdy connection between the components. Here’s a detailed guide to aid you in this critical stage:
Positioning the Legs:
Begin by positioning the legs at the corners of the tabletop, ensuring symmetrical placement and uniform spacing. This deliberate arrangement not only contributes to the table’s stability but also enhances its visual balance and overall aesthetic appeal.
Read more: How To Build A Picnic Style Dining Table
Securing the Connection:
Using wood screws and a reliable electric drill, carefully secure the legs to the tabletop, ensuring a snug and durable connection. Pay close attention to the alignment and angle of the screws to maintain a consistent and professional finish.
Reinforcing the Attachment:
To further reinforce the attachment between the legs and tabletop, consider applying wood glue at the juncture before securing the components with screws. This additional measure can enhance the overall strength and stability of the table’s foundational structure.
By methodically attaching the legs to the tabletop, you’re not only finalizing the physical construction of the picnic table but also infusing it with a sense of solidity and permanence, bringing you one step closer to the completion of your handcrafted masterpiece.
Step 5: Sanding and Finishing
As you near the completion of your custom-built picnic table, the sanding and finishing phase takes center stage, offering the opportunity to refine the wood surfaces and imbue the table with a captivating visual allure. This transformative step requires meticulous attention to detail and a keen eye for achieving a polished and inviting final product. Here’s a comprehensive guide to help you navigate this essential stage:
Sanding the Wood Surfaces:
Begin by meticulously sanding all exposed wood surfaces of the picnic table, including the tabletop, seats, legs, and frame. Use medium-grit sandpaper initially to eliminate rough spots and uneven edges, followed by fine-grit sandpaper to achieve a smooth and touchable finish.
Read more: How To Make A Low Picnic Table
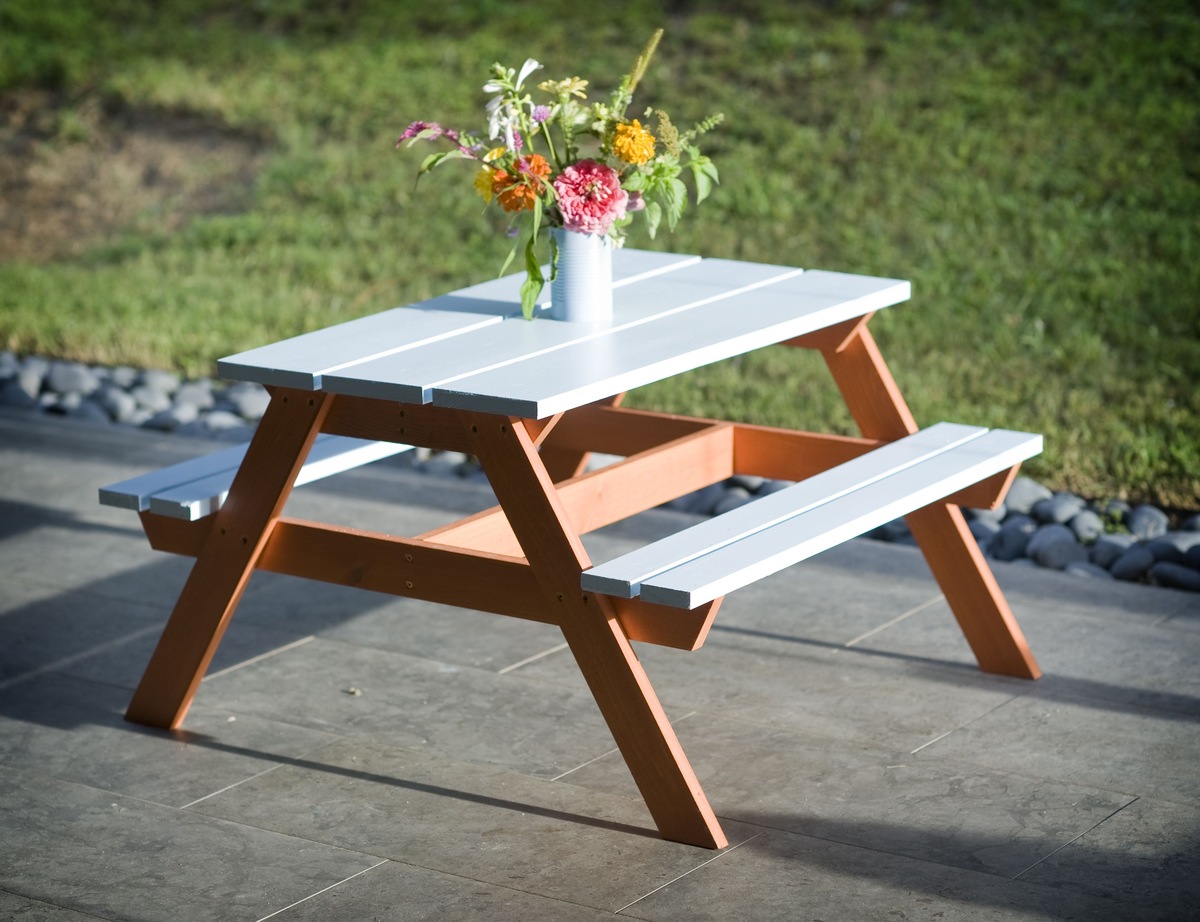
Applying Wood Stain or Paint:
Once the wood surfaces are impeccably sanded, consider applying a high-quality wood stain or paint to enhance the table’s visual appeal and protect it from outdoor elements. Choose a shade that complements your outdoor setting and resonates with your personal style, ensuring a harmonious integration with the natural surroundings.
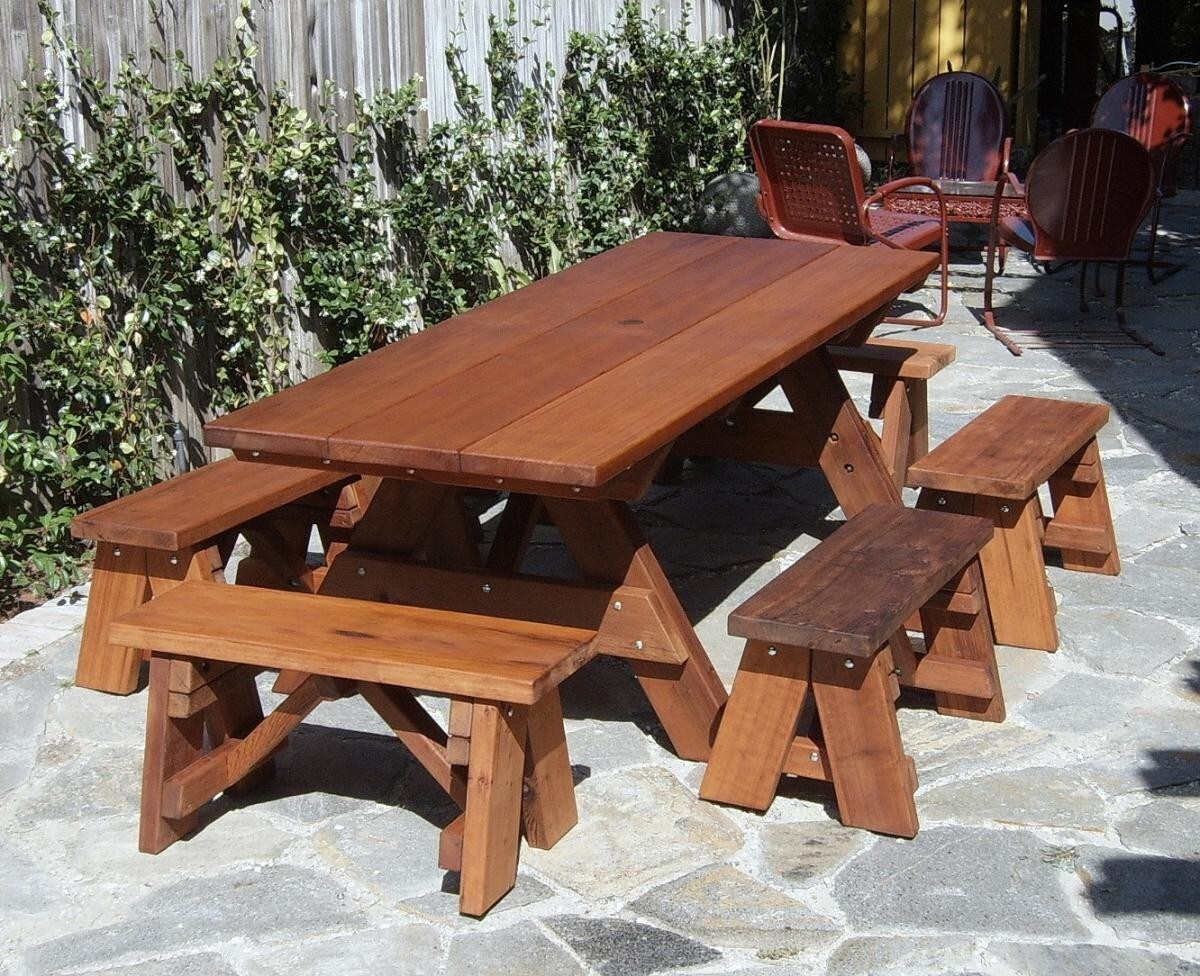
Sealing for Longevity:
To safeguard the picnic table against moisture, UV exposure, and general wear and tear, apply a weather-resistant sealer after the stain or paint has dried. This crucial step not only prolongs the table’s lifespan but also preserves the vibrancy of the finish, ensuring enduring beauty and functionality.
By meticulously sanding and finishing the picnic table, you’re not only elevating its visual allure but also fortifying its resilience against the outdoor elements, culminating in the creation of a captivating and enduring centerpiece for your outdoor entertaining endeavors.
Conclusion
Congratulations on successfully navigating the enriching journey of crafting your own picnic table! Through meticulous woodworking techniques and a creative touch, you’ve transformed raw materials into a functional and visually captivating centerpiece for outdoor gatherings. As you reflect on the fulfilling experience of building your picnic table, consider the enduring value it adds to your outdoor entertaining space and the cherished memories it will facilitate.
By embracing the art of woodworking and investing your time and effort into this project, you’ve not only honed your DIY skills but also cultivated a deeper appreciation for the craftsmanship and dedication embedded in every handcrafted creation. As you envision the delightful gatherings and heartwarming conversations that will unfold around your custom picnic table, take pride in the tangible manifestation of your creativity and labor.
Furthermore, the skills and knowledge acquired throughout this endeavor serve as a springboard for future woodworking projects, empowering you to embark on new ventures and expand your repertoire of handcrafted creations. Whether it’s a set of matching benches, an intricately designed pergola, or other outdoor furniture pieces, your newfound expertise positions you to continue shaping and enhancing your outdoor living space with personalized and enduring elements.
As you bask in the satisfaction of completing your picnic table, take a moment to appreciate the sense of accomplishment and fulfillment that accompanies the realization of a DIY project. The table stands not only as a testament to your creativity and dedication but also as an invitation to countless moments of joy, laughter, and connection in the great outdoors.
So, gather your loved ones, prepare a delectable feast, and relish the fruits of your labor around the welcoming embrace of your handcrafted picnic table. May it continue to be a symbol of warmth, togetherness, and the enduring spirit of craftsmanship for years to come.
Frequently Asked Questions about How To Make A Picnic Table
Was this page helpful?
At Storables.com, we guarantee accurate and reliable information. Our content, validated by Expert Board Contributors, is crafted following stringent Editorial Policies. We're committed to providing you with well-researched, expert-backed insights for all your informational needs.

0 thoughts on “How To Make A Picnic Table”