Home>Gardening & Outdoor>Outdoor Entertaining>How To Make A Low Picnic Table
Outdoor Entertaining
How To Make A Low Picnic Table
Modified: February 18, 2024
Learn how to create a low picnic table for outdoor entertaining. Follow our step-by-step guide for a perfect addition to your outdoor gatherings.
(Many of the links in this article redirect to a specific reviewed product. Your purchase of these products through affiliate links helps to generate commission for Storables.com, at no extra cost. Learn more)
Introduction
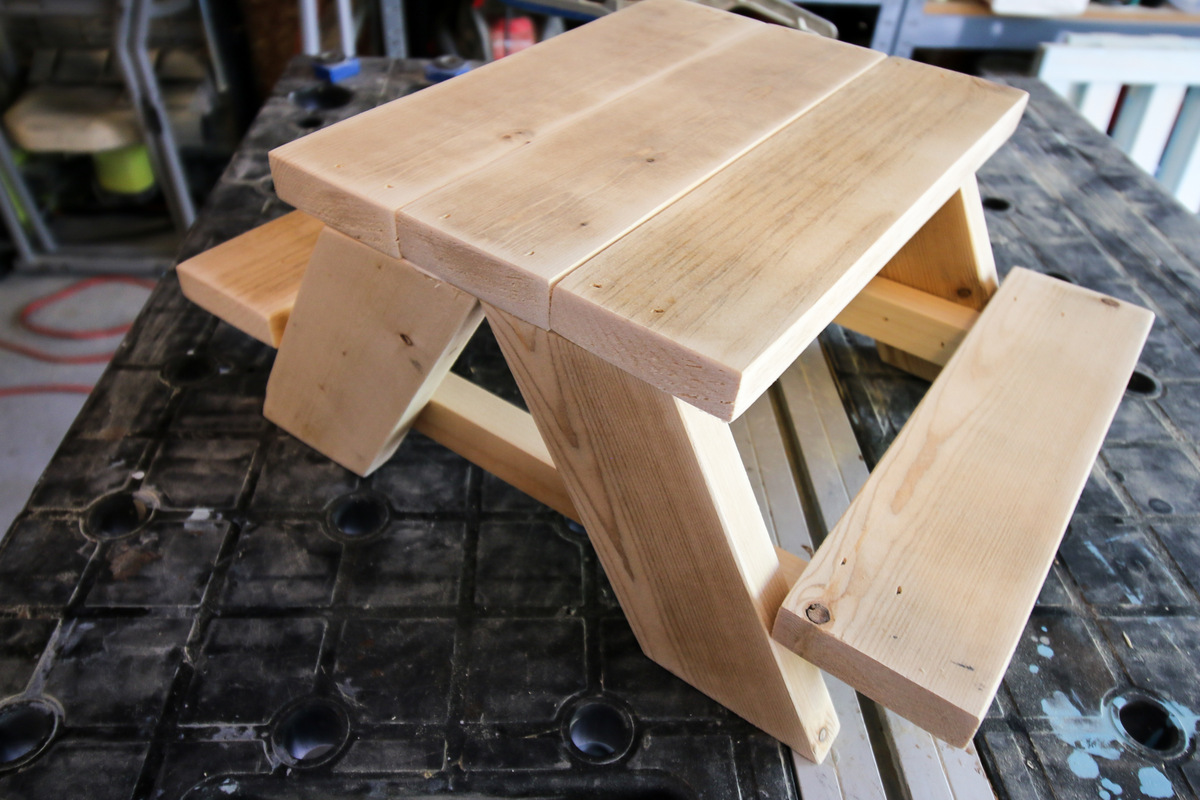
Are you ready to elevate your outdoor entertaining game with a stylish and functional addition to your backyard or patio? Building a low picnic table can be a rewarding and budget-friendly project, offering a perfect spot for relaxed gatherings, al fresco dining, or simply unwinding with a good book and a refreshing beverage. Whether you're a seasoned DIY enthusiast or a novice looking to embark on a new adventure, crafting your own low picnic table can be an immensely gratifying experience.
In this guide, we'll walk you through the step-by-step process of creating a sleek and sturdy low picnic table that complements your outdoor space. With just a few basic materials, some essential tools, and a dash of creativity, you'll soon have a versatile piece of furniture that's both practical and visually appealing. So, roll up your sleeves, gather your supplies, and let's dive into the wonderful world of DIY woodworking to craft a fabulous low picnic table that will be the envy of your friends and neighbors.
Key Takeaways:
- Crafting a low picnic table is a fun and rewarding DIY project that requires basic materials and tools. From cutting the wood to assembling the table, it’s a hands-on way to enhance your outdoor space.
- Building a low picnic table allows you to create a stylish and functional piece of furniture for outdoor gatherings. With attention to detail and a touch of creativity, you can craft a centerpiece for memorable moments.
Read more: How To Make A Picnic Romantic
Materials and Tools
Before you begin crafting your low picnic table, it’s essential to gather all the necessary materials and tools. Here’s a comprehensive list of what you’ll need:
Materials:
- Pressure-treated lumber or cedar boards: These will serve as the primary building material for the table's frame and top. Opt for high-quality, weather-resistant wood to ensure durability.
- Wood screws: Choose corrosion-resistant screws in appropriate lengths for securing the table's components.
- Wood glue: A reliable wood adhesive will reinforce the table's joints, enhancing its strength.
- Wood stain or outdoor sealant: This will protect the table from the elements, preventing rot and decay while adding a touch of color.
- Sandpaper: Select varying grits to smooth the wood surfaces and achieve a professional finish.
Tools:
- Measuring tape and pencil: Essential for marking and measuring the wood accurately.
- Saw: A circular saw or miter saw will be indispensable for cutting the lumber to the required dimensions.
- Drill and bits: You'll need a drill to create pilot holes and drive screws into the wood.
- Screwdriver: For tightening screws and assembling the table components.
- Sanding block or electric sander: To smooth the wood surfaces for a polished look and touchable finish.
- Paintbrushes or applicator pads: These will be used to apply the wood stain or sealant evenly.
- Protective gear: Safety goggles, gloves, and a dust mask are crucial for safeguarding yourself during the woodworking process.
With these materials and tools at your disposal, you’re well-equipped to embark on the journey of constructing your own low picnic table. The next steps will guide you through the construction process, helping you bring your vision to life with precision and craftsmanship.
Step 1: Cutting the Wood
With your materials and tools assembled, it’s time to roll up your sleeves and begin the construction process. The first step involves cutting the wood to the appropriate dimensions to form the table’s frame and top. Here’s a detailed breakdown of this crucial stage:
Read more: How To Make A Picnic Blanket
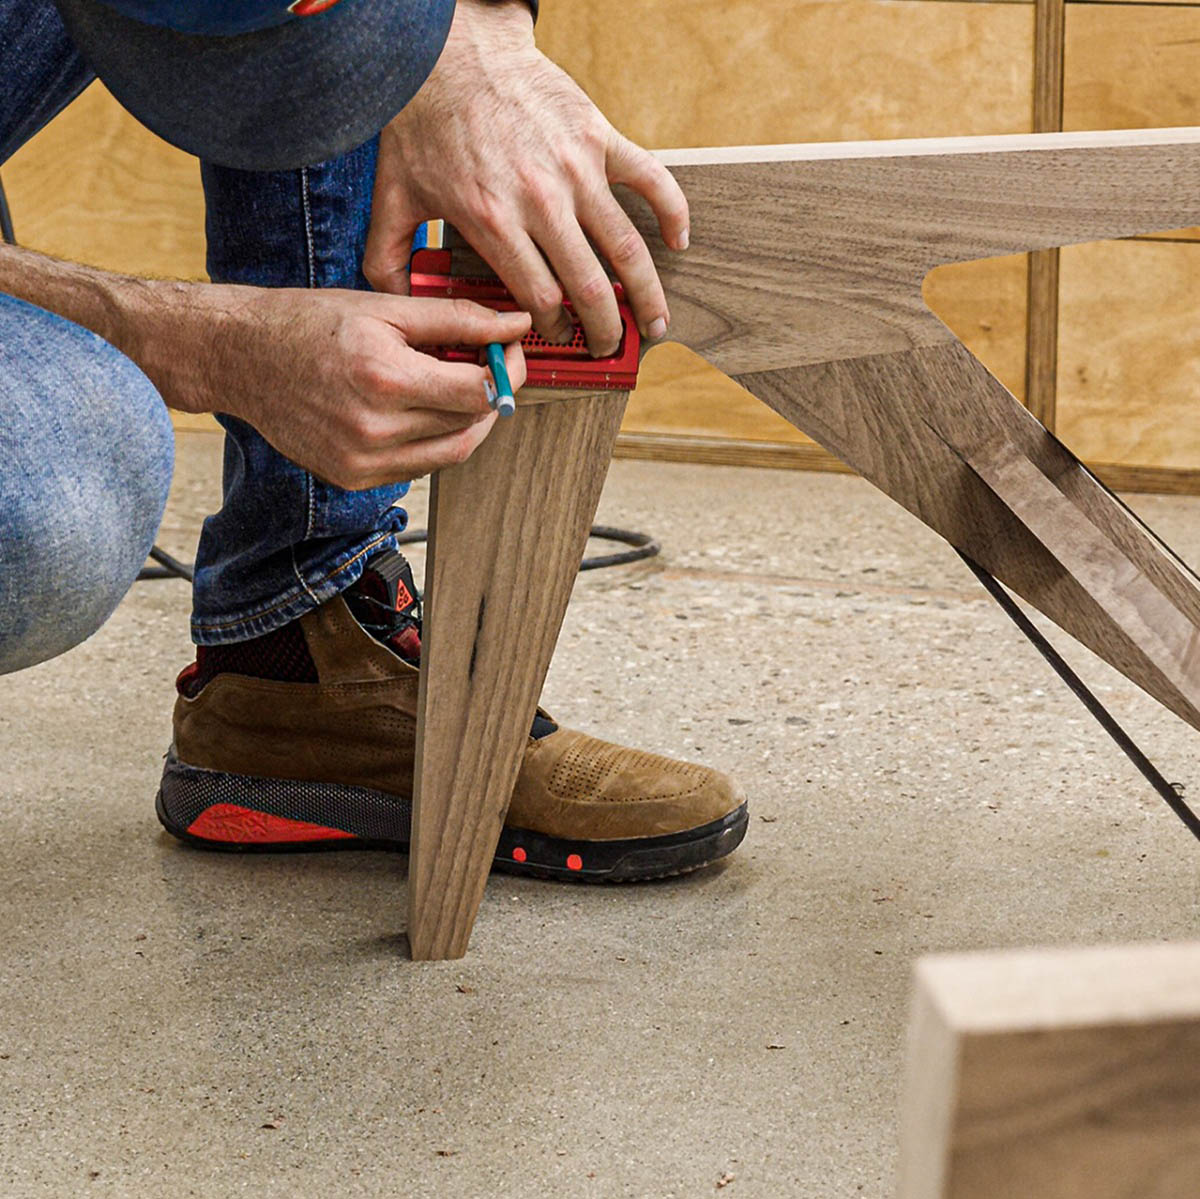
1.1 Measuring and Marking:
Begin by measuring and marking the pressure-treated lumber or cedar boards according to the desired dimensions of your low picnic table. Use a measuring tape and pencil to ensure precision, and double-check the measurements before making any cuts.
1.2 Cutting the Frame Components:
Using a saw, carefully cut the lumber to create the tabletop and frame components. If you’re aiming for a specific height for your low picnic table, ensure that the legs are cut to the exact length to achieve the desired elevation. Additionally, cut the boards for the table’s frame, ensuring that they are uniform in length to maintain symmetry.
1.3 Crafting the Tabletop:
Once the frame components are cut, proceed to cut the boards that will form the tabletop. Depending on the design you envision, you may opt for a slatted tabletop or solid panels. Take your time to ensure clean, straight cuts, as the tabletop will be a prominent feature of your low picnic table.
1.4 Double-Checking the Cuts:
After completing the cutting process, carefully inspect each piece to verify that it aligns with the specified measurements. This attention to detail will contribute to the overall stability and aesthetics of the finished table.
By meticulously executing this initial stage of cutting the wood, you’re laying the foundation for a well-constructed and visually appealing low picnic table. With the components prepared, you’re now ready to progress to the next phase of the assembly process, bringing your table to life one step at a time.
Read more: How To Make A Picnic Table
Step 2: Assembling the Legs
With the wood cut to the appropriate dimensions, it’s time to move on to assembling the legs of your low picnic table. This pivotal step will lay the groundwork for the table’s stability and structural integrity. Here’s a comprehensive guide to navigating this phase of the construction process:
2.1 Positioning the Components:
Lay out the cut pieces for the table’s frame and legs in the designated work area. Ensure that the components are arranged in an organized manner, allowing easy access as you begin the assembly process.
2.2 Attaching the Leg Supports:
Using wood screws and a drill, secure the leg supports to the frame components. Position the supports evenly to ensure that the legs will be sturdily anchored to the table’s frame, providing reliable support for the tabletop.
2.3 Attaching the Legs:
Carefully attach the legs to the leg supports, ensuring that they are perpendicular to the ground and securely fastened to the frame. Double-check the alignment and stability of the legs to guarantee that they will provide a solid foundation for the table.
Read more: How To Make A Picnic Basket
2.4 Reinforcing the Joints:
Apply wood glue to the joints where the legs meet the frame, enhancing the overall strength and stability of the assembly. This additional reinforcement will contribute to the longevity of your low picnic table, ensuring that it withstands the rigors of outdoor use.
2.5 Verifying Stability:
After assembling the legs, carefully test the stability of the structure to confirm that it stands firm and level. Making any necessary adjustments at this stage will set the stage for a well-balanced and reliable low picnic table.
By meticulously following these steps to assemble the legs, you’re one step closer to bringing your vision of a stylish and functional low picnic table to fruition. With the legs securely in place, the next phase of the construction process will see the tabletop taking shape, adding another layer of craftsmanship to your DIY masterpiece.
Step 3: Attaching the Tabletop
As you progress through the construction of your low picnic table, the next critical step involves attaching the tabletop. This stage not only brings the table closer to completion but also adds a defining element to its visual appeal. Here’s a detailed guide to successfully affixing the tabletop to the frame:
3.1 Preparing the Frame:
Ensure that the table’s frame and legs are positioned securely in the designated area, ready to receive the tabletop. Verify that the frame is level and stable, providing a solid foundation for the tabletop attachment process.
Read more: How To Make A Picnic Basket Liner
3.2 Arranging the Tabletop Components:
Lay out the tabletop components, whether slats or panels, in the desired configuration on top of the frame. Take the time to arrange the tabletop pieces evenly, ensuring a cohesive and visually appealing layout.
3.3 Securing the Tabletop:
Using wood screws and a drill, carefully attach the tabletop components to the frame. Start from one end and work your way across, securing each piece firmly to the frame to create a unified tabletop surface. Pay attention to spacing and alignment to achieve a professional and polished look.
3.4 Applying Wood Glue (Optional):
For added stability and longevity, consider applying a thin bead of wood glue along the joints where the tabletop components meet. This step can reinforce the connections and enhance the overall durability of the tabletop assembly.
3.5 Verifying Alignment and Stability:
After attaching the tabletop, carefully inspect the alignment and stability of the assembled components. Confirm that the tabletop sits level and securely atop the frame, ready to withstand the joys of outdoor gatherings and leisurely moments.
With the tabletop securely attached, your low picnic table is rapidly taking shape, embodying both functionality and aesthetic charm. As you move forward to the final stages of construction, the prospect of enjoying delightful outdoor experiences around your handcrafted table becomes increasingly tangible.
Read more: How To Build A Picnic Style Dining Table
Step 4: Sanding and Finishing
As your low picnic table nears completion, the crucial step of sanding and finishing will elevate its visual appeal and ensure a smooth, touchable surface. This transformative stage adds a touch of finesse to your creation, enhancing its overall allure. Here’s a detailed guide to achieving a professional finish for your low picnic table:
4.1 Sanding the Wood Surfaces:
Using sandpaper or an electric sander, meticulously sand the entire surface of the table, including the tabletop, frame, and legs. Begin with a coarse grit to smooth any rough surfaces or uneven edges, then progress to finer grits for a polished and velvety finish.
4.2 Rounding the Edges (Optional):
If desired, use sandpaper to gently round the edges of the tabletop and frame components. This subtle touch can soften the table’s appearance and create a more inviting aesthetic, especially if children will be using the table.
4.3 Removing Dust and Debris:
After sanding, thoroughly clean the table to remove any dust or debris. A damp cloth can be used to wipe down the surfaces, ensuring that the wood is clean and ready for the finishing touches.
Read more: How To Make A Picnic Table For Kids
4.4 Applying Wood Stain or Sealant:
Select a high-quality wood stain or outdoor sealant in a shade that complements your outdoor space. Using a paintbrush or applicator pad, evenly apply the stain or sealant to the entire table, following the manufacturer’s instructions for a flawless finish.
4.5 Allowing for Drying and Curing:
Once the stain or sealant is applied, allow the table to dry and cure according to the product’s recommended timeframe. This crucial step ensures that the finish sets properly, providing long-lasting protection against the elements.
4.6 Final Inspection:
After the finishing process is complete, conduct a final inspection of the table to ensure that the surfaces are smooth, the color is even, and the wood is adequately protected. This meticulous attention to detail will result in a low picnic table that exudes craftsmanship and durability.
With the sanding and finishing stage concluded, your low picnic table has undergone a stunning transformation, emerging as a testament to your woodworking prowess. The final phase of the construction process will see your masterpiece ready to take its place as a focal point of outdoor enjoyment, beckoning friends and family to gather and create cherished memories around its inviting presence.
Conclusion
Congratulations are in order as you’ve successfully navigated the exhilarating journey of crafting your very own low picnic table. From the initial stages of cutting and assembling the wood to the transformative process of sanding and finishing, you’ve poured creativity, skill, and dedication into creating a versatile and visually captivating piece of outdoor furniture. As you stand back and admire your handiwork, envisioning the delightful moments that await around your new table, it’s evident that your efforts have borne fruit in the form of a functional and stylish addition to your outdoor space.
With its sturdy frame, meticulously attached tabletop, and impeccably finished surfaces, your low picnic table stands as a testament to your craftsmanship and attention to detail. It embodies the perfect blend of form and function, offering a welcoming spot for leisurely gatherings, al fresco dining, or simply basking in the beauty of the great outdoors. The pride and satisfaction that accompany the completion of this DIY endeavor are immeasurable, underscoring the joy of creating something with your own hands.
As you envision the countless memories that will unfold around your low picnic table – from shared meals with loved ones to tranquil moments of relaxation – you can take pride in knowing that your creation will be a cherished centerpiece of outdoor enjoyment. Its presence will bear witness to laughter, conversations, and the simple pleasures of life, becoming an integral part of your outdoor sanctuary.
So, as you prepare to unveil your low picnic table to the world, take a moment to savor the culmination of your hard work and dedication. Embrace the anticipation of the delightful experiences that lie ahead, knowing that your craftsmanship has enriched your outdoor space and the moments you’ll share within it. With your low picnic table as a beacon of warmth and conviviality, you’re poised to create enduring memories and forge deeper connections in the embrace of nature’s beauty.
As you embark on this new chapter of outdoor entertaining, may your low picnic table stand as a testament to the joy of craftsmanship and the boundless potential of DIY endeavors. Embrace the moments it will facilitate, the stories it will witness, and the laughter it will echo, knowing that your creation has added a touch of magic to your outdoor oasis.
Frequently Asked Questions about How To Make A Low Picnic Table
Was this page helpful?
At Storables.com, we guarantee accurate and reliable information. Our content, validated by Expert Board Contributors, is crafted following stringent Editorial Policies. We're committed to providing you with well-researched, expert-backed insights for all your informational needs.


0 thoughts on “How To Make A Low Picnic Table”