Home>Gardening & Outdoor>Outdoor Entertaining>How To Make A Picnic Table For Kids
Outdoor Entertaining
How To Make A Picnic Table For Kids
Modified: October 21, 2024
Discover how to create a fun and practical picnic table for kids, perfect for outdoor entertaining. Get step-by-step instructions and ideas now!
(Many of the links in this article redirect to a specific reviewed product. Your purchase of these products through affiliate links helps to generate commission for Storables.com, at no extra cost. Learn more)
Introduction
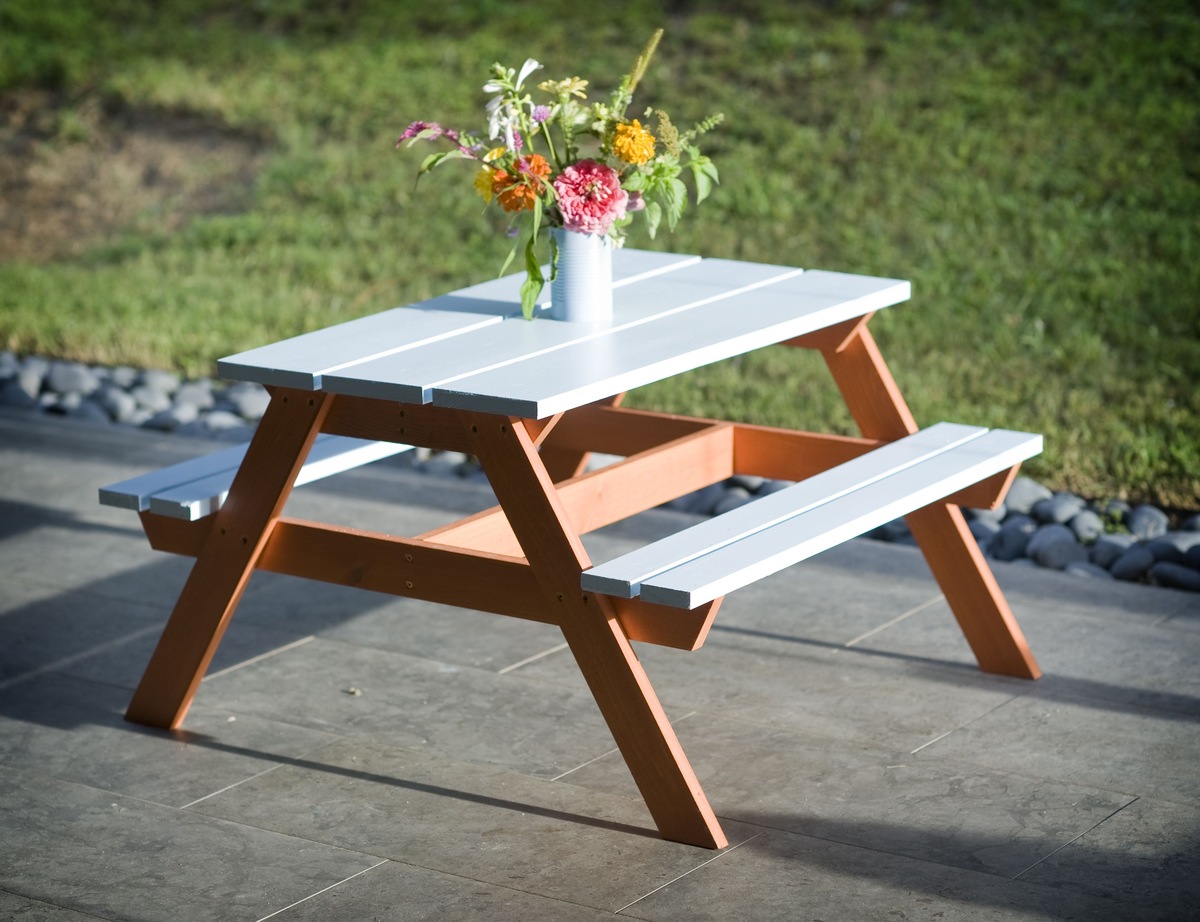
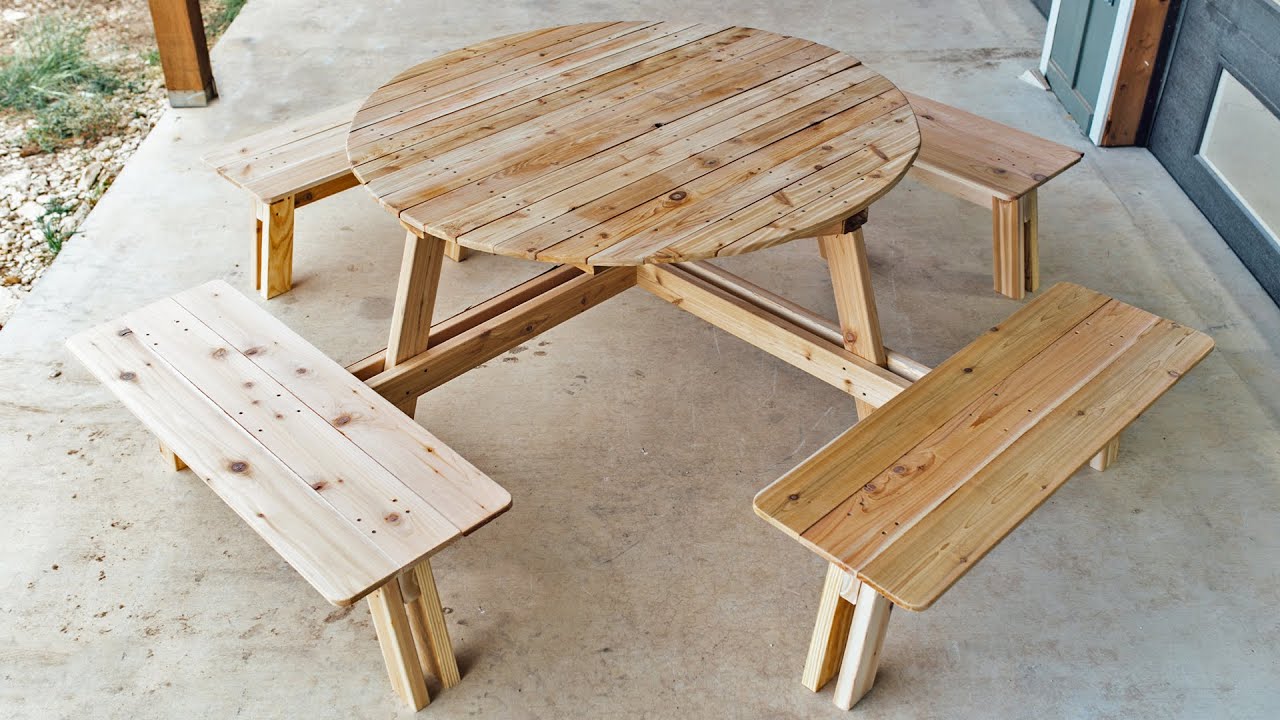
Are you ready to embark on a fun and rewarding outdoor project that will bring joy to your little ones? Building a picnic table for kids is a fantastic way to enhance your outdoor space and create a designated area where children can dine, play, and unleash their creativity. Whether it's for enjoying snacks, engaging in arts and crafts, or simply basking in the sunshine, a kid-sized picnic table is a valuable addition to any backyard or garden.
In this guide, we will walk you through the step-by-step process of constructing a sturdy and charming picnic table that is just the right size for children. Not only will this project allow you to unleash your creativity and woodworking skills, but it will also provide a delightful and functional piece of furniture that your kids will adore. With the right materials, tools, and a dash of enthusiasm, you can craft a beautiful picnic table that will be the centerpiece of countless outdoor adventures and gatherings.
So, gather your supplies, roll up your sleeves, and get ready to dive into the world of DIY woodworking. Whether you're a seasoned craftsman or a novice do-it-yourselfer, this project is designed to be both achievable and enjoyable. Let's get started on creating a special space where laughter, imagination, and cherished memories will flourish.
Key Takeaways:
- Building a kid-sized picnic table is a fun and rewarding DIY project that creates a special space for children to dine, play, and make cherished memories in the outdoors. It’s a great way to unleash creativity and woodworking skills while enhancing outdoor spaces.
- By carefully crafting a sturdy and charming picnic table set, you can create a hub of youthful energy and creativity, nurturing a space where laughter, imagination, and cherished memories will flourish for years to come.
Read more: How To Make A Picnic Romantic
Materials Needed
Before diving into the construction process, it’s essential to gather all the necessary materials to ensure a smooth and efficient building experience. Here’s a comprehensive list of the materials required to construct a kid-sized picnic table:
- Pressure-treated lumber: Opt for high-quality, weather-resistant lumber such as cedar, redwood, or composite materials to ensure durability and longevity.
- Wood screws: Select corrosion-resistant screws that are suitable for outdoor use to secure the various components of the picnic table.
- Wood glue: A reliable wood adhesive will reinforce the joints and enhance the overall stability of the table and benches.
- Sanding materials: Emery cloth, sandpaper, or a power sander will be essential for smoothing rough edges and achieving a polished finish.
- Wood finish or paint: Choose a child-safe, non-toxic finish or paint to protect the wood from the elements and add a splash of color to the picnic table.
- Measuring tape and carpenter’s square: Accurate measurements and precise angles are crucial for ensuring that the table and benches are structurally sound and aesthetically pleasing.
- Protective gear: Safety goggles, gloves, and a dust mask will safeguard you during the cutting, sanding, and assembly stages of the project.
By acquiring these materials, you’ll be well-equipped to commence the construction of a delightful picnic table that will bring delight and functionality to your outdoor space. Now that you’ve assembled the necessary materials, it’s time to gather the essential tools for this woodworking endeavor.
Tools Required
Equipping yourself with the right tools is crucial for executing a successful woodworking project. Here’s a lineup of essential tools that will facilitate the construction of a charming and sturdy picnic table for kids:
- Power saw: A circular saw or a miter saw will be indispensable for cutting the lumber to the required dimensions with precision and efficiency.
- Drill/driver: A versatile cordless drill/driver equipped with the appropriate bits will enable you to bore holes and drive screws with ease.
- Clamps: Utilize a variety of clamps, such as bar clamps and spring clamps, to secure the wood during assembly and ensure tight, secure joints.
- Square: A carpenter’s square is essential for verifying the accuracy of cuts and ensuring that the table and benches are square and true.
- Sandpaper or power sander: Smooth out rough edges and surfaces using sandpaper or a power sander to achieve a flawless finish.
- Paintbrushes or sprayer: If you plan to apply a finish or paint to the picnic table, high-quality paintbrushes or a paint sprayer will be necessary for an even and professional application.
- Measuring tape: Accurate measurements are paramount in woodworking, so a reliable measuring tape is a must-have tool for this project.
- Safety gear: Prioritize safety by wearing protective gear, including safety goggles, gloves, and a dust mask, to shield yourself from potential hazards during the construction process.
With these essential tools at your disposal, you’ll be well-prepared to embark on the construction journey and create a captivating picnic table that will be cherished by children and admired by adults alike. Now that you’ve assembled the required materials and tools, it’s time to delve into the step-by-step construction process.
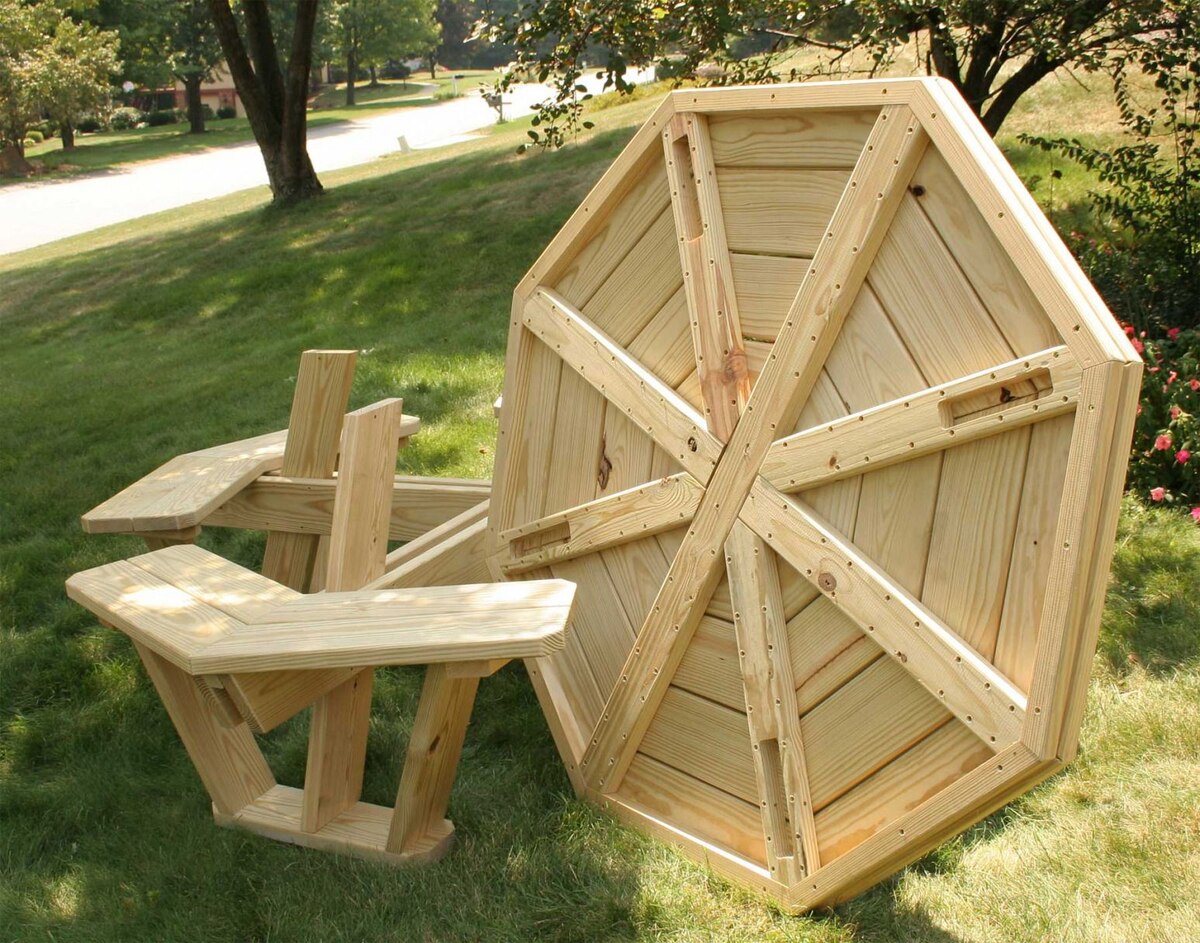
Step 1: Cutting the Wood
The initial phase of constructing a kid-sized picnic table involves accurately cutting the lumber to the specified dimensions. This step is crucial in ensuring that the table and benches are appropriately sized and proportioned for young users. Here’s a detailed breakdown of the cutting process:
1.1 Selecting the Lumber: Begin by carefully choosing high-quality pressure-treated lumber that is resistant to decay and suitable for outdoor use. Opt for durable wood species such as cedar or redwood, or consider utilizing composite materials for enhanced longevity and minimal maintenance.
1.2 Taking Measurements: Use a measuring tape to precisely measure and mark the lumber according to the dimensions outlined in the picnic table plans. Accurate measurements are essential for achieving a well-proportioned and structurally sound table and benches.
1.3 Cutting the Tabletop and Seat Boards: Utilize a power saw, such as a circular saw or miter saw, to make precise cuts on the tabletop and seat boards. Ensure that the cuts are straight and accurate to facilitate seamless assembly and a polished final product.
1.4 Beveling the Edges (Optional): For a decorative touch, consider beveling the edges of the tabletop and seat boards using a router or a chamfering tool. This step adds a refined and professional look to the picnic table while minimizing sharp edges.
By meticulously executing the wood cutting phase, you’ll lay the foundation for a well-crafted and aesthetically pleasing picnic table that is tailored to the needs and comfort of young children. With the lumber cut to the appropriate dimensions, you’re now ready to progress to the next stage: assembling the tabletop.
Step 2: Assembling the Tabletop
With the lumber cut to the specified dimensions, it’s time to embark on assembling the tabletop, a pivotal component of the kid-sized picnic table. This phase involves joining the tabletop boards to create a solid and level surface for dining, crafting, and play. Here’s a comprehensive guide to assembling the tabletop:
2.1 Arranging the Tabletop Boards: Lay out the tabletop boards on a flat and stable surface, ensuring that the edges align seamlessly to form a cohesive surface. This preparatory step sets the stage for the subsequent assembly process.
2.2 Applying Wood Glue: Prior to securing the tabletop boards, apply a thin and even layer of high-quality wood glue along the edges of the boards. The wood glue will enhance the strength and stability of the tabletop assembly, ensuring a durable and long-lasting bond.
2.3 Securing the Boards: Utilize clamps to hold the tabletop boards together, exerting uniform pressure to promote optimal adhesion. Once the boards are aligned and secured with clamps, use a drill/driver and corrosion-resistant wood screws to fasten the boards firmly, creating a unified tabletop structure.
2.4 Verifying Alignment and Levelness: Employ a carpenter’s square and a spirit level to confirm that the tabletop is square and level. This meticulous verification process is essential for guaranteeing a well-balanced and aesthetically pleasing tabletop that will serve as a secure and inviting space for children.
2.5 Sanding the Tabletop: After the tabletop assembly is complete, utilize sandpaper or a power sander to smooth any rough edges and achieve a flawless surface. Pay attention to detail, ensuring that the tabletop is impeccably sanded for a safe and comfortable user experience.
By methodically assembling the tabletop, you’ll lay the groundwork for a charming and functional picnic table that is tailored to the needs and enjoyment of young children. With the tabletop now taking shape, it’s time to progress to the next phase: constructing the benches.
When making a picnic table for kids, be sure to use child-friendly materials that are safe and durable. Consider using rounded edges and non-toxic finishes to ensure the table is safe for kids to use.
Read more: How To Make A Picnic Blanket
Step 3: Building the Benches
As you progress in the construction of the kid-sized picnic table, the next pivotal phase involves crafting the benches that will accompany the table, providing seating for young adventurers and creatives. Building sturdy and comfortable benches is essential for ensuring that children can gather around the table for meals, games, and artistic endeavors. Here’s a comprehensive guide to constructing the benches:
3.1 Cutting Bench Components: Begin by accurately cutting the lumber to the specified dimensions for the bench legs, seat supports, and seat boards. Precision in the cutting phase is crucial for achieving well-proportioned and stable benches that complement the picnic table.
3.2 Assembling Bench Frames: Utilize a power saw to make precise miter cuts and create the bench frames. Secure the bench legs and seat supports using wood glue and corrosion-resistant screws, ensuring that the frames are robust and capable of supporting the weight of young users.
3.3 Attaching Seat Boards: Once the bench frames are assembled, affix the seat boards to the frames using wood glue and screws. Ensure that the seat boards are evenly spaced and securely fastened to create a comfortable and aesthetically pleasing seating surface.
3.4 Verifying Stability and Alignment: Employ a carpenter’s square and a spirit level to confirm that the bench frames are square, stable, and level. This meticulous verification process is essential for ensuring that the benches provide a secure and inviting seating area for children.
3.5 Sanding and Finishing: After the benches are assembled, meticulously sand the surfaces to achieve a smooth and splinter-free finish. Once sanded, apply a child-safe wood finish or paint to protect the benches from the elements and add a touch of color and charm to the picnic table ensemble.
By conscientiously crafting the benches, you’ll create a welcoming and functional seating area that complements the kid-sized picnic table, setting the stage for delightful outdoor gatherings and activities. With the benches now taking shape, it’s time to proceed to the next phase: attaching the benches to the table.
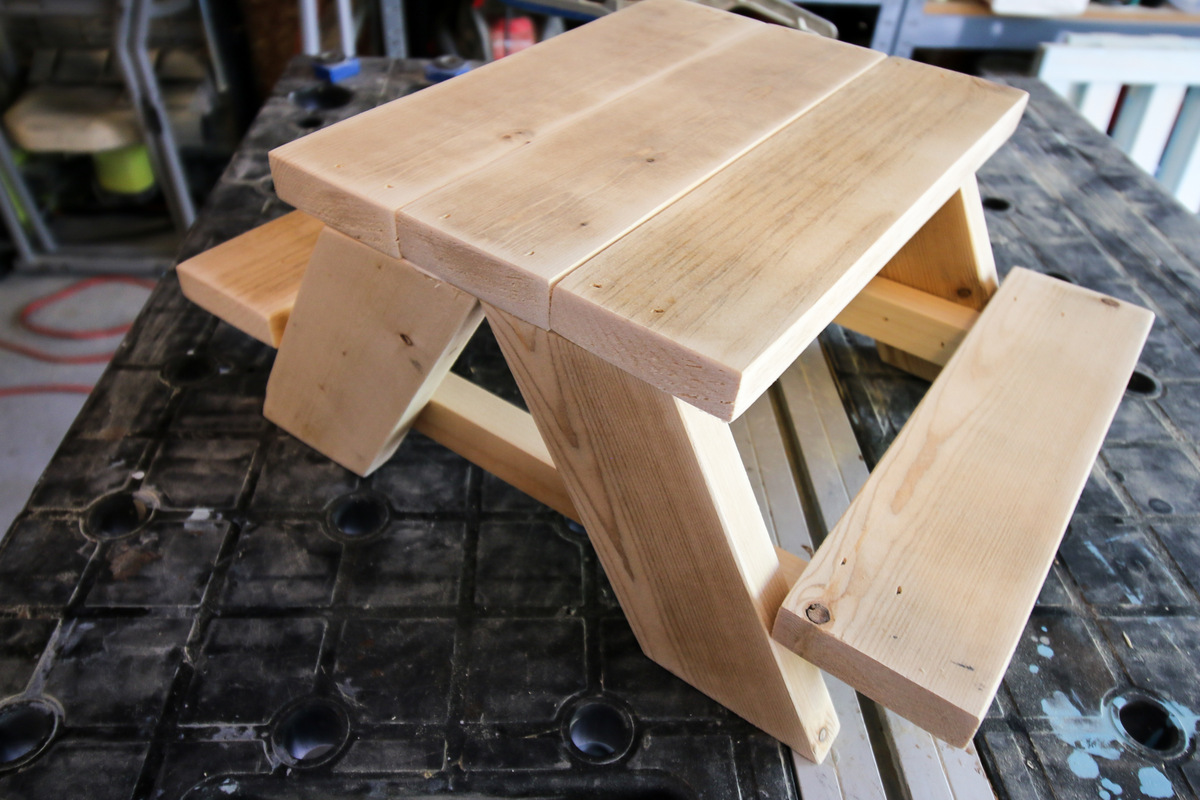
Step 4: Attaching the Benches to the Table
As the construction of the kid-sized picnic table nears completion, the next crucial phase entails securely attaching the benches to the table, creating a unified and inviting outdoor furniture set for children. Properly affixing the benches to the table is essential for ensuring stability and safety during use, providing a secure and cohesive seating and dining area. Here’s a detailed guide to attaching the benches to the table:
4.1 Positioning the Benches: Carefully place the benches in proximity to the table, ensuring that they are aligned and evenly spaced on each side. This preparatory step sets the stage for the subsequent attachment process.
4.2 Securing the Benches: Utilize clamps to temporarily secure the benches to the table, ensuring that they are positioned flush against the table’s frame. This step facilitates precise drilling and fastening, promoting a seamless and secure attachment.
4.3 Drilling and Fastening: Use a drill/driver equipped with the appropriate bits to bore pilot holes through the table’s frame and into the bench frames. Subsequently, drive corrosion-resistant screws through the pilot holes to firmly attach the benches to the table, creating a unified and stable furniture ensemble.
4.4 Verifying Alignment and Stability: Employ a measuring tape and a spirit level to confirm that the benches are evenly aligned and securely attached to the table. This meticulous verification process is essential for ensuring that the picnic table and benches provide a safe and comfortable seating and dining area for children.
4.5 Finishing Touches: Once the benches are securely attached to the table, perform a final inspection to ensure that all connections are robust and stable. If necessary, touch up the finish or paint to maintain a cohesive and polished appearance across the entire picnic table ensemble.
By meticulously attaching the benches to the table, you’ll complete the construction of a charming and functional picnic table set that will be cherished by children and admired by adults. With the benches now seamlessly integrated with the table, it’s time to proceed to the final phase: sanding and finishing the entire ensemble.
Step 5: Sanding and Finishing
As the construction of the kid-sized picnic table and benches nears completion, the final phase involves sanding and finishing the entire ensemble to achieve a polished and inviting appearance. This crucial step not only enhances the aesthetic appeal of the picnic table set but also ensures a safe and comfortable experience for young users. Here’s a comprehensive guide to sanding and finishing the picnic table and benches:
5.1 Sanding the Wood Surfaces: Utilize sandpaper or a power sander to meticulously sand all exposed wood surfaces, including the tabletop, benches, and any visible edges. Focus on smoothing rough areas and eliminating splinters to create a safe and enjoyable user experience.
5.2 Rounding Edges (Optional): For an added touch of refinement and safety, consider rounding the edges of the tabletop and benches using sandpaper or a router. This step minimizes sharp corners and edges, making the picnic table set more child-friendly and visually appealing.
5.3 Applying Wood Finish or Paint: Once the sanding process is complete, apply a child-safe wood finish or paint to protect the picnic table and benches from the elements. Choose a finish or paint that is specifically formulated for outdoor use, ensuring durability and resistance to weathering.
5.4 Achieving a Uniform Finish: Whether applying a clear wood finish to showcase the natural beauty of the wood or adding a vibrant coat of paint, strive for a uniform and even application across all surfaces. This attention to detail will result in a visually cohesive and professional-looking picnic table ensemble.
5.5 Final Inspection: After the wood finish or paint has dried, perform a thorough inspection of the picnic table and benches. Verify that the finish is evenly applied, and address any touch-ups or refinements as needed to ensure a flawless and inviting appearance.
By meticulously sanding and finishing the picnic table and benches, you’ll elevate the overall aesthetic and functionality of the ensemble, creating a captivating and durable outdoor furniture set that is tailor-made for children’s enjoyment. With the sanding and finishing process now complete, it’s time to revel in the satisfaction of bringing your woodworking project to fruition and creating a cherished space for outdoor fun and relaxation.
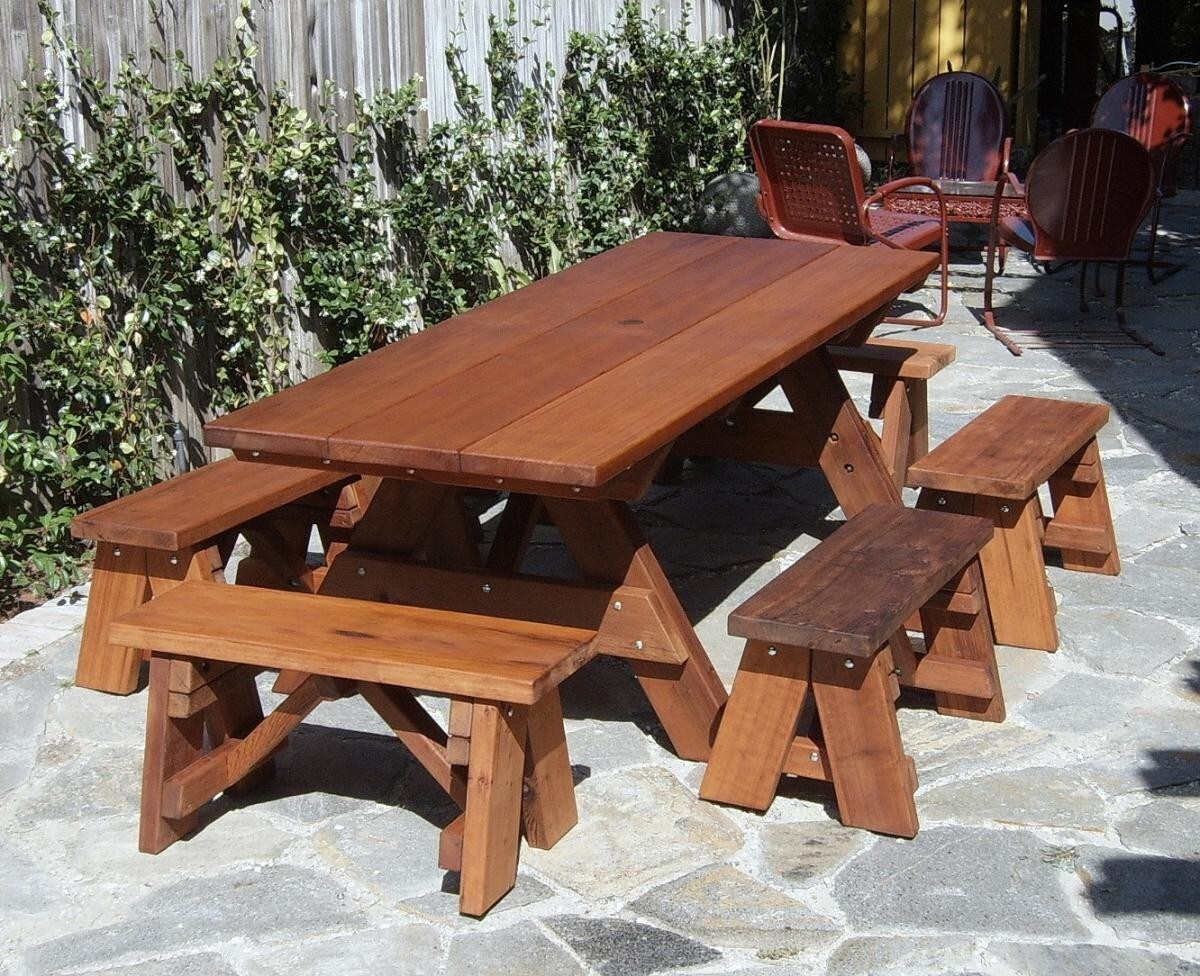
Conclusion
Congratulations on successfully completing the construction of a delightful and functional picnic table set designed specifically for kids. By embarking on this woodworking journey, you’ve not only crafted a charming and durable outdoor furniture ensemble but also created a space where children can gather, play, and make cherished memories. As you reflect on the rewarding process of bringing this project to fruition, consider the profound impact it will have on outdoor gatherings, imaginative play, and family bonding.
Through careful planning, precise execution, and a touch of creativity, you’ve transformed basic materials into a captivating picnic table and benches that will serve as a focal point for countless outdoor adventures. This woodworking endeavor has not only honed your skills but also provided an opportunity to infuse your outdoor space with a touch of handmade craftsmanship and heartfelt dedication.
As you admire the finished picnic table set, envision the joy and laughter it will inspire as children gather around it for picnics, art projects, or simply to share stories and laughter. The sturdy construction, meticulous attention to detail, and child-safe finishes ensure that this outdoor furniture ensemble will stand the test of time, providing a reliable and inviting space for children to connect with nature and each other.
As you witness the picnic table set becoming a hub of youthful energy and creativity, take pride in the lasting impact of your craftsmanship. This project embodies the spirit of DIY ingenuity and the joy of creating something truly special with your own hands. The picnic table set you’ve crafted is not merely a piece of furniture; it’s a conduit for joyful moments, imaginative play, and the simple pleasures of outdoor living.
So, as you bask in the satisfaction of completing this woodworking endeavor, revel in the knowledge that you’ve not only built a picnic table for kids but also nurtured a space where laughter, imagination, and cherished memories will flourish for years to come.
Now, it’s time to invite the little ones to experience the magic of their new picnic table set and witness the joy and wonder it brings to their outdoor adventures.
Frequently Asked Questions about How To Make A Picnic Table For Kids
Was this page helpful?
At Storables.com, we guarantee accurate and reliable information. Our content, validated by Expert Board Contributors, is crafted following stringent Editorial Policies. We're committed to providing you with well-researched, expert-backed insights for all your informational needs.

0 thoughts on “How To Make A Picnic Table For Kids”