Home>Gardening & Outdoor>Outdoor Structures>How To Build A Base For A Shed

Outdoor Structures
How To Build A Base For A Shed
Modified: August 27, 2024
Learn how to build a sturdy base for your shed with our outdoor structures guide. Follow our step-by-step instructions for a durable and long-lasting foundation.
(Many of the links in this article redirect to a specific reviewed product. Your purchase of these products through affiliate links helps to generate commission for Storables.com, at no extra cost. Learn more)
Introduction
Welcome to the world of outdoor structures! Whether you're a seasoned DIY enthusiast or just venturing into the realm of construction, building a base for a shed is a rewarding project that adds both functionality and aesthetic appeal to your outdoor space. A sturdy and well-constructed base not only provides a level foundation for your shed but also ensures its longevity by safeguarding it against ground moisture and uneven terrain.
In this comprehensive guide, we'll delve into the art of creating a solid base for your shed, covering everything from selecting the ideal location to the final finishing touches. By the end of this journey, you'll be equipped with the knowledge and confidence to embark on this fulfilling endeavor.
So, grab your tools, roll up your sleeves, and let's lay the groundwork for a successful shed base construction!
Key Takeaways:
- Choose a level, well-drained location for your shed base to ensure stability and longevity. Consider accessibility and sunlight exposure for a functional and visually appealing outdoor space.
- Prepare the ground meticulously and use durable materials to build a solid shed base. Add finishing touches like edge restraints and landscaping integration for long-term durability and visual appeal.
Read more: How To Build A Shed Base On Grass
Choosing the Right Location
Before you embark on constructing a base for your shed, it’s crucial to carefully select the optimal location. The chosen site should not only complement the aesthetics of your outdoor space but also offer practical advantages for the shed’s functionality.
Here are some key considerations when choosing the right location:
- Level Ground: Look for an area with relatively level ground to minimize the need for extensive excavation and leveling. This will simplify the construction process and ensure a more stable foundation for your shed.
- Drainage: Assess the site’s drainage patterns to avoid areas prone to pooling water. Proper drainage is essential for preventing water damage to the shed and maintaining a dry interior.
- Accessibility: Consider the accessibility of the location, especially if you plan to store large equipment or heavy items in the shed. Easy access will streamline the process of transporting items in and out of the shed.
- Sunlight Exposure: Evaluate the sun’s path throughout the day to determine the shed’s sun exposure. Positioning the shed to receive ample natural light can enhance its interior brightness and create a more pleasant environment.
- Landscape Integration: Take into account the surrounding landscape and how the shed will fit into the overall aesthetic of your outdoor space. Aim to integrate the shed seamlessly with its surroundings for a harmonious and visually appealing result.
By carefully considering these factors, you can identify the most suitable location for your shed, setting the stage for a successful base construction project.
Preparing the Ground
With the ideal location selected, the next crucial step in building a solid base for your shed is preparing the ground. Proper ground preparation is essential for ensuring the stability and longevity of the shed’s foundation.
Here’s a step-by-step guide to preparing the ground for your shed base:
- Clear the Area: Begin by clearing the designated area of any debris, vegetation, or obstacles. This includes removing rocks, roots, and any other obstructions that could disrupt the base construction process.
- Mark the Perimeter: Use marking paint or stakes to outline the perimeter of the shed base. This will provide a clear visual guide for the excavation and construction process, ensuring accurate dimensions for the base.
- Excavate the Site: Excavate the marked area to the required depth, taking into account the base material’s thickness and any necessary adjustments for drainage. Use a shovel, spade, or a small excavator to remove the topsoil and create a level surface for the base.
- Compact the Soil: Once the site is excavated, use a hand tamper or a plate compactor to compact the soil thoroughly. Compaction is crucial for creating a stable foundation that can support the weight of the shed and withstand ground movement.
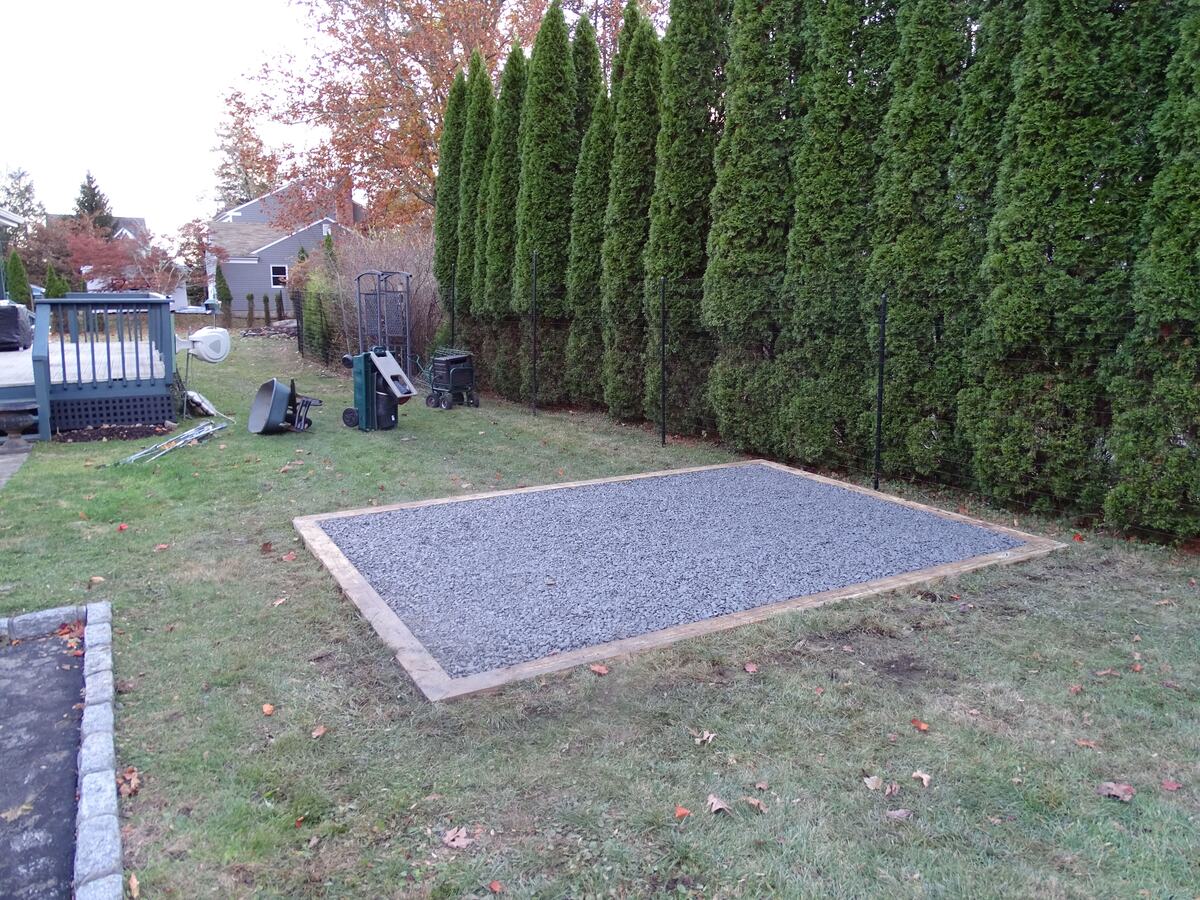
- Add a Layer of Gravel: To enhance drainage and stability, consider adding a layer of gravel to the excavated area. The gravel will facilitate water drainage and prevent the base material from shifting over time.
- Level the Surface: Use a long, straight board or a level to ensure the surface is perfectly level. This step is essential for achieving a uniform and stable base for the shed.
By meticulously preparing the ground according to these guidelines, you’ll establish a solid foundation for the shed base, setting the stage for the next phase of construction.
When building a base for a shed, make sure the ground is level and use pressure-treated lumber for the frame to prevent rot. Also, consider using gravel or concrete for a sturdy foundation.
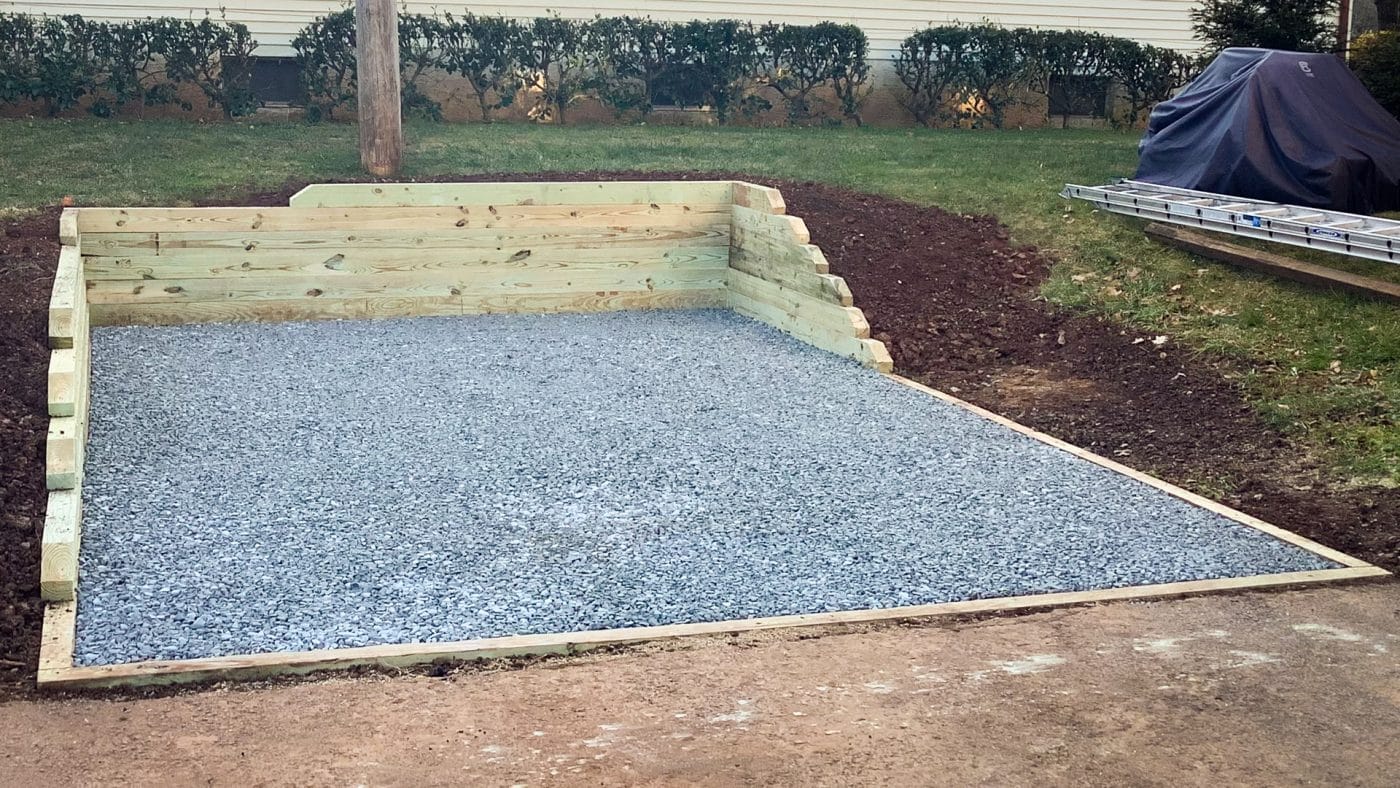
Building the Base
With the ground meticulously prepared, it’s time to embark on the construction of the base for your shed. The base serves as the fundamental support structure for the shed, providing stability and protection against ground moisture. When building the base, it’s essential to select durable materials and adhere to precise construction techniques.
Here’s a comprehensive overview of the steps involved in building the base for your shed:
- Choose the Base Material: Select a suitable base material based on your specific requirements and budget. Common options include pressure-treated lumber, concrete blocks, or paving slabs, each offering distinct advantages in terms of durability and ease of installation.
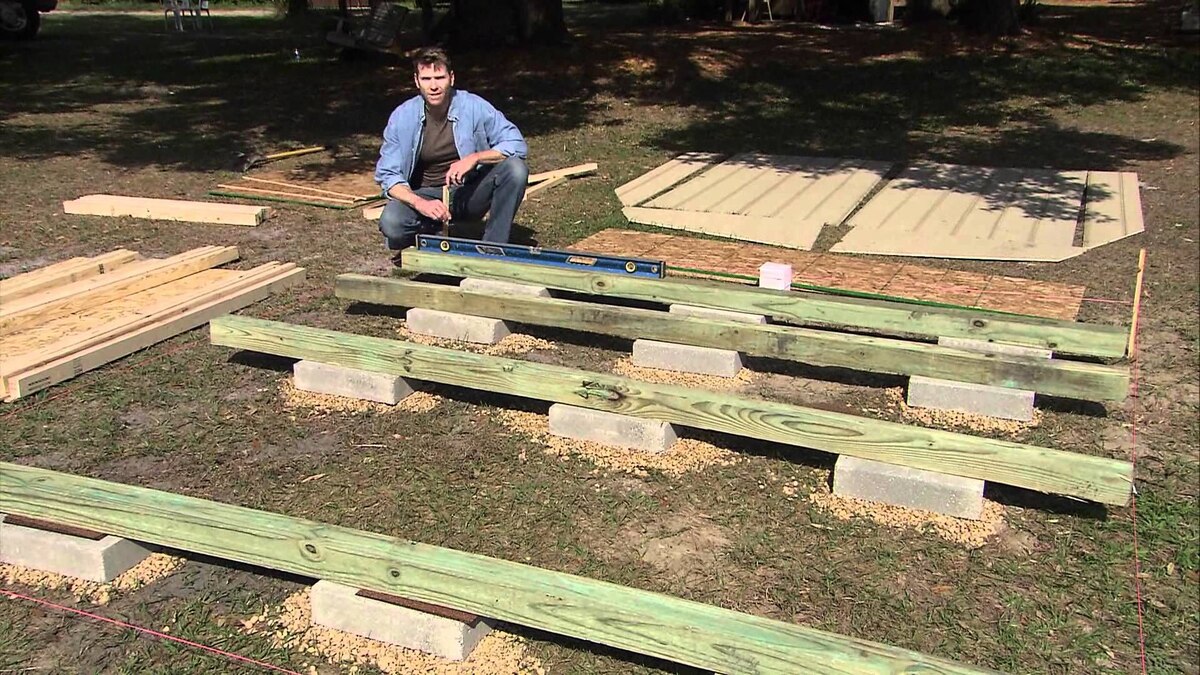
- Construct the Frame: If using lumber as the base material, construct a sturdy frame using pressure-treated 2×6 or 4×4 lumber. Ensure the frame is precisely squared and level, as it will form the primary support structure for the shed.
- Install Support Beams: Within the frame, install additional support beams or joists to bolster the base’s load-bearing capacity. These beams will distribute the shed’s weight evenly and prevent the base from sagging over time.
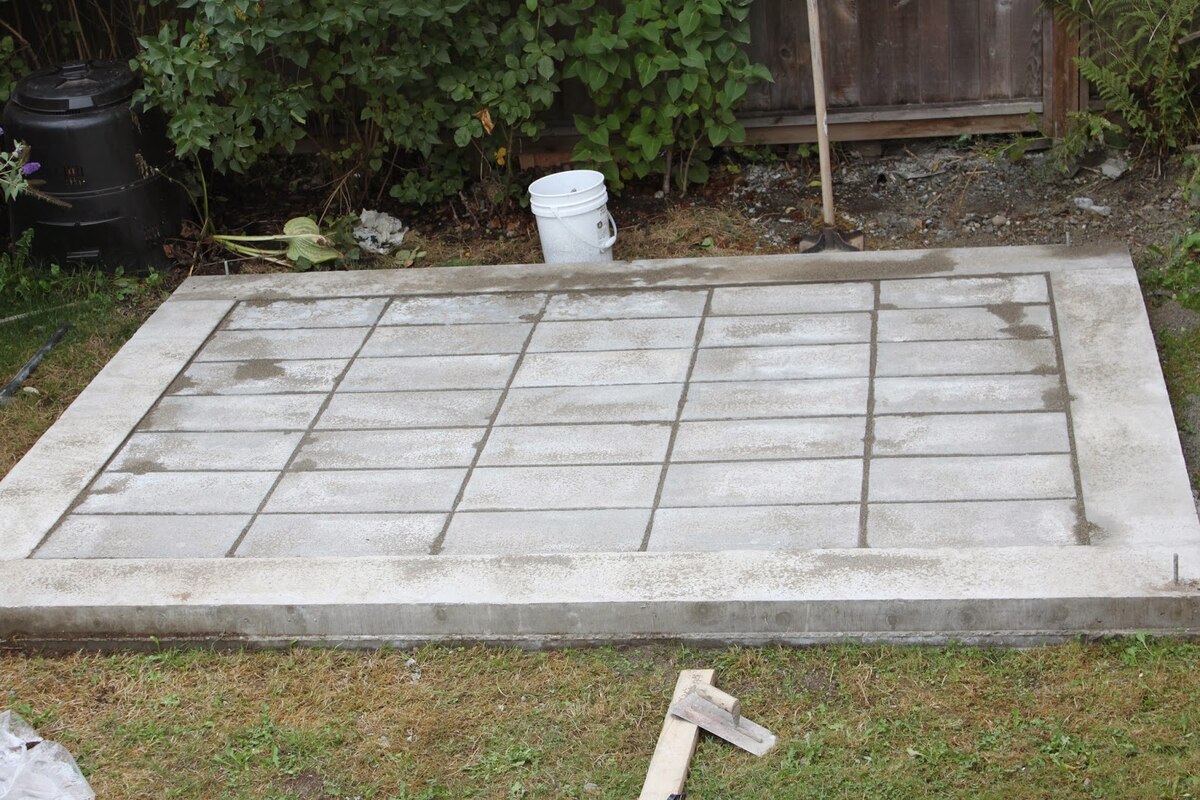
- Position the Base Material: Whether using concrete blocks or paving slabs, carefully position and align the base material within the frame. Ensure each block or slab is level and uniformly spaced to provide a solid and even surface for the shed.
- Anchoring the Base: To secure the base in place, use anchor bolts or screws to fasten the shed’s floor joists to the base material. This anchoring process fortifies the connection between the shed and its base, enhancing overall stability.
- Weatherproofing: Apply a weatherproof sealant or membrane to the base material to protect it from moisture and enhance its longevity. This step is especially crucial if using lumber as the base material, as it safeguards against rot and decay.
By meticulously following these steps and paying attention to detail, you’ll construct a robust and reliable base that forms the cornerstone of your shed’s structural integrity.
Finishing Touches
As the construction of the shed base nears completion, attention to the finishing touches will elevate the functionality and visual appeal of the structure. These final steps not only add a polished look to the base but also contribute to its long-term durability and resilience against the elements.
Here are the essential finishing touches to consider for your shed base:
- Edge Restraints: Install edge restraints around the perimeter of the base to secure the base material in place and prevent shifting or displacement. This is particularly important for gravel or paving slab bases, as it maintains the structural integrity of the shed base.
- Drainage Considerations: Assess the shed base’s drainage capabilities and make any necessary adjustments to ensure proper water runoff. Installing a French drain or incorporating sloping techniques can effectively manage water accumulation around the shed.
- Landscaping Integration: Enhance the visual appeal of the shed base by incorporating landscaping elements around its perimeter. This can include planting shrubs, flowers, or decorative stones to seamlessly blend the shed base with its surroundings.
- Sealing Gaps: Seal any gaps or joints in the base material to prevent water infiltration and minimize the risk of moisture-related damage. This step is crucial for maintaining the structural integrity of the shed base over time.
- Surface Treatment: Consider applying a protective surface treatment to the base material to enhance its resistance to weathering and UV exposure. This can include a sealant or paint specifically designed for the chosen base material.
- Accessibility Features: If desired, incorporate accessibility features such as ramps or steps to facilitate easy entry and exit from the shed. This is particularly important if the shed will be used for storing heavy equipment or tools.
By attending to these finishing touches, you’ll not only enhance the functionality and durability of the shed base but also create a visually appealing and seamlessly integrated structure within your outdoor space.
Read more: How To Build A Wood Base For A Shed
Conclusion
Congratulations on completing the journey of building a solid base for your shed! From carefully selecting the ideal location to adding the finishing touches, every step in this process contributes to the longevity, stability, and functionality of your outdoor structure. As you stand back and admire the newly constructed shed base, take pride in the craftsmanship and attention to detail that have gone into this essential foundation.
By choosing the right location, you’ve ensured that your shed will stand on level ground, with proper drainage and ideal sun exposure. The meticulous ground preparation has created a stable and compacted surface, laying the groundwork for a durable base. Building the base itself, whether with lumber, concrete blocks, or paving slabs, has provided a solid foundation for your shed, anchoring it securely in place.
As you add the finishing touches, such as edge restraints, landscaping integration, and surface treatments, you’re not only enhancing the functionality of the shed base but also integrating it seamlessly into your outdoor environment. These thoughtful details contribute to the overall aesthetics and long-term resilience of the structure.
With the shed base now complete, you’re ready to embark on the next phase of your outdoor project, whether it involves assembling the shed itself, organizing the interior space, or simply enjoying the newfound functionality that this addition brings to your property.
Remember, the investment of time and effort in constructing a sturdy base for your shed will pay dividends in the years to come, ensuring that your outdoor space remains organized, functional, and visually appealing. So, as you prepare to move forward with your shed project, take pride in the foundation you’ve built, knowing that it will support and protect your shed for many years of enjoyment to come.
Frequently Asked Questions about How To Build A Base For A Shed
Was this page helpful?
At Storables.com, we guarantee accurate and reliable information. Our content, validated by Expert Board Contributors, is crafted following stringent Editorial Policies. We're committed to providing you with well-researched, expert-backed insights for all your informational needs.


0 thoughts on “How To Build A Base For A Shed”