Home>Gardening & Outdoor>Outdoor Structures>How To Level A Shed Base
Outdoor Structures
How To Level A Shed Base
Modified: August 27, 2024
Learn how to level a shed base for your outdoor structures with our step-by-step guide. Ensure a stable foundation for your shed with these easy tips and techniques.
(Many of the links in this article redirect to a specific reviewed product. Your purchase of these products through affiliate links helps to generate commission for Storables.com, at no extra cost. Learn more)
Introduction – Importance of a Level Shed Base
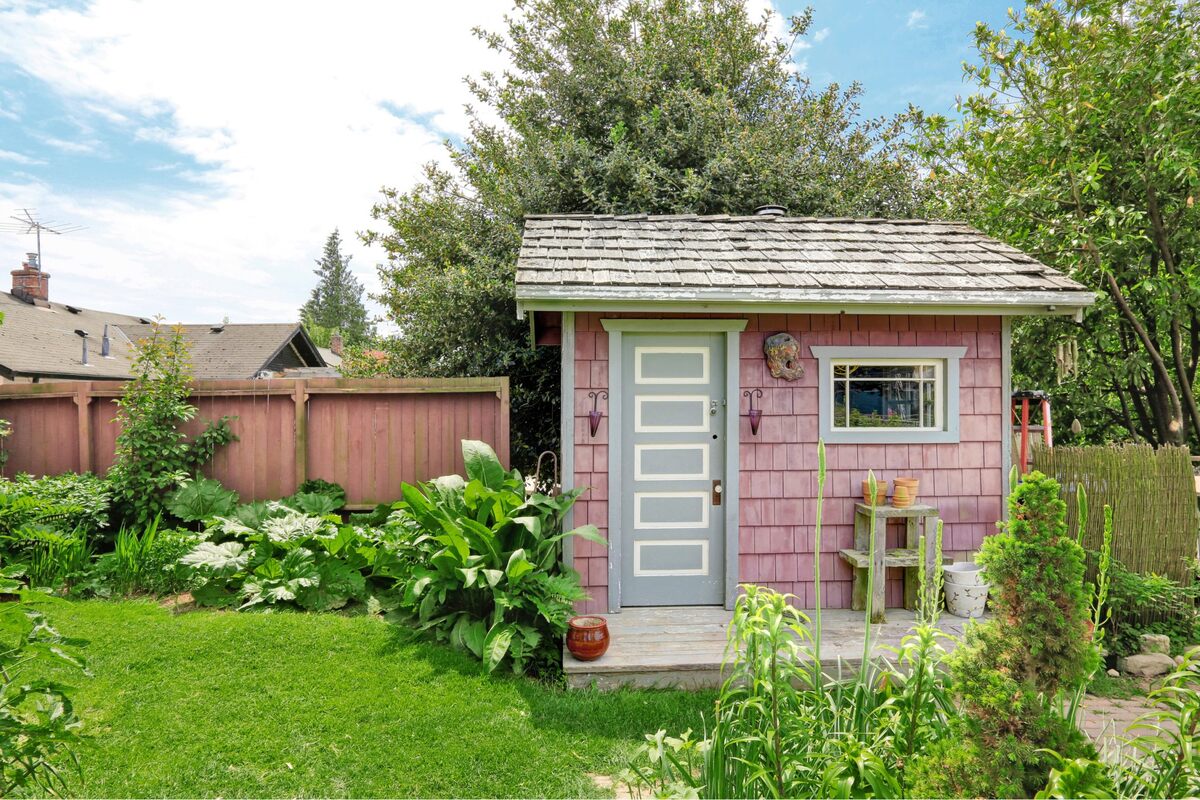
When it comes to setting up a shed, ensuring that the base is level is a crucial step that significantly impacts the structure’s stability and longevity. A level shed base provides a solid foundation for the shed, preventing issues such as structural instability, uneven weight distribution, and water drainage problems. By taking the time to properly level the shed base, you can safeguard your investment and ensure that your shed stands the test of time.
Without a level base, a shed is prone to a range of complications. Uneven surfaces can cause the shed to become unbalanced, leading to potential structural damage and safety hazards. Additionally, an unlevel base can result in water pooling around the shed, which can lead to moisture-related issues such as rot, mold, and deterioration of the shed’s materials. By addressing the importance of a level shed base, you can proactively mitigate these risks and create a sturdy foundation for your outdoor structure.
Furthermore, a level shed base facilitates the proper functioning of doors and windows. If the base is not level, it can cause the shed’s doors and windows to become misaligned, making them difficult to open and close. This not only diminishes the shed’s functionality but also detracts from its overall aesthetic appeal.
By recognizing the significance of a level shed base, you can lay the groundwork for a durable, reliable outdoor structure. Whether you plan to use your shed for storage, as a workshop, or for any other purpose, a level base is essential for ensuring that the shed remains structurally sound and resilient in the face of various environmental factors.
As we delve into the process of leveling a shed base, it’s important to understand the tools, materials, and techniques involved in achieving a level foundation. By mastering these fundamental aspects, you can embark on the journey of creating a stable and secure base for your shed, setting the stage for its long-term functionality and structural integrity.
Key Takeaways:
- Importance of a level shed base: A level shed base is crucial for stability, preventing water damage, and ensuring doors and windows function properly, creating a durable and reliable outdoor structure.
- Steps to level a shed base: Clear the area, prepare the ground, use a spirit level, and make fine adjustments to achieve a stable and uniform shed base, ensuring long-term resilience and functionality.
Read more: How To Build A Base For A Shed
Tools and Materials – List of Tools and Materials Required for Leveling a Shed Base
Before embarking on the task of leveling a shed base, it’s essential to gather the necessary tools and materials to ensure a smooth and efficient process. Here’s a comprehensive list of items you’ll need:
Tools:
- Shovel: To clear the area and prepare the ground for the shed base.
- Rake: For smoothing and leveling the ground.
- Tape Measure: To ensure precise dimensions and levelness.
- Spirit Level: Essential for checking the level of the shed base during the construction process.
- Tamper: Used to compact the soil or gravel for a solid base.
- Wheelbarrow: For transporting and distributing gravel or sand.
- String and Stakes: To outline the shed base area and ensure straight edges.
- Hammer: For securing stakes and other construction tasks.
- Power Compactor (optional): For compacting the base material more efficiently.
Materials:
- Gravel or Crushed Stone: Provides a stable and well-draining base for the shed.
- Concrete Blocks or Pavers: Optional, for additional support and leveling.
- Landscape Fabric: Helps prevent weed growth and maintains the integrity of the base.
- Pressure-Treated Wood or Metal Beams: For constructing the shed base frame.
- Hardware (Screws, Nails, Brackets): Used for securing the base frame and components.
- Leveling Sand (if using pavers): Ensures a smooth and level surface for the pavers.
- Wood Shims: For making fine adjustments to achieve a perfectly level base.
- Concrete Mix (if pouring a concrete base): Provides a durable and solid foundation.
By having these tools and materials at your disposal, you’ll be well-equipped to tackle the task of leveling a shed base with confidence and precision. Each item plays a vital role in the construction and leveling process, contributing to the creation of a stable and durable foundation for your shed.
With the tools and materials in hand, the next steps involve clearing the area and preparing the ground for the shed base, laying the groundwork for a level and resilient foundation.
Clearing the Area – Steps to Clear the Area for the Shed Base
Before you can begin the process of leveling a shed base, it’s crucial to ensure that the area is properly cleared and prepared. Here are the essential steps to clear the area for the shed base:
1. Remove Debris: Start by removing any debris, rocks, branches, or other obstacles from the area where the shed will be placed. This step ensures a clean and unobstructed space for the base construction.
2. Mark the Area: Use string and stakes to outline the perimeter of the shed base area. This will provide a clear visual guide for the construction process and help ensure that the base is properly aligned and sized.
3. Clear Vegetation: If there is grass, weeds, or other vegetation within the outlined area, use a shovel or a sod cutter to remove it. Clearing the vegetation will prevent organic matter from decomposing beneath the shed base, which could lead to uneven settling over time.
4. Level the Ground: Use a rake and shovel to level the ground within the outlined area. Remove any high spots and fill in any low areas to create a uniform surface for the shed base. It’s important to take your time with this step to ensure that the ground is as level as possible before proceeding with the base construction.
5. Install Landscape Fabric (Optional): Consider laying down landscape fabric to inhibit weed growth and provide additional stability to the base. This step can help maintain the integrity of the base over time, particularly if the shed will be used for storage or as a workspace.
By following these steps to clear the area for the shed base, you’ll establish a solid foundation for the subsequent stages of base preparation and leveling. With the area cleared and prepared, you can proceed to the next crucial phase: preparing the ground for the shed base construction.
Read more: How To Build A Shed Base On Grass
Preparing the Ground – How to Prepare the Ground for the Shed Base
Once the area for the shed base is cleared, the next step involves preparing the ground to ensure a stable and level foundation. Follow these essential steps to prepare the ground for the shed base:
1. Measure and Mark: Use a tape measure to ensure that the dimensions of the cleared area align with the shed’s base requirements. Mark the corners and edges of the shed base area to provide a clear guide for the construction process.
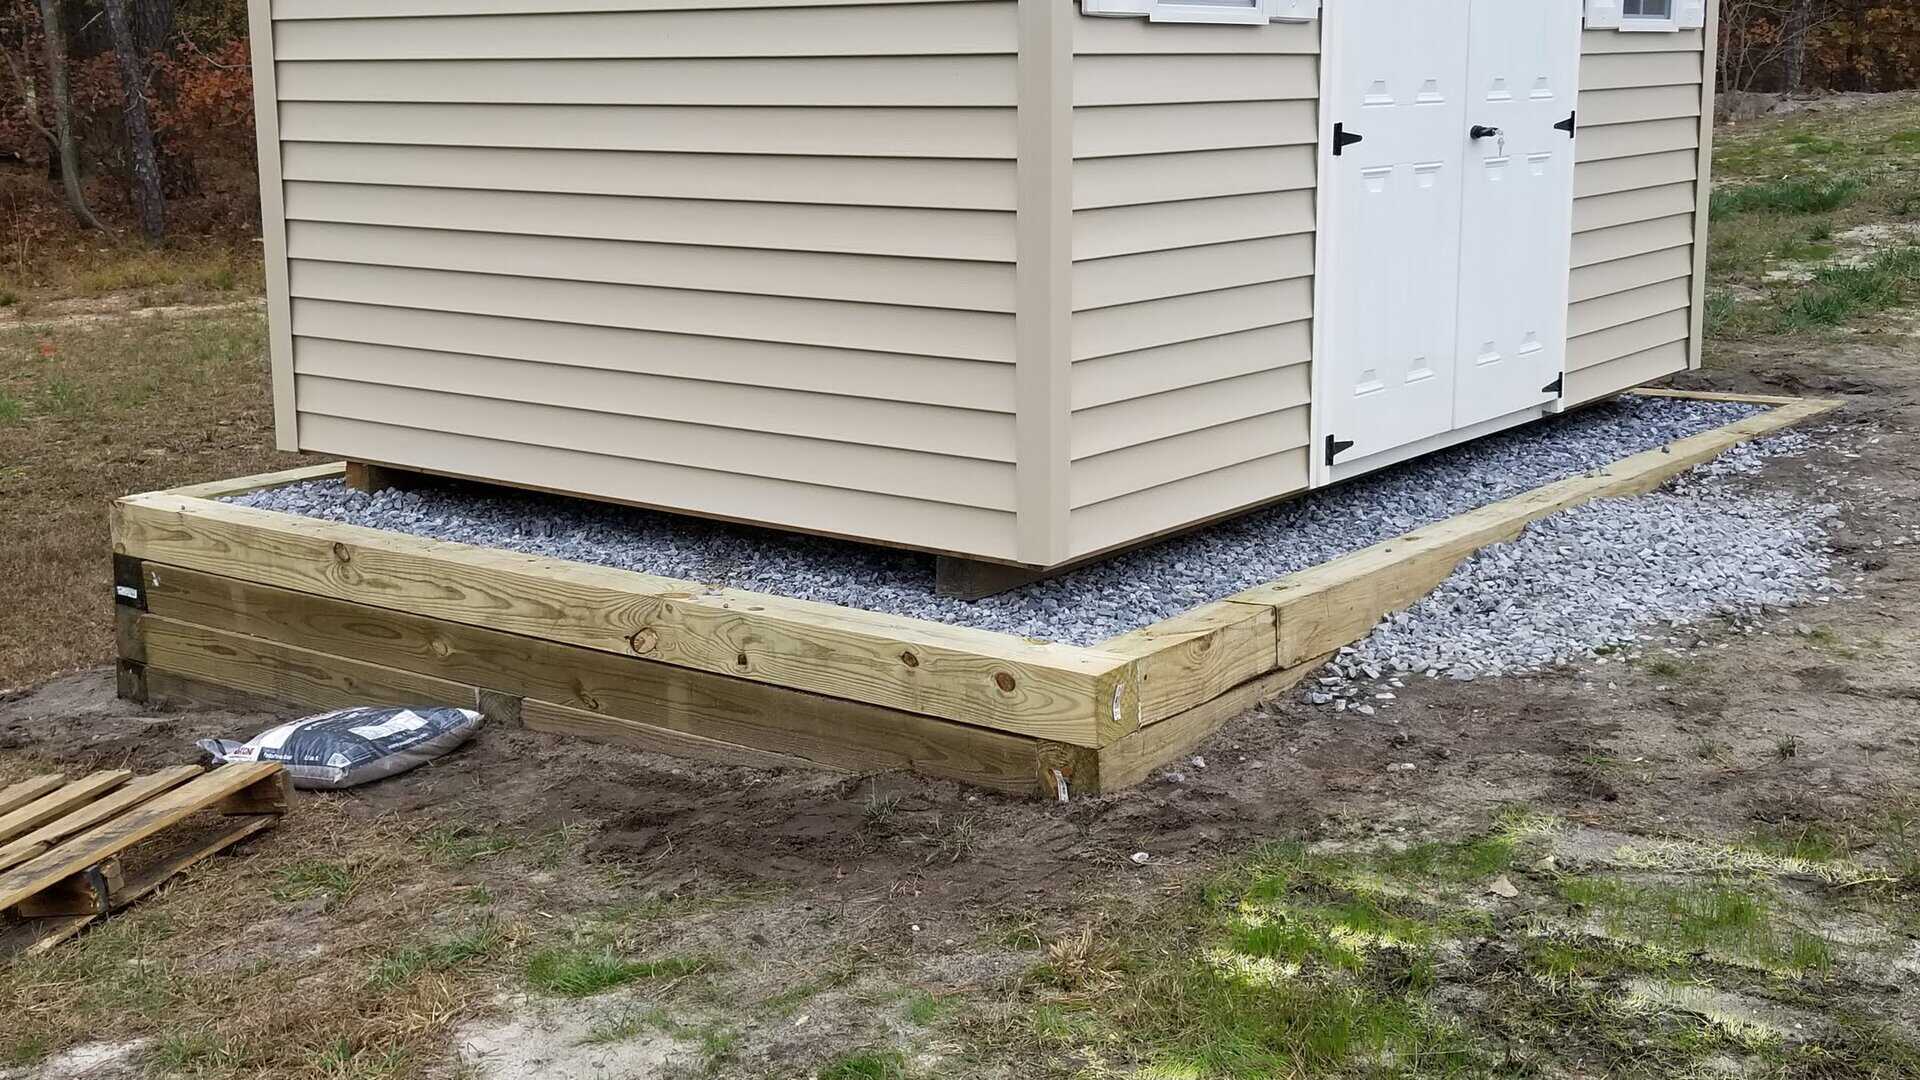
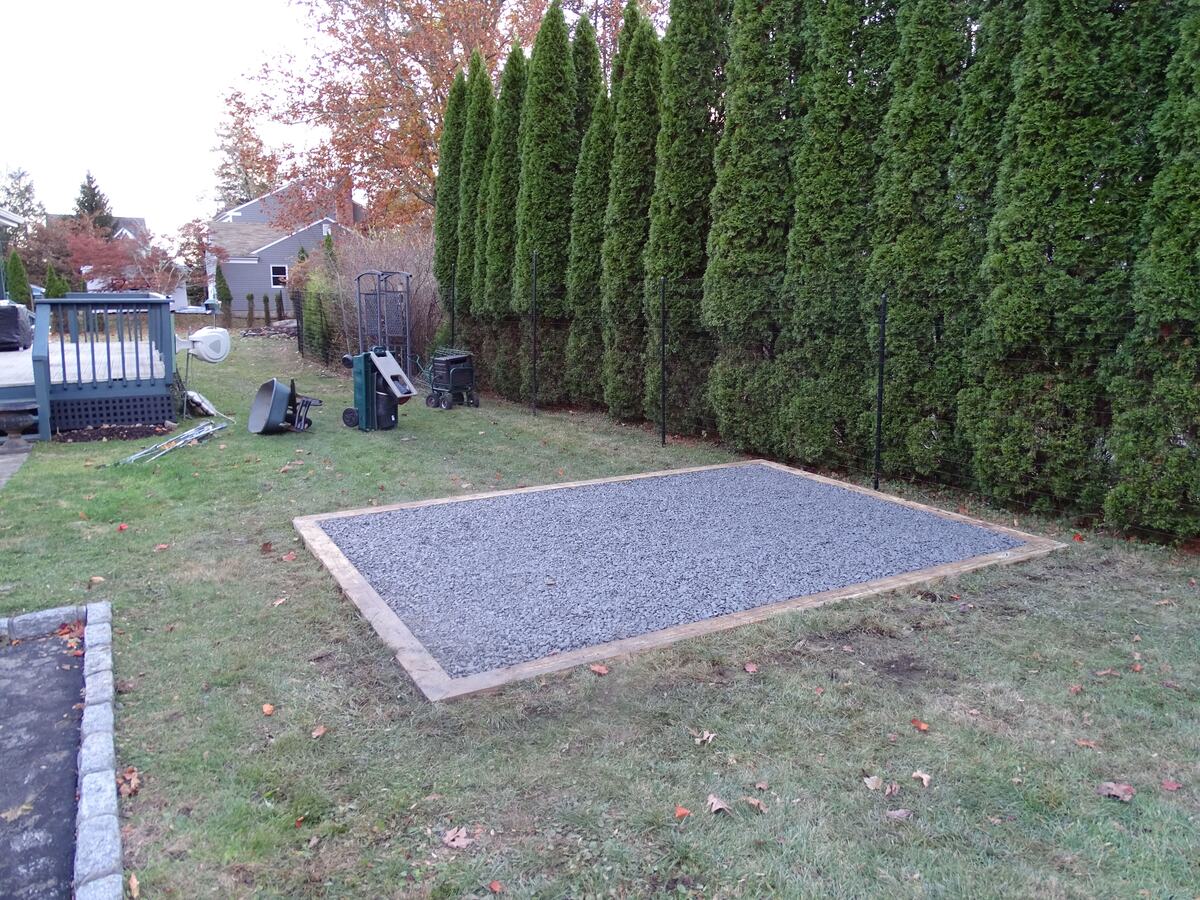
2. Excavate the Area: Depending on the type of shed base you’re constructing, you may need to excavate the ground to a certain depth. For example, if you’re using a gravel or crushed stone base, you’ll need to dig down to accommodate the base material and provide a level surface. If you’re pouring a concrete base, the excavation will need to be deeper to accommodate the concrete thickness.
3. Add Base Material: Once the ground is excavated, add a layer of gravel or crushed stone to create a stable and well-draining base for the shed. Use a tamper to compact the base material, ensuring a solid foundation for the shed base.
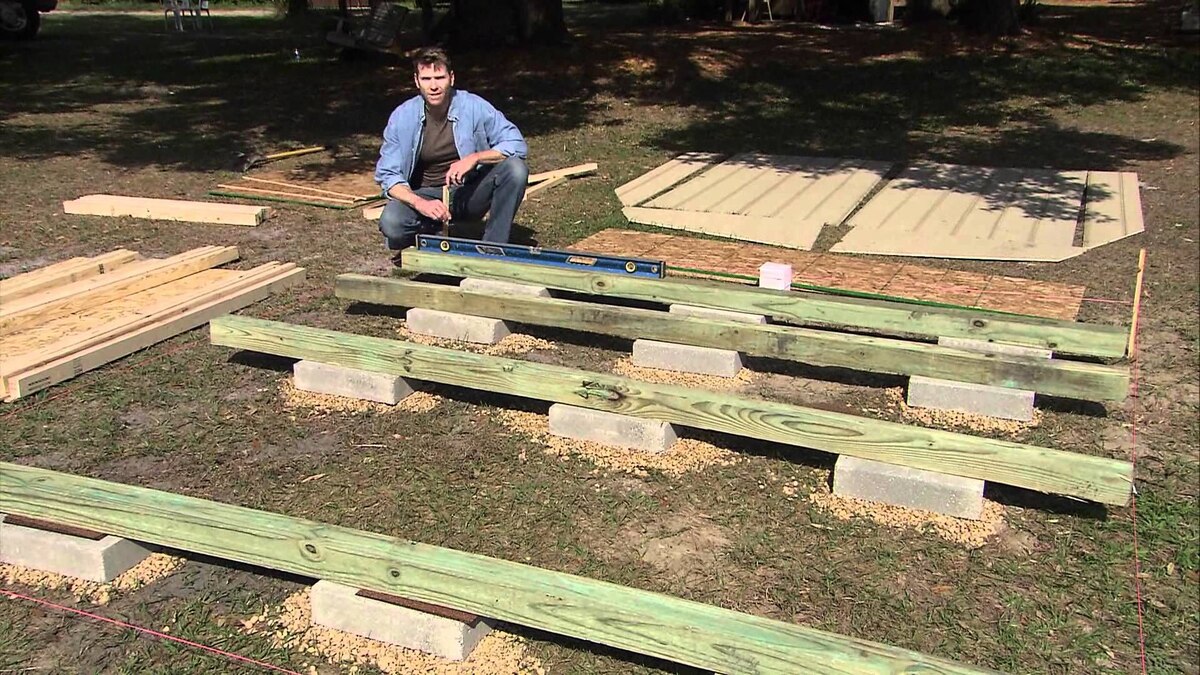
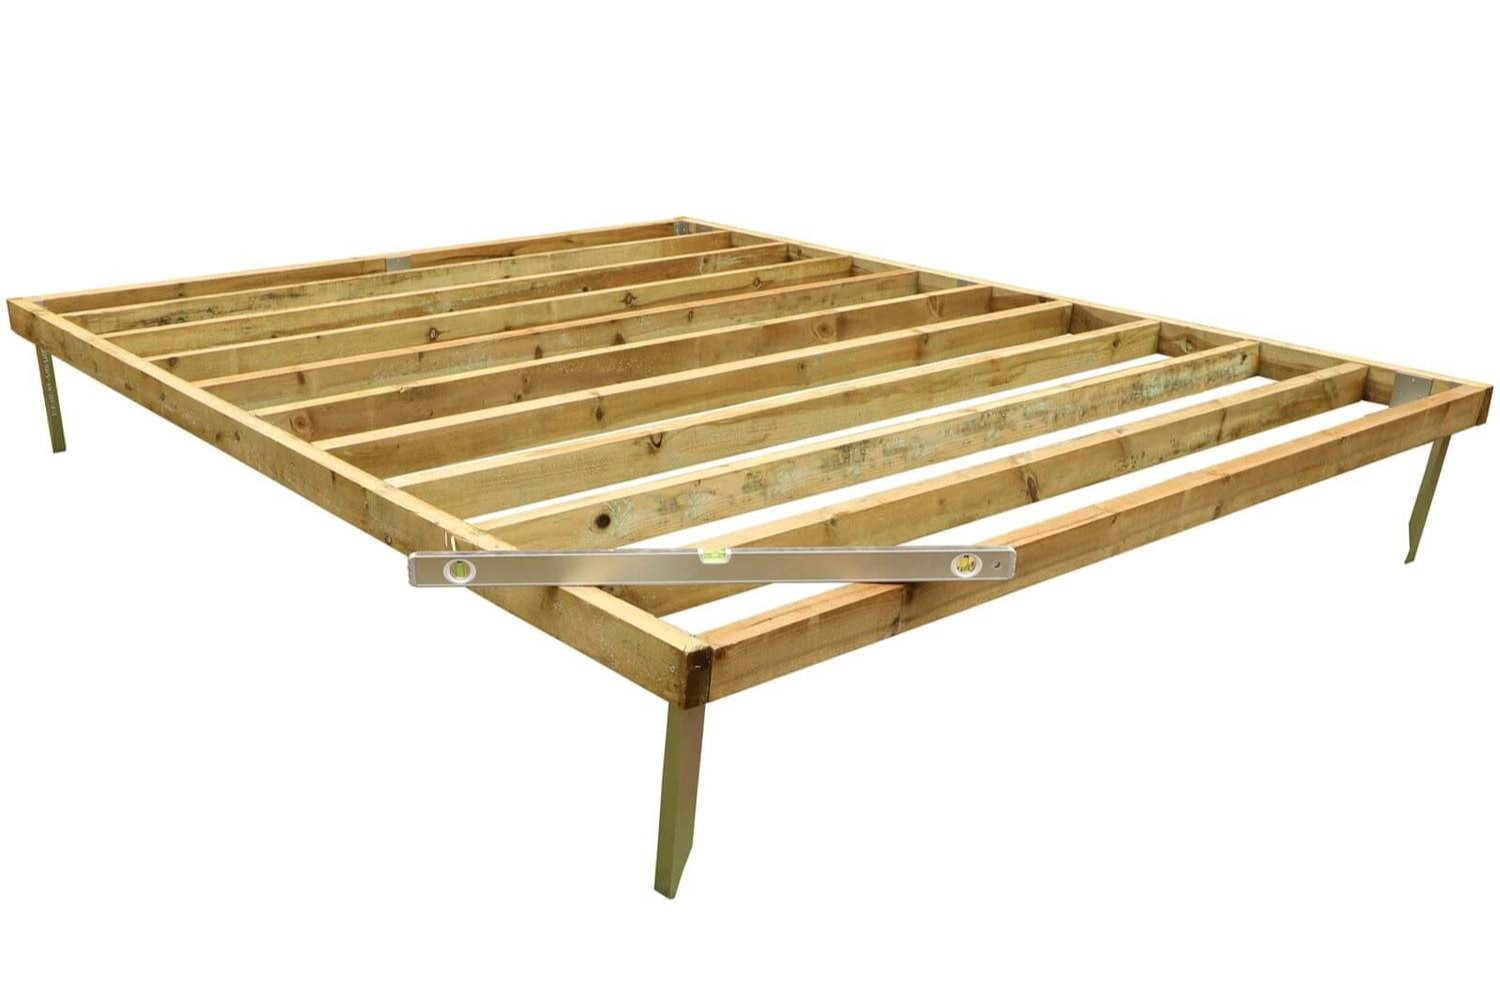
4. Construct the Base Frame: If you’re using a raised wooden or metal base frame, assemble it within the excavated area according to the shed’s dimensions. Ensure that the frame is level and securely positioned, as it will serve as the support structure for the shed base.
5. Level the Base: Use a spirit level to check the levelness of the base frame or the excavated area. Make any necessary adjustments to ensure that the base is perfectly level in all directions. This step is crucial for the overall stability and integrity of the shed base.
6. Secure the Base Frame: If you’re using a raised base frame, secure it in place using stakes, screws, or other appropriate fasteners. This will ensure that the base frame remains stable and aligned during the subsequent stages of shed construction.
By meticulously preparing the ground for the shed base, you’ll establish a solid foundation that sets the stage for the successful construction and leveling of the shed base. With the ground prepared, you can proceed to the next phase: leveling the base to ensure its stability and longevity.
Leveling the Base – Techniques for Leveling the Shed Base
Leveling the shed base is a critical step in ensuring the stability and structural integrity of the entire shed. Here are the essential techniques for leveling the shed base:
1. Use a Spirit Level: A spirit level is a fundamental tool for ensuring that the shed base is perfectly level. Place the spirit level in various locations across the base, both horizontally and vertically, to assess the levelness of the surface. Make adjustments as needed to achieve a uniform level throughout the base.
2. Shim and Adjust: If the base frame or excavated area is not perfectly level, use wooden shims or additional base material to make precise adjustments. Place the shims strategically to raise or lower specific areas of the base, gradually working toward achieving a level surface.
3. Check for Uniformity: In addition to checking for levelness, it’s essential to ensure that the base is uniform in all directions. Use a tape measure to confirm that the dimensions of the base are consistent, and make any necessary alterations to achieve uniformity across the entire surface.
4. Compact the Base Material: If you’re using gravel or crushed stone as the base material, use a tamper to compact the material thoroughly. This process helps eliminate air gaps and ensures that the base remains stable and level over time.
5. Consider Drainage: While leveling the base, pay attention to the slope and drainage of the area. It’s important to ensure that the shed base is slightly elevated or graded to promote water runoff and prevent pooling, which can lead to moisture-related issues and deterioration of the shed’s materials over time.
6. Verify Stability: Once the base is leveled, walk across the surface and apply gentle pressure to confirm its stability. Address any areas that feel uneven or unstable, making necessary adjustments to enhance the overall solidity of the shed base.
By employing these techniques, you can achieve a level shed base that forms a sturdy and reliable foundation for the shed. The meticulous attention to leveling ensures that the shed base is well-prepared to support the structure and withstand various environmental factors.
With the shed base successfully leveled, the next step is to check for level and make any final adjustments to guarantee the base’s stability and functionality.
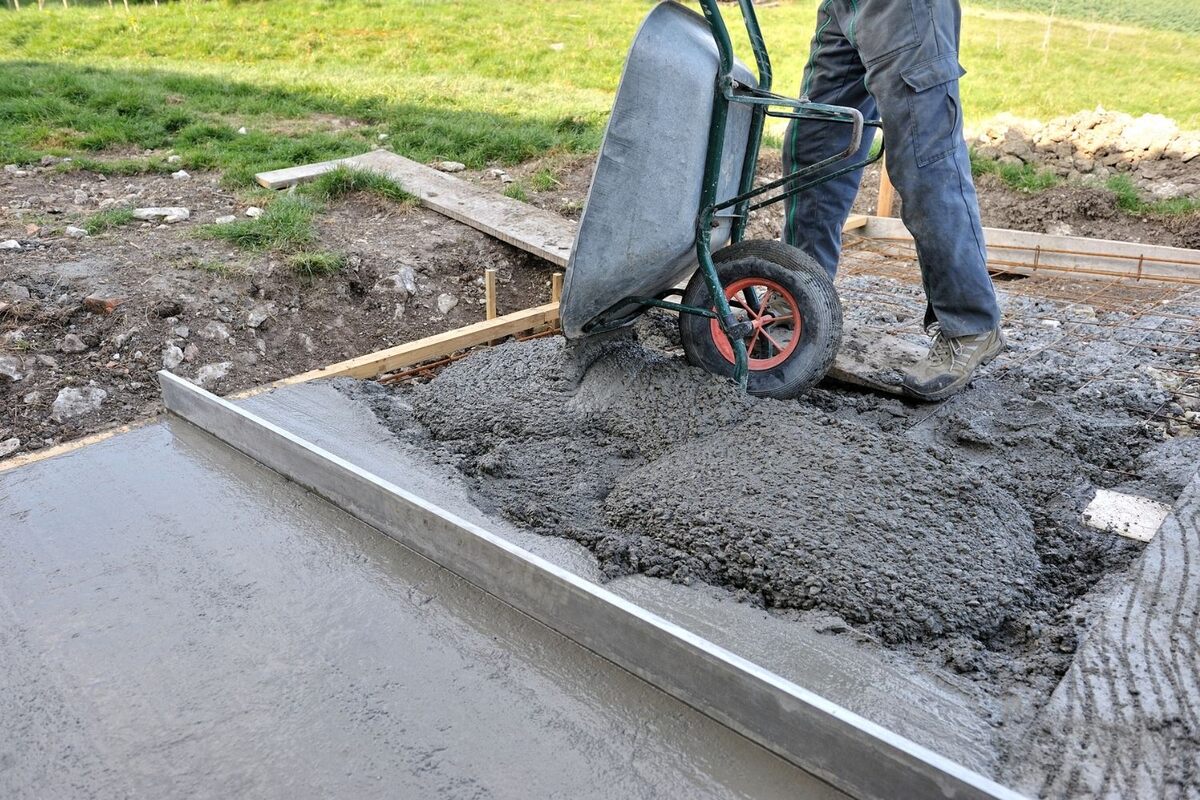
Before laying the shed base, use a long spirit level to check for any uneven areas. Add or remove gravel as needed to ensure a level surface for the shed.
Checking for Level – Steps to Ensure the Shed Base is Level
After leveling the shed base, it’s crucial to verify its levelness to guarantee a stable and reliable foundation for the shed. Follow these essential steps to ensure that the shed base is level:
1. Utilize a Spirit Level: Once the base has been leveled, use a spirit level to double-check the levelness of the entire surface. Place the spirit level in various locations across the base, ensuring that it is both horizontally and vertically level. This comprehensive assessment helps identify any areas that may require further adjustments.
2. Assess the Shed Base Frame (if applicable): If you’ve constructed a raised base frame using pressure-treated wood or metal beams, verify that the frame remains level and securely positioned. Pay close attention to the corners and joints of the frame, as these areas are critical for maintaining the overall stability of the shed base.
3. Measure for Uniformity: Use a tape measure to confirm that the shed base maintains consistent dimensions across its length and width. This step ensures that the base is uniform and symmetrical, contributing to its overall stability and the shed’s proper fit once it is installed.
4. Make Fine Adjustments: If the spirit level indicates any areas that are slightly off-level, use wooden shims or additional base material to make precise adjustments. Gradually fine-tune the levelness of the shed base, striving for an even and uniform surface throughout.
5. Confirm Stability: Walk across the shed base and apply gentle pressure to different areas to verify its stability. Pay attention to any areas that feel uneven or unstable, and make necessary adjustments to enhance the overall solidity of the shed base.
6. Consider Long-Term Maintenance: While checking for level, consider the long-term maintenance of the shed base. Ensure that the base is designed to withstand environmental factors and that its levelness will be maintained over time, minimizing the need for frequent adjustments and repairs.
By meticulously following these steps to check for level, you can ensure that the shed base is stable, uniform, and well-prepared to support the shed. This thorough verification process sets the stage for the successful installation and long-term functionality of the shed.
With the shed base confirmed to be level and stable, you can proceed with confidence, knowing that the foundation is primed to support the shed and withstand the test of time.
Conclusion – Importance of a Level Shed Base and Its Impact on the Shed’s Stability
As we conclude our exploration of leveling a shed base, it’s essential to underscore the critical importance of achieving a level foundation and its profound impact on the overall stability and longevity of the shed. A level shed base is not merely a construction prerequisite; it is a cornerstone of the shed’s structural integrity and functionality.
Stability and Structural Integrity: A level shed base serves as the bedrock upon which the entire shed is built. By ensuring that the base is level and uniform, you create a solid foundation that supports the shed’s structure and weight distribution. This stability is essential for safeguarding the shed against structural damage and ensuring its long-term durability.
Prevention of Water Drainage Issues: A level shed base plays a crucial role in preventing water drainage problems. By maintaining a level surface with proper drainage, you can mitigate the risk of water pooling around the shed, which can lead to moisture-related issues such as rot, mold, and deterioration of the shed’s materials. This proactive measure protects the shed from environmental damage and preserves its structural integrity.
Enhanced Functionality: A level shed base facilitates the proper functioning of doors and windows, ensuring that they align and operate smoothly. This not only enhances the shed’s functionality but also contributes to its overall aesthetic appeal, creating a seamless and user-friendly space for various activities and storage needs.
Long-Term Resilience: By prioritizing a level shed base, you lay the groundwork for the shed’s long-term resilience. A stable and level foundation minimizes the risk of structural issues, uneven settling, and the need for frequent adjustments or repairs. This long-term resilience is a testament to the meticulous preparation and leveling of the shed base.
Ultimately, the importance of a level shed base cannot be overstated. It is the fundamental element that underpins the shed’s stability, functionality, and resilience in the face of diverse environmental factors. By dedicating attention to the leveling process and ensuring a level foundation, you invest in the longevity and reliability of your shed, creating a space that stands strong and steadfast over time.
As you embark on the journey of constructing a shed, remember that a level base is not just a starting point; it is a cornerstone of the shed’s enduring strength and functionality. By honoring the significance of a level shed base, you set the stage for a structure that stands the test of time, providing a secure and dependable space for your diverse needs and endeavors.
Frequently Asked Questions about How To Level A Shed Base
Was this page helpful?
At Storables.com, we guarantee accurate and reliable information. Our content, validated by Expert Board Contributors, is crafted following stringent Editorial Policies. We're committed to providing you with well-researched, expert-backed insights for all your informational needs.


0 thoughts on “How To Level A Shed Base”