Home>Gardening & Outdoor>Outdoor Structures>How To Clean A Camper Awning

Outdoor Structures
How To Clean A Camper Awning
Modified: February 18, 2024
Learn the best techniques for cleaning your camper awning to keep it looking fresh and extend its lifespan. Discover expert tips for maintaining outdoor structures.
(Many of the links in this article redirect to a specific reviewed product. Your purchase of these products through affiliate links helps to generate commission for Storables.com, at no extra cost. Learn more)
Introduction
Welcome to the comprehensive guide on how to clean a camper awning! A camper awning is a crucial component of any outdoor adventure, providing shade and protection from the elements. However, over time, awnings can accumulate dirt, grime, and other unsightly substances, detracting from their functionality and aesthetic appeal. By following the steps outlined in this guide, you can restore your camper awning to its former glory, ensuring that it remains a reliable and visually appealing asset during your outdoor excursions.
Cleaning a camper awning is a relatively straightforward process that can be completed with the right tools and a bit of elbow grease. Whether you're a seasoned camper or a novice outdoor enthusiast, maintaining your awning is essential for prolonging its lifespan and preserving its pristine condition. In this article, we will walk you through the step-by-step process of cleaning your camper awning, from gathering the necessary supplies to applying a protective coating for long-lasting results.
So, roll up your sleeves, gather your cleaning supplies, and let's dive into the rejuvenating journey of restoring your camper awning to its original splendor. With a little effort and the guidance provided here, you'll soon be enjoying the great outdoors under a beautifully clean and well-maintained awning.
Key Takeaways:
- Regularly cleaning and applying a protective coating to your camper awning can prolong its lifespan and maintain its pristine appearance, ensuring a reliable and visually appealing shelter for outdoor adventures.
- By following a simple six-step process, you can effectively clean and revitalize your camper awning, enhancing its durability and aesthetic charm for countless outdoor excursions.
Step 1: Gather Your Supplies
Before embarking on the camper awning cleaning process, it’s essential to gather all the necessary supplies. Having the right tools at your disposal will streamline the cleaning procedure and ensure that you can tackle the task effectively. Here’s a list of supplies you’ll need:
- Mild Detergent: Opt for a gentle, non-abrasive detergent specifically formulated for outdoor fabrics. Avoid using harsh chemicals that could damage the awning material.
- Soft-Bristle Brush: A soft-bristle brush or a specialty awning cleaning brush will help dislodge dirt and debris without causing damage to the fabric.
- Bucket: Use a large bucket to mix the cleaning solution and water for scrubbing the awning.
- Water Hose: A steady supply of water is essential for rinsing the awning thoroughly after cleaning.
- Ladder: Depending on the size and height of your camper, a ladder may be necessary to reach the entirety of the awning surface.
- Protective Gloves: It’s advisable to wear protective gloves to shield your hands from cleaning solutions and potential debris.
- Old Towels or Cloths: These will come in handy for drying the awning after cleaning and rinsing.
- Awnings Cleaner: Consider using a specialized awning cleaner for particularly stubborn stains or deeply embedded dirt.
- Protective Coating: An optional but beneficial supply is a protective coating designed for awnings, which can help repel dirt and extend the time between cleanings.
By ensuring that you have all the necessary supplies on hand, you’ll be well-prepared to tackle the cleaning process efficiently and achieve optimal results. With these tools at your disposal, you’re ready to move on to the next step in the process: brushing off debris from the awning surface.
Step 2: Brush Off Debris
Now that you’ve gathered your cleaning supplies, it’s time to begin the process of revitalizing your camper awning. Before applying any cleaning solution, it’s essential to remove loose debris and dirt from the awning’s surface. This initial step will prevent the accumulation of grime and ensure that the cleaning solution can effectively penetrate the fabric.
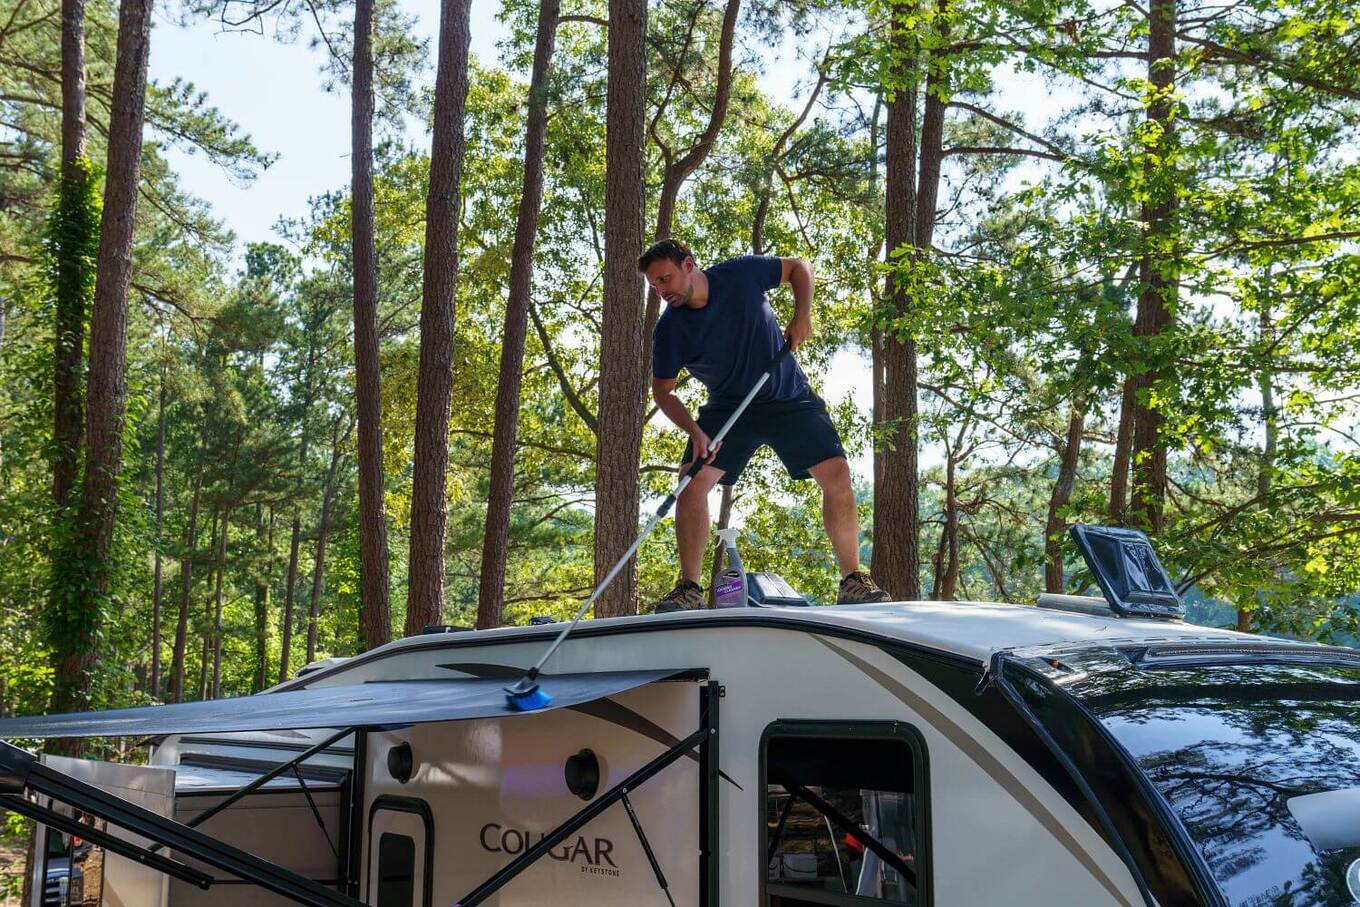
Start by extending the awning fully to expose the entire surface area. Use a soft-bristle brush or a specialty awning cleaning brush to gently sweep away loose dirt, leaves, twigs, and any other debris that may have settled on the fabric. Work methodically from one end of the awning to the other, paying attention to creases, seams, and any areas where debris may be particularly concentrated.
It’s crucial to exercise caution during this process to avoid causing damage to the awning fabric. Gentle, sweeping motions with the brush will dislodge the debris without placing undue stress on the material. Additionally, be mindful of any seams, stitching, or delicate areas that may require extra care to prevent fraying or tearing.
By thoroughly brushing off debris, you’ll create a clean canvas for the subsequent cleaning steps, ensuring that the cleaning solution can effectively target embedded dirt and stains. Once the loose debris has been removed, you’re ready to move on to the next step: preparing the cleaning solution that will restore your awning to its pristine condition.
Step 3: Prepare Cleaning Solution
With the debris brushed off, the next crucial step in the camper awning cleaning process is preparing the cleaning solution. The right cleaning solution will effectively lift dirt and grime from the fabric without causing damage or discoloration. Here’s how to create a gentle yet potent cleaning solution:
Begin by filling a large bucket with lukewarm water. Avoid using hot water, as it can potentially damage the fabric of the awning. Once the bucket is filled, add a small amount of mild detergent specifically formulated for outdoor fabrics. Be sure to follow the manufacturer’s instructions regarding the proper dilution ratio for the detergent.
Gently agitate the water to create a soapy solution, ensuring that the detergent is thoroughly mixed. It’s essential to use a mild detergent to avoid harsh chemicals that could compromise the integrity of the awning fabric. Opting for a non-abrasive, eco-friendly detergent will help preserve the fabric’s color and texture while effectively removing dirt and stains.
Once the cleaning solution is prepared, it’s time to move on to the next step: applying the solution to the awning and scrubbing away any remaining dirt and grime. With the right cleaning solution at your disposal, you’re well-equipped to tackle the task of restoring your camper awning to its original luster.
To clean a camper awning, mix a solution of mild soap and water. Use a soft brush or sponge to gently scrub the awning, then rinse thoroughly with water and allow it to air dry completely before rolling it up.
Step 4: Scrub the Awning
With the cleaning solution prepared, it’s time to embark on the pivotal stage of scrubbing the camper awning. This step involves applying the cleaning solution to the fabric and using a gentle yet effective scrubbing technique to dislodge embedded dirt and stains. Here’s how to proceed:
Using a soft-bristle brush or a specialty awning cleaning brush, dip the bristles into the prepared cleaning solution. Begin applying the solution to the awning, working in small sections to ensure thorough coverage. It’s crucial to avoid saturating the fabric excessively, as this can prolong the drying process and potentially lead to water spots.
Once the cleaning solution is applied, use the brush to gently scrub the fabric in a back-and-forth motion. Focus on areas where dirt and stains are particularly prevalent, such as high-traffic zones or spots exposed to environmental elements. Exercise caution to avoid applying excessive pressure, as this could potentially damage the fabric.
As you scrub the awning, periodically rinse the brush in the cleaning solution to prevent the accumulation of dirt on the bristles. This will ensure that the cleaning process remains effective and prevents the spread of grime from one section of the awning to another.
Throughout the scrubbing process, pay attention to any stubborn stains or areas where dirt may be deeply embedded. In such cases, a bit of extra effort may be required to effectively lift the stains. For particularly stubborn spots, consider using a specialized awning cleaner designed to target tough stains without compromising the fabric.
By methodically scrubbing the entire surface of the awning, you’ll effectively lift dirt, grime, and stains, restoring the fabric to its original cleanliness. With this crucial step completed, you’re ready to move on to the next stage: rinsing and drying the awning to reveal the revitalized, immaculate surface.
Read more: How To Make An Awning For A Camper
Step 5: Rinse and Dry
After scrubbing the camper awning to lift dirt and stains, the next essential step is to thoroughly rinse and dry the fabric. Proper rinsing will remove residual cleaning solution and any loosened debris, while effective drying will prevent the formation of water spots and ensure that the awning is ready for the next phase of the cleaning process. Here’s how to proceed:
Using a water hose with a gentle spray attachment, thoroughly rinse the entire surface of the awning. Start from the top and work your way down, ensuring that all traces of the cleaning solution are effectively removed. Pay special attention to seams, creases, and folds where cleaning solution and dirt may accumulate.
As you rinse the awning, be mindful of any remaining dirt or stains that may require additional attention. If necessary, consider repeating the scrubbing process in targeted areas to ensure that the fabric is thoroughly clean and free of any lingering grime.
Once the awning is fully rinsed, it’s time to proceed with the drying process. Extend the awning fully to allow air circulation and expedite the drying time. Using old towels or cloths, gently blot the awning to absorb excess water. Avoid rubbing the fabric vigorously, as this can potentially damage the material or cause wrinkles to form.
Depending on the weather conditions, allow the awning to air dry naturally. If sunlight is available, the gentle warmth can aid in the drying process. However, if direct sunlight is not feasible or if the awning is made of delicate material, consider using a fan to promote air circulation and accelerate drying.
Throughout the drying process, periodically inspect the awning to ensure that no water spots or residual moisture remain. Once the fabric is completely dry, you’re ready to proceed to the final step: applying a protective coating to safeguard the awning and prolong its cleanliness.
With the awning thoroughly rinsed and dried, you’ve successfully completed a crucial stage in the cleaning process, setting the stage for the application of a protective coating to preserve the fabric’s pristine condition.
Step 6: Apply a Protective Coating
After thoroughly cleaning and drying the camper awning, the final step in the rejuvenation process involves applying a protective coating to safeguard the fabric and prolong its cleanliness. A protective coating serves as a barrier against environmental elements, repelling dirt, moisture, and UV rays to maintain the awning’s pristine appearance. Here’s how to effectively apply a protective coating:
Choose a high-quality protective coating specifically formulated for awnings. These coatings are designed to bond with the fabric, creating a durable shield that enhances the awning’s resistance to dirt and stains. Before application, carefully read the manufacturer’s instructions to ensure proper usage and optimal results.
Begin by extending the awning fully to expose the entire surface area. Ensure that the fabric is clean and completely dry before proceeding with the application of the protective coating. This will allow the coating to adhere effectively and provide long-lasting protection.
Using a clean, soft cloth or a specialized applicator recommended by the coating manufacturer, apply the protective coating to the awning in smooth, even strokes. Work methodically from one end of the awning to the other, ensuring comprehensive coverage of the fabric. Pay special attention to seams, edges, and areas prone to wear and tear.
As you apply the protective coating, be mindful of any excess product to prevent over-saturation of the fabric. Follow the manufacturer’s guidelines regarding the recommended quantity of coating to achieve optimal protection without causing buildup or uneven application.
Once the protective coating is applied, allow it to dry completely according to the manufacturer’s instructions. Depending on the product, this may involve a specific drying time or curing period to ensure that the coating forms a resilient barrier on the fabric.
With the protective coating in place, your camper awning is now fortified against the elements, with enhanced resistance to dirt, stains, and environmental wear. This final step ensures that your awning remains clean, vibrant, and well-protected, ready to accompany you on countless outdoor adventures.
By following these six essential steps, you’ve successfully revitalized your camper awning, restoring its cleanliness and ensuring its longevity. With regular maintenance and care, your awning will continue to provide shade, shelter, and aesthetic appeal during your outdoor excursions, enhancing your overall camping or travel experience.
Conclusion
Congratulations on successfully completing the comprehensive process of cleaning and revitalizing your camper awning! By following the step-by-step guide outlined in this article, you’ve not only restored the cleanliness and pristine appearance of your awning but also extended its lifespan and durability. As a result, your outdoor adventures will be enhanced by the shade, protection, and visual appeal provided by a well-maintained awning.
Regular maintenance and cleaning of your camper awning are essential for preserving its functionality and aesthetic charm. By investing time and effort into the cleaning process, you’ve ensured that your awning remains a reliable and visually appealing asset during your outdoor excursions.
Remember that the key to maintaining a clean and well-protected awning is regular care and attention. Periodically inspect the fabric for signs of dirt, stains, or wear, and address any issues promptly to prevent them from becoming more challenging to clean or repair.
Additionally, consider establishing a routine cleaning schedule to prevent dirt and grime from accumulating and becoming deeply embedded in the fabric. Regularly brushing off debris and applying a protective coating will help maintain the awning’s cleanliness and prolong its pristine condition.
By incorporating these maintenance practices into your outdoor routine, you’ll ensure that your camper awning remains a dependable and visually appealing companion on your adventures, providing shade, shelter, and comfort for years to come.
Thank you for embarking on this rejuvenating journey with us. We hope that the insights and guidance provided in this article have empowered you to effectively clean and maintain your camper awning, allowing you to fully enjoy the great outdoors under the shelter of a beautifully clean and well-protected awning.
Here’s to many more memorable outdoor experiences with your revitalized camper awning!
Frequently Asked Questions about How To Clean A Camper Awning
Was this page helpful?
At Storables.com, we guarantee accurate and reliable information. Our content, validated by Expert Board Contributors, is crafted following stringent Editorial Policies. We're committed to providing you with well-researched, expert-backed insights for all your informational needs.



0 thoughts on “How To Clean A Camper Awning”