Articles
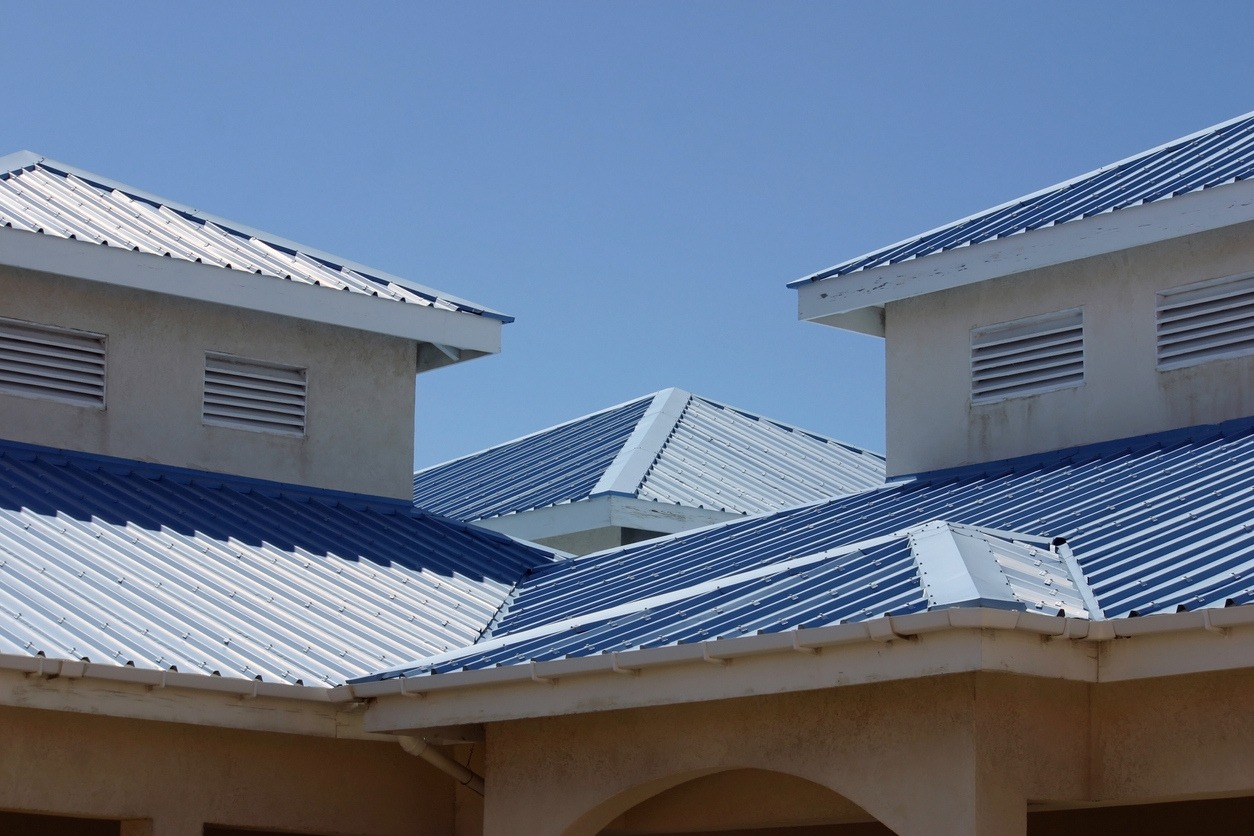
How To Put On A Tin Roof
Modified: October 18, 2024
Learn how to put on a tin roof with our comprehensive articles. Step-by-step guides, expert tips, and everything you need to know.
(Many of the links in this article redirect to a specific reviewed product. Your purchase of these products through affiliate links helps to generate commission for Storables.com, at no extra cost. Learn more)
Introduction
Installing a tin roof is a great way to add durability and aesthetic appeal to your home or building. Whether you’re constructing a new structure or replacing an existing roof, the process of putting on a tin roof requires careful planning and attention to detail. In this article, we will provide you with a step-by-step guide on how to put on a tin roof.
Before we dive in, it’s important to note that installing a tin roof requires some construction knowledge and skills. If you’re not well-versed in roofing or feel uncomfortable taking on this task, it’s always a good idea to consult with a professional contractor.
Now, let’s get started on our journey to create a durable and attractive tin roof!
Key Takeaways:
- Proper preparation is essential for a successful tin roof installation. From cleaning and inspecting the roof to adding insulation and a vapor barrier, attention to detail sets the stage for a durable and long-lasting tin roof.
- Attention to detail and careful execution are crucial when measuring, cutting, and attaching tin sheets. From precise measurements to sealing and securing the roof, each step contributes to a weather-resistant and visually appealing tin roof.
Read more: How To Build A Tin Roof Patio Cover
Step 1: Preparing the Roof
Before you begin the installation process, it’s crucial to prepare the roof properly. This ensures a smooth and successful tin roof installation. Here are the steps to follow:
- Clean the roof: Start by thoroughly cleaning the roof surface. Remove any debris, dirt, or loose materials that may hinder the installation process. Use a broom, rake, or pressure washer to clean the roof effectively.
- Inspect for damages: Carefully inspect the roof for any damages or issues that need to be addressed before installing the tin roof. Check for leaks, rot, or structural problems. It’s essential to fix any pre-existing roof issues to prevent further damage once the tin roof is installed.
- Repair and reinforce: If you identify any damages or weak spots, make the necessary repairs and reinforce the roof structure. Replace damaged or rotten roof decking, fix any leaks, and strengthen the supports as needed. This step ensures the stability and longevity of your tin roof.
- Install insulation: Depending on your geographical location and climate, adding insulation to the roof can help improve energy efficiency and reduce heating and cooling costs. Install insulation between the rafters or on top of the roof decking to create a thermal barrier.
- Apply a vapor barrier: A vapor barrier is essential to prevent moisture buildup and protect the tin roof from potential damage. Install a vapor barrier on top of the insulation or under the roof decking. This barrier keeps moisture from seeping into the roof structure and causing problems down the line.
By properly preparing your roof, you lay the groundwork for a successful tin roof installation. Take the time to clean, inspect, repair, and reinforce the roof, and consider adding insulation and a vapor barrier for added protection and energy efficiency.
Step 2: Measuring and Cutting the Tin Sheets
Once you have prepared the roof, it’s time to measure and cut the tin sheets that will form your tin roof. This step requires accuracy and precision to ensure a proper fit. Follow these steps to measure and cut the tin sheets:
- Measure the roof: Start by measuring the length and width of the roof. Use a tape measure to get accurate measurements. Consider the overhang you want for the eaves and make adjustments accordingly.
- Calculate the number of sheets needed: Determine the number of tin sheets required based on the measurements you took. Take into account the width of the tin sheets you’ll be using to ensure complete coverage of the roof surface.
- Mark the sheets: Using a permanent marker or chalk, mark the measurements on the tin sheets. Be precise and double-check your measurements to ensure accuracy.
- Cut the sheets: It’s time to cut the tin sheets according to the marked measurements. Use tin snips or a circular saw with a metal cutting blade to make clean and accurate cuts. Exercise caution and wear protective gloves and eyewear during this step.
- File the edges: After cutting the tin sheets, use a file or sandpaper to smooth out any rough edges or sharp corners. This step is essential for safety and to prevent injuries during the installation process.
Remember to measure and cut the tin sheets carefully to ensure a proper fit and avoid any unnecessary waste. Take your time and double-check your measurements to minimize errors. By following these steps, you will have accurately measured and cut tin sheets ready for installation.
Step 3: Installing the Underlayment
After measuring and cutting the tin sheets for your roof, the next step is to install the underlayment. The underlayment acts as an additional layer of protection against moisture penetration and provides a smooth surface for the tin sheets to be installed on. Here’s how to install the underlayment:
- Choose the underlayment material: There are different options for underlayment materials, such as asphalt-saturated felt, synthetic underlayment, or rubberized membrane. Consult with a roofing professional or follow the manufacturer’s recommendations to determine the best underlayment material for your specific needs.
- Prepare the underlayment: Cut the underlayment material into strips or sheets that are slightly larger than the size of the tin sheets. This allows for overlap and ensures full coverage of the roof surface. Make sure the underlayment is free of wrinkles or creases.
- Start at the bottom: Begin installing the underlayment at the bottom edge of the roof, starting from one side and working your way across. Use roofing nails or staples to secure the underlayment to the roof surface. Place the fasteners approximately 6 inches apart along the edges and around 12 inches apart in the field of the underlayment.
- Overlap the underlayment: As you move up the roof, overlap each subsequent row of the underlayment over the previous row. The amount of overlap will depend on the specific underlayment material you’re using, so be sure to follow the manufacturer’s guidelines. This overlapping technique helps to shed water effectively and prevents water from seeping through the seams.
- Trim the underlayment: Once the underlayment is fully installed, trim any excess material along the edges of the roof. Use a utility knife or roofing shears to achieve clean, precise cuts.
Installing the underlayment is an important step in the tin roof installation process. It provides an extra layer of protection against moisture and ensures a smooth surface for the tin sheets to be installed on. Take your time to properly install the underlayment, and follow the manufacturer’s guidelines for the specific material you’re using.
Make sure to use the correct size and type of screws for your tin roof installation. Using the wrong screws can lead to leaks and other issues down the line.
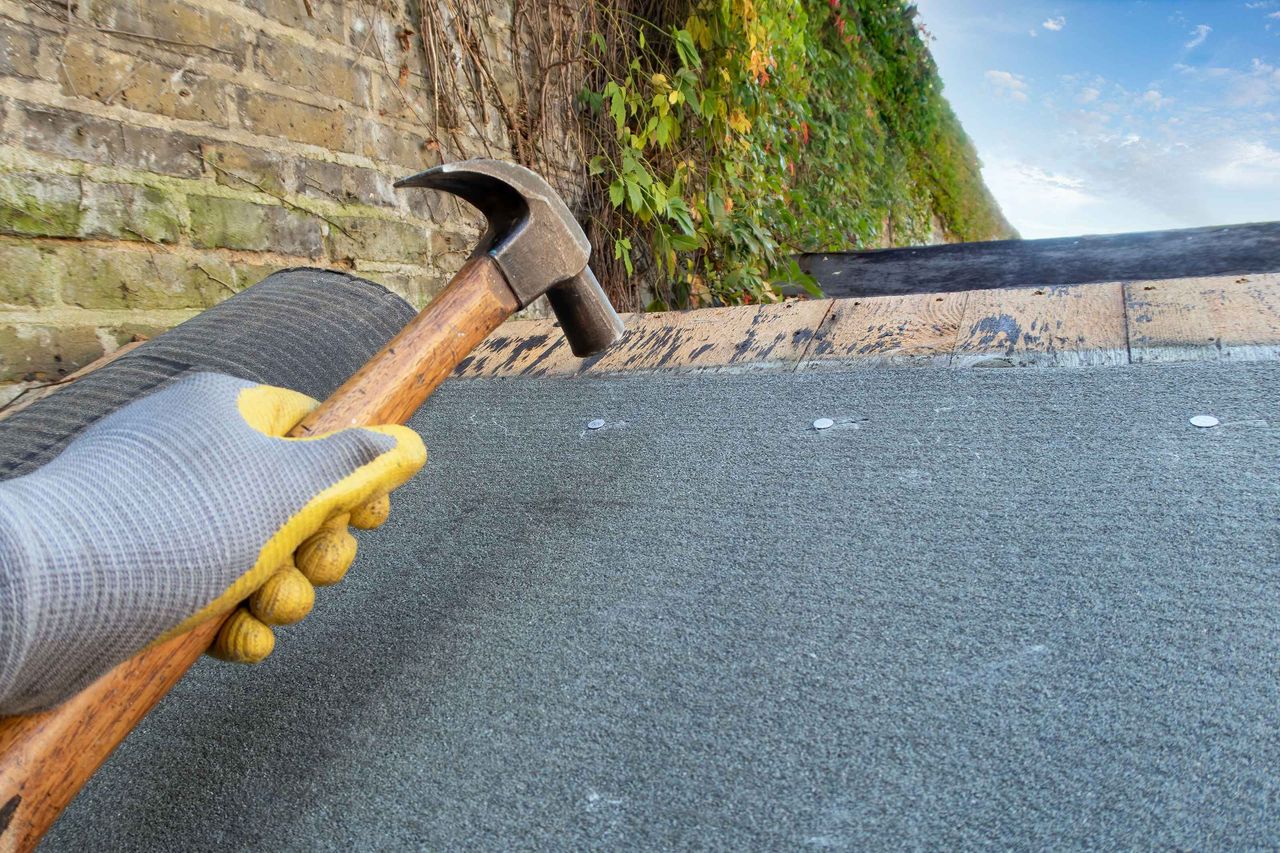
Step 4: Attaching the Tin Sheets
With the underlayment in place, it’s time to move on to the exciting part – attaching the tin sheets to your roof. This step requires careful positioning and fastening to ensure a secure and long-lasting tin roof. Here’s how to attach the tin sheets:
- Start at the bottom: Begin installing the tin sheets at the bottom edge of the roof, aligning them with the edge of the eaves. Leave a small overhang, typically around 1 inch, to allow for water runoff.
- Position the tin sheets: Place the first tin sheet in position, making sure it is aligned with the edges of the roof and the previously installed sheets, if applicable. Use a level to ensure the sheet is perfectly horizontal.
- Fasten the tin sheets: Secure the tin sheet to the roof by using roofing nails or screws. Place the fasteners in the pre-drilled holes or along the edges of the tin sheet, following the manufacturer’s recommendations. Typically, nails or screws should be placed around every 12 to 24 inches along the edges of the tin sheets and within 6 to 12 inches of the side lap seams.
- Overlap the tin sheets: As you move up the roof, overlap each subsequent row of tin sheets over the previous row. The amount of overlap will depend on the specific type of tin you’re using, such as standing seam or corrugated tin. Ensure that the upper sheet covers the fasteners on the lower sheet to prevent water penetration.
- Seal the seams: To create a watertight seal, apply a tin roof sealant or caulk along the seams where the tin sheets overlap. This forms an additional layer of protection against water and ensures a secure connection between the sheets.
Take your time during this step to carefully position and fasten each tin sheet. Ensure proper alignment and overlapping to create a weather-resistant and visually pleasing tin roof. With the tin sheets securely attached, your roof will be well on its way to completion.
Read more: How To Put Tarp On Roof
Step 5: Sealing and Securing the Tin Roof
Now that the tin sheets are installed on your roof, it’s important to take the necessary steps to seal and secure the tin roof. This will ensure that your roof is waterproof and able to withstand the elements. Here’s what you need to do:
- Inspect for gaps: Carefully inspect the tin roof for any gaps between the sheets or around the edges. These gaps can allow water to penetrate and damage the roof structure. Use a sealant or caulk to fill in any gaps or holes, creating a watertight seal.
- Seal the fasteners: Go through all the roofing nails or screws used to attach the tin sheets and ensure that they are securely in place. If any are loose, remove them and replace them with new fasteners. Apply a dab of sealant or caulk over each fastener to prevent water infiltration.
- Check for roof penetrations: Take a close look at any roof penetrations, such as vents, chimneys, or skylights. Make sure they are properly sealed with appropriate flashing and sealant. This prevents water from entering through these vulnerable areas.
- Inspect the ridge cap: The ridge cap is the peak of the roof where the tin sheets come together. Check that the ridge cap is securely fastened and use a ridge cap sealer to create a tight seal along the ridge. This helps to prevent wind-driven rain from entering the roof.
- Trim excess flashing: If you have used flashing around the roof edges or other areas, trim any excess flashing to create a neat and tidy appearance. Use tin snips or metal shears to make precise cuts.
By sealing and securing your tin roof, you ensure its long-term durability and protection against the elements. Take the time to carefully inspect and address any gaps or loose fasteners, and make sure all roof penetrations and the ridge cap are properly sealed. These steps will give you peace of mind knowing that your tin roof is ready to withstand harsh weather conditions and provide lasting protection for your home or building.
Step 6: Adding the Finishing Touches
With the majority of the tin roof installation complete, it’s time to add the final touches to ensure a polished and well-protected roof. Taking care of these finishing details will enhance both the functionality and aesthetics of your tin roof. Here’s what you need to do:
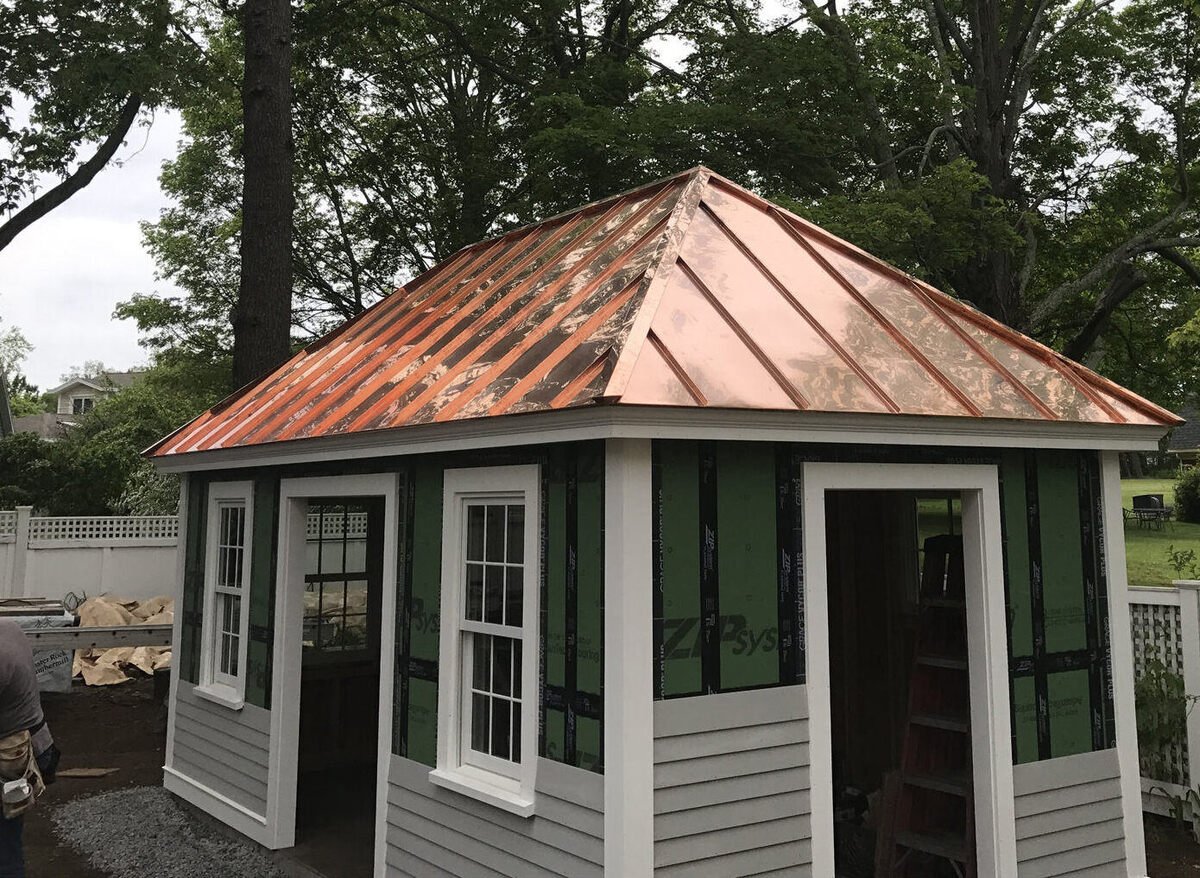
- Install ridge cap: The ridge cap not only serves as a protective cover for the peak of the roof but also adds a finishing touch to the overall appearance. Install the ridge cap by aligning it with the ridge of the roof and securing it with roofing nails or screws. Use a tin roof sealant to create a watertight seal along the ridge cap.
- Paint or seal the tin: Depending on the type of tin you’ve used for your roof, you may choose to paint it or apply a protective coating. This can help prolong the life of the tin roof and enhance its visual appeal. Select a high-quality paint or coating that is specifically designed for metal surfaces and follow the manufacturer’s instructions for application.
- Check for any loose or dislodged tin sheets: Take a final walk around your roof to check for any loose or dislodged tin sheets. If you find any, secure them back into place using appropriate fasteners and sealant.
- Clean up: Once the tin roof is fully installed and the finishing touches are complete, make sure to clean up the work area. Remove any debris, tools, or materials that may have accumulated during the installation process. A clean and tidy work area not only improves safety but also leaves you with a sense of accomplishment.
- Maintain your tin roof: Regular maintenance is essential to keep your tin roof in optimal condition. Schedule periodic inspections to check for any damage, such as loose fasteners or rust spots. Clean off any debris that may accumulate on the roof surface, as it can potentially cause damage over time. Additionally, trim any overhanging tree branches that could scrape against the roof during strong winds.
By adding these finishing touches, your tin roof will not only be functional and durable but also visually appealing. Take the time to install the ridge cap, consider painting or sealing the tin, and ensure that all tin sheets are secure. With proper maintenance, your tin roof will provide long-lasting protection and enhance the value of your home or building.
Conclusion
Installing a tin roof requires careful planning, precise measurements, and attention to detail. By following the step-by-step guide outlined in this article, you can successfully put on a tin roof that offers durability, protection, and aesthetic appeal for your home or building.
Throughout the installation process, it is important to prioritize the preparation of the roof, measuring and cutting the tin sheets accurately, installing the underlayment, securely attaching the tin sheets, sealing and securing the roof, and adding the finishing touches. Each step plays a vital role in ensuring a successful tin roof installation.
Remember, if you are not confident in your roofing skills, it is always best to consult with a professional contractor who can provide guidance and expertise. Your safety and the integrity of your tin roof are of utmost importance.
Once your tin roof is in place, make sure to perform regular inspections and maintenance to address any issues promptly. By keeping up with maintenance tasks and addressing any concerns promptly, you can prolong the lifespan of your tin roof and maintain its functionality and appearance over the years.
With proper installation and maintenance, a tin roof can provide decades of reliable protection against the elements. It offers durability, resistance to fire, and an aesthetically pleasing look that can enhance the overall appeal of your home or building.
Now that you have a comprehensive understanding of the step-by-step process for putting on a tin roof, it’s time to put your knowledge into action. Plan carefully, stay safe, and enjoy the benefits of your new tin roof for years to come.
Frequently Asked Questions about How To Put On A Tin Roof
Was this page helpful?
At Storables.com, we guarantee accurate and reliable information. Our content, validated by Expert Board Contributors, is crafted following stringent Editorial Policies. We're committed to providing you with well-researched, expert-backed insights for all your informational needs.


0 thoughts on “How To Put On A Tin Roof”