Home>Energy>Home Insulation & Ventilation>Where To Put Weather Stripping On Doors
Home Insulation & Ventilation
Where To Put Weather Stripping On Doors
Modified: October 20, 2024
Learn how to properly install weather stripping on doors to improve home insulation and ventilation. Find out where to place weather stripping for maximum energy efficiency.
(Many of the links in this article redirect to a specific reviewed product. Your purchase of these products through affiliate links helps to generate commission for Storables.com, at no extra cost. Learn more)
Introduction
Welcome to the world of home insulation and ventilation, where every element plays a crucial role in maintaining a comfortable and energy-efficient living space. One often overlooked yet vital component of this system is weather stripping. In this article, we will delve into the ins and outs of weather stripping for doors, exploring its importance, types, installation, and maintenance. By the end, you will be equipped with the knowledge to optimize your home’s energy efficiency and comfort.
Weather stripping serves as a barrier against outdoor elements, preventing air and moisture from infiltrating your home. By effectively sealing gaps around doors, it helps to regulate indoor temperatures, reduce energy consumption, and enhance overall comfort. Understanding the significance of weather stripping and knowing where and how to install it can make a substantial difference in your home’s insulation and energy bills.
Whether you are a homeowner looking to improve your property’s energy efficiency or a DIY enthusiast eager to tackle a new project, this guide is tailored to provide you with comprehensive insights and practical tips. Let’s embark on this journey to discover the world of weather stripping and its impact on your home’s insulation and ventilation.
Key Takeaways:
- Weather stripping for doors is crucial for energy efficiency, reducing drafts, and maintaining indoor comfort. Understanding its types, installation, and maintenance can make a substantial difference in your home’s insulation and energy bills.
- By strategically installing weather stripping in key areas and maintaining it regularly, homeowners can create a comprehensive barrier against outdoor elements, ensuring a well-insulated and energy-efficient home. Properly sealed doors contribute to reduced energy consumption and lower utility bills.
Read more: How To Put Weather Stripping On A Window
Understanding Weather Stripping
Weather stripping is a fundamental component of a well-insulated and energy-efficient home. It is designed to seal the gaps around doors and windows, effectively blocking out drafts, moisture, and outdoor air, thus preventing heat loss in the winter and heat gain in the summer. By creating a tight seal, weather stripping plays a pivotal role in maintaining comfortable indoor temperatures and reducing energy consumption.
Understanding the principles behind weather stripping can empower homeowners to make informed decisions about their insulation needs. The effectiveness of weather stripping is determined by its ability to withstand temperature changes, resist moisture, and remain durable over time. Different materials and designs are available to suit various door and window types, ensuring a tailored approach to insulation.
When considering weather stripping for doors, it’s essential to evaluate the specific requirements of each entry point. Factors such as the door’s material, size, and location influence the selection and installation of weather stripping. By comprehending these nuances, homeowners can optimize the insulation of their living spaces and enhance overall comfort.
Moreover, understanding the impact of weather stripping on energy efficiency and indoor air quality can inspire homeowners to prioritize this often overlooked aspect of home maintenance. By investing in high-quality weather stripping and ensuring its proper installation, homeowners can enjoy a more sustainable and comfortable living environment while reducing their carbon footprint.
As we delve deeper into the world of weather stripping, we will explore the various types of weather stripping available, the optimal locations for installation, and the best practices for maintaining its effectiveness. By gaining a comprehensive understanding of weather stripping, you can take proactive steps to enhance your home’s insulation and ventilation, ultimately creating a more sustainable and comfortable living space.
Types of Weather Stripping
Weather stripping comes in a variety of materials and designs, each offering unique advantages and suitability for different door types and weather conditions. Understanding the characteristics of each type can help homeowners make informed decisions when selecting weather stripping for their doors.
1. Foam Tape: This type of weather stripping is made of open or closed-cell foam, offering an affordable and easy-to-install option. It is suitable for irregularly shaped cracks and is available with a self-adhesive backing for convenient application.
2. Vinyl Weather Stripping: Vinyl strips are durable and versatile, making them a popular choice for weather sealing. They are resistant to moisture and UV exposure, making them ideal for outdoor use. Vinyl weather stripping is available in various profiles, including V-shaped, tubular, and finned designs.
3. Metal Weather Stripping: Metal strips, such as aluminum or stainless steel, provide excellent durability and resistance to extreme temperatures. They are often used in commercial and industrial settings and can be applied to doors with high traffic or exposure to harsh weather conditions.
4. Magnetic Weather Stripping: This innovative type of weather stripping utilizes magnets to create a secure seal when the door is closed. It offers superior insulation and is particularly effective for steel doors and windows.
5. Silicone Weather Stripping: Silicone offers exceptional flexibility and resilience, making it suitable for irregular surfaces and extreme temperatures. It is resistant to UV exposure and remains pliable over time, ensuring long-term effectiveness.
6. Felt Weather Stripping: Felt strips provide a cost-effective and easy-to-install option for sealing gaps around doors. While not as durable as other materials, felt weather stripping offers a temporary solution for reducing drafts and noise infiltration.
7. Interlocking Metal Channels: This type of weather stripping consists of metal channels that interlock when the door is closed, creating a tight seal. It is commonly used in commercial and industrial settings where robust insulation is required.
By understanding the characteristics and applications of these different types of weather stripping, homeowners can select the most suitable option for their specific insulation needs. The choice of weather stripping material should consider factors such as the door’s material, the severity of weather exposure, and the desired longevity of the weather stripping.
Where to Install Weather Stripping on Doors
Installing weather stripping in the right locations is essential for maximizing its effectiveness in sealing out drafts, moisture, and outdoor air. When it comes to doors, several key areas should be targeted to ensure comprehensive insulation and energy efficiency.
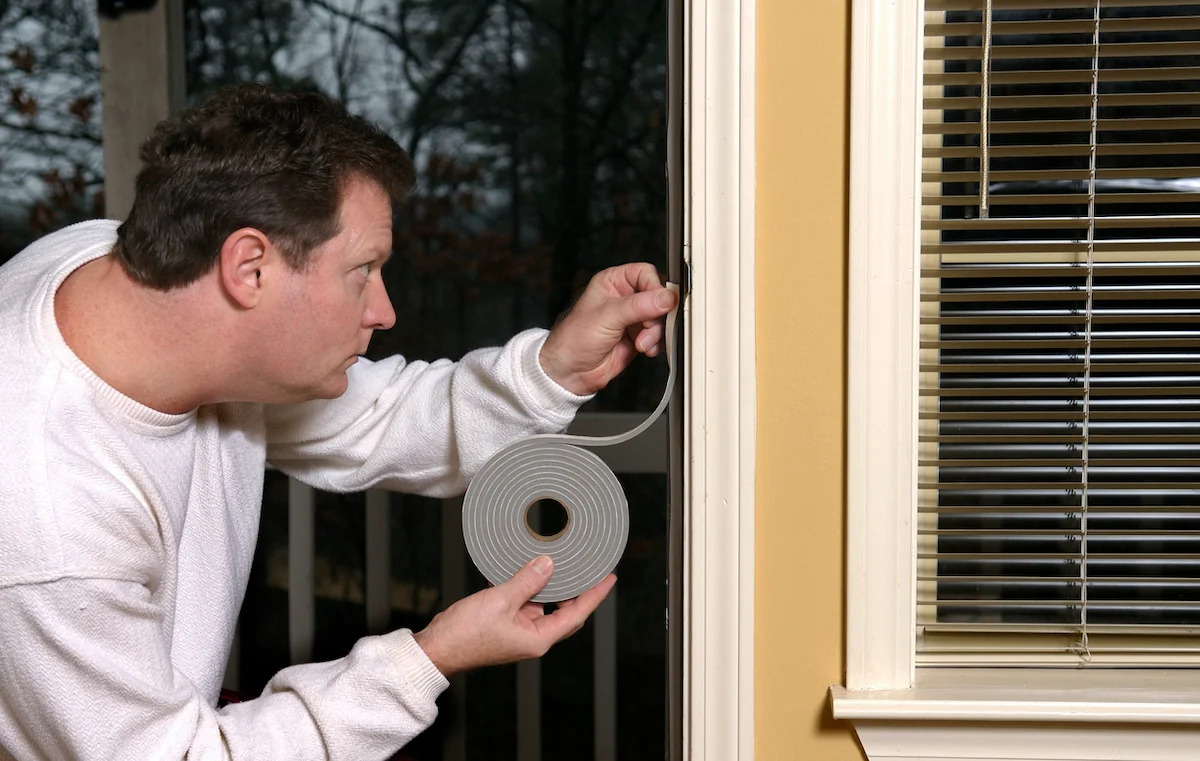
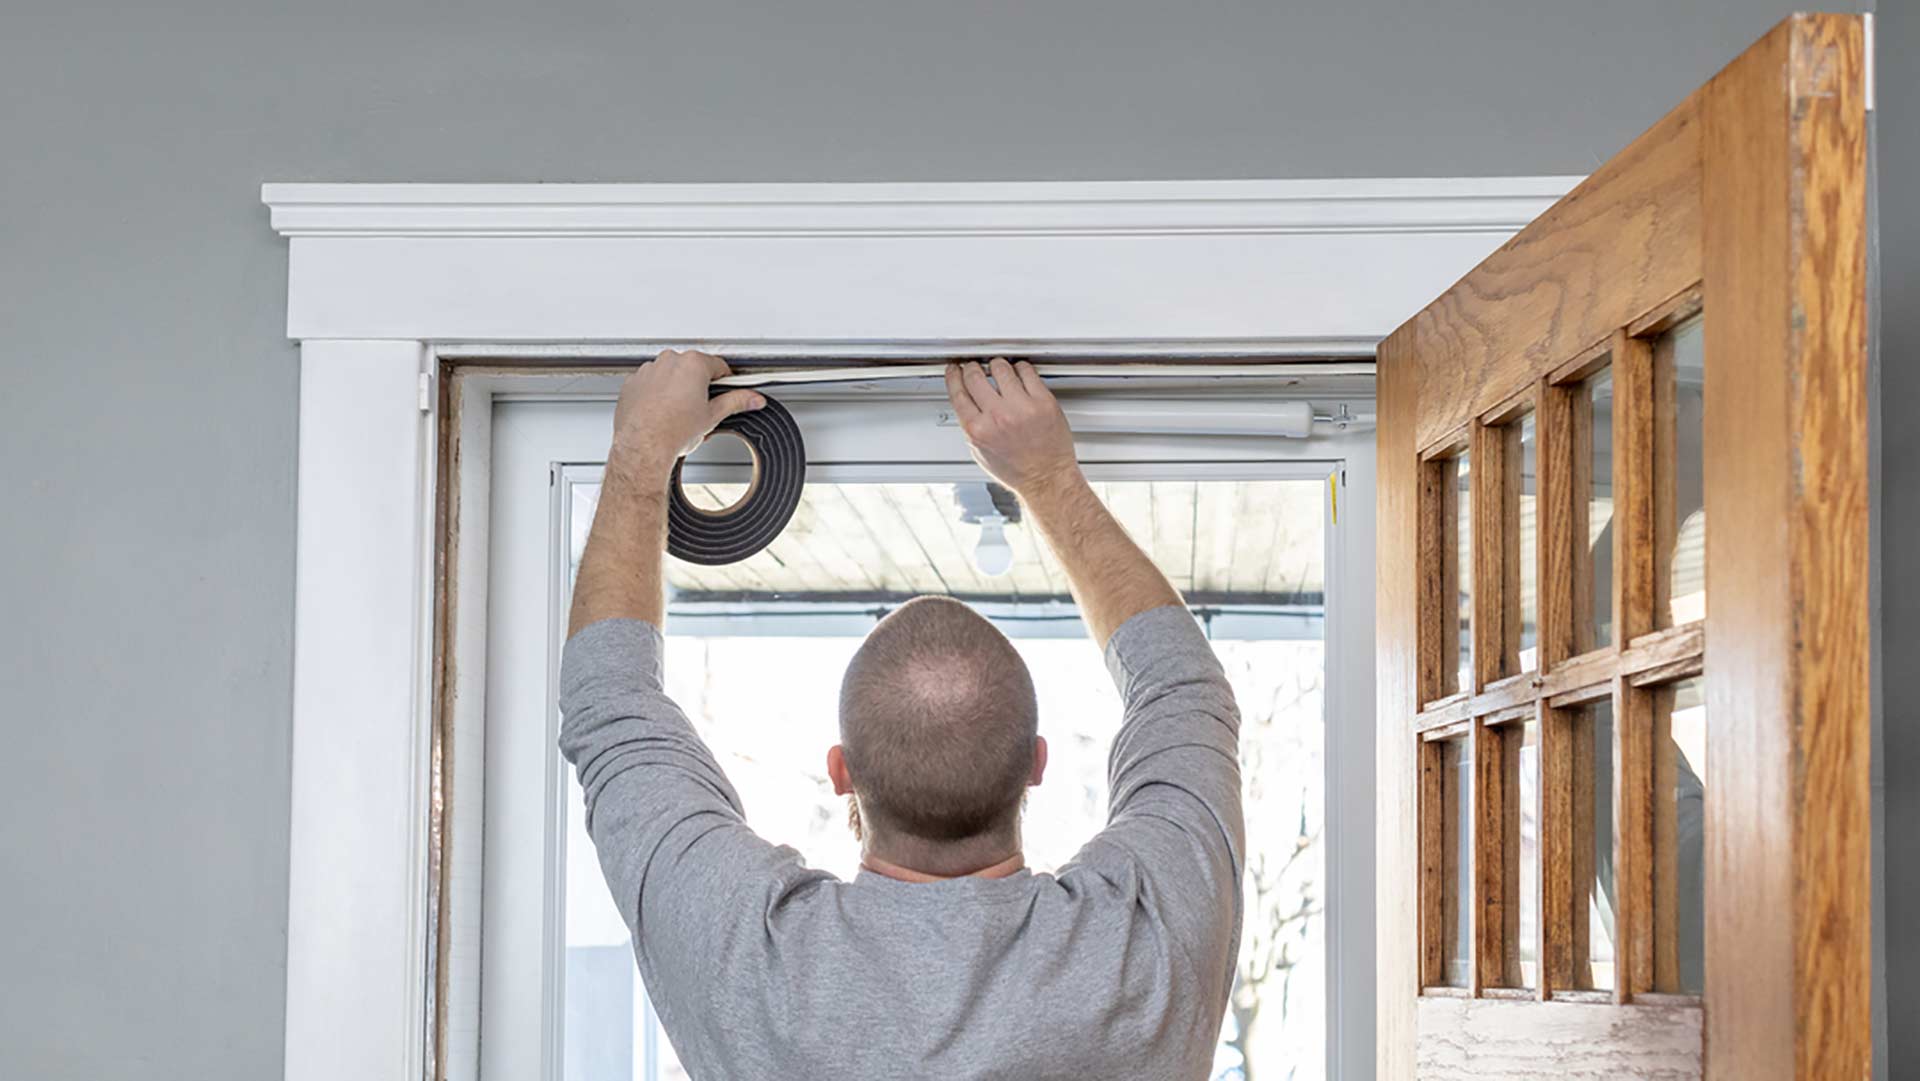
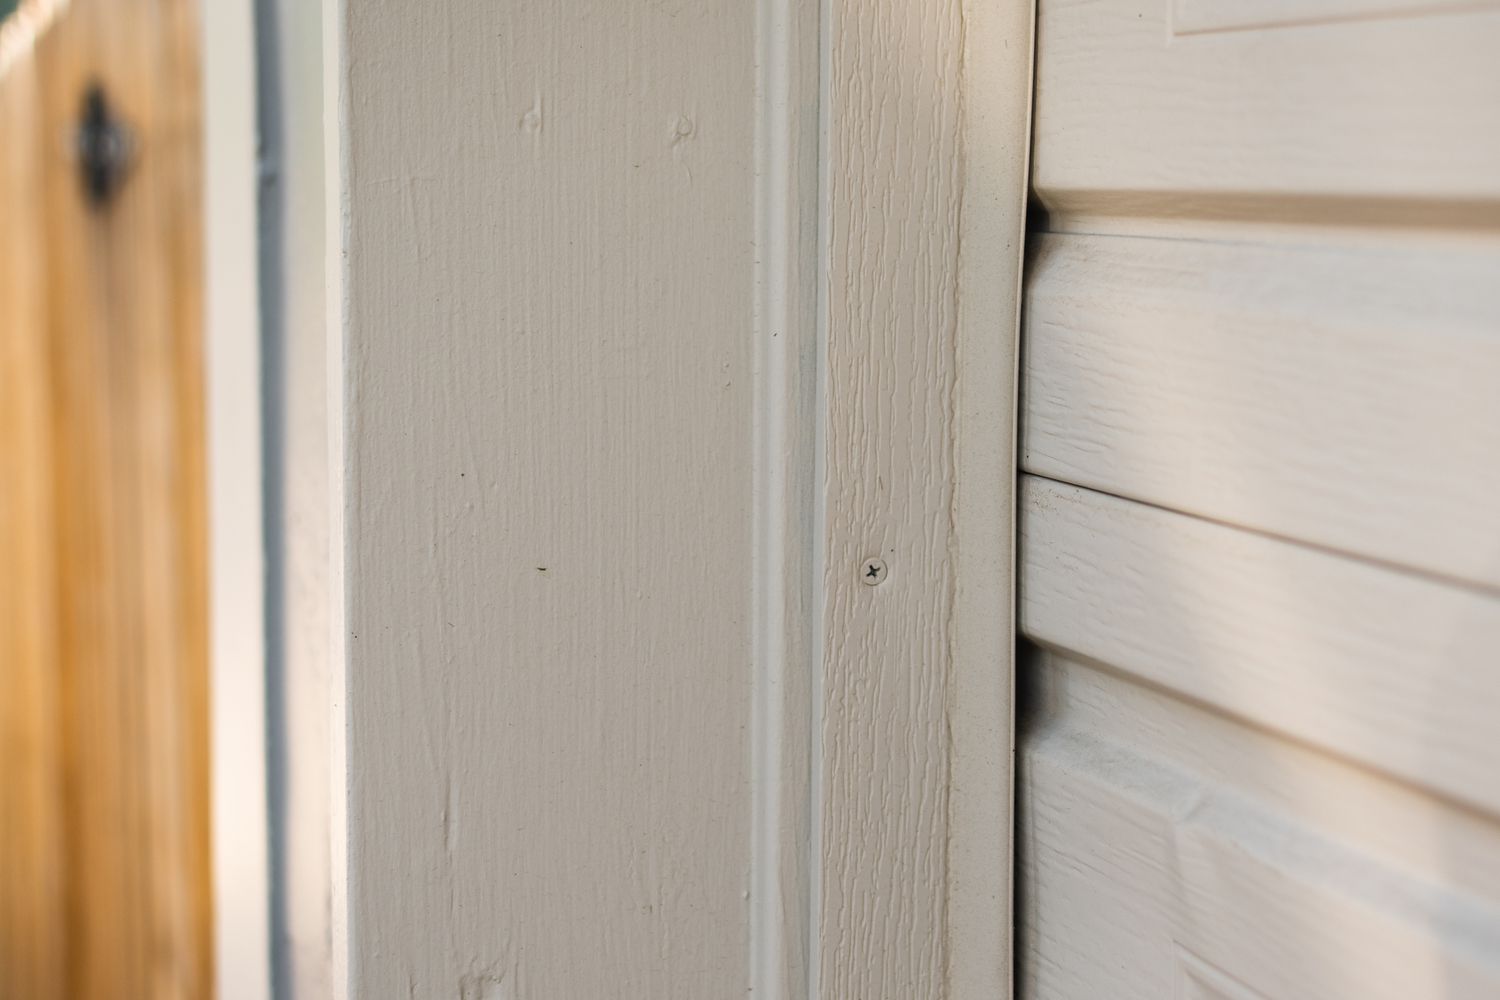
1. Door Jambs: The vertical sides of the door frame, known as the door jambs, are primary areas for weather stripping installation. Applying weather stripping along the full length of the jambs helps create a tight seal when the door is closed, preventing air infiltration and heat loss/gain.
2. Door Stop: The door stop, which is the narrow strip located inside the door frame where the door closes, is another critical location for weather stripping. Placing weather stripping along the door stop ensures that gaps between the door and the frame are effectively sealed when the door is closed.
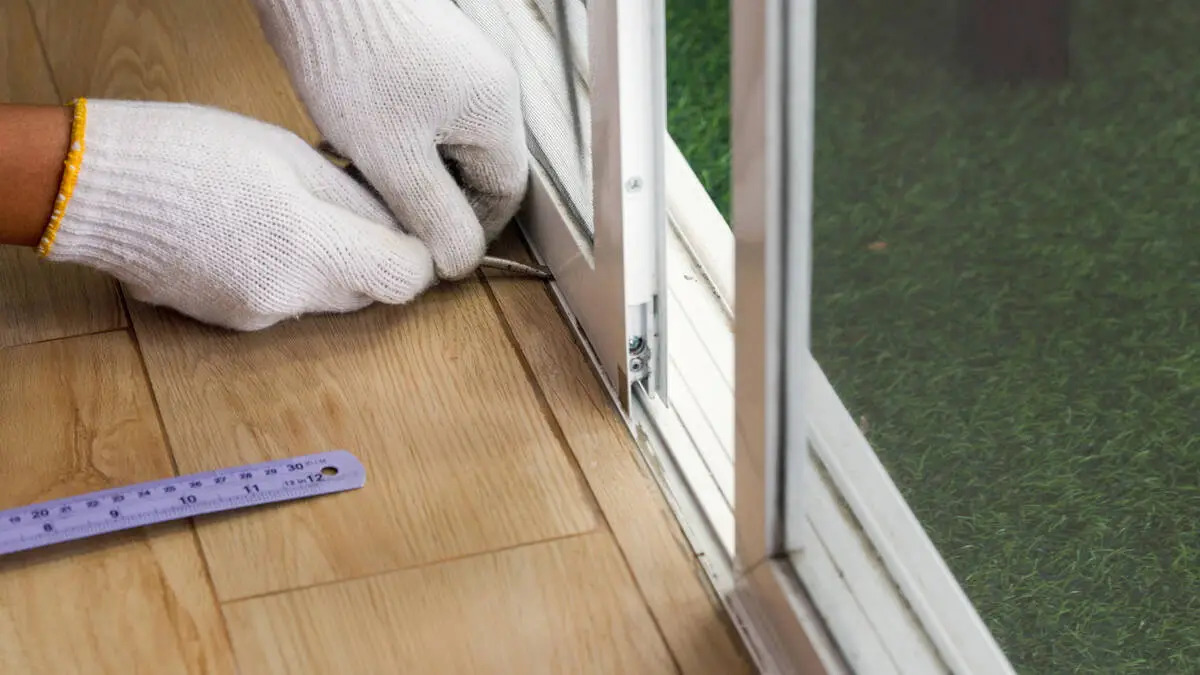
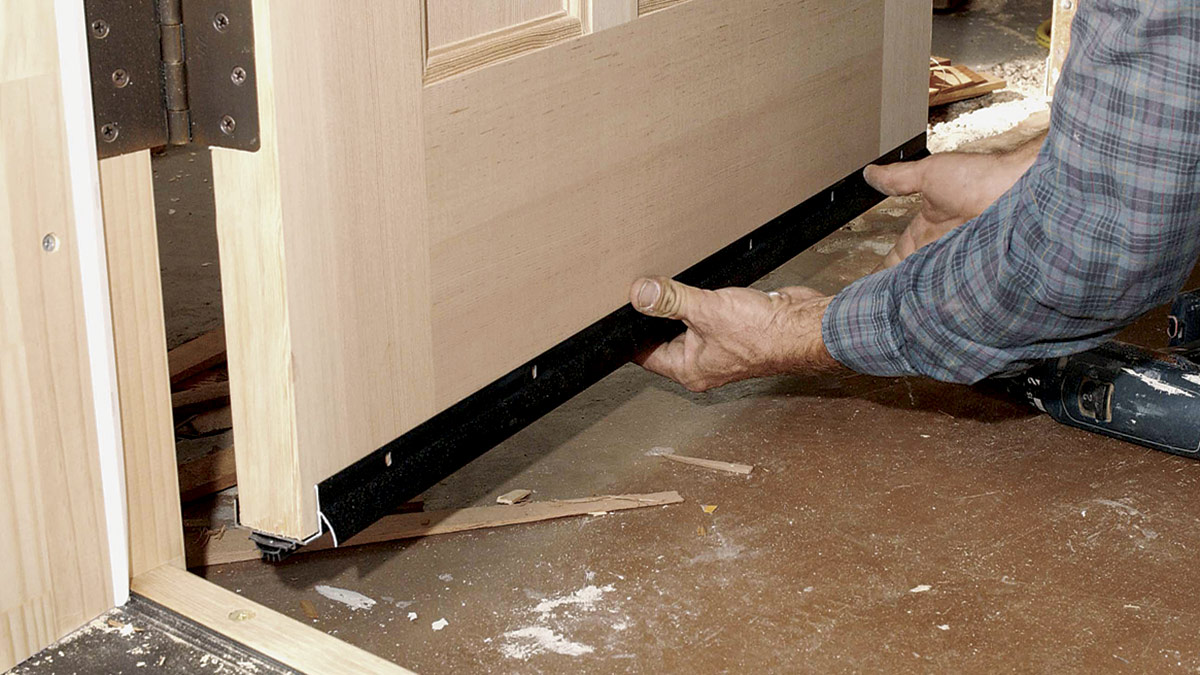
3. Threshold: The bottom of the door, known as the threshold, is prone to air and moisture infiltration. Installing weather stripping along the threshold helps prevent drafts and outdoor elements from entering the home, particularly in areas prone to wind or heavy rainfall.
4. Hinges and Astragal: While the primary focus is on the perimeter of the door, it’s important to consider the areas around the hinges and astragal (the vertical molding between double doors). Ensuring these areas are properly sealed contributes to comprehensive insulation and energy efficiency.
5. Meeting Stiles (for Double Doors): In the case of double doors, weather stripping along the meeting stiles, where the two doors meet when closed, is crucial for preventing air and moisture infiltration between the doors.
By strategically installing weather stripping in these key areas, homeowners can create a comprehensive barrier against outdoor elements, ensuring that their doors contribute to a well-insulated and energy-efficient home. Properly sealed doors not only enhance comfort but also contribute to reduced energy consumption and lower utility bills.
Place weather stripping along the top and sides of the door frame to create a tight seal. Make sure the stripping is snug against the door when closed to prevent drafts and save energy.
How to Install Weather Stripping on Doors
Installing weather stripping on doors is a straightforward process that can be accomplished with basic tools and materials. By following these simple steps, homeowners can effectively seal gaps and enhance the insulation of their doors:
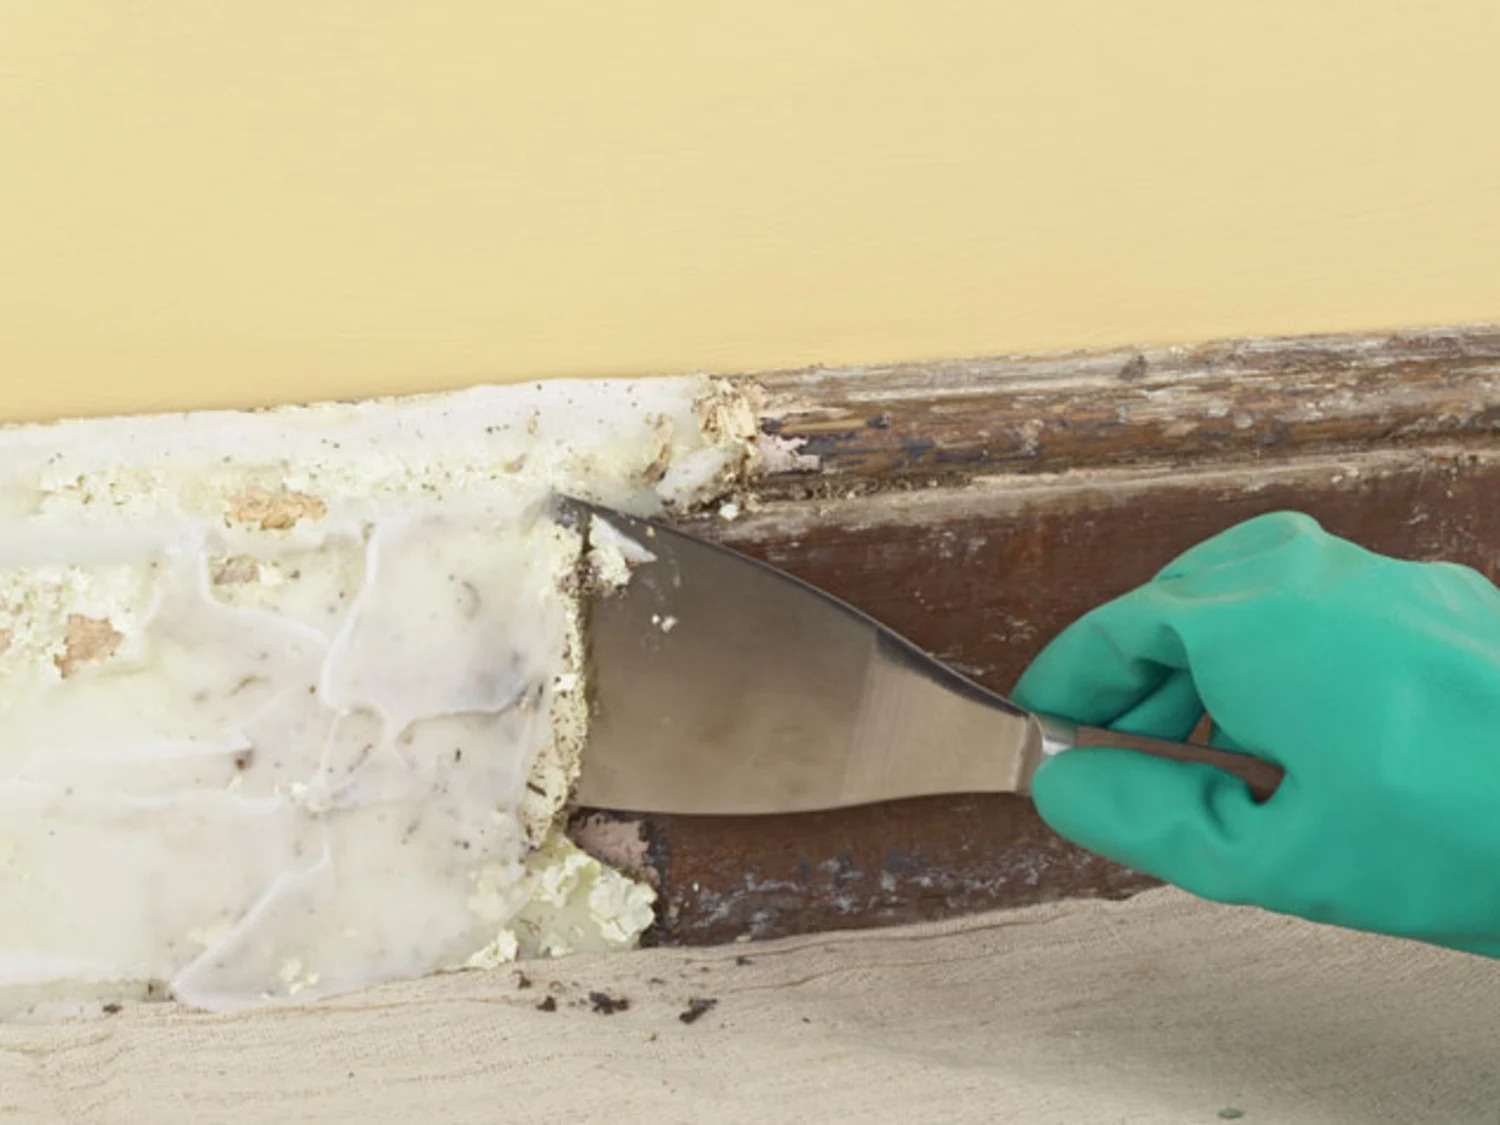
- Clean and Prepare: Begin by thoroughly cleaning the surfaces where the weather stripping will be applied. Remove any existing weather stripping and adhesive residues, ensuring that the door frame and surrounding areas are clean and dry.
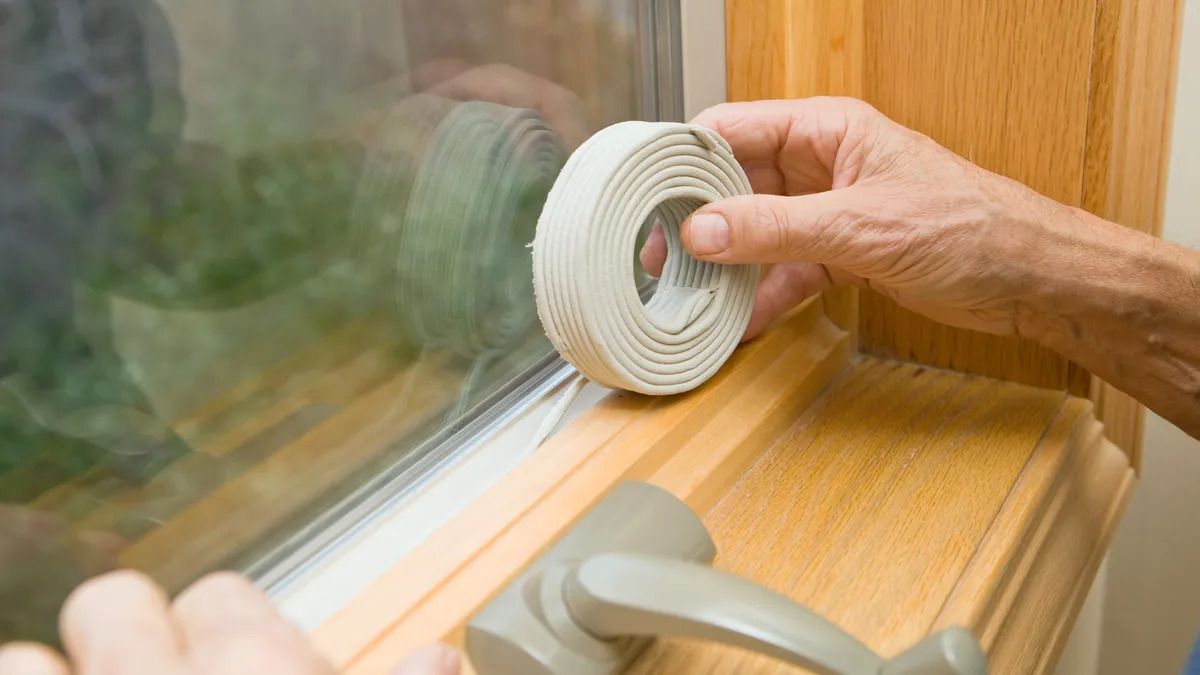
- Measure and Cut: Take accurate measurements of the door jambs, door stop, threshold, and any other areas where weather stripping will be installed. Use these measurements to cut the weather stripping material to the appropriate lengths, ensuring a precise fit.
- Apply Weather Stripping: Starting with the door jambs, carefully apply the weather stripping along the full length of each jamb. Press the weather stripping firmly against the surface, ensuring that it creates a snug seal when the door is closed. Repeat this process for the door stop, threshold, and any other designated areas.
- Secure in Place: Depending on the type of weather stripping used, it may feature a self-adhesive backing or require additional fastening. Ensure that the weather stripping is securely attached to the door frame, threshold, and other surfaces, using adhesive or appropriate fasteners as needed.
- Test the Seal: Once the weather stripping is installed, test the door to ensure that it closes smoothly and creates a tight seal. Check for any gaps or areas where the weather stripping may need adjustment or reinforcement.
- Double-Check Double Doors: If weather stripping is being installed on double doors, pay special attention to the meeting stiles and astragal, ensuring that the weather stripping creates a seamless seal when the doors are closed.
- Trim Excess Material: If necessary, trim any excess weather stripping to ensure a neat and precise fit. Clean up any debris and ensure that the installed weather stripping presents a tidy and professional appearance.
By following these steps, homeowners can effectively install weather stripping on their doors, creating a tight seal that enhances insulation, reduces energy consumption, and improves overall comfort. Properly installed weather stripping contributes to a well-insulated and energy-efficient home, making it a valuable investment in sustainable living.
Read more: What Is The Best Weather Stripping For Doors
Tips for Maintaining Weather Stripping
Maintaining weather stripping is essential for preserving its effectiveness in sealing out drafts, moisture, and outdoor air. By implementing regular maintenance practices, homeowners can prolong the lifespan of their weather stripping and ensure continued insulation and energy efficiency. Here are some valuable tips for maintaining weather stripping:
- Regular Inspection: Schedule periodic inspections of the weather stripping around doors to check for signs of wear, damage, or detachment. Look for gaps, tears, or compression, as these can compromise the sealing effectiveness of the weather stripping.
- Cleaning and Lubrication: Keep the weather stripping clean and free from debris, dirt, and grime. Use a mild detergent and water to gently clean the surfaces, and consider applying a silicone-based lubricant to maintain flexibility and resilience, particularly for materials such as silicone or vinyl.
- Repair or Replacement: Address any damaged or worn weather stripping promptly. Small tears or gaps can often be repaired using appropriate sealants or adhesives, while more extensive damage may necessitate the replacement of the weather stripping to maintain optimal insulation.
- Protection from UV Exposure: If the weather stripping is exposed to direct sunlight, consider applying a UV-resistant coating or paint to protect it from degradation caused by UV rays. This proactive measure can extend the lifespan of the weather stripping, particularly for outdoor applications.
- Seasonal Adjustment: As temperatures fluctuate throughout the year, the compression and effectiveness of weather stripping may vary. Consider adjusting the weather stripping to ensure a snug seal during both cold and warm seasons, optimizing its insulation performance accordingly.
- Preventive Measures: Take proactive steps to prevent damage to the weather stripping, such as avoiding excessive force when closing doors, minimizing exposure to harsh weather conditions, and addressing any underlying issues that may contribute to wear and tear, such as misaligned doors or excessive friction.
By incorporating these maintenance tips into their home care routine, homeowners can preserve the integrity of their weather stripping, ensuring that it continues to contribute to a well-insulated and energy-efficient living environment. Regular maintenance not only extends the lifespan of the weather stripping but also supports sustainable energy consumption and enhanced indoor comfort.
Conclusion
As we conclude our exploration of weather stripping for doors, it becomes evident that this often overlooked component plays a vital role in home insulation and energy efficiency. By effectively sealing gaps around doors, weather stripping prevents air and moisture infiltration, contributing to a more comfortable living environment and reduced energy consumption.
Understanding the principles of weather stripping, the various types available, and the optimal locations for installation empowers homeowners to make informed decisions about their insulation needs. Whether it’s foam tape for irregular gaps, vinyl weather stripping for durability, or magnetic weather stripping for steel doors, the diverse options cater to different door types and weather conditions, ensuring a tailored approach to insulation.
When it comes to installation, the process is straightforward, requiring basic tools and materials. By following simple steps and paying attention to key areas such as door jambs, door stops, and thresholds, homeowners can effectively seal their doors and enhance their home’s energy efficiency.
Maintaining weather stripping through regular inspections, cleaning, and repair or replacement when necessary is crucial for preserving its effectiveness. By incorporating these maintenance tips into their home care routine, homeowners can ensure that their weather stripping continues to contribute to a well-insulated and energy-efficient living space.
Ultimately, weather stripping is a small yet significant investment in sustainable living. By optimizing the insulation of doors, homeowners can enjoy enhanced comfort, reduced energy costs, and a reduced environmental impact. This simple yet impactful measure aligns with the broader goal of creating more sustainable and energy-efficient homes.
As you embark on your journey to enhance your home’s insulation and energy efficiency, remember that weather stripping is a valuable ally in this endeavor. By understanding its importance, selecting the right type, installing it effectively, and maintaining it diligently, you can create a more sustainable and comfortable living space for years to come.
Frequently Asked Questions about Where To Put Weather Stripping On Doors
Was this page helpful?
At Storables.com, we guarantee accurate and reliable information. Our content, validated by Expert Board Contributors, is crafted following stringent Editorial Policies. We're committed to providing you with well-researched, expert-backed insights for all your informational needs.


0 thoughts on “Where To Put Weather Stripping On Doors”