Home>Gardening & Outdoor>Outdoor Structures>How To Tear Down A Shed
Outdoor Structures
How To Tear Down A Shed
Published: January 20, 2024
Learn how to tear down a shed with our comprehensive guide on outdoor structure demolition. Get expert tips and step-by-step instructions.
(Many of the links in this article redirect to a specific reviewed product. Your purchase of these products through affiliate links helps to generate commission for Storables.com, at no extra cost. Learn more)
Introduction
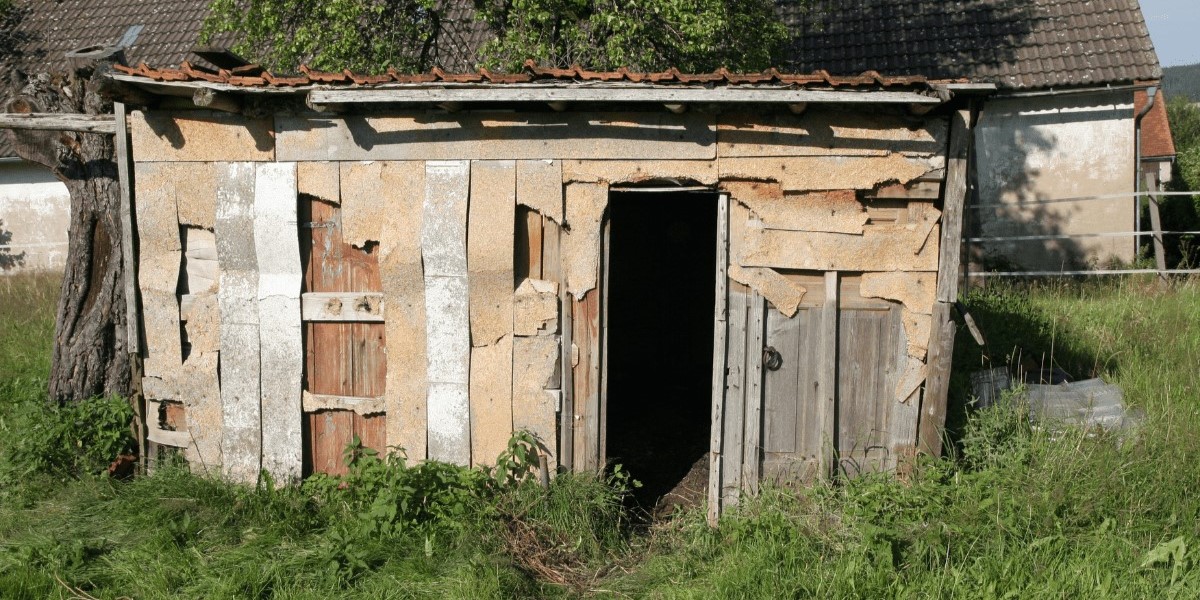
So, you've made the decision to tear down that old, dilapidated shed in your backyard. Whether it's to make room for a new structure, clear up space, or simply to get rid of an eyesore, dismantling a shed is a task that requires careful planning and the right approach. In this guide, we'll walk you through the step-by-step process of tearing down a shed, from assessing the structure to disposing of the debris. By the end of this journey, you'll have the knowledge and confidence to tackle this project with ease.
Tearing down a shed can be a rewarding endeavor, as it opens up possibilities for new projects and revitalizes your outdoor space. However, it's essential to approach this task with caution and preparedness. Understanding the condition of the shed, gathering the necessary tools, and ensuring proper disposal of the debris are all crucial elements of the process. Whether you're a seasoned DIY enthusiast or a novice looking to take on a new challenge, this guide is designed to equip you with the insights and know-how to successfully dismantle a shed.
So, roll up your sleeves, put on your work gloves, and let's embark on this journey together. It's time to bid farewell to the old and make way for the new. Let's dive into the process of tearing down a shed and transform your outdoor space.
Key Takeaways:
- Assess the shed’s condition, gather the right tools, and clear the area before tearing down a shed to ensure a safe and successful demolition process.
- Dispose of debris responsibly, prioritize recycling, and embrace new possibilities to transform your outdoor space after tearing down a shed.
Read more: How To Tear A Building Down With Hand Tools
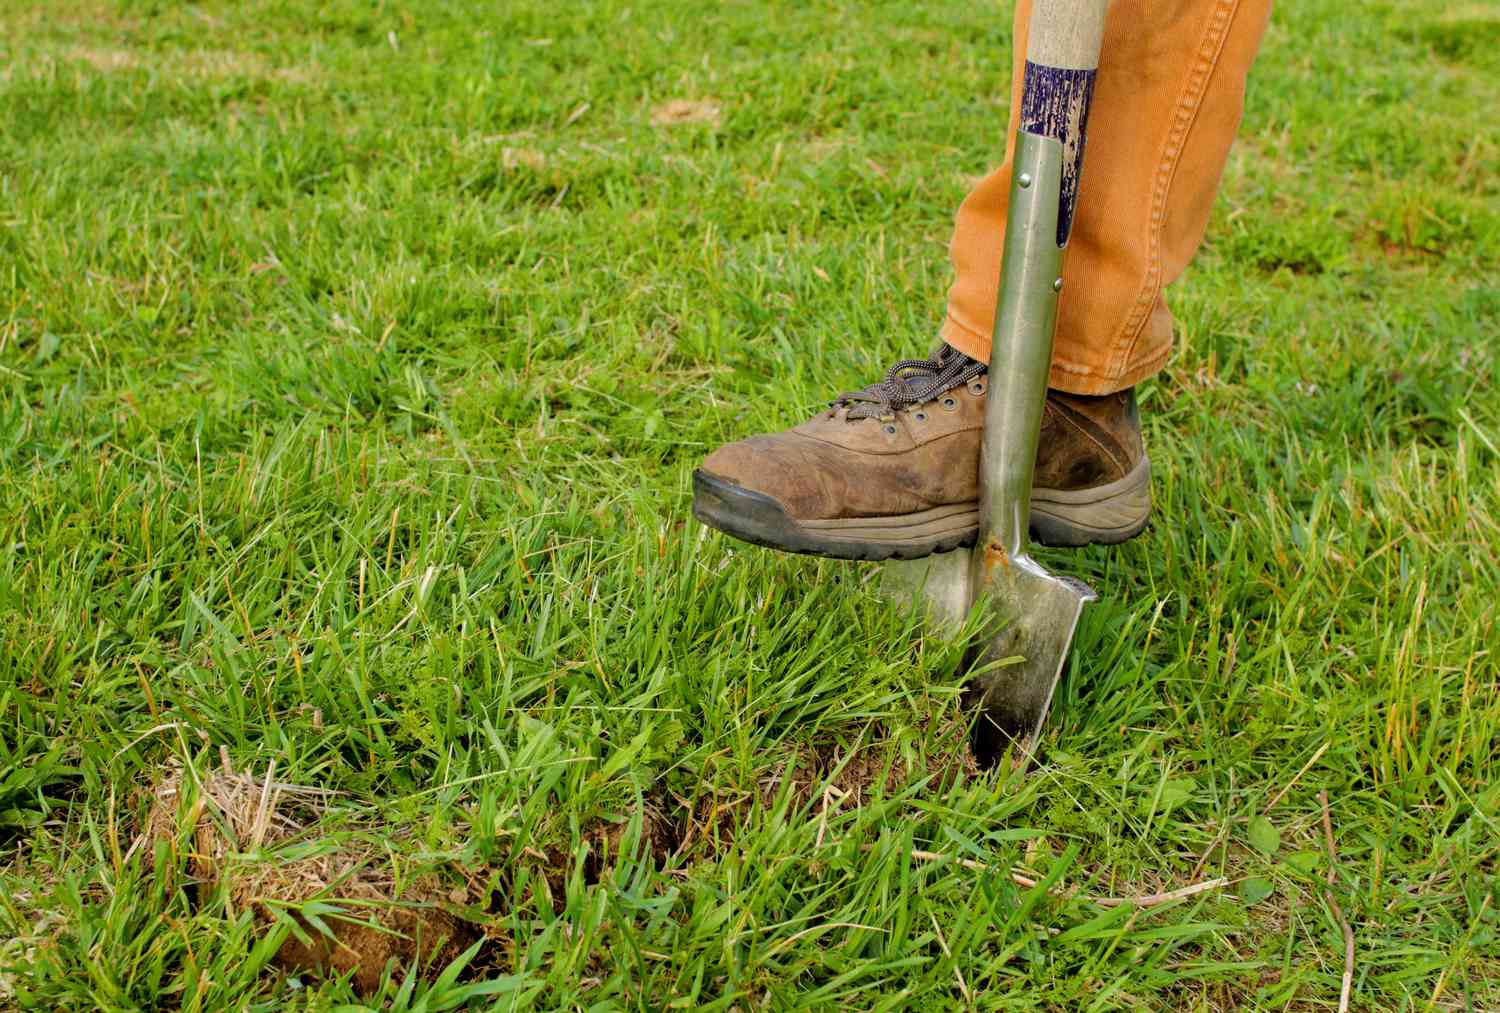
Assessing the Shed
Before you embark on the task of tearing down a shed, it’s crucial to assess the structure thoroughly. Start by examining the overall condition of the shed. Look for signs of decay, rot, or structural damage. Pay close attention to the foundation, walls, roof, and any supporting elements. Understanding the condition of the shed will not only guide your approach but also ensure your safety throughout the dismantling process.
Next, consider the materials used in constructing the shed. Is it made of wood, metal, or another material? This information will influence the tools and techniques you’ll use during the demolition. Additionally, assess the size and layout of the shed. Understanding its dimensions and layout will help you plan the dismantling process and anticipate any challenges that may arise.
It’s also important to take note of any hazardous materials that may be present in the shed. For instance, older sheds may contain asbestos or lead-based paint, which require special handling and disposal procedures. Identifying and addressing these materials early in the process is essential for a safe and compliant demolition.
Lastly, consider the surroundings of the shed. Are there any obstacles, such as trees, fences, or utility lines, that could impact the demolition process? Evaluating the surrounding area will help you plan for safe and efficient debris removal.
By thoroughly assessing the shed, you’ll gain valuable insights that will inform your approach to tearing it down. This initial step sets the stage for a well-planned and methodical demolition, ensuring that you’re prepared for the task ahead.
Gathering the Necessary Tools and Equipment
Once you’ve assessed the shed and have a clear understanding of its condition, materials, and surroundings, it’s time to gather the essential tools and equipment for the demolition process. Having the right tools at your disposal will not only make the task more manageable but also contribute to a safer and more efficient dismantling experience.
First and foremost, protective gear is paramount. Ensure that you have sturdy work gloves, safety goggles, and a dust mask to shield yourself from debris, dust, and potential hazards. Additionally, wearing durable work boots with steel toes will provide added protection as you navigate the demolition site.
When it comes to tools, a pry bar, sledgehammer, and reciprocating saw are indispensable for dismantling a shed. The pry bar will aid in removing siding, trim, and other attachments, while the sledgehammer can be used to break apart larger sections of the shed. A reciprocating saw equipped with a demolition blade will facilitate cutting through stubborn materials such as nails and screws.
Depending on the shed’s construction, you may also need a crowbar, bolt cutters, and a drill with screwdriver bits. These tools will assist in disassembling fasteners, cutting through metal components, and accessing hard-to-reach areas. Additionally, a sturdy ladder will be essential for working at elevated heights, especially when removing the shed’s roof or upper sections.
For debris removal, consider renting a dumpster or arranging for a pickup service to dispose of the demolished materials. Having a designated area for sorting and discarding debris will streamline the cleanup process and ensure a tidy worksite.
By gathering the necessary tools and equipment, you’ll be well-equipped to tackle the demolition of the shed with confidence and efficiency. Preparation is key, and having the right gear at your disposal sets the stage for a successful and safe dismantling endeavor.
Clearing the Area
Before diving into the physical dismantling of the shed, it’s essential to prepare the surrounding area for the demolition process. Clearing the space around the shed will not only ensure a safe and unobstructed work environment but also facilitate efficient debris removal as the project progresses.
Start by removing any items stored inside the shed. Clear out tools, equipment, and any personal belongings to prepare the interior for demolition. Properly storing or relocating these items will prevent damage and ensure that they’re not in the way during the dismantling process.
Next, assess the vegetation and landscaping around the shed. Trim back any overhanging branches, bushes, or foliage that could hinder access to the shed or impede the demolition. Clearing the area of potential obstacles will create a more open and navigable workspace, allowing for smoother progress during the dismantling process.
If the shed is situated close to other structures, such as fences or buildings, take precautions to protect these adjacent elements. Cover nearby windows with plywood or protective sheeting to prevent damage from debris. Communicate with neighbors if the demolition may impact their property, and take measures to minimize disruptions or hazards to the surrounding area.
Additionally, establish a designated area for debris and waste disposal. Whether it’s a rented dumpster, a designated pile, or arrangements for a pickup service, having a clear plan for managing the demolished materials is essential. This proactive approach to waste management will contribute to a tidier worksite and streamline the cleanup process once the shed has been dismantled.
By clearing the area and preparing the surroundings, you’ll set the stage for a focused and organized demolition. This initial step ensures that the work environment is safe, accessible, and conducive to a smooth and efficient dismantling process.
Before tearing down a shed, make sure to disconnect any utilities such as electricity and water to ensure safety. Also, remove any hazardous materials like asbestos before starting the demolition process.
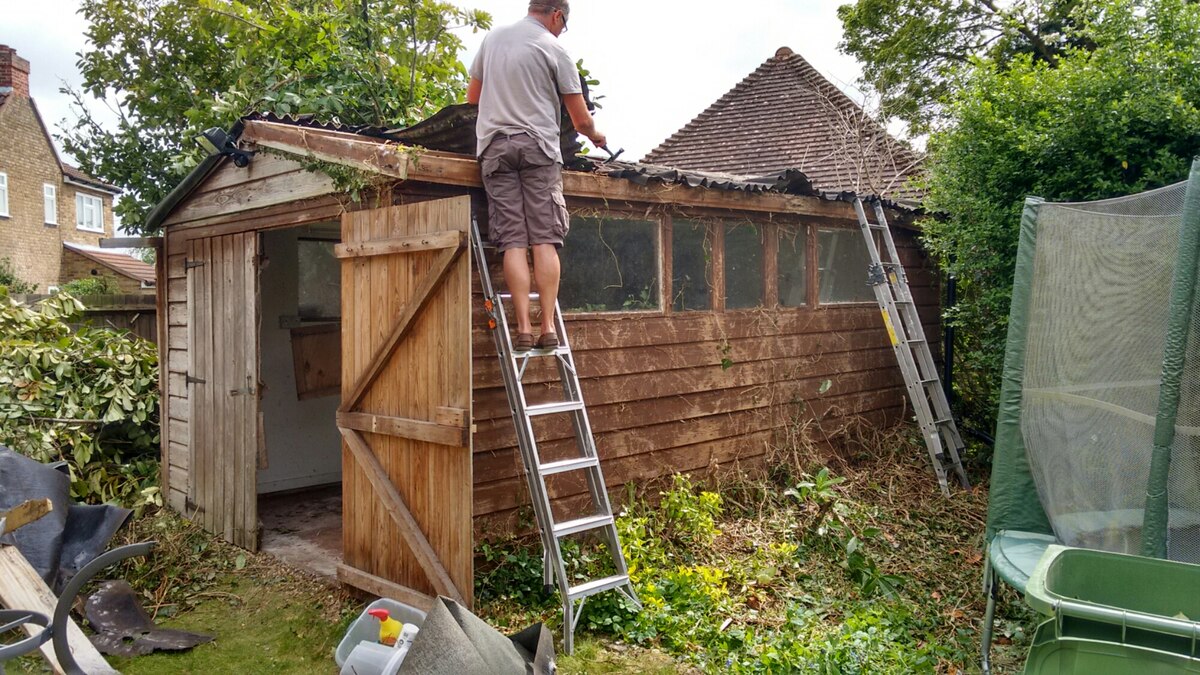
Dismantling the Shed
With the area cleared and the necessary tools at the ready, it’s time to embark on the physical dismantling of the shed. This stage of the process requires methodical precision, attention to detail, and a focus on safety to ensure a successful demolition.
Begin by removing the exterior elements of the shed, such as siding, trim, and roofing materials. Use a pry bar to carefully detach these components, taking care to avoid unnecessary damage to the surrounding structure. As you work, be mindful of any protruding nails, screws, or sharp edges, and handle materials with caution to prevent injuries.
Once the exterior has been addressed, focus on disassembling the main structural components of the shed. Depending on the construction, this may involve unscrewing fasteners, cutting through supports, or using a sledgehammer to dismantle larger sections. Take a systematic approach, working from the top down and ensuring that the shed’s framework is disassembled in a controlled manner.
When dealing with walls and supports, be mindful of any electrical or plumbing elements that may be present. Safely disconnect and cap off any utilities to prevent accidents during the demolition process. If you’re unsure about handling these components, it’s advisable to seek professional assistance to ensure a safe and compliant approach.
As the shed is dismantled, carefully separate salvageable materials from debris. Reusable lumber, hardware, and other components can be set aside for future projects or recycling. This mindful approach to material management not only reduces waste but also allows for the potential repurposing of valuable resources.
Throughout the dismantling process, prioritize safety at every step. Be aware of your surroundings, use proper lifting techniques, and work with a partner if possible to ensure a secure and controlled demolition. By approaching the dismantling process with care and attention to detail, you’ll pave the way for a successful and efficient demolition of the shed.
Read more: How To Cool Down A Shed
Disposing of the Debris
Once the shed has been dismantled, the focus shifts to managing the debris and waste generated during the demolition. Proper disposal of the materials is essential for maintaining a clean and safe environment, as well as adhering to waste management regulations and guidelines.
Begin by sorting the demolished materials into distinct categories. Separating wood, metal, roofing materials, and other components will facilitate recycling and disposal. Salvageable materials can be set aside for reuse or recycling, while non-recyclable waste should be prepared for proper disposal.
If the volume of debris is substantial, consider renting a dumpster to contain and manage the waste. Ensure that the dumpster is placed in a convenient location for debris disposal, and adhere to any local regulations regarding dumpster placement and waste removal. Alternatively, arrange for a waste pickup service to collect the demolished materials and transport them to an approved disposal facility.
When disposing of the debris, it’s important to consider environmental impact and sustainability. Whenever possible, prioritize recycling and responsible waste management practices. Many communities offer recycling facilities for construction and demolition materials, allowing for the repurposing of wood, metal, and other recyclable components.
If the shed contained hazardous materials, such as asbestos or lead-based paint, it’s crucial to follow specific disposal protocols. Consult with local authorities or waste management professionals to ensure that hazardous materials are handled and disposed of in compliance with safety regulations and environmental standards.
As the debris is cleared and the waste is managed, take the opportunity to tidy and restore the demolition site. Remove any remaining debris, sweep the area, and assess the surroundings for any potential hazards or residual materials. By leaving the site clean and organized, you’ll wrap up the demolition process with a sense of accomplishment and a renewed outdoor space.
By conscientiously managing and disposing of the debris, you’ll not only ensure a clean and safe worksite but also contribute to sustainable waste management practices. This final step in the demolition process sets the stage for a fresh start and the potential for new projects in your revitalized outdoor space.
Conclusion
Congratulations! You’ve successfully navigated the process of tearing down a shed, transforming an old structure into a blank canvas for new possibilities. As you reflect on the journey from assessing the shed to managing the debris, it’s evident that each step has contributed to a well-executed and rewarding demolition experience.
Throughout this endeavor, you’ve embraced the importance of careful planning, preparedness, and attention to detail. Assessing the shed provided valuable insights into its condition, materials, and surroundings, guiding your approach to the demolition process. Gathering the necessary tools and equipment equipped you with the means to tackle the project with confidence and efficiency, while clearing the area created a safe and accessible workspace for the dismantling process.
As you delved into the physical dismantling of the shed, the meticulous approach to disassembling the structure and managing the debris underscored the significance of safety, sustainability, and responsible waste management. By prioritizing these elements, you’ve not only successfully dismantled the shed but also contributed to a clean and environmentally conscious demolition process.
As you survey the revitalized outdoor space, take pride in the accomplishment of transforming the old into the potential for new beginnings. Whether you’re envisioning a new structure, a garden, or an open expanse for outdoor activities, the space now holds endless opportunities for creativity and revitalization.
Remember, the journey doesn’t end with the demolition. Embrace the possibilities that lie ahead, and consider the myriad projects and endeavors that can breathe new life into your outdoor space. Whether it’s building a new shed, creating a vibrant garden, or designing an outdoor sanctuary, the blank canvas before you is ripe for exploration and creativity.
As you embark on future projects, carry forward the lessons learned from this demolition experience. Approach each endeavor with the same meticulous planning, attention to detail, and commitment to safety and sustainability. By doing so, you’ll continue to transform your outdoor space into a thriving and dynamic environment that reflects your vision and ingenuity.
So, take a moment to savor the accomplishment, bask in the potential of the revitalized space, and embrace the exciting journey that lies ahead. You’ve dismantled a shed, but in doing so, you’ve also unlocked a world of new opportunities and possibilities for your outdoor haven.
Frequently Asked Questions about How To Tear Down A Shed
Was this page helpful?
At Storables.com, we guarantee accurate and reliable information. Our content, validated by Expert Board Contributors, is crafted following stringent Editorial Policies. We're committed to providing you with well-researched, expert-backed insights for all your informational needs.


0 thoughts on “How To Tear Down A Shed”