Home>Gardening & Outdoor>Outdoor Structures>How To Take Down A Wooden Shed
Outdoor Structures
How To Take Down A Wooden Shed
Published: January 19, 2024
Learn how to safely dismantle and remove your outdoor wooden shed with our comprehensive guide. Expert tips for taking down outdoor structures.
(Many of the links in this article redirect to a specific reviewed product. Your purchase of these products through affiliate links helps to generate commission for Storables.com, at no extra cost. Learn more)
Introduction
Taking down a wooden shed may seem like a daunting task, but with the right approach and a bit of know-how, it can be a manageable and rewarding project. Whether you're looking to make way for a new structure, clear space for landscaping, or simply need to remove an old, worn-out shed, the process can be broken down into several key steps. By carefully assessing the shed, gathering the necessary materials and tools, and systematically dismantling the structure, you can safely and efficiently take down a wooden shed. This guide will walk you through each stage of the process, providing practical tips and insights to help you tackle the project with confidence. So, roll up your sleeves and get ready to transform your outdoor space!
Key Takeaways:
- Assess the shed’s condition, gather the right tools, and dismantle the roof and walls carefully to safely and efficiently take down a wooden shed.
- Responsibly manage and dispose of shed materials by sorting, salvaging, and following environmental regulations, contributing to sustainability and community well-being.
Read more: How To Cool Down A Shed
Assessing the Shed
Before diving into the process of dismantling a wooden shed, it’s crucial to thoroughly assess the structure and its surroundings. Start by examining the shed’s overall condition. Note any areas of rot, decay, or structural damage, as these may impact the dismantling process and influence the methods you’ll use to take down the shed.
Next, consider the shed’s location and accessibility. Evaluate the space around the shed to determine the best approach for safely maneuvering around the structure during the dismantling process. Identify any potential obstacles, such as overhanging branches or nearby structures, that could impede your progress or pose safety hazards.
Additionally, take stock of the materials used in the construction of the shed. Understanding the types of wood, fasteners, and roofing materials employed will inform your approach to dismantling and disposal. If the shed contains any hazardous materials, such as asbestos or lead-based paint, it’s essential to take appropriate precautions and adhere to relevant regulations for their safe removal and disposal.
Finally, assess the tools and equipment you’ll need for the project. Ensure that you have the necessary protective gear, such as gloves, safety goggles, and sturdy footwear, to safeguard yourself during the dismantling process. Take note of any specialized tools required for removing roofing materials, disassembling walls, and handling heavy components.
By thoroughly assessing the shed and its surroundings, you’ll be better equipped to plan and execute the dismantling process with safety and efficiency in mind. With a clear understanding of the shed’s condition, construction, and logistical considerations, you can proceed to gather the materials and tools needed to begin the dismantling process.
Gathering Materials and Tools
Once you’ve assessed the shed and its surroundings, it’s time to gather the materials and tools necessary for the dismantling process. Having the right equipment on hand will streamline the project and ensure that you can work safely and efficiently.
First and foremost, you’ll need basic hand tools, such as a hammer, pry bar, and screwdrivers, to disassemble the shed’s components. A reciprocating saw or circular saw may be required for cutting through stubborn fasteners or sections of the shed. Additionally, a sturdy ladder will be essential for accessing the roof and upper portions of the shed during the dismantling process.
For removing roofing materials, consider obtaining a roofing shovel or specialized pry bar designed for this purpose. If the shed is equipped with gutters or downspouts, you may need a pair of tin snips or a hacksaw to disconnect these components from the structure.
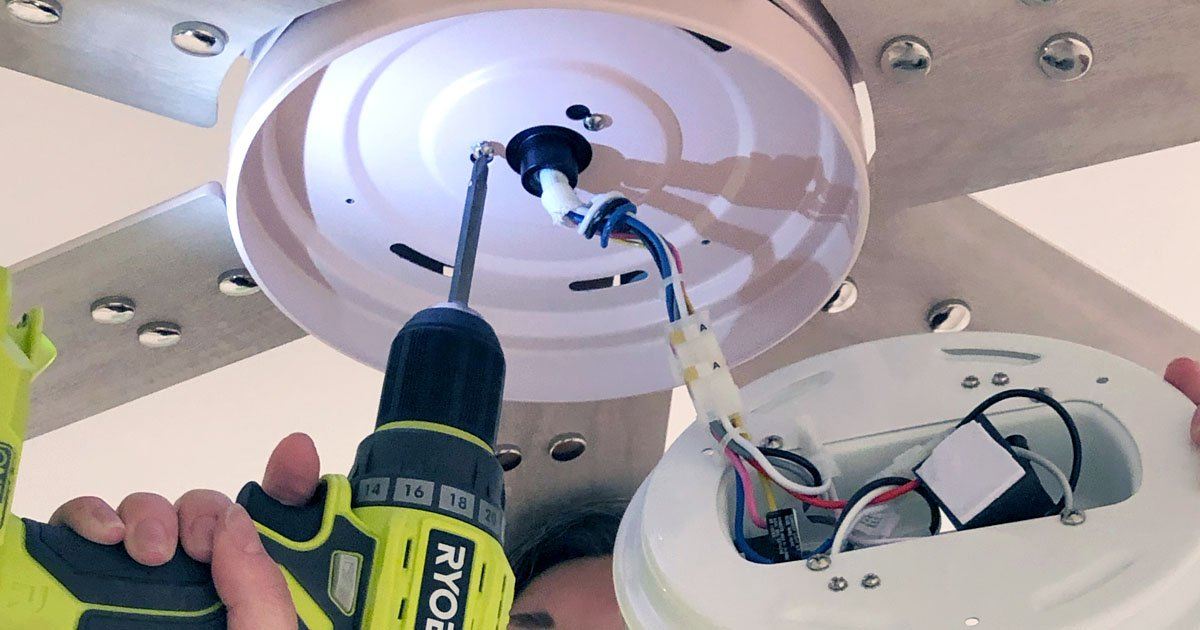
When it comes to handling heavy components, such as walls and support beams, a set of sturdy work gloves and a hand truck or dolly can be invaluable for safely transporting and maneuvering these items. If the shed contains electrical wiring or fixtures, it’s crucial to enlist the services of a qualified electrician to safely disconnect and remove these elements.
Furthermore, consider the materials needed for waste disposal. Heavy-duty contractor bags, a wheelbarrow, or a small utility trailer can facilitate the collection and transport of debris and salvaged materials to their respective disposal or recycling destinations.
Finally, prioritize personal protective equipment (PPE) to safeguard yourself during the dismantling process. This includes safety goggles, a dust mask, and sturdy work boots to shield against potential hazards such as flying debris, dust, and sharp objects.
By gathering the appropriate materials and tools ahead of time, you’ll be well-prepared to commence the dismantling process with confidence and efficiency. With these essentials at your disposal, you can proceed to tackle the next stages of dismantling the shed, beginning with the removal of the roof.
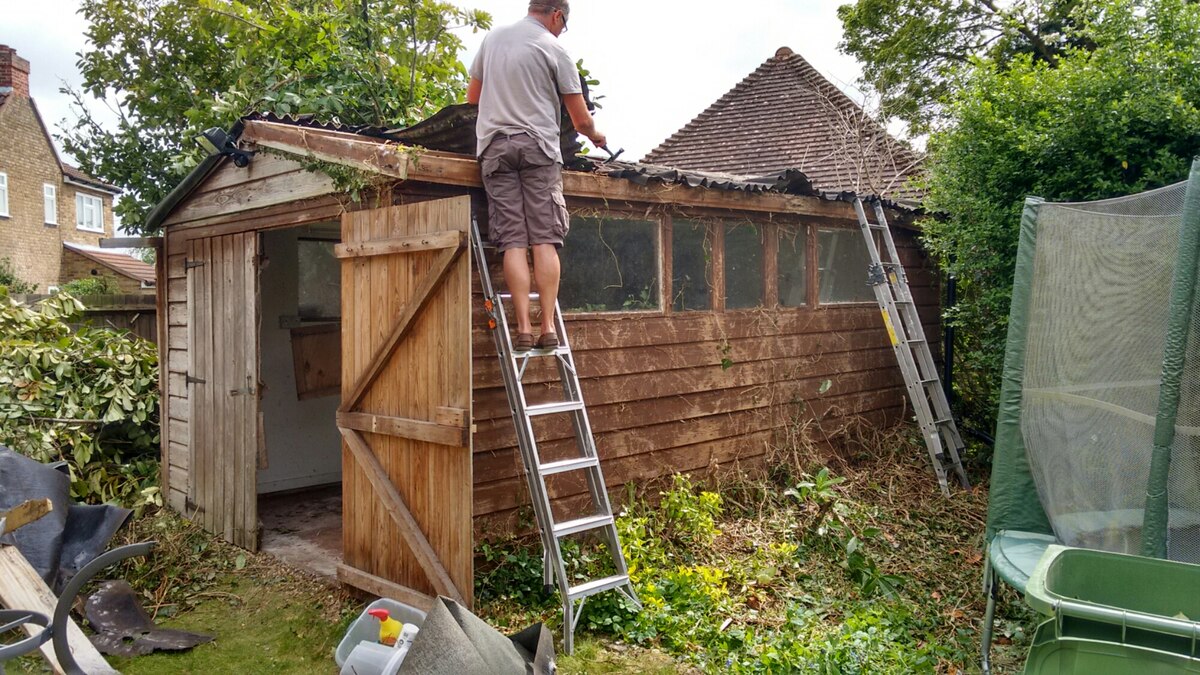
Dismantling the Shed Roof
With the necessary materials and tools assembled, it’s time to begin the dismantling process, starting with the shed’s roof. Before proceeding, ensure that you’ve taken all safety precautions, including wearing appropriate protective gear and securing the work area to prevent accidents.
Begin by removing any roofing materials, such as shingles, metal panels, or roofing sheets, starting from the top and working your way down. Use a roofing shovel or pry bar to carefully detach the roofing materials from the underlying sheathing or rafters. Exercise caution when working on the roof, and be mindful of potential hazards such as slippery surfaces and unstable footing.
If the shed’s roof is supported by trusses or rafters, carefully disassemble these structural components using a saw or pry bar as needed. Take care to avoid damaging surrounding areas and to lower the components to the ground safely. Utilize a sturdy ladder and enlist the help of a partner to ensure stability and safety while working at heights.
As you remove the roof components, be mindful of any protruding nails, screws, or fasteners that may pose a hazard. Use a magnet or a nail-pulling tool to collect and dispose of these items safely, minimizing the risk of punctures or injuries during the dismantling process.
Once the roof has been completely disassembled and cleared from the shed, carefully lower the materials to the ground, taking care to avoid injury or damage to the surrounding area. If salvageable, set aside any reusable roofing materials for potential future use or recycling.
With the shed’s roof successfully dismantled, you’ve completed a significant phase of the dismantling process. Next, you’ll move on to removing the shed’s walls, further deconstructing the structure in preparation for disposal or repurposing. By systematically tackling each stage of the dismantling process, you’ll make steady progress toward transforming the space and achieving your desired outdoor environment.
Before taking down a wooden shed, make sure to disconnect any electrical or plumbing connections. Remove the roof first, then dismantle the walls and finally, clear the foundation. Always wear protective gear and work with a partner for safety.
Removing the Shed Walls
After successfully dismantling the shed’s roof, the next phase of the dismantling process involves removing the shed walls. This stage requires careful attention to detail and a methodical approach to ensure safe and efficient deconstruction.
Begin by identifying the points of attachment between the walls and the shed’s foundation or floor. Use a pry bar, hammer, or reciprocating saw to carefully detach the walls from their base, taking care to avoid damage to the surrounding area. If the shed walls are secured with nails or screws, systematically remove these fasteners to facilitate the disassembly process.
As you work to disassemble the walls, be mindful of any electrical wiring, fixtures, or outlets that may be present. If the shed is equipped with electrical components, it’s essential to enlist the services of a qualified electrician to safely disconnect and remove these elements in accordance with local regulations and safety standards.
Once the walls have been detached from the shed’s foundation, carefully maneuver and lower the wall panels to the ground, ensuring that you have a clear path and adequate space for safe handling. If the shed walls are constructed from reusable materials, such as lumber or siding, consider salvaging these components for potential repurposing or recycling.
If the shed walls are composed of multiple sections or panels, systematically disassemble and stack these components for efficient disposal or recycling. Take care to avoid injury and minimize potential damage to the surrounding environment during this phase of the dismantling process.
As the shed walls are removed, take the opportunity to inspect the underlying foundation or flooring for any signs of damage or deterioration. Address any issues promptly to ensure the structural integrity of the space and prepare for potential future construction or landscaping projects.
With the shed walls successfully removed, you’ve completed a significant portion of the dismantling process, bringing you closer to your desired outdoor transformation. Next, you’ll focus on disposing of the materials and waste generated during the dismantling process, ensuring responsible and efficient management of the shed’s components.
Read more: How To Tear Down A Shed
Disposing of the Materials
As you near the completion of the shed dismantling process, proper disposal of the materials and waste generated becomes a crucial consideration. Responsible management of the shed’s components is essential for environmental sustainability and safety. Here’s how to efficiently handle the disposal of the materials.
Start by sorting the dismantled materials into distinct categories, such as lumber, roofing materials, metal fixtures, and general debris. This segregation facilitates the recycling and disposal process, ensuring that materials are directed to appropriate facilities for responsible handling.
If the shed components are in salvageable condition, consider donating them to local organizations, community projects, or individuals in need of building materials. Reusable lumber, fixtures, and other components can find new life in various construction and renovation endeavors, minimizing waste and benefiting the community.
For materials that cannot be salvaged or repurposed, such as deteriorated wood, damaged roofing materials, or non-recyclable debris, arrange for their proper disposal. Contact local waste management facilities, recycling centers, or construction debris removal services to determine the most suitable methods for discarding these materials in accordance with local regulations.
When transporting and disposing of the shed materials, ensure that you comply with any applicable weight restrictions, disposal fees, or special handling requirements for certain items. Secure the materials safely for transport, utilizing appropriate vehicles, containers, or disposal bins as needed.
If the shed contained hazardous materials, such as asbestos, lead-based paint, or other regulated substances, it’s imperative to engage qualified professionals for their safe removal and disposal. Adhere to all relevant environmental and health regulations to mitigate potential risks and protect the well-being of yourself and others involved in the dismantling process.
Throughout the disposal process, prioritize environmental consciousness and ethical waste management practices. By making informed decisions about the disposal of shed materials, you contribute to the preservation of natural resources and the reduction of landfill waste, aligning with sustainable principles and community stewardship.
With the shed materials responsibly managed and disposed of, you’ve completed a significant aspect of the dismantling process, paving the way for a fresh start and new possibilities in your outdoor space. As you reflect on the journey of deconstructing the shed, take pride in your conscientious approach to waste management and environmental stewardship.
Conclusion
Congratulations on successfully completing the dismantling of your wooden shed! Through careful assessment, strategic planning, and methodical execution, you’ve transformed your outdoor space and set the stage for new possibilities. As you reflect on the journey from assessing the shed to responsibly disposing of its materials, consider the valuable insights and skills gained throughout the process.
By thoroughly assessing the shed’s condition, surroundings, and materials, you developed a comprehensive understanding of the task at hand, enabling you to approach the dismantling process with confidence and foresight. This initial phase laid the groundwork for a safe and efficient deconstruction endeavor, setting the tone for the subsequent stages of the project.
Gathering the necessary materials and tools equipped you for the challenges of dismantling the shed, ensuring that you had the essential resources at your disposal to navigate each phase of the process with ease. This preparation underscored the importance of readiness and resourcefulness in undertaking outdoor projects, empowering you to tackle the task at hand with competence and efficiency.
Dismantling the shed’s roof and walls demanded careful attention to detail, safety precautions, and methodical disassembly techniques. Through your diligence and perseverance, you successfully navigated these pivotal stages, deconstructing the shed with precision and care while prioritizing safety and environmental responsibility.
As you responsibly managed and disposed of the shed materials, you demonstrated a commitment to ethical waste management and environmental stewardship. Your conscientious approach to waste disposal reflects a dedication to sustainability and community well-being, underscoring the positive impact of mindful decision-making in outdoor projects.
As you look ahead to the future of your outdoor space, envision the possibilities that arise from the completion of this project. Whether you’re preparing the area for a new structure, landscaping enhancements, or a revitalized outdoor environment, the successful dismantling of the wooden shed marks a significant milestone in your outdoor transformation journey.
Embrace the knowledge and experience gained from this endeavor, and carry forward the skills and insights acquired as you embark on future outdoor projects. Your resourcefulness, determination, and commitment to responsible practices have not only reshaped your outdoor space but also contributed to the preservation of natural resources and the well-being of your community.
As you embark on new ventures and continue to enhance your outdoor environment, may the lessons learned from dismantling the wooden shed serve as a source of inspiration and empowerment, guiding you toward further achievements and fulfilling experiences in your outdoor endeavors.
Frequently Asked Questions about How To Take Down A Wooden Shed
Was this page helpful?
At Storables.com, we guarantee accurate and reliable information. Our content, validated by Expert Board Contributors, is crafted following stringent Editorial Policies. We're committed to providing you with well-researched, expert-backed insights for all your informational needs.


0 thoughts on “How To Take Down A Wooden Shed”