Home>Home Appliances>Laundry Appliances>How To Replace Washing Machine Water Valves
Laundry Appliances
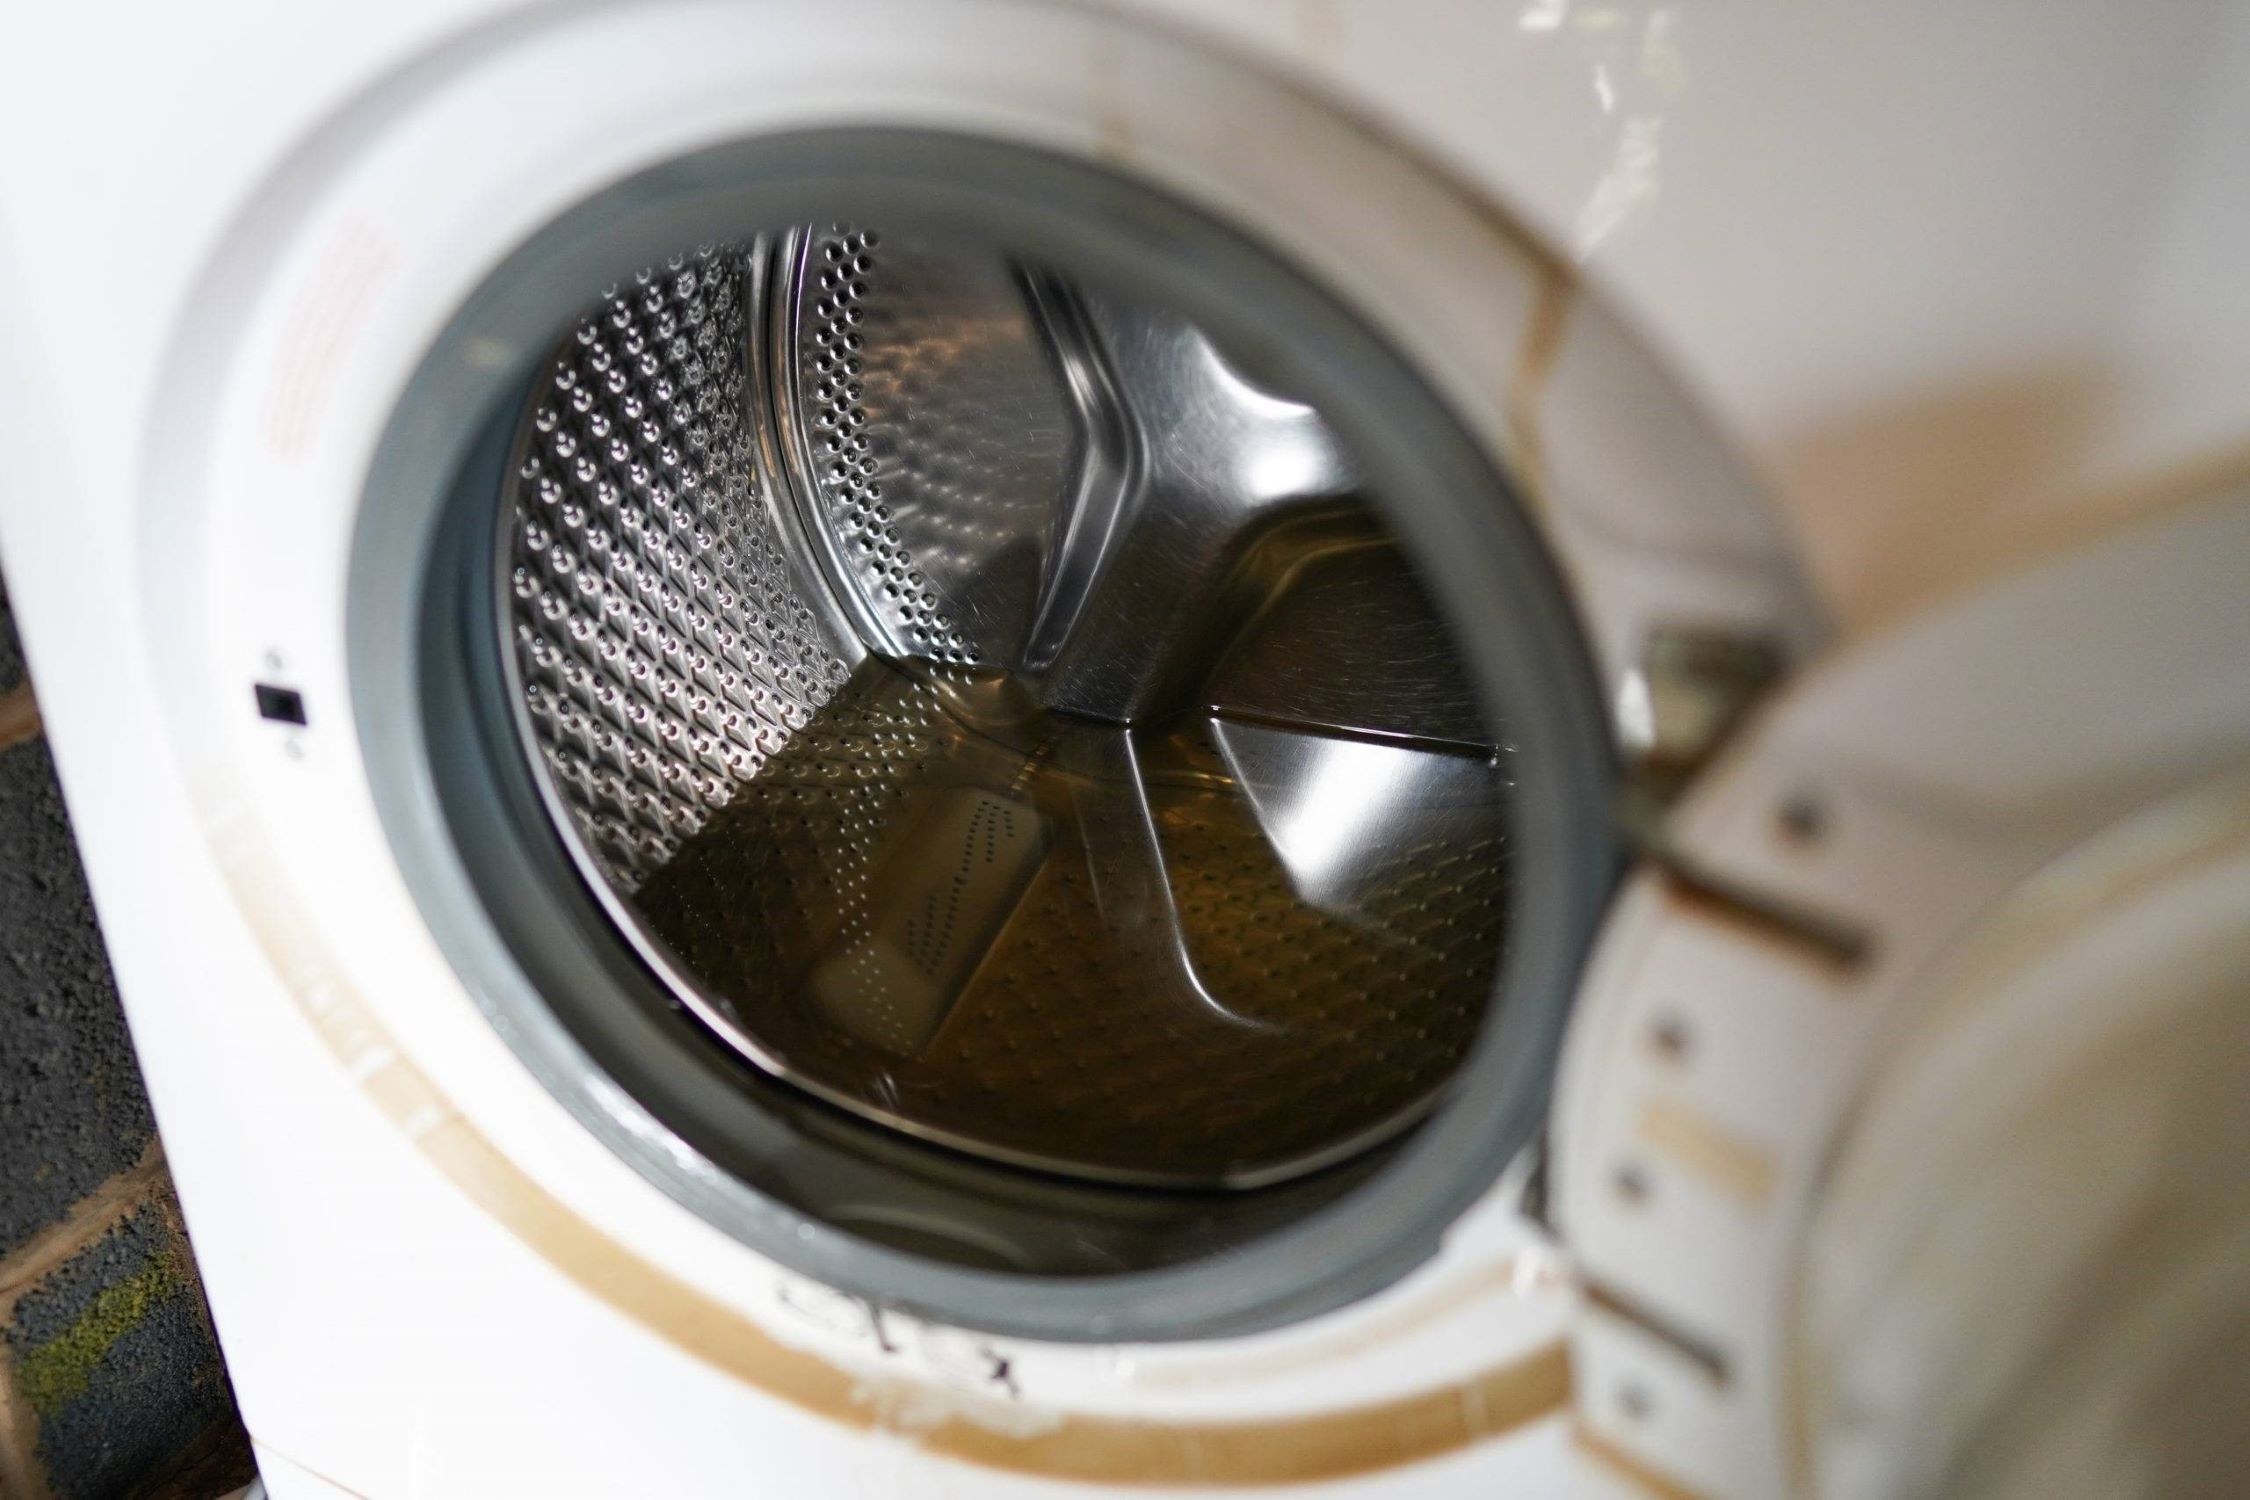
How To Replace Washing Machine Water Valves
Modified: August 17, 2024
Learn how to replace washing machine water valves with our step-by-step guide. Keep your laundry appliances running smoothly with this easy DIY fix.
(Many of the links in this article redirect to a specific reviewed product. Your purchase of these products through affiliate links helps to generate commission for Storables.com, at no extra cost. Learn more)
Introduction
Replacing the water valves of a washing machine is a crucial maintenance task that ensures the proper functioning of the appliance. Over time, these valves can wear out or develop leaks, leading to potential water damage and disruption of the laundry routine. By understanding the step-by-step process of replacing washing machine water valves, you can effectively address any issues and maintain the optimal performance of your appliance.
In this comprehensive guide, we will walk you through the essential steps required to replace the water valves of your washing machine. Whether you are a seasoned DIY enthusiast or a novice homeowner looking to tackle a practical home improvement project, this guide will equip you with the knowledge and confidence to successfully complete the task.
By following these instructions and using the recommended tools and materials, you can ensure a smooth and efficient replacement process. With a bit of patience and attention to detail, you can safeguard your washing machine against potential water leaks and malfunctions, ultimately prolonging its lifespan and preserving its performance.
Now, let's delve into the specific tools and materials you will need to gather before embarking on this essential maintenance endeavor.
Key Takeaways:
- Ensure a smooth washing machine operation by replacing water valves. Follow step-by-step instructions and use the right tools for a hassle-free process, safeguarding against leaks and extending appliance lifespan.
- Prioritize safety and precision when replacing washing machine water valves. Turn off the water supply, disconnect and reconnect hoses, and follow manufacturer guidelines for a reliable and efficient appliance.
Tools and Materials Needed
Before initiating the process of replacing the water valves of your washing machine, it's essential to gather the necessary tools and materials to ensure a seamless and efficient workflow. Here's a comprehensive list of items you will need for this undertaking:
Tools:
-
Adjustable Wrench: This versatile tool will enable you to loosen and tighten various fittings and connections during the valve replacement process. Ensure that the wrench is adjustable to accommodate different sizes of nuts and bolts.
-
Phillips and Flat-Head Screwdrivers: These screwdrivers will be indispensable for removing screws and accessing the internal components of the washing machine.
-
Pipe Wrench: A pipe wrench is essential for securely gripping and turning the pipes and fittings, facilitating the disconnection and installation of the water valves.
-
Teflon Tape: Also known as plumber's tape, Teflon tape is used to seal pipe threads, preventing leaks and ensuring a tight, secure connection between fittings.
-
Bucket and Towel: Having a bucket and a towel on hand will help contain any residual water that may drain from the hoses during the disconnection process, minimizing potential mess and water damage.
Materials:
-
Replacement Water Valves: It's crucial to obtain the correct replacement water valves that are compatible with your specific washing machine model. Ensure that the new valves match the existing specifications to guarantee a proper fit and functionality.
-
Rubber Washer Seals: These seals are essential for creating a watertight connection between the water valves and the hoses, preventing leaks and ensuring efficient water flow.
-
Safety Gloves and Goggles: Prioritize safety by wearing protective gloves and goggles throughout the valve replacement process to safeguard your hands and eyes from potential hazards.
-
Owner's Manual: Keeping the washing machine's owner's manual handy can provide valuable insights and guidance specific to your appliance model, aiding in the successful replacement of the water valves.
By assembling these tools and materials, you will be well-prepared to embark on the process of replacing the water valves of your washing machine. With these essentials at your disposal, you can proceed with confidence, knowing that you have everything necessary to complete the task effectively and with minimal disruption.
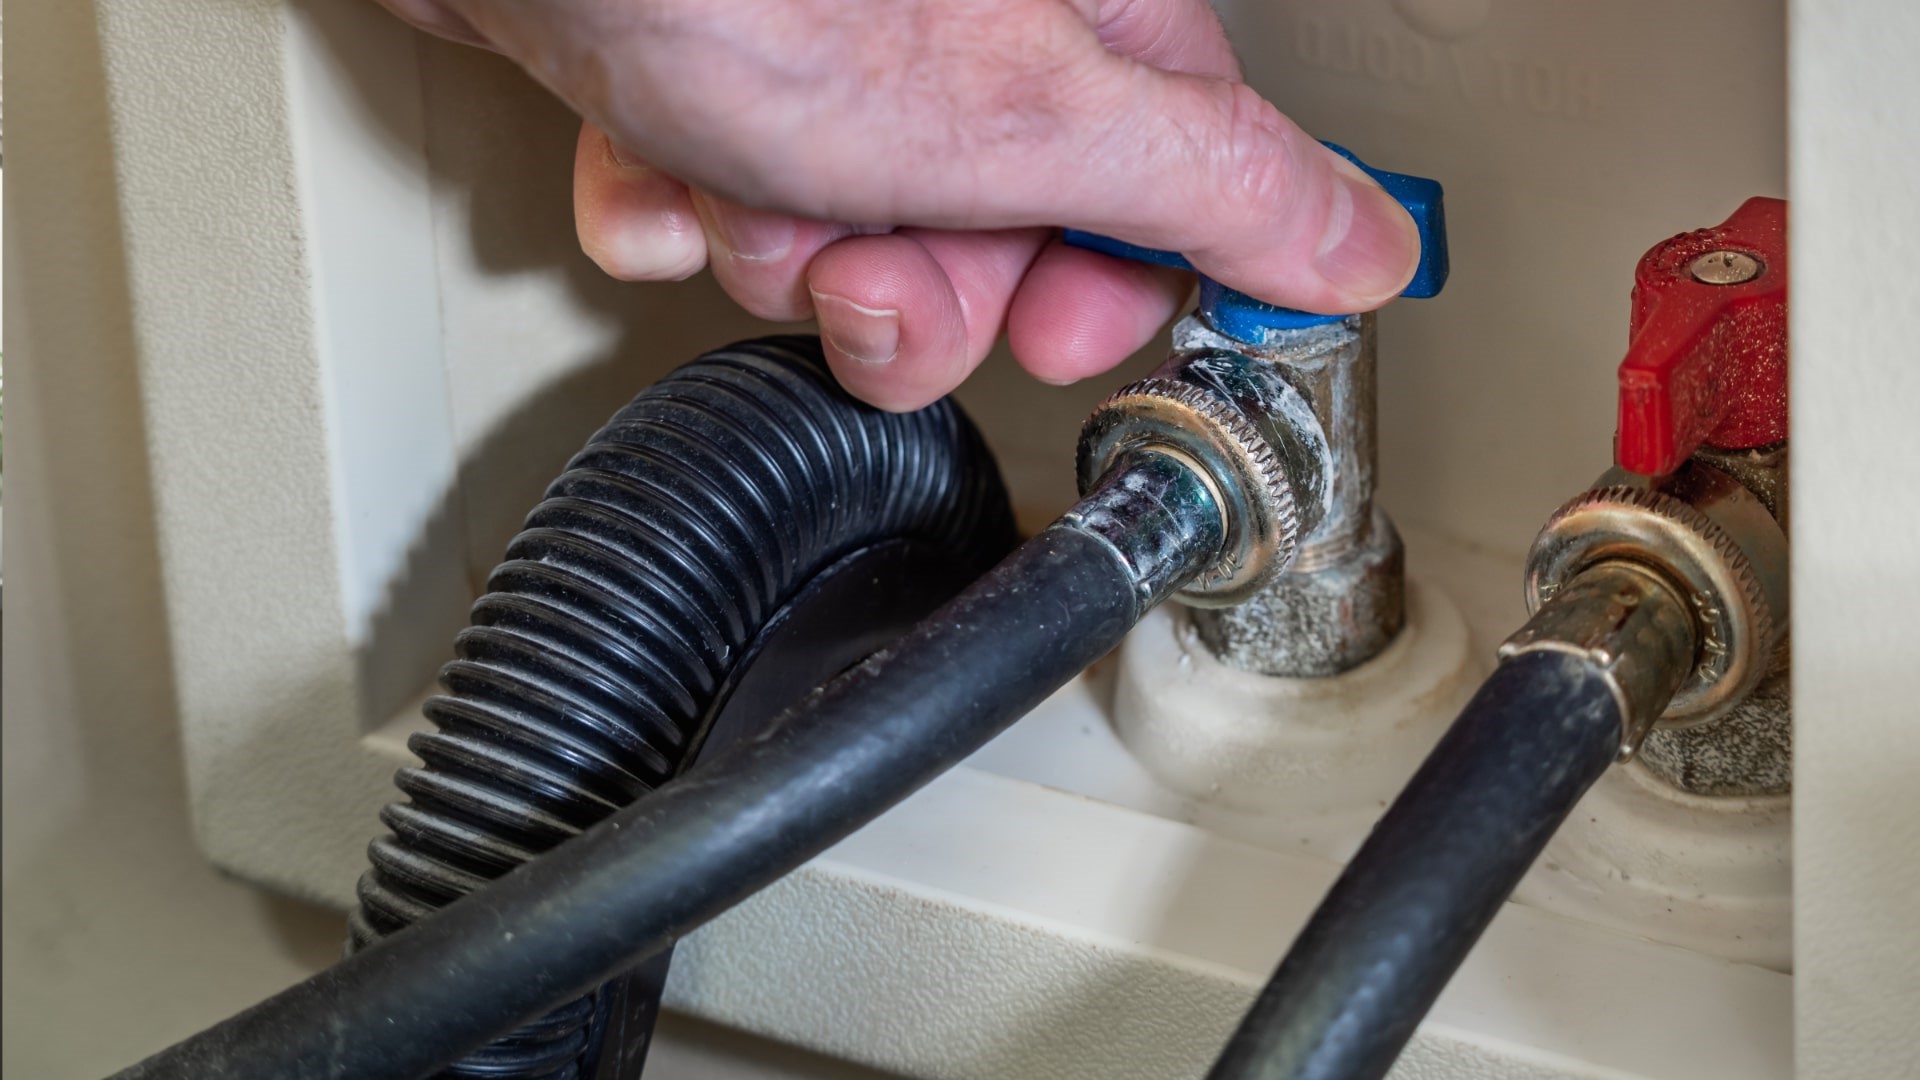
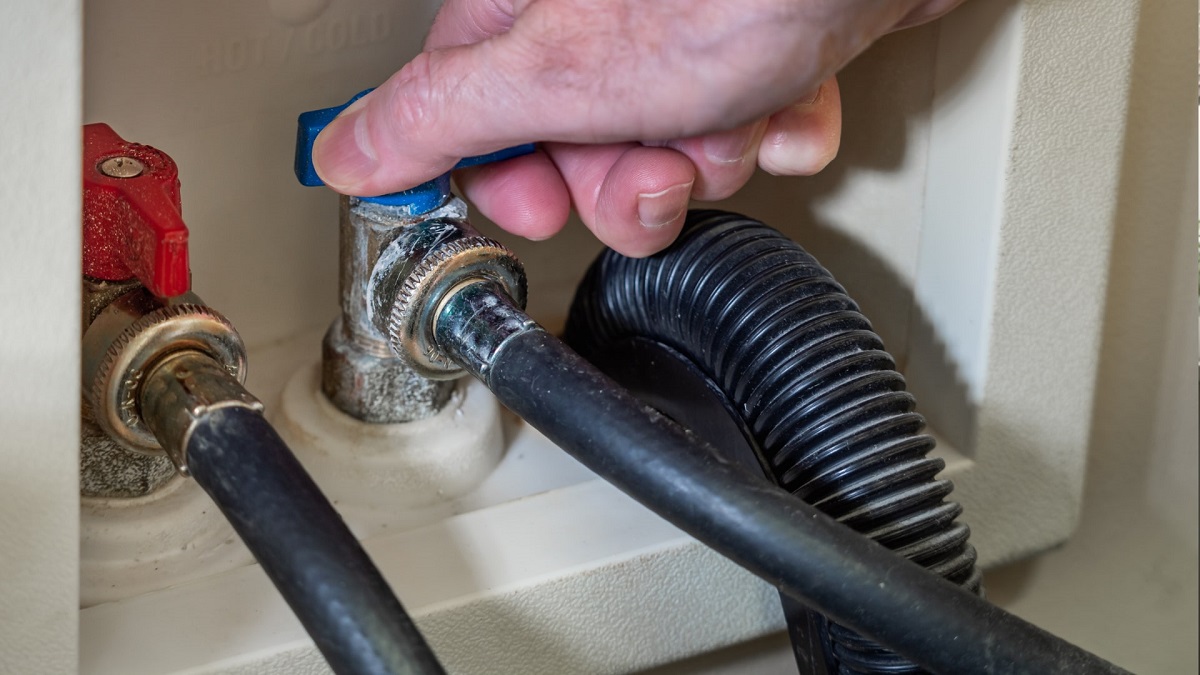
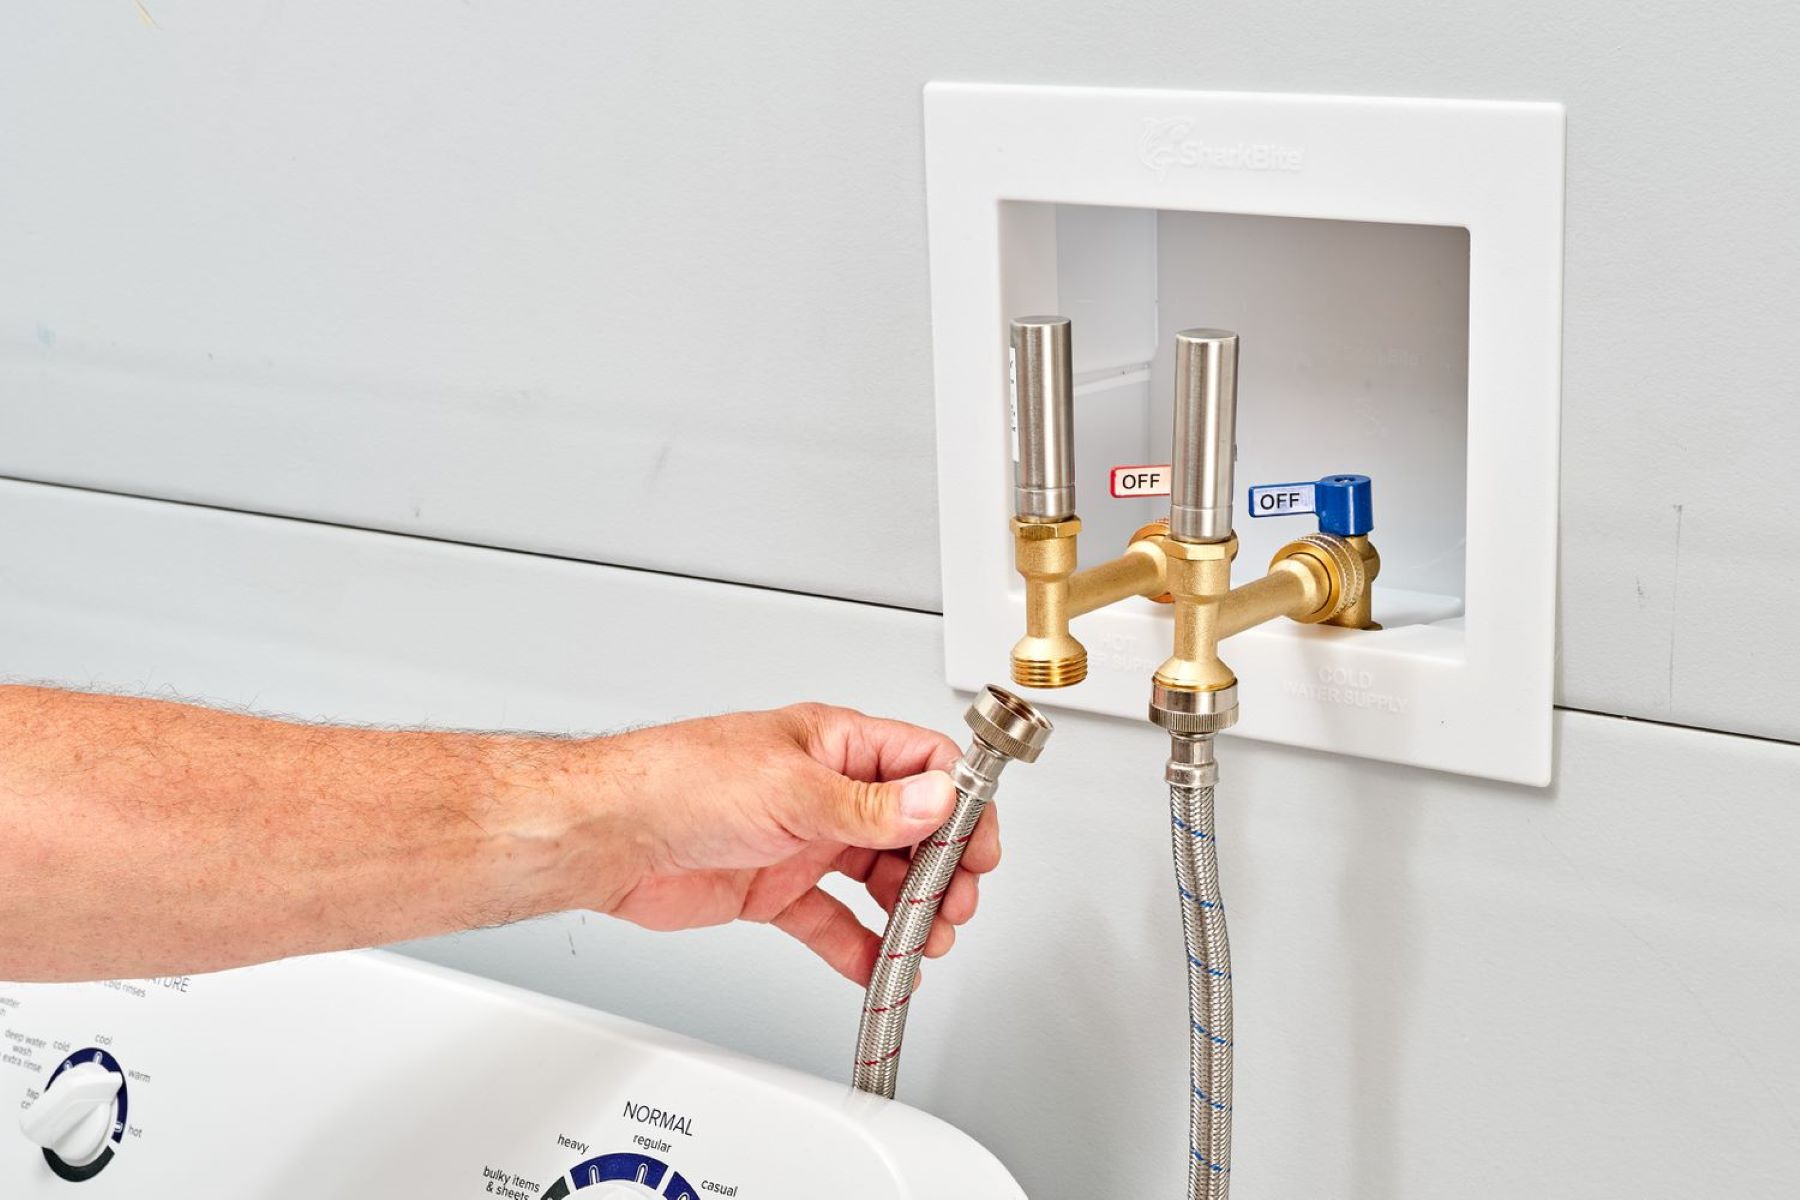
Step 1: Turn Off the Water Supply
Before initiating the replacement of the washing machine water valves, it is crucial to start by turning off the water supply to the appliance. This essential step ensures a safe working environment and minimizes the risk of water leakage during the valve replacement process.
-
Locate the Water Shut-Off Valve: Begin by identifying the water shut-off valve connected to the washing machine. This valve is typically situated behind or adjacent to the appliance, often within close proximity to the wall. Once located, ensure that there is clear and unobstructed access to the valve for ease of operation.
-
Turn Off the Water: Using a firm grip, rotate the handle of the shut-off valve in a clockwise direction to effectively shut off the water supply to the washing machine. As you turn the valve, be attentive to any resistance or unusual sounds, which may indicate potential issues with the valve or the water supply line.
-
Verify the Water Supply: After turning off the shut-off valve, it is advisable to double-check the water supply to confirm that it has been successfully halted. This can be done by attempting to run a short cycle on the washing machine, ensuring that no water enters the appliance. Additionally, inspect the area around the shut-off valve and the washing machine for any signs of water flow to validate the successful cessation of the water supply.
-
Release Pressure: To further ensure safety and minimize the risk of residual water leakage, relieve any remaining pressure in the water lines by briefly opening a faucet or releasing the pressure through the washing machine's dispenser. This step helps prevent unexpected water discharge when disconnecting the hoses and old water valves.
By diligently following these steps to turn off the water supply, you establish a secure environment for the subsequent stages of the water valve replacement process. With the water supply effectively halted, you can proceed with confidence, knowing that the risk of water leakage and related complications has been mitigated.
Read more: How To Replace Gas Valve On Water Heater
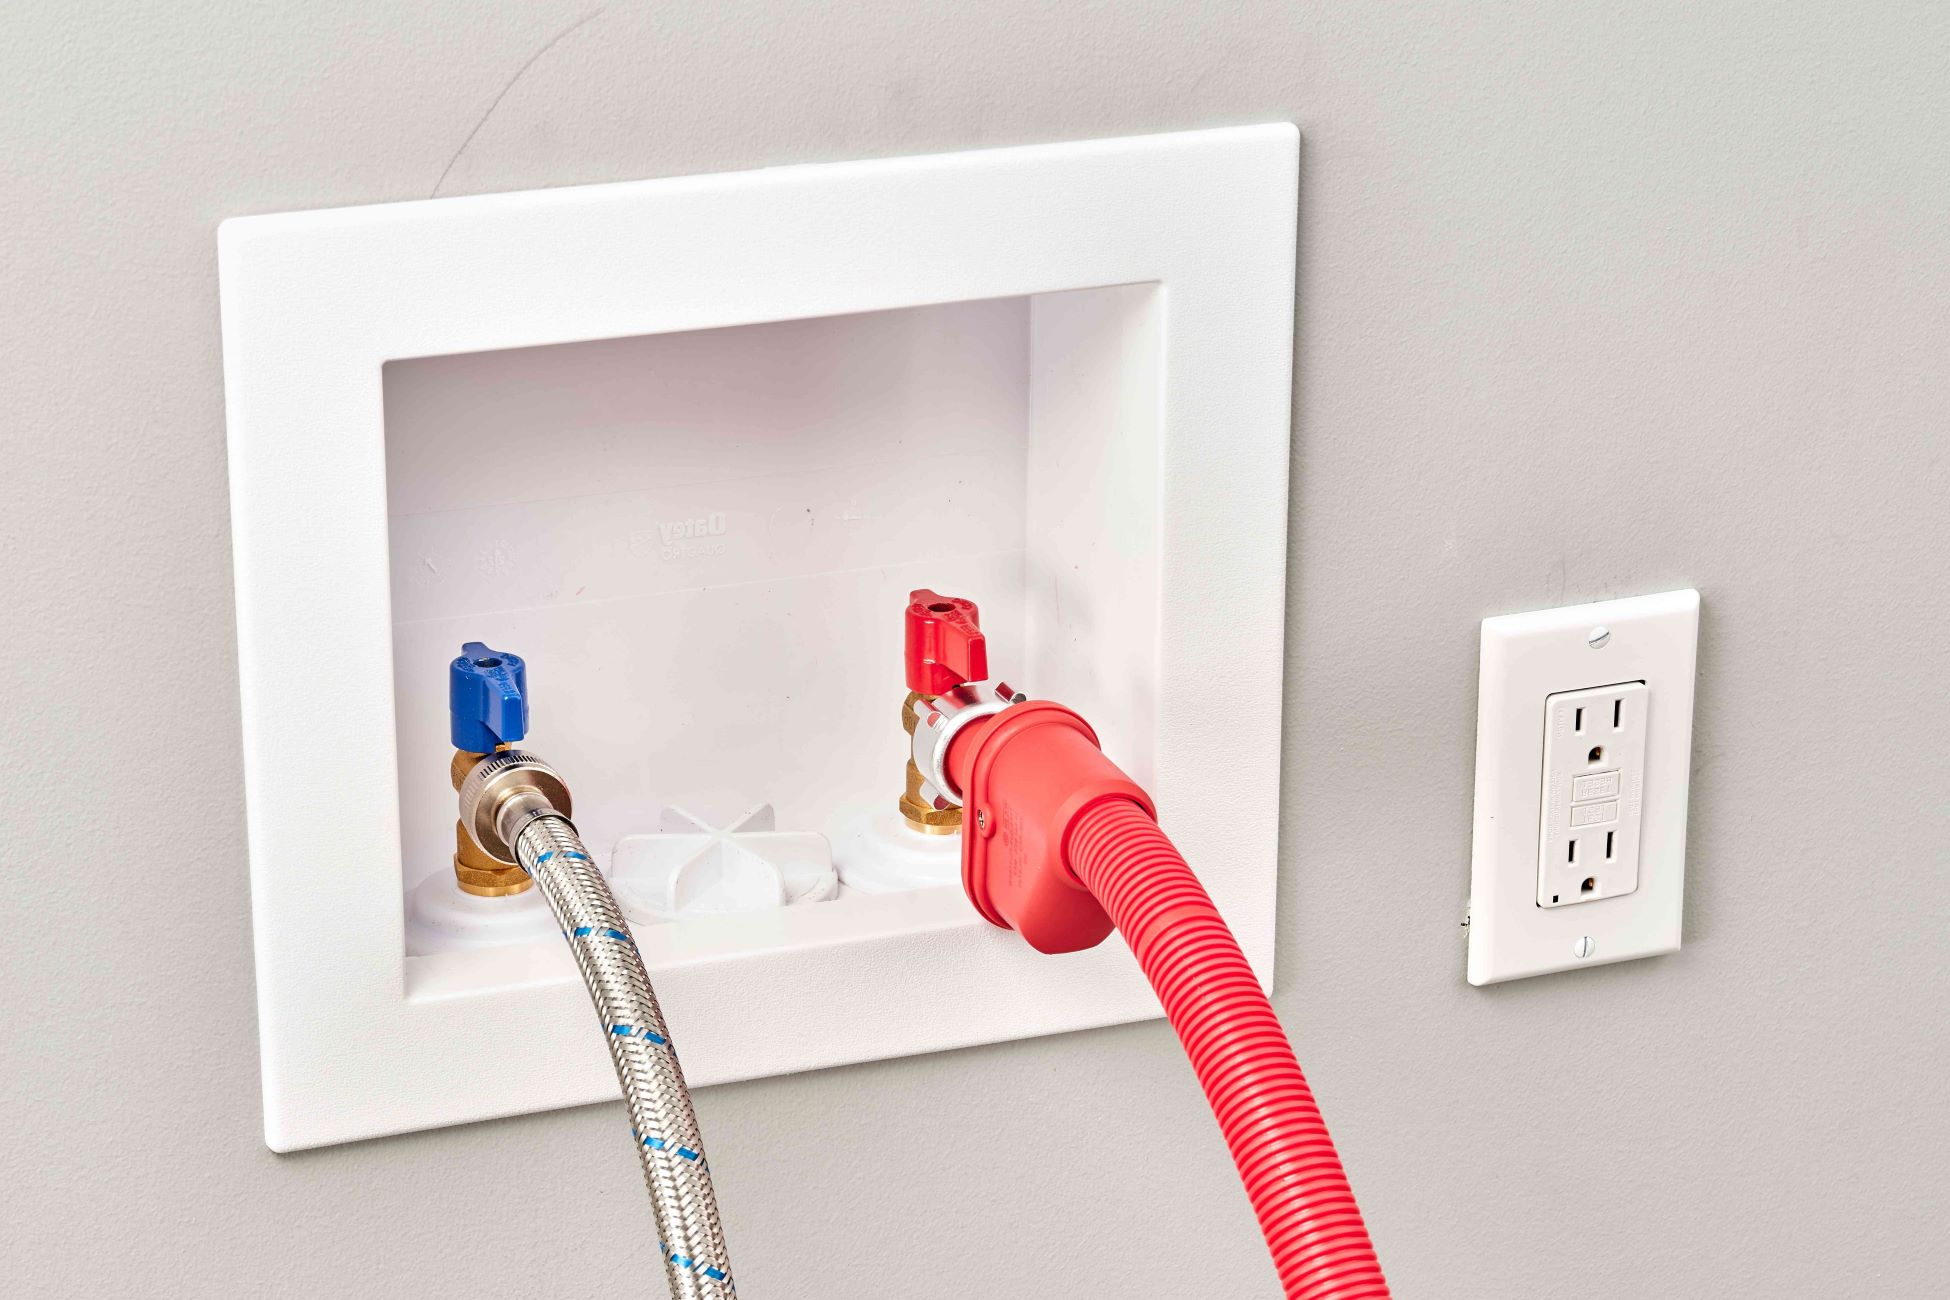
Step 2: Disconnect the Hoses
With the water supply successfully turned off, the next critical step in replacing the washing machine water valves involves disconnecting the hoses from the existing valves. This process requires careful attention to detail and a methodical approach to ensure the safe and efficient removal of the hoses without causing damage to the appliance or surrounding components.
-
Identify the Hoses: Begin by identifying the inlet hoses connected to the water valves at the rear of the washing machine. Typically, there are two hoses – one for hot water and the other for cold water. Ensure clear visibility and access to the hose connections to facilitate the disconnection process.
-
Prepare the Work Area: Place a bucket and a towel beneath the hose connections to capture any residual water that may drain out during the disconnection. This proactive measure helps prevent water spillage and minimizes the risk of creating a mess in the surrounding area.
-
Loosen the Hose Connections: Using an adjustable wrench, carefully loosen the hose connections by turning them counterclockwise. Exercise caution to avoid applying excessive force, as overtightened connections may require additional effort to loosen. Once the connections are sufficiently loosened, continue by hand to detach the hoses from the water valves.
-
Inspect for Residual Water: After disconnecting the hoses, visually inspect them for any remaining water. It is common for a small amount of water to be retained within the hoses and the valve connections. By allowing the hoses to drain into the bucket and using a towel to absorb any excess water, you can effectively minimize the potential for water spillage and ensure a tidy work environment.
-
Examine the Hose Condition: While the hoses are disconnected, take the opportunity to inspect their condition for signs of wear, damage, or deterioration. Check for cracks, bulges, or hardened areas that may indicate the need for hose replacement. If any issues are identified, it is advisable to replace the hoses to maintain the integrity of the washing machine's water supply system.
By meticulously following these steps to disconnect the hoses, you can effectively prepare the washing machine for the subsequent stages of the water valve replacement process. This methodical approach ensures that the hoses are safely removed, minimizing the risk of water leakage and facilitating the seamless installation of the new water valves.
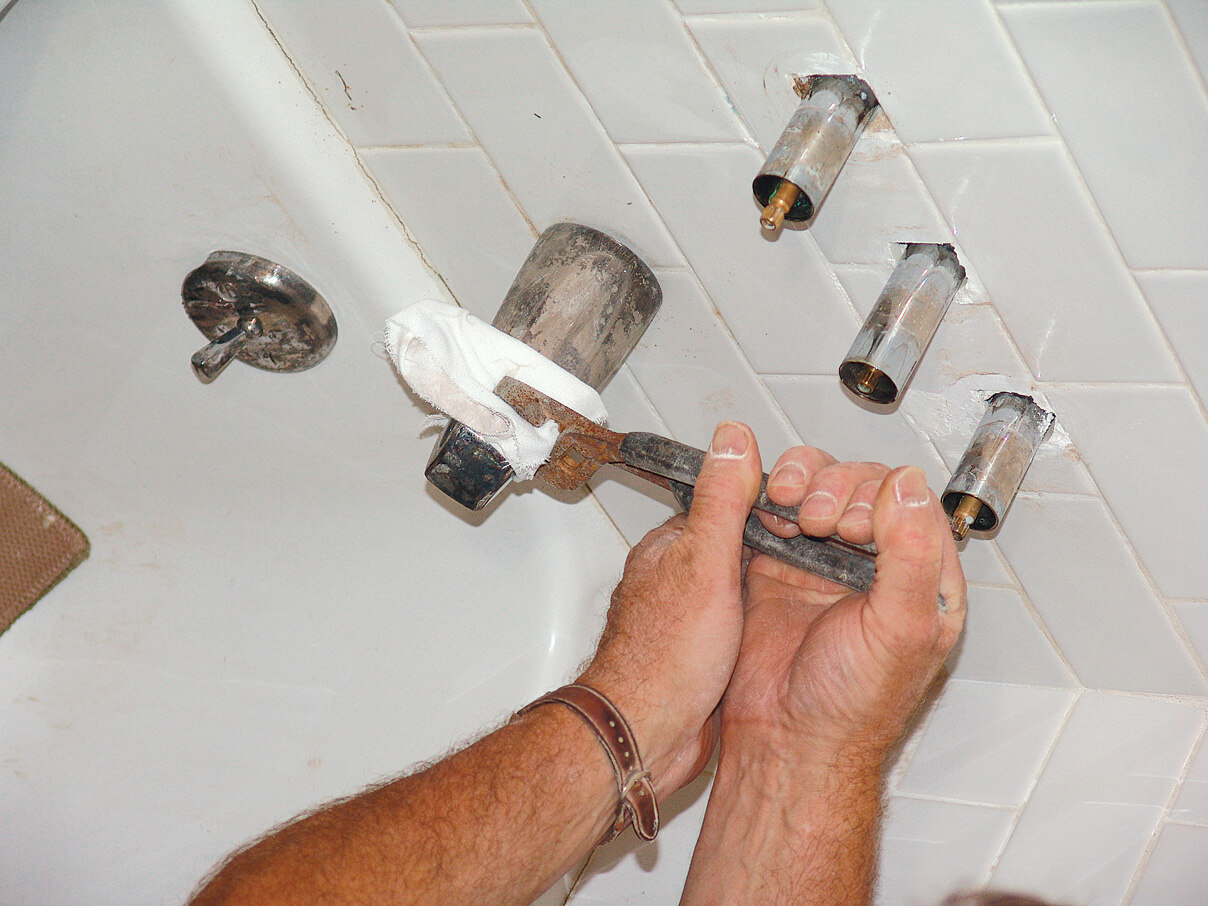
Step 3: Remove the Old Water Valves
With the hoses successfully disconnected, the next pivotal phase in the process of replacing the washing machine water valves involves the removal of the old valves from the appliance. This step requires precision and attentiveness to ensure the safe extraction of the existing valves and the preparation of the installation area for the new components.
-
Access the Water Valves: Begin by locating the existing water valves on the rear panel of the washing machine. These valves are typically positioned at the point where the inlet hoses were previously connected. Ensure clear visibility and access to the valves, allowing ample space to maneuver the necessary tools for their removal.
-
Inspect the Valve Connections: Before proceeding with the removal, inspect the connections and surrounding areas for any signs of corrosion, rust, or debris accumulation. Clearing away any obstructions and ensuring that the valve connections are free from impediments can facilitate a smoother removal process and help prevent potential complications during installation.
-
Use the Appropriate Tools: Employ a suitable wrench or pliers to loosen and remove the mounting nuts securing the water valves to the washing machine. Exercise caution to avoid applying excessive force, as this may lead to damage to the valve connections or the appliance itself. By using the appropriate tools and a methodical approach, you can effectively loosen and detach the old water valves from their mounting positions.
-
Disconnect the Valve Assembly: Once the mounting nuts are removed, carefully disconnect the valve assembly from the inlet ports on the washing machine. Pay close attention to any attached electrical or wiring connections, ensuring that they are safely detached to allow for the complete removal of the old valves.
-
Inspect for Residue and Debris: After removing the old water valves, take a moment to inspect the inlet ports and surrounding areas for any residue, debris, or signs of deterioration. Clear away any accumulated debris and clean the mounting area to prepare it for the installation of the new water valves. This proactive measure helps ensure a secure and stable connection for the replacement valves.
By meticulously following these steps to remove the old water valves, you can effectively prepare the washing machine for the subsequent installation of the new components. This methodical approach ensures that the old valves are safely extracted, setting the stage for the seamless integration of the replacement water valves, ultimately contributing to the optimal performance and reliability of the appliance.
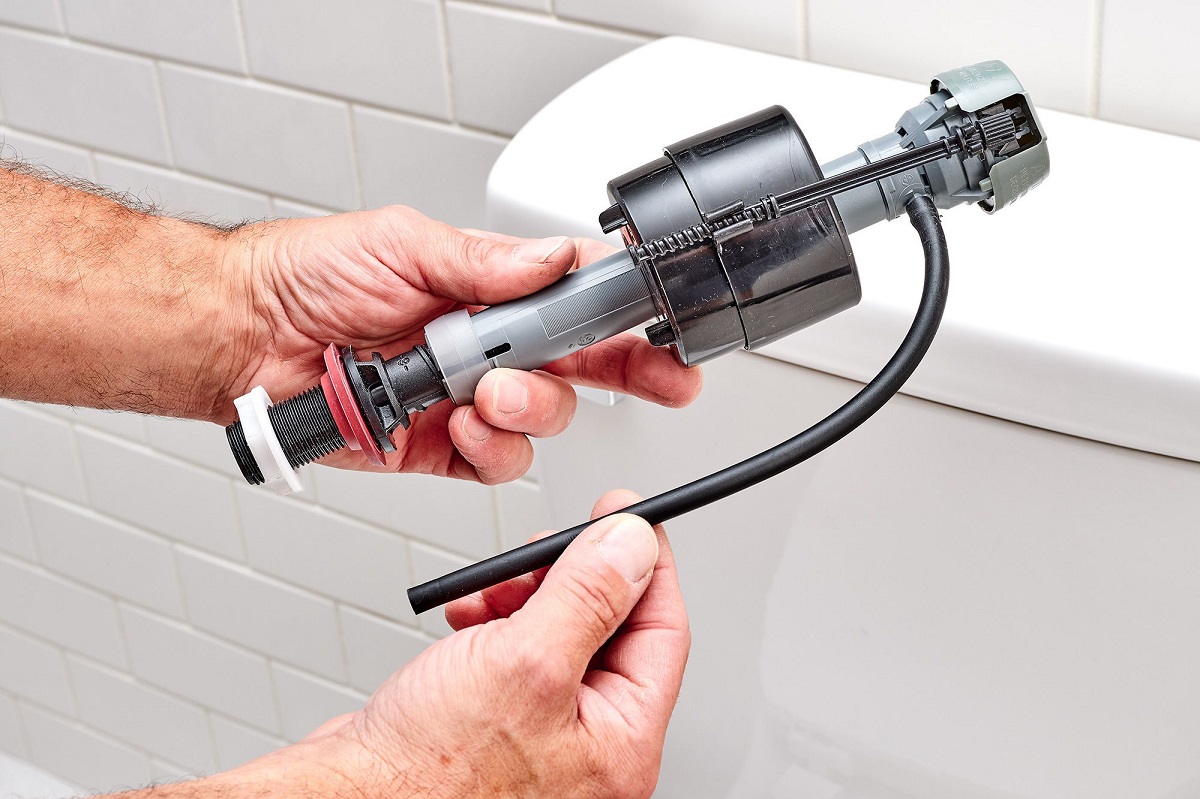
Step 4: Install the New Water Valves
With the old water valves successfully removed, the installation of the new water valves marks a pivotal phase in the process of rejuvenating the washing machine's water supply system. This step demands precision, attention to detail, and a methodical approach to ensure the seamless integration of the replacement components, ultimately contributing to the appliance's optimal functionality and longevity.
Follow the Manufacturer's Guidelines
Before proceeding with the installation, refer to the owner's manual or any accompanying documentation provided with the new water valves. Familiarize yourself with the manufacturer's guidelines, specific instructions, and any recommended procedures for installing the replacement valves. Adhering to the manufacturer's recommendations can help ensure the correct installation and compatibility with your washing machine model.
Read more: How To Replace Water Valve Under Sink
Positioning and Alignment
Carefully position the new water valves at the designated inlet ports on the washing machine, aligning them with precision to facilitate a secure and stable connection. Take note of any electrical or wiring connections associated with the valves, ensuring that they are appropriately aligned and ready for reattachment.
Secure Mounting
Using the appropriate wrench or pliers, secure the new water valves in place by fastening the mounting nuts to the designated inlet ports. Exercise caution to avoid overtightening, as this may lead to damage or distortion of the valve connections. Ensure that the valves are firmly and securely mounted, providing stability and reliability in their positioning.
Establish Watertight Connections
Prior to connecting the inlet hoses to the new water valves, apply Teflon tape to the threaded ends of the valve connections. This proactive measure helps create a watertight seal, preventing potential leaks and ensuring a secure and reliable connection between the valves and the hoses. Carefully wrap the Teflon tape around the threads, overlapping the tape to form a tight seal without obstructing the connection.
Hose Connection
Reconnect the inlet hoses to the newly installed water valves, ensuring a snug and secure fit. Use an adjustable wrench to tighten the hose connections, exercising caution to avoid over-tightening, which may lead to damage or distortion of the fittings. Verify that the hoses are firmly attached, providing a stable and leak-free connection to the replacement water valves.
Read more: How To Adjust Pressure Washer Unloader Valve
Electrical Reconnection
If the new water valves feature electrical or wiring connections, carefully reattach and secure the electrical components as per the manufacturer's instructions. Ensure that the electrical connections are properly aligned and securely fastened, minimizing the risk of disconnection or malfunction during the operation of the washing machine.
By meticulously following these steps to install the new water valves, you can effectively rejuvenate the washing machine's water supply system, ensuring reliable and efficient functionality. This methodical approach sets the stage for the successful integration of the replacement components, ultimately contributing to the appliance's optimal performance and longevity.
Step 5: Reconnect the Hoses
After successfully installing the new water valves, the next crucial step in the process of replacing the washing machine water valves involves reconnecting the hoses to the newly installed components. This pivotal phase demands precision, attention to detail, and a methodical approach to ensure the secure and reliable reconnection of the hoses, ultimately contributing to the efficient and leak-free operation of the appliance.
-
Inspect the Hose Condition: Before proceeding with the reconnection, take a moment to inspect the condition of the hoses. Check for any signs of wear, damage, or deterioration that may necessitate hose replacement. It is essential to ensure that the hoses are free from cracks, bulges, or hardened areas that could compromise their integrity and lead to potential leaks.
-
Apply Rubber Washer Seals: Prior to reconnecting the hoses, place rubber washer seals inside the hose connections of the new water valves. These seals play a crucial role in creating a watertight connection, preventing leaks and ensuring efficient water flow. Ensure that the rubber washer seals are positioned securely within the hose connections to facilitate a reliable seal.
-
Align and Connect the Hoses: Carefully align the inlet hoses with the corresponding connections on the new water valves. Ensure that the hoses are positioned correctly and securely attached to the valves, providing a snug and reliable fit. Exercise caution to avoid twisting or kinking the hoses during the reconnection process, as this may impede water flow and lead to operational issues.
-
Tighten the Hose Connections: Using an adjustable wrench, gently tighten the hose connections to the new water valves. Exercise caution to avoid over-tightening, as this may lead to damage or distortion of the fittings. Verify that the hose connections are securely fastened, providing a stable and leak-free attachment to the replacement water valves.
-
Double-Check the Connections: After reconnecting the hoses, double-check the connections to ensure that they are properly aligned and securely fastened. Visually inspect the hose connections and verify that there are no gaps or loose fittings that may compromise the integrity of the water supply system. This proactive measure helps minimize the risk of potential leaks and ensures the reliable operation of the reconnected hoses.
By meticulously following these steps to reconnect the hoses, you can effectively complete the process of replacing the washing machine water valves, ensuring the secure and reliable attachment of the hoses to the newly installed components. This methodical approach sets the stage for the efficient and leak-free operation of the appliance, ultimately contributing to its optimal performance and longevity.
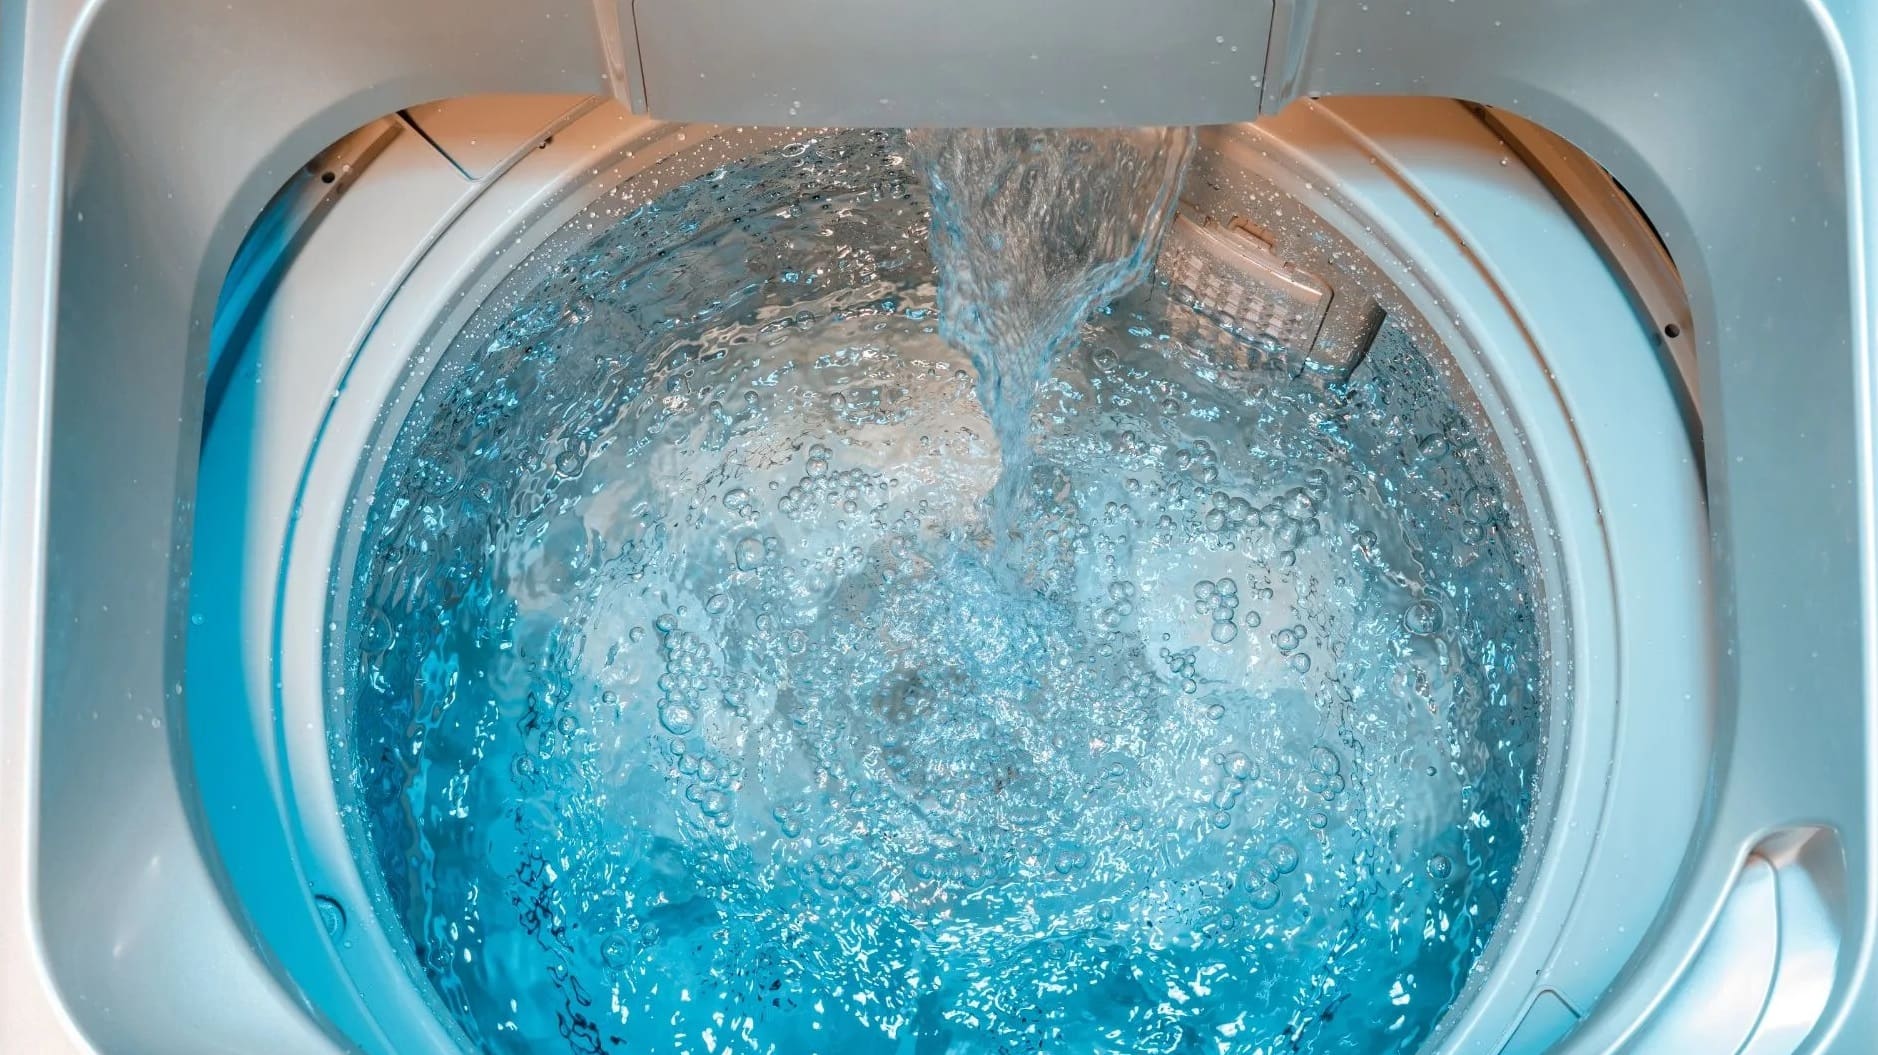
Step 6: Turn On the Water Supply
With the new water valves installed and the hoses securely reconnected, the final step in the process of replacing the washing machine water valves involves turning on the water supply to restore the appliance's functionality. This pivotal phase demands attentiveness and a methodical approach to ensure the safe and efficient resumption of the water flow, ultimately contributing to the seamless operation of the washing machine.
Before turning on the water supply, it is essential to conduct a thorough inspection of the newly installed components and the surrounding area. Verify that the hose connections to the water valves are securely fastened, with no signs of leakage or loose fittings. Additionally, inspect the inlet ports and the valve connections for any residue, debris, or signs of deterioration, ensuring that the installation area is clean and free from obstructions.
Once the inspection is complete, proceed to the water shut-off valve connected to the washing machine. With a firm grip, rotate the handle of the shut-off valve in a counterclockwise direction to gradually restore the water supply to the appliance. As you turn the valve, be attentive to any resistance or unusual sounds, which may indicate potential issues with the valve or the water supply line. Ensure a gradual and controlled reactivation of the water flow to minimize the risk of sudden pressure surges or water hammer effects.
After turning on the shut-off valve, it is advisable to double-check the water supply to confirm the successful restoration of water flow to the washing machine. This can be done by running a brief cycle on the appliance, ensuring that water enters the machine without any leaks or irregularities. Additionally, inspect the area around the shut-off valve and the washing machine for any signs of water flow to validate the effective resumption of the water supply.
As the water supply is restored, monitor the hose connections and the newly installed water valves for any signs of leakage or irregularities. Pay close attention to the areas where the hoses are attached to the valves, ensuring that there are no indications of water seepage or loose fittings. This proactive measure helps identify and address any potential issues promptly, ensuring the reliable and leak-free operation of the washing machine.
By meticulously following these steps to turn on the water supply, you can effectively complete the process of replacing the washing machine water valves, ensuring the safe and efficient restoration of the water flow to the appliance. This methodical approach sets the stage for the seamless operation of the washing machine, ultimately contributing to its optimal performance and reliability.
Conclusion
In conclusion, the successful replacement of washing machine water valves is a fundamental maintenance task that ensures the efficient and reliable operation of the appliance. By following the comprehensive steps outlined in this guide and utilizing the recommended tools and materials, homeowners can effectively address issues related to worn-out or leaking water valves, ultimately safeguarding their washing machines against potential water damage and operational disruptions.
The process begins with the essential step of turning off the water supply, creating a safe working environment and minimizing the risk of water leakage during the valve replacement. Subsequently, disconnecting the hoses from the existing valves demands careful attention to detail, ensuring the safe removal of the hoses without causing damage to the appliance or surrounding components.
The meticulous removal of the old water valves sets the stage for the installation of the new components, marking a pivotal phase in rejuvenating the washing machine's water supply system. By adhering to the manufacturer's guidelines and ensuring precise positioning, secure mounting, and watertight connections, homeowners can seamlessly integrate the replacement valves, contributing to the appliance's optimal functionality and longevity.
Reconnecting the hoses to the newly installed water valves demands precision and attentiveness, ensuring the secure and reliable attachment of the hoses to the replacement components. Finally, turning on the water supply marks the culmination of the process, requiring a methodical approach to ensure the safe and efficient restoration of the water flow to the appliance.
By diligently following these steps and prioritizing attention to detail, homeowners can successfully replace the washing machine water valves, ultimately contributing to the appliance's optimal performance and longevity. This proactive maintenance endeavor not only safeguards against potential water damage and operational disruptions but also promotes the efficient and reliable functionality of the washing machine, enhancing the overall laundry experience for the household.
In essence, the process of replacing washing machine water valves empowers homeowners to take proactive measures in maintaining their appliances, ensuring their continued reliability and performance. By embracing this essential maintenance task, homeowners can effectively prolong the lifespan of their washing machines and mitigate the risk of water-related issues, ultimately contributing to a seamless and efficient laundry routine.
Frequently Asked Questions about How To Replace Washing Machine Water Valves
Was this page helpful?
At Storables.com, we guarantee accurate and reliable information. Our content, validated by Expert Board Contributors, is crafted following stringent Editorial Policies. We're committed to providing you with well-researched, expert-backed insights for all your informational needs.

0 thoughts on “How To Replace Washing Machine Water Valves”