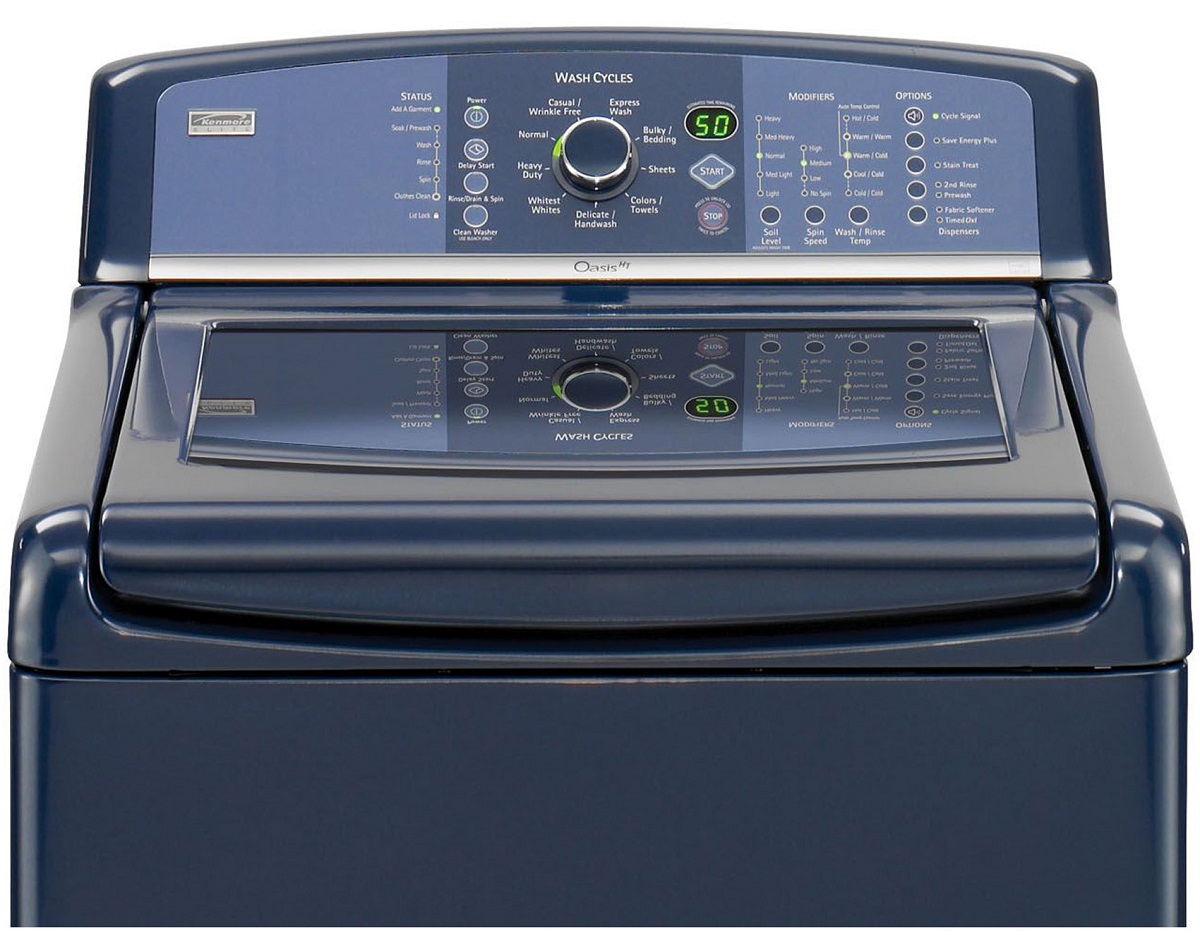
Home>Home Appliances>Laundry Appliances>How To Replace Washing Machine Bearings
Laundry Appliances
How To Replace Washing Machine Bearings
Modified: October 27, 2024
Learn how to replace washing machine bearings and restore your laundry appliances to top condition with our step-by-step guide. Save money and time with our expert tips.
(Many of the links in this article redirect to a specific reviewed product. Your purchase of these products through affiliate links helps to generate commission for Storables.com, at no extra cost. Learn more)
Introduction
Replacing the bearings in a washing machine might seem like a daunting task, but with the right tools, a bit of know-how, and a willingness to get your hands dirty, it's a repair that can be accomplished by the average DIY enthusiast. Over time, the bearings in a washing machine can wear out due to the constant friction and movement during the wash cycle. This wear and tear can lead to a noisy, rumbling washing machine and, if left unattended, can cause further damage to the appliance.
By learning how to replace the bearings in your washing machine, you can save money on costly repair bills and extend the lifespan of your trusty appliance. Additionally, tackling this repair yourself can be a rewarding experience, providing a sense of accomplishment and a deeper understanding of how your washing machine functions.
In this comprehensive guide, we will walk you through the step-by-step process of replacing the bearings in your washing machine. From disconnecting the appliance and removing the drum to installing the new bearings and reassembling the washing machine, we'll cover each stage in detail. By following these instructions, you'll be able to restore your washing machine to its former quiet and efficient self, all while gaining valuable DIY skills along the way.
So, roll up your sleeves, gather your tools, and let's dive into the world of washing machine repair. With a little patience and determination, you'll soon have your washing machine running smoothly once again.
Key Takeaways:
- Don’t be afraid to replace your washing machine bearings! With the right tools and know-how, you can save money and extend the life of your appliance while gaining valuable DIY skills.
- By following step-by-step instructions, you can revitalize your washing machine and enjoy the satisfaction of a quiet and efficient appliance. This DIY project empowers you with valuable maintenance skills.
Read more: How To Replace A Washing Machine Outlet Box
Tools and Materials Needed
Before embarking on the task of replacing the bearings in your washing machine, it's essential to gather the necessary tools and materials. Having the right equipment at your disposal will ensure a smooth and efficient repair process. Here's a comprehensive list of the tools and materials you'll need:
Tools:
- Screwdriver Set: A set of screwdrivers, including both flathead and Phillips head varieties, will be indispensable for removing screws and accessing internal components.
- Adjustable Wrench: This versatile tool will come in handy for loosening and tightening various nuts and bolts during the disassembly and reassembly of the washing machine.
- Hammer: A hammer may be required to gently tap components or bearings into place, aiding in the disassembly and installation process.
- Pliers: Both regular and needle-nose pliers will be useful for gripping and manipulating small components and fasteners.
- Socket Set: A socket set with a ratchet and various socket sizes will be essential for accessing and removing bolts and nuts of different dimensions.
- Rubber Mallet: This tool can be used to gently tap the drum and bearings into place without causing damage.
- Spanner Wrench: Depending on the specific model of your washing machine, a spanner wrench may be necessary for removing the tub nut or other specialized fasteners.
- Work Gloves: It's important to protect your hands during the repair process, especially when handling sharp or heavy components.
Materials:
- Replacement Bearings: Ensure you have the correct type and size of bearings for your washing machine model. It's advisable to purchase high-quality, durable bearings to guarantee long-term performance.
- Grease: High-temperature grease suitable for washing machine bearings will be needed to lubricate the new bearings before installation.
- Cleaning Solvent: A solvent or degreaser can be used to clean the drum and surrounding components, removing any built-up grime or residue.
- Towels and Rags: Keep a supply of clean towels and rags on hand to wipe down components and clean up any spills or mess during the repair process.
- Safety Glasses: Protect your eyes from dust, debris, and potential splashes of cleaning solvents or lubricants with a pair of safety glasses.
By ensuring you have these tools and materials readily available, you'll be well-prepared to tackle the task of replacing the bearings in your washing machine. With everything in place, you can proceed with confidence, knowing that you have the necessary resources to complete the repair effectively and efficiently.
Step 1: Disconnecting the Washing Machine
Before delving into the intricate process of replacing the bearings in your washing machine, it's crucial to begin by disconnecting the appliance from its power source and water supply. This initial step is essential for ensuring your safety and preventing any potential damage to the machine during the repair process.
-
Unplug the Washing Machine: Start by locating the power cord of the washing machine and unplugging it from the electrical outlet. This simple yet crucial step will eliminate the risk of electric shock and allow you to work on the appliance without any power supply.
-
Turn Off the Water Supply: Next, locate the water supply valves connected to the washing machine. These are typically located behind or beside the appliance. Turn off both the hot and cold water supply valves by rotating them in a clockwise direction until they are fully closed. This will prevent water from flowing into the machine during the repair.
-
Disconnect the Hoses: Once the water supply has been turned off, use pliers to loosen the hose connections at the back of the washing machine. Place a towel or a small container beneath the hoses to catch any residual water that may drain out. After loosening the connections, carefully detach the hoses from the water inlet valves on the back of the machine.
-
Prepare for Moving: If the washing machine needs to be moved to a different location for easier access during the repair, ensure that the area is clear and that there is a clear path for maneuvering the appliance. Enlist the help of a friend or family member to assist with lifting and moving the washing machine if necessary.
By following these steps to disconnect the washing machine, you'll create a safe and accessible environment for the subsequent stages of the bearing replacement process. With the appliance safely disconnected from its power and water sources, you can proceed with confidence, knowing that you've taken the necessary precautions to ensure a smooth and secure repair experience.
Read more: How To Replace Washing Machine Water Valves
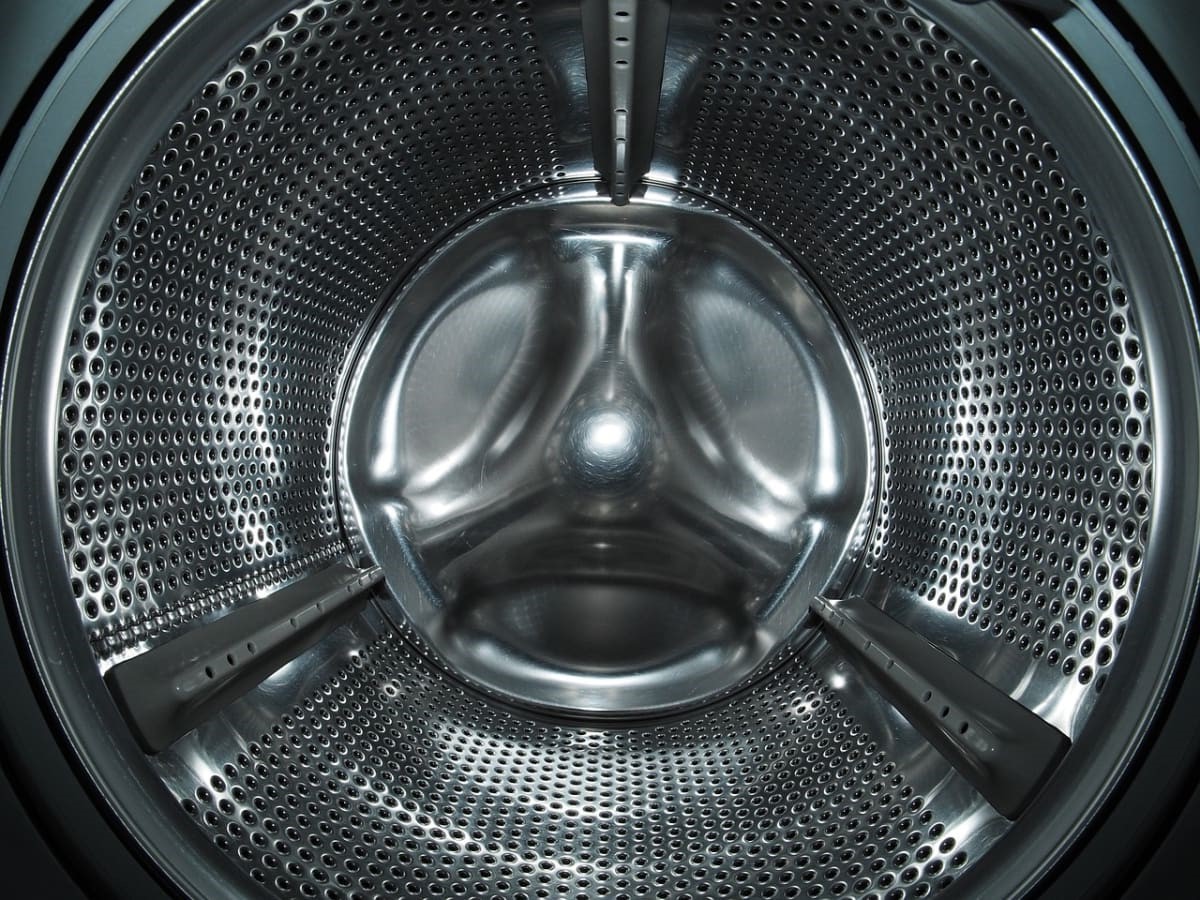
Step 2: Removing the Drum
With the washing machine safely disconnected from its power and water sources, the next crucial step in replacing the bearings involves removing the drum from the appliance. The drum, also known as the inner tub, houses the bearings and is essential for the washing machine's operation. Removing the drum requires careful disassembly of the machine's outer components to gain access to the inner workings.
-
Accessing the Drum: Begin by locating and removing the access panel or rear panel of the washing machine. Depending on the model, the panel may be secured with screws or clips. Use the appropriate tools, such as a screwdriver or wrench, to loosen and remove the fasteners holding the panel in place. Once the panel is removed, you'll have a clear view of the internal components, including the drum and bearings.
-
Disconnecting Components: Before the drum can be removed, it's necessary to disconnect various components that are attached to it. Start by disconnecting the drive belt that connects the motor to the drum. This belt is typically accessible from the rear of the washing machine and can be detached by releasing the tension from the belt and sliding it off the pulley. Additionally, if the washing machine has a concrete counterweight, it will need to be detached to allow for the drum's removal.
-
Removing the Drum: With the necessary components disconnected, the drum can now be carefully maneuvered out of the washing machine. Depending on the specific model, the drum may be secured in place by bolts or clamps. Use the appropriate tools to loosen and remove these fasteners, taking care to support the weight of the drum as it becomes free. Once the securing fasteners are removed, gently guide the drum out of the machine, being mindful of any wiring or hoses that may still be connected.
-
Inspecting the Drum and Bearings: As the drum is removed, take the opportunity to inspect its condition and the state of the bearings. Look for signs of wear, damage, or excessive rust, as these may indicate the need for additional repairs or replacements. Additionally, examine the bearing housing and seals for any wear or deterioration that could affect the performance of the new bearings.
By following these detailed steps to remove the drum from the washing machine, you'll have successfully gained access to the crucial components that house the bearings. With the drum removed, you're now ready to proceed with the next stages of the bearing replacement process, bringing you one step closer to restoring your washing machine to optimal working condition.
Step 3: Removing the Old Bearings
With the drum successfully removed from the washing machine, the next critical phase in the bearing replacement process involves removing the old, worn-out bearings from their housing. This step requires precision and care to ensure that the bearings are extracted without causing damage to the surrounding components.
-
Locating the Bearings: Begin by identifying the location of the bearings within the drum assembly. The bearings are typically situated at the rear of the drum, where they facilitate smooth rotation during the wash cycle. Depending on the design of the washing machine, the bearings may be housed in a bearing housing or mounted directly onto the drum shaft.
-
Disassembling the Bearing Housing: If the bearings are housed within a bearing housing, carefully inspect the housing for any securing clips, bolts, or retaining rings that hold it in place. Use the appropriate tools to remove these fasteners, taking note of their arrangement for reassembly. Once the housing is detached, the old bearings will be exposed and ready for removal.
-
Extracting the Bearings: With the bearings accessible, it's time to extract them from their mounting points. Depending on the design, the bearings may be press-fit onto the drum shaft or secured within the housing. To remove the bearings, a combination of techniques may be employed, such as using a bearing puller, carefully tapping them out with a drift punch, or applying controlled heat to expand the metal and ease the removal process.
-
Inspecting the Bearing Seats: As the old bearings are removed, take the opportunity to inspect the bearing seats within the drum and housing. Ensure that the seats are free from damage, corrosion, or excessive wear that could affect the performance of the new bearings. If necessary, clean the bearing seats using a suitable solvent and inspect them for any irregularities that may require attention.
-
Cleaning the Bearing Mounting Points: Once the old bearings are removed, thoroughly clean the mounting points and surrounding areas to remove any debris, old grease, or contaminants. Use a cleaning solvent and a lint-free cloth to ensure that the surfaces are clean and free from any obstructions that could hinder the installation of the new bearings.
By meticulously following these steps to remove the old bearings from the washing machine, you'll have completed a crucial phase in the bearing replacement process. With the old bearings successfully extracted, you're now prepared to move on to the next stage of installing the new bearings, bringing you closer to revitalizing your washing machine and restoring its optimal functionality.
Step 4: Installing the New Bearings
With the old bearings removed and the bearing seats and mounting points meticulously cleaned, it's time to proceed with the installation of the new bearings. This phase of the bearing replacement process is critical, as it sets the stage for restoring smooth and efficient operation to your washing machine. By following the steps outlined below, you'll be well-equipped to install the new bearings with precision and care, ensuring optimal performance and longevity.
-
Preparing the New Bearings: Before installing the new bearings, it's essential to prepare them for placement within the drum assembly. Begin by applying a generous amount of high-temperature grease to the inner race of each bearing. This lubrication is crucial for ensuring smooth rotation and reducing friction, ultimately prolonging the lifespan of the bearings.
-
Placing the Bearings: With the new bearings adequately lubricated, carefully position them into the designated mounting points within the drum assembly. Take care to align the bearings correctly, ensuring that they seat snugly and securely in their respective positions. Depending on the design, the bearings may be press-fit onto the drum shaft or inserted into a bearing housing, requiring gentle pressure to seat them fully.
-
Securing the Bearings: Once the new bearings are in place, it's important to secure them to prevent any movement or misalignment during operation. If the bearings are housed within a bearing housing, reassemble the housing and fasten it securely using the appropriate retaining clips, bolts, or rings. Ensure that the housing is aligned correctly and that the bearings are seated firmly within it. If the bearings are mounted directly onto the drum shaft, verify that they are positioned securely and that there is no excessive play or wobbling.
-
Applying Additional Grease: After the bearings are installed and secured, apply a final coating of high-temperature grease to the outer race of each bearing. This additional layer of lubrication will further enhance the smooth operation of the bearings and contribute to the overall efficiency of the washing machine.
-
Inspecting the Installation: Once the new bearings are in place and properly lubricated, take a moment to inspect the installation and ensure that everything is aligned and secured as per the manufacturer's specifications. Verify that the bearings rotate smoothly and without any resistance, indicating a successful installation.
By meticulously following these steps to install the new bearings in your washing machine, you'll have completed a crucial phase in the bearing replacement process. With the new bearings securely in place and properly lubricated, you're now poised to move on to the final stage of reassembling the washing machine, bringing you one step closer to revitalizing your appliance and enjoying its quiet and efficient performance once again.
Step 5: Reassembling the Washing Machine
With the new bearings successfully installed and the critical internal components of the washing machine attended to, the final phase of the bearing replacement process involves reassembling the appliance. This pivotal step requires meticulous attention to detail and precision to ensure that all components are reinstated correctly, setting the stage for the washing machine to resume its optimal functionality.
Reattaching the Drum
Begin the reassembly process by carefully maneuvering the drum back into its original position within the washing machine. Take care to align the drum with the mounting points and guide it into place, ensuring that any wiring or hoses are reconnected as necessary. If the drum was secured with bolts or clamps during removal, reattach these fasteners, tightening them securely to hold the drum in place.
Reconnecting Components
Once the drum is securely in place, proceed to reconnect the various components that were detached during the disassembly process. This includes reattaching the drive belt to the motor pulley, ensuring that it is positioned correctly and tensioned appropriately. If the washing machine features a concrete counterweight, reattach it to its designated location, ensuring that it is secured firmly to maintain balance during operation.
Securing Panels and Access Points
With the internal components reconnected, reattach any access panels or rear panels that were removed to gain access to the drum and bearings. Use the appropriate fasteners, such as screws or clips, to secure the panels in place, ensuring a snug fit that prevents any unnecessary movement or vibration during operation.
Reconnecting Power and Water Supply
Before completing the reassembly, reconnect the washing machine to its power source by plugging in the power cord to the electrical outlet. Additionally, reattach the hot and cold water supply hoses to the corresponding water inlet valves, ensuring that the connections are tight and secure. Once the power and water supply are restored, turn on the water valves to allow water to flow into the machine.
Testing the Washing Machine
With the reassembly process complete, it's time to conduct a thorough test of the washing machine to ensure that all components are functioning as intended. Run a brief wash cycle to observe the operation of the drum and bearings, listening for any unusual noises or vibrations that may indicate misalignment or issues with the installation. If everything operates smoothly and quietly, the reassembly process has been successful.
By meticulously following these steps to reassemble the washing machine, you'll have completed the comprehensive process of replacing the bearings in your appliance. With the reassembly complete, your washing machine is now ready to resume its essential role in keeping your laundry clean and fresh, all while operating quietly and efficiently, thanks to the newly installed bearings.
Conclusion
Congratulations on successfully replacing the bearings in your washing machine! By embarking on this DIY repair journey, you've not only saved on costly repair bills but also gained valuable insights into the inner workings of your trusty appliance. As you reflect on the meticulous process of disconnecting the washing machine, removing the drum, extracting the old bearings, installing the new bearings, and reassembling the appliance, you've undoubtedly honed your DIY skills and deepened your understanding of washing machine maintenance.
The completion of this bearing replacement endeavor marks a significant achievement, showcasing your determination and resourcefulness in tackling a complex repair task. As you stand back and admire your handiwork, you can take pride in knowing that your washing machine has been revitalized, ready to deliver quiet and efficient performance for many more laundry cycles to come.
Beyond the immediate benefits of a smoothly operating washing machine, this experience has empowered you with newfound confidence in handling future appliance repairs and maintenance tasks. The knowledge and skills acquired throughout this process serve as a testament to your ability to take on challenges and emerge victorious, all while contributing to the longevity and functionality of your household appliances.
As you reflect on the journey from disconnecting the power and water supply to delicately installing the new bearings, you've not only revitalized your washing machine but also cultivated a sense of accomplishment and self-reliance. The satisfaction of witnessing your appliance running smoothly, free from the rumbling and noise that plagued it before, serves as a reminder of the tangible rewards that come with DIY endeavors.
Moving forward, the expertise gained from this experience positions you as a capable and knowledgeable homeowner, equipped to address a wide range of maintenance and repair tasks. Whether it's replacing other components in your washing machine or taking on projects in other areas of your home, you can approach future endeavors with the confidence and know-how acquired from this successful bearing replacement project.
In conclusion, the journey of replacing the bearings in your washing machine has not only restored the appliance to its optimal state but has also empowered you with valuable skills and insights. As you revel in the quiet hum of your revitalized washing machine, take pride in the accomplishment and expertise gained from this rewarding DIY endeavor.
Frequently Asked Questions about How To Replace Washing Machine Bearings
Was this page helpful?
At Storables.com, we guarantee accurate and reliable information. Our content, validated by Expert Board Contributors, is crafted following stringent Editorial Policies. We're committed to providing you with well-researched, expert-backed insights for all your informational needs.


0 thoughts on “How To Replace Washing Machine Bearings”