Home>Home Appliances>Laundry Appliances>How To Service A Washing Machine
Laundry Appliances
How To Service A Washing Machine
Modified: October 21, 2024
Learn how to service your laundry appliances with our comprehensive guide. Keep your washing machine in top condition with our expert tips and advice.
(Many of the links in this article redirect to a specific reviewed product. Your purchase of these products through affiliate links helps to generate commission for Storables.com, at no extra cost. Learn more)
Introduction
Servicing a washing machine is an essential aspect of appliance maintenance that can significantly extend its lifespan and ensure optimal performance. Regular servicing not only helps in preventing potential breakdowns but also contributes to the efficient functioning of the machine. By understanding the key components and processes involved in servicing a washing machine, you can effectively address common issues and keep your appliance in top condition.
Whether you have a top-loading or front-loading washing machine, periodic servicing is crucial for preserving its functionality and preventing costly repairs. From cleaning the interior components to inspecting and replacing essential parts, a comprehensive servicing routine can enhance the overall efficiency and longevity of your washing machine.
In this article, we will delve into the step-by-step process of servicing a washing machine, providing valuable insights and practical tips to guide you through the maintenance procedure. By following these guidelines, you can gain a deeper understanding of your appliance and develop the confidence to perform essential servicing tasks with ease.
Throughout this article, we will emphasize the importance of safety precautions and highlight the tools and materials required for servicing your washing machine. Additionally, we will explore various aspects of maintenance, including cleaning the washing machine, checking and replacing hoses, inspecting and replacing belts, maintaining the drum and agitator, and testing the machine after servicing.
By familiarizing yourself with these servicing procedures, you can take proactive measures to ensure the smooth operation of your washing machine while minimizing the risk of malfunctions. Whether you are a homeowner seeking to maintain your appliance or a professional looking to expand your knowledge, this comprehensive guide will equip you with the essential skills and knowledge to effectively service a washing machine.
As we embark on this servicing journey, let's delve into the intricacies of maintaining a washing machine and uncover the key steps to uphold its functionality and performance.
Key Takeaways:
- Regular servicing of your washing machine is crucial for its longevity and efficiency. By following safety precautions, using the right tools, and conducting thorough testing, you can ensure a smooth and reliable operation of your appliance.
- Cleaning, inspecting, and potentially replacing components like hoses, belts, and the motor are essential for maintaining your washing machine. Prioritizing safety, using the right tools, and conducting thorough testing contribute to a well-maintained and efficient appliance.
Read more: How To Reset A Washer
Safety Precautions
When servicing a washing machine, prioritizing safety is paramount to prevent accidents and ensure a smooth maintenance process. Before initiating any servicing tasks, it is crucial to adhere to the following safety precautions:
-
Power Disconnection: Always unplug the washing machine from the power source before commencing any servicing activities. This precautionary measure eliminates the risk of electric shock and safeguards against accidental activation of the machine during maintenance.
-
Water Supply: Turn off the water supply to the washing machine to prevent leaks and flooding. This step is essential, especially when inspecting or replacing hoses and other water-related components.
-
Personal Protective Equipment (PPE): Wear appropriate PPE, such as gloves and safety goggles, to shield yourself from potential hazards. PPE provides an additional layer of protection and minimizes the risk of injury while handling various components of the washing machine.
-
Stability: Ensure that the washing machine is on a stable surface and properly balanced to prevent it from tipping over during servicing. This is particularly important when accessing the underside or rear of the machine.
-
Ventilation: Work in a well-ventilated area to avoid inhaling dust, debris, or fumes that may be present inside the washing machine. Adequate ventilation promotes a safe and comfortable working environment.
-
Proper Tools: Use the appropriate tools for the servicing tasks at hand. This includes screwdrivers, pliers, wrenches, and other specialized tools as required. Using the correct tools enhances safety and efficiency during the maintenance process.
-
Manufacturer's Guidelines: Refer to the manufacturer's manual for specific safety instructions and guidelines related to servicing the washing machine. Adhering to the manufacturer's recommendations ensures that you are following approved procedures and precautions.
By adhering to these safety precautions, you can create a secure working environment and mitigate potential risks associated with servicing a washing machine. Prioritizing safety not only safeguards your well-being but also contributes to a smooth and effective maintenance process, allowing you to address the appliance's needs with confidence and peace of mind.
Tools and Materials Needed
When embarking on the task of servicing a washing machine, it is essential to have the right tools and materials at your disposal. Equipping yourself with the appropriate resources ensures that you can effectively address various maintenance tasks and streamline the servicing process. Here's a comprehensive list of tools and materials needed for servicing a washing machine:
Tools:
-
Screwdriver Set: A set of screwdrivers, including both flathead and Phillips head varieties, is indispensable for accessing and removing components such as panels, covers, and fasteners.
-
Adjustable Wrench: An adjustable wrench facilitates the loosening and tightening of nuts, bolts, and hose fittings during maintenance tasks.
-
Pliers: Both regular and needle-nose pliers are essential for gripping, twisting, and maneuvering small components, particularly when dealing with electrical connections and hose clamps.
-
Socket Set: A versatile socket set with various sizes of sockets and a ratchet handle enables the efficient removal and installation of nuts and bolts on the washing machine.
-
Multimeter: This electronic measuring instrument is crucial for testing electrical components, such as switches, fuses, and motors, to diagnose potential malfunctions accurately.
-
Flashlight: A reliable flashlight or headlamp is invaluable for illuminating dark and confined spaces within the washing machine, aiding in visual inspections and component identification.
-
Wire Brush: A wire brush assists in cleaning and removing debris from components, ensuring optimal performance and longevity of the washing machine.
-
Tub Spanner Wrench: This specialized tool is essential for removing the tub nut when accessing the inner components of the washing machine.
Materials:
-
Gloves: Durable work gloves provide hand protection and enhance grip when handling components and performing maintenance tasks.
-
Safety Goggles: Eye protection is crucial to shield against debris, dust, and potential splashes of cleaning solutions or water during servicing.
-
Cleaning Solution: A mild cleaning solution or vinegar is effective for cleaning the interior of the washing machine, removing residue, and eliminating odors.
-
Replacement Parts: It is advisable to have common replacement parts on hand, such as hoses, belts, and agitator components, to address potential wear and tear during servicing.
-
Lint Brush: A lint brush or flexible cleaning wand is useful for removing lint and debris from the washing machine's drain pump and filter, promoting optimal drainage and preventing clogs.
By ensuring that you have these essential tools and materials readily available, you can approach the servicing of your washing machine with confidence and efficiency. Having the right resources at hand empowers you to address maintenance tasks effectively, maintain the appliance's functionality, and prolong its operational lifespan.
Read more: How To Clean Washer And Dryer
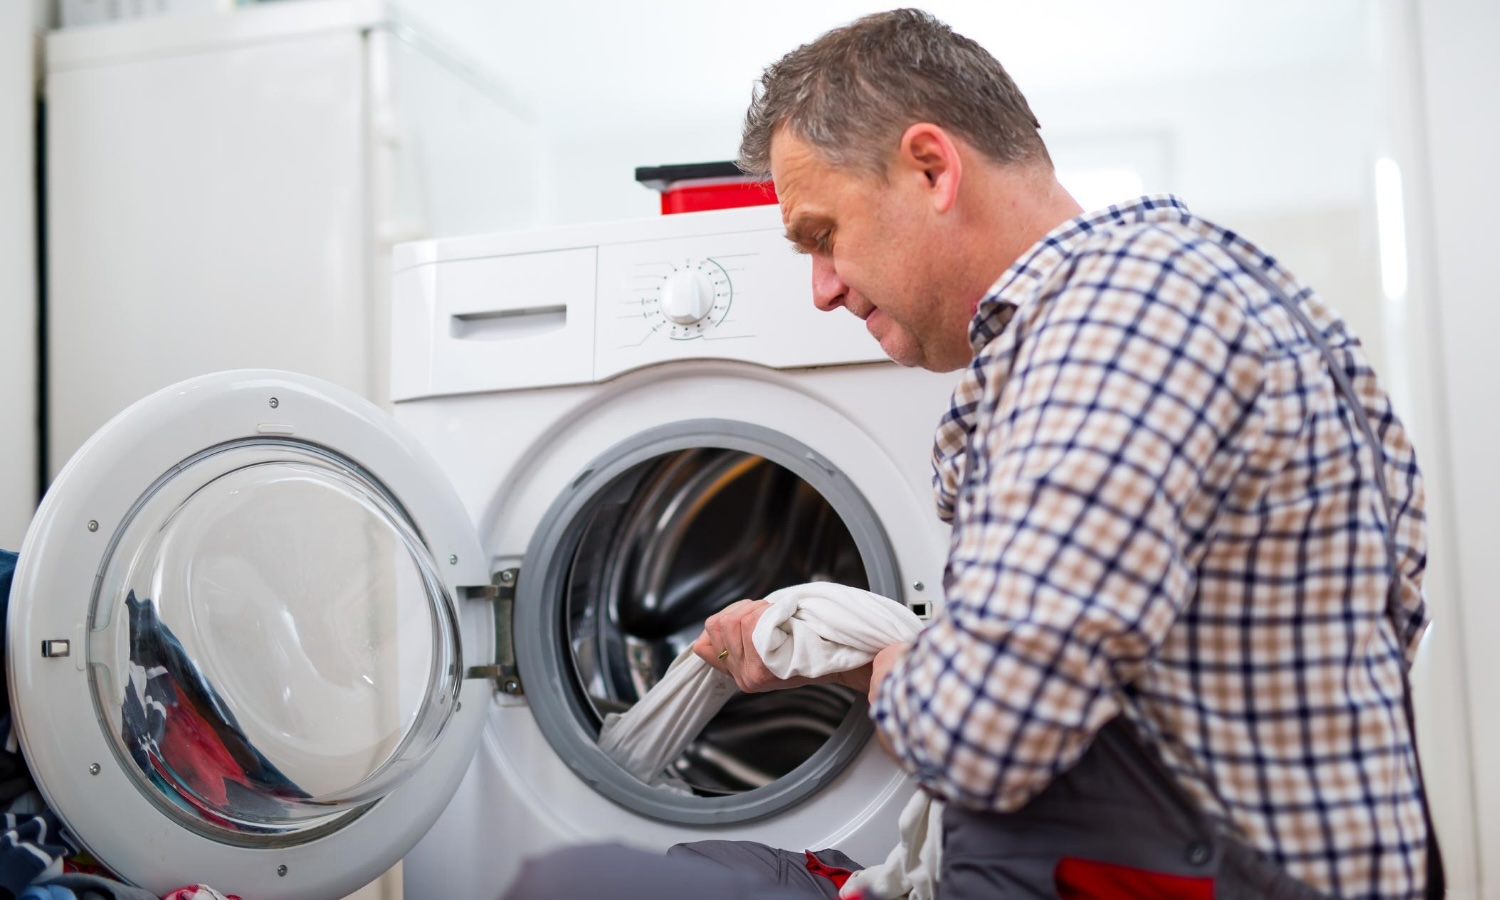
Cleaning the Washing Machine
Cleaning the washing machine is a fundamental aspect of servicing that contributes to its optimal performance and longevity. Over time, soap scum, mineral deposits, and residual detergent can accumulate inside the machine, leading to unpleasant odors and potentially affecting the cleanliness of your laundry. By incorporating regular cleaning into your maintenance routine, you can ensure that the washing machine operates efficiently and delivers consistently clean and fresh-smelling laundry.
Step 1: Interior Cleaning
Begin by preparing a cleaning solution using a mild detergent or a mixture of white vinegar and water. This solution effectively breaks down residue and eliminates odors. With the machine empty, pour the cleaning solution into the detergent dispenser or directly into the drum. Run a hot water cycle to allow the cleaning solution to circulate throughout the interior, effectively loosening and dissolving any buildup.
Step 2: Door Seal and Dispenser Cleaning
The door seal and detergent dispenser are common areas where mold, mildew, and residue can accumulate. Use a soft cloth or sponge soaked in the cleaning solution to thoroughly wipe these areas, ensuring that any visible residue is removed. Pay close attention to the folds and crevices of the door seal to eliminate any trapped debris.
Step 3: Exterior and Control Panel Cleaning
To maintain the overall cleanliness and appearance of the washing machine, wipe down the exterior surfaces, including the control panel, with a damp cloth and a mild all-purpose cleaner. This helps to remove dust, fingerprints, and spills, preserving the aesthetic appeal of the appliance.
Read more: How To Hide Washer Hookups
Step 4: Drain Pump and Filter Maintenance
Periodically inspect and clean the drain pump and filter to prevent blockages and ensure proper drainage. Locate the access panel or filter cover, typically located at the front or rear of the machine, and remove any accumulated lint, debris, or foreign objects. Use a lint brush or flexible cleaning wand to dislodge and remove trapped materials, promoting unobstructed water flow during the draining process.
Step 5: Drum and Agitator Maintenance
For top-loading machines, clean the agitator by removing it according to the manufacturer's instructions and scrubbing it with a brush and the cleaning solution. Additionally, wipe down the drum's interior surfaces to remove any remaining residue or buildup, ensuring a clean and sanitized washing environment.
By incorporating these cleaning steps into your washing machine servicing routine, you can effectively maintain a hygienic and odor-free appliance while promoting the longevity of its components. Regular cleaning not only enhances the performance of the washing machine but also contributes to the overall quality of your laundry, ensuring that each load emerges fresh and clean.
Checking and Replacing the Hoses
The hoses of a washing machine play a critical role in facilitating the intake of water and the drainage of soiled water during the laundry cycles. Over time, hoses can deteriorate due to wear and tear, exposure to high water pressure, or aging, potentially leading to leaks, cracks, or blockages. Therefore, regularly checking and replacing the hoses is a vital aspect of washing machine maintenance to prevent water damage and ensure the appliance's optimal functionality.
Inspection of Hoses
Begin by visually inspecting the hoses for any signs of wear, bulges, cracks, or leaks. Pay close attention to the areas near the connections and bends, as these are common areas where hose damage occurs. Additionally, check for any mineral deposits or discoloration, which may indicate deterioration of the hose material. If any of these issues are detected, it is imperative to replace the hoses promptly to prevent potential water-related mishaps.
Read more: How To Clean Amana Washer
Water Supply and Drain Hoses
The washing machine typically has two hoses: the water supply hose, responsible for delivering water to the machine during the wash cycle, and the drain hose, which expels the used water during the drainage process. Inspect both hoses thoroughly, ensuring that they are securely connected to the corresponding water sources and the washing machine. Verify that the hoses are free from kinks, twists, or obstructions that could impede the water flow.
Replacement Procedure
When replacing the hoses, it is advisable to use high-quality, reinforced hoses designed specifically for washing machine use. Turn off the water supply valves and disconnect the hoses from the water sources and the washing machine. Use a container to catch any residual water that may drain from the hoses. After removing the old hoses, carefully attach the new hoses, ensuring a secure and leak-free connection. Tighten the hose connections using an adjustable wrench to prevent any potential water leaks.
Testing the Hoses
Once the new hoses are installed, turn on the water supply and check for any leaks or drips at the hose connections. It is essential to verify that the hoses are free from any twists or kinks that could restrict water flow. Additionally, run a short wash cycle to confirm that the hoses function properly, allowing water to enter the machine and drain efficiently without any issues.
By routinely inspecting and replacing the hoses of your washing machine, you can mitigate the risk of water damage and maintain the appliance's reliable performance. This proactive approach to hose maintenance ensures that your washing machine operates seamlessly, providing you with the peace of mind that comes with a well-maintained and dependable appliance.
Inspecting and Replacing the Belts
The belts in a washing machine play a crucial role in driving the various mechanical components responsible for the machine's operation, including the agitator and the drum. Over time, these belts can experience wear and tear, leading to issues such as excessive noise, erratic spinning, or the inability to agitate properly. Therefore, regular inspection and potential replacement of the belts are essential aspects of washing machine maintenance to ensure smooth and efficient laundry cycles.
Read more: How To Reset Frigidaire Washer
Inspection of Belts
Commence the inspection process by accessing the washing machine's belt system, which is typically located beneath the outer housing or behind an access panel. Carefully observe the condition of the belts, looking for signs of wear, fraying, cracking, or stretching. Additionally, check for any accumulation of debris or residue on the belts, as this can impede their functionality and lead to performance issues.
Tension and Alignment
Verify that the belts are properly tensioned and aligned within the pulley system. Belts that are too loose may slip or fail to drive the components effectively, while overly tight belts can place excessive strain on the motor and other mechanical parts. Ensure that the belts exhibit the appropriate level of tension, allowing for smooth and consistent operation without unnecessary strain on the system.
Replacement Procedure
If the belts show significant signs of wear or damage, it is advisable to proceed with their replacement to maintain the washing machine's optimal performance. Begin by disconnecting the power supply and accessing the belt system according to the manufacturer's guidelines. Carefully remove the old belts, taking note of their orientation and positioning within the pulley system.
Select high-quality replacement belts designed specifically for the make and model of your washing machine. Carefully thread the new belts into place, ensuring proper alignment and tension within the pulley system. Refer to the manufacturer's instructions for specific guidance on belt installation, as proper alignment is crucial for the effective operation of the washing machine's components.
Testing the Belts
After installing the new belts, carefully reassemble the washing machine and reconnect the power supply. Run a test cycle to observe the belts' performance, ensuring that they drive the agitator and drum smoothly and without any unusual noises or slippage. It is essential to monitor the belts during the test cycle to confirm that they operate seamlessly and contribute to the overall functionality of the washing machine.
By incorporating thorough inspection and potential replacement of the belts into your washing machine maintenance routine, you can address potential performance issues and ensure the appliance's reliable operation. This proactive approach to belt maintenance contributes to the longevity of the washing machine's mechanical components, allowing you to enjoy consistently efficient and trouble-free laundry cycles.
Read more: How To Reset Kenmore Washer
Maintaining the Drum and Agitator
The drum and agitator are integral components of a washing machine, working in tandem to ensure thorough cleaning and effective agitation of the laundry. Proper maintenance of these elements is essential for preserving the washing machine's performance and preventing potential issues that may arise from wear and tear over time.
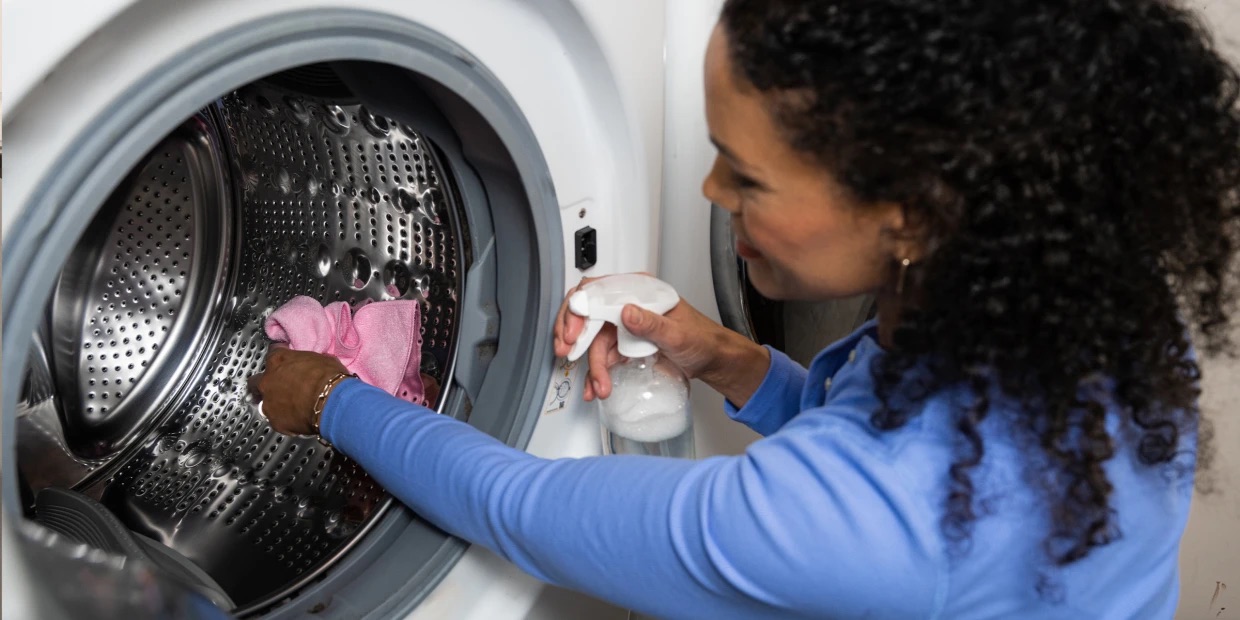
Cleaning the Drum
Regular cleaning of the washing machine drum is crucial for preventing the buildup of residue, mold, and mildew, which can compromise the cleanliness of the laundry and contribute to unpleasant odors. To clean the drum, start by preparing a solution of white vinegar and water or a mild detergent. With the machine empty, pour the cleaning solution into the drum and run a hot water cycle. This process helps to dissolve and remove any accumulated residue, ensuring a hygienic washing environment.
After the cleaning cycle, wipe down the drum's interior surfaces with a soft cloth to remove any remaining residue or deposits. Pay particular attention to the drum's seals and crevices, as these areas are prone to harboring debris. Additionally, inspect the drum for any signs of damage, such as rust or chipped enamel, and address any issues promptly to prevent further deterioration.
Agitator Maintenance
For top-loading washing machines, the agitator plays a pivotal role in agitating the laundry, facilitating thorough cleaning. To maintain the agitator, periodically remove it according to the manufacturer's instructions and inspect it for any trapped debris, residue, or signs of wear. Use a brush and the cleaning solution to scrub the agitator thoroughly, ensuring that it remains free from buildup and operates efficiently during the wash cycles.
Inspect the agitator's fins or paddles for any damage or distortion that may affect its performance. If any issues are detected, consider replacing the agitator components to maintain the washing machine's effectiveness in cleaning the laundry.
Lubrication and Alignment
Proper lubrication of the agitator and drum bearings is essential for ensuring smooth and quiet operation of the washing machine. Refer to the manufacturer's guidelines for specific lubrication recommendations and procedures. Additionally, verify that the agitator and drum are properly aligned within the machine, as misalignment can lead to excessive wear and noise during operation.
By incorporating these maintenance practices into your washing machine care routine, you can uphold the cleanliness and functionality of the drum and agitator, ensuring that the appliance continues to deliver optimal cleaning performance and efficiency. Regular attention to these components contributes to the overall longevity and reliability of the washing machine, allowing you to enjoy consistently satisfying laundry results.
Read more: How To Calibrate A Washing Machine
Checking and Replacing the Motor
The motor is the powerhouse of a washing machine, driving the drum's rotation and facilitating the various wash cycles. Over time, the motor may experience wear, electrical issues, or mechanical malfunctions, leading to performance issues such as erratic spinning, unusual noises, or failure to initiate the wash cycle. Therefore, thorough inspection and potential replacement of the motor are crucial aspects of washing machine maintenance to ensure consistent and reliable operation.
Inspection of the Motor
Commence the inspection by accessing the motor assembly according to the manufacturer's guidelines. Carefully examine the motor for any visible signs of damage, such as frayed wiring, burnt components, or excessive dust accumulation. Additionally, check the motor's electrical connections and wiring harness for any signs of corrosion, loose connections, or damage that may affect its functionality.
Verify that the motor's mounting and securing bolts are intact and properly fastened, ensuring that the motor remains stable and aligned within the washing machine's framework. Any signs of instability or misalignment should be addressed promptly to prevent further damage to the motor and surrounding components.
Electrical Testing
Utilize a multimeter to perform electrical tests on the motor, including continuity checks and resistance measurements. These tests help diagnose potential electrical issues within the motor, such as open circuits, short circuits, or faulty windings. By conducting comprehensive electrical testing, you can pinpoint the root cause of motor malfunctions and determine whether replacement is necessary.
Replacement Procedure
If the motor exhibits significant signs of wear, damage, or electrical faults that cannot be rectified through repairs, it is advisable to proceed with its replacement. Begin by disconnecting the power supply and safely removing the existing motor from its mounting position. Take note of the motor's orientation and wiring connections to facilitate the installation of the replacement motor.
Select a compatible replacement motor designed specifically for the make and model of your washing machine. Carefully install the new motor, ensuring that it is securely mounted and aligned within the machine's framework. Follow the manufacturer's instructions for proper wiring and connection of the new motor, adhering to recommended procedures to guarantee a seamless and reliable installation.
Read more: How To Reset A GE Washer
Testing the New Motor
After installing the replacement motor, reconnect the power supply and run a test cycle to observe its performance. Monitor the motor's operation closely, ensuring that it drives the drum smoothly and without any unusual noises or irregularities. It is essential to verify that the new motor functions seamlessly, contributing to the efficient operation of the washing machine's wash cycles.
By incorporating thorough inspection and potential replacement of the motor into your washing machine maintenance routine, you can address potential performance issues and ensure the appliance's reliable and consistent operation. This proactive approach to motor maintenance contributes to the longevity of the washing machine's essential components, allowing you to enjoy consistently efficient and trouble-free laundry cycles.
Testing the Machine After Servicing
After completing the servicing tasks on your washing machine, it is crucial to conduct comprehensive testing to ensure that the appliance operates seamlessly and meets the desired performance standards. Testing the machine after servicing allows you to verify the effectiveness of the maintenance procedures and address any potential issues before resuming regular use. Here's a detailed overview of the testing process:
Functional Testing
Initiate a test cycle to assess the overall functionality of the washing machine. Select a standard wash program and observe the machine's operation closely. Pay attention to key aspects such as water intake, agitation, spinning, and drainage. Verify that the machine transitions smoothly between the different phases of the wash cycle, indicating that the internal components are functioning as intended.
Water Leakage Check
During the test cycle, closely monitor the areas around the water inlet and drain hoses for any signs of leakage. Inspect the hose connections, seals, and the areas beneath the machine for the presence of water. Any indication of leakage should be promptly addressed to prevent potential water damage and ensure the appliance's safe operation.
Read more: How To Drain A Maytag Washer
Noise and Vibration Assessment
Observe the washing machine for any unusual noises or excessive vibration during the test cycle. Unusual sounds such as grinding, scraping, or rattling may indicate underlying issues with the motor, belts, or other mechanical components. Excessive vibration can also point to imbalanced loads or misaligned components. Address any abnormal noise or vibration to maintain the appliance's smooth and quiet operation.
Water Temperature and Dispensing Verification
If your washing machine features temperature control and detergent dispensing capabilities, verify that these functions operate correctly during the test cycle. Ensure that the machine dispenses detergent or fabric softener at the appropriate times and that the water temperature aligns with the selected wash program. Consistent and accurate dispensing and temperature control are essential for achieving optimal cleaning results.
Load Capacity and Balance Testing
Introduce a moderate-sized laundry load into the machine and run a test cycle to assess its capacity and balance. Verify that the washing machine effectively handles the load without excessive shaking or imbalance during the spinning phase. Proper load capacity and balance are crucial for preventing damage to the machine and ensuring thorough cleaning of the laundry.
Final Rinse and Drainage Evaluation
Observe the final rinse and drainage phases of the test cycle to confirm that the washing machine effectively removes soapy water and thoroughly rinses the laundry. Verify that the drainage process is efficient, with no residual water remaining in the drum or the detergent dispenser. Adequate rinsing and drainage are essential for achieving clean and fresh-smelling laundry.
By conducting thorough testing after servicing your washing machine, you can identify and address any potential issues, ensuring that the appliance operates reliably and delivers consistently satisfying laundry results. This proactive approach to testing contributes to the longevity and optimal performance of the washing machine, allowing you to enjoy the benefits of a well-maintained and efficient appliance.
Read more: How To Calibrate Whirlpool Washer
Conclusion
In conclusion, servicing a washing machine is a fundamental aspect of appliance maintenance that significantly contributes to its longevity, efficiency, and overall performance. By adhering to a comprehensive maintenance routine and incorporating essential tasks such as cleaning, inspecting, and potential replacement of components, you can ensure that your washing machine operates seamlessly and delivers consistently clean and fresh-smelling laundry.
Throughout this article, we have explored the critical steps involved in servicing a washing machine, emphasizing the importance of safety precautions, the essential tools and materials needed, and the detailed procedures for cleaning the washing machine, checking and replacing hoses, inspecting and replacing belts, maintaining the drum and agitator, and testing the machine after servicing. By following these guidelines, you can develop the confidence and skills necessary to maintain your washing machine effectively, whether you are a homeowner seeking to preserve your appliance or a professional looking to expand your knowledge.
Prioritizing safety precautions when servicing a washing machine is paramount to prevent accidents and ensure a smooth maintenance process. By disconnecting the power, turning off the water supply, wearing appropriate personal protective equipment, and working in a well-ventilated area, you can create a secure environment for servicing your appliance.
Equipping yourself with the right tools and materials is essential for addressing various maintenance tasks efficiently. From screwdrivers and wrenches to cleaning solutions and replacement parts, having these resources readily available empowers you to maintain your washing machine with confidence and precision.
Cleaning the washing machine, inspecting and replacing hoses, belts, and the motor, and maintaining the drum and agitator are all integral components of a comprehensive servicing routine. By incorporating these tasks into your maintenance regimen, you can address potential issues, prevent malfunctions, and ensure that your washing machine operates optimally.
Finally, conducting thorough testing after servicing your washing machine allows you to verify its functionality, address any potential issues, and ensure that the appliance operates reliably. This proactive approach to testing contributes to the longevity and optimal performance of the washing machine, allowing you to enjoy the benefits of a well-maintained and efficient appliance.
In essence, by following the guidelines and recommendations outlined in this article, you can effectively service your washing machine, prolong its operational lifespan, and enjoy consistently satisfying laundry results. Whether you are a DIY enthusiast or a professional in the field, the knowledge and skills gained from this comprehensive guide will empower you to maintain your washing machine with confidence and precision.
Frequently Asked Questions about How To Service A Washing Machine
Was this page helpful?
At Storables.com, we guarantee accurate and reliable information. Our content, validated by Expert Board Contributors, is crafted following stringent Editorial Policies. We're committed to providing you with well-researched, expert-backed insights for all your informational needs.


0 thoughts on “How To Service A Washing Machine”