Home>Home Appliances>Laundry Appliances>How To Vent A Washing Machine Drain Pipe
Laundry Appliances
How To Vent A Washing Machine Drain Pipe
Modified: August 16, 2024
Learn how to properly vent a washing machine drain pipe to ensure efficient drainage and prevent potential issues. Get expert tips for installing and maintaining laundry appliances.
(Many of the links in this article redirect to a specific reviewed product. Your purchase of these products through affiliate links helps to generate commission for Storables.com, at no extra cost. Learn more)
Introduction
Properly venting a washing machine drain pipe is essential for ensuring efficient drainage and preventing unpleasant odors from permeating your laundry area. When installing or repositioning a washing machine, it's crucial to consider the placement of the drain pipe and its venting to maintain the functionality of the appliance and the overall plumbing system. By understanding the necessary steps and utilizing the right tools and materials, you can successfully vent a washing machine drain pipe, contributing to a smoothly operating laundry area.
Venting the washing machine drain pipe involves creating a pathway for the release of air and gases that accumulate within the plumbing system. This process facilitates the smooth flow of water and prevents airlock, which can impede drainage and lead to water backup. Additionally, proper venting helps to minimize the risk of sewer gas entering your living space, promoting a healthier and more pleasant environment.
In this comprehensive guide, we will delve into the essential steps for venting a washing machine drain pipe, from finding the optimal location for the drain pipe to connecting it to the sewer line. By following these instructions, you can ensure that your washing machine operates efficiently and that your plumbing system functions smoothly. Let's explore the tools and materials required, the proper installation process, and the crucial steps for testing and maintaining the drainage system. With this knowledge, you can confidently tackle the task of venting a washing machine drain pipe, contributing to the functionality and longevity of your laundry appliances.
Key Takeaways:
- Properly venting a washing machine drain pipe is crucial for efficient drainage and preventing unpleasant odors. By following the installation steps and conducting regular maintenance, you can ensure smooth operation and a healthier laundry area.
- When venting a washing machine drain pipe, consider the proximity to the washing machine, accessibility, slope, and venting requirements. By addressing these factors, you can optimize the drain pipe’s functionality and minimize potential issues.
Read more: How To Vent Washer Drain
Tools and Materials Needed
When venting a washing machine drain pipe, it's essential to gather the necessary tools and materials to ensure a smooth and efficient installation process. Here's a comprehensive list of what you'll need:
Tools:
- Measuring Tape: This tool is crucial for accurately determining the distance between the washing machine and the drainage point, ensuring precise placement of the drain pipe.
- Hacksaw or PVC Pipe Cutter: Depending on the type of pipe you're using, a hacksaw or PVC pipe cutter will be necessary for cutting the drain pipe to the required length.
- Adjustable Wrench: An adjustable wrench is essential for tightening and securing fittings, ensuring a leak-free connection.
- Screwdriver: You may need a screwdriver for securing clamps or fastening the drain pipe to the wall or floor, depending on the installation requirements.
- Level: To ensure the drain pipe is installed correctly and maintains the proper slope for efficient drainage, a level will help you achieve the necessary alignment.
- Marker or Pencil: Having a marker or pencil on hand will allow you to mark the cutting points and reference lines on the drain pipe for accurate installation.
Materials:
- PVC Drain Pipe: Select a durable and appropriately sized PVC drain pipe that matches the specifications of your washing machine and the plumbing system.
- PVC Fittings: Depending on the layout and configuration of your drainage system, you'll need various PVC fittings, such as elbows, couplings, and adapters, to connect the drain pipe securely.
- Pipe Hangers or Straps: These are essential for securing the drain pipe to the wall or floor, providing stability and preventing movement during operation.
- PVC Cement: To create strong and reliable connections between PVC pipes and fittings, PVC cement is necessary for bonding the components securely.
- Vent Pipe: If your installation requires a vent pipe to facilitate air release and prevent airlock, ensure you have the appropriate size and length for the venting process.
- Screws or Nails: Depending on the surface to which you're securing the drain pipe, you'll need screws or nails to fasten the pipe hangers or straps securely.
By gathering these tools and materials, you'll be well-prepared to embark on the process of venting a washing machine drain pipe, ensuring that you have everything necessary to complete the installation with precision and efficiency.
Finding the Proper Location for the Drain Pipe
Determining the optimal location for the washing machine drain pipe is a crucial initial step in the venting process. The placement of the drain pipe directly impacts the efficiency of the drainage system and the overall functionality of the washing machine. Here's a detailed guide on finding the proper location for the drain pipe:
Read more: What Size Pipe For Washer Drain
Assessing the Proximity to the Washing Machine
Begin by assessing the proximity of the intended drain pipe location to the washing machine. Ideally, the drain pipe should be positioned within close proximity to the washing machine to minimize the length of the drainage pathway. This proximity ensures efficient water discharge and reduces the risk of clogs or drainage issues. Measure the distance from the washing machine to the potential drain pipe location using a measuring tape to ensure an optimal placement.
Considering Accessibility and Space Constraints
Evaluate the accessibility of the chosen location, ensuring that there is ample space for installing the drain pipe and making necessary connections. Additionally, consider any space constraints that may impact the installation process, such as nearby obstacles or limited clearance for maneuvering the drain pipe and associated fittings. Adequate space around the drain pipe facilitates ease of maintenance and future inspections, contributing to the longevity of the drainage system.
Assessing the Slope and Alignment
Ensure that the chosen location allows for the proper slope and alignment of the drain pipe. The drain pipe should maintain a consistent downward slope from the washing machine to the drainage point to facilitate smooth water flow and prevent standing water within the pipe. Use a level to confirm that the installation location enables the drain pipe to maintain the necessary slope for efficient drainage.
Considering Venting Requirements
If the installation necessitates venting the drain pipe to release trapped air and prevent airlock, consider the placement of the vent pipe in relation to the drain pipe location. The vent pipe should be positioned to facilitate the release of air and gases from the drainage system, ensuring optimal functionality and preventing potential issues such as slow drainage or gurgling sounds during the washing machine's operation.
By carefully assessing these factors, you can identify the proper location for the washing machine drain pipe, setting the stage for a successful installation process and ensuring the efficient operation of your laundry appliances.
Installing the Drain Pipe
Once you have identified the optimal location for the washing machine drain pipe, the next crucial step is the installation process. Proper installation of the drain pipe is essential for facilitating efficient drainage and ensuring the seamless operation of your washing machine. Here's a comprehensive guide to installing the drain pipe with precision and attention to detail.
Cutting and Fitting the Drain Pipe
Begin by cutting the PVC drain pipe to the required length using a hacksaw or PVC pipe cutter, ensuring a precise and clean cut. Measure and mark the cutting points on the pipe based on the distance from the washing machine to the drainage point, accounting for any necessary angles or turns in the drainage pathway. Once the pipe is cut to the appropriate length, dry-fit the PVC fittings, such as elbows and couplings, to the pipe to confirm the alignment and make any necessary adjustments.
Securing the Drain Pipe
After fitting the PVC fittings to the drain pipe, secure the components using PVC cement to create strong and reliable connections. Apply the PVC cement to the outside of the pipe and the inside of the fittings, then firmly press the components together, ensuring a secure bond. It's essential to follow the manufacturer's instructions for the proper application of PVC cement and allow sufficient time for the connections to set and cure effectively.
Establishing Proper Slope and Alignment
As you position the drain pipe for installation, ensure that it maintains the proper downward slope from the washing machine to the drainage point. Use a level to confirm that the pipe maintains a consistent slope, promoting efficient water flow and preventing the accumulation of standing water within the pipe. Additionally, verify that the alignment of the drain pipe facilitates a smooth and unobstructed pathway for water discharge, minimizing the risk of clogs or drainage issues.
Read more: What Size Drain Pipe For A Washing Machine
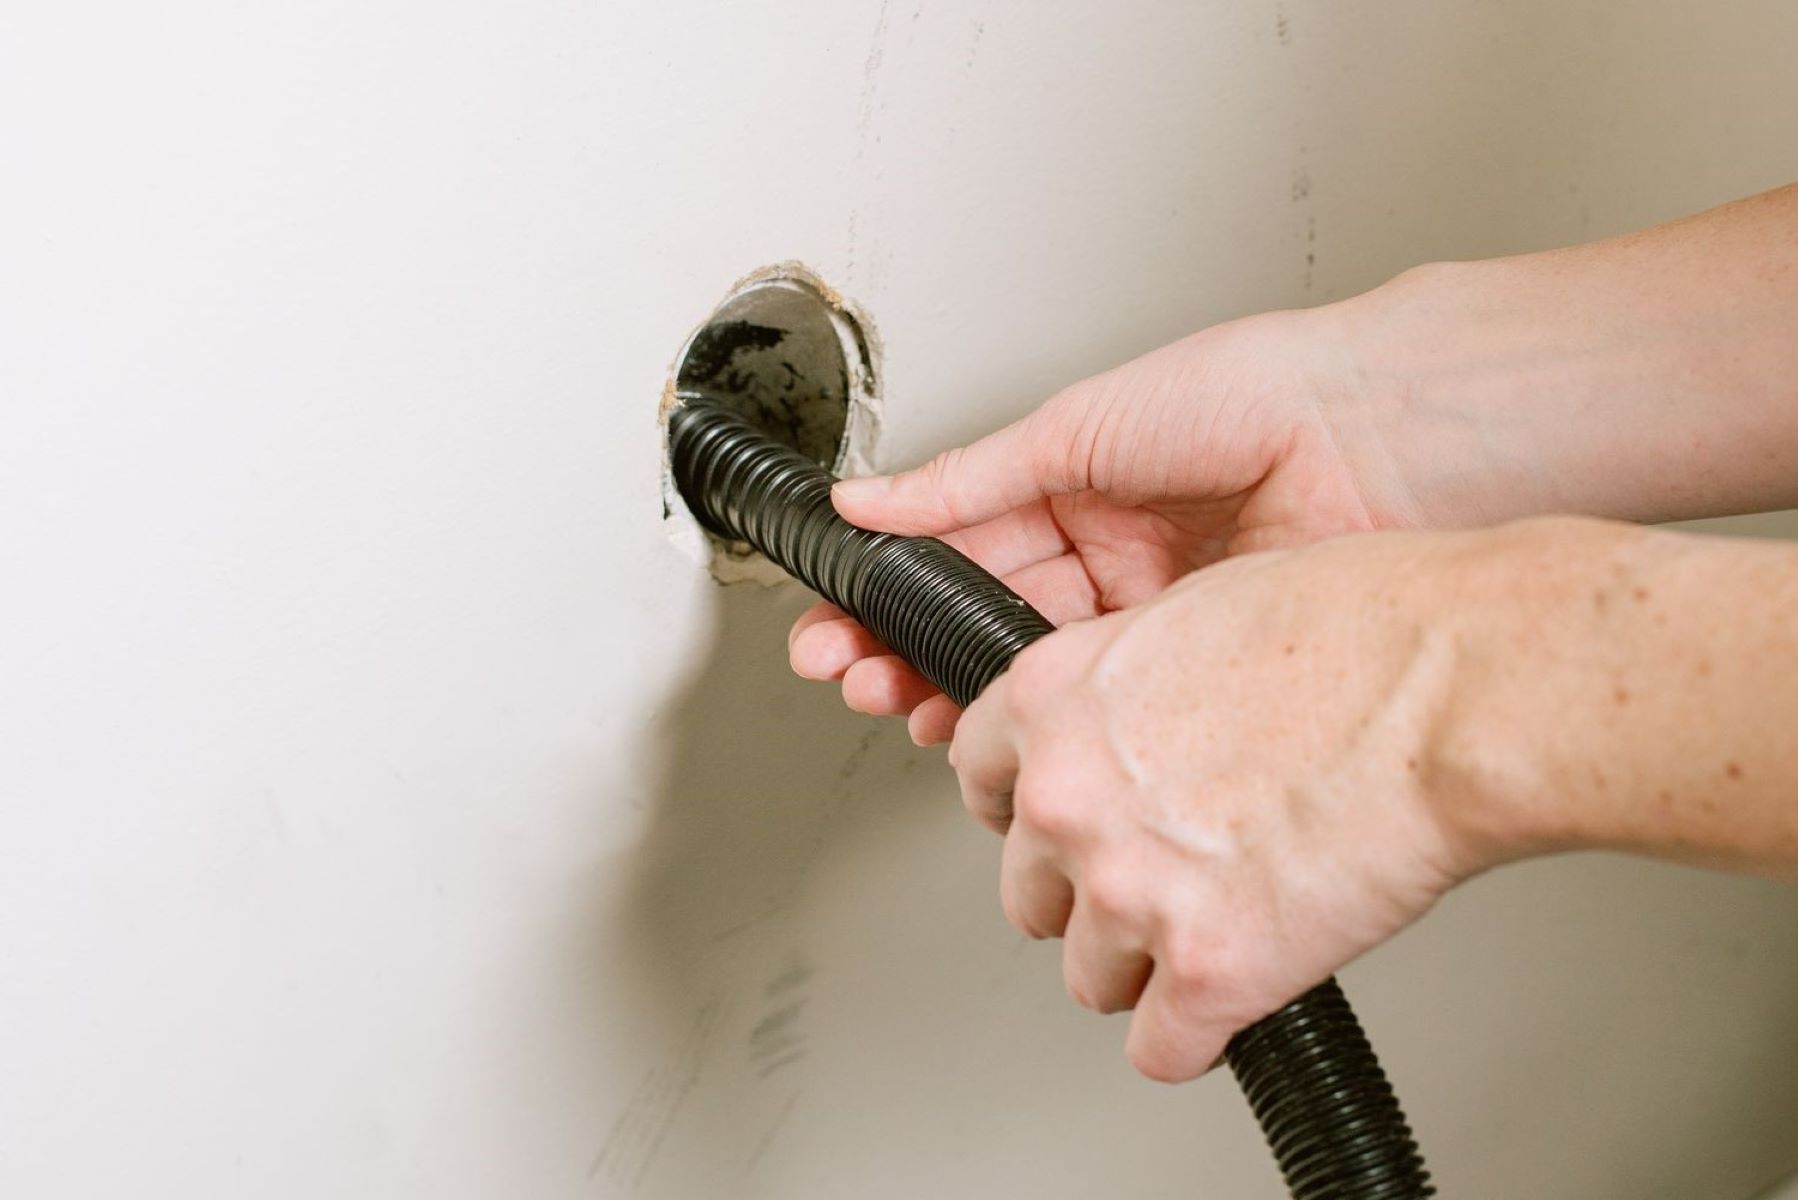
Securing the Drain Pipe in Place
Once the drain pipe is properly aligned and fitted, secure it in place using pipe hangers or straps. Fasten the hangers or straps to the wall or floor, providing stability and preventing movement during the operation of the washing machine. Ensure that the drain pipe is securely anchored, minimizing the risk of shifting or dislodging, and maintaining the integrity of the installation.
By following these detailed steps for installing the drain pipe, you can ensure a precise and effective installation process, contributing to the efficient drainage of your washing machine and the overall functionality of your plumbing system. With the drain pipe securely in place, you're one step closer to completing the venting process and optimizing the performance of your laundry appliances.
Connecting the Drain Pipe to the Sewer Line
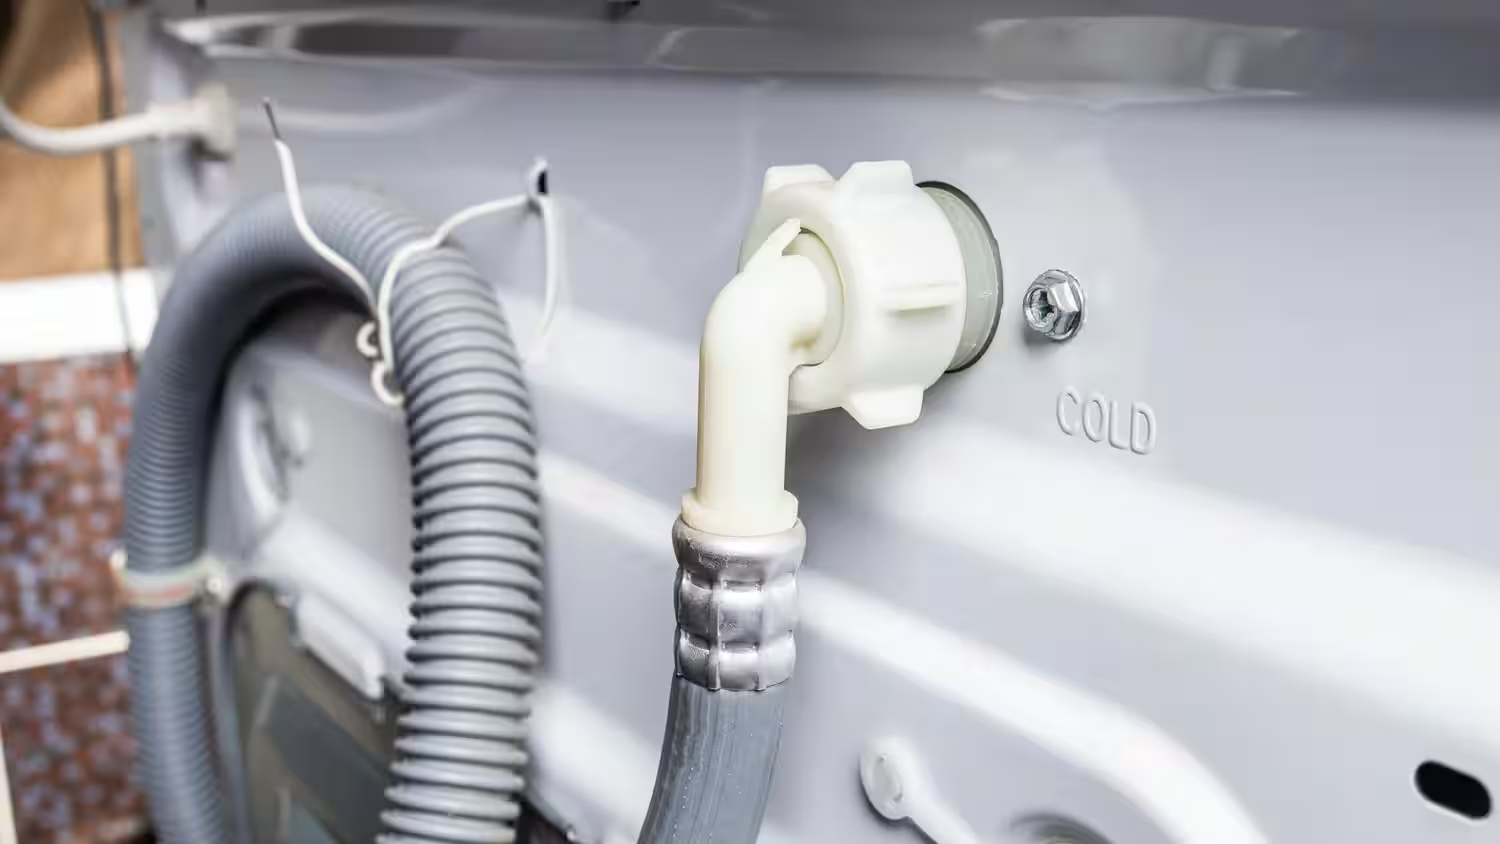
Connecting the washing machine drain pipe to the sewer line is a critical step in the venting process, as it establishes the direct pathway for wastewater discharge from the appliance to the main plumbing system. Properly connecting the drain pipe to the sewer line ensures efficient water disposal and contributes to the overall functionality of the washing machine and the plumbing system. Here's a detailed guide on the essential steps for connecting the drain pipe to the sewer line with precision and attention to detail.
Assessing the Sewer Line Connection Point
Begin by identifying the location of the sewer line connection point, ensuring that it aligns with the placement of the washing machine drain pipe. The connection point should provide convenient access to the main sewer line while allowing for a secure and reliable connection to facilitate the smooth discharge of wastewater. Assess the accessibility and clearance around the connection point, ensuring that there is ample space to maneuver and make the necessary connections.
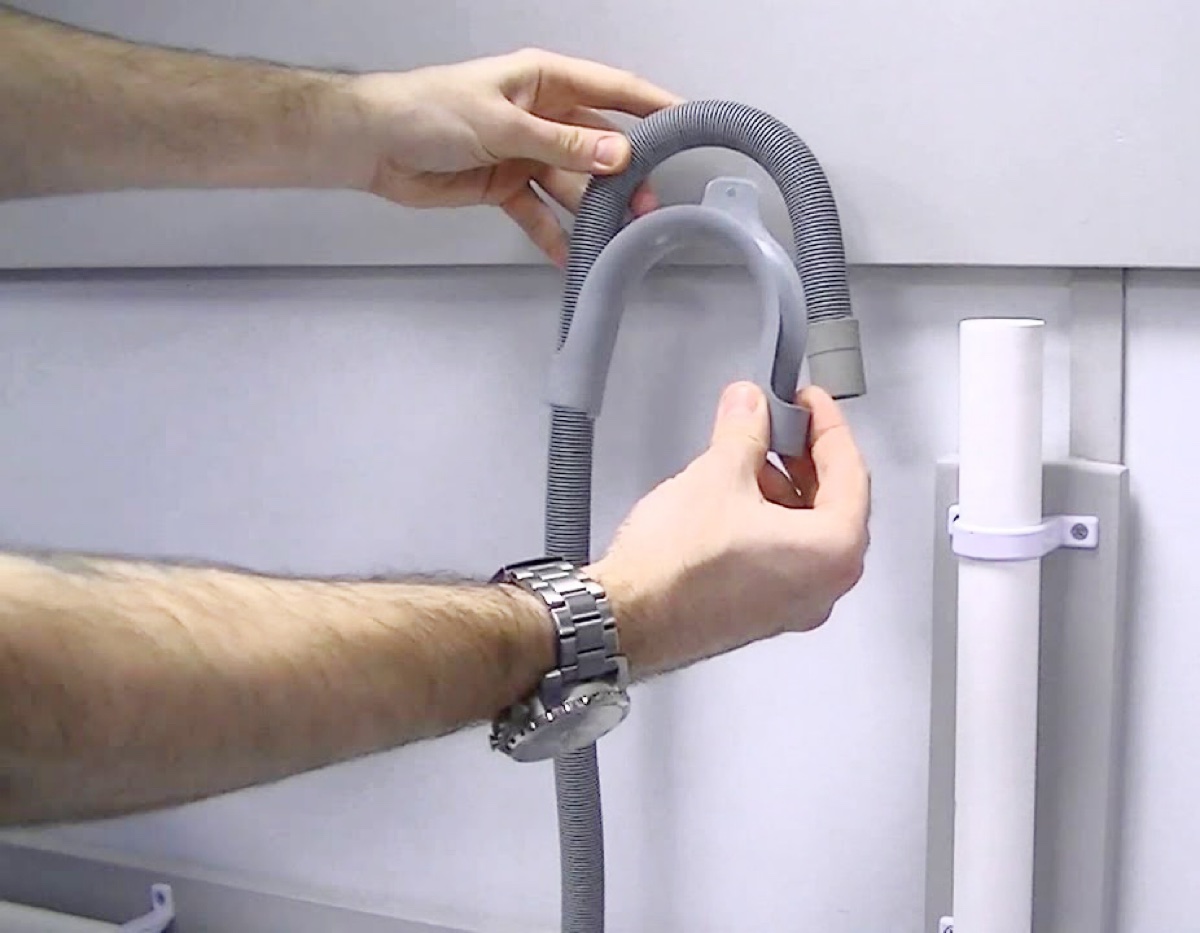
Installing the P-Trap and Standpipe
To connect the washing machine drain pipe to the sewer line, it's essential to install a P-trap and standpipe assembly. The P-trap serves to prevent sewer gases from entering the living space, while the standpipe provides a direct pathway for wastewater discharge. Begin by positioning the P-trap at the connection point, ensuring a secure and watertight fit. Then, install the standpipe, which extends vertically from the P-trap to accommodate the discharge of wastewater from the washing machine.
Securing the Connection with Proper Fittings
Once the P-trap and standpipe are in place, secure the connection between the washing machine drain pipe and the standpipe using the appropriate fittings. Depending on the specific requirements of your plumbing system, you may need to use a combination of fittings, such as couplings and adapters, to establish a leak-free and secure connection. Ensure that the fittings are properly sized and compatible with the materials used in the drain pipe and standpipe assembly.
Testing for Proper Drainage
After connecting the drain pipe to the sewer line, it's crucial to test the drainage system to confirm its proper functionality. Run a test cycle on the washing machine to observe the discharge of wastewater through the drain pipe and into the sewer line. Verify that the water flows smoothly and consistently, without any signs of backup or obstruction. Additionally, check for any leaks or seepage at the connection points, ensuring that the connections are secure and watertight.
By following these essential steps for connecting the drain pipe to the sewer line, you can establish a reliable and efficient pathway for wastewater disposal, contributing to the seamless operation of your washing machine and the overall functionality of your plumbing system. With the drain pipe securely connected to the sewer line, you can proceed with confidence, knowing that your laundry appliances are equipped with a robust and reliable drainage system.
Testing the Drainage System
After completing the installation of the washing machine drain pipe and connecting it to the sewer line, it is crucial to conduct thorough testing to ensure the proper functionality of the drainage system. Testing the drainage system serves as a critical validation of the installation process, allowing you to identify and address any potential issues before fully integrating the washing machine into regular use.
To begin the testing process, initiate a full cycle on the washing machine, including the fill, wash, and drain phases. Observe the discharge of wastewater through the drain pipe and into the sewer line, paying close attention to the flow rate and consistency of water discharge. A smooth and uninterrupted flow of water indicates that the drainage system is effectively removing wastewater from the washing machine, contributing to the efficient operation of the appliance.
During the testing phase, listen for any unusual sounds, such as gurgling or bubbling, which may indicate airlock or drainage obstruction within the system. These sounds can be indicative of improper venting or potential clogs, necessitating further inspection and potential adjustments to the drain pipe and venting components.
Additionally, visually inspect the connections between the drain pipe and the sewer line, ensuring that there are no signs of leaks or seepage. A secure and watertight connection is essential for preventing water damage and maintaining the integrity of the drainage system. Any signs of leakage should be promptly addressed to prevent potential water damage and ensure the long-term reliability of the installation.
As the washing machine completes its drainage cycle, verify that the wastewater is effectively removed from the standpipe and flows into the sewer line without any backup or overflow. The standpipe should accommodate the discharge of wastewater without any signs of obstruction or inadequate drainage capacity, ensuring that the system can handle the volume of water generated during the washing machine's operation.
Following the initial testing, it is advisable to conduct multiple cycles to validate the consistent performance of the drainage system under varying load conditions. By subjecting the system to repeated testing, you can gain confidence in its reliability and identify any potential issues that may arise during regular use.
By meticulously testing the drainage system, you can confirm the successful installation and integration of the washing machine drain pipe, ensuring that it operates seamlessly and contributes to the overall efficiency of your laundry area. With a well-tested drainage system in place, you can confidently utilize your washing machine, knowing that it is equipped with a robust and reliable pathway for wastewater disposal.
Maintenance and Troubleshooting
Maintaining the functionality of the washing machine drain pipe and promptly addressing any potential issues are essential for ensuring the long-term efficiency of the drainage system. By implementing regular maintenance practices and being prepared to troubleshoot common problems, you can uphold the optimal performance of the drain pipe and mitigate potential disruptions to your laundry routine.
Read more: How To Drain Washer
Regular Maintenance Practices
-
Inspection and Cleaning: Periodically inspect the drain pipe for any signs of debris accumulation or blockages. Remove any obstructions and clean the interior of the pipe to prevent clogs and ensure smooth water flow.
-
Vent Pipe Maintenance: If your installation includes a vent pipe, inspect it for any blockages or obstructions that may impede proper air release. Clear any debris or buildup to maintain effective venting and prevent airlock within the drainage system.
-
Secure Connections: Regularly check the connections between the drain pipe, fittings, and the sewer line for any signs of leaks or loosening. Ensure that all connections remain secure and watertight to prevent potential water damage.
-
Slope and Alignment: Verify that the drain pipe maintains the proper slope and alignment, facilitating efficient water discharge. Adjust the positioning if necessary to prevent standing water and optimize drainage performance.
Troubleshooting Common Issues
-
Slow Drainage: If you notice slow drainage or standing water in the standpipe, check for potential clogs or obstructions within the drain pipe. Clear any blockages and ensure that the pathway for water discharge remains unobstructed.
-
Gurgling Sounds: Unusual gurgling or bubbling sounds during the washing machine's operation may indicate airlock or improper venting. Inspect the vent pipe and associated components to facilitate the release of trapped air and maintain smooth drainage.
-
Leak Detection: If you detect any signs of water leakage around the drain pipe or connections, promptly address the issue to prevent water damage and maintain the integrity of the drainage system. Reapply sealant or replace damaged components as needed.
-
Venting Issues: In cases where the washing machine experiences drainage backup or airlock, assess the venting components to ensure proper air release. Adjust the vent pipe and connections to facilitate efficient venting and prevent drainage disruptions.
By incorporating these maintenance practices and troubleshooting strategies into your routine, you can proactively preserve the functionality of the washing machine drain pipe and address potential issues before they escalate. Regular maintenance and prompt troubleshooting contribute to the longevity and reliability of the drainage system, ensuring that your laundry appliances operate smoothly and efficiently.
Frequently Asked Questions about How To Vent A Washing Machine Drain Pipe
Was this page helpful?
At Storables.com, we guarantee accurate and reliable information. Our content, validated by Expert Board Contributors, is crafted following stringent Editorial Policies. We're committed to providing you with well-researched, expert-backed insights for all your informational needs.


0 thoughts on “How To Vent A Washing Machine Drain Pipe”