Articles
How To Drain Washer
Modified: October 20, 2024
Learn how to drain your washer in a few easy steps with our comprehensive articles. Get expert advice and tips for a hassle-free laundry experience.
(Many of the links in this article redirect to a specific reviewed product. Your purchase of these products through affiliate links helps to generate commission for Storables.com, at no extra cost. Learn more)
Introduction:
Having a washing machine is a convenient and essential appliance in any modern household. Whether you have a top-loading or front-loading washer, proper maintenance is crucial to ensure its smooth operation. One common issue that homeowners face is a clogged or slow-draining washer. If you notice excessive water remaining in the drum after a wash cycle or if your washer is not draining properly, it may be time to drain the washer and clear any blockages.
In this article, we will guide you through the step-by-step process of draining a washer. We will cover the necessary safety precautions, the tools and materials you will need, and the methods to effectively drain the washer to resolve any drainage issues. By following these instructions, you can save on costly repairs and keep your washer functioning optimally.
Please note that the specific instructions provided in this article may vary depending on your washer model. Always refer to your washer’s user manual for manufacturer-specific instructions and guidelines.
Now let’s get started by ensuring your safety as you work on draining your washer.
Key Takeaways:
- Ensure safety by disconnecting the power, protecting your hands, and preparing a clean, well-lit work area before draining your washer to prevent accidents and ensure a smooth process.
- Thoroughly clean the drain pump filter, check for blockages in the drain hose, and test the washer’s drain system to effectively resolve drainage issues and maintain optimal washer performance.
Read more: How To Drain A Maytag Washer
Safety Precautions:
Before you begin draining your washer, it is essential to prioritize safety. By following these safety precautions, you can prevent accidents and ensure a smooth and safe drain process:
- Turn off the power: Before starting any maintenance work on your washer, make sure to disconnect the power supply. Unplug the washer from the electrical outlet or turn off the circuit breaker dedicated to the washer. This will eliminate the risk of electric shock while working on the machine.
- Protect your hands: Wear protective gloves to safeguard your hands from sharp objects or debris that you may encounter during the draining process. Additionally, a pair of gloves will protect you from any cleaning chemicals or detergents that may spill.
- Prepare a clean work area: Clear the area around the washer and ensure you have enough space to move and work comfortably. By keeping the work area clear, you reduce the risk of tripping or knocking over objects while performing the drain procedure.
- Use proper lighting: Adequate lighting is crucial for visibility, especially when working in tight spaces or under the washer. Make sure you have good lighting to prevent any accidental injuries or mistakes.
- Take precautions to avoid water damage: When draining your washer, consider the possibility of water spillage. Place towels or absorbent materials around the washer to catch any water and protect your floor from damage. Also, have a bucket or container nearby to collect water that may gush out during the draining process.
By adhering to these safety precautions, you can minimize the risk of accidents or injuries while draining your washer. Now that you have taken necessary safety measures, let’s move on to the next steps of gathering the required tools and materials for the drain process.
Gather Necessary Tools and Materials:
Before you start draining your washer, it is important to ensure you have all the necessary tools and materials readily available. Here is a list of items you will need:
- Adjustable pliers or wrench: These tools will be needed to loosen and tighten hose connections or other fasteners.
- Screwdriver: Depending on your washer model, you may need a screwdriver to remove any access panels or screws blocking the drain pump or filter.
- Bucket or container: This will be used to collect any water that flows out of the washer during the draining process.
- Towels or absorbent materials: Have towels or absorbent materials nearby to clean up any spills or leaks during the drain procedure.
- Cleaning brush or toothbrush: A small cleaning brush or toothbrush will come in handy for cleaning the drain pump filter and removing any debris or build-up.
- Vinegar or mild detergent: To clean the drain pump filter and hoses, a solution of vinegar or mild detergent mixed with water can effectively remove any dirt or residue.
Make sure you have these tools and materials prepared before proceeding with the draining process. Having everything on hand will help you complete the task more efficiently without interruptions.
Once you have gathered all the necessary tools and materials, the next step is to locate and disconnect the power source for your washer. We will explain this step in detail in the following section.
Locate and Disconnect the Power Source:
Before you begin draining your washer, it is crucial to locate and disconnect the power source. This will ensure your safety and prevent any electrical mishaps during the draining process. Here’s how you can do it:
- Locate the power cord: Start by locating the power cord of your washer. It is usually located at the back of the machine or on the side.
- Unplug the power cord: Once you have located the power cord, gently unplug it from the electrical outlet. Make sure to pull the plug straight out and avoid tugging on the cord to prevent any damage.
- Turn off the circuit breaker: If your washer doesn’t have a visible power cord or if you can’t access the outlet easily, you can turn off the circuit breaker dedicated to the washer. Locate the circuit breaker panel in your home and switch off the breaker that controls the washer’s power supply. This step will ensure that no electricity is flowing to the appliance.
After following these steps, verify that the power source is safely disconnected by trying to power on the washer. If it doesn’t start, you can proceed confidently with the draining process. However, it is good practice to double-check and ensure the power source remains disconnected throughout the procedure.
Now that you have disconnected the power source, the next step is to remove any standing water from the washer. We will guide you through this step in the following section.
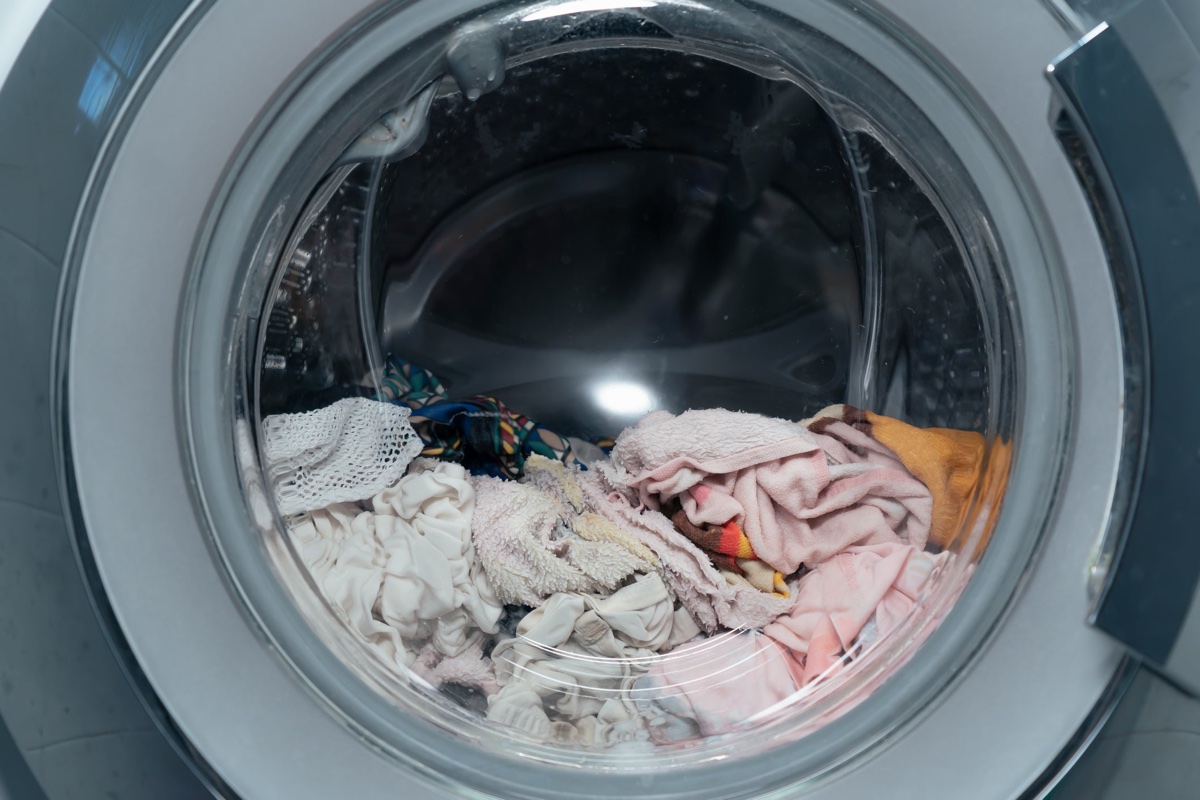
Remove Any Standing Water:
Before you begin draining your washer, it’s important to remove any standing water that may be present in the drum. This will prevent any spills or potential damage during the drain process. Here’s how you can remove standing water from your washer:
- Open the washer door: If you have a front-loading washer, open the door carefully. If you have a top-loading washer, lift the lid to access the drum.
- Check for any visible water: Take a look inside the drum and check for any visible water. If there is a significant amount of water, use a container or a bucket to scoop it out. Be careful not to spill water onto the floor or any electrical components of the washer.
- Use a towel or sponge: If there is only a small amount of standing water, you can use a towel or a sponge to absorb it. Gently press the towel or sponge against the wet areas to soak up the water. Remember to wring out the towel or sponge into a bucket or sink to dispose of the water properly.
Once you have removed the standing water, dry the inside of the drum and wipe any excess moisture with a clean cloth. This will prepare the washer for the drain process and prevent any water from spilling out while you work on clearing the drainage system.
Now that you have removed any standing water, the next step is to access the drain pump filter. We’ll cover this step in detail in the following section.
Read more: How To Unclog Washer Drain
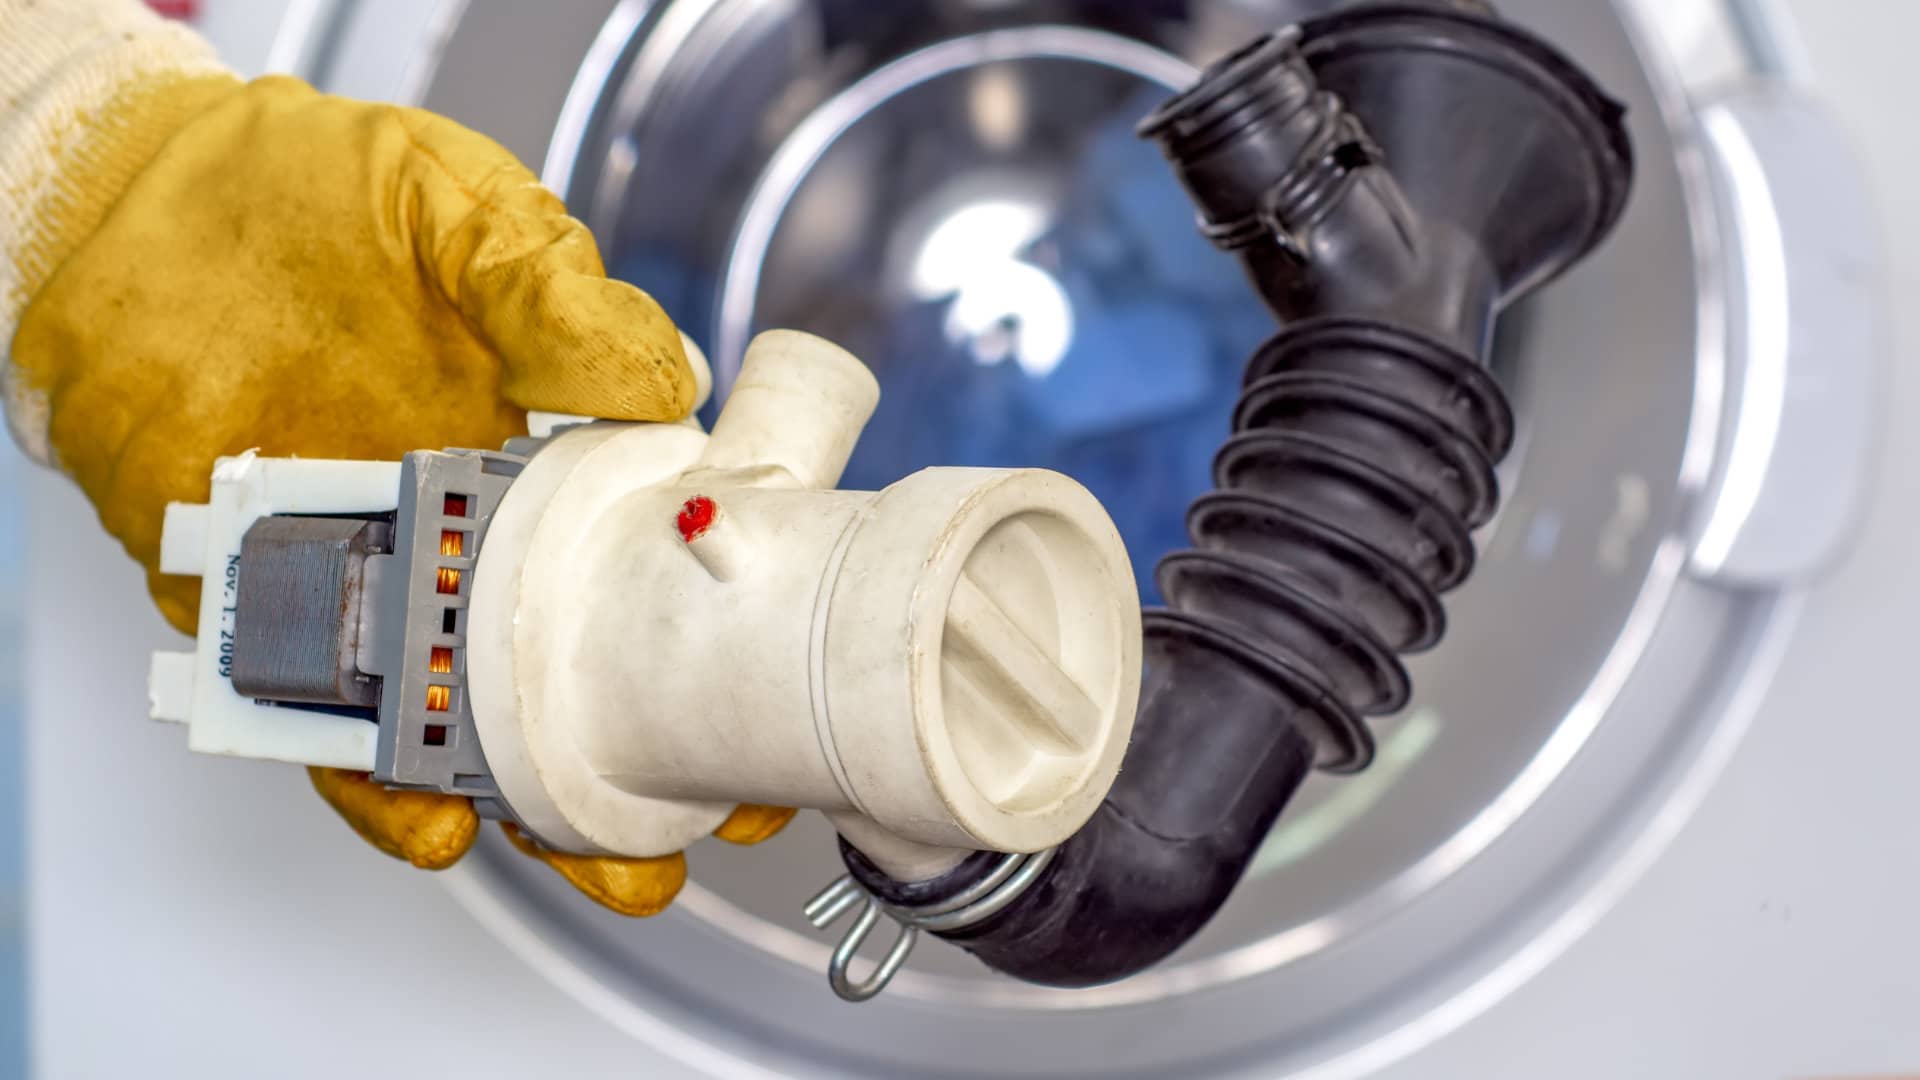
Access the Drain Pump Filter:
In order to effectively drain your washer, you’ll need to access the drain pump filter. The drain pump filter is responsible for capturing debris and preventing it from clogging the drain system. Here are the steps to access the drain pump filter:
- Locate the drain pump filter: The location of the drain pump filter varies depending on the make and model of your washer. In most cases, it can be found behind a small access panel at the front or bottom of the machine. Consult your washer’s user manual for specific instructions on where to find the drain pump filter for your model.
- Prepare the area: Before opening the access panel, place a towel or a bucket underneath the washer to catch any water that may spill out during the drain process.
- Remove the access panel: Use a screwdriver or a wrench to remove the screws or fasteners securing the access panel. Keep these in a safe place to avoid losing them.
- Locate the drain pump filter: Behind the access panel, you’ll find the drain pump filter. It is typically a cylindrical or rectangular component with a twist-off cap or a handle. Take a moment to familiarize yourself with the appearance of the filter.
- Prepare for any remaining water: It is common for some water to be trapped inside the drain pump filter. Have a towel or a container ready to catch any water that may spill out when opening the filter.
Once you have successfully accessed the drain pump filter, you can proceed to the next step of cleaning it to remove any debris or blockages. We will explain how to do this in the following section.
To drain a washer, locate the drain hose at the back of the machine. Place the end of the hose into a bucket or sink, then open the drain pump filter to release the water.
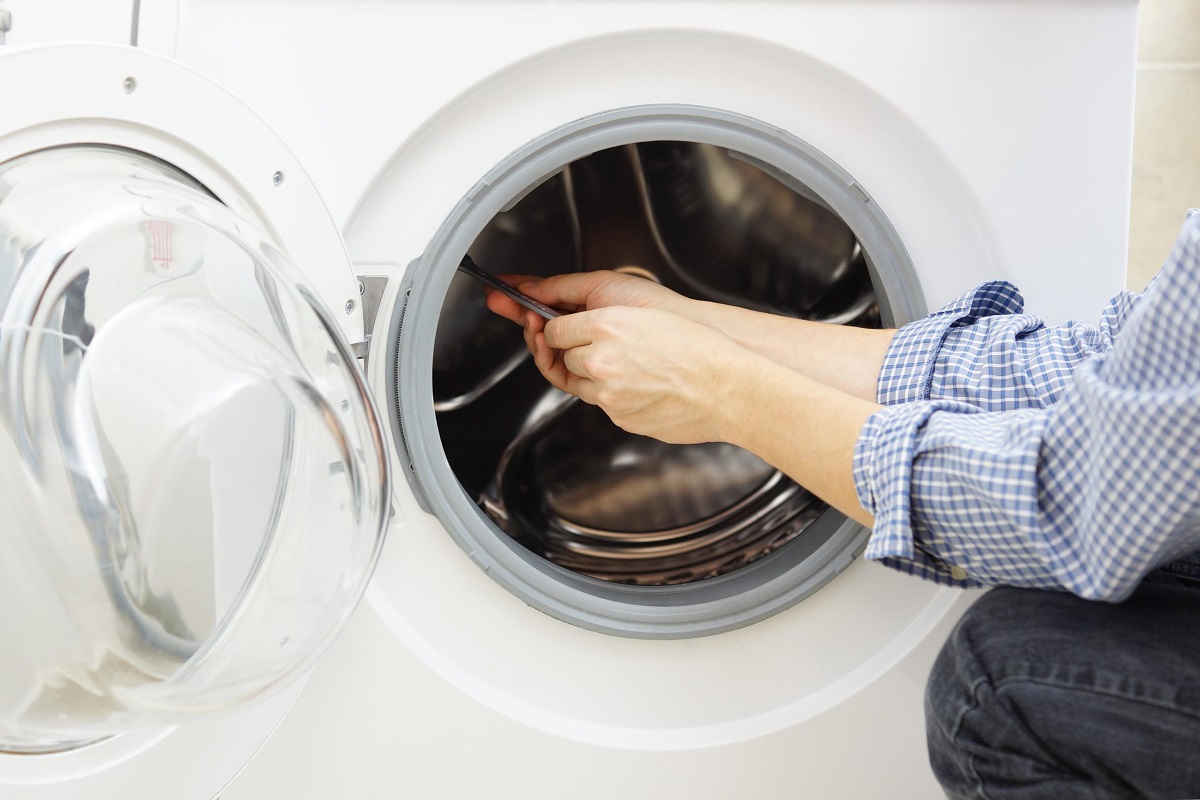
Clean the Drain Pump Filter:
Now that you have accessed the drain pump filter, it’s time to clean it. Over time, debris such as lint, coins, or small objects can accumulate in the filter, causing drainage issues in your washer. Follow these steps to clean the drain pump filter:
- Prepare a container: Place a shallow container or a towel underneath the filter area to catch any water or debris that may spill out during the cleaning process.
- Open the drain pump filter: Depending on your washer model, you may need to twist the cap counterclockwise or pull the handle to remove the drain pump filter. Be cautious to prevent any water or debris from escaping and causing a mess.
- Inspect the drain pump filter: Take a close look at the drain pump filter and remove any visible debris or blockages. Inspect the filter for signs of damage or wear, such as cracks or tears. If you notice any significant damage, it may be necessary to replace the filter.
- Clean the drain pump filter: Rinse the drain pump filter under running water to remove any remaining debris. You can use a gentle brush or a toothbrush to scrub away stubborn dirt or residue. Avoid using harsh cleaning agents or abrasive materials that may damage the filter.
- Dry and reinstall the drain pump filter: After cleaning the filter, dry it thoroughly with a clean towel or allow it to air dry. Once dry, reinsert the drain pump filter back into its original position and secure it by twisting the cap clockwise or pushing in the handle.
Now that you have cleaned the drain pump filter, it’s time to check for any potential blockages in the drain hose. We will cover this step in the next section.
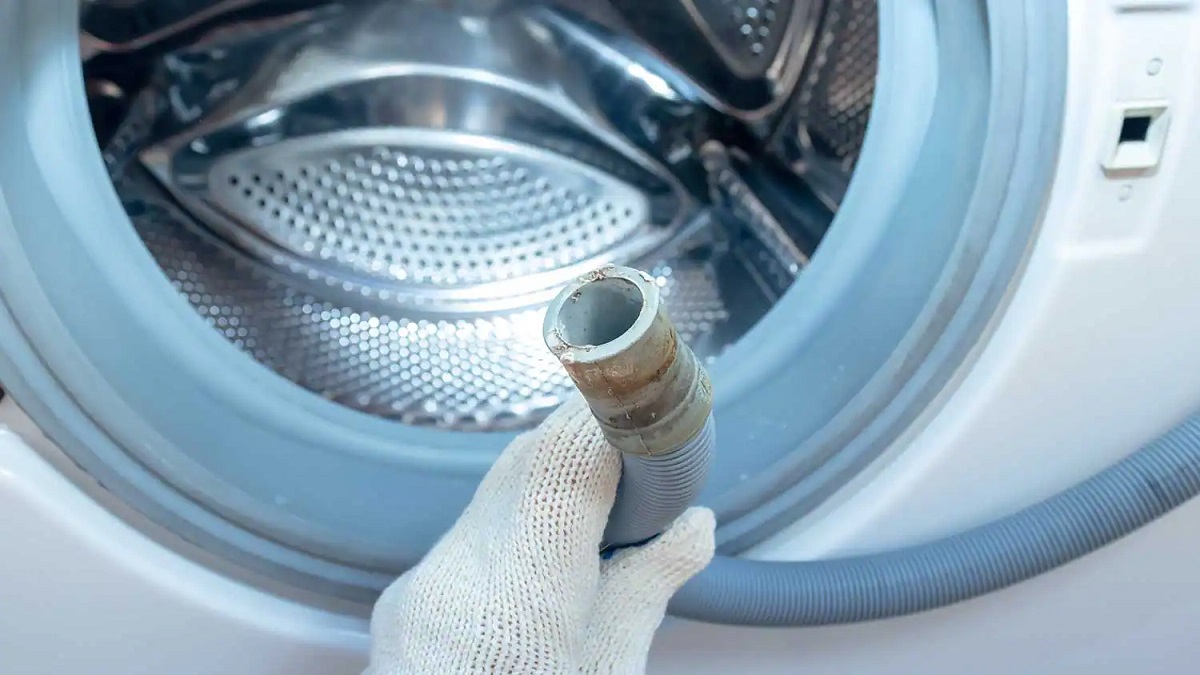
Check for Blockages in the Drain Hose:
In order to ensure proper drainage, it’s important to check for any blockages in the drain hose of your washer. A clogged or obstructed drain hose can hinder the flow of water and cause drainage issues. Follow these steps to check for blockages in the drain hose:
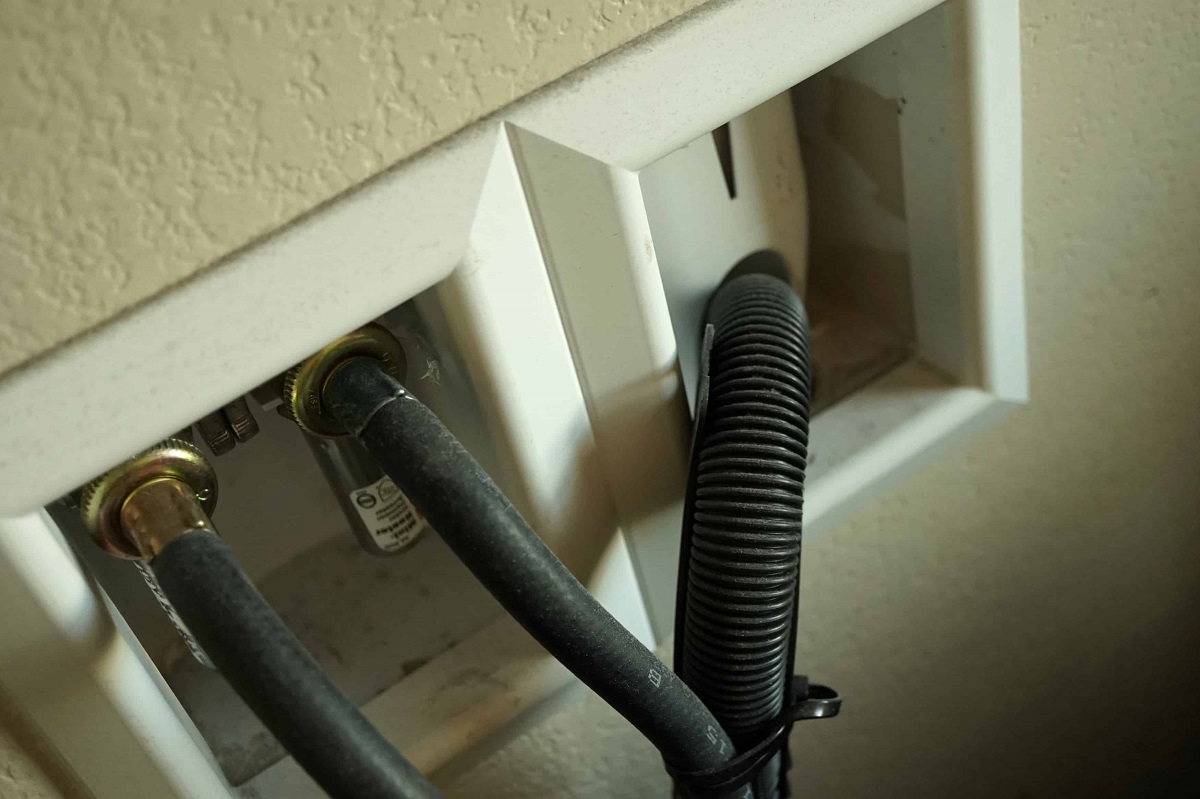
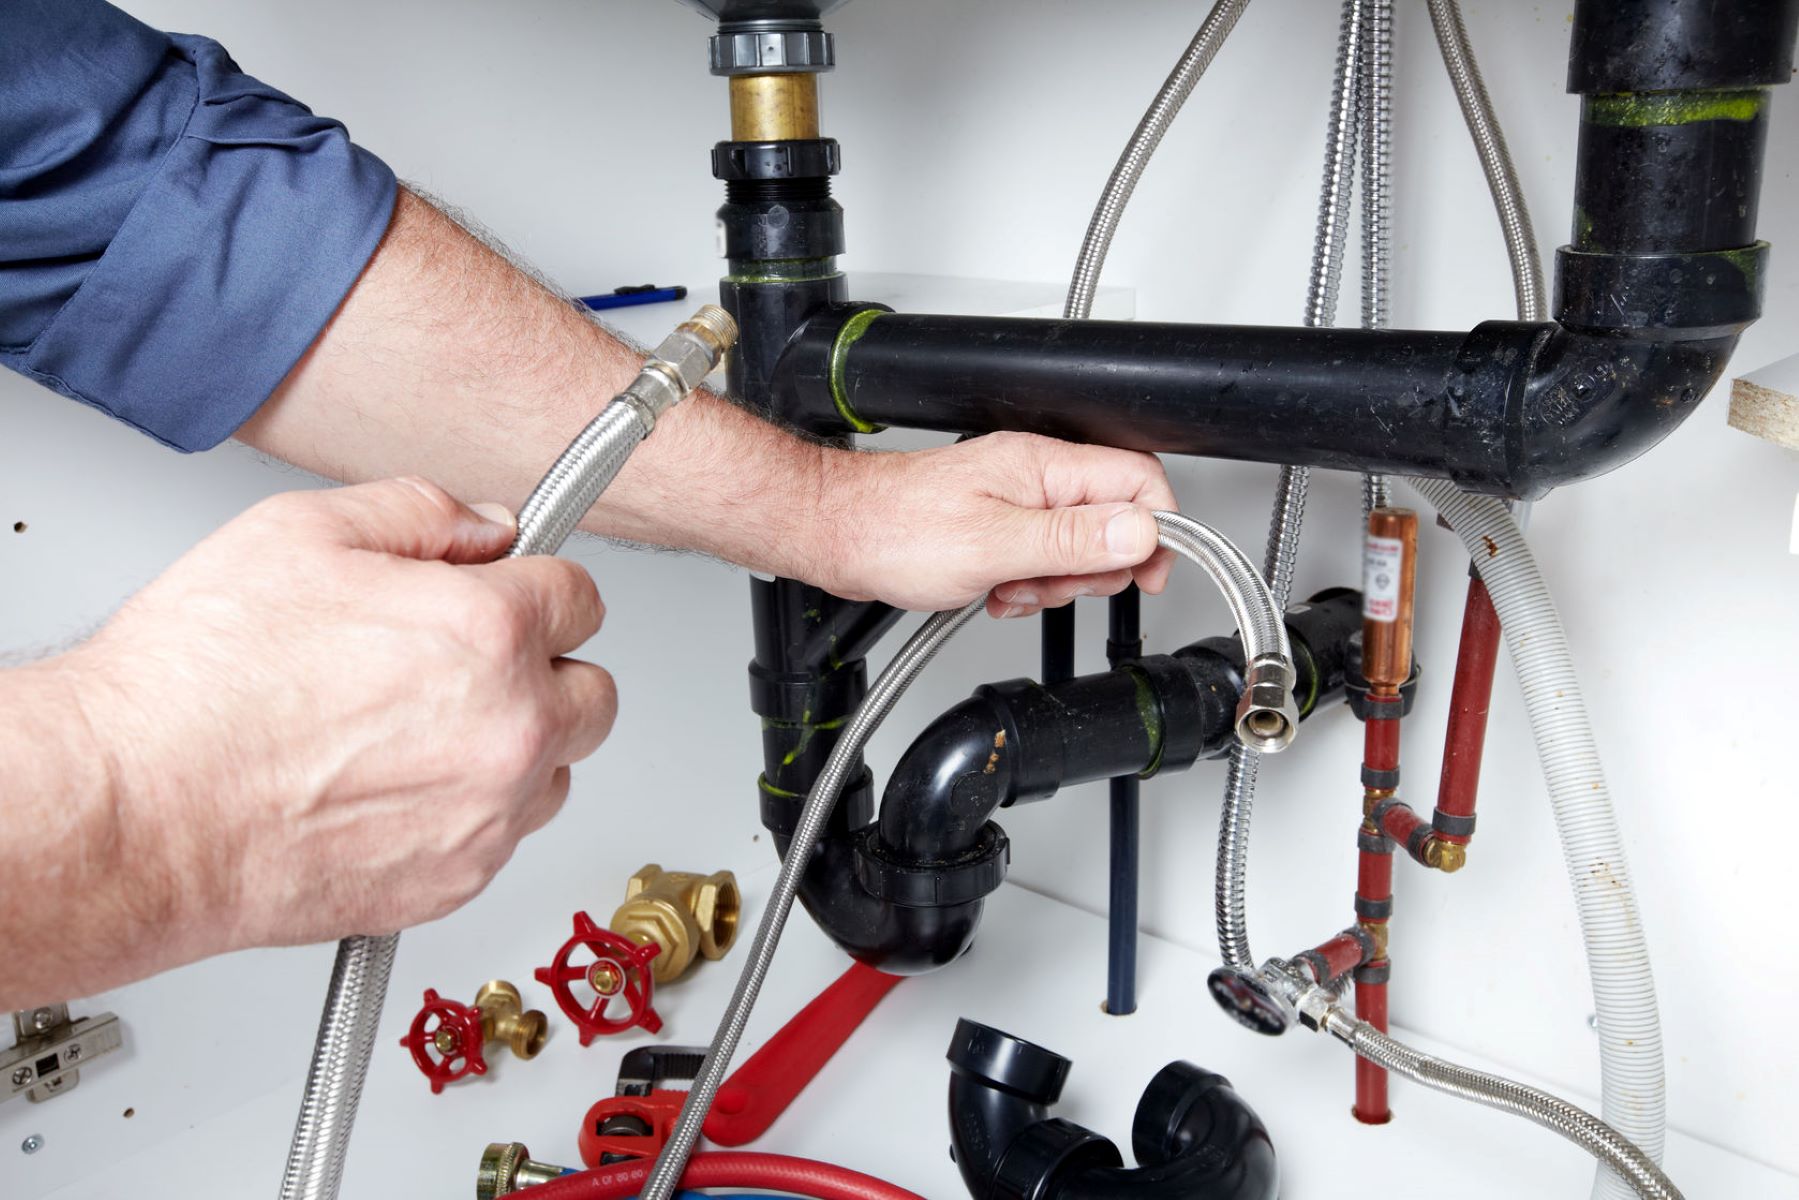
- Locate the drain hose: The drain hose is usually located at the back of the washer, near the bottom. It is a flexible tube that connects the washer to a drain or to a standpipe.
- Inspect the drain hose: Thoroughly examine the drain hose for any twists, kinks, or bends that may be causing a blockage. Straighten out any obstructions by gently manipulating the hose.
- Remove the drain hose: Depending on your washer model, you may need to detach the drain hose from the washer or the standpipe. Use adjustable pliers or a wrench to loosen any hose clamps or connectors if necessary.
- Check for debris or blockages: Once the drain hose is removed, inspect it for any debris, lint, or objects that may be obstructing the flow of water. You can use a flashlight or a small mirror to get a better view inside the hose.
- Remove any blockages: If you find any blockages, use a long-handled brush, a plumbing snake, or a gentle stream of water to remove them. Be cautious not to push the blockage further into the hose.
After checking and clearing any potential blockages in the drain hose, reattach it securely to the washer and the standpipe. Ensure that the hose is not bent or twisted, allowing for a smooth and unobstructed flow of water.
Now that you have checked the drain hose, the next step is to reconnect it properly and test the washer to ensure the drain is working effectively. We will guide you through this step in the following section.
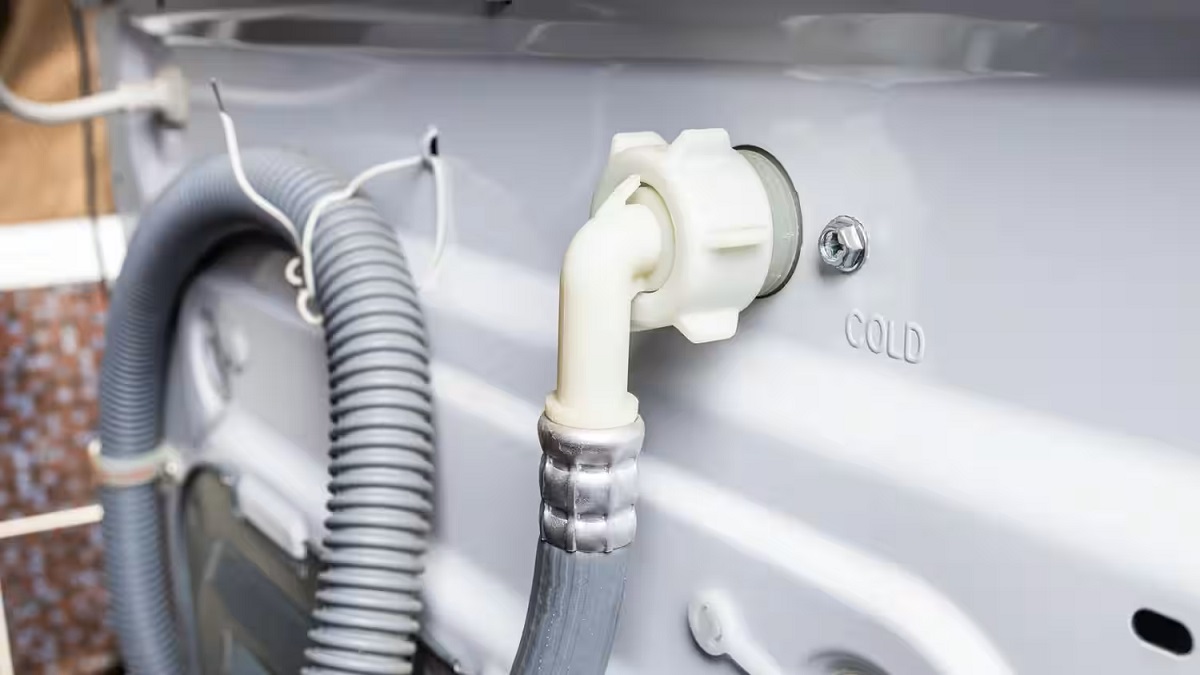
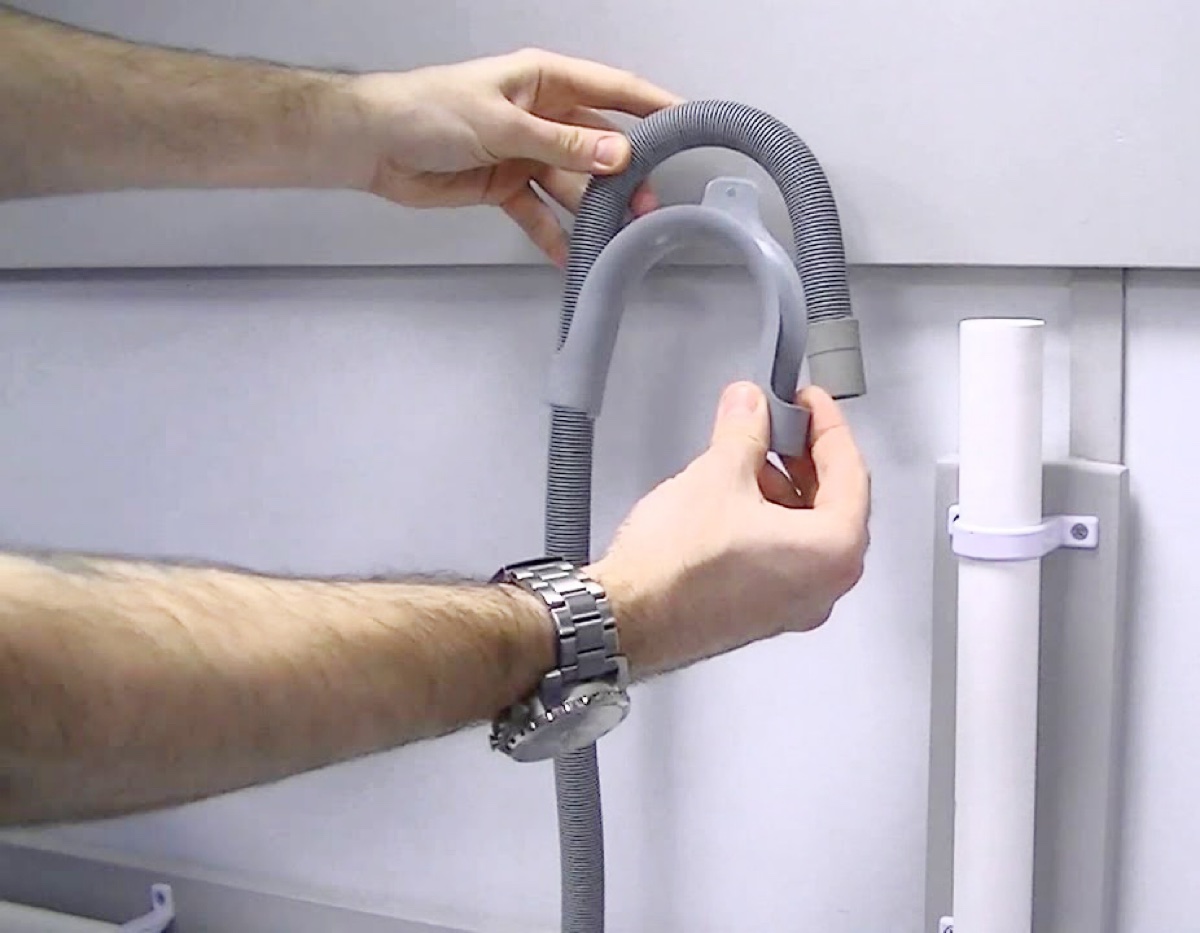
Reconnect the Drain Hose:
After checking for blockages in the drain hose of your washer, it is time to reconnect it properly. Ensuring a secure and proper connection will allow for the smooth flow of water during the drain process. Follow these steps to reconnect the drain hose:
- Align the hose: Take the drain hose and align it with the outlet on the back of the washer. Make sure there are no twists or kinks in the hose.
- Attach the hose clamp: If your drain hose has a hose clamp, slide it over the end of the drain hose and position it near the outlet of the washer.
- Secure the hose clamp: Using adjustable pliers or a screwdriver, tighten the hose clamp to secure the drain hose to the washer. Make sure it is snug but not overly tight to avoid damaging the hose or washer.
- Connect to the standpipe: If your washer drains into a standpipe or a utility sink, position the end of the drain hose securely into the drain opening. Ensure a tight fit to prevent any leaks or spills.
- Secure the drain hose: If necessary, use zip ties or clamps to secure the drain hose to the standpipe or sink. This will help prevent the hose from coming loose during the washing and draining cycles.
After reconnecting the drain hose, double-check all the connections to make sure they are secure and tight. This will help prevent any leaks or water spills during the washer’s operation. Now, it’s time to test the washer to ensure the drain is working effectively.
In the next section, we will guide you through testing the washer’s drain system to ensure everything is functioning as it should.
Read more: How To Drain A Kenmore Washer
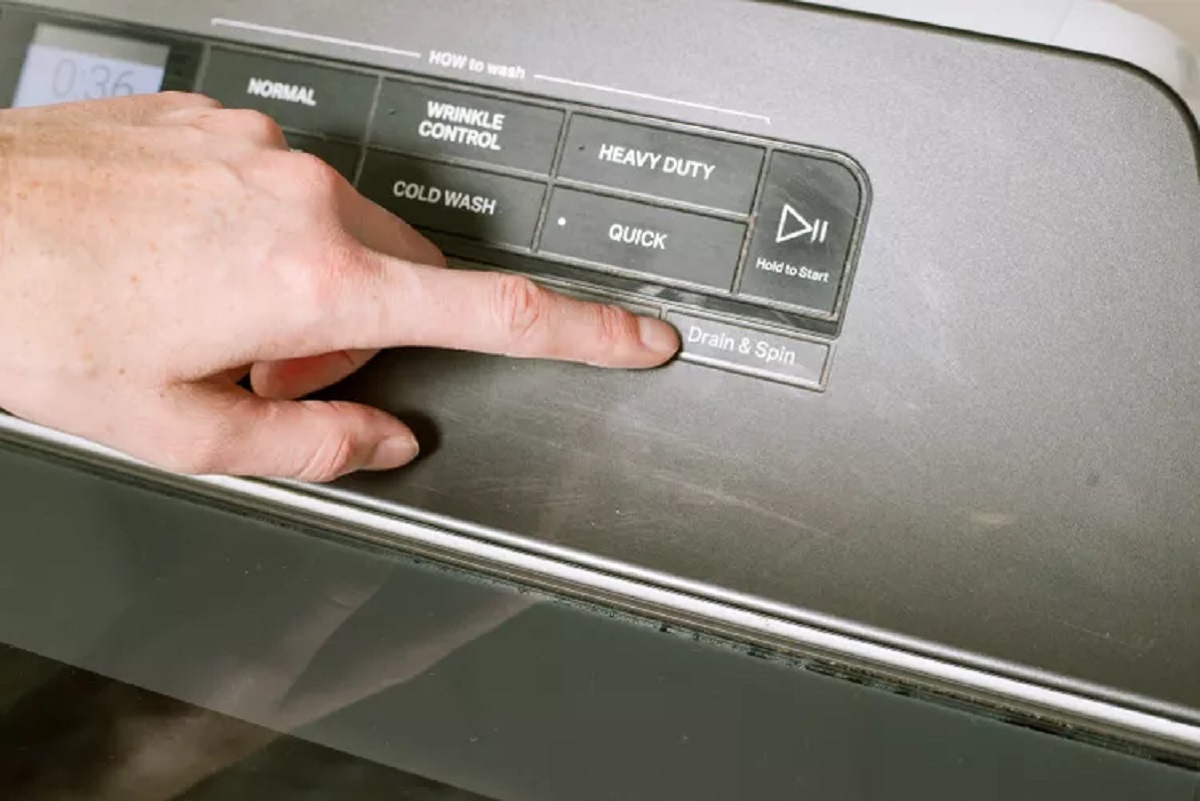
Test the Washer:
Now that you have completed the necessary steps to drain your washer and ensure proper connections, it’s time to test the washer to ensure the drain system is functioning effectively. Follow these steps to test the washer:
- Plug in the washer: If you had previously disconnected the power source, plug the washer back into the electrical outlet or turn on the circuit breaker dedicated to the washer.
- Set the washer to a drain cycle: Consult your washer’s user manual to determine the specific settings for a drain cycle. Usually, there is a dedicated drain or spin-only cycle you can select. Choose the appropriate cycle on the washer’s control panel.
- Start the drain cycle: Once you have selected the drain cycle, press the start button to initiate the cycle. Observe the washer as it goes through the drain process.
- Check for proper drainage: During the drain cycle, pay attention to the flow of water. Ensure that the water is draining smoothly and quickly through the drain hose without any leaks or spills.
- Monitor the washer’s performance: After the drain cycle is complete, observe the washer to see if there are any signs of water remaining in the drum. If the washer drains properly and there is no standing water, it means the drain system is functioning effectively.
If you notice any issues with the drain system or if the washer is still not draining correctly, double-check all the connections and repeat the steps for cleaning the drain pump filter and checking the drain hose for blockages. It may be necessary to seek professional assistance if the problem persists.
By testing the washer’s drain system, you can ensure that any drainage issues have been resolved and that your washer is ready for use. Now, let’s summarize the steps we have covered in this article.
Conclusion:
Draining your washer is an essential step in maintaining its proper functioning and preventing drainage issues. By following the step-by-step process outlined in this article, you can effectively drain your washer and clear any blockages that may be causing drainage problems.
Remember to prioritize safety by disconnecting the power source and taking necessary precautions throughout the process. Gather all the required tools and materials before starting, and ensure you have a clean and well-lit work area.
Start by removing any standing water from the washer and accessing the drain pump filter. Clean the drain pump filter thoroughly and check for blockages in the drain hose. Once any blockages are cleared, reconnect the drain hose securely to the washer and test the washer’s drain system to ensure proper functionality.
If you continue to experience drainage issues or if the problem persists, it is best to consult a professional technician for further assistance. They can diagnose and fix any underlying problems that may be causing the drainage issues.
Regular maintenance, including draining and cleaning your washer, will help prolong its lifespan and ensure optimal performance. By taking the time to properly drain your washer and address any drainage issues, you can enjoy clean and fresh laundry without any hassle.
Thank you for following this guide. We hope it has been helpful in providing you with the necessary information to drain your washer effectively. Remember to always refer to your washer’s user manual for model-specific instructions, and prioritize safety throughout the process.
Frequently Asked Questions about How To Drain Washer
Was this page helpful?
At Storables.com, we guarantee accurate and reliable information. Our content, validated by Expert Board Contributors, is crafted following stringent Editorial Policies. We're committed to providing you with well-researched, expert-backed insights for all your informational needs.


0 thoughts on “How To Drain Washer”