Home>Home Appliances>Laundry Appliances>How To Drain A Washing Machine Manually
Laundry Appliances
How To Drain A Washing Machine Manually
Modified: October 20, 2024
Learn how to manually drain a washing machine to troubleshoot issues and keep your laundry appliances running smoothly. Discover step-by-step instructions for draining your washer.
(Many of the links in this article redirect to a specific reviewed product. Your purchase of these products through affiliate links helps to generate commission for Storables.com, at no extra cost. Learn more)
Introduction
When your washing machine refuses to drain, it can be a frustrating experience. Whether it's due to a clogged drain, a malfunctioning pump, or a faulty hose, a non-draining washing machine can disrupt your laundry routine. However, fear not! In this comprehensive guide, you will learn how to manually drain a washing machine, allowing you to tackle this issue with confidence and ease.
Understanding the process of manually draining a washing machine can save you time and money, as well as prevent potential water damage to your laundry area. By following the steps outlined in this guide, you can effectively address the drainage issue and restore your washing machine to its optimal functionality.
So, grab your tools and let's dive into the step-by-step process of manually draining a washing machine. Whether you're a seasoned DIY enthusiast or a novice in the world of appliance maintenance, this guide will equip you with the knowledge and skills to tackle this common laundry appliance issue.
Key Takeaways:
- Don’t panic if your washing machine won’t drain! Follow these steps to safely and confidently remove the water manually. It’s like giving your washing machine a spa day!
- By cleaning the drain filter and reconnecting the hose, you can fix the drainage issue and keep your washing machine running smoothly. It’s like giving your machine a high-five for a job well done!
Read more: How To Drain Washer
Tools and Materials Needed
Before embarking on the process of manually draining a washing machine, it's essential to gather the necessary tools and materials. By ensuring that you have everything at your disposal, you can streamline the drainage process and address any potential obstacles with ease. Here's a comprehensive list of the tools and materials you'll need:
Tools:
- Adjustable Wrench: This versatile tool will enable you to loosen and tighten hose clamps and fittings with precision, facilitating the disconnection of the drain hose from the washing machine or the drainage point.
- Bucket or Large Container: A sturdy bucket or container with a capacity suitable for holding the volume of water in the washing machine is essential for collecting the drained water.
- Towels or Rags: Keep a supply of towels or rags handy to wipe up any spilled water and to ensure a dry work area.
- Flashlight: A reliable flashlight will aid in locating the drain hose and accessing hard-to-reach areas behind or beneath the washing machine.
- Gloves: It's advisable to wear protective gloves to safeguard your hands from any sharp edges or debris while handling the drain hose and filter.
Materials:
- Newspapers or Plastic Sheet: Lay down newspapers or a plastic sheet around the washing machine to protect the floor from potential water spills during the drainage process.
- Plastic Zip Ties: These can be useful for securing the drain hose in place after draining the water, preventing it from slipping or causing potential leaks.
- Vinegar and Baking Soda (Optional): If you intend to clean the drain filter as part of the process, having vinegar and baking soda on hand can aid in this maintenance task.
By ensuring that you have these tools and materials readily available, you'll be well-prepared to tackle the manual drainage of your washing machine efficiently and effectively. With these essentials at your disposal, you can proceed with confidence to address the non-draining issue and restore your washing machine to optimal working condition.
Step 1: Turn Off the Power
Before initiating the process of manually draining your washing machine, it is crucial to prioritize safety by turning off the power supply to the appliance. This step is essential to prevent any electrical mishaps and ensure a secure working environment.
To begin, locate the power cord of the washing machine and unplug it from the electrical outlet. If the outlet is positioned in a hard-to-reach area behind the appliance, consider using a flashlight to illuminate the space and safely disconnect the power cord. It's important to exercise caution and avoid tugging on the cord excessively to prevent damage.
In some cases, washing machines may be directly wired into the electrical system. If this is the case, it is advisable to switch off the circuit breaker or remove the fuse associated with the washing machine's electrical circuit. This additional precaution ensures that there is no active electrical supply to the appliance during the drainage process.
By deactivating the power source, you mitigate the risk of electrical hazards and create a secure environment for working around the washing machine. This step is fundamental in ensuring your safety and the proper execution of the subsequent drainage process.
Once the power is successfully turned off, you can proceed with confidence to the next steps of manually draining the washing machine, knowing that you have taken the necessary precautions to safeguard yourself and the appliance.
With the power supply disconnected, you are now ready to advance to the subsequent steps, equipped with the assurance of a secure working environment. This proactive approach sets the stage for a smooth and safe manual drainage process, allowing you to address the non-draining issue with confidence and efficiency.
Read more: How To Drain A Maytag Washer
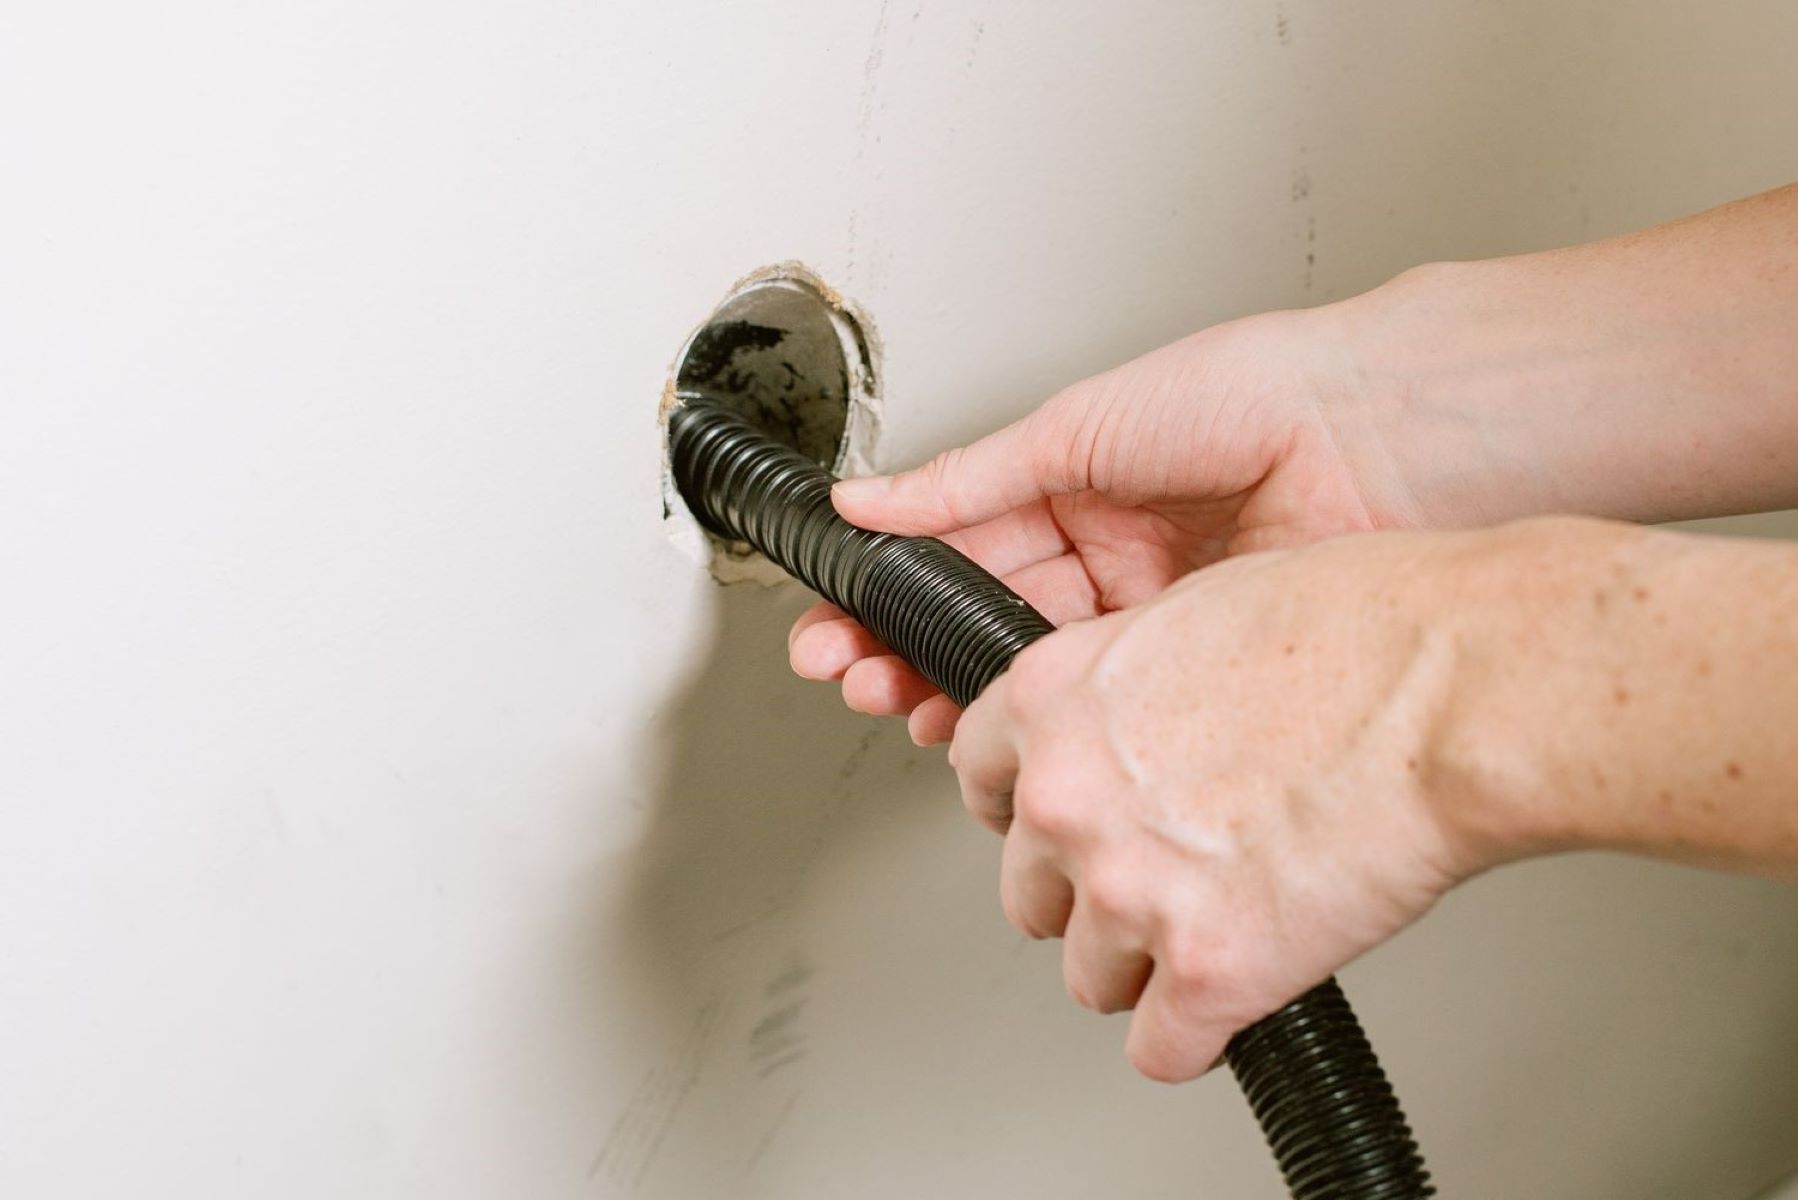
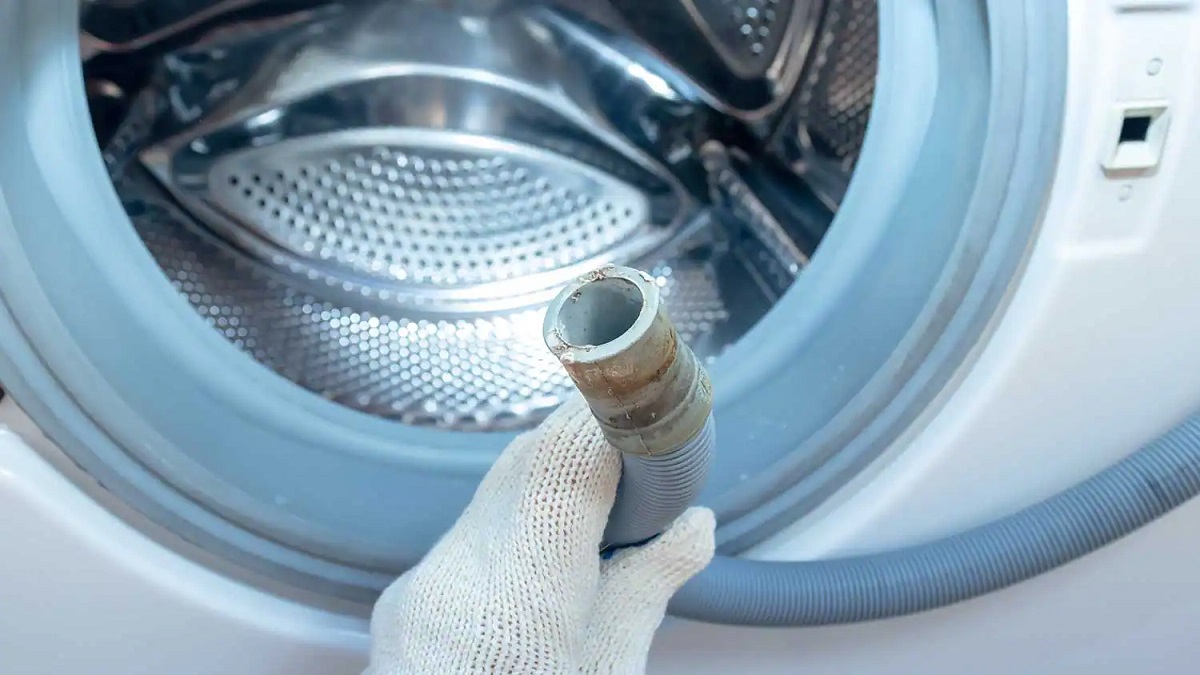
Step 2: Locate the Drain Hose
After ensuring the power supply to the washing machine is turned off, the next crucial step in manually draining the appliance is to locate the drain hose. The drain hose serves as the conduit through which the water is expelled from the washing machine during the normal drainage cycle. By identifying and accessing the drain hose, you can effectively initiate the manual drainage process.
-
Position of the Drain Hose: The drain hose is typically located at the rear of the washing machine. It is a flexible, ribbed tube that extends from the back of the appliance and is designed to expel the wastewater into a designated drainage point. In some models, the drain hose may be visible and easily accessible, while in others, it may be positioned behind a removable panel or within a compartment.
-
Inspecting the Drain Hose: Once you have identified the general location of the drain hose, it is advisable to conduct a visual inspection to ensure that it is free from any kinks, twists, or damage. A clear and unobstructed drain hose is essential for facilitating the smooth flow of water during the manual drainage process. Additionally, check for any signs of blockages or debris near the hose's entry point into the washing machine.
-
Accessing the Drain Hose: In some instances, accessing the drain hose may require moving the washing machine slightly away from the wall to create space for maneuvering. If the drain hose is concealed behind a panel or within a compartment, carefully remove the covering to gain access. It's important to exercise caution and avoid exerting excessive force to prevent damage to the appliance or surrounding components.
-
Using a Flashlight: To aid in locating and inspecting the drain hose, utilize a reliable flashlight to illuminate the area behind the washing machine. This will enable you to clearly visualize the path of the drain hose, identify any potential obstructions, and ensure that the hose is securely connected to the washing machine and the drainage point.
By meticulously locating the drain hose and assessing its condition, you set the stage for a successful manual drainage process. This proactive approach allows you to address any potential issues related to the drain hose and prepare for the subsequent steps of draining the water from the washing machine. With the drain hose identified and accessible, you are now ready to proceed with the manual drainage process, equipped with a clear understanding of the appliance's drainage system.
Step 3: Prepare the Drainage Area
Preparing the drainage area is a crucial step in the process of manually draining a washing machine. By creating a suitable environment for the water to be expelled from the appliance, you can ensure a smooth and efficient drainage process. Here's a detailed guide on how to prepare the drainage area effectively:
-
Clear the Surrounding Space: Begin by clearing the immediate area around the washing machine to create ample space for the drainage process. Remove any obstacles, laundry baskets, or other items that may impede access to the back of the appliance. This allows for unrestricted movement and facilitates the positioning of the drainage container.
-
Lay Down Newspapers or a Plastic Sheet: To safeguard the floor from potential water spills during the drainage process, lay down newspapers or a plastic sheet around the base of the washing machine. This protective measure helps prevent water from seeping onto the floor, minimizing the risk of damage to the surrounding area.
-
Position the Drainage Container: Place a sturdy bucket or large container in close proximity to the washing machine, ensuring that it is positioned to collect the expelled water effectively. The container should have the capacity to accommodate the volume of water expected to drain from the washing machine. Additionally, consider using towels or rags to create a stable base for the container and absorb any minor spills.
-
Secure the Drain Hose: Prior to initiating the drainage process, ensure that the drain hose is positioned to direct the expelled water into the drainage container. If necessary, use plastic zip ties to secure the hose in place, preventing it from shifting or causing potential leaks. This proactive measure helps maintain a controlled flow of water and minimizes the risk of spillage.
-
Check the Drainage Point: If the washing machine is connected to a floor drain or a designated drainage point, inspect the area to ensure that it is clear and unobstructed. Clear any debris or obstructions near the drainage point to facilitate the smooth expulsion of water from the washing machine.
By meticulously preparing the drainage area, you can create an optimal environment for the manual drainage process. This proactive approach minimizes the risk of water spills, ensures efficient water collection, and sets the stage for a seamless drainage experience. With the drainage area effectively prepared, you are now ready to proceed with the subsequent steps of manually draining the washing machine.
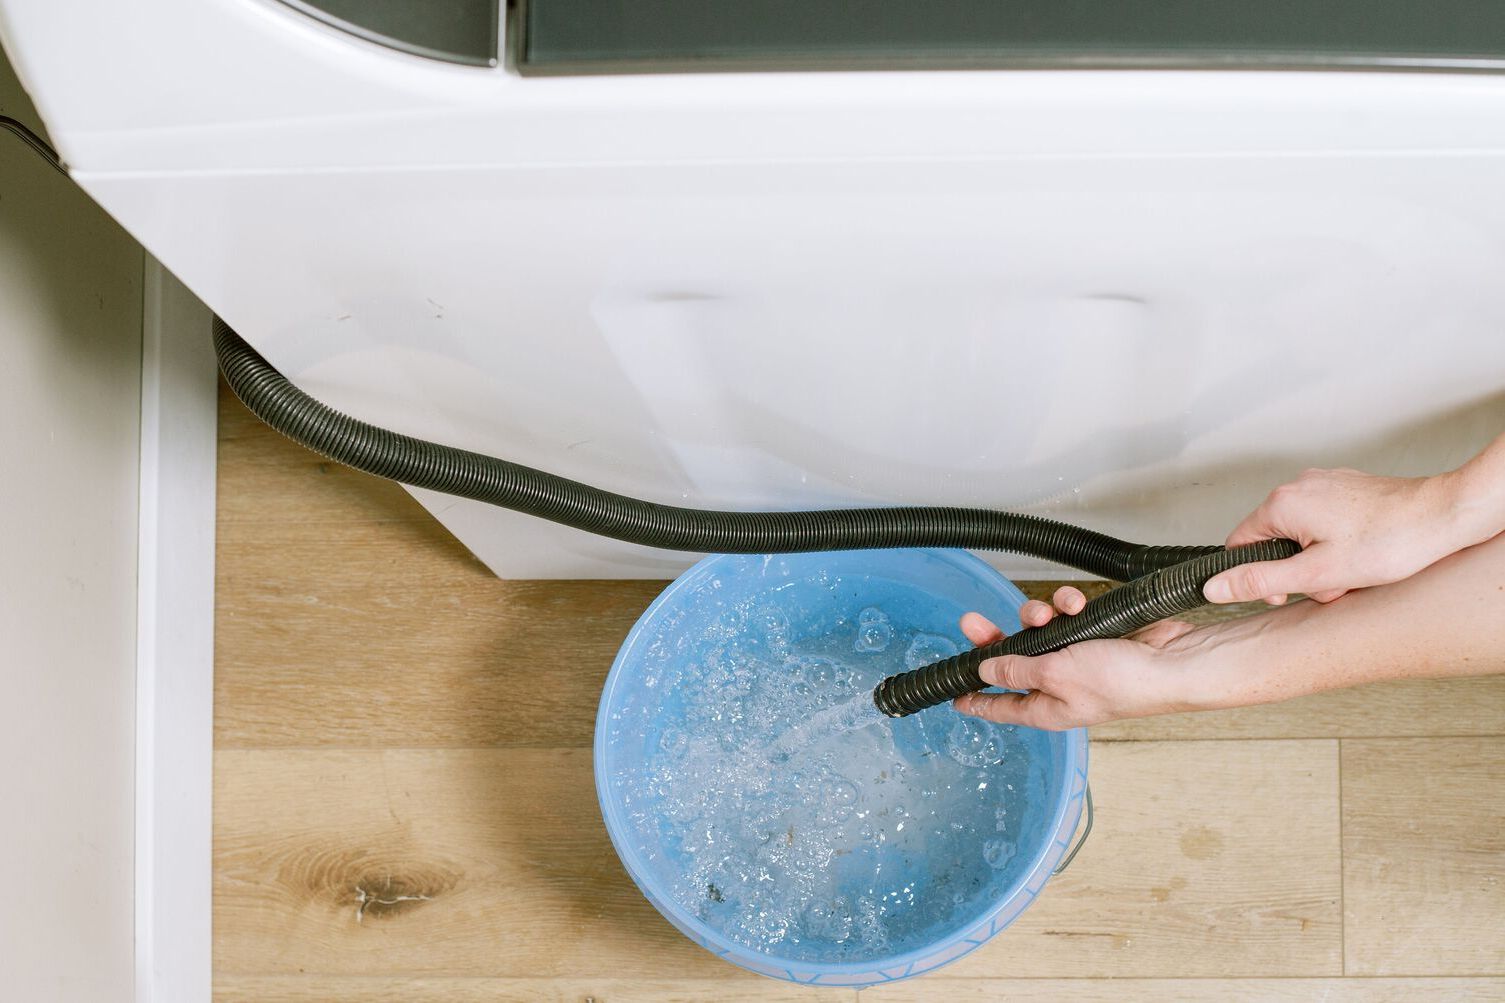
Step 4: Drain the Water
With the power supply turned off and the drainage area meticulously prepared, you are now ready to initiate the manual drainage of the washing machine. The process of draining the water from the appliance involves a systematic approach to ensure a controlled and efficient expulsion of the wastewater. Here's a detailed guide on how to proceed with draining the water from the washing machine:
-
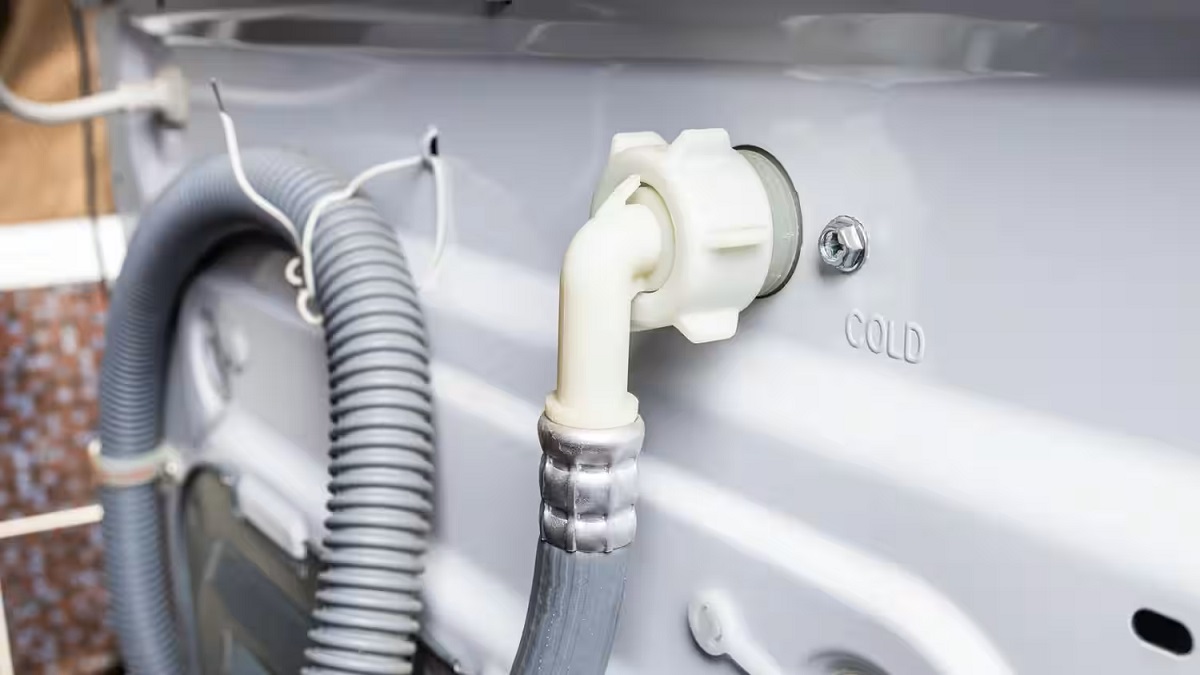
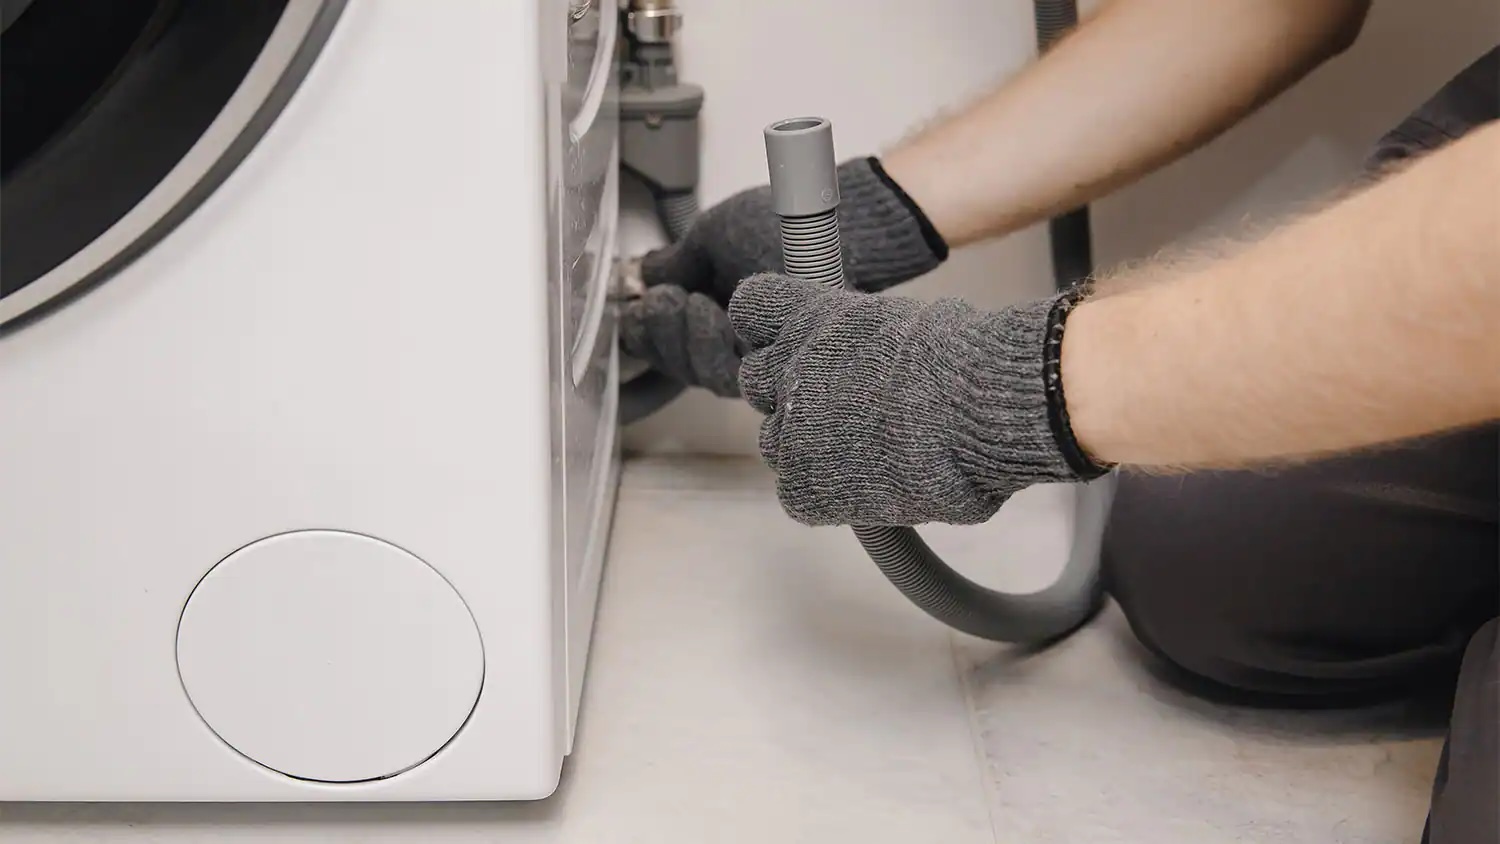
Disconnect the Drain Hose: Begin by carefully disconnecting the drain hose from the designated drainage point or the standpipe. Depending on the configuration of your washing machine's drainage system, you may need to utilize an adjustable wrench to loosen the hose clamp securing the drain hose. Exercise caution to avoid damaging the hose or the surrounding components during this step.
-
Position the Drain Hose: Once the drain hose is detached from the drainage point, position it to direct the expelled water into the prepared drainage container. Ensure that the hose is securely placed to facilitate the smooth flow of water and minimize the risk of spillage. If necessary, use plastic zip ties to secure the hose in place, maintaining a controlled path for the draining water.
-
Initiate the Drainage Process: With the drain hose appropriately positioned, proceed to carefully tilt the washing machine forward to initiate the expulsion of water. As the appliance is tilted, the accumulated water within the drum and the drainage system will begin to flow out through the detached hose and into the designated container. Exercise caution and control during this step to prevent excessive spillage and ensure that the water is directed into the container effectively.
-
Monitor the Drainage: As the water drains from the washing machine, monitor the flow to ensure that it is consistent and unobstructed. Keep a close eye on the drainage container to gauge the volume of expelled water and make adjustments as necessary to maintain a steady flow. Additionally, inspect the drain hose for any signs of blockages or irregularities that may impede the drainage process.
-
Complete the Drainage: Once the majority of the water has been expelled from the washing machine, carefully lower the appliance back to its original position. Allow any remaining water within the system to drain out completely, ensuring that the drainage process is thorough and comprehensive. Once the water has been successfully drained, proceed to the next step of cleaning the drain filter and addressing any potential blockages.
By following these detailed steps, you can effectively drain the water from your washing machine manually, addressing the non-draining issue with precision and confidence. This systematic approach ensures a controlled and efficient drainage process, allowing you to restore the optimal functionality of your appliance. With the water successfully expelled from the washing machine, you are now prepared to proceed to the subsequent maintenance steps and address any underlying causes of the drainage issue.
If your washing machine is not draining, try manually draining it by locating the drain hose at the back of the machine, placing it into a bucket, and then opening the drain filter to release the water. Be sure to unplug the machine first for safety.
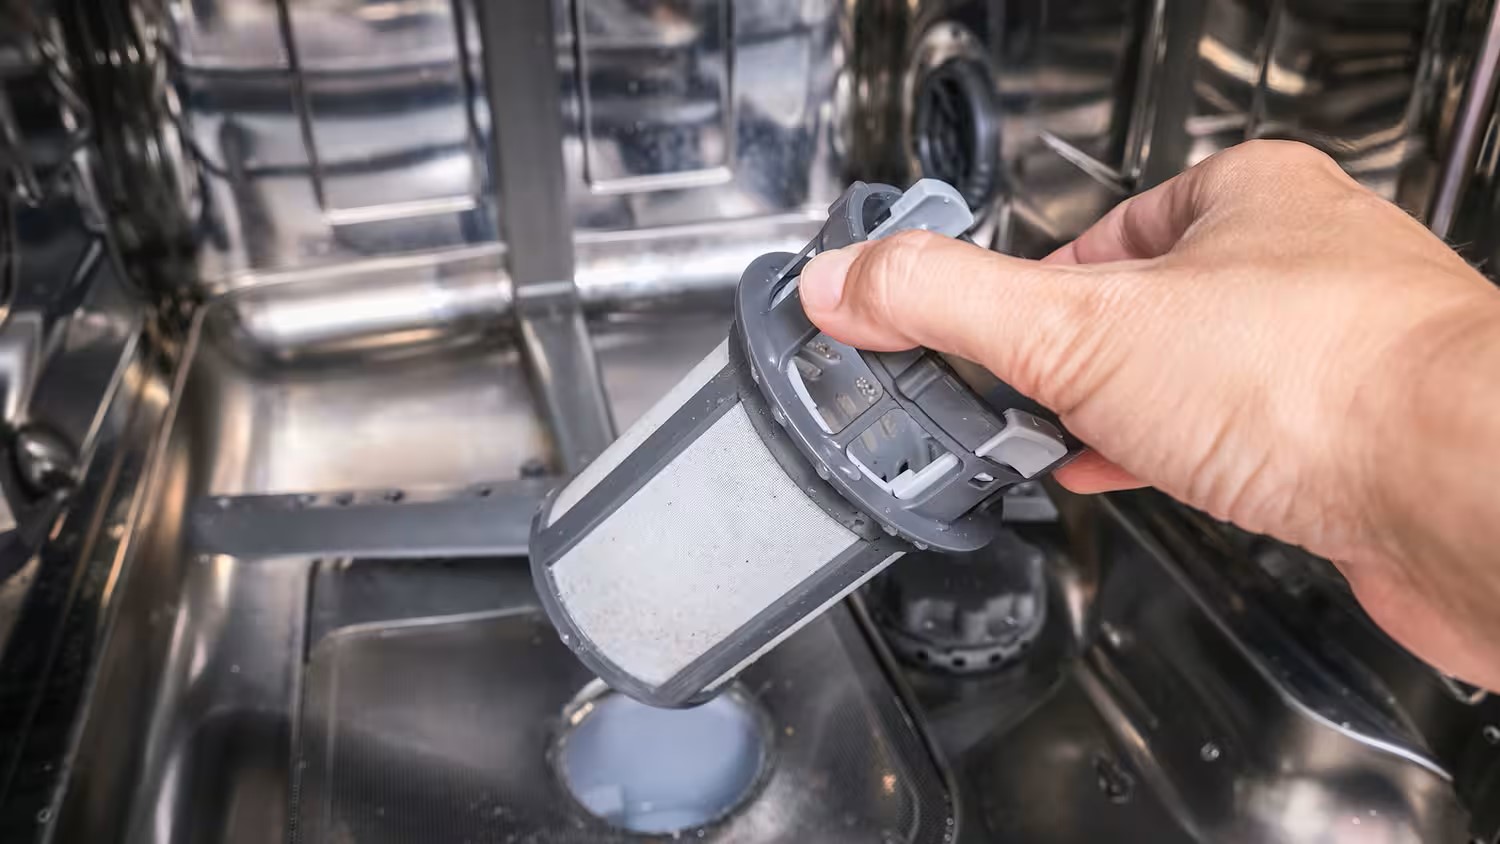
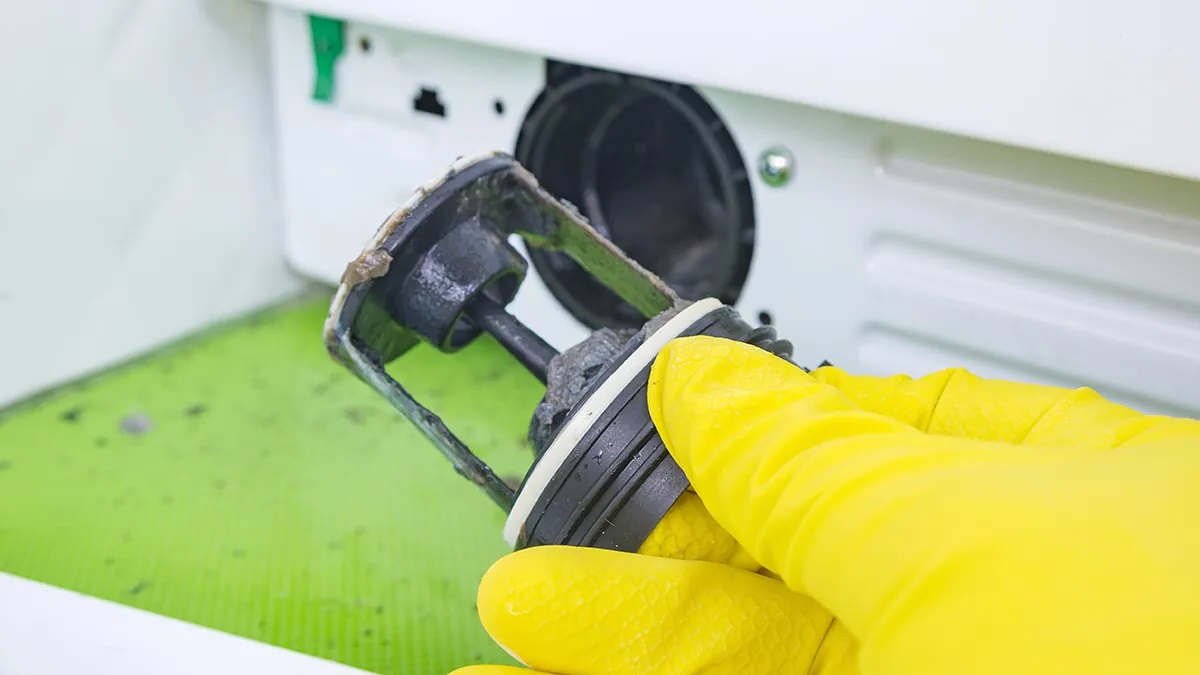
Step 5: Clean the Drain Filter
After successfully draining the water from the washing machine, it is essential to address the maintenance of the drain filter. The drain filter, also known as the lint trap or debris filter, plays a crucial role in capturing lint, debris, and foreign objects that may have accumulated during the laundry cycles. Over time, the filter can become clogged or obstructed, leading to drainage issues and potential damage to the appliance. Cleaning the drain filter is a fundamental maintenance task that helps ensure the optimal performance of the washing machine.
Here's a detailed guide on how to clean the drain filter effectively:
-
Locate the Drain Filter: The drain filter is typically situated near the bottom front of the washing machine, behind a small access panel. In some models, the filter may be accessible without the need for tools, while in others, a screwdriver or coin may be required to open the panel. Carefully inspect the area around the washing machine to identify the location of the drain filter access point.
-
Prepare for Maintenance: Before proceeding with the cleaning process, it's advisable to place a towel or shallow container beneath the access panel to capture any residual water that may emerge when the filter is removed. This precaution helps prevent water spills and maintains a tidy work area.
-
Remove the Drain Filter: Using the appropriate tool, such as a screwdriver or coin, carefully open the access panel to reveal the drain filter. Gently unscrew or release the filter, taking care to support it as it is removed to prevent any trapped debris from spilling back into the washing machine.
-
Inspect and Clean the Filter: Once the drain filter is removed, visually inspect it for any accumulated lint, debris, or foreign objects. Use a soft-bristled brush or a cloth to gently clean the filter, removing any obstructions and ensuring that it is free from buildup. Additionally, rinse the filter under running water to dislodge any stubborn debris and restore its functionality.
-
Clear the Filter Housing: While the filter is removed, take the opportunity to inspect the filter housing for any residual debris or blockages. Use a flashlight to illuminate the area and carefully remove any accumulated lint or foreign objects using a soft brush or cloth. Ensuring that the filter housing is clear of obstructions is essential for maintaining optimal drainage performance.
-
Reinstall the Drain Filter: Once the drain filter and housing are thoroughly cleaned, carefully reinsert the filter into its designated position. Ensure that it is securely fastened and properly aligned to facilitate effective filtration during future laundry cycles.
By meticulously cleaning the drain filter, you can mitigate potential drainage issues and maintain the optimal functionality of your washing machine. This proactive maintenance task helps safeguard the appliance against clogs and obstructions, ensuring a smooth and efficient drainage process. With the drain filter cleaned and reinstalled, you have effectively addressed a critical component of the washing machine's maintenance, setting the stage for continued reliable performance.
This comprehensive guide equips you with the knowledge and skills to effectively clean the drain filter, empowering you to maintain the optimal functionality of your washing machine and address potential drainage issues with confidence and precision.
Read more: How To Unclog Washer Drain
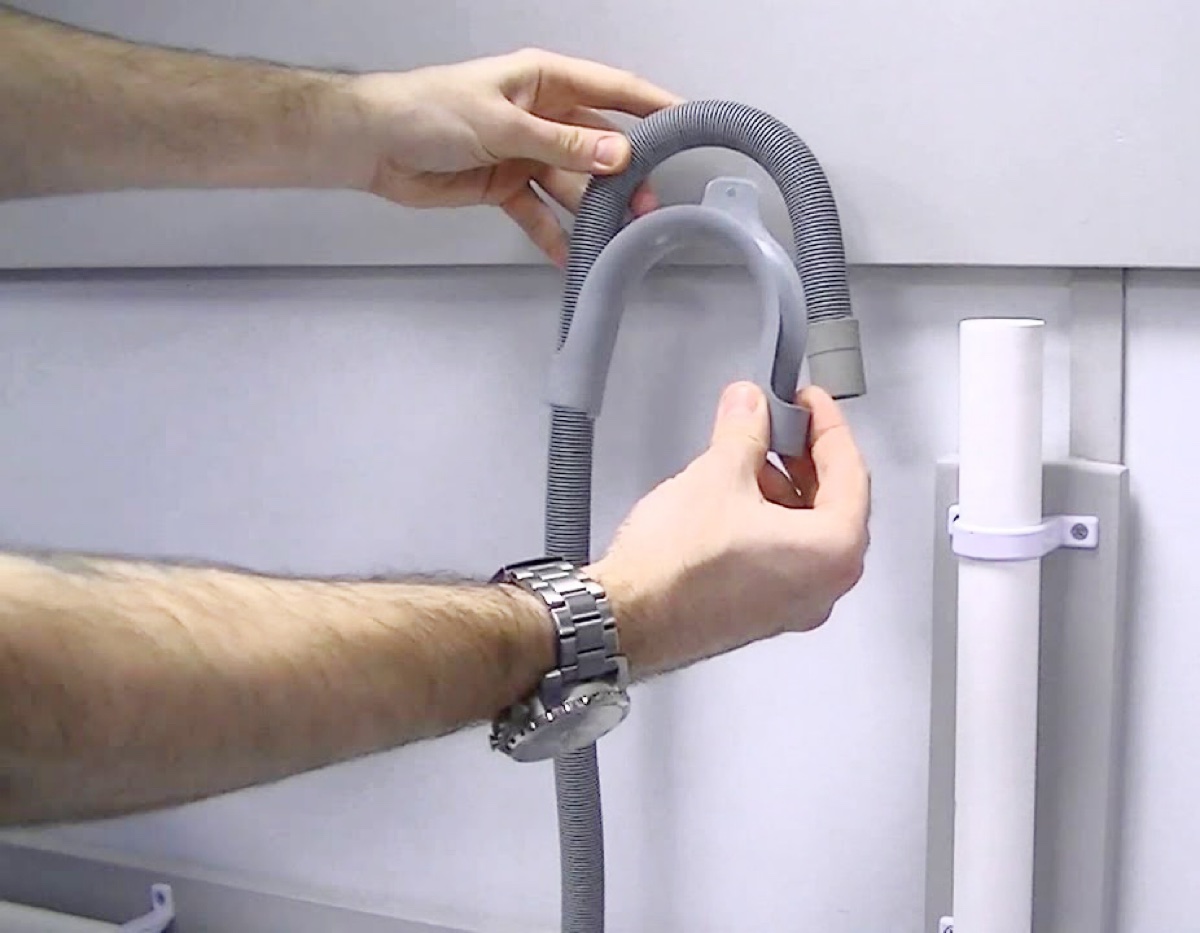
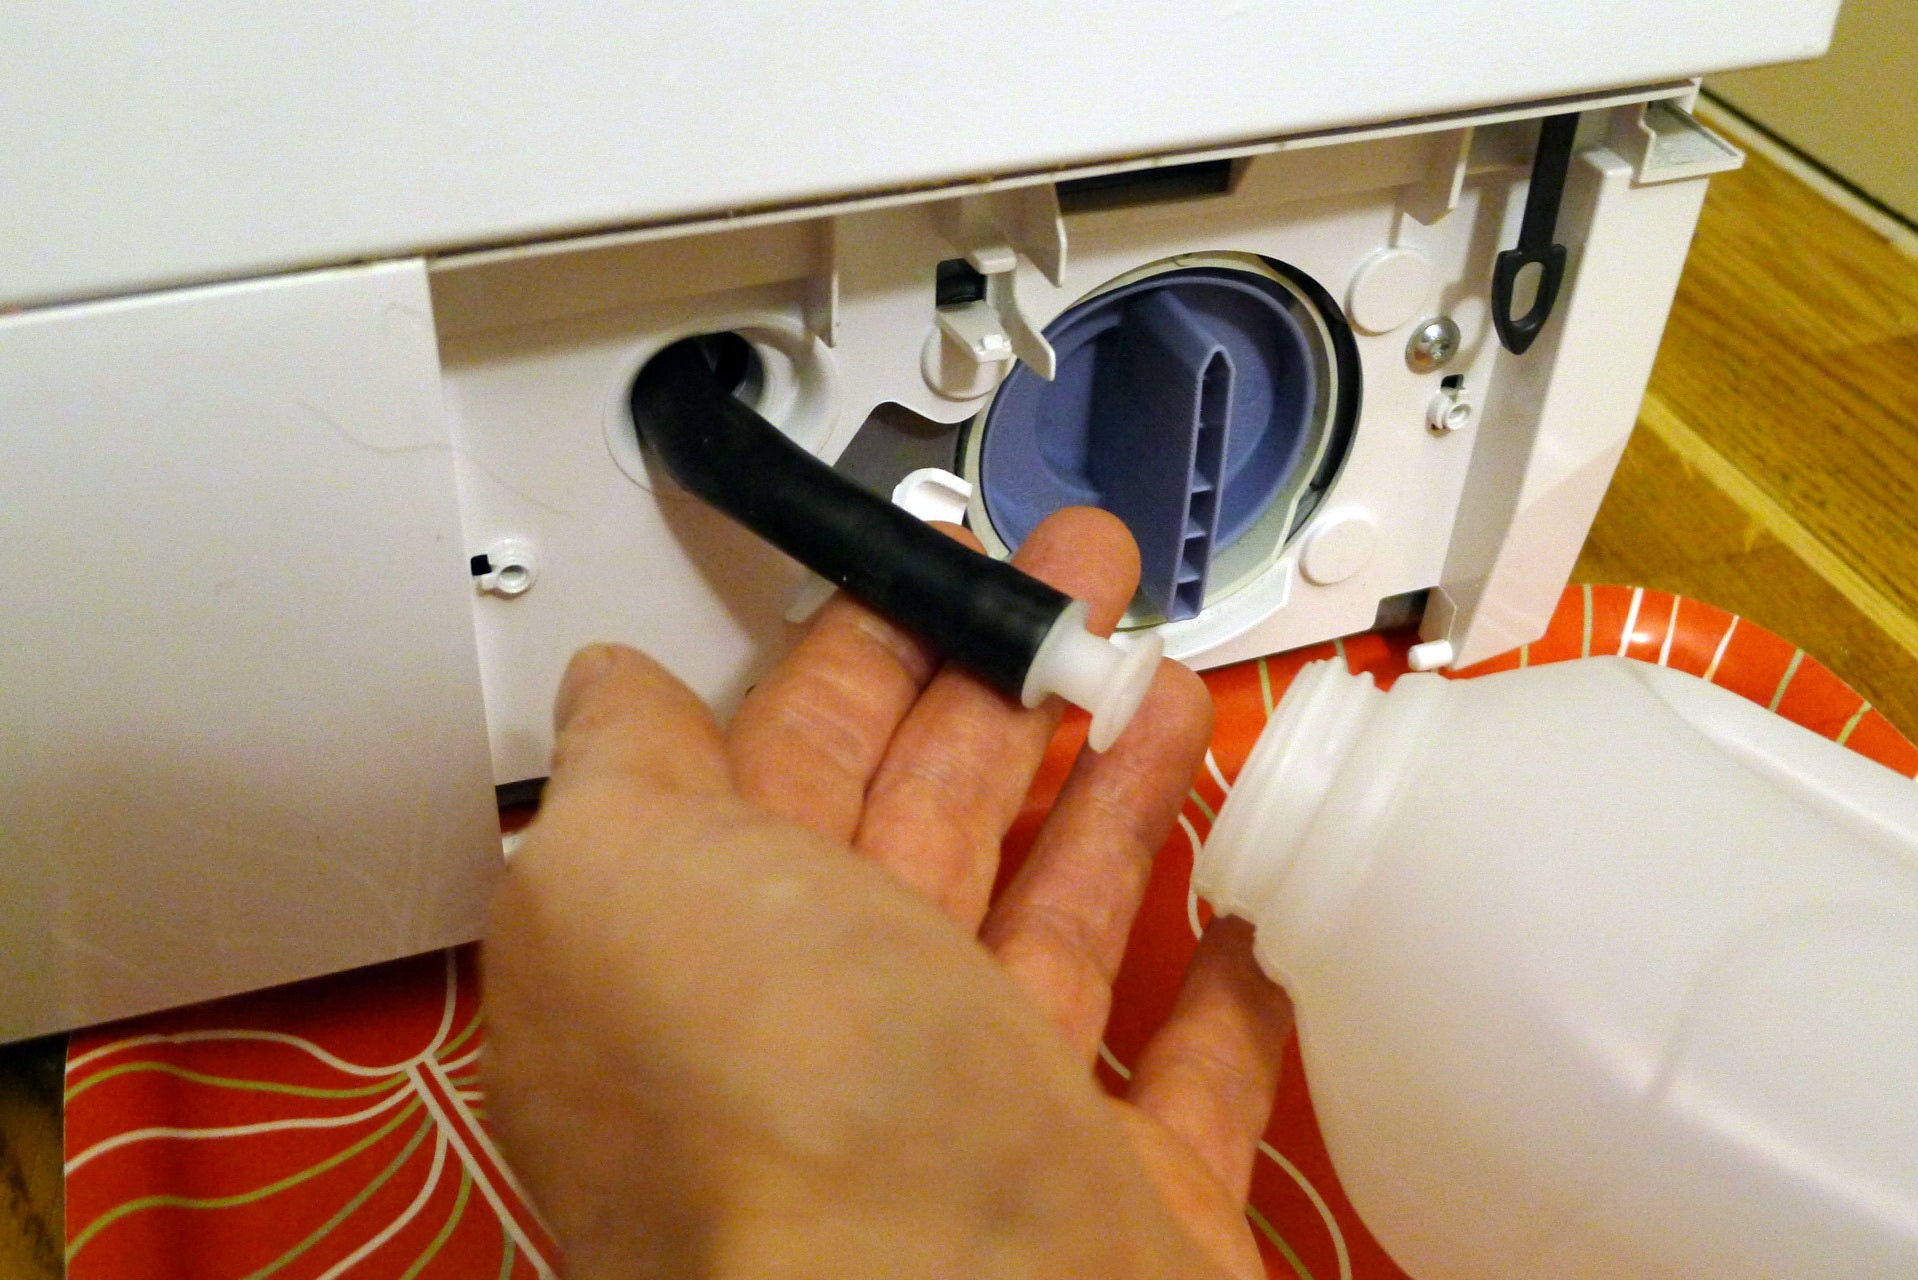
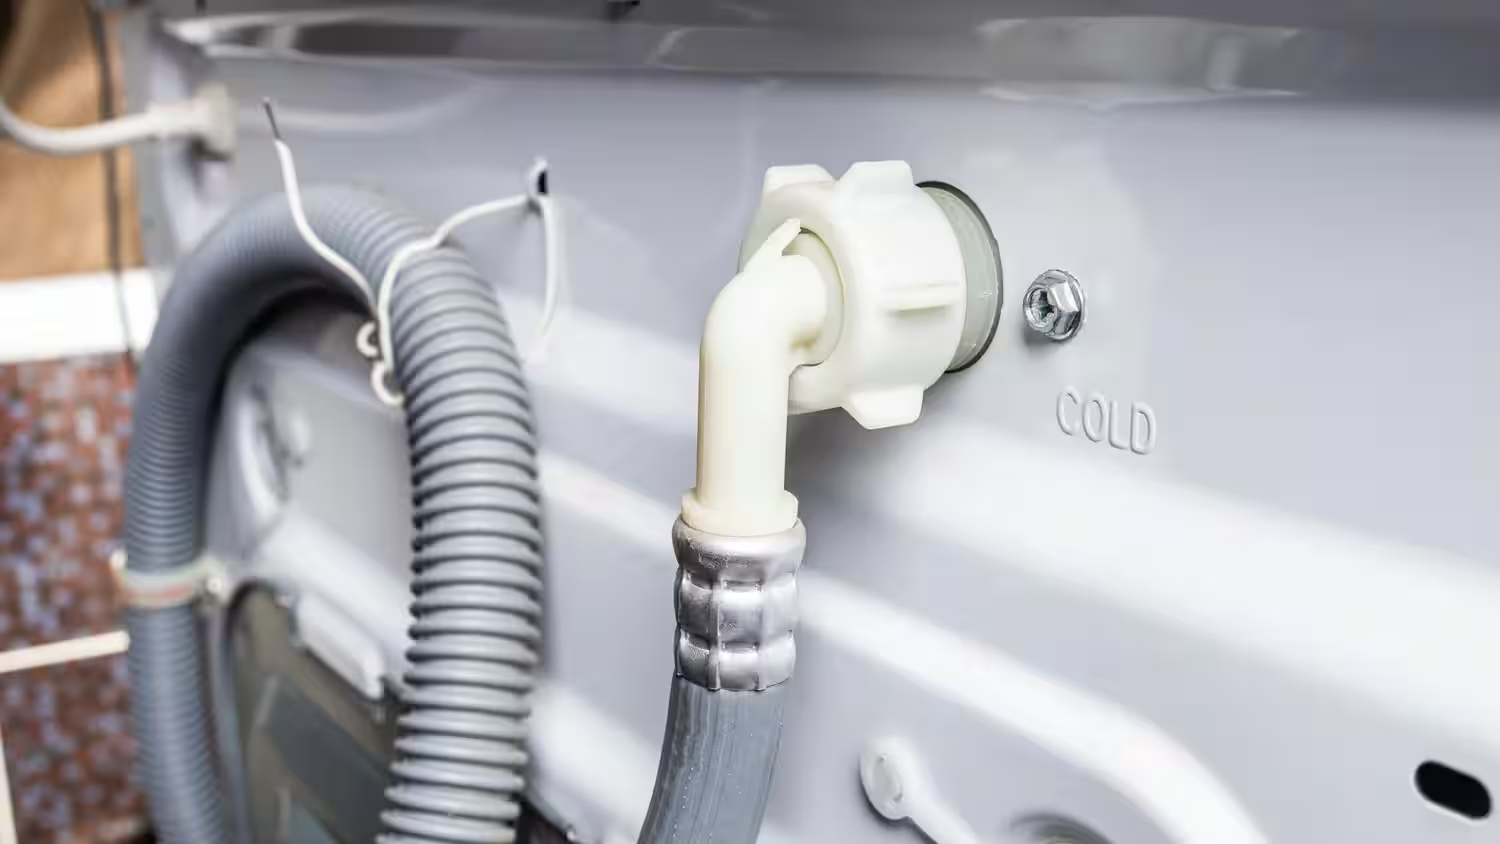
Step 6: Reconnect the Drain Hose
After successfully draining the water and addressing the maintenance of the drain filter, the final step in the manual drainage process involves reconnecting the drain hose to its designated drainage point or standpipe. This critical step ensures the restoration of the washing machine's drainage functionality and sets the stage for the appliance to resume its regular laundry cycles without impediments.
Here's a detailed guide on how to effectively reconnect the drain hose:
-
Positioning the Drain Hose: Begin by carefully positioning the end of the drain hose back into the designated drainage point or standpipe. Ensure that the hose is securely inserted and aligned to facilitate the smooth expulsion of water during future laundry cycles. If the drainage point features a secure connection mechanism, such as a hose clamp, utilize the appropriate tools to fasten the hose in place, ensuring a tight and reliable seal.
-
Securing the Drain Hose: Once the drain hose is repositioned, take proactive measures to secure it in place to prevent potential leaks or dislodgment. If the hose features an adjustable clamp, use the appropriate tool to tighten the connection, ensuring that the hose remains firmly attached to the drainage point. Additionally, inspect the surrounding area to verify that the hose is free from kinks, twists, or obstructions that may impede the drainage process.
-
Testing the Connection: After reconnecting the drain hose, conduct a brief test to verify the integrity of the connection. Run a small amount of water through the washing machine to observe the flow through the drain hose and ensure that there are no signs of leakage or disconnection. This proactive measure allows you to identify and address any potential issues with the reconnected hose before resuming full laundry cycles.
-
Restoring the Power: Once the drain hose is securely reconnected and verified to be functioning effectively, proceed to restore the power supply to the washing machine. Plug the power cord back into the electrical outlet or switch on the circuit breaker, ensuring that the appliance is ready to resume its regular operations.
By meticulously reconnecting the drain hose, you can effectively conclude the manual drainage process and restore the optimal functionality of your washing machine. This systematic approach ensures that the appliance is prepared to resume its essential laundry tasks without encountering drainage impediments. With the drain hose securely reconnected, you have successfully addressed the non-draining issue and positioned the washing machine for continued reliable performance.
This comprehensive guide equips you with the knowledge and skills to effectively reconnect the drain hose, empowering you to maintain the optimal functionality of your washing machine and address potential drainage issues with confidence and precision.
Conclusion
In conclusion, the process of manually draining a washing machine is a fundamental skill that empowers homeowners to address non-draining issues with confidence and precision. By following the comprehensive steps outlined in this guide, individuals can effectively navigate the manual drainage process, restore the optimal functionality of their washing machines, and mitigate potential water damage to their laundry areas.
From the initial step of turning off the power supply to the meticulous reconnection of the drain hose, each phase of the manual drainage process plays a crucial role in ensuring a controlled and efficient expulsion of water from the appliance. The proactive measures taken to prepare the drainage area, locate the drain hose, and clean the drain filter contribute to a comprehensive approach that addresses potential drainage issues at their core.
Furthermore, the emphasis on safety and attention to detail throughout the manual drainage process underscores the importance of creating a secure working environment and maintaining the integrity of the washing machine. By prioritizing safety measures and exercising caution during each step, individuals can confidently tackle the non-draining issue while safeguarding themselves and their appliances.
The proactive maintenance task of cleaning the drain filter serves as a pivotal component of the manual drainage process, enabling individuals to mitigate potential drainage obstructions and maintain the optimal performance of their washing machines. By addressing the cleanliness and functionality of the drain filter, homeowners can proactively prevent future drainage issues and ensure the appliance's continued reliability.
Ultimately, the successful completion of the manual drainage process equips individuals with the knowledge and skills to address non-draining washing machines effectively. By following the detailed steps and embracing a proactive approach to appliance maintenance, homeowners can restore the optimal functionality of their washing machines and enjoy uninterrupted laundry cycles.
In essence, the ability to manually drain a washing machine empowers individuals to take proactive measures in addressing common appliance issues, fostering a sense of self-reliance and confidence in managing household maintenance tasks. With the knowledge and skills gained from this guide, individuals can navigate the manual drainage process with ease, ensuring the continued efficiency and reliability of their washing machines.
Frequently Asked Questions about How To Drain A Washing Machine Manually
Was this page helpful?
At Storables.com, we guarantee accurate and reliable information. Our content, validated by Expert Board Contributors, is crafted following stringent Editorial Policies. We're committed to providing you with well-researched, expert-backed insights for all your informational needs.


0 thoughts on “How To Drain A Washing Machine Manually”