Home>Home Maintenance>How To Connect A Dryer Vent Hose

Home Maintenance
How To Connect A Dryer Vent Hose
Modified: October 19, 2024
Learn how to properly connect a dryer vent hose for better home maintenance. Our step-by-step guide ensures safety and efficient airflow.
(Many of the links in this article redirect to a specific reviewed product. Your purchase of these products through affiliate links helps to generate commission for Storables.com, at no extra cost. Learn more)
Introduction
Connecting a dryer vent hose is an important step in maintaining the efficiency and safety of your dryer. A dryer vent hose is responsible for removing hot air and moisture from the dryer and directing it outside your home. Without a properly connected vent hose, the hot air and moisture can linger, leading to poor drying performance, increased energy consumption, and even potential fire hazards.
In this article, we will guide you through the step-by-step process of connecting a dryer vent hose. Whether you are installing a new dryer or replacing an old hose, following these instructions will ensure that your dryer operates at its best while keeping your home safe.
Before we dive into the steps, let’s first gather the necessary materials you will need:
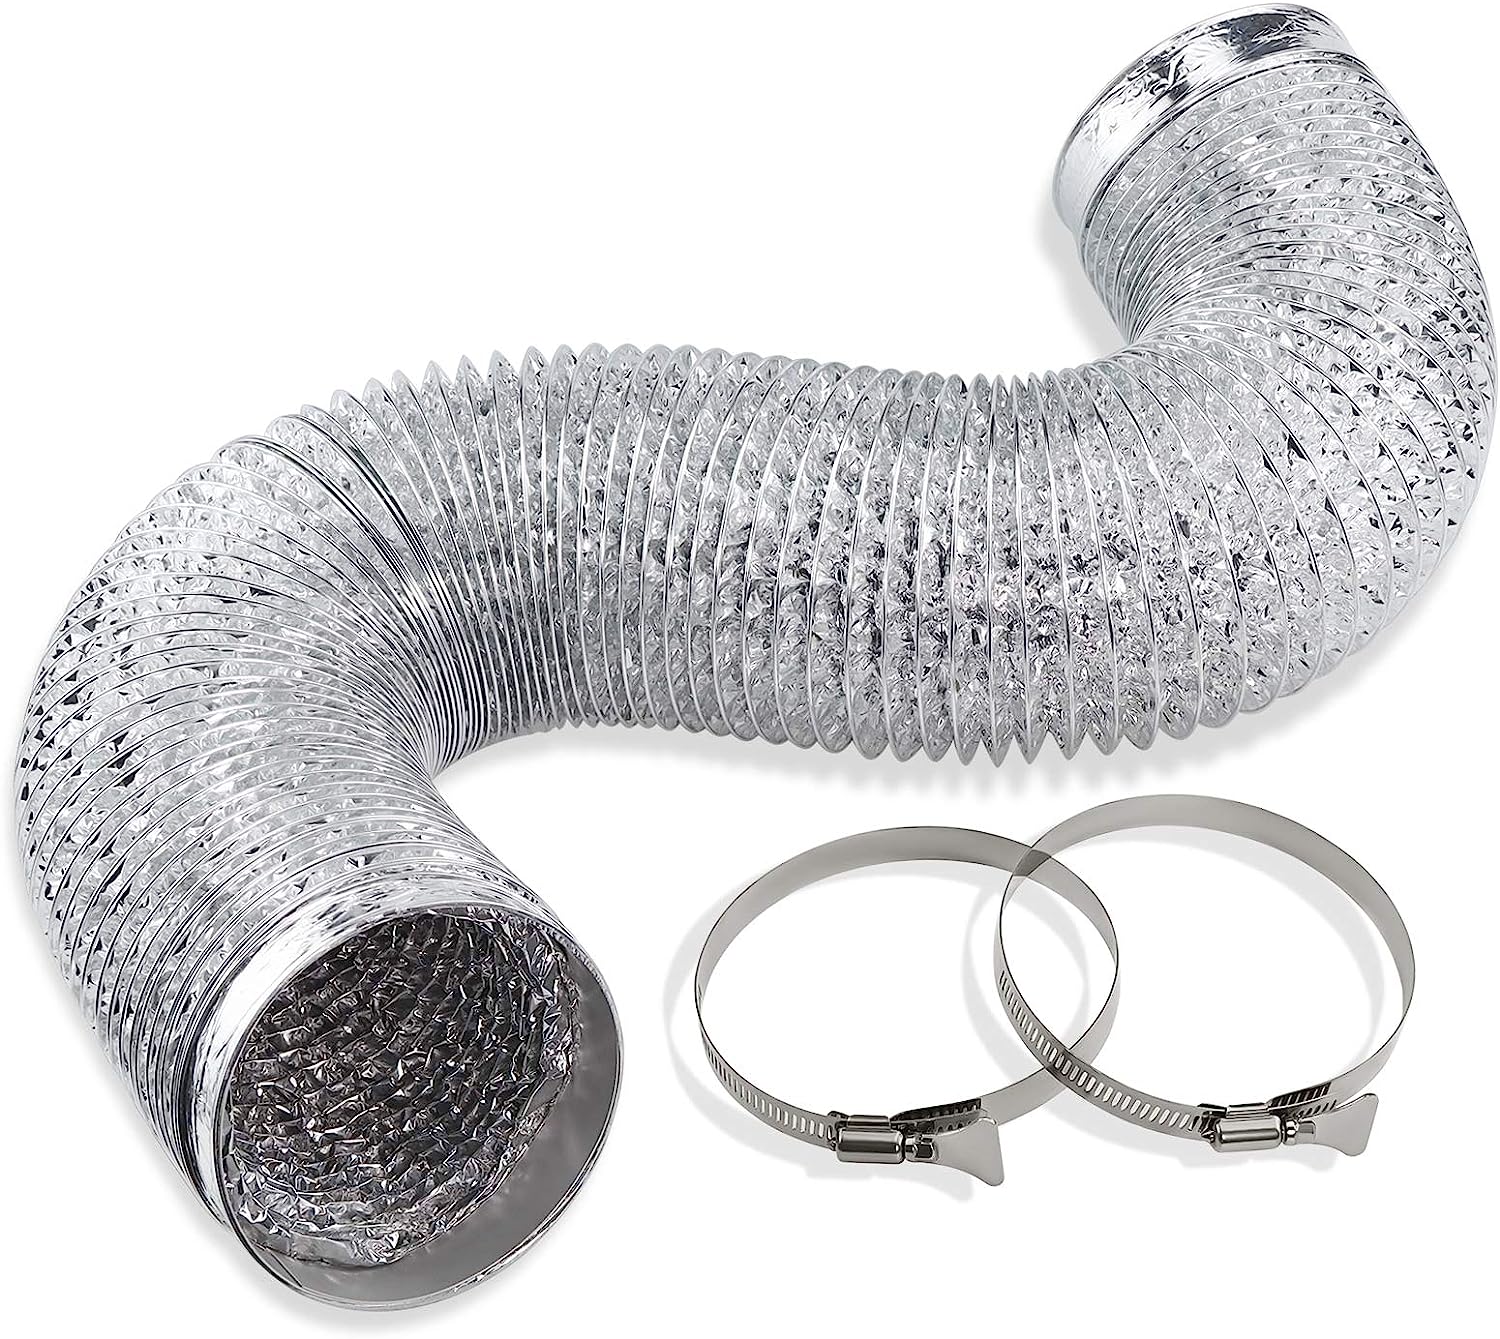
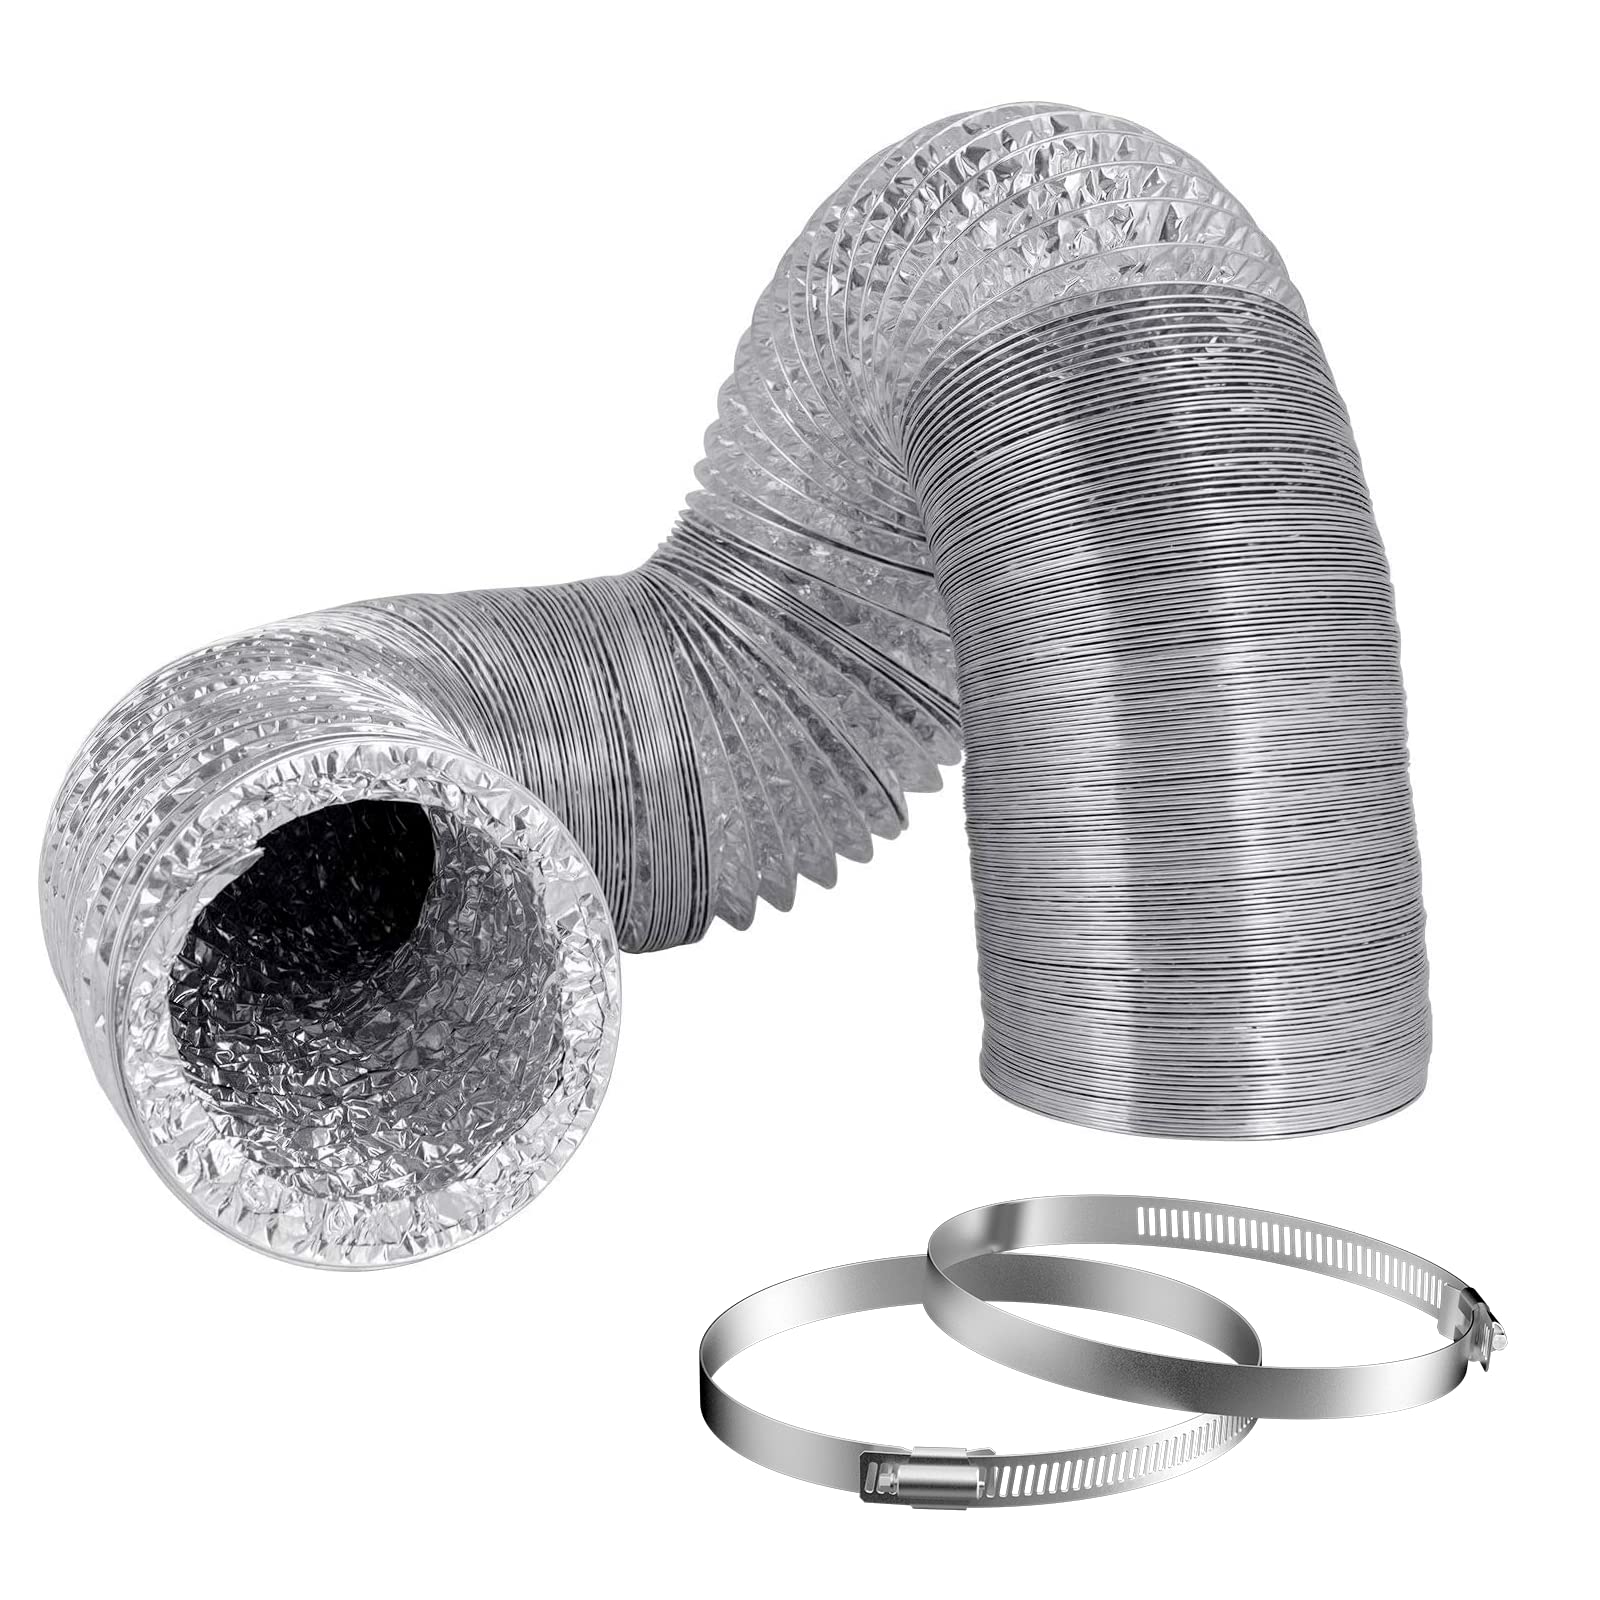
- Dryer vent hose
- Dryer vent clamp
- Screwdriver or drill
- Duct tape or metal foil tape
Now that you have the materials ready, let’s move on to the first step!
Key Takeaways:
- Properly connecting a dryer vent hose is crucial for efficient drying and home safety. Follow the steps carefully, gather the right materials, and test the airflow to ensure a well-functioning dryer.
- Safety is paramount when working with dryers. Always unplug the dryer, handle tools with caution, and seek professional help if needed. Regular maintenance and cleaning will keep your dryer running smoothly.
Read more: How To Connect A Dryer Vent
Step 1: Gather the necessary materials
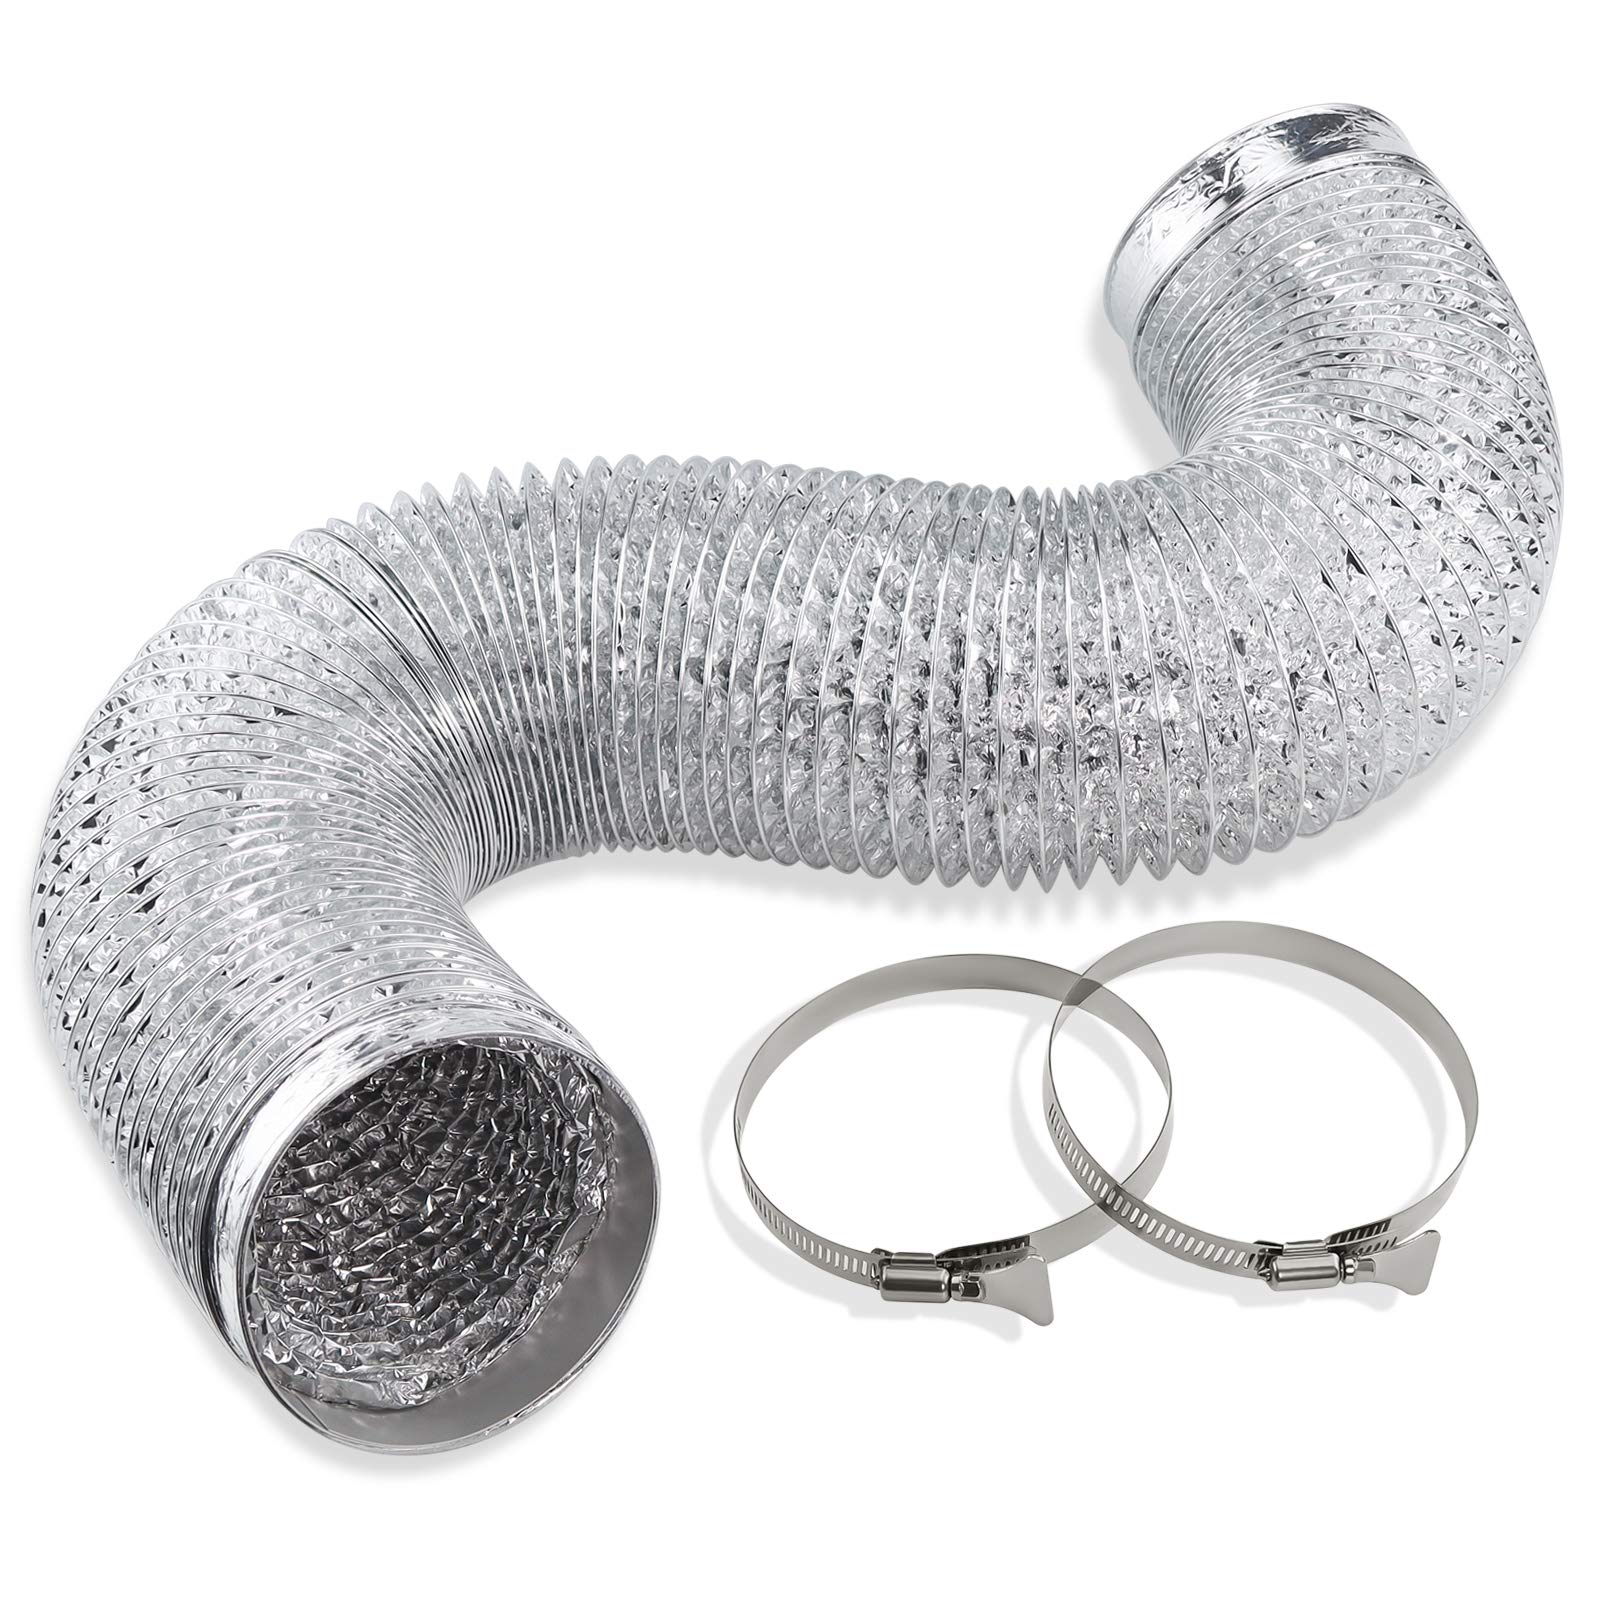
Before you begin connecting the dryer vent hose, it’s important to gather all the materials you will need. Having everything prepared in advance will save you time and ensure a smooth installation process. Here’s a list of the materials you’ll need:
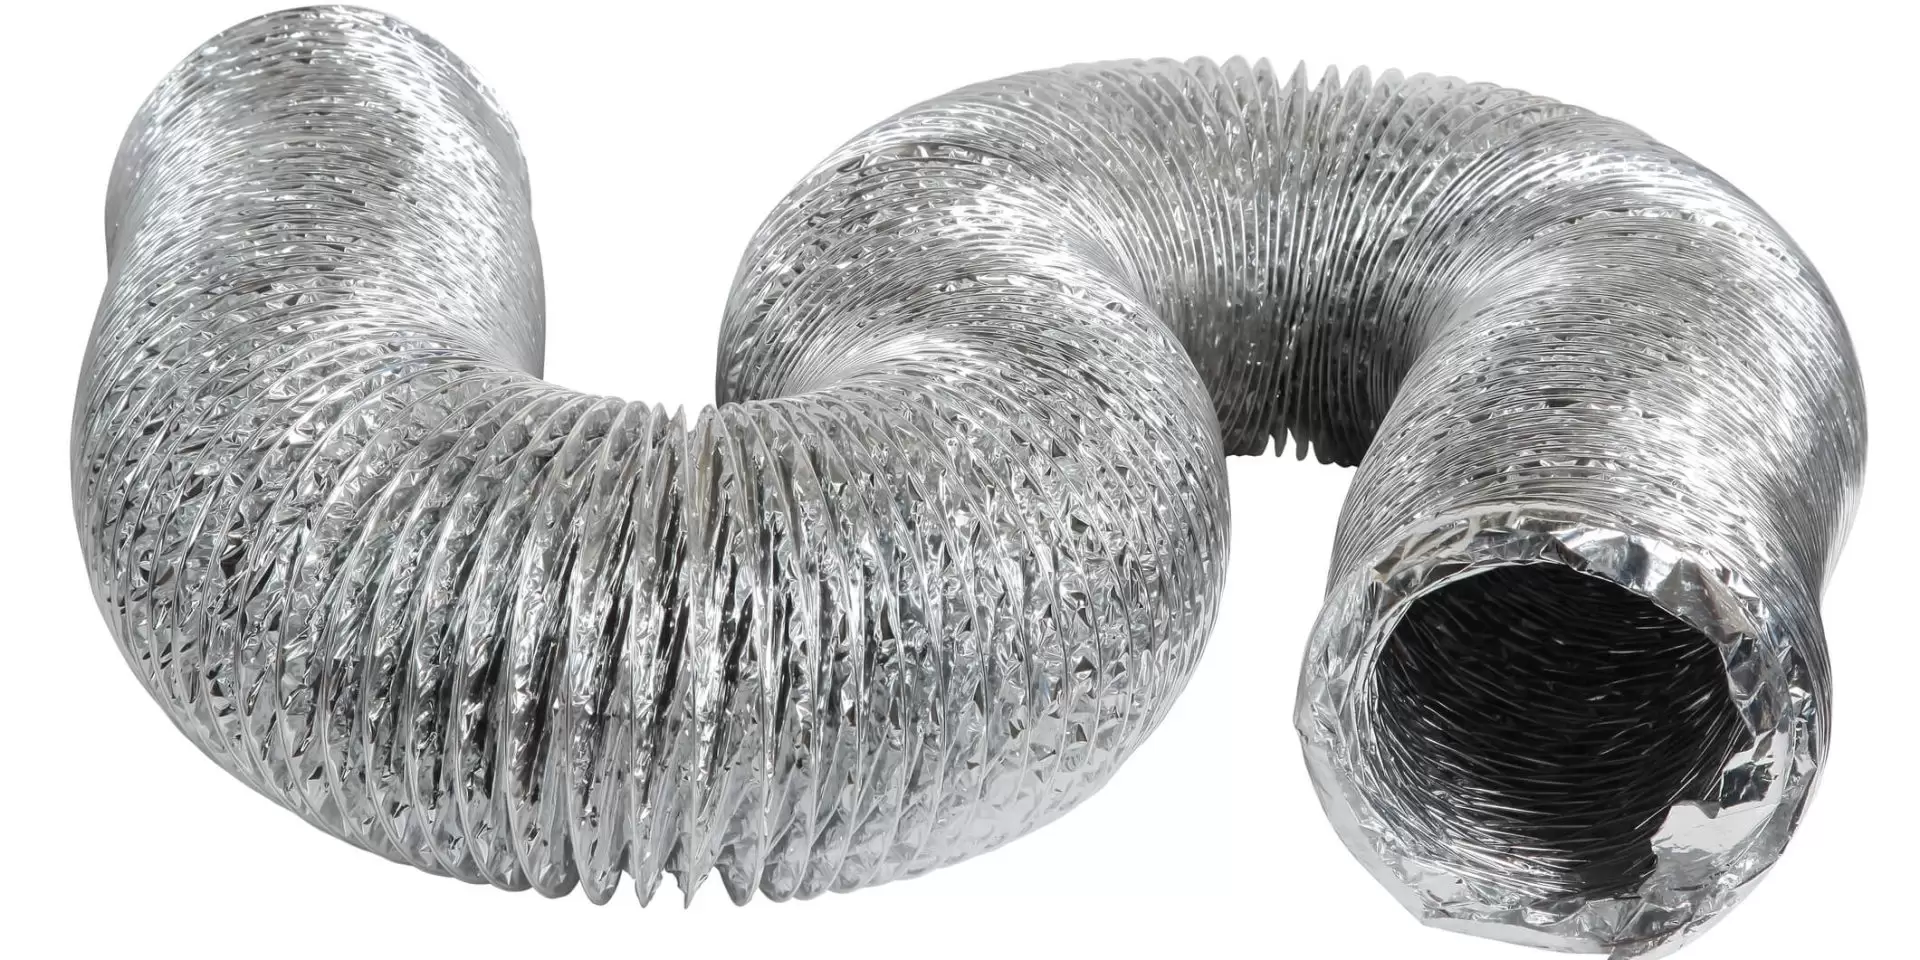
- Dryer vent hose: This is the flexible tube that connects the dryer to the vent outlet. It should be made of a durable material like aluminum or rigid metal.
- Dryer vent clamp: This clamp is used to secure the vent hose to the dryer and the vent outlet. It should be adjustable and sturdy.
- Screwdriver or drill: Depending on the type of clamp you have, you may need a screwdriver or a drill to tighten the clamp securely.
- Duct tape or metal foil tape: This will be used to create a tight seal between the vent hose and the dryer or vent outlet. It’s essential to use tape specifically designed for HVAC systems to ensure it can withstand the heat and airflow.
Once you have all the materials ready, you can proceed to the next step of locating the dryer vent outlet.
But before we move on, it’s crucial to mention that safety should always be a priority when working with any appliance. Ensure that the dryer is unplugged and turned off before attempting to connect the vent hose. Additionally, take caution when handling any tools and follow the manufacturer’s instructions for your specific dryer model.
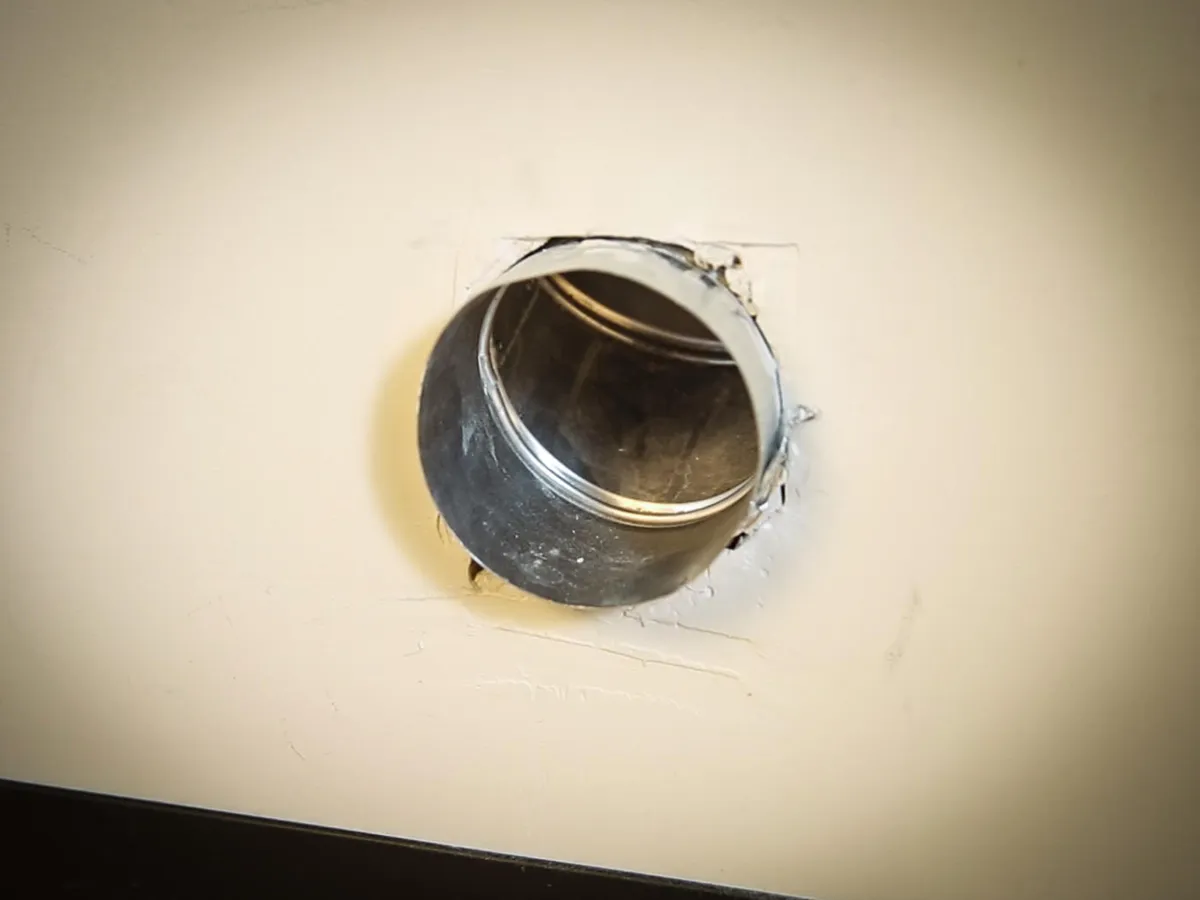
Step 2: Locate the dryer vent outlet
Locating the dryer vent outlet is an essential step in connecting the vent hose correctly. The vent outlet is where the hot air and moisture from the dryer will be directed to the outside of your home. Here’s how you can find it:
- Check behind the dryer: The vent outlet is typically located on the back of the dryer. Look for a round or rectangular opening with a cover or flap. It may be labeled as “Dryer Vent” or have an exhaust symbol.
- Follow the ductwork: If you cannot locate the vent outlet behind the dryer, you can follow the ductwork from the back of the machine. The ductwork usually runs vertically or horizontally and should lead you to the vent outlet.
- Inspect the exterior of your home: Once you have found the general area where the vent outlet should be, go outside and visually inspect the exterior of your home. Look for a vent cover or hood, usually made of metal or plastic. It may be located near the ground or higher up depending on your home’s design.
If you are having trouble locating the vent outlet, it’s important to consult your dryer’s manual or contact a professional for assistance. Connecting the vent hose to the wrong outlet can lead to inefficient airflow and potential damage to your dryer.
Once you have successfully located the dryer vent outlet, you are ready to move on to the next step: measuring and cutting the vent hose.
Step 3: Measure and cut the vent hose
One of the critical steps in connecting a dryer vent hose is ensuring the hose is the correct length and properly aligned. This step requires measuring and cutting the vent hose to fit the distance between the dryer and the vent outlet. Follow these steps to measure and cut the vent hose:
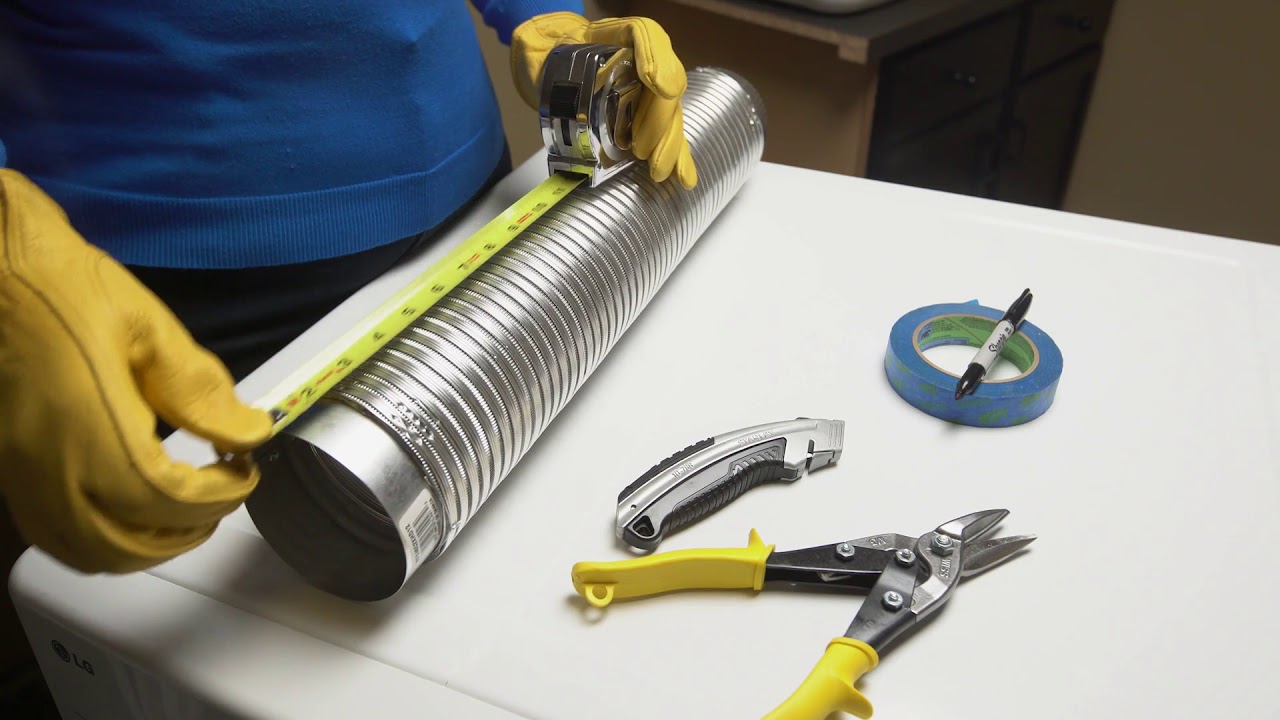
- Start by measuring the distance: Use a measuring tape to determine the distance between the dryer and the vent outlet. Measure from the back of the dryer to the location of the vent outlet. It’s important to have an accurate measurement to ensure a snug fit for optimal airflow.
- Add a few inches for flexibility: Add a few inches to your measurement to allow for flexibility when connecting the vent hose. This will prevent any strain or kinks in the hose, which can restrict airflow.
- Transfer the measurement to the vent hose: Use a marker or a piece of tape to mark the desired length on the vent hose. Ensure your mark is clear and visible.
- Secure the vent hose: Find a flat surface or vice to steady the vent hose while cutting. Use a sharp utility knife or a pair of tin snips to carefully cut the hose along your marked line. Take your time and make smooth, even cuts.
It’s important to note that if you are using a rigid metal vent hose, you may need a specialized tool, such as aviation snips, to cut it. Follow the manufacturer’s recommendations for cutting rigid metal hoses.
After cutting the vent hose to the appropriate length, visually inspect the cut ends for any burrs or sharp edges. Use sandpaper or a file to smooth out any rough edges, ensuring a secure and safe connection to the dryer and vent outlet.
Now that you have the correct length of vent hose, you can proceed to the next step: attaching the vent hose to the dryer.
Step 4: Attach the vent hose to the dryer
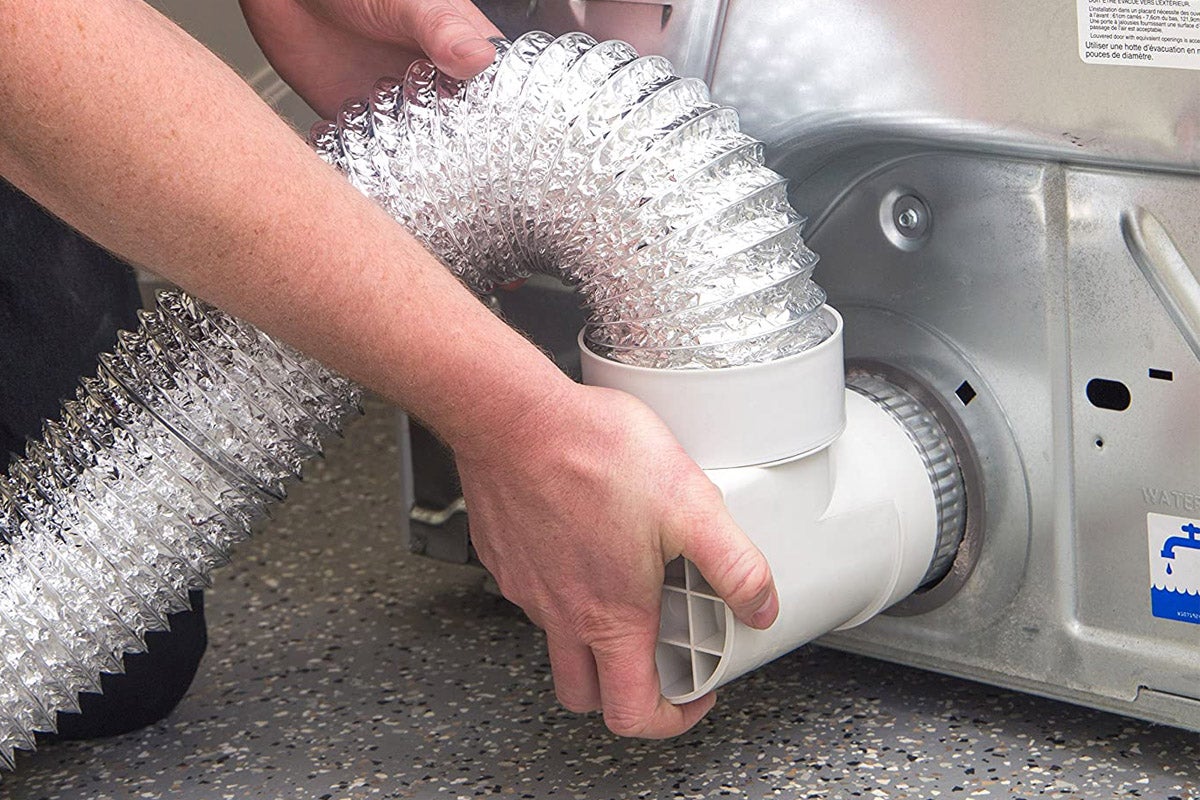
Now that you have measured and cut the vent hose to the correct length, it’s time to attach it to the dryer. Properly securing the vent hose will ensure efficient airflow and prevent it from coming loose during operation. Follow these steps to attach the vent hose to the dryer:
- Locate the dryer’s vent outlet: As mentioned in step 2, the vent outlet is typically located on the back of the dryer. Remove any existing hose or cover from the outlet.
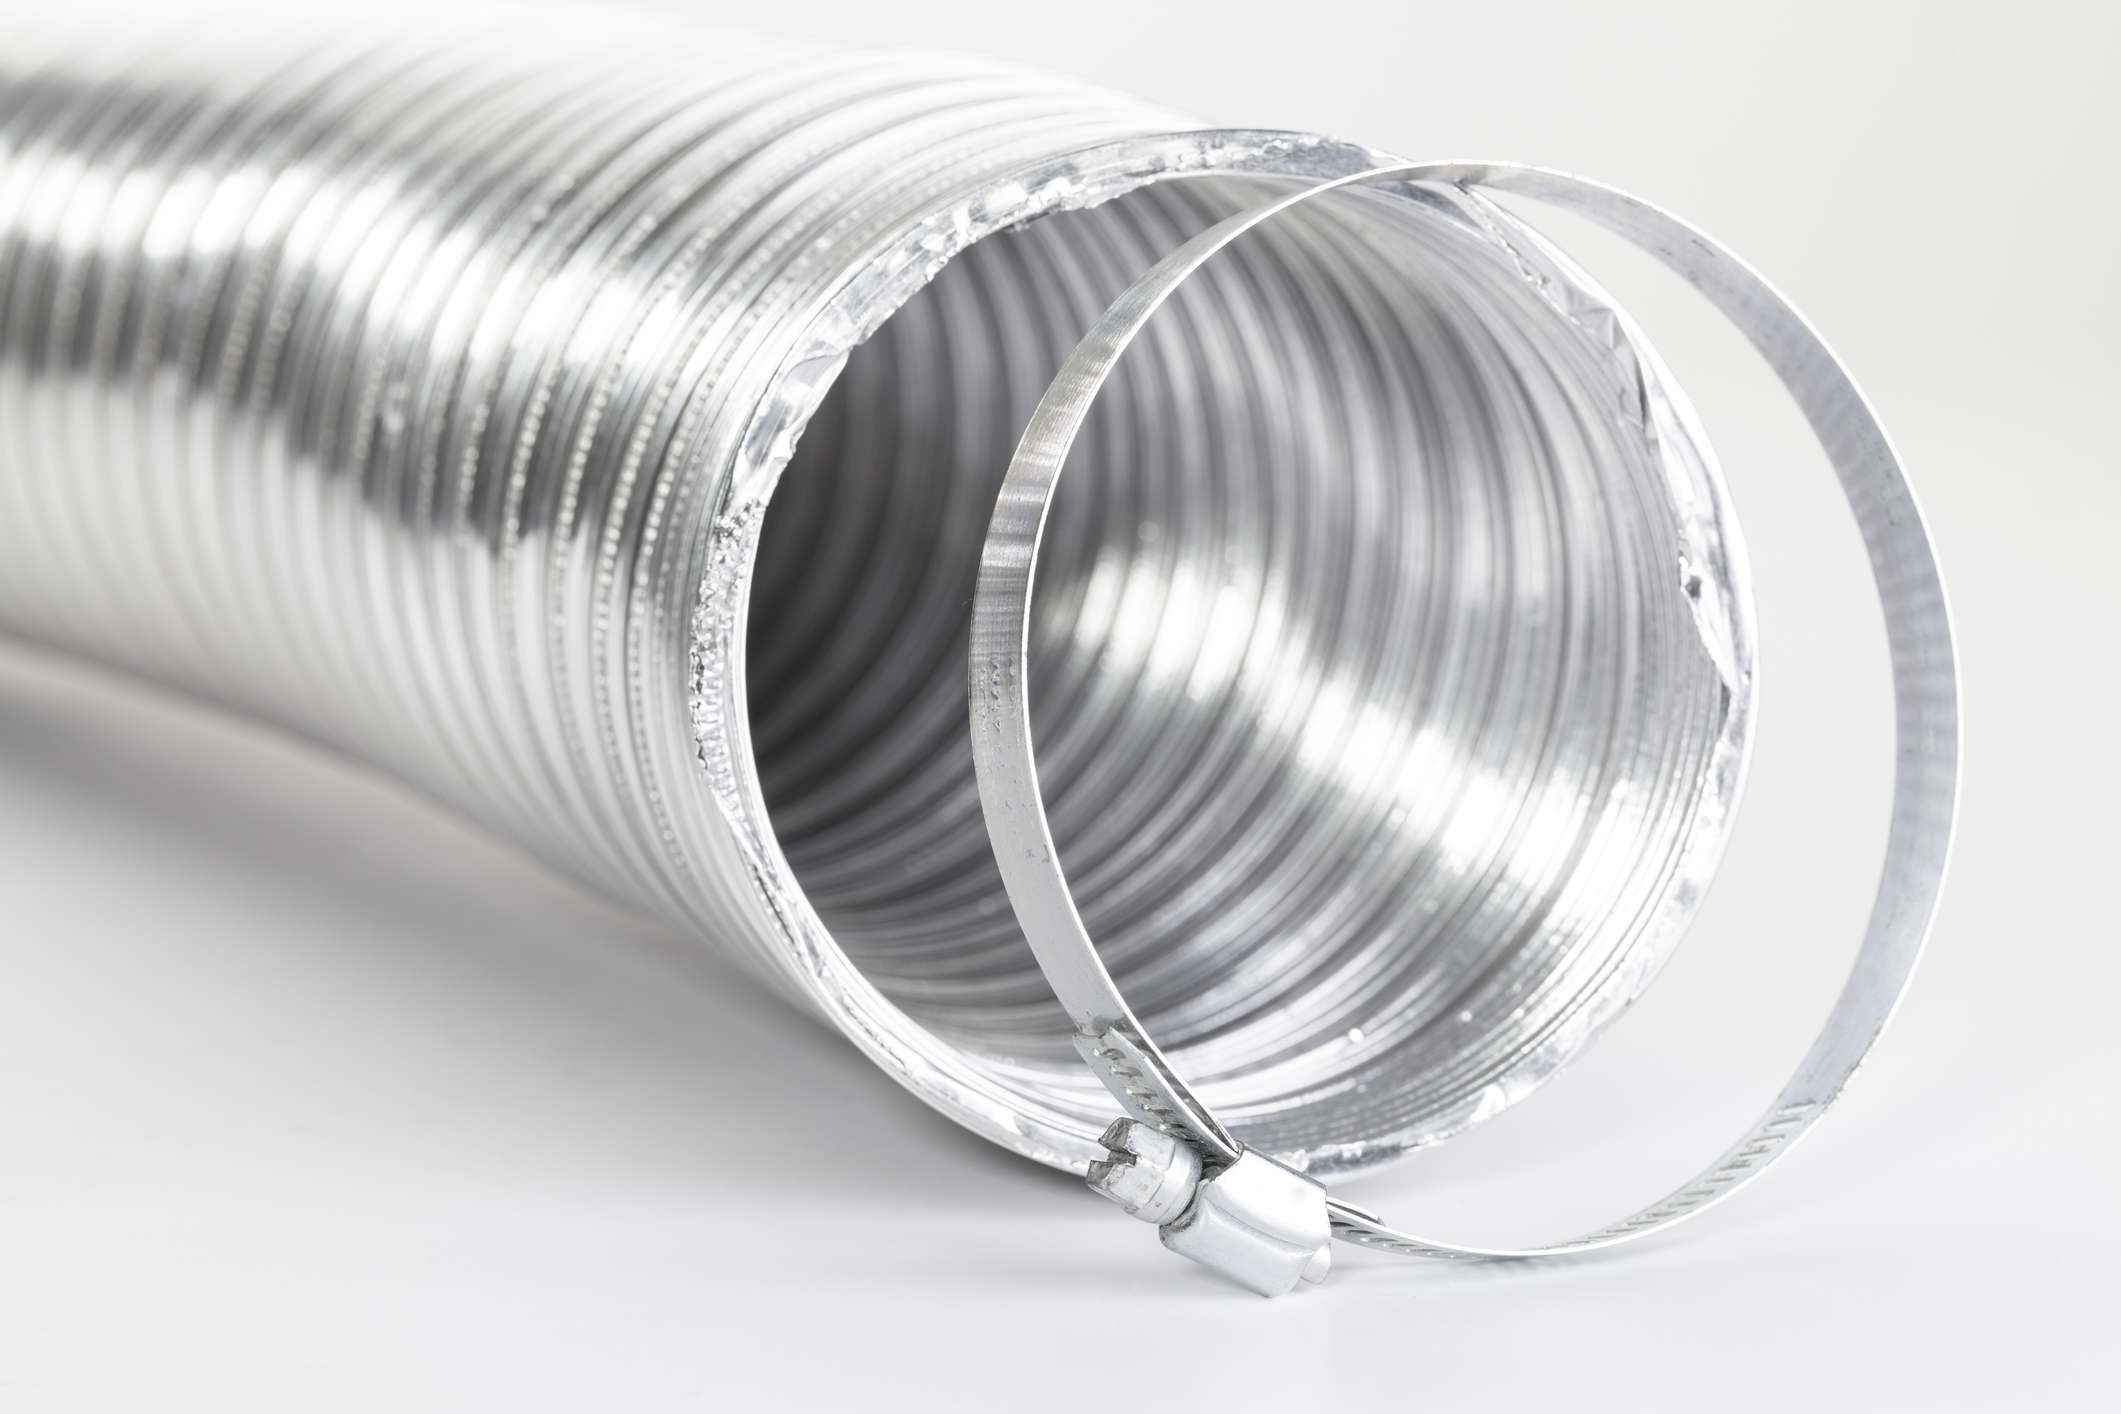
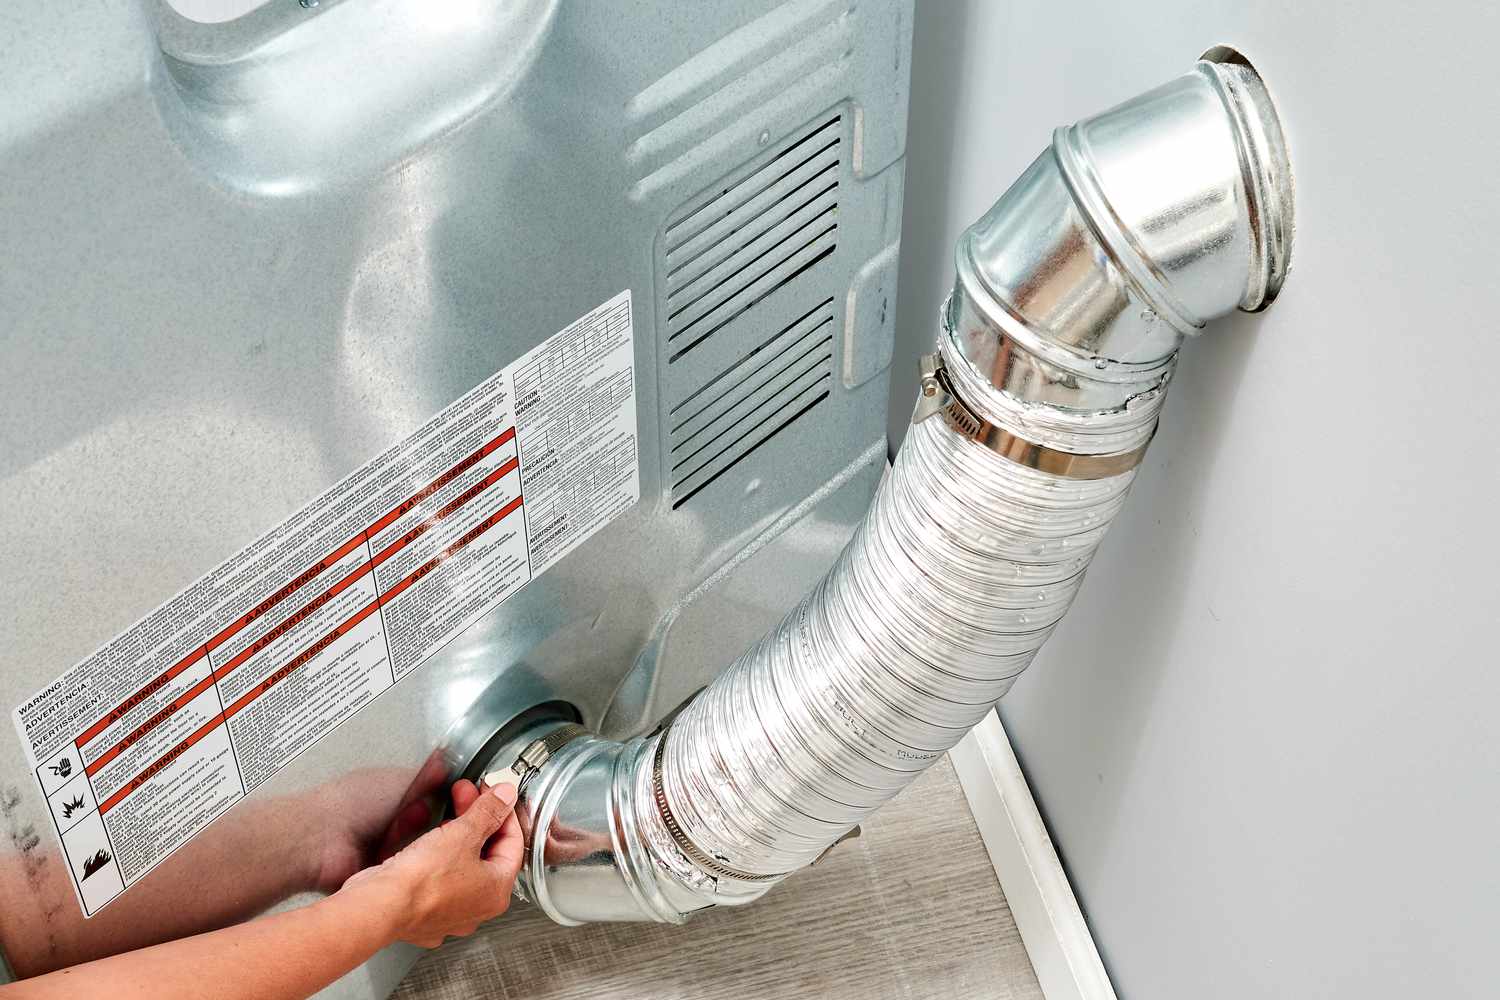
- Insert one end of the vent hose onto the dryer outlet: Carefully slide one end of the vent hose onto the dryer’s vent outlet. Make sure it fits snugly and securely. For added stability, you can use a vent clamp to hold the hose in place.
- Tighten the vent clamp: If your vent clamp requires a screwdriver or drill, use it to tighten the clamp securely around the vent hose and dryer outlet. This will prevent any potential leaks or disconnections.
Ensure that the vent hose is not kinked or bent at any point. Keep it as straight and free of obstructions as possible to promote efficient airflow.
Add a layer of duct tape or metal foil tape around the connection point to create an additional seal. This will help prevent any air leakage.
Once you have securely attached the vent hose to the dryer, you can move on to the next step: connecting the other end of the vent hose to the vent outlet.
Make sure to use a vent hose that is the correct size for your dryer and vent opening. Secure the hose with clamps to prevent it from coming loose and causing a fire hazard. Regularly clean the vent to prevent lint buildup.
Read more: How To Install Dryer Vent Hose
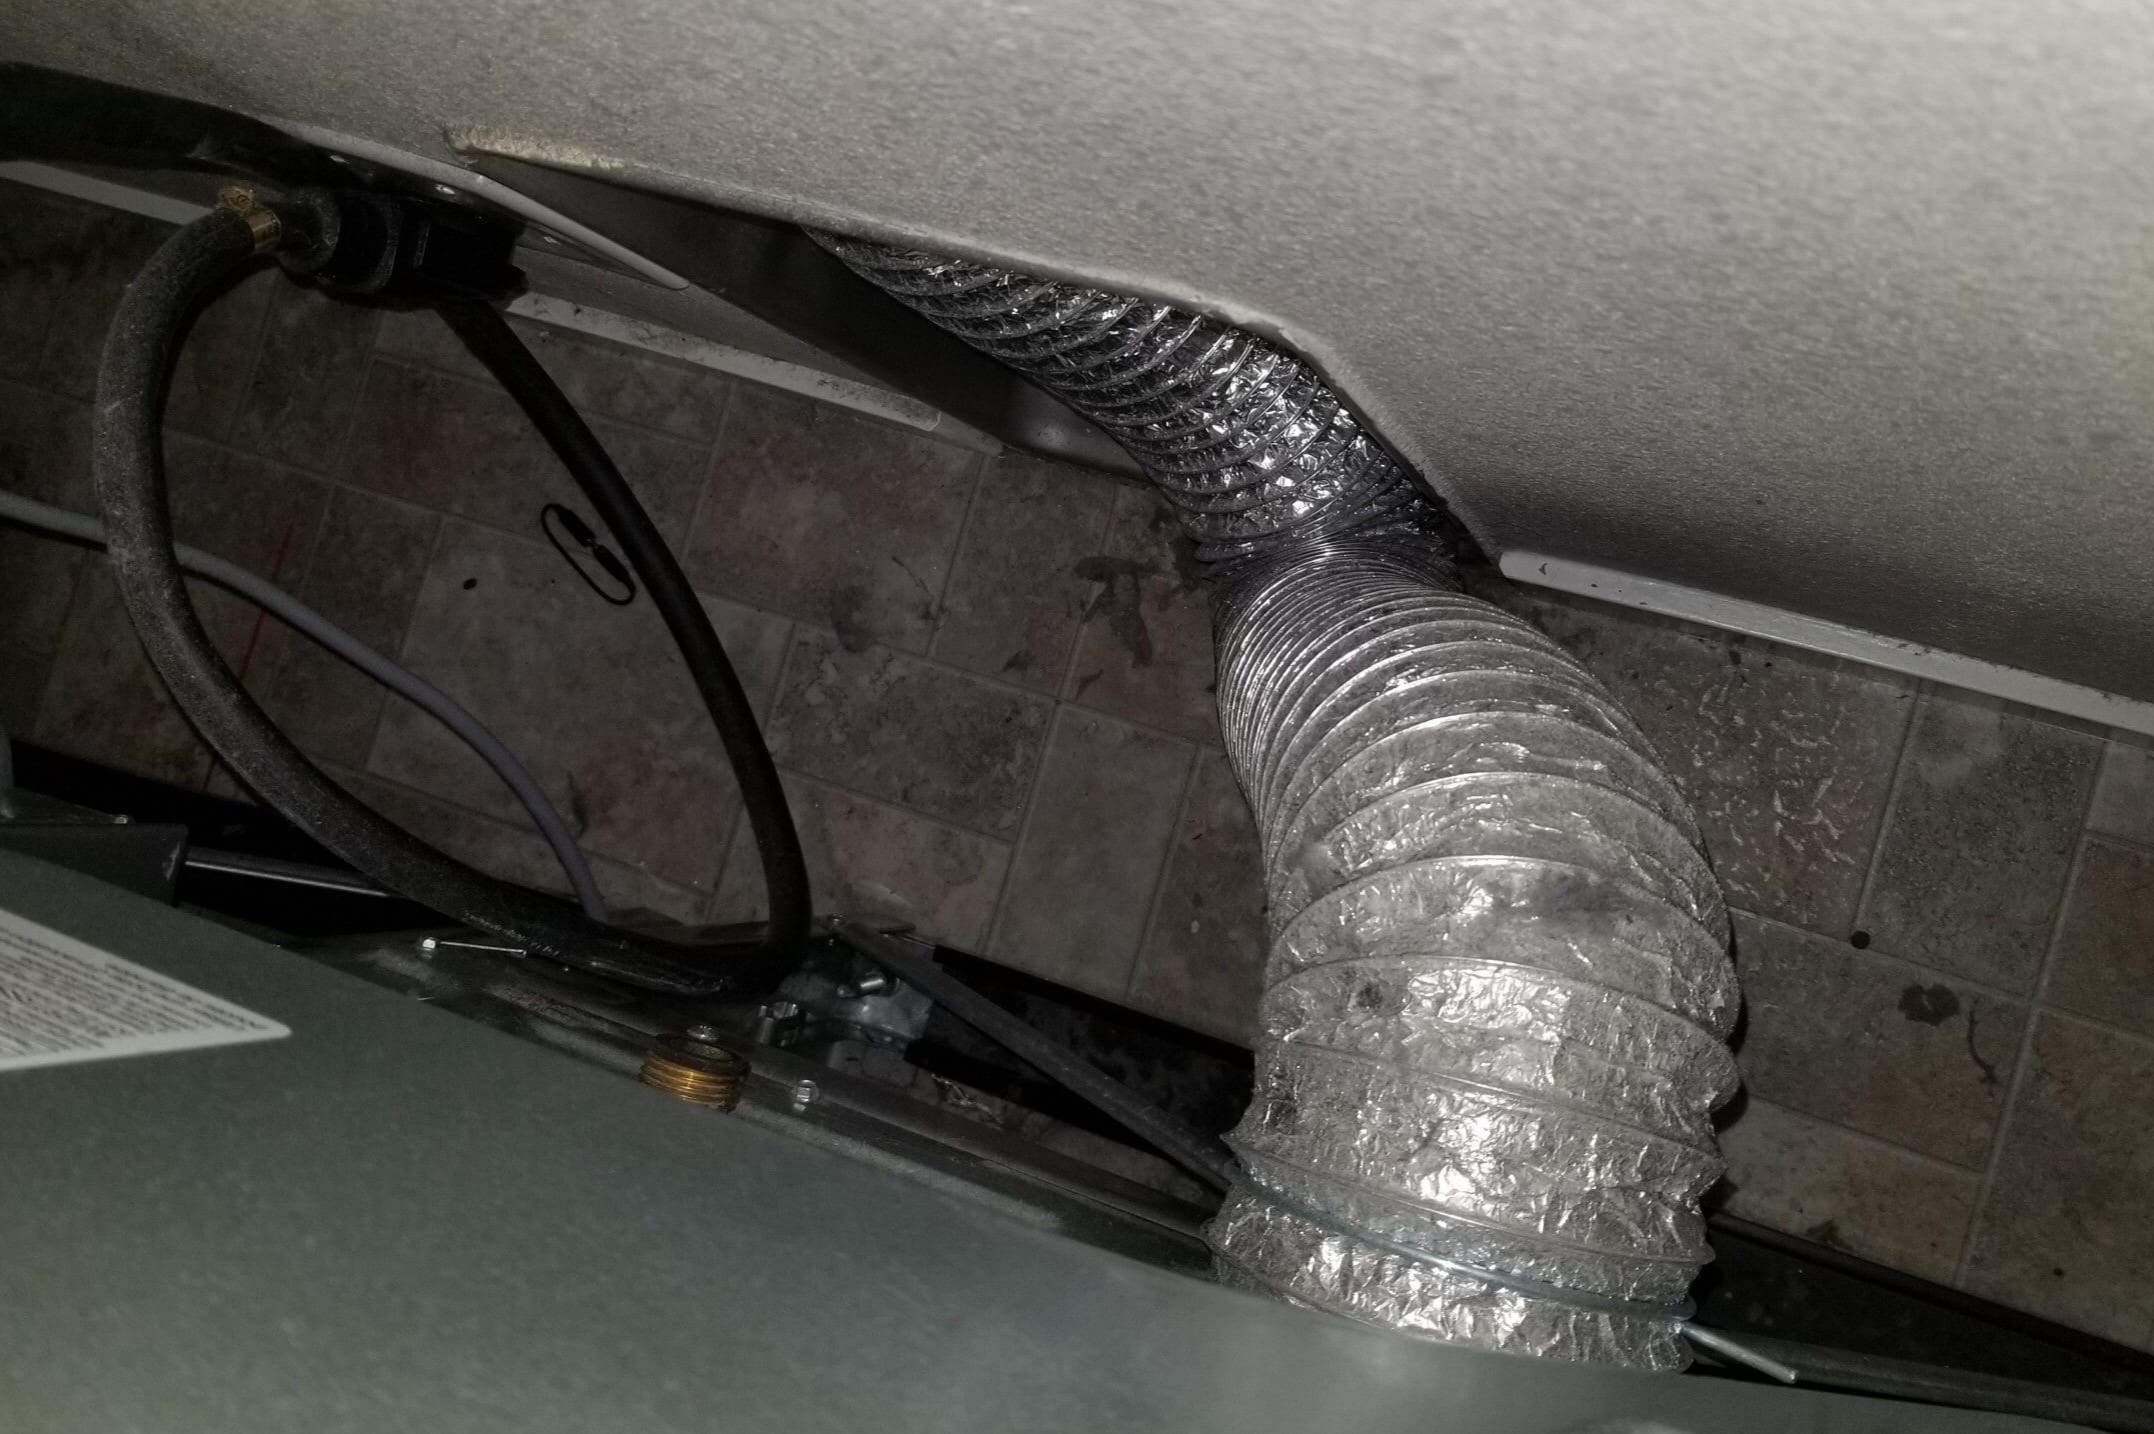
Step 5: Connect the other end of the vent hose to the vent outlet
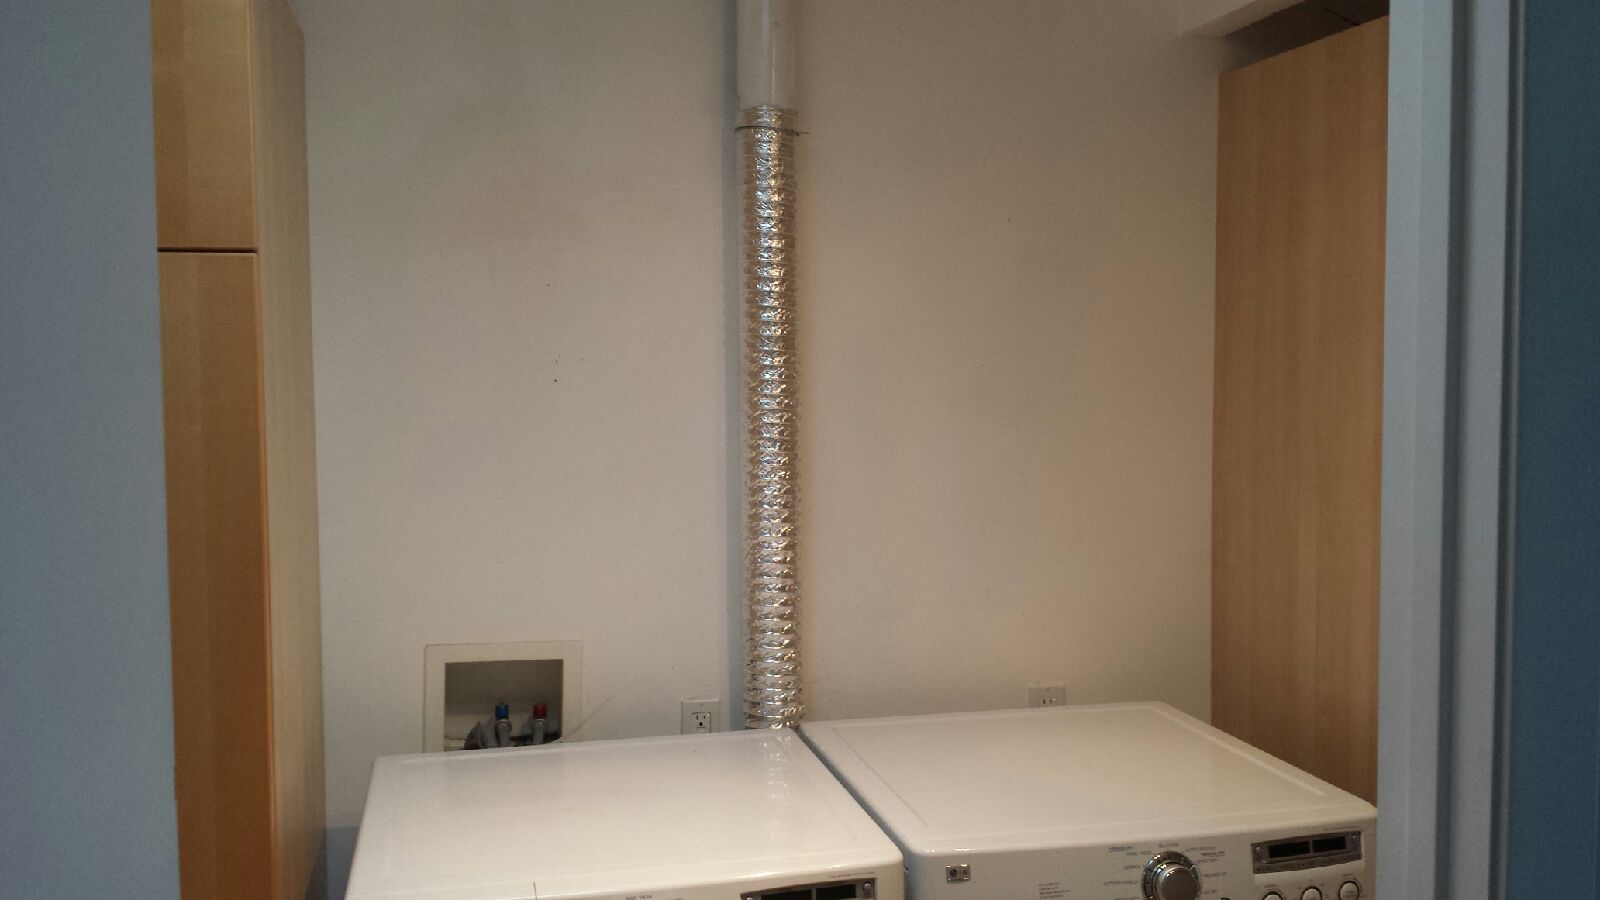
With the vent hose securely attached to the dryer, it’s time to connect the other end of the hose to the vent outlet. This outlet is usually located on an exterior wall or roof, allowing the hot air and moisture to be expelled from your home. Follow these steps to connect the vent hose to the vent outlet:
- Locate the vent outlet: Ensure that you have identified the correct vent outlet based on the steps mentioned earlier. It should be a designated opening with a vent cover or hood.
- Align the vent hose with the vent outlet: Position the other end of the vent hose near the vent outlet. Ensure that it is properly aligned and facing the same direction as the outlet. It should slide snugly onto the vent outlet.
- Attach the vent hose to the vent outlet: Depending on the type of vent outlet you have, you may need to use a clamp or other fastening mechanism to secure the vent hose in place. Follow the manufacturer’s instructions for your specific vent outlet to ensure proper attachment.
Similar to the connection at the dryer end, wrap a layer of duct tape or metal foil tape around the connection point to create a tight seal and minimize any air leakage. This will help maintain efficient airflow and prevent any potential problems.
Remember to check that the vent hose is not kinked or bent at any point. It should be a straight and unobstructed path from the dryer to the vent outlet.
Once you have successfully connected the vent hose to the vent outlet, you are ready to move on to the next step: securing the connections.
Step 6: Secure the connections
Securing the connections of the dryer vent hose is crucial to ensure proper airflow and prevent any potential leaks or disconnections. Follow these steps to secure the connections between the dryer, vent hose, and vent outlet:
- Check the clamps: Inspect the clamps that are holding the vent hose in place. Ensure that they are tight and secure. If necessary, use a screwdriver or drill to tighten the clamps further.
- Inspect for leaks: After tightening the clamps, visually inspect the connections for any signs of leaks. Look for any gaps or openings where air could escape. If you notice any leaks, reposition and tighten the connections or add an additional layer of duct tape or metal foil tape.
- Double-check alignment: Verify that the vent hose is properly aligned with both the dryer and the vent outlet. Make sure it is not twisted or kinked at any point along its length. A smooth and straight path will promote efficient airflow.
- Ensure clearance: Confirm that there is enough clearance between the dryer and the wall or any nearby objects. The vent hose should not be pressed against anything, as this can restrict airflow and potentially create a fire hazard.
- Perform a tug test: Carefully give the vent hose a gentle tug to ensure it is securely attached at both ends. It should not easily come loose or disconnect. If it feels loose, reexamine the connections and tighten them further if needed.
By securing the connections properly, you will minimize the risk of loose or disconnected hoses, which can hinder the performance of your dryer and pose a safety hazard.
With the connections securely in place, you’re almost done! The next and final step is to test the dryer vent airflow.
Step 7: Test the dryer vent airflow
Once you have completed the installation of the dryer vent hose, it’s essential to test the airflow to ensure proper ventilation. This step will help you identify any potential issues and make necessary adjustments. Follow these steps to test the dryer vent airflow:
- Remove any obstacles: Ensure that there are no obstructions blocking the vent outlet. Clear away any debris, lint, or other objects that may hinder the airflow.
- Turn on the dryer: Plug in the dryer and turn it on. Set it to a high heat cycle and let it run for a few minutes. This will generate hot air and moisture that should be expelled through the vent hose and outlet.
- Check for proper airflow: Go outside and locate the vent outlet. You should feel hot air and see moisture being expelled from the vent. If you do not feel any airflow or notice limited or weak airflow, there may be an issue with the vent hose or connections.
- Inspect for leaks: During the testing process, inspect the connections and vent hose for any signs of leaks. Look for gaps or openings where air could escape. If you find any leaks, reposition and tighten the connections or add an additional layer of duct tape or metal foil tape.
- Monitor dryer performance: While the dryer is running, pay attention to its performance. If you notice a decrease in drying efficiency, longer drying times, or excessive heat inside the dryer, it may indicate an airflow problem that requires further investigation.
If you encounter any issues with the dryer vent airflow or suspect a problem, it’s best to consult a professional technician or contact the manufacturer for assistance. They can offer guidance and help ensure that your dryer operates safely and efficiently.
With the dryer vent airflow successfully tested and any necessary adjustments made, congratulations! You have completed the process of connecting a dryer vent hose. Properly connecting the vent hose will not only improve the performance and efficiency of your dryer but also reduce the risk of fire hazards.
Remember to periodically check and clean your vent hose and vent outlet to maintain optimal airflow and prevent the buildup of lint and debris. Regular maintenance will help keep your dryer running smoothly for years to come.
Thank you for following this step-by-step guide. We hope it has been helpful in ensuring the proper connection and functionality of your dryer vent hose. Happy drying!
Conclusion
Connecting a dryer vent hose is an essential task to ensure the efficient and safe operation of your dryer. By following the steps outlined in this guide and taking the necessary precautions, you can successfully connect the vent hose and maintain optimal airflow. This will not only enhance the drying performance of your dryer but also minimize energy consumption and reduce the risk of fire hazards.
Throughout the process, we have emphasized the importance of safety. Always remember to unplug the dryer and turn it off before connecting the vent hose, and exercise caution when handling tools and equipment. Additionally, be sure to consult the manufacturer’s instructions and guidelines specific to your dryer model for the best practices.
From gathering the necessary materials to securing the connections and testing the airflow, each step contributes to the overall function and efficiency of your dryer. Taking the time to measure and cut the vent hose accurately, aligning and tightening the connections, and evaluating the airflow will ensure that your dryer operates optimally.
Regular maintenance, such as cleaning the vent hose and outlet and checking for any leaks or blockages, is also crucial to sustain the efficiency and safety of your dryer. By keeping the vent hose clean and clear, you can prevent lint buildup and improve the overall performance of the dryer.
Remember, if you encounter any difficulties or suspect any issues with the dryer vent hose or connections, it’s always recommended to seek professional assistance or consult the manufacturer. They will be able to provide expert guidance and address any concerns or potential problems.
By following this comprehensive guide, you have acquired the knowledge and skills necessary to connect a dryer vent hose effectively. Enjoy the benefits of a properly functioning dryer that efficiently removes hot air and moisture from your home and keeps your laundry fresh and dry.
Thank you for reading, and we hope this guide has been informative and helpful. Happy drying!
Frequently Asked Questions about How To Connect A Dryer Vent Hose
Was this page helpful?
At Storables.com, we guarantee accurate and reliable information. Our content, validated by Expert Board Contributors, is crafted following stringent Editorial Policies. We're committed to providing you with well-researched, expert-backed insights for all your informational needs.