Home>Home Appliances>Laundry Appliances>How To Connect A Washing Machine Drain Hose
Laundry Appliances
How To Connect A Washing Machine Drain Hose
Modified: October 20, 2024
Learn how to properly connect a washing machine drain hose for efficient and effective drainage. Get expert tips for installing laundry appliances.
(Many of the links in this article redirect to a specific reviewed product. Your purchase of these products through affiliate links helps to generate commission for Storables.com, at no extra cost. Learn more)
Introduction
Connecting a washing machine drain hose may seem like a daunting task, but with the right guidance and a few simple steps, you can easily accomplish this essential aspect of laundry appliance installation. The drain hose plays a crucial role in ensuring that the wastewater from your washing machine is efficiently and safely removed from your home. By properly connecting the drain hose, you can prevent potential leaks, water damage, and drainage issues, ultimately contributing to the smooth operation of your washing machine.
In this comprehensive guide, we will walk you through the process of connecting a washing machine drain hose, providing you with the knowledge and confidence to tackle this task with ease. Whether you are setting up a new washing machine or replacing an old drain hose, understanding the steps involved in connecting the drain hose will empower you to maintain a well-functioning laundry area.
By following the steps outlined in this guide, you will be able to ensure that your washing machine operates efficiently and that the wastewater is effectively directed to the appropriate drainage point. Additionally, by mastering this essential aspect of washing machine installation, you can contribute to the overall maintenance and longevity of your appliance, ultimately saving time and money in the long run.
Now, let's delve into the tools and materials you will need to successfully connect your washing machine drain hose.
Key Takeaways:
- Properly connecting a washing machine drain hose is crucial for efficient wastewater removal, preventing leaks and drainage issues. Gather the right tools and materials, find the drainage point, and secure the hose for a smooth operation.
- After connecting the hose, secure it in place to prevent displacement and ensure efficient drainage. Test the connection by running a test cycle, inspecting for leaks, and verifying proper water discharge to ensure a reliable installation.
Read more: How To Clean A Washing Machine Drain Hose
Tools and Materials Needed
Before embarking on the process of connecting a washing machine drain hose, it is essential to gather the necessary tools and materials to ensure a smooth and efficient installation. Here is a comprehensive list of items you will need:
Tools:
- Adjustable Wrench: This versatile tool will be used to tighten hose clamps and secure connections.
- Pliers: Pliers will come in handy for manipulating and securing hose clamps.
- Screwdriver: Depending on the type of hose clamps used, a flathead or Phillips screwdriver may be required for tightening or loosening clamps.
- Bucket: Having a bucket on hand will allow you to catch any water that may spill during the installation process, minimizing potential mess and water damage.
- Level: A level will help ensure that the washing machine is properly positioned, which is crucial for the efficient drainage of water.
Materials:
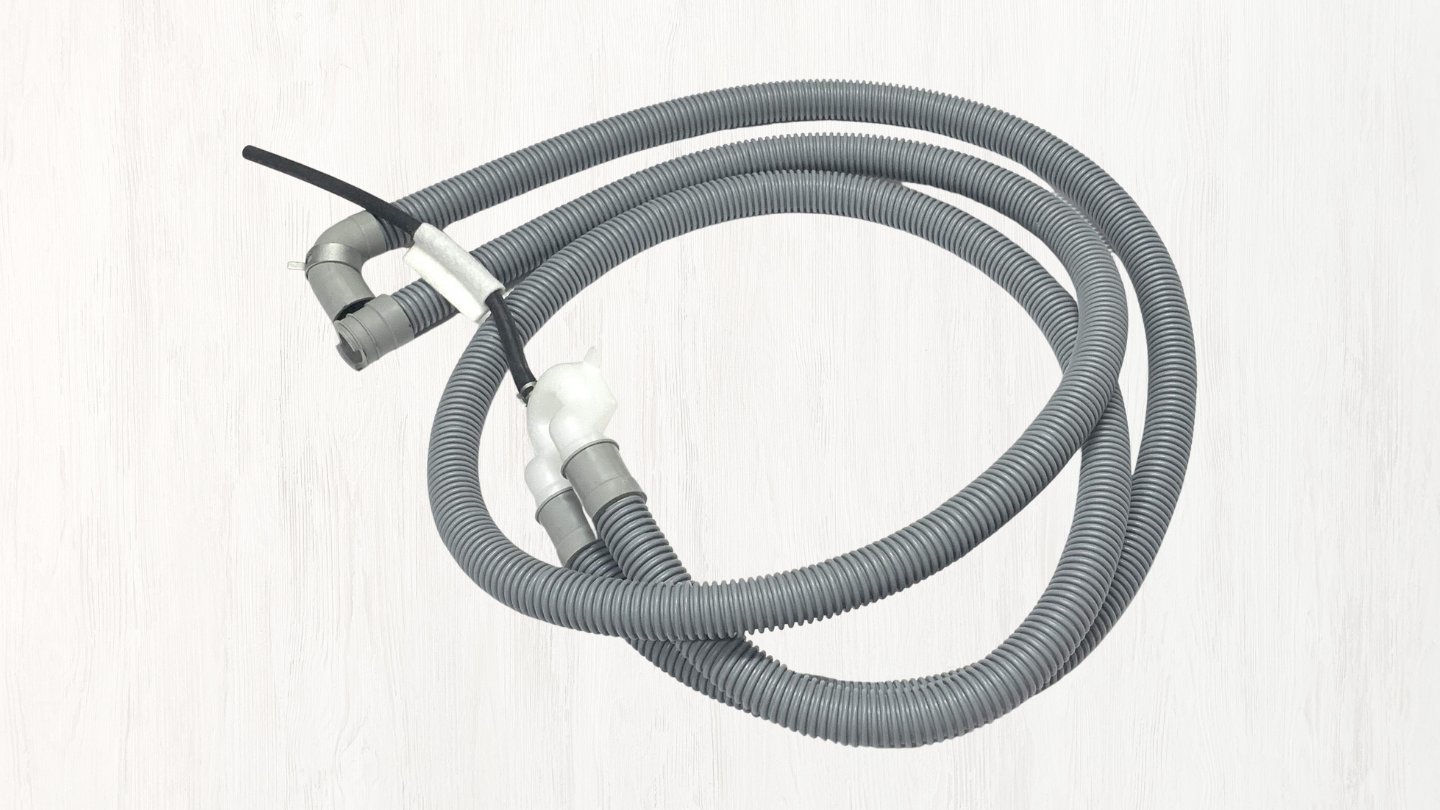
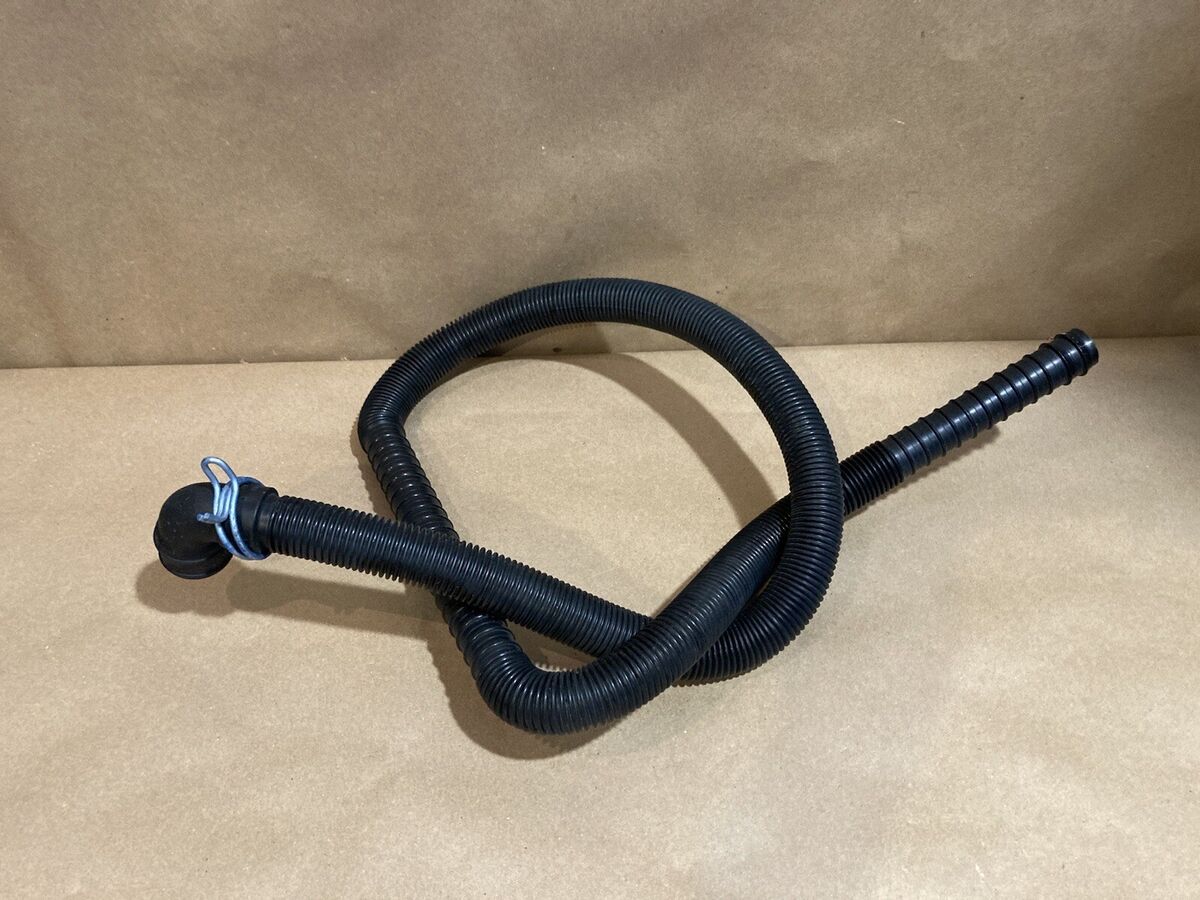
- Washing Machine Drain Hose: Ensure that you have a high-quality, durable drain hose that is compatible with your washing machine model. The hose should be long enough to reach the drainage point without being stretched or kinked.
- Hose Clamps: Depending on the type of hose and drainage point, you may need hose clamps to secure the connections and prevent leaks.
- Plumber's Tape: Also known as Teflon tape, this material is used to create a tight seal between threaded connections, reducing the risk of leaks.
- Rubber Washer: If your washing machine drain hose connects to a standpipe or laundry tub, a rubber washer will help create a secure and watertight seal.
- Owner's Manual: It is always helpful to have the washing machine's owner's manual on hand to reference specific instructions or guidelines provided by the manufacturer.
By ensuring that you have these tools and materials readily available, you can streamline the process of connecting your washing machine drain hose and minimize the likelihood of encountering unexpected challenges during the installation. With these essentials at your disposal, you are well-equipped to proceed to the next steps of finding the drainage point and connecting the hose.
Finding the Drainage Point
Before connecting the washing machine drain hose, it is crucial to identify the most suitable drainage point for the efficient removal of wastewater. The drainage point is the location where the water from the washing machine will be discharged, and finding the optimal position for this connection is essential for the proper functioning of the appliance.
-
Locate the Standpipe or Utility Sink: In most homes, the standard drainage point for a washing machine is a standpipe, which is a vertical pipe connected to a P-trap that allows for the safe disposal of wastewater. The standpipe is typically located near the washing machine and is designed to accommodate the drain hose. Alternatively, some laundry areas may feature a utility sink as the drainage point, providing a convenient location for connecting the washing machine drain hose.
-
Check for Existing Connections: If you are replacing an old washing machine or drain hose, it is important to inspect the existing drainage point for any signs of damage, blockages, or leaks. Ensure that the standpipe or utility sink is clear of debris and obstructions, as this will facilitate a smooth connection for the new drain hose.
-
Assess Accessibility and Height: When identifying the drainage point, consider the accessibility and height of the standpipe or utility sink in relation to the washing machine. The ideal drainage point should be easily accessible for connecting and securing the drain hose, and its height should comply with the manufacturer's guidelines to facilitate proper drainage without the risk of backflow.
-
Evaluate Drainage Requirements: Different washing machine models may have specific requirements regarding the placement and configuration of the drain hose. Refer to the washing machine's owner's manual to determine the recommended height and positioning of the drainage point, as well as any additional guidelines provided by the manufacturer.
-
Ensure Proper Ventilation: Proper ventilation of the drainage point is essential to prevent airlocks and ensure the efficient flow of wastewater. If the standpipe lacks adequate ventilation, it may lead to drainage issues and potential backups. Verify that the drainage point is properly vented to promote smooth water discharge from the washing machine.
By carefully assessing these factors and locating the most suitable drainage point, you can lay the groundwork for a successful connection of the washing machine drain hose. Once the drainage point has been identified, you can proceed to the next step of connecting the hose to facilitate the seamless removal of wastewater during the laundry cycles.
Read more: How To Hook Up A Washer Drain Hose
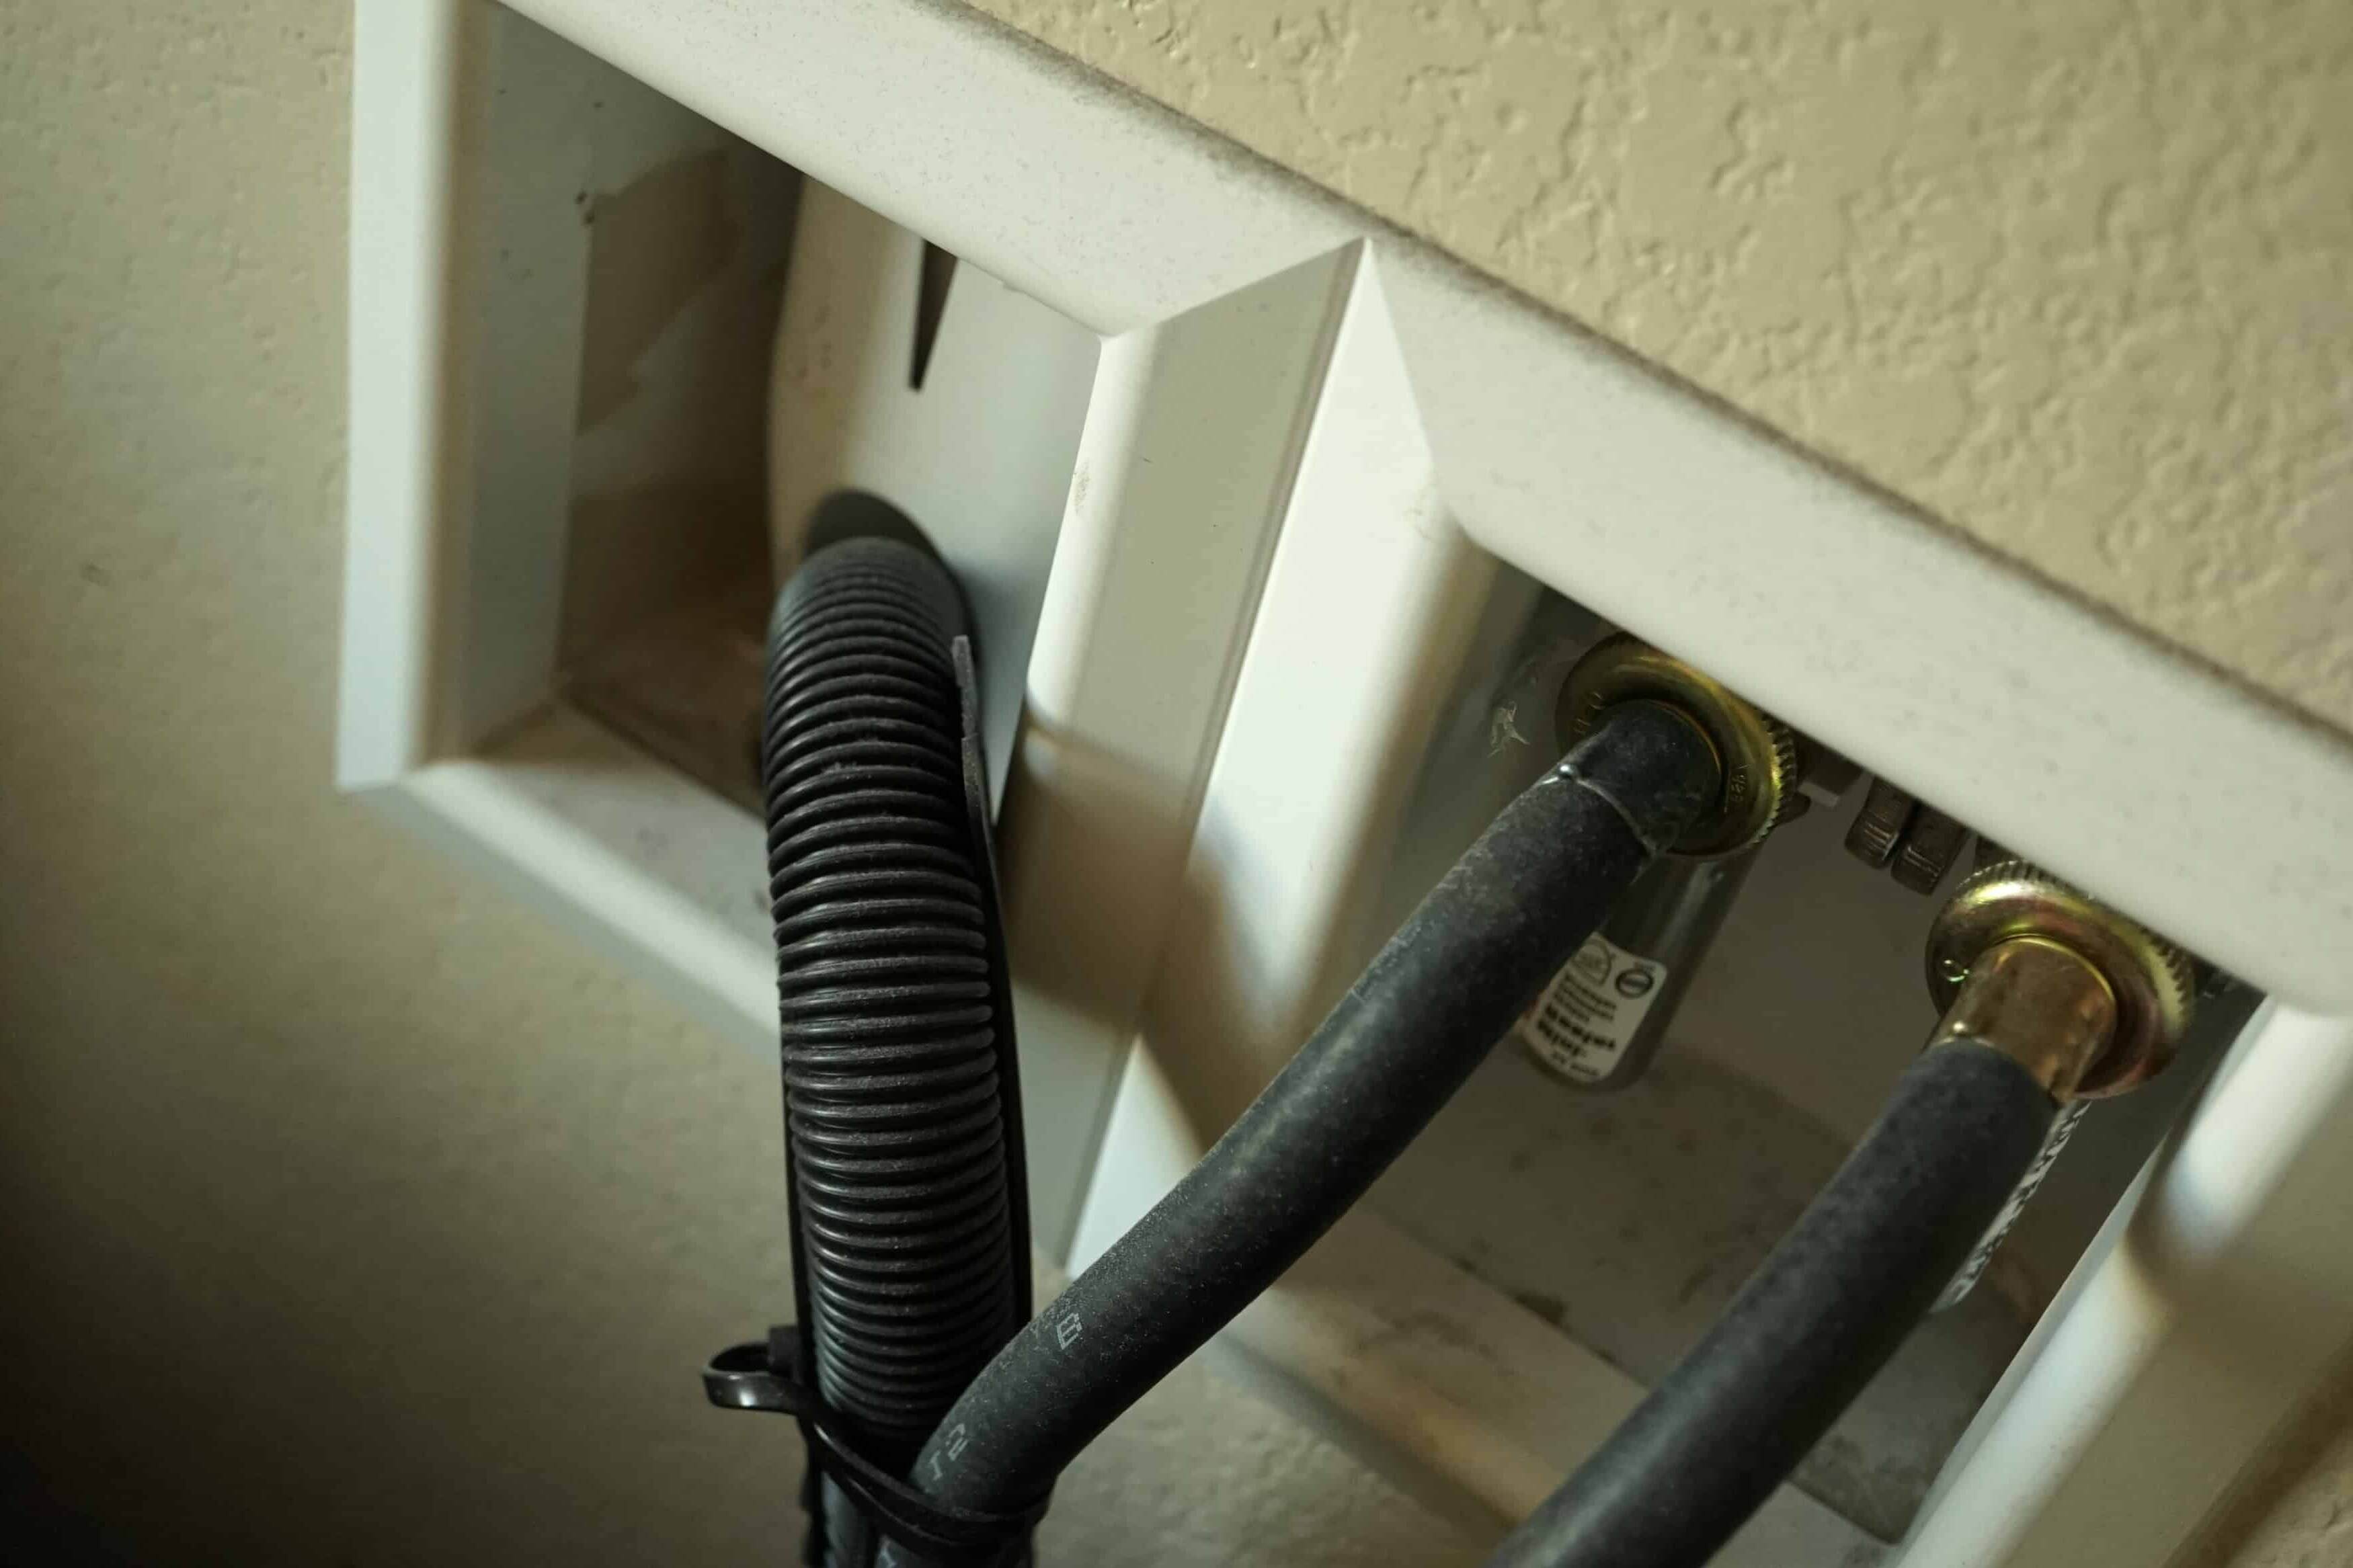
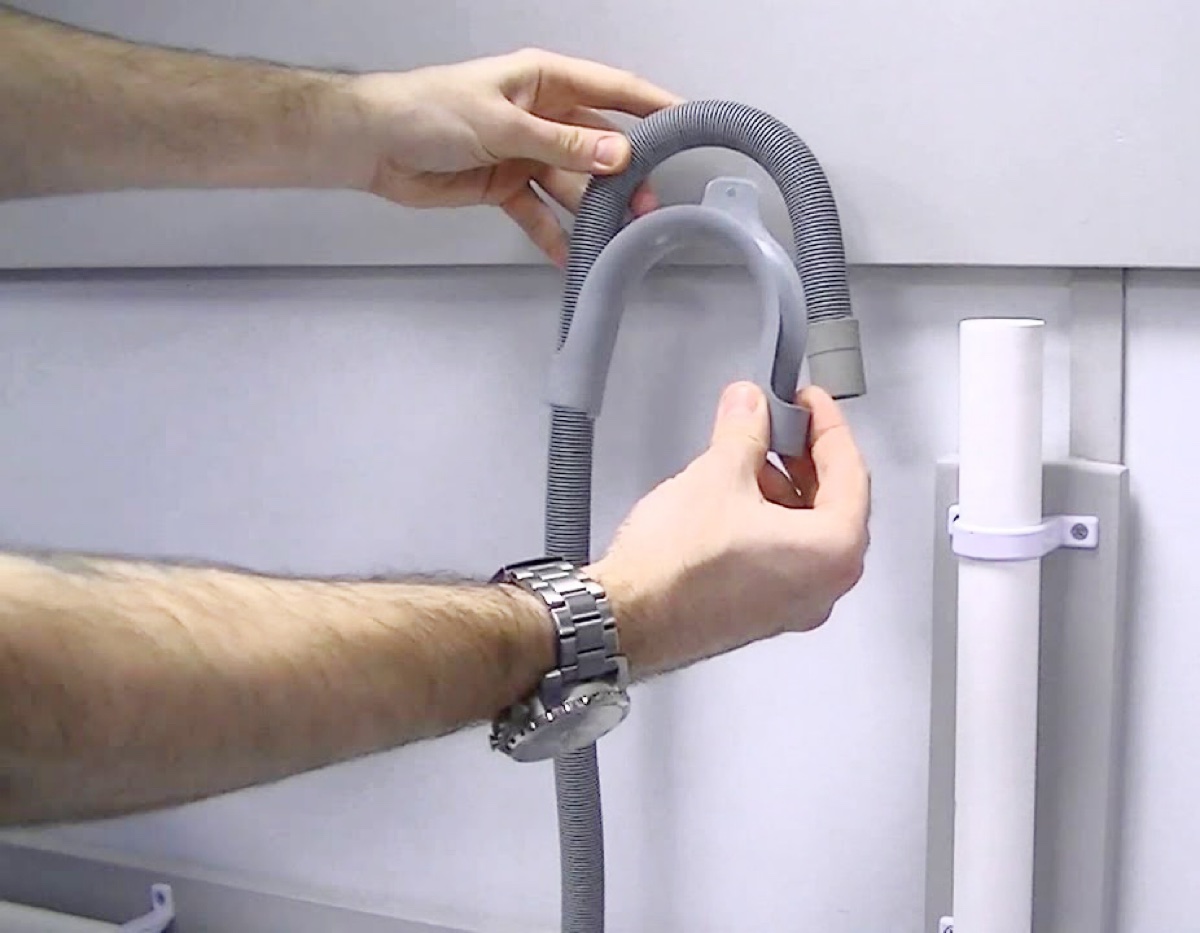
Connecting the Hose to the Drainage Point
Once you have identified the optimal drainage point for your washing machine, the next step is to connect the drain hose to facilitate the efficient removal of wastewater. Properly securing the hose to the drainage point is essential for preventing leaks and ensuring that the wastewater is effectively directed out of your home. Follow these steps to successfully connect the hose to the drainage point:
-
Position the Washing Machine: Before connecting the drain hose, ensure that the washing machine is positioned near the drainage point, allowing for easy access to the standpipe or utility sink. The proximity of the washing machine to the drainage point will facilitate a seamless connection and minimize the risk of kinks or bends in the hose.
-
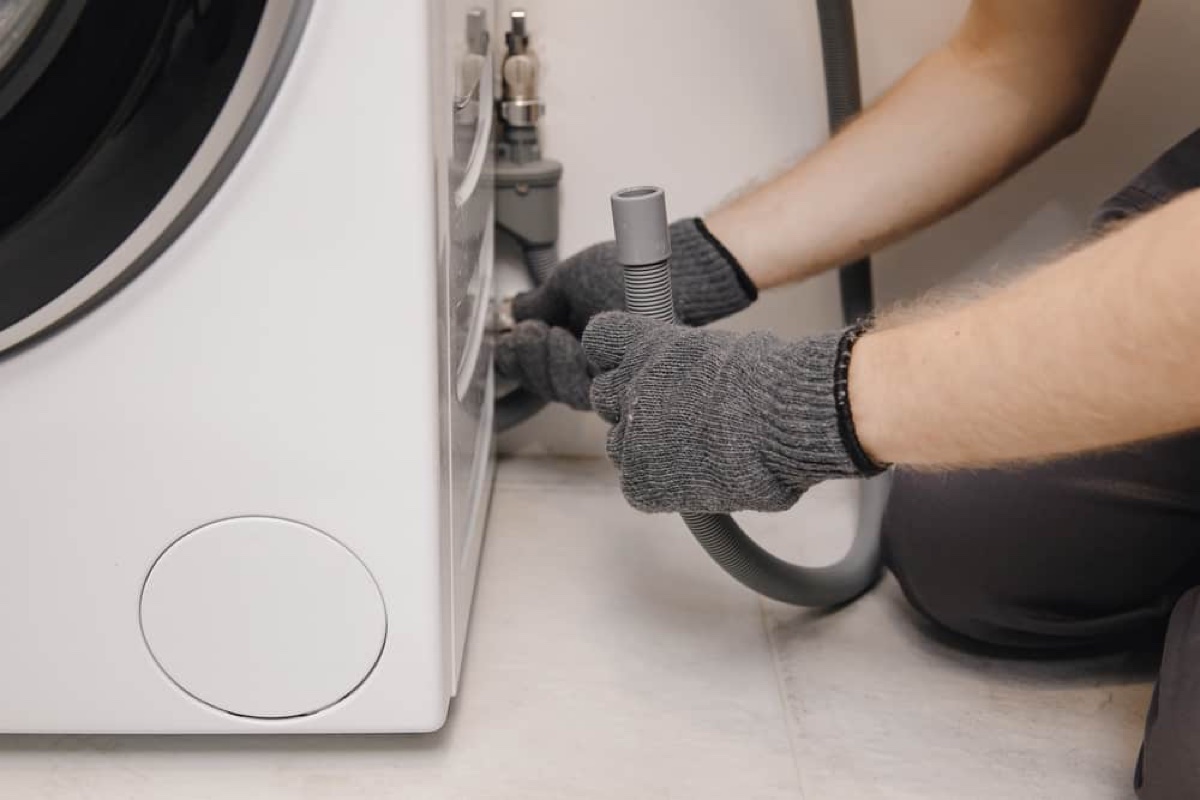
Attach the Hose to the Standpipe or Utility Sink: If your washing machine utilizes a standpipe as the drainage point, carefully insert the end of the drain hose into the standpipe, ensuring a snug fit. For added security, use a hose clamp to secure the connection, preventing the hose from dislodging during the water discharge process. If a utility sink serves as the drainage point, connect the hose to the sink's drainage outlet, ensuring a tight and secure fit.
-
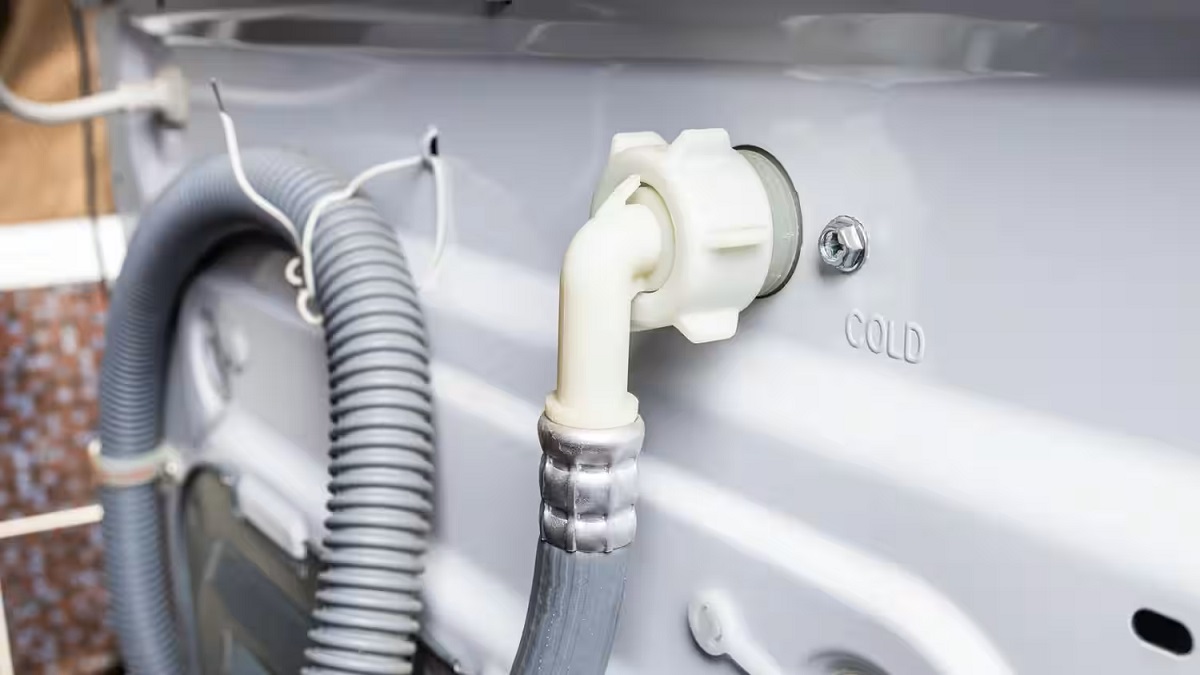
Create a Watertight Seal: To prevent leaks and ensure efficient drainage, it is essential to create a watertight seal between the drain hose and the standpipe or utility sink. If the connection involves threaded components, apply plumber's tape (Teflon tape) to the threaded ends of the hose to create a tight seal and minimize the risk of water seepage.
-
Check for Proper Alignment: Once the hose is connected to the drainage point, verify that it is properly aligned and free of any kinks or twists. A straight and unobstructed hose will facilitate the smooth flow of wastewater, preventing potential drainage issues and backups during the washing machine's operation.
-
Refer to the Manufacturer's Guidelines: It is important to consult the washing machine's owner's manual for specific instructions or recommendations regarding the connection of the drain hose. The manufacturer may provide detailed guidelines on the proper positioning and attachment of the hose to ensure optimal performance and drainage efficiency.
By following these steps and ensuring a secure and proper connection between the drain hose and the drainage point, you can effectively facilitate the removal of wastewater from your washing machine. With the hose securely attached, you are ready to proceed to the next step of securing the hose in place to prevent displacement during the washing machine's operation.
Securing the Hose in Place
Once the washing machine drain hose is connected to the drainage point, it is crucial to secure the hose in place to prevent displacement and ensure the smooth operation of the appliance. Properly securing the hose not only minimizes the risk of leaks and potential water damage but also contributes to the overall safety and efficiency of the washing machine's drainage system. Follow these essential steps to effectively secure the hose in place:
1. Utilize Hose Clamps:
Using hose clamps is a reliable method to secure the drain hose to the standpipe or utility sink. Position the hose clamp over the connection point and tighten it using a screwdriver or pliers, ensuring a snug and secure fit. The use of hose clamps provides added stability, preventing the hose from detaching during the washing machine's drainage cycles.
2. Avoid Kinks and Bends:
Ensure that the drain hose is free of kinks, bends, or sharp angles that could impede the flow of wastewater. A straight and unobstructed hose allows for the unhindered discharge of water, minimizing the risk of blockages and drainage issues. Position the hose in a manner that promotes a smooth and continuous flow of wastewater from the washing machine to the drainage point.
Read more: How To Extend A Washing Machine Drain Hose
3. Secure Elevated Sections:
If the drain hose features elevated sections or loops, secure these areas to prevent sagging or drooping. Use cable ties or adjustable straps to fasten the elevated portions of the hose to nearby plumbing or structural elements. By securing elevated sections, you can maintain the proper slope and alignment of the hose, facilitating efficient drainage without the risk of water accumulation.
4. Verify Stability:
After securing the hose in place, verify the stability of the entire assembly. Gently tug on the hose to ensure that it remains firmly attached to the drainage point without any signs of loosening or displacement. Confirm that the hose is securely positioned and that all connections are tight and leak-free.
5. Consider Manufacturer Recommendations:
Refer to the washing machine's owner's manual for any specific recommendations provided by the manufacturer regarding the securing of the drain hose. The manual may offer insights into best practices for securing the hose and maintaining optimal drainage performance, ensuring that you adhere to the manufacturer's guidelines for the safe and effective operation of the appliance.
By following these steps and implementing proper measures to secure the drain hose in place, you can uphold the integrity of the washing machine's drainage system and minimize the likelihood of potential issues related to hose displacement or leaks. With the hose securely fastened and aligned, you are now prepared to proceed to the final step of testing the connection to validate the efficiency of the drainage system.
Testing the Connection
After connecting and securing the washing machine drain hose, it is imperative to conduct a thorough assessment of the connection to ensure its reliability and effectiveness. Testing the connection serves as a critical step in the installation process, allowing you to verify that the drainage system operates as intended and that the washing machine can discharge wastewater without encountering any issues. Follow these essential steps to methodically test the connection and validate the efficiency of the drainage system:
-
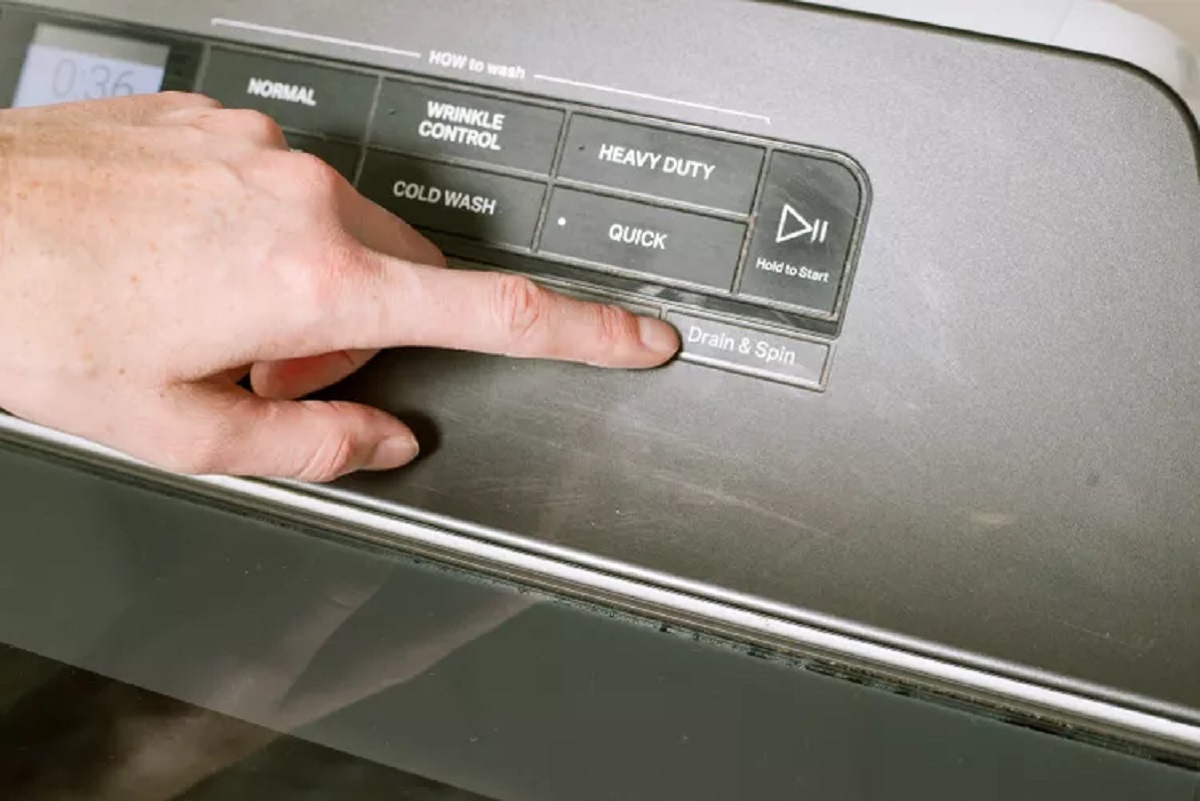
Run a Test Cycle: Initiate a test cycle on the washing machine to activate the drainage process. Allow the machine to complete a full cycle, including the washing, rinsing, and draining phases. Observing the drainage process during a test cycle enables you to monitor the flow of wastewater and identify any potential leaks or irregularities in the drainage system.
-
Inspect for Leaks: While the test cycle is in progress, carefully inspect the connection points, including the junction between the drain hose and the standpipe or utility sink. Look for any signs of water seepage, drips, or moisture accumulation around the connections. Thoroughly examine the entire length of the drain hose to ensure that it remains leak-free and properly secured throughout the drainage process.
-
Observe Water Discharge: As the washing machine enters the draining phase of the test cycle, observe the discharge of wastewater from the drain hose. Verify that the water flows smoothly and consistently without any interruptions or backflow. A steady and unhindered discharge of water indicates that the connection is functioning effectively, facilitating the removal of wastewater from the washing machine.
-
Check for Proper Drainage: After the test cycle is complete, inspect the drainage point, such as the standpipe or utility sink, to ensure that the wastewater has been effectively removed from the washing machine. Confirm that the drainage point exhibits no signs of blockages or backups, and that the water has been efficiently directed out of the home without any residual pooling or overflow.
-
Monitor Hose Stability: Throughout the test cycle, monitor the stability of the drain hose and its connections. Verify that the hose remains securely fastened to the drainage point and that the hose clamps, if utilized, maintain their tight grip. Additionally, ensure that the hose maintains its proper alignment and slope, promoting efficient drainage without the risk of sagging or displacement.
By meticulously testing the connection and assessing the performance of the drainage system, you can validate the successful installation of the washing machine drain hose. Any issues or concerns identified during the testing process can be promptly addressed, ensuring that the drainage system operates reliably and contributes to the seamless functionality of the washing machine. With the connection thoroughly tested and confirmed to meet the necessary standards, you can proceed with confidence, knowing that the washing machine is equipped with a dependable and efficient drainage solution.
Frequently Asked Questions about How To Connect A Washing Machine Drain Hose
Was this page helpful?
At Storables.com, we guarantee accurate and reliable information. Our content, validated by Expert Board Contributors, is crafted following stringent Editorial Policies. We're committed to providing you with well-researched, expert-backed insights for all your informational needs.


0 thoughts on “How To Connect A Washing Machine Drain Hose”