Home>Home Maintenance>How To Unhook A Dryer Vent

Home Maintenance
How To Unhook A Dryer Vent
Modified: March 6, 2024
Learn how to properly unhook a dryer vent in your home for effective home maintenance. Follow our step-by-step guide to ensure safety and efficient operation of your dryer.
(Many of the links in this article redirect to a specific reviewed product. Your purchase of these products through affiliate links helps to generate commission for Storables.com, at no extra cost. Learn more)
Introduction
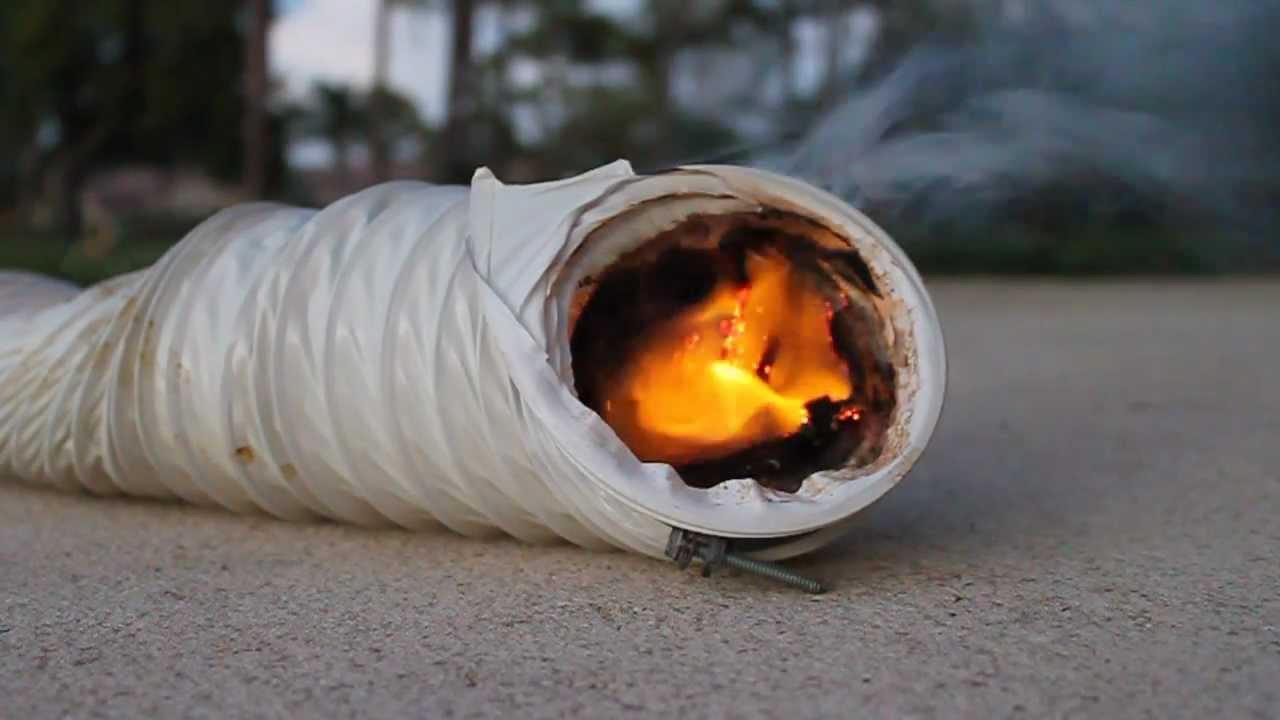
Welcome to a beginner’s guide on how to unhook a dryer vent. A dryer vent is a crucial component of your home’s laundry system, allowing hot air and moisture to escape from the dryer. Over time, the vent may become clogged with lint, debris, or even critters seeking shelter. When this happens, it can lead to reduced airflow, increased drying times, and even potential fire hazards. Unhooking the dryer vent is a necessary step in cleaning and maintaining your dryer, as well as facilitating repairs or replacement if needed.
Unhooking a dryer vent may seem like a daunting task, especially if you’re not familiar with home maintenance or have limited DIY experience. But fear not! In this guide, we will walk you through the step-by-step process of safely unhooking a dryer vent, ensuring that you can tackle this essential maintenance task with confidence.
Before we dive into the details, it is important to mention that safety should always be your top priority. Make sure to follow all recommended safety precautions, such as wearing protective gloves and eyewear, as well as ensuring that the dryer is turned off and unplugged before proceeding with the vent unhooking process. By taking these necessary precautions, you can minimize the risk of accidents or injuries.
Now, let’s gather the materials you will need to successfully unhook a dryer vent.
Key Takeaways:
- Regularly unhooking and cleaning your dryer vent is crucial for preventing lint buildup, improving drying efficiency, and reducing fire hazards. Prioritize safety and follow the step-by-step guide for a safer and more efficient laundry experience.
- By unhooking, cleaning, and reconnecting your dryer vent, you can extend the lifespan of your dryer and achieve optimal performance. Make it a part of your home maintenance routine to ensure a safer and more efficient laundry experience.
Read more: How To Unhook A Gas Dryer
Materials Needed
Before starting the process of unhooking a dryer vent, it is important to have the necessary materials on hand to ensure a smooth and efficient task completion. Here are the materials you will need:
- Adjustable wrench
- Screwdriver (flat head or Phillips, depending on your dryer’s fasteners)
- Vent brush or vacuum cleaner with a long attachment
- Dryer vent clamp
- Lint trap brush or cleaning tool
- Rag or paper towels
- Optional: Duct tape or foil tape for sealing any gaps or leaks, if necessary
These materials will help you effectively and safely unhook the dryer vent, as well as clean and maintain it for optimal performance.
Now that you have gathered all the necessary materials, let’s move on to the step-by-step process of unhooking a dryer vent.
Step 1: Turn off the Dryer and Unplug
The first step in unhooking a dryer vent is to ensure that the dryer is turned off and unplugged. This is a crucial safety measure to prevent any accidents or injuries.
Start by locating the power cord of the dryer and unplugging it from the electrical outlet. If the cord is difficult to reach, you may need to pull the dryer away from the wall to access it properly.
Once the dryer is unplugged, take a moment to make sure that the control panel is turned off and that no lights or indicators are illuminated. This will ensure that there is no electrical power flowing to the dryer while you work on unhooking the vent.
Double-checking that the dryer is completely powered down and unplugged is essential to your safety and the success of the vent unhooking process. With the power off and the dryer unplugged, you can proceed to the next step with peace of mind.
Next, let’s move on to locating the dryer vent.
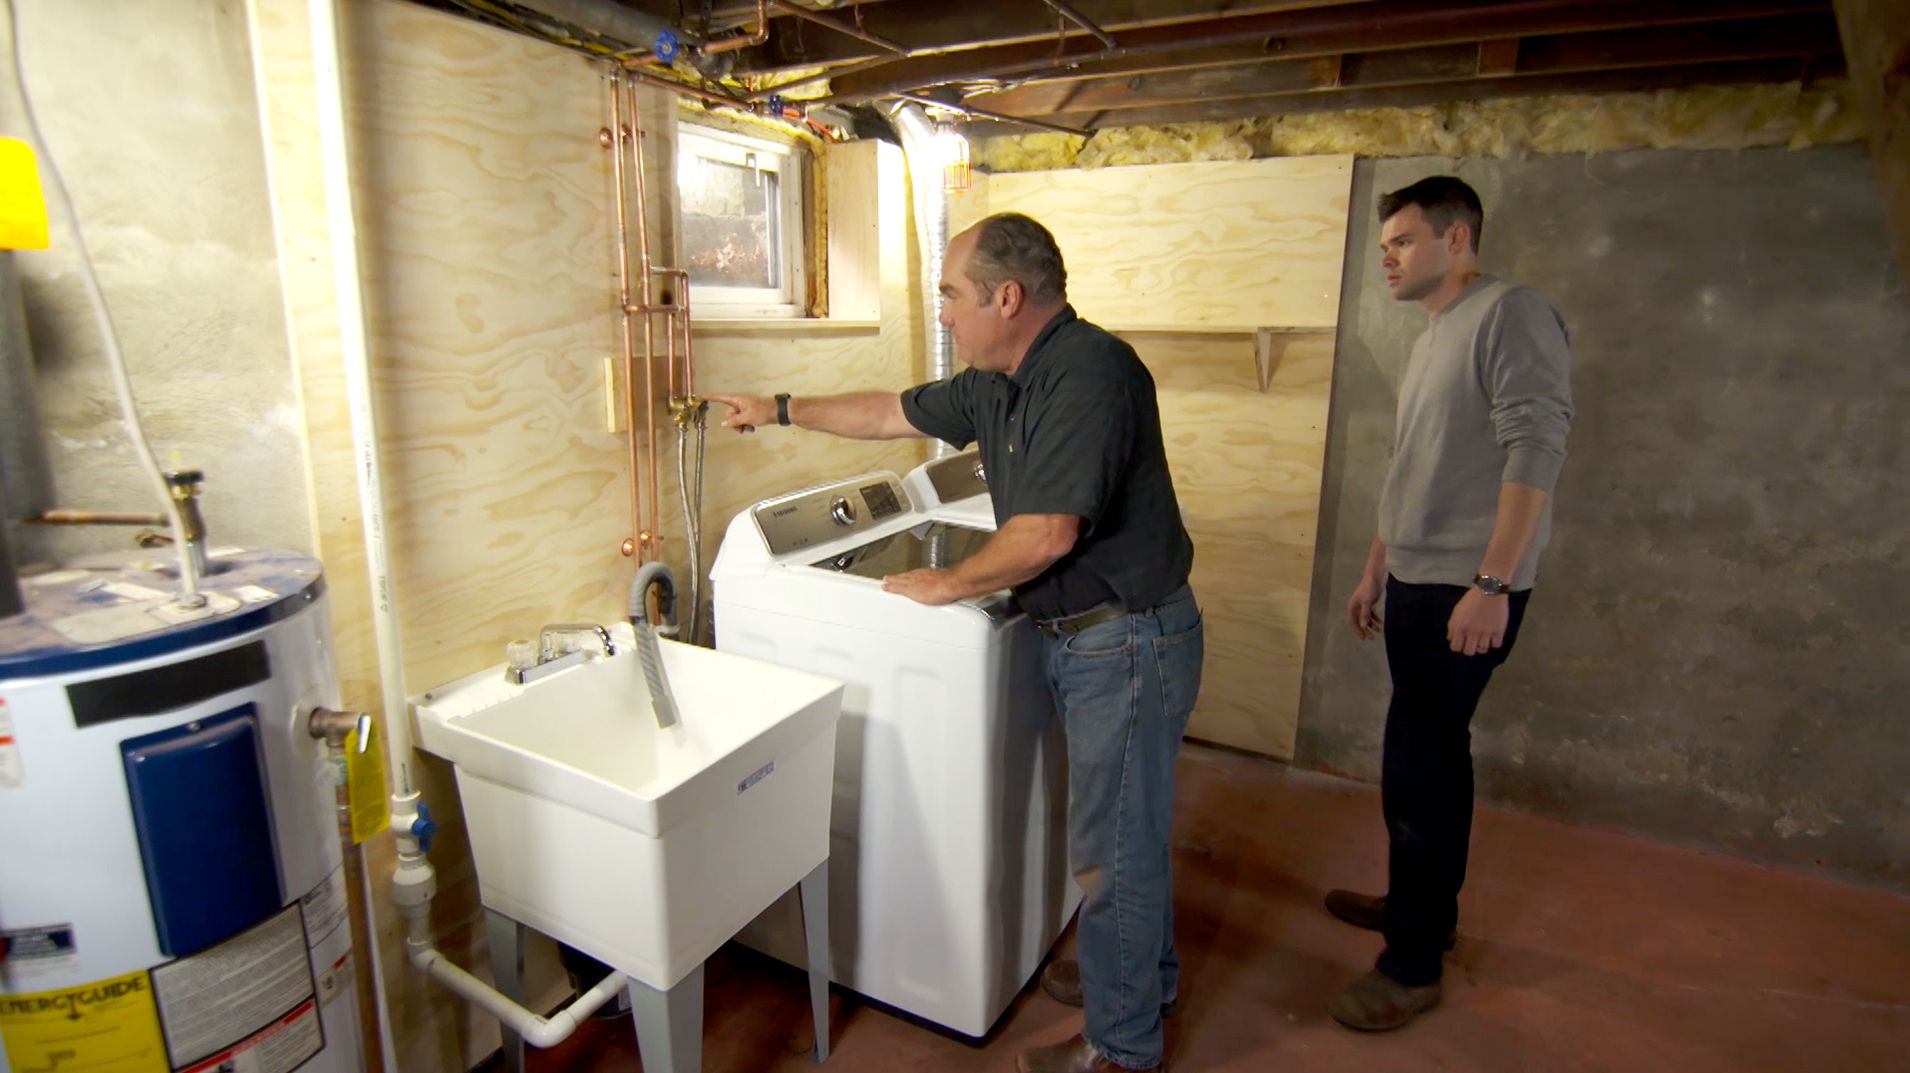
Step 2: Locate the Dryer Vent
After ensuring that the dryer is turned off and unplugged, the next step is to locate the dryer vent. The dryer vent is typically located on the back of the dryer or on the side, depending on the model.
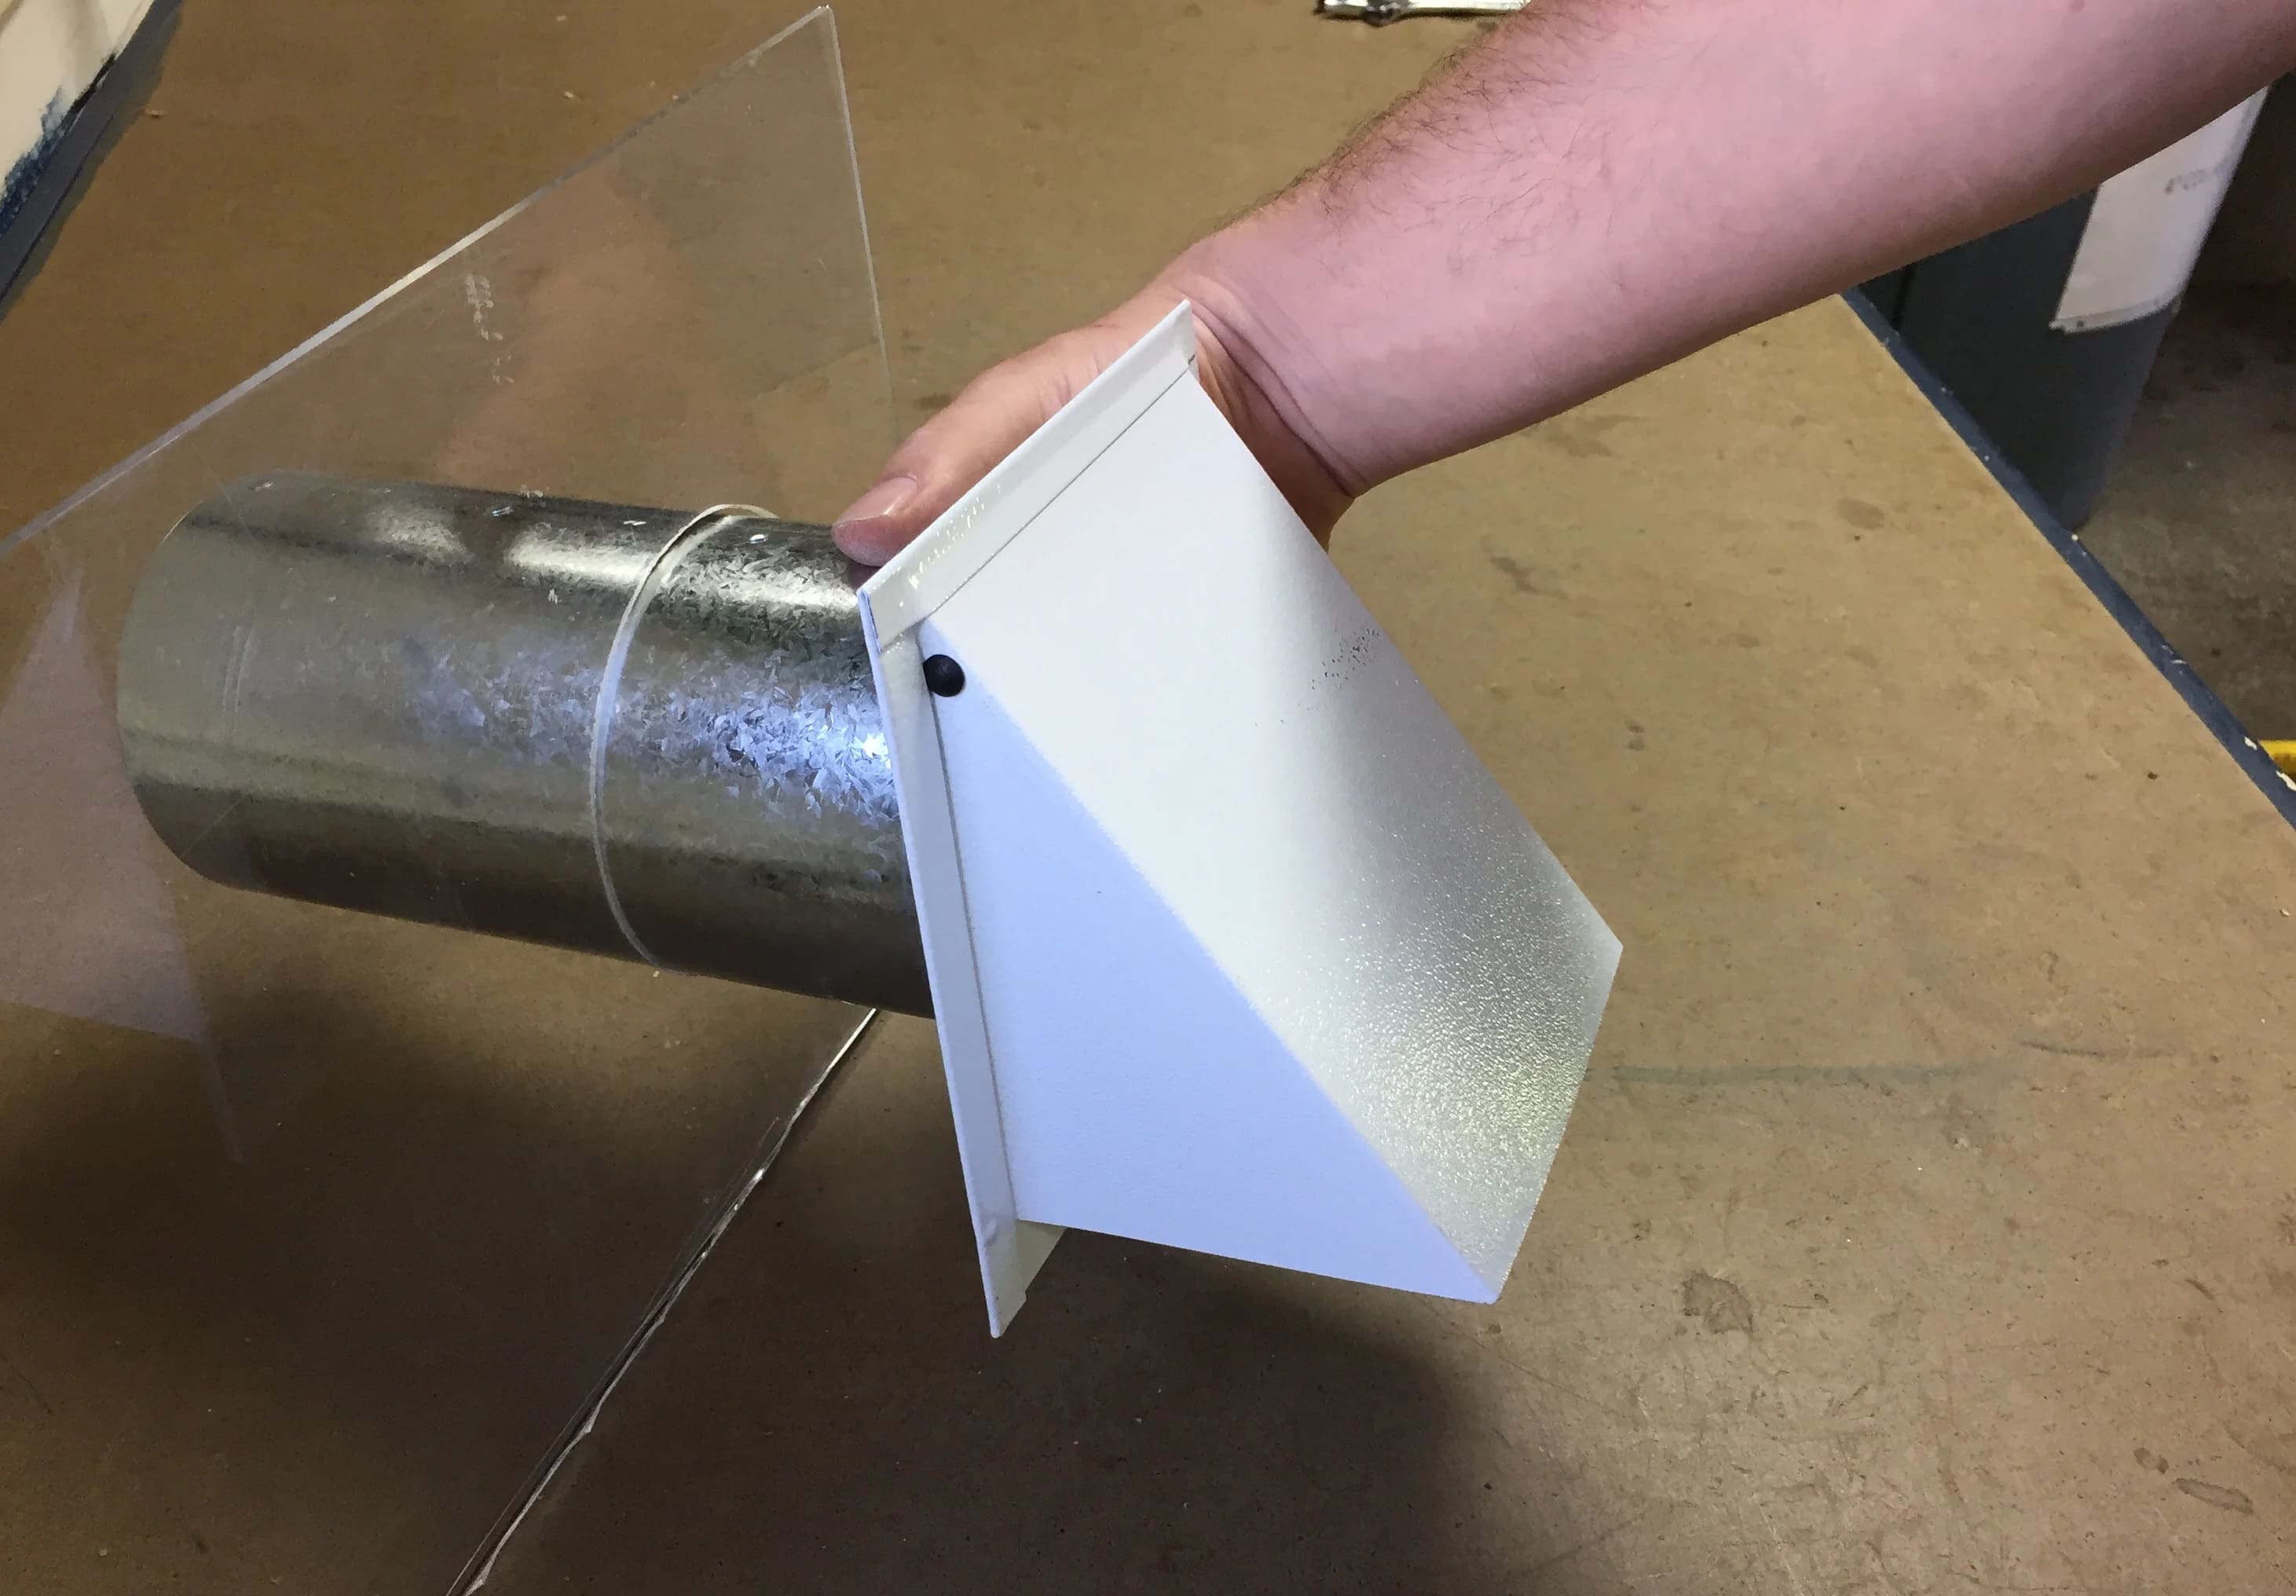
Carefully inspect the back of the dryer to find a metal or plastic tube extending from the unit. This is the dryer vent. It is usually connected to the dryer with a clamp or fasteners.
In some cases, the dryer vent may be connected to a wall or floor vent outlet. If this is the case, carefully examine the area around the dryer and check for any visible vents or openings.
Once you have located the dryer vent, take note of its position and accessibility. This will help you determine the best approach for unhooking it.
Now that you have located the dryer vent, it’s time to move on to the next step: loosening the clamp.
Step 3: Loosen the Clamp
Now that you have located the dryer vent, it’s time to loosen the clamp that secures it to the dryer. The clamp is typically made of metal and can be tightened or loosened with the help of an adjustable wrench or screwdriver.
Start by identifying the clamp that is holding the dryer vent in place. It is usually located near the opening of the vent where it connects to the dryer. Depending on the design, the clamp may be a screw-type clamp or a spring-loaded clamp.
If it is a screw-type clamp, use an adjustable wrench or a screwdriver to loosen the screw and open the clamp. Turn the screw counterclockwise until the clamp is loose enough to slide off the vent.
If it is a spring-loaded clamp, locate the small metal tab or lever on the clamp. Use your fingers or a pair of pliers to push or squeeze the tab, releasing the tension on the clamp. Once the clamp is loose, slide it off the vent.
Take extra care not to damage the vent or the dryer when loosening the clamp. If necessary, use a rag or some padding to protect the surfaces from scratches or dents.
With the clamp now loosened, you are ready to move on to the next step: disconnecting the vent from the dryer.
Read more: How To Vent A Dryer
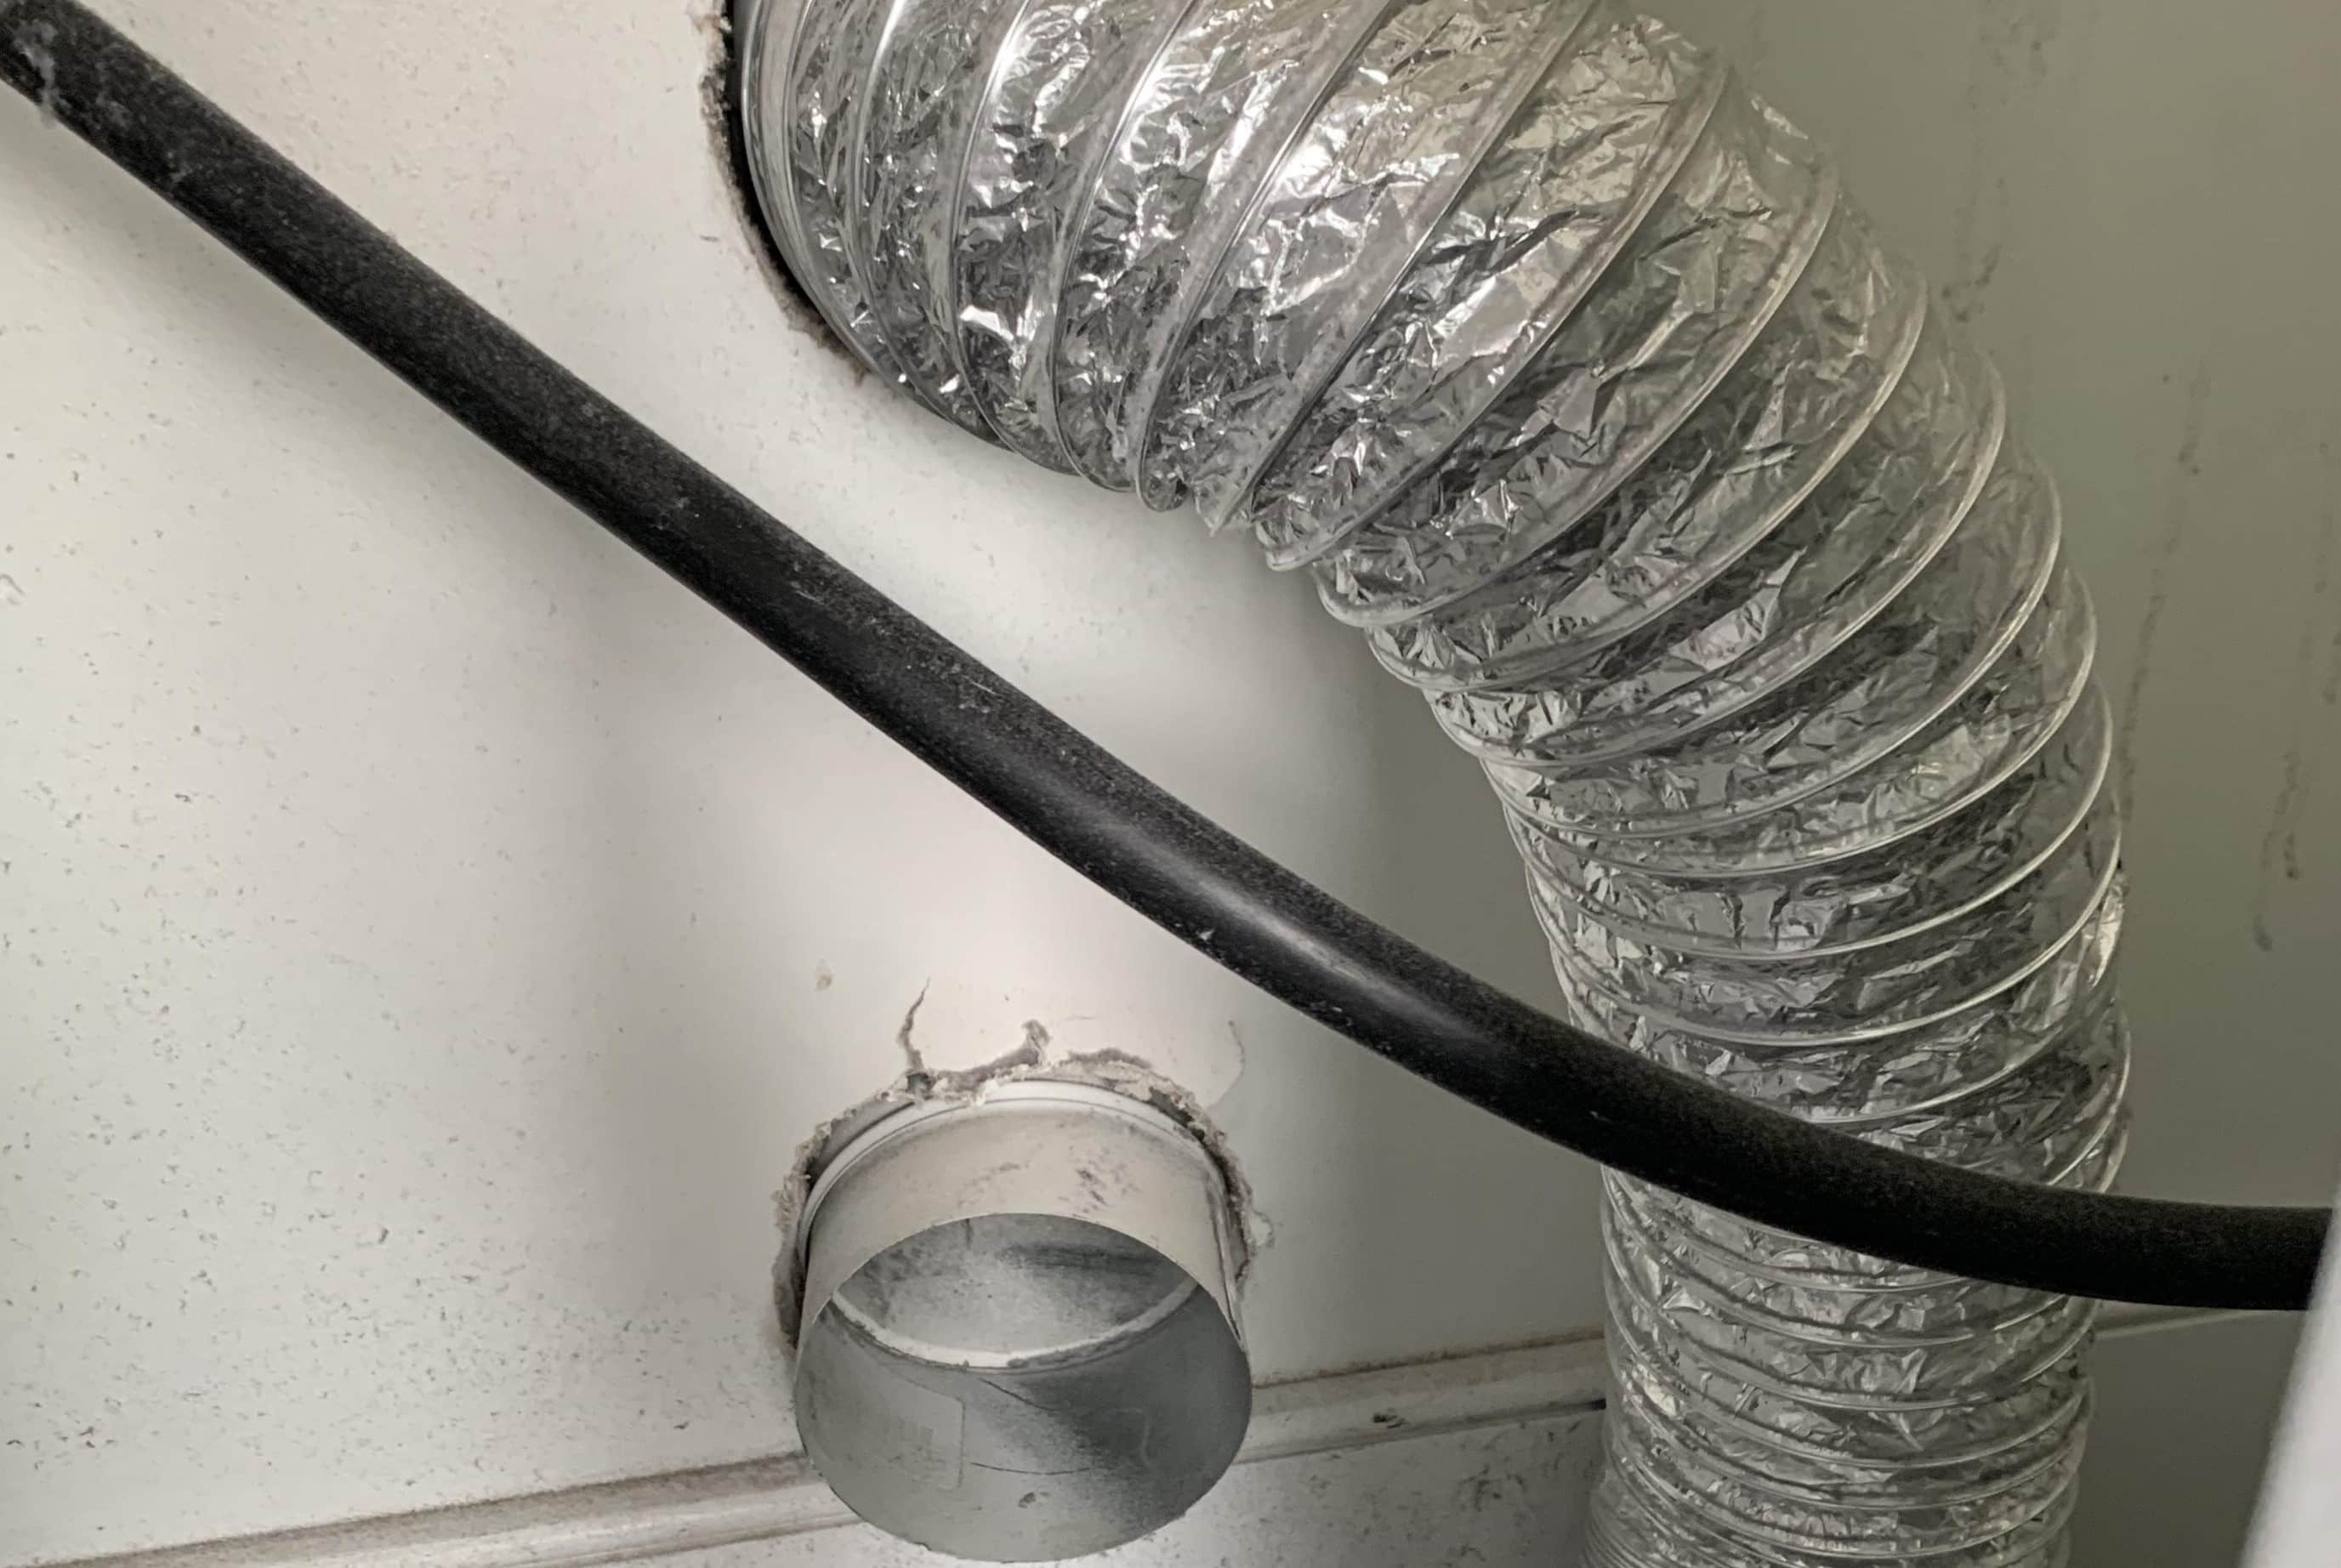
Step 4: Disconnect the Vent from the Dryer
Now that the clamp is loosened, it’s time to disconnect the vent from the dryer. Be cautious while performing this step to prevent any damage to the vent or the dryer.
Gently pull the dryer vent away from the dryer, while keeping a firm grip on both the vent and the dryer to maintain stability. Wiggle the vent back and forth, if necessary, to loosen it from any potential buildup of lint or debris that may be causing it to stick.
If the vent seems stubborn and won’t come loose, don’t force it. Instead, you can use a flathead screwdriver or pliers to gently pry the vent away from the dryer. Be careful not to apply too much pressure to avoid damaging the vent or the dryer’s connection point.
As you remove the vent, be mindful of any sharp edges or protrusions that may be present on either the vent or the dryer. Take your time to detach the vent completely, ensuring that there are no remaining connections or obstructions.
Once the vent is fully disconnected, set it aside in a safe place. Inspect the vent for any signs of damage or blockage. If you notice any issues, such as cracks, dents, or excessive buildup, it may be necessary to repair or clean the vent before reattaching it.
With the vent successfully disconnected, you are now ready to move on to the next step: cleaning the vent and removing any debris.
Use a screwdriver to loosen the clamp holding the vent to the dryer. Pull the vent off and clean any lint buildup. Be careful not to damage the vent or the dryer.
Step 5: Clean the Vent and Remove any Debris
Now that you have disconnected the vent from the dryer, it’s time to clean it and remove any accumulated debris. Cleaning the vent is essential for optimal dryer performance and preventing potential fire hazards.
Start by inspecting the vent for any visible lint or debris. Use a vent brush or a vacuum cleaner with a long attachment to remove any loose debris. Work your way through the vent, gently scrubbing or suctioning out any lint or particles that may have accumulated.
If the vent is heavily clogged or blocked, you may need to use a lint trap brush or a cleaning tool with a long, flexible handle to reach and dislodge stubborn lint. Be thorough in your cleaning and ensure that you remove all debris to maintain proper airflow.
In addition to cleaning the vent itself, take a moment to inspect the vent opening on the dryer. Remove any lint or debris that may have collected around the opening to ensure a clear and unobstructed pathway.
While cleaning, also check for any signs of damage or deterioration, such as cracks or detachment. If you notice any issues, it is advisable to address them before reattaching the vent.
Once you have thoroughly cleaned the vent and removed any debris, set it aside and move on to the next step: reconnecting the vent to the dryer.
Step 6: Reconnect the Vent to the Dryer
Now that you have cleaned the vent and removed any debris, it’s time to reconnect it to the dryer. Properly reconnecting the vent ensures that it functions effectively and safely.
Take the vent and align it with the opening on the dryer. Slowly and carefully insert the end of the vent into the dryer’s connection point. Make sure it is aligned properly to ensure a secure and tight fit.
Once the vent is inserted, use your hands to hold it in place and check for any gaps or misalignment. A secure connection is important to prevent air leaks that can affect the dryer’s performance and efficiency.
If there is a gap between the vent and the dryer, you can use duct tape or foil tape to seal it. Wrap the tape around the joint, ensuring a tight seal that prevents any air from escaping.
After ensuring a proper connection, it’s time to move on to the next step: securing the clamp.
Note: If your dryer vent requires additional attachment methods, such as screws or fasteners, follow the manufacturer’s instructions to properly secure the vent.
Step 7: Secure the Clamp
With the vent properly connected to the dryer, the next step is to secure the clamp. The clamp is responsible for holding the vent in place and ensuring a tight seal to prevent any air leaks.
If you loosened a screw-type clamp earlier, use an adjustable wrench or a screwdriver to tighten the screw until it is snug against the vent. Make sure not to overtighten, as this can damage the vent or the dryer’s connection point.
If you have a spring-loaded clamp, simply slide it back into position over the vent and release the metal tab or lever. The spring tension will securely hold the clamp and the vent together.
Once the clamp is secured, give it a gentle tug to ensure that it is firmly in place. This will help verify that the vent is securely attached to the dryer and won’t come loose during operation.
Take a moment to inspect the entire length of the vent and ensure that there are no visible gaps or looseness. This will guarantee proper airflow and prevent any potential issues down the line.
Now that the clamp is securely fastened, you’re ready for the final step: plugging in the dryer and testing it.
Read more: How To Replace Dryer Vent
Step 8: Plug in the Dryer and Test it
After securing the clamp and ensuring that the vent is properly connected to the dryer, the final step is to plug in the dryer and test its functionality. This step will confirm that the dryer is operating correctly and that the vent reconnection was successful.
First, locate the power cord of the dryer and plug it back into the electrical outlet. Ensure that the outlet is in good condition and properly grounded.
Once the dryer is plugged in, turn on the control panel and select a dry cycle. Pay close attention to the airflow and listen for any unusual noises or vibrations.
Observe the vent area and check for any air leaks or obstructions. If you notice any signs of air leakage or if the dryer doesn’t seem to be drying properly, stop the dryer immediately and double-check the vent connection and the clamp.
If everything seems to be working correctly, run a full drying cycle to test the dryer’s performance. Monitor the drying time and ensure that the clothes are drying thoroughly and evenly.
While the dryer is running, also inspect the vent area for any signs of overheating or unusual smells. These can be indications of a ventilation issue that may require further investigation.
If you do encounter any problems during the testing phase, it may be necessary to revisit the previous steps to ensure that the vent is properly connected and secured.
Congratulations! You have successfully unhooked, cleaned, and reconnected your dryer vent. By performing this routine maintenance task, you have not only improved the efficiency of your dryer but also reduced the potential fire hazards associated with a clogged or faulty vent.
Remember to regularly clean and inspect your dryer vent to prevent lint buildup and ensure continued optimal performance. By doing so, you can extend the lifespan of your dryer and enjoy more efficient and effective drying cycles.
Thank you for following this step-by-step guide on how to unhook a dryer vent. Happy drying!
Conclusion
Maintaining a clean and functioning dryer vent is an essential part of home maintenance. By following the step-by-step guide provided in this article, you have learned how to safely unhook, clean, and reconnect your dryer vent.
Regularly cleaning your dryer vent helps to prevent lint buildup, improve drying efficiency, and reduce the risk of fire hazards. By removing debris and ensuring proper airflow, you can extend the lifespan of your dryer and achieve optimal performance.
Remember to always prioritize safety during the vent unhooking process. Turn off and unplug the dryer, wear protective gear, and exercise caution when working with tools or sharp edges.
Inspect the vent for any signs of damage or wear, as this can affect its efficiency. If necessary, repair or replace the vent to maintain proper airflow and prevent any issues in the future.
Regularly cleaning and maintaining your dryer vent should be a part of your home maintenance routine. Consider adding it to your checklist to ensure you don’t overlook this important task.
By following these steps and taking the time to properly unhook, clean, and reconnect your dryer vent, you can enjoy a more efficient and safer laundry experience.
Thank you for reading this comprehensive guide on how to unhook a dryer vent. We hope that it has been informative and helpful. Happy drying!
Frequently Asked Questions about How To Unhook A Dryer Vent
Was this page helpful?
At Storables.com, we guarantee accurate and reliable information. Our content, validated by Expert Board Contributors, is crafted following stringent Editorial Policies. We're committed to providing you with well-researched, expert-backed insights for all your informational needs.