Home>Home Maintenance>How To Organize Home Repair Tools
Home Maintenance
How To Organize Home Repair Tools
Modified: October 20, 2024
Discover efficient ways to organize your home repair tools for easy access and maintenance. Simplify your DIY projects with proper tool storage solutions and maximize productivity.
(Many of the links in this article redirect to a specific reviewed product. Your purchase of these products through affiliate links helps to generate commission for Storables.com, at no extra cost. Learn more)
Introduction
When it comes to home maintenance, having the right tools is essential to ensuring that repairs and improvements can be carried out efficiently and effectively. However, without proper organization, tools can become misplaced or damaged, causing frustration and delays. That’s why it’s essential to have a well-organized system in place for storing and maintaining your home repair tools.
In this article, we will explore the importance of assessing and categorizing tools, creating a dedicated tool storage area, and the essential tools needed for various home repair tasks. Additionally, we will provide tips on organizing your tools and offer insights into specific tools required for plumbing and electrical work, carpentry and woodworking, painting and finishing, and gardening and outdoor maintenance.
By the end of this article, you will have a comprehensive understanding of how to efficiently organize your home repair tools, helping you save time, avoid frustration, and ensure that you have the right tools readily available for any home maintenance project that comes your way.
Key Takeaways:
- Keep your home repair tools organized by categorizing them based on function and size. Invest in suitable storage solutions and maintain your tools to save time and frustration during home maintenance projects.
- Essential tools for plumbing, electrical work, carpentry, painting, gardening, and outdoor maintenance are crucial for efficient home repairs. Prioritize safety, invest in quality tools, and personalize your organization system for a well-prepared home maintenance experience.
Read more: How To Identify Machinist Tool Chest
Assessing and Categorizing Tools
Before you can begin organizing your home repair tools, it’s important to assess what you have and determine how to best categorize them. Start by gathering all of your tools in one place, whether it’s a garage, basement, or dedicated storage area. Take inventory of the tools you have and evaluate their condition.
Next, categorize your tools based on their function. For example, group together plumbing tools, electrical tools, carpentry tools, and so on. This will help you easily locate specific tools when you need them. You can further subcategorize tools based on their size or frequency of use.
As you assess your tools, also consider their condition. Are any tools damaged or in need of repair? Set aside these tools for maintenance or replacement. Keeping your tools in good condition is essential for their effectiveness and longevity.
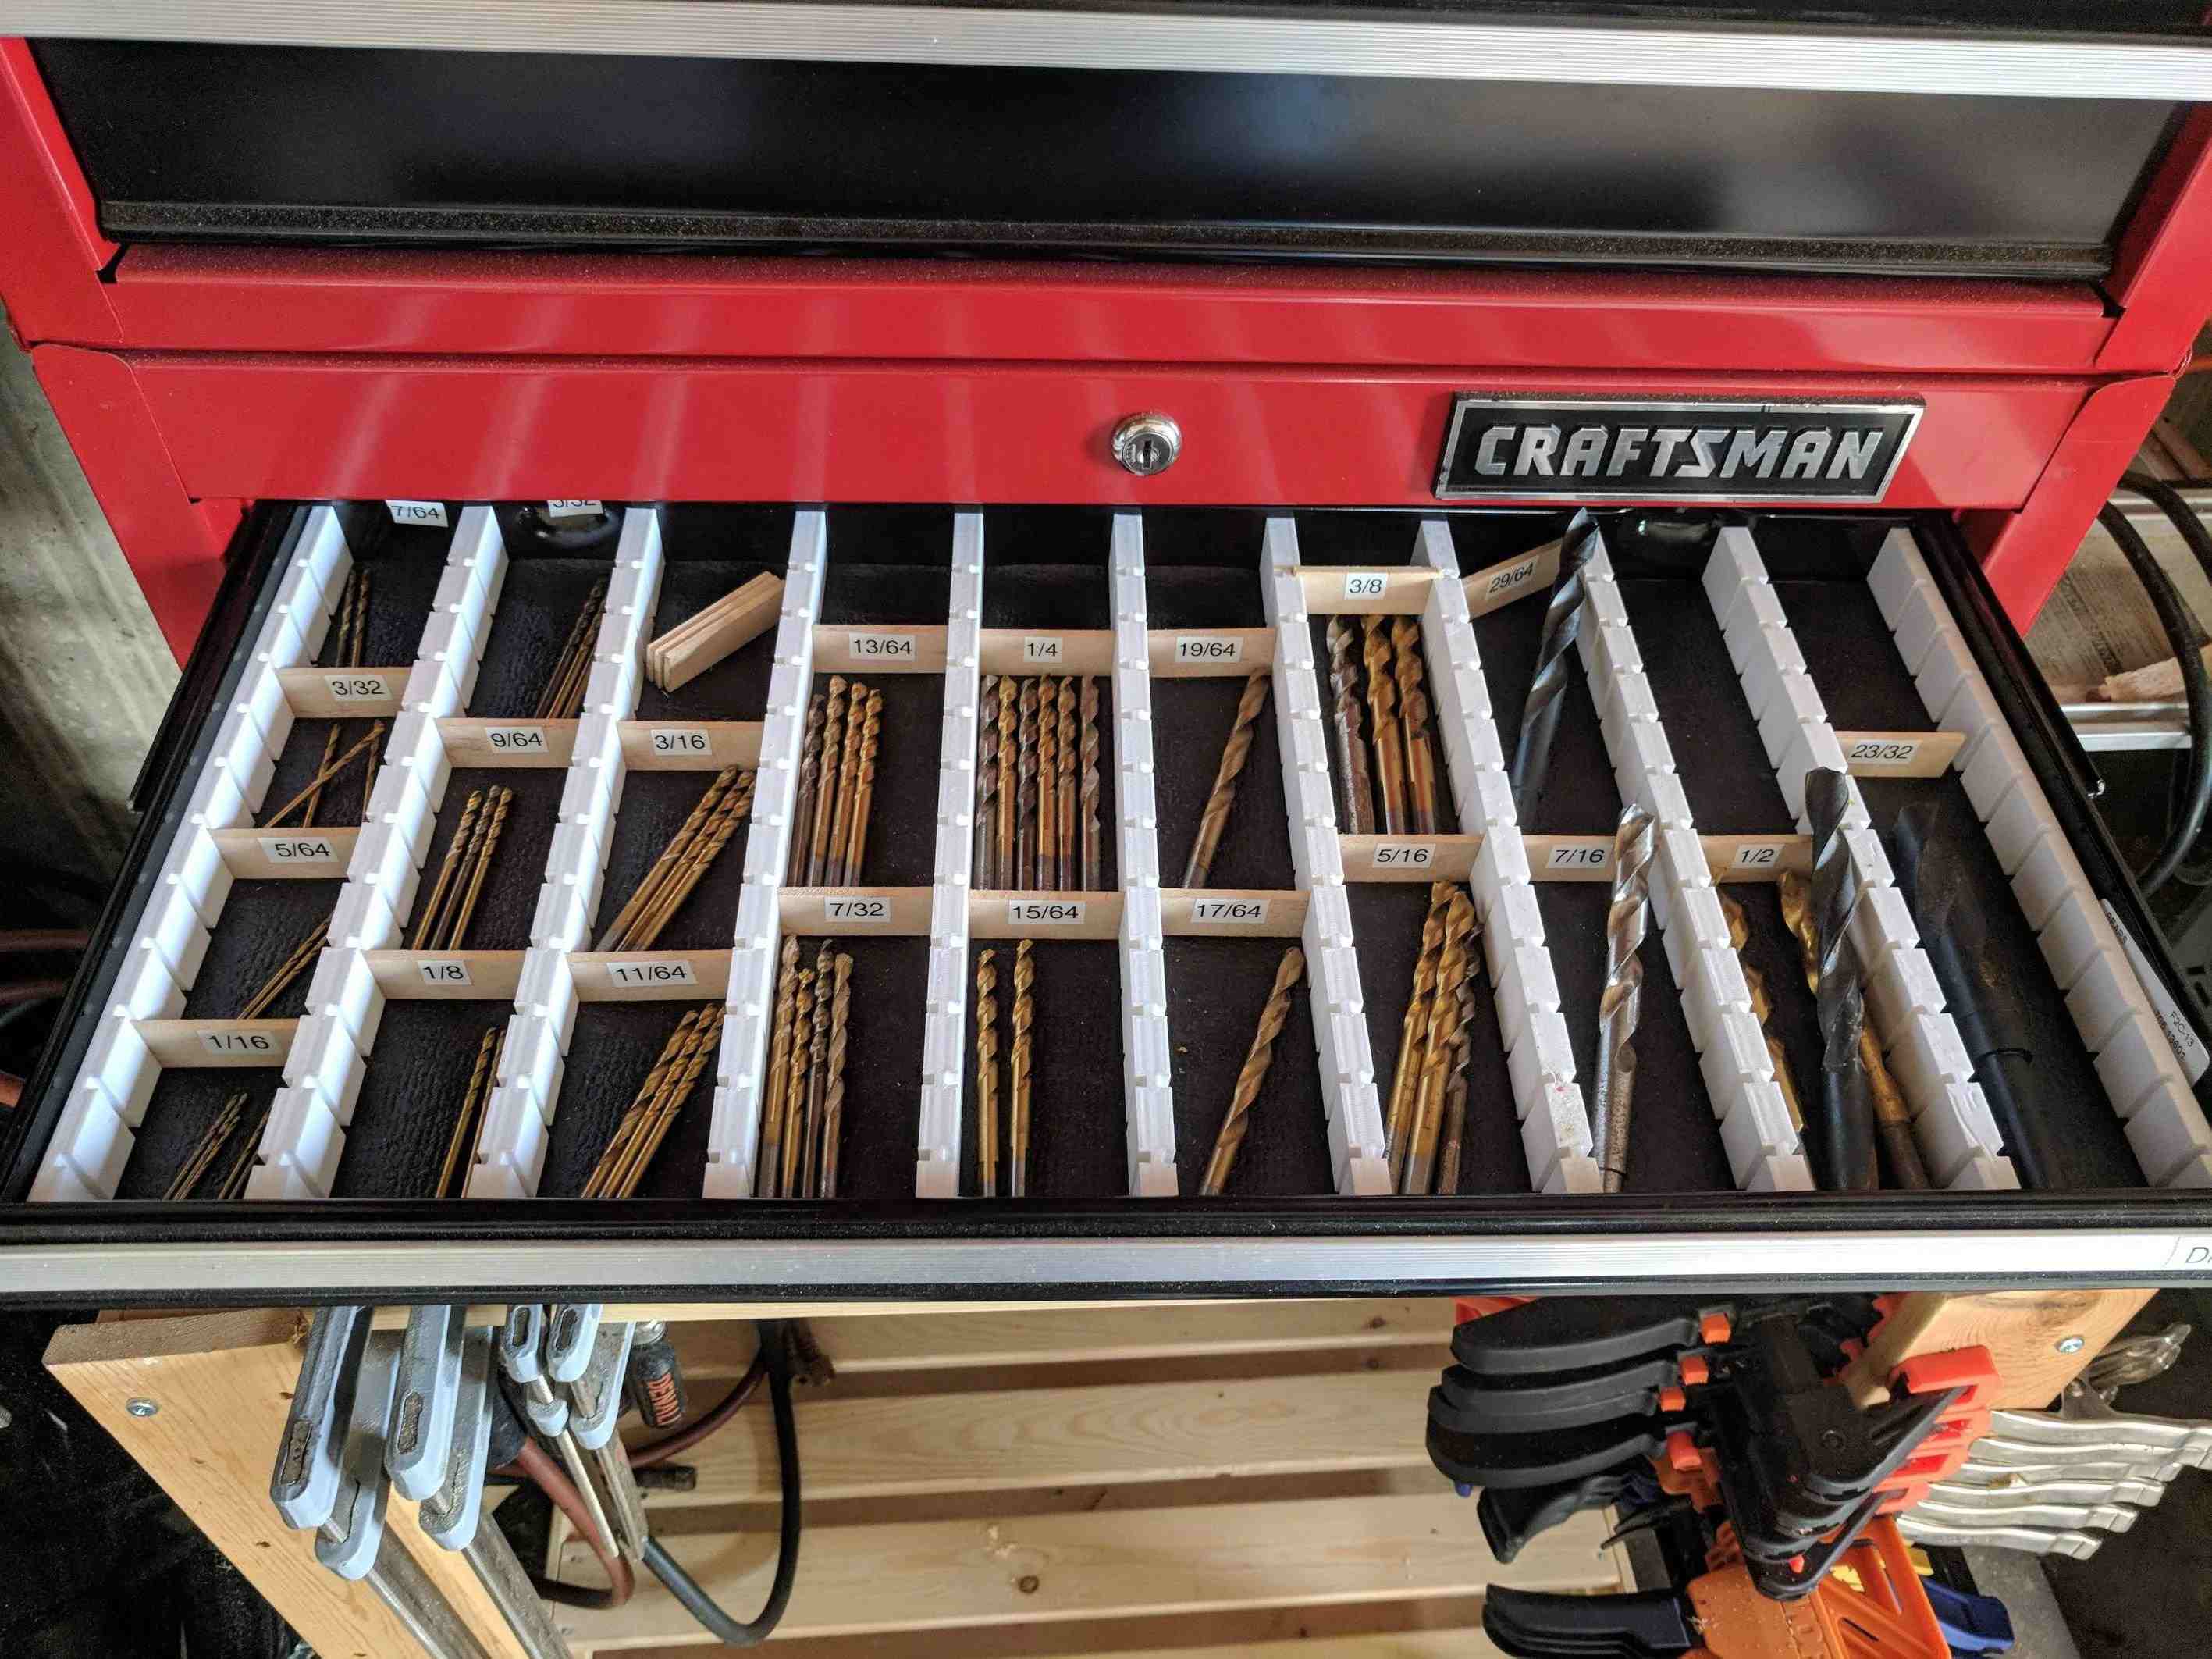
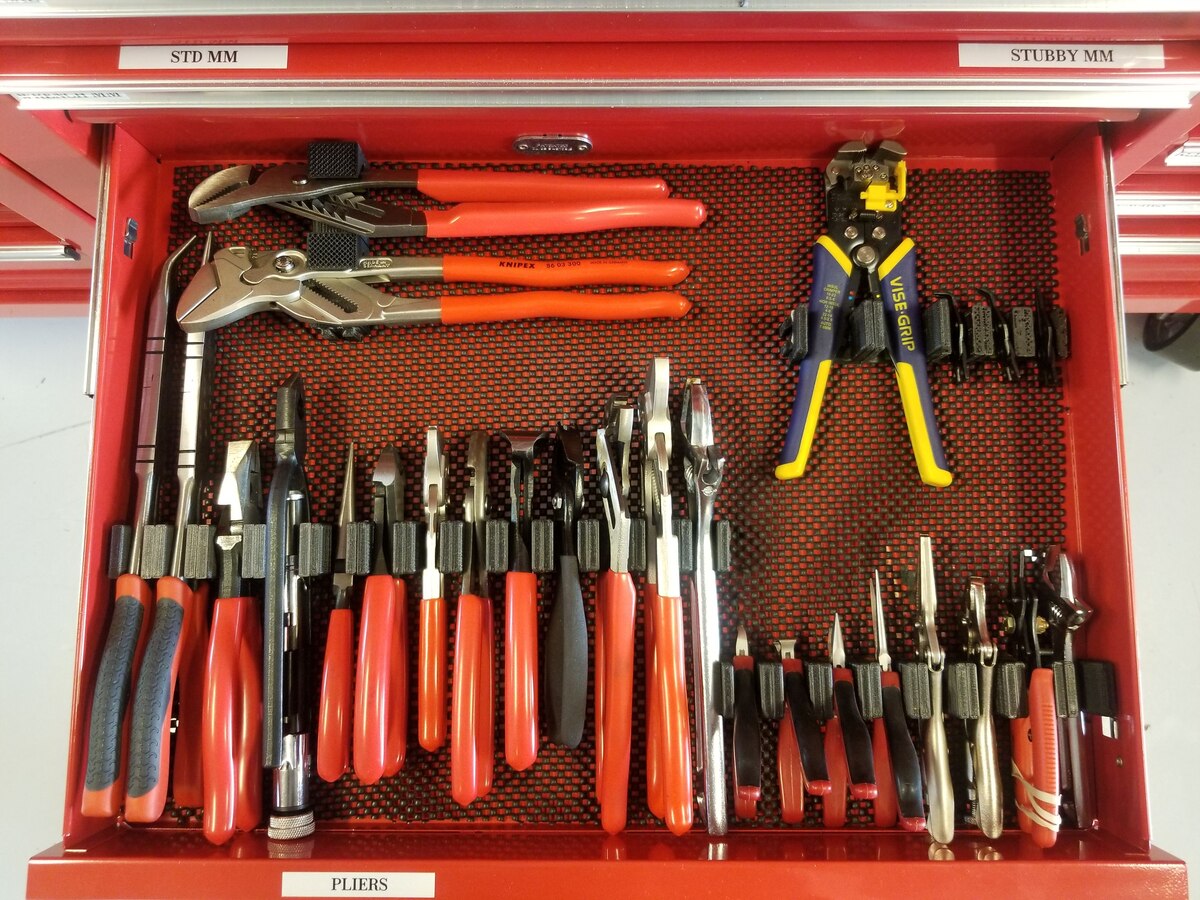
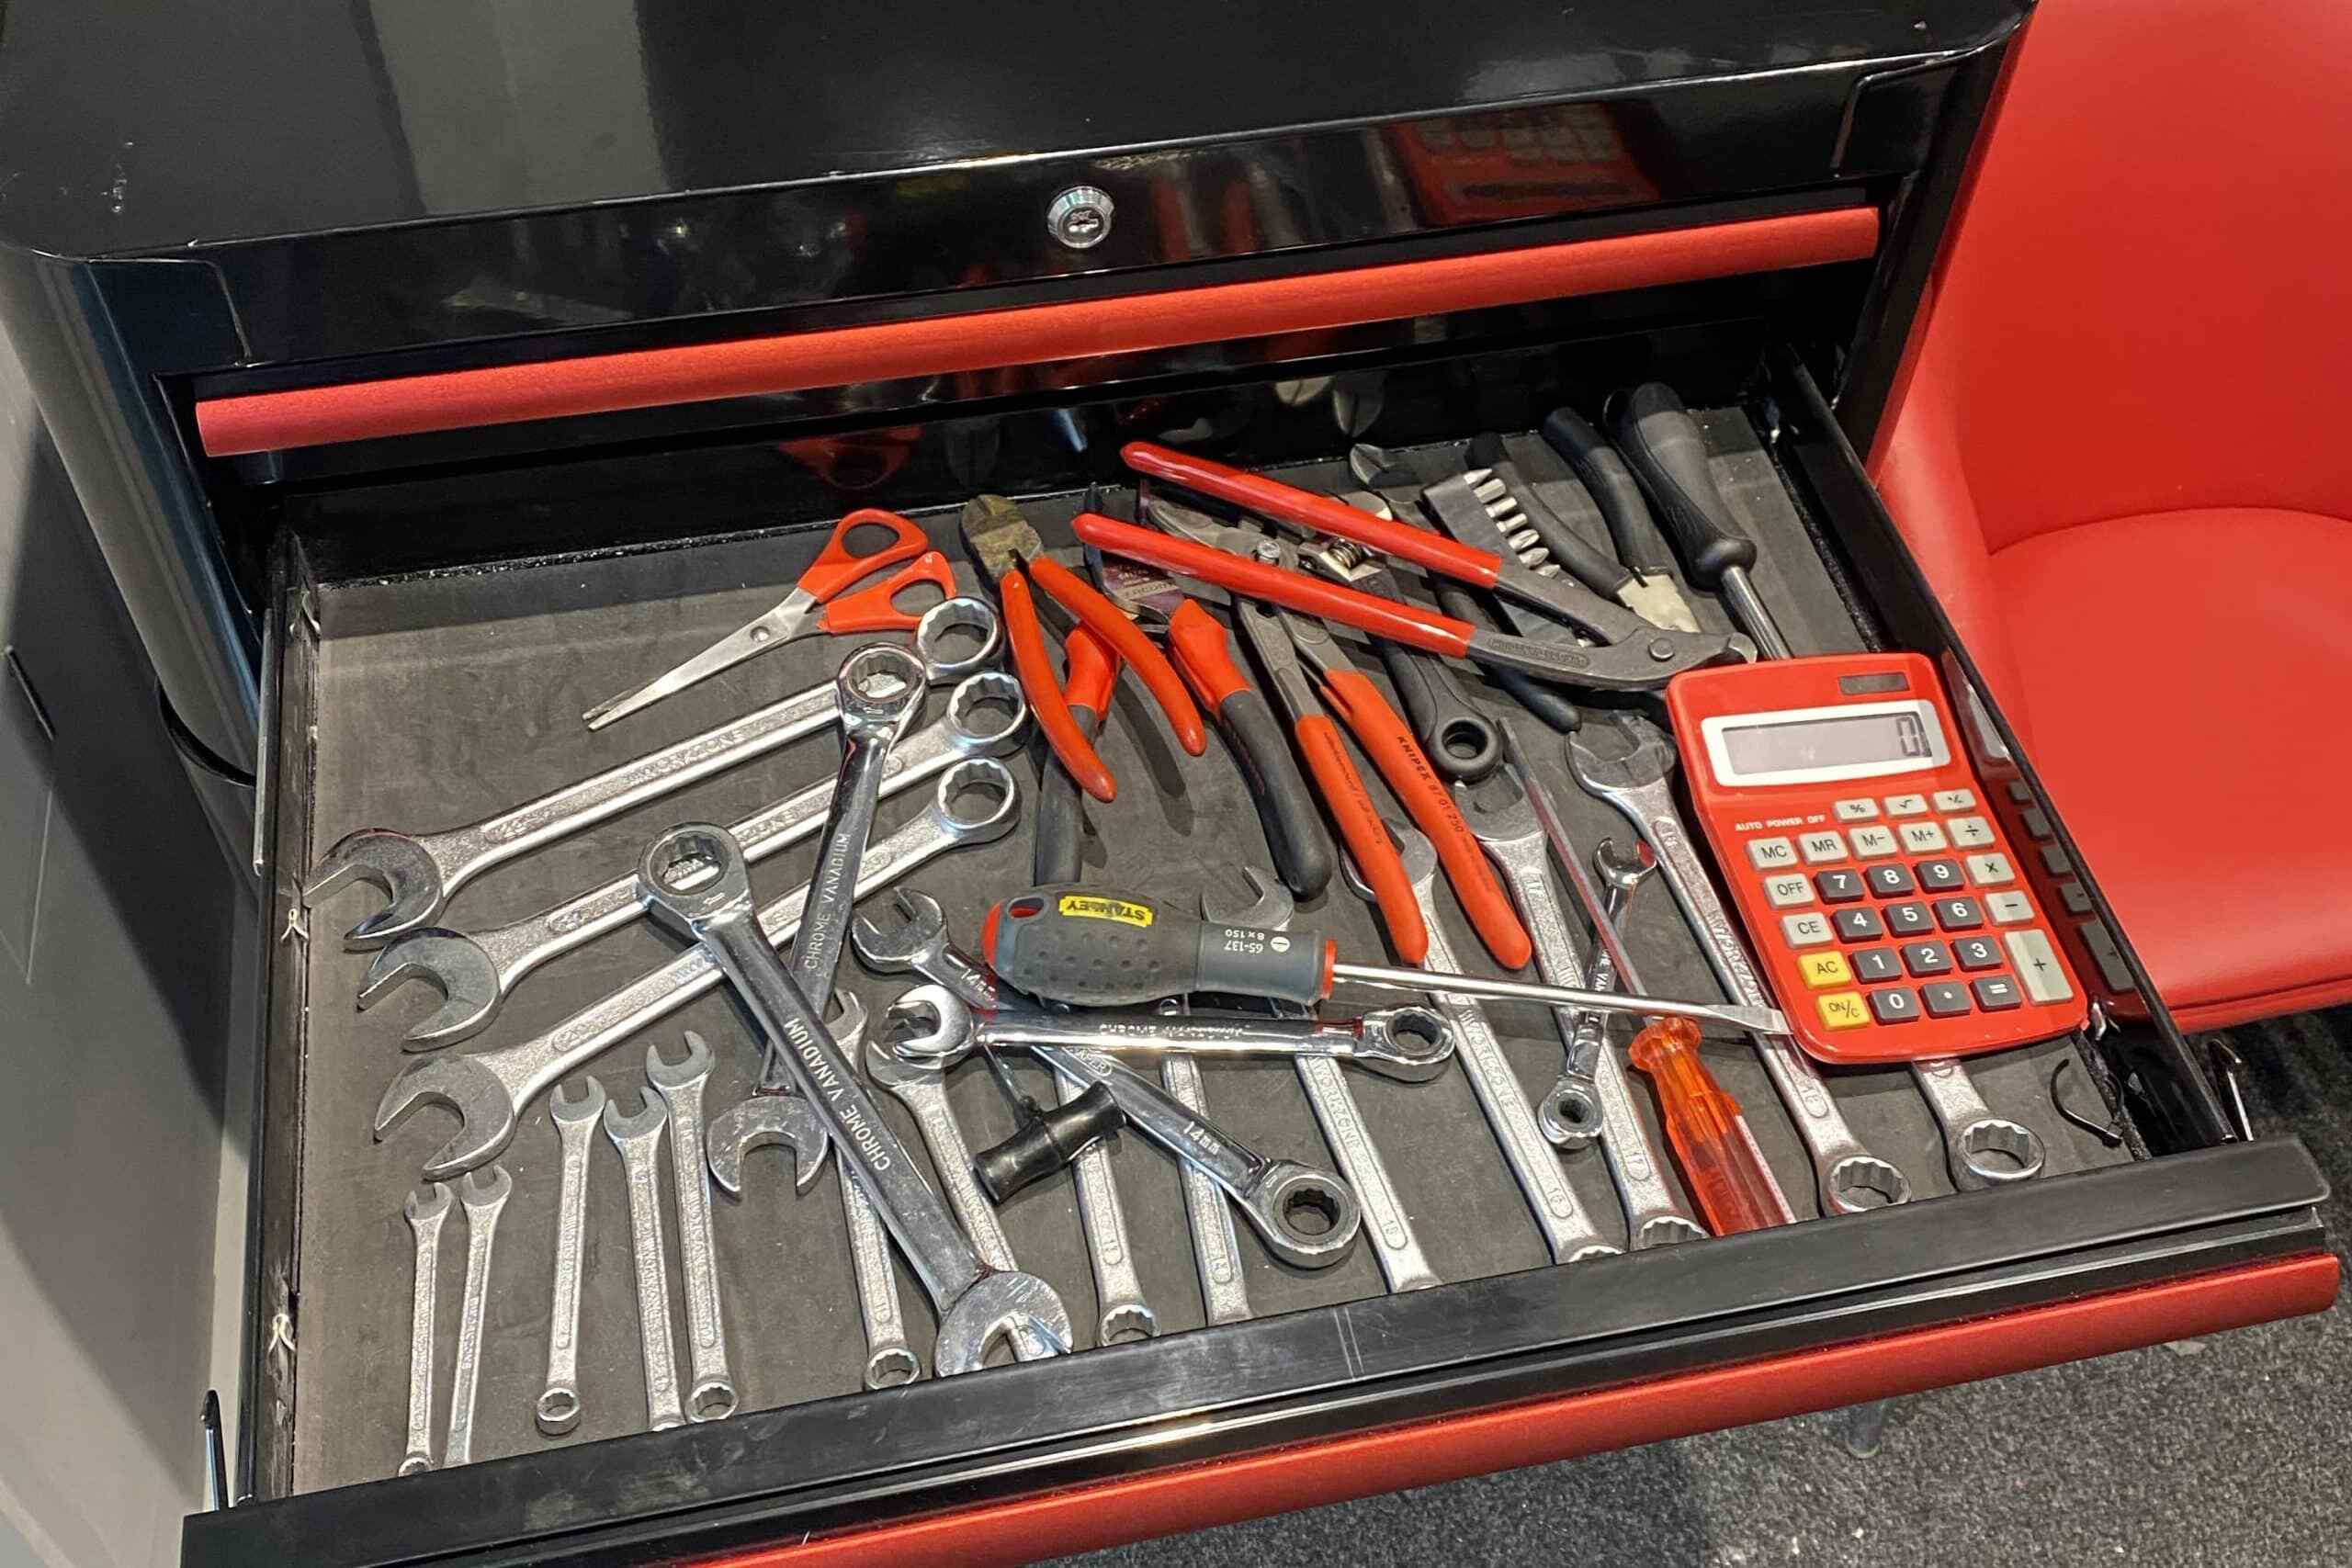
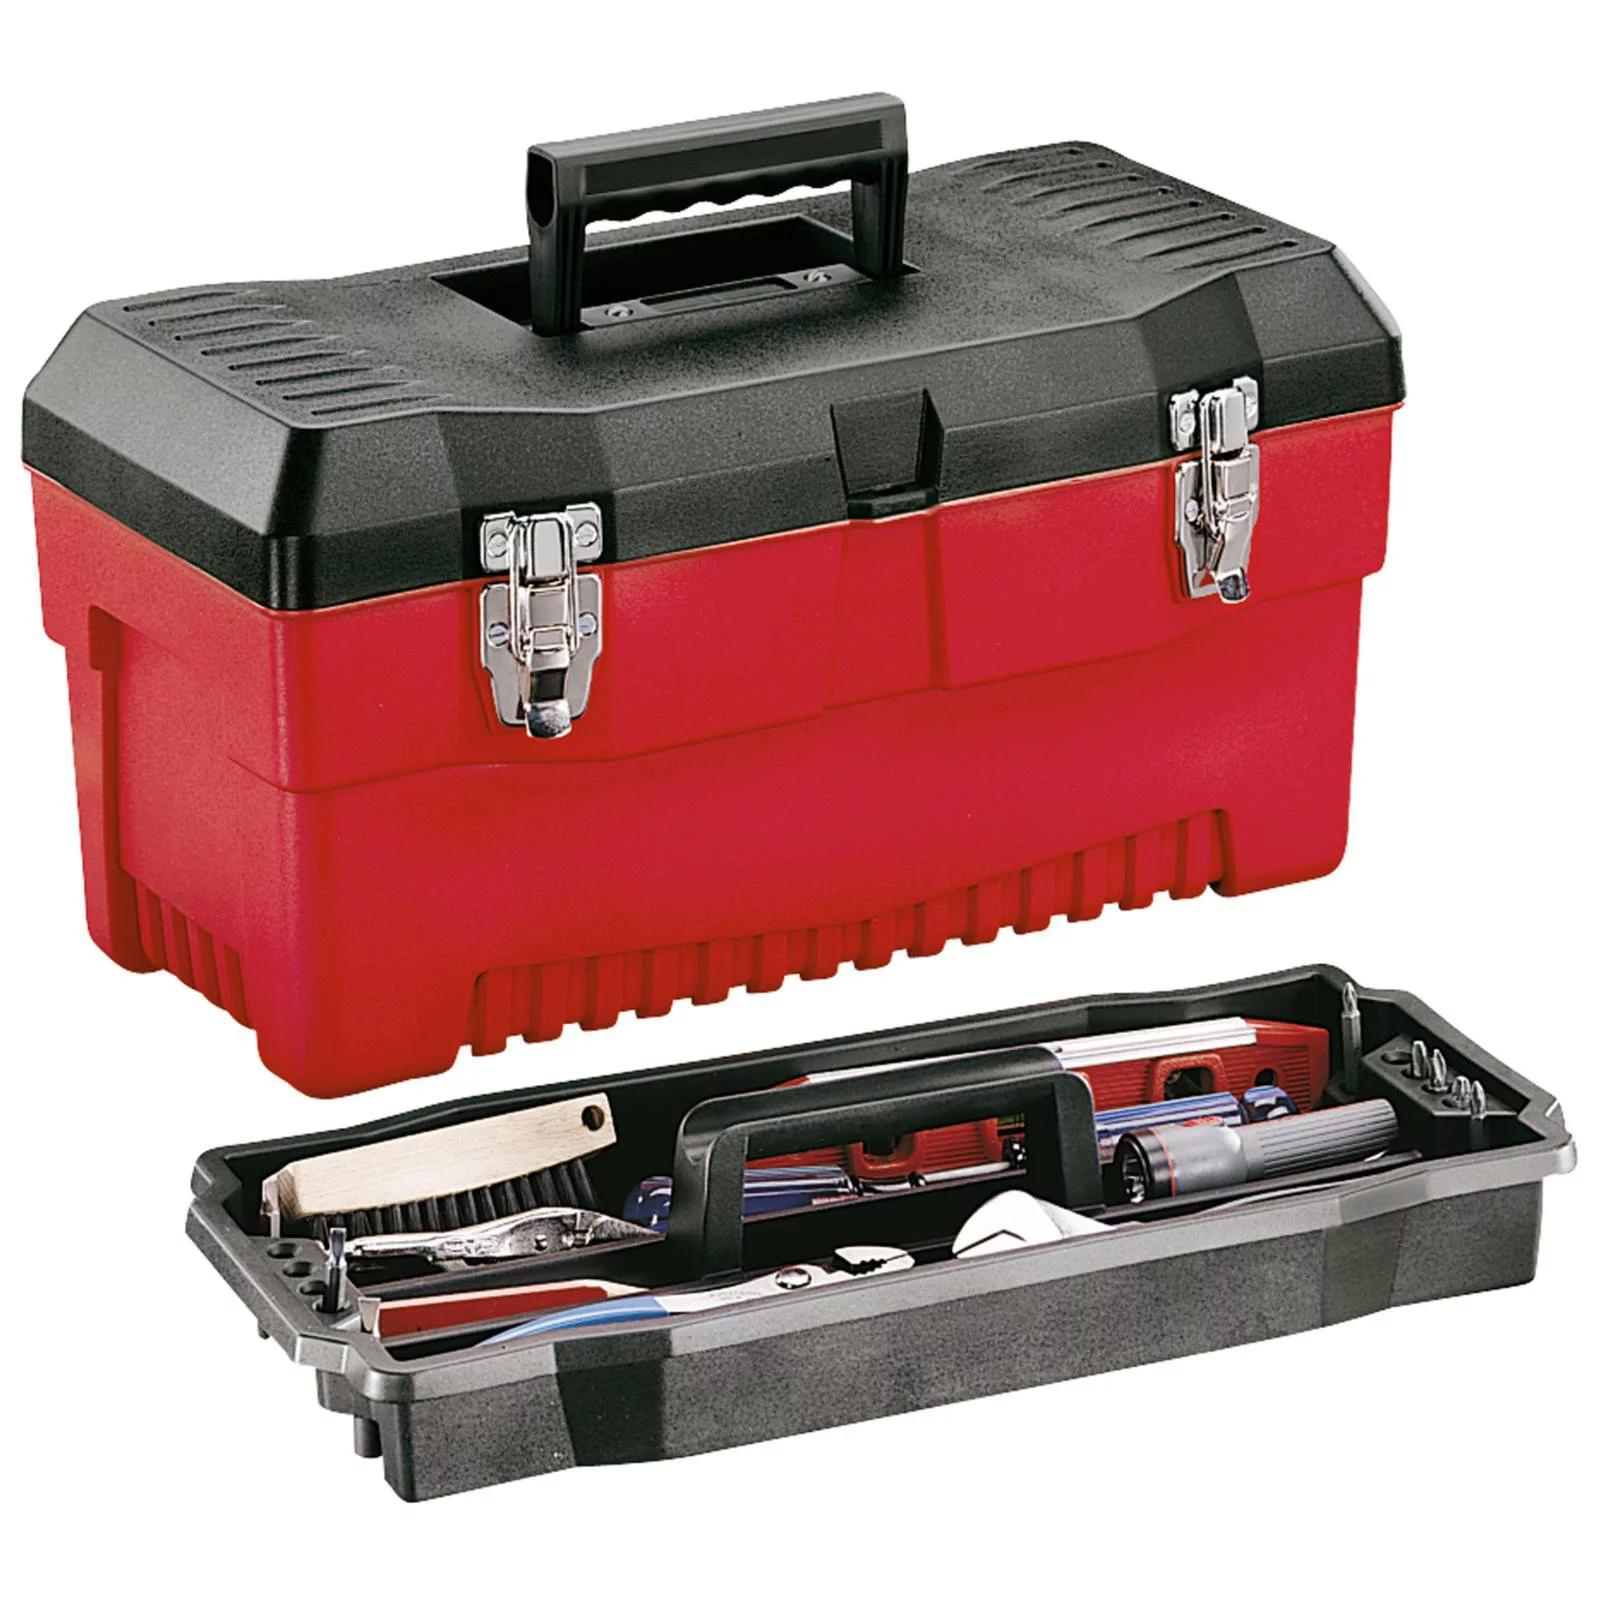
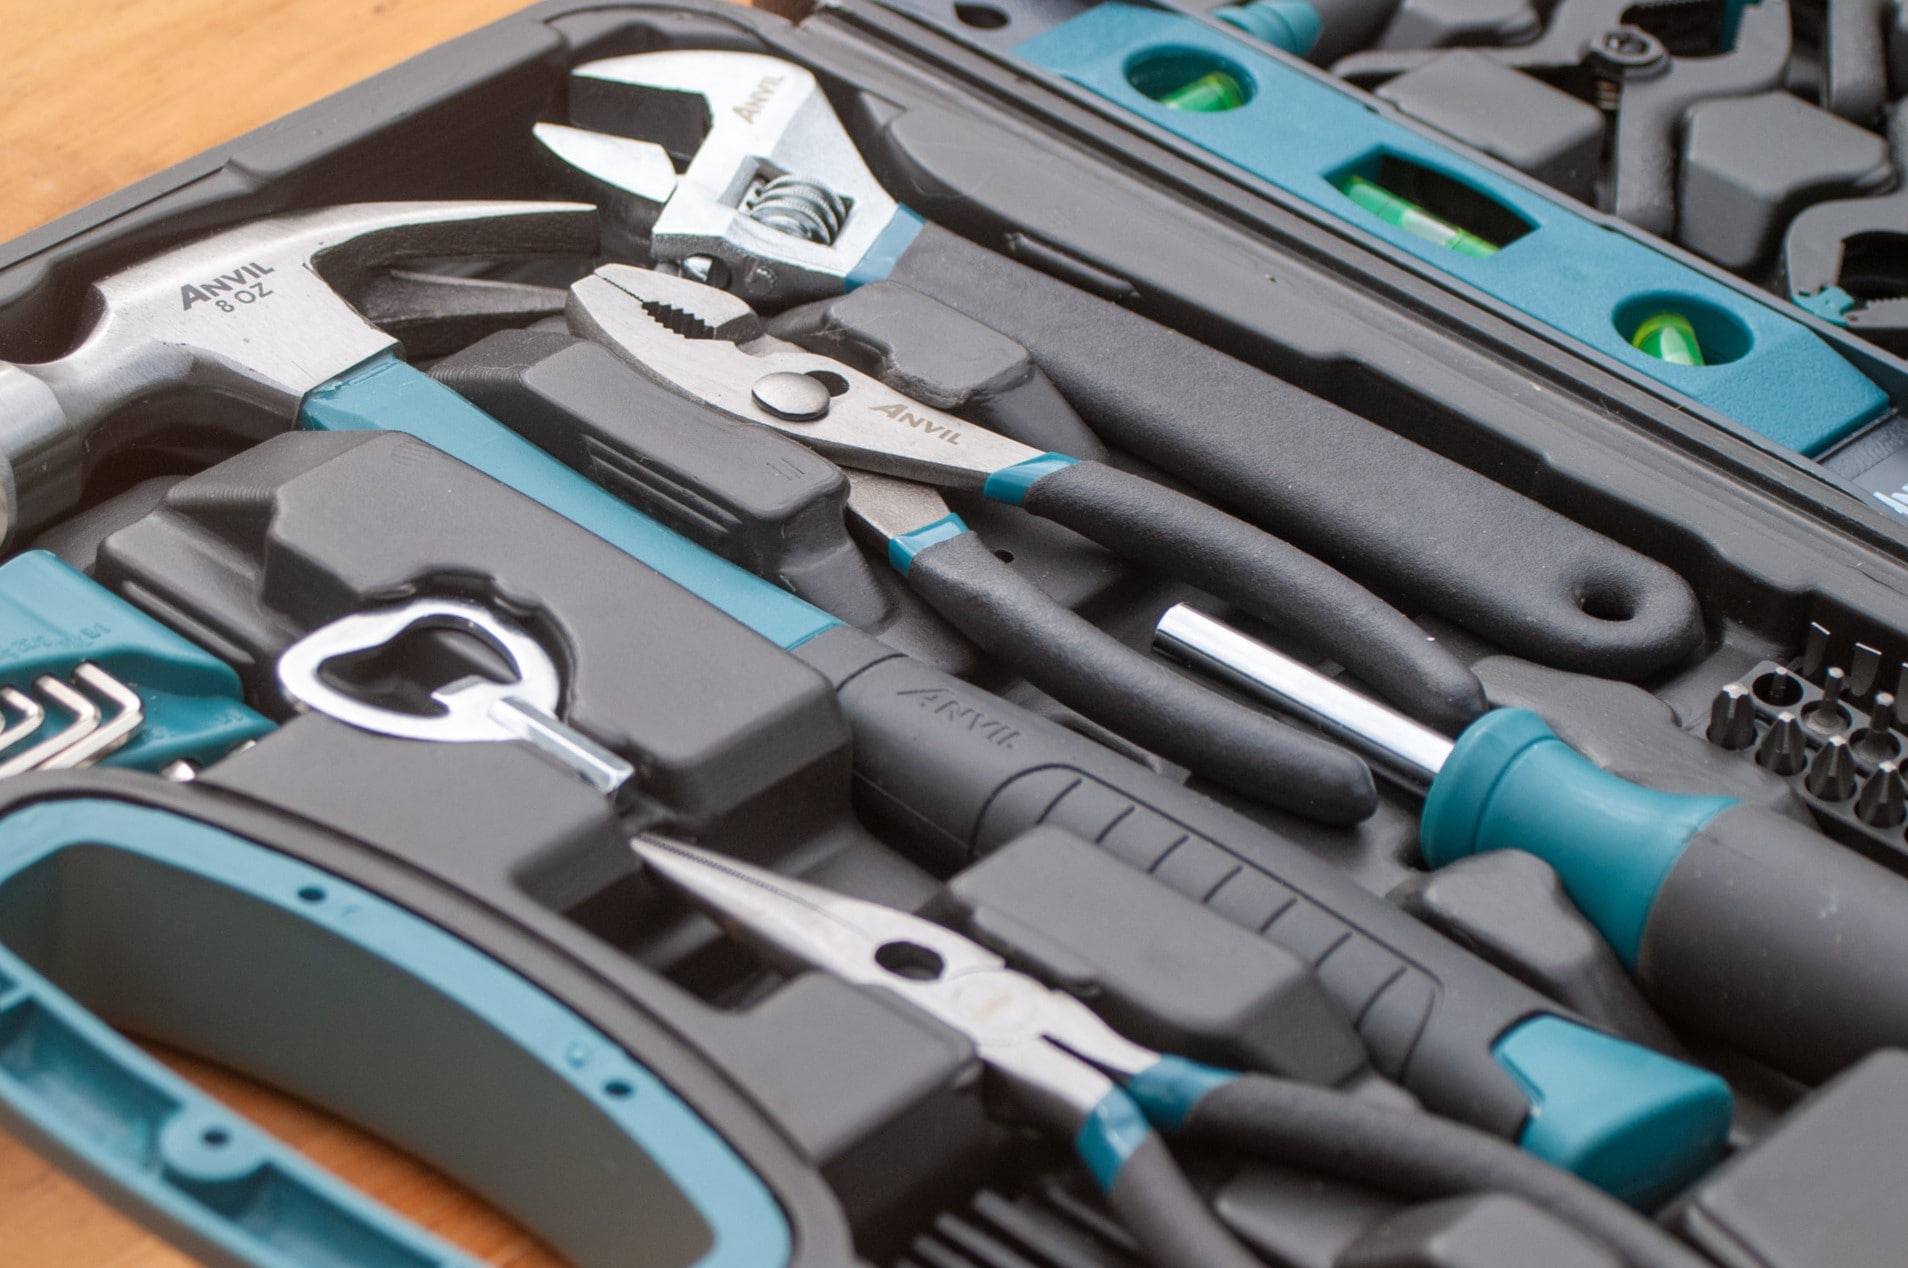
Consider investing in a tool chest or toolbox with dividers or compartments to store smaller tools, such as screwdrivers, wrenches, and pliers. This will help prevent them from getting lost or tangled. Label each compartment or drawer to make finding tools even easier. You can also use pegboards, tool racks, or magnetic strips to hang larger tools for quick and easy access.
Remember, the key to assessing and categorizing tools is to create an organized system that works best for you. Consider your storage space, the types of tools you have, and your personal preferences. By taking the time to properly categorize your tools, you’ll save yourself valuable time and frustration in the long run.
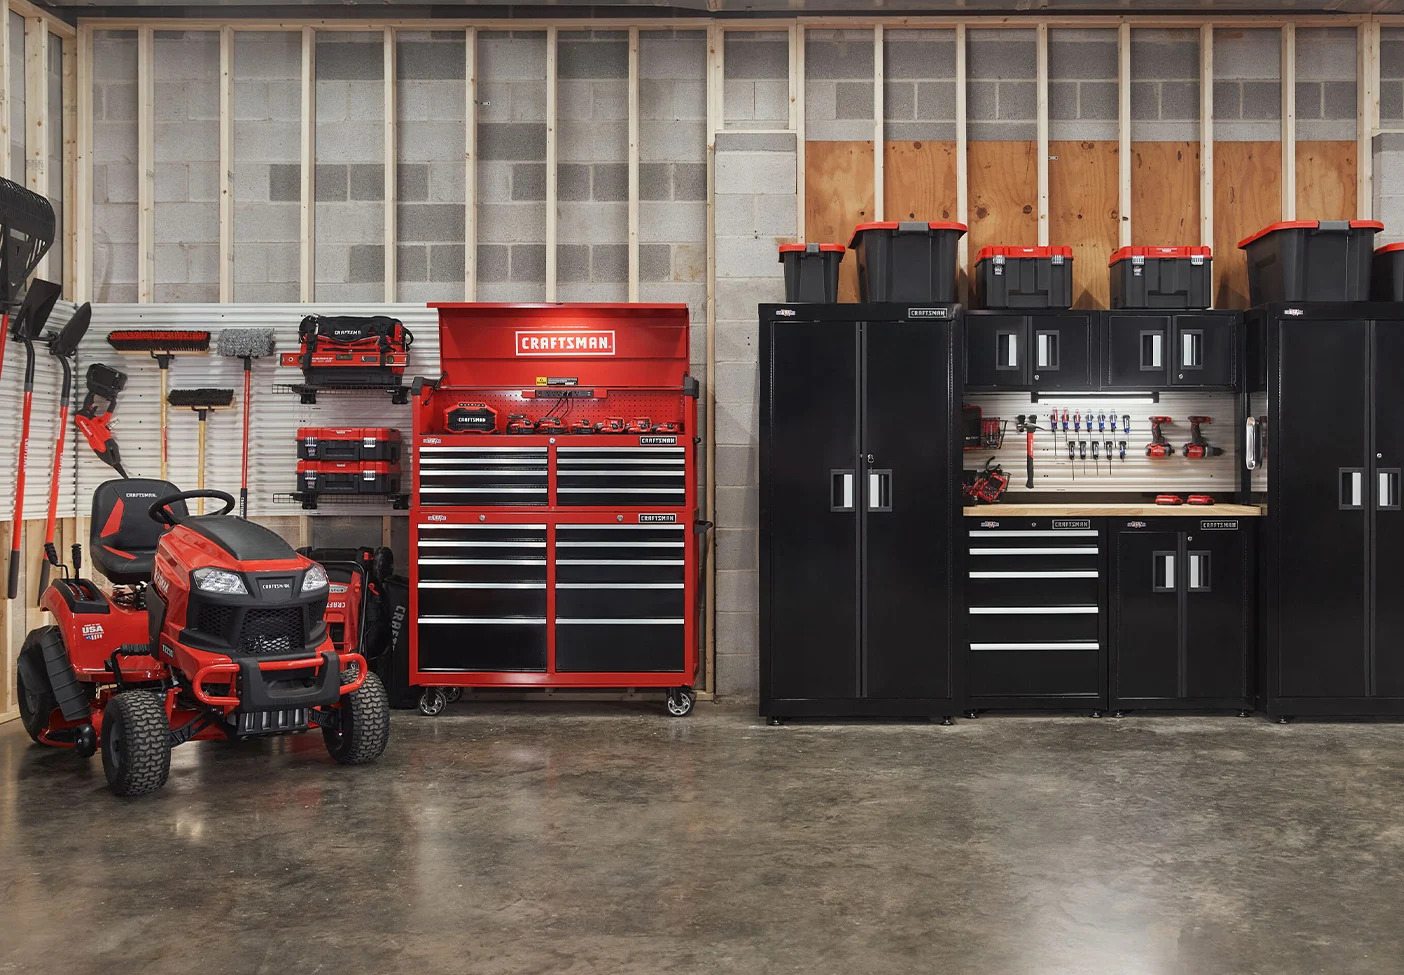
Creating a Dedicated Tool Storage Area
Once you have assessed and categorized your home repair tools, the next step is to create a dedicated tool storage area. Having a designated space for your tools not only keeps them organized but also ensures they are easily accessible whenever you need them.
Start by selecting a suitable location for your tool storage area. This could be a corner of your garage, a shed, a basement, or even a designated room. Consider factors such as humidity, temperature, and accessibility when choosing the right spot.
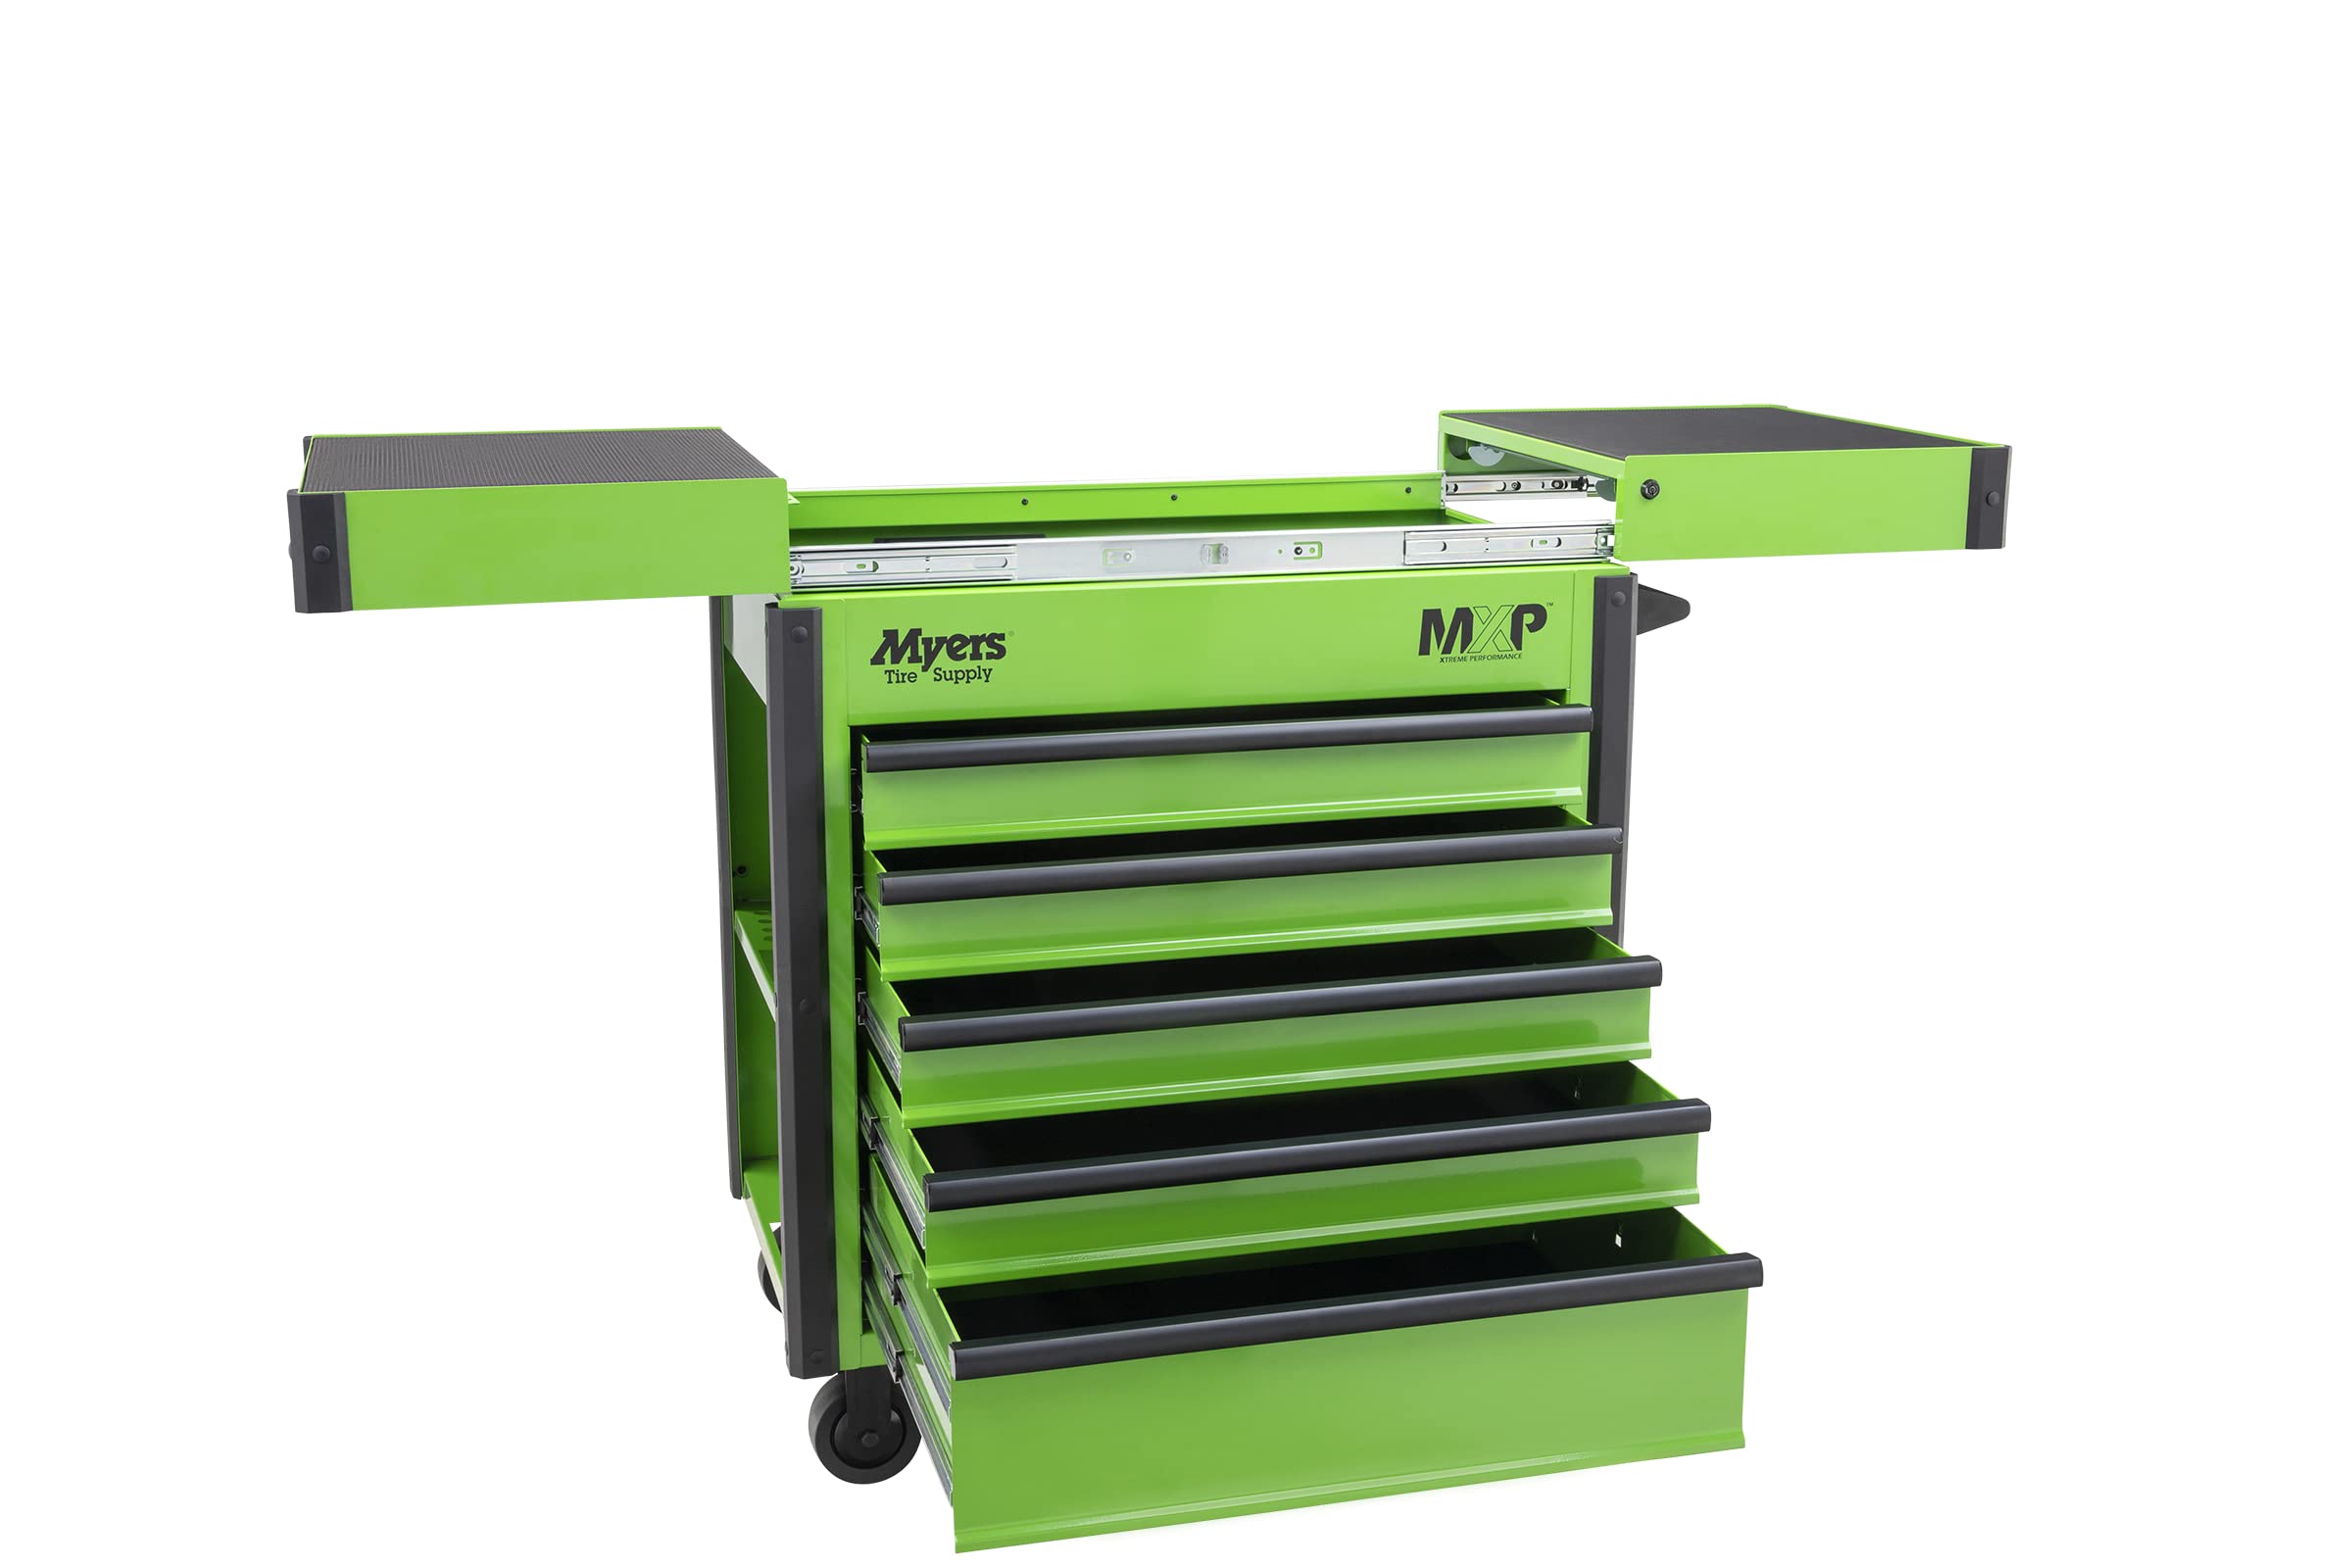
Next, invest in storage solutions that fit your needs. Depending on the size and number of tools you have, options could include tool chests, cabinets, shelving units, or a combination of these. Make sure to choose storage solutions that are durable and able to withstand the weight of your tools.
When organizing your tools within the storage area, keep frequently used tools in easily accessible locations. Place them within arm’s reach or at eye level to prevent unnecessary bending or searching. Less frequently used tools can be stored in lower or higher shelves or cabinets.
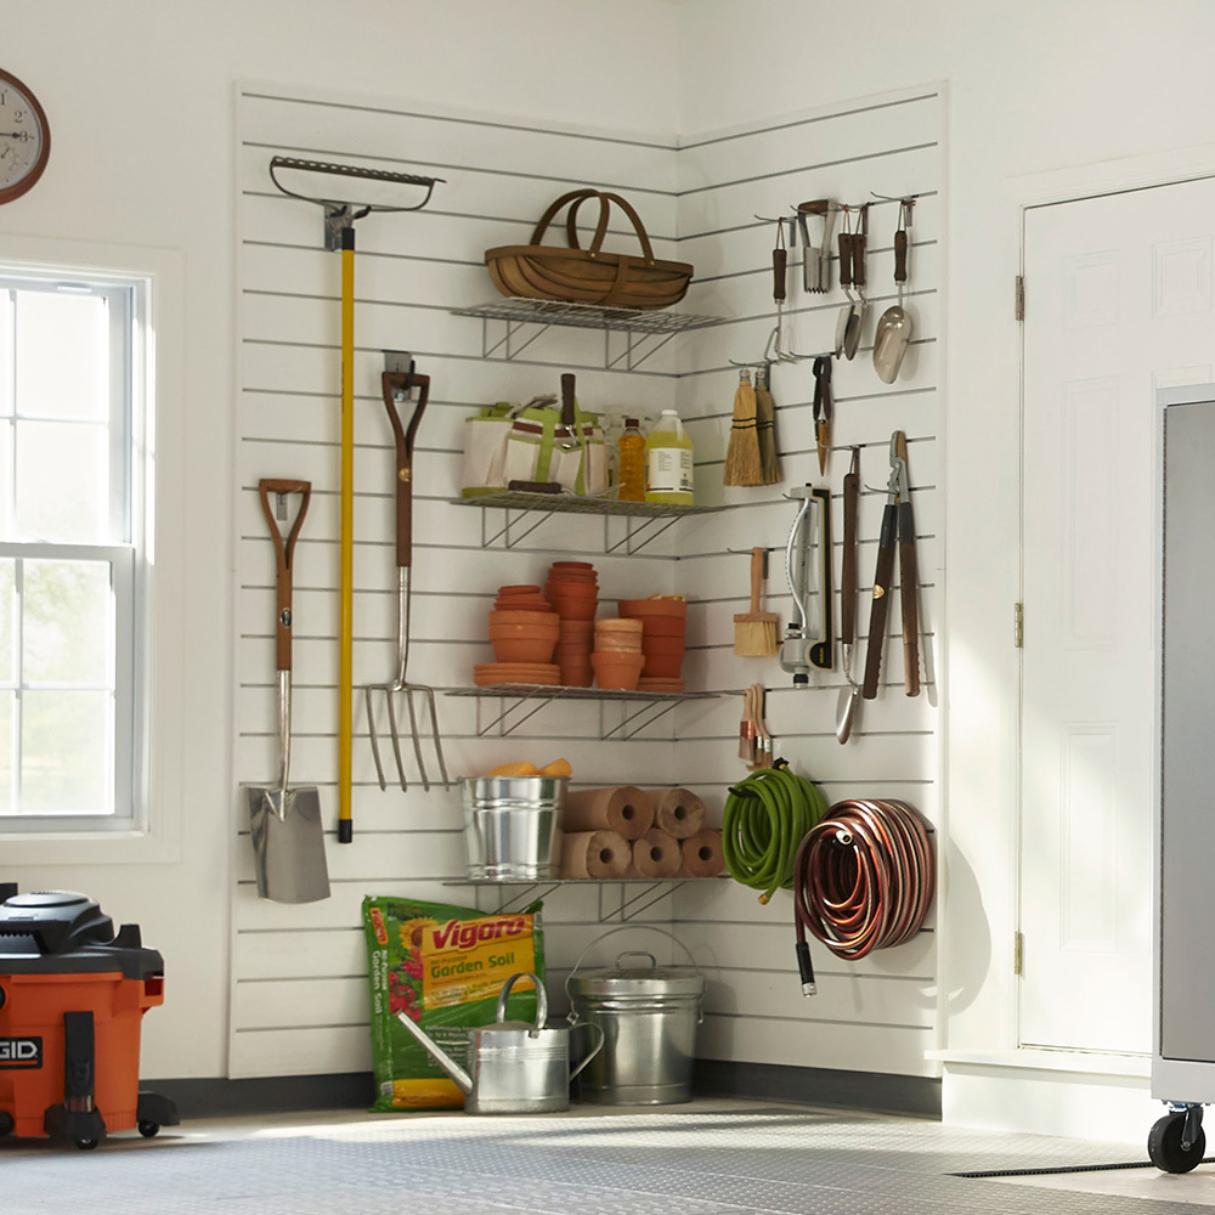
Utilize wall space by installing pegboards, which can hold a variety of tools and allow for easy visibility and access. Arrange your tools on the pegboard in a way that makes sense to you, whether it’s grouping them by type or arranging them based on size. Attach hooks, baskets, or shelves to hold smaller tools or accessories.
In addition to your main storage area, consider creating smaller storage solutions for specific types of tools. For example, you could have a separate toolbox for portable hand tools that you can easily grab and take with you for smaller tasks.
Finally, ensure that your tool storage area is well-lit and properly ventilated. Adequate lighting will make it easier to locate and identify tools, while proper ventilation will help prevent the buildup of moisture, which can lead to rust or damage to your tools.
By creating a dedicated tool storage area, you will not only keep your tools organized but also extend their lifespan. With a designated space for your tools, you can be confident that you will be able to find the right tool whenever the need arises, saving you time and frustration during your home repair projects.
Essential Tools for Basic Home Repairs
When it comes to basic home repairs, having a set of essential tools is crucial. These tools will come in handy for a wide range of tasks, from fixing a leaky faucet to hanging a picture frame. Here are some must-have tools for every homeowner:
- Screwdriver Set: A good set of screwdrivers is essential for various tasks around the house. Make sure to have both flathead and Phillips head screwdrivers in different sizes to handle different types of screws.
- Adjustable Wrench: An adjustable wrench is a versatile tool that can be used for tightening or loosening nuts and bolts of different sizes. It’s especially useful for plumbing repairs.
- Pliers: Pliers are handy for gripping, twisting, and cutting wires or other materials. A pair of needle-nose pliers and a set of slip-joint pliers should cover most tasks.
- Tape Measure: A tape measure is essential for accurately measuring distances and dimensions when hanging pictures or installing furniture.
- Level: A level ensures that objects, such as shelves or pictures, are straight and level. This tool is essential for achieving a professional-looking result.
- Utility Knife: A utility knife is perfect for cutting various materials, such as cardboard, carpet, or drywall. Make sure to have spare blades on hand.
- Hammer: A good quality hammer is essential for tasks like driving nails or removing them. Choose a hammer with a comfortable grip and a claw for pulling out nails.
- Flashlight: A reliable flashlight will come in handy when working in dark or hard-to-reach areas.
- Measuring Tape: In addition to a tape measure, a measuring tape that easily retracts is useful for longer measurements and DIY home improvement projects.
- Safety Equipment: Always prioritize safety. Ensure you have safety goggles, work gloves, and a dust mask to protect yourself during home repairs.
Having these essential tools readily available will empower you to handle basic home repairs efficiently. Remember to purchase quality tools that will last, as they will pay off in the long run by making your tasks easier and more successful.
Tools for Plumbing and Electrical Work
When it comes to plumbing and electrical work, having the right tools is essential for tackling repairs and installations safely and effectively. Here are some tools that every homeowner should have in their arsenal:
Plumbing Tools:
- Pipe Wrench: A pipe wrench is a must-have for tightening and loosening pipe fittings. It has adjustable jaws that provide a secure grip on various pipe sizes.
- Plunger: An essential tool for unclogging drains and toilets, a plunger creates suction to dislodge blockages. It’s important to have both a sink plunger and a toilet plunger on hand.
- Adjustable Pliers: Adjustable pliers, also known as channel-lock pliers, are handy for gripping, turning, and holding objects securely during plumbing repairs.
- Teflon Tape: Teflon tape is used to seal pipe threads and prevent leaks. It’s typically applied to the threads of pipe fittings before assembly.
- Plumbing Snake: When dealing with stubborn clogs, a plumbing snake, or drain auger, is invaluable. It can reach deep into pipes to remove blockages that plunging alone cannot fix.
Electrical Tools:
- Screwdrivers: Screwdrivers, specifically insulated ones, are necessary for working with electrical components. They ensure your safety by protecting you from electrical shocks.
- Wire Strippers: Wire strippers allow you to remove the insulation from wires easily. This tool is essential for electrical repairs and installations.
- Voltage Tester: A voltage tester helps you determine whether an electrical circuit is live or not. It ensures your safety by indicating the presence of electrical current.
- Wire Nuts: Wire nuts are connectors used to join electrical wires securely. They are essential for creating reliable connections during electrical repairs or installations.
- Circuit Breaker Finder: This device helps you identify which circuit breaker controls a specific outlet or fixture. It streamlines troubleshooting and makes working on electrical systems safer.
When working on plumbing or electrical systems, always prioritize safety. Make sure to turn off the water or electricity supply before starting any repairs or installations. If you are uncomfortable or unsure about the task at hand, it’s best to consult a professional.
Investing in these plumbing and electrical tools will equip you to handle basic repairs and installations with confidence. Remember to use them responsibly and safely, always following proper procedures and guidelines.
Invest in a sturdy toolbox or tool chest to keep all your home repair tools organized and easily accessible. Label each compartment or drawer to quickly find the right tool for the job.
Read more: How To Build A Tool Chest With Drawers
Tools for Carpentry and Woodworking
Whether you’re a seasoned woodworker or just starting with carpentry projects, having the right tools is essential for achieving professional-quality results. Here are some must-have tools for carpentry and woodworking:
- Tape Measure: Accurate measurements are crucial in carpentry and woodworking projects. Invest in a reliable tape measure with both metric and imperial measurements.
- Circular Saw: A circular saw is a versatile power tool used for cutting straight lines in various materials, including wood. Look for one with adjustable cutting depth and easy blade changing.
- Mitre Saw: A mitre saw, also known as a chop saw, is used for making precise angled cuts, such as those required for creating picture frames or crown moldings.
- Router: A router is a versatile tool that allows you to create decorative edges, cut grooves, and shape wood pieces. It’s a must-have for more intricate woodworking projects.
- Clamps: Clamps are essential for holding wood pieces together firmly while glue dries or when making precise cuts. Quick-release bar clamps and pipe clamps are popular choices.
- Chisels: Chisels are used for shaping, carving, and removing excess wood during woodworking projects. A set of chisels with different sizes will cover most tasks.
- Hand Planes: Hand planes are used for smoothing surfaces, removing rough spots, and shaping wood. Consider a block plane, smoothing plane, and jack plane for different purposes.
- Sanding Tools: Sanding is a crucial step in woodworking to achieve a smooth finish. Invest in sandpaper, a sanding block, and an orbital sander for efficient sanding.
- Woodworking Square: A woodworking square ensures accurate right angles and measurements. Look for a square that’s made of durable materials and has a clear marking system.
- Hammer: A good-quality hammer is useful for driving nails, adjusting joints, and making smaller adjustments. Choose one with a comfortable grip and a claw for pulling out nails.
In addition to these essential tools, it’s important to have a well-equipped toolbox with a set of high-quality drill bits, screws, nails, and other fasteners. Safety should always be a priority when working with carpentry tools, so don’t forget to wear appropriate safety gear, such as safety goggles and ear protection.
As you gain more experience in carpentry and woodworking, you may find that specific projects require additional specialized tools. However, starting with these fundamental tools will set you on the path to success and allow you to take on a variety of woodworking projects with confidence.
Tools for Painting and Finishing
When it comes to painting and finishing projects, having the right tools can make all the difference in achieving a smooth and professional-looking result. Here are some essential tools for painting and finishing:
- Paintbrushes: Invest in a variety of high-quality paintbrushes in different sizes and types. A synthetic bristle brush is suitable for water-based paints, while a natural bristle brush is ideal for oil-based paints.
- Roller and Roller Covers: A roller is an efficient tool for painting larger surfaces. Choose a roller frame with a comfortable grip and high-quality roller covers that best suit your painting project.
- Paint Trays: Paint trays are essential for holding and distributing paint as you work. Look for trays with a liner or a disposable tray liner for easier clean-up.
- Painters Tape: Painters tape is a must-have when it comes to achieving clean edges and protecting surfaces that you don’t want to be painted. Use it to mask off areas such as trim, windows, and baseboards.
- Sandpaper and Sanding Block: Before painting or finishing, it’s important to prepare the surface by sanding it smooth. Different grits of sandpaper and a sanding block will help you achieve the desired finish.
- Putty Knife: A putty knife is useful for filling holes, cracks, and imperfections in walls or wood surfaces. It’s also handy for scraping away loose paint or wallpaper.
- Paint Scraper: A paint scraper is essential for removing peeling or chipping paint from surfaces. Look for a scraper with a comfortable grip and replaceable blades.
- Paint Stirrer: To ensure that your paint is well mixed and ready for application, use a paint stirrer to gently stir the paint and blend any settled pigments.
- Drop Cloths: Protect your floors and furniture from splatters and spills by using drop cloths. Canvas or plastic drop cloths provide excellent coverage and are reusable.
- Extension Pole: An extension pole is invaluable when painting hard-to-reach areas, such as high ceilings or tall walls. It eliminates the need for a ladder and provides better control.
Additionally, invest in high-quality paint and finishing products, as they can greatly affect the overall result of your project. Follow the manufacturer’s instructions regarding product application and drying times for the best outcomes.
Remember to clean your painting tools properly after each use to prolong their lifespan and ensure optimal performance. Dispose of leftover paint and other hazardous materials safely and in accordance with local regulations.
By having these essential tools for painting and finishing, you’ll be well-equipped to tackle a wide range of projects, from refreshing a room’s appearance to refinishing furniture, and achieve professional results that you can take pride in.
Tools for Gardening and Outdoor Maintenance
When it comes to gardening and outdoor maintenance, having the right tools can make the tasks easier, more efficient, and enjoyable. These tools will help you maintain a beautiful and well-kept outdoor space. Here are some essential tools for gardening and outdoor maintenance:
- Garden Gloves: A good pair of garden gloves protects your hands from thorns, prickly plants, and dirt. Look for gloves that are durable, flexible, and provide a good grip.
- Trowel: A trowel is a handheld garden tool that is used for digging small holes, transplanting plants, and scooping soil. Choose a sturdy trowel with a comfortable grip.
- Pruning Shears: Pruning shears, also known as hand pruners or secateurs, are essential for cutting and shaping plants, shrubs, and trees. Look for a pair with sharp blades and ergonomic handles.
- Garden Fork: A garden fork is used for loosening soil, turning compost, and lifting plants. Consider a garden fork with sturdy tines suitable for the tasks you’ll be performing.
- Hand Rake: A hand rake, also known as a garden cultivator, helps break up clumps of soil, remove debris, and cultivate the soil surface. Look for a rake with sturdy tines and a comfortable handle.
- Watering Can or Hose: Proper watering is crucial for the health of your plants. Choose a watering can with a long spout for targeted watering or invest in a hose with an adjustable spray nozzle.
- Garden Wheelbarrow: A garden wheelbarrow is useful for transporting heavy loads of soil, mulch, or plants around your yard. Opt for a sturdy wheelbarrow with handles that provide good grip and control.
- Lawn Mower: If you have a lawn, a reliable lawn mower is a must-have for maintaining its appearance. Choose a lawn mower suitable for the size of your lawn and consider options like electric or gas-powered models.
- Hedge Trimmer: A hedge trimmer helps you maintain neat and tidy hedges and shrubs. Look for a trimmer with sharp blades and adjustable settings for different cutting angles.
- Leaf Rake: During the fall season, a leaf rake is essential for gathering and clearing away fallen leaves. Look for a rake with flexible tines that can easily collect leaves without damaging your lawn.
Investing in high-quality gardening tools will ensure that they last longer and perform better for the tasks at hand. Proper maintenance, such as cleaning and sharpening, will also help extend their lifespan.
Keep in mind that additional tools may be required depending on your specific outdoor maintenance needs. Consider factors like the size and type of your garden, the plants you have, and the tasks you’ll be performing regularly.
With these essential gardening and outdoor maintenance tools, you’ll be well-equipped to create and maintain a beautiful outdoor space that you can enjoy year-round.
Tips and Techniques for Organizing Tools
Organizing your tools not only saves time and frustration but also ensures that they remain in good condition for longer. Here are some tips and techniques for efficiently organizing your tools:
- Assess Your Storage Space: Take a close look at your storage area to determine its size, layout, and any limitations. This will help you make informed decisions about the type of storage solutions you can implement.
- Categorize Tools: Group your tools by their function or type. This could include categories such as plumbing, electrical, carpentry, painting, gardening, or outdoor maintenance. Subcategorize further as needed based on size or frequency of use.
- Invest in Tool Storage Solutions: Depending on your available space and tool collection, consider investing in tool chests, cabinets, shelves, pegboards, or magnetic strips. Utilize wall space effectively to maximize storage capacity.
- Label and Arrange: Label each storage area, drawer, or compartment to indicate the tools it contains. This makes it easier to locate specific tools when you need them. Arrange tools logically within each category or container for easy retrieval.
- Maintain Proper Maintenance: Regularly inspect and clean your tools to ensure they are in good working condition. This includes checking for any damage, oiling moving parts, and sharpening blades as necessary.
- Keep Frequently Used Tools Accessible: Store your most frequently used tools in easily accessible locations. This could include placing them within arm’s reach or at eye level. Consider installing hooks, racks, or holders to keep them organized and readily available.
- Secure Loose Smaller Tools: Use tool organizers, such as dividers or compartments in toolboxes, to store smaller tools like screwdrivers, wrenches, and pliers. This prevents them from getting lost or tangled.
- Designate a Portable Tool Bag or Box: Have a dedicated tool bag or box for smaller projects or for when you need to work in different areas of your home. This allows you to easily carry essential tools with you without having to retrieve them from your main storage area.
- Create a Maintenance Schedule: Set aside time periodically to organize and clean your tools. This will help you stay on top of any repairs, replacements, or maintenance tasks that need attention.
- Personalize Your Organization System: Adapt your tool organization system to your personal preferences and workflow. Experiment with different layouts and storage solutions until you find what works best for you.
Remember, organizing your tools is an ongoing process. Regularly review and update your system as needed to accommodate new tools or changes in workflow. By following these tips and techniques, you’ll have a well-organized tool collection that saves time and allows you to focus on your home maintenance projects with ease.
Read more: How To Stiffen Up A Rolling Tool Chest
Conclusion
Organizing your home repair tools is a vital step in maintaining an efficient and enjoyable home maintenance experience. By assessing and categorizing your tools, creating a dedicated storage area, and investing in the essential tools for various tasks, you can ensure that you’re prepared to handle any repairs or improvements that come your way.
Whether it’s plumbing, electrical work, carpentry, painting, gardening, or outdoor maintenance, having the right tools at your disposal is essential for achieving professional-quality results. By organizing your tools in a logical and accessible manner, you can save time and frustration when embarking on home improvement projects.
Remember to prioritize safety throughout your organizing process and when using your tools. Wear appropriate safety gear, implement proper maintenance procedures, and consult professionals when needed. Safety should always be a top priority when working on any home maintenance tasks.
By following the tips and techniques outlined in this article, you can create an efficient and well-organized system for storing and maintaining your home repair tools. Not only will this help you save time and effort, but it will also extend the lifespan of your tools, ensuring they remain in good condition for years to come.
So, take the time to assess your tools, invest in storage solutions that suit your needs, and organize them in a way that works best for you. With a well-organized tool collection, you can approach home maintenance projects with confidence and tackle them with ease.
Remember, organization is an ongoing process. Regularly evaluate and update your tool organization system as needed. By doing so, you’ll always have the right tool at hand, allowing you to maintain and improve your home efficiently and effectively.
Frequently Asked Questions about How To Organize Home Repair Tools
Was this page helpful?
At Storables.com, we guarantee accurate and reliable information. Our content, validated by Expert Board Contributors, is crafted following stringent Editorial Policies. We're committed to providing you with well-researched, expert-backed insights for all your informational needs.