Home>Home Maintenance>How To Remove A Brush Stuck In A Dryer Vent
Home Maintenance
How To Remove A Brush Stuck In A Dryer Vent
Modified: August 25, 2024
Learn how to safely remove a brush stuck in your dryer vent with this step-by-step guide. Discover essential home maintenance tips to keep your dryer running efficiently.
(Many of the links in this article redirect to a specific reviewed product. Your purchase of these products through affiliate links helps to generate commission for Storables.com, at no extra cost. Learn more)
Introduction
Welcome to the ultimate guide on how to remove a brush stuck in a dryer vent. If you’ve encountered this frustrating issue, you’re not alone. A brush stuck in a dryer vent can cause poor airflow, leading to longer drying times, increased energy consumption, and even potential fire hazards. However, with the right knowledge and tools, you can safely and effectively resolve this problem.
In this comprehensive article, we will walk you through the step-by-step process of removing a brush stuck in a dryer vent. We will also provide essential safety precautions to ensure your well-being throughout the entire procedure. So, let’s get started!
Before we dive into the detailed steps, it’s important to emphasize the significance of maintaining a clean and obstruction-free dryer vent. A clogged or obstructed vent not only affects the efficiency of your dryer but also poses serious risks. Lint buildup and blockages in the dryer vent can lead to overheating, which may cause a fire. Therefore, regular maintenance and cleaning are essential.
Now, let’s move on to the safety precautions that you should always keep in mind before attempting to remove a brush stuck in a dryer vent.
Key Takeaways:
- Regularly removing obstructions from your dryer vent, like a stuck brush, ensures safety, efficiency, and prevents fire hazards. Follow safety precautions and use the right tools for a smooth process.
- Prioritize safety, gather the right tools, and follow the step-by-step process to remove a brush stuck in your dryer vent. Regular maintenance ensures optimal dryer performance and safety.
Read also: 8 Amazing Dryer Vent Brush For 2025
Safety Precautions
When dealing with a brush stuck in a dryer vent, it’s crucial to prioritize safety to avoid accidents or injuries. Here are some essential safety precautions to follow:
- Turn off the dryer: Before starting any work, ensure that the dryer is completely turned off and unplugged. This will eliminate the risk of the dryer turning on while you are working on it.
- Wear protective gear: Put on safety goggles to protect your eyes from any debris or loose particles that may be dislodged during the process. Additionally, wear gloves to safeguard your hands from sharp edges or potential allergens.
- Work in a well-ventilated area: It’s important to have proper ventilation while working on the dryer vent. Open windows or doors to allow fresh air to circulate, especially if you’re using any cleaning solvents.
- Use a stability device: If the dryer is located in an elevated position, such as on a pedestal or stacked on top of a washing machine, make sure it is secure. Use a stability device, like an appliance strap or bracket, to prevent it from accidentally falling during the process.
- Maintain a clutter-free workspace: Clear any obstructions or objects around the dryer to create a safe and organized workspace. This will prevent any tripping hazards and allow easy access to the vent opening.
- Follow manufacturer’s instructions: Consult the user manual or manufacturer’s guidelines specific to your dryer model. This will provide valuable information on maintenance and safety procedures.
- Consider professional help: If you’re unsure about performing the task yourself or encounter any difficulties, it’s best to seek professional assistance. Experienced technicians can handle complex cases and ensure the job is done safely and efficiently.
By following these safety precautions, you can minimize the risk of accidents and ensure a safe working environment. Now let’s move on to the tools and materials you will need for the task.
Tools and Materials Needed
Before you begin removing a brush stuck in a dryer vent, it’s important to gather the necessary tools and materials. Here’s a list of what you’ll need:
- Screwdriver: A screwdriver will be needed to remove the screws securing the exterior vent cover.
- Flashlight: A flashlight will help illuminate the vent opening and allow you to see any obstructions or the lodged brush.
- Shop Vacuum: A shop vacuum with a hose attachment will be used to remove any loose debris or lint from the vent opening.
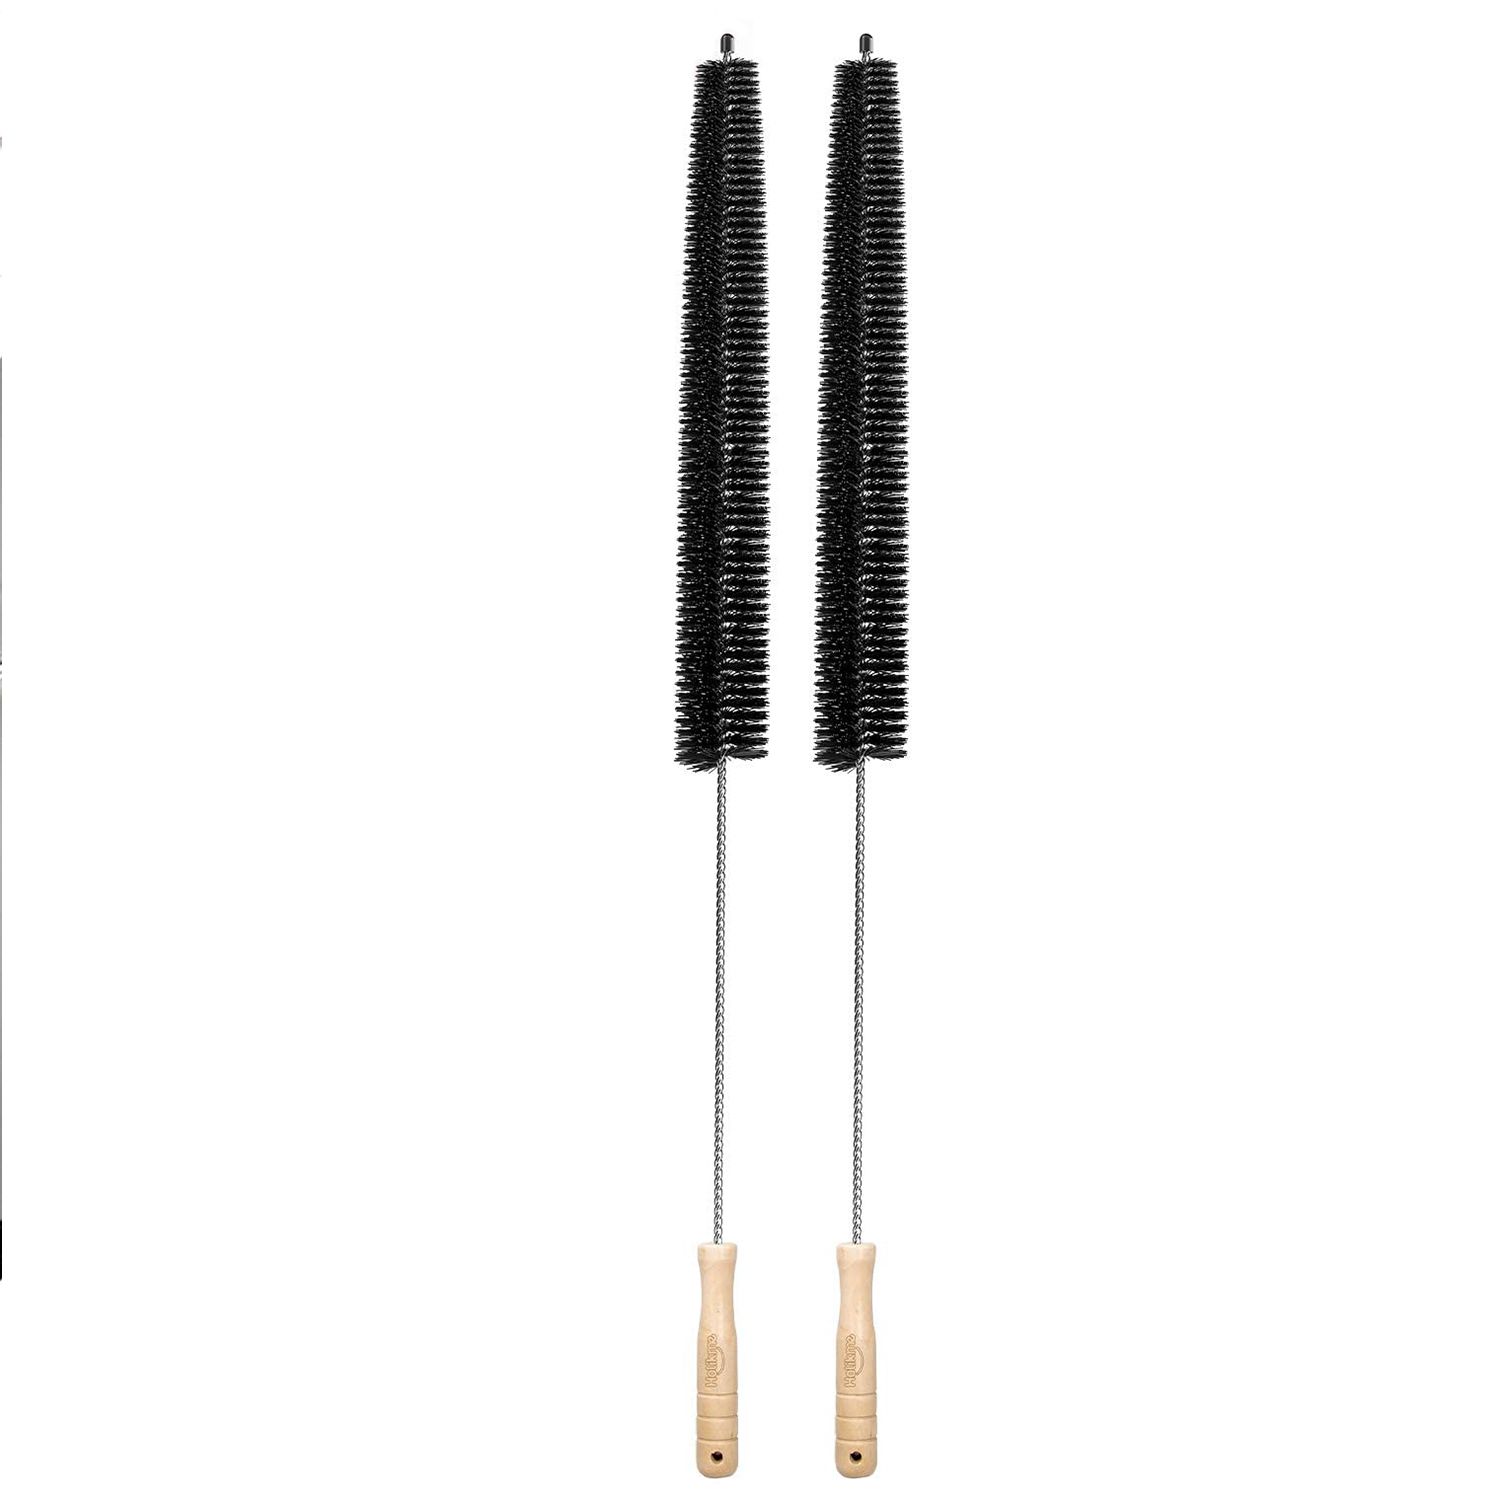
- Brush or Rod: A long, flexible brush or rod specifically designed for dryer vent cleaning will be necessary to dislodge and remove the brush stuck in the vent.
- Cleaning Solvent: Depending on the condition of the vent opening, you may need a mild cleaning solvent to remove any stubborn debris or buildup.
- Rags or Towels: Rags or towels will be helpful for cleaning and wiping down the vent opening, as well as for protecting the surrounding area from any dirt or cleaning solvents.
- Optional: Replacement Vent Cover: If the exterior vent cover shows signs of damage or deterioration, it’s recommended to have a replacement cover on hand for reinstalling after the brush removal.
Make sure to gather all the tools and materials before starting the process. This will ensure that you have everything you need within reach, saving you time and frustration.
Now that you have the necessary tools and materials, let’s move on to the step-by-step process of removing a brush stuck in a dryer vent.
Step 1: Disconnect the Dryer
The first step in removing a brush stuck in a dryer vent is to safely disconnect the dryer from its power source. Follow these steps:
- Turn off the dryer: Make sure the dryer is turned off and unplugged from the electrical outlet. This will prevent any accidental startup during the process.
- Move the dryer away from the wall: Gently pull the dryer away from the wall, creating enough space to access the back of the appliance comfortably.
- Disconnect the dryer vent hose: Locate the dryer vent hose connected to the back of the dryer. Depending on the type of connection, you may need to loosen a clamp or simply pull the hose off the dryer vent exhaust. Be cautious not to damage or bend the hose as you disconnect it.
- Remove any additional attachments: If there are any additional attachments, such as a lint trap or lint screen, detach them from the dryer. These attachments may hinder access to the exterior vent cover or obstruct the brush removal process.
- Set the dryer aside: Once the dryer and all attachments are disconnected, carefully set the dryer aside or place it on a stable surface. Ensure that it is secure and won’t topple over during the remaining steps.
By disconnecting the dryer from its power source, you minimize the risk of electrical shock and create a safe working environment. Now, with the dryer properly disconnected, we can move on to the next step of locating the vent opening.
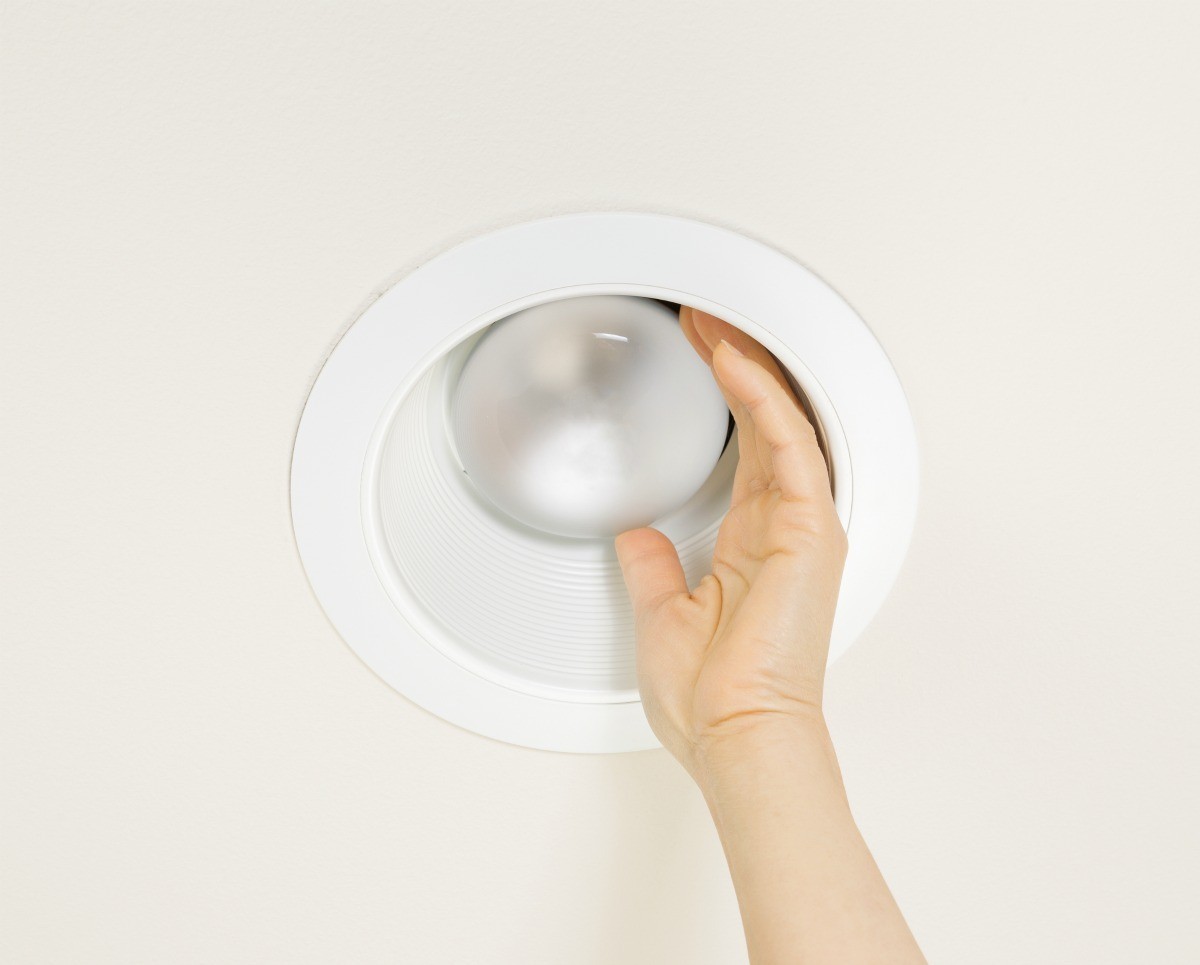
Step 2: Locate the Vent Opening
Locating the vent opening is crucial to accessing and removing the brush stuck in the dryer vent. Follow these steps to locate the vent opening:
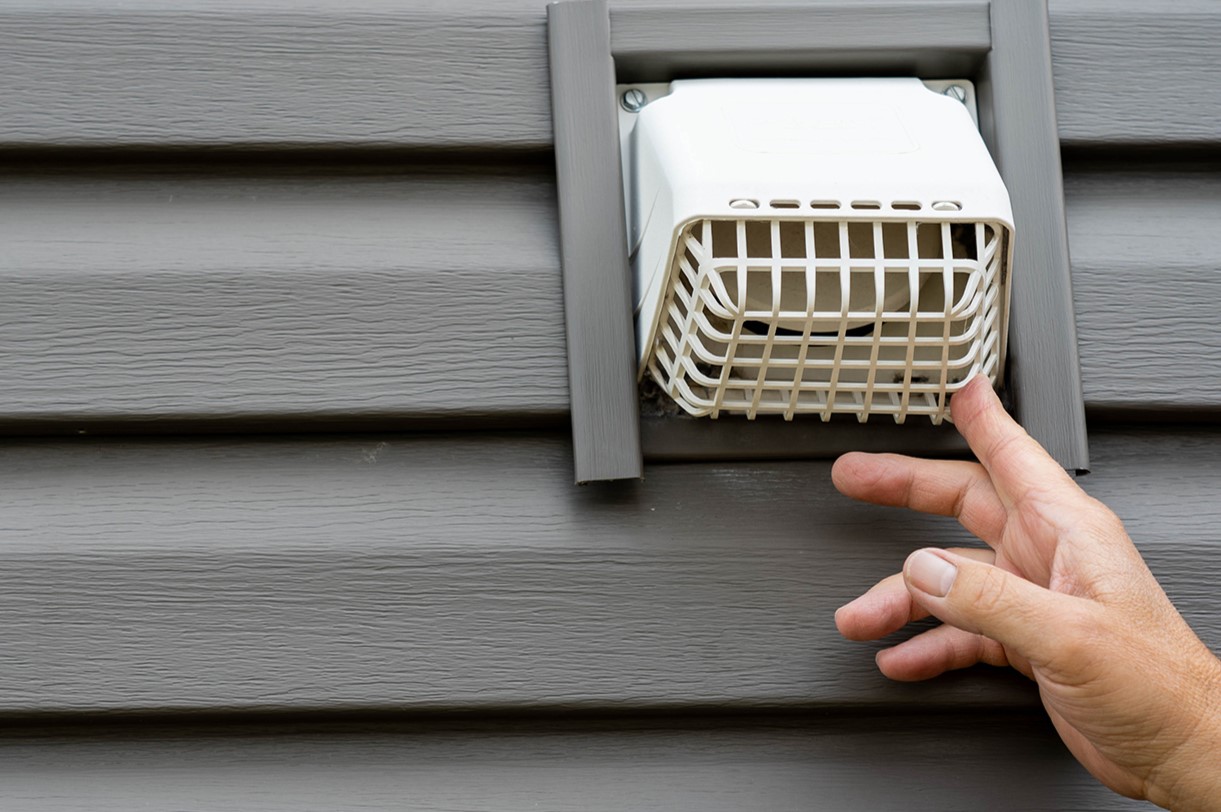
- Exterior: Start by going outside your home to locate the exterior vent opening. This is typically located on an exterior wall or on the roof. Look for a louvered cover or a metal hood with slits or grilles.
- Inspect surroundings: Clear any obstacles around the vent opening, such as plants, furniture, or debris. This will ensure easy access and prevent any items from falling inside the vent during the removal process.
- Check for signs of obstruction: Look for signs of obstruction around the vent opening, such as accumulated lint, bird nests, or visible brush bristles. These indicators can help confirm the presence of a brush stuck in the vent.
- Note the vent opening location: Take note of the vent opening’s exact location for easy reference when reattaching the exterior vent cover later.
It’s important to locate the vent opening accurately to avoid unnecessary damage and ensure a smooth brush removal process. With the vent opening identified, we can move on to the next step of removing the exterior vent cover.
Read more: How To Remove An Animal From A Dryer Vent
Step 3: Remove the Exterior Vent Cover
Removing the exterior vent cover is necessary to gain access to the interior of the dryer vent. Follow these steps to remove the exterior vent cover:
- Choose the right type of screwdriver: Determine the type of screws holding the vent cover in place. It is commonly secured with Phillips or flat-head screws. Select the appropriate screwdriver accordingly.
- Loosen the screws: Use the screwdriver to carefully loosen and remove the screws securing the exterior vent cover. Place the screws in a secure spot, such as a small container, to avoid losing them.
- Set aside the vent cover: Once the screws are removed, set the vent cover aside in a safe location. Make sure to place it on a clean surface to avoid dirt or debris entering the vent.
- Inspect the vent opening: Take a brief moment to inspect the interior of the vent opening for any visible obstructions. You may see part of the brush or other debris that needs to be removed.
By removing the exterior vent cover, you create an opening for accessing the brush stuck in the dryer vent. Now that the vent cover is removed, let’s move on to Step 4: Inspecting the vent opening.
Use a vacuum to suck out the brush or try using a long, flexible tool to push it out from the other end of the vent. Always unplug the dryer before attempting to remove the brush.
Step 4: Inspect the Vent Opening
Inspecting the vent opening is an important step to assess the condition and extent of the blockage caused by the brush stuck in the dryer vent. Follow these steps to inspect the vent opening:
- Use a flashlight: Shine a flashlight into the vent opening to get a clear view of the interior. This will help you identify any visible blockages, such as lint, debris, or the lodged brush.
- Look for signs of damage: Check for any signs of damage or deterioration within the vent opening. Look for loose or disconnected ducts, corrosion, or signs of wear and tear. Note any issues that may require repair or replacement.
- Take note of the blockage: If you can see the brush or any other blockages, take note of their position and severity. This will help you determine the best approach for removal.
- Assess the cleanliness: Pay attention to the level of cleanliness within the vent opening. If there is a buildup of lint or debris, it may require a more thorough cleaning process after removing the brush.
Inspecting the vent opening provides crucial information about the condition of the dryer vent and the blockage caused by the brush. Based on your observations, you can proceed to the next step, which is removing the brush stuck in the vent.
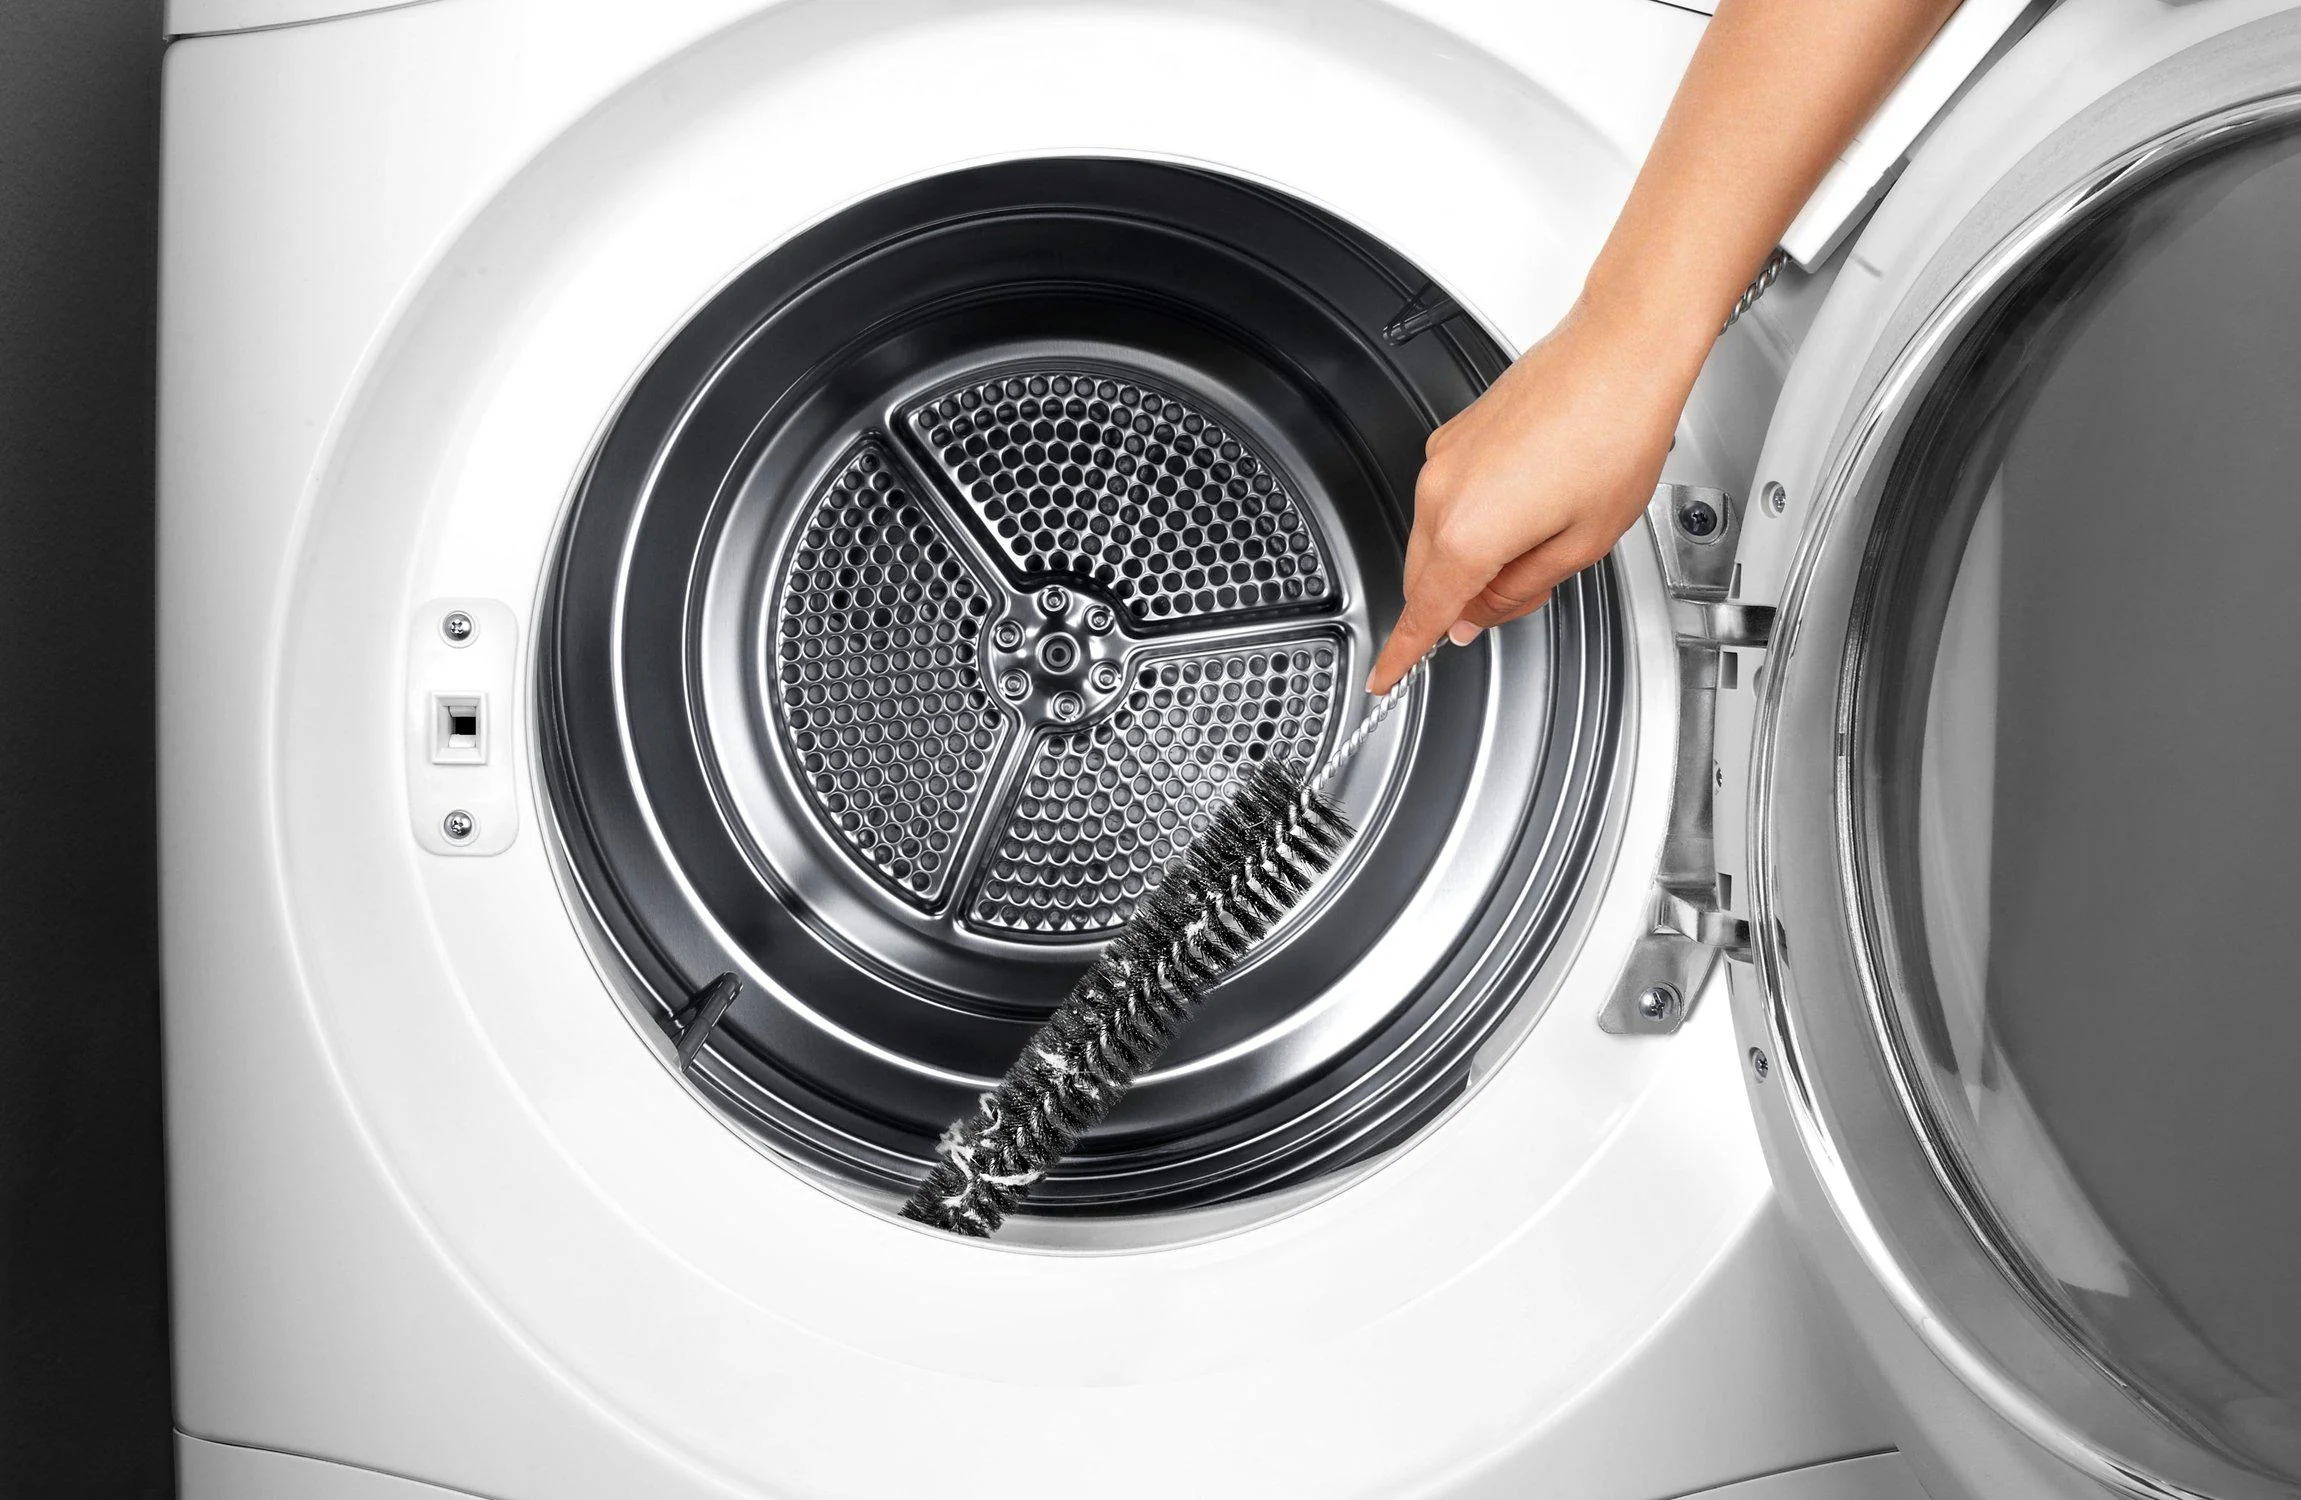
Step 5: Remove the Brush Stuck in the Vent
Now comes the crucial step of removing the brush stuck in the dryer vent. Proper technique and tools will ensure a smooth and efficient removal process. Follow these steps:
- Select the appropriate brush or rod: Choose a long, flexible brush or rod specifically designed for dryer vent cleaning. This will allow you to reach the brush stuck in the vent and dislodge it effectively.
- Insert the brush or rod into the vent: Gently insert the brush or rod into the vent opening, carefully navigating it towards the area where the brush is lodged. Take your time and avoid using excessive force to prevent damage to the vent or dislodged debris falling further into the vent system.
- Gently rotate or push and pull: Once the brush or rod is inserted, gently rotate it in a clockwise or counterclockwise motion, or push and pull it back and forth. This action will help dislodge the brush from its stuck position.
- Remove the brush: As you rotate or move the brush or rod, you will feel the brush start to loosen. Continue your gentle movements until the brush is completely free from the vent. Carefully retract the brush or rod, making sure not to let it drop into the vent.
- Inspect for additional obstructions: After removing the brush, visually inspect the vent opening once again to ensure there are no additional obstructions or loose debris. If necessary, use a shop vacuum with a hose attachment to remove any remaining lint or debris.
By following these steps, you should be able to successfully remove the brush stuck in the dryer vent. However, if you encounter any difficulties or the blockage is causing extensive damage, it’s recommended to seek professional assistance.
Now that the brush is removed, let’s move on to Step 6: Cleaning the vent opening to ensure proper airflow and functionality.
Step 6: Clean the Vent Opening
Cleaning the vent opening is an essential step to ensure proper airflow and functionality of your dryer. Even after removing the brush stuck in the vent, there may still be some lint or debris present. Follow these steps to clean the vent opening:
- Use a shop vacuum: Attach a hose or crevice tool to your shop vacuum. This will help you effectively remove any loose lint or debris from the vent opening.
- Vacuum the vent opening: Insert the shop vacuum hose into the vent opening and gently maneuver it around to suction up any remaining lint or debris. Be thorough in your cleaning, ensuring that the entire vent opening is clear.
- Inspect the vent hose: While cleaning the vent opening, take a moment to inspect the dryer vent hose as well. Look for any signs of damage or blockages. If necessary, use the shop vacuum to suction out any lint or debris from the vent hose.
- Clean the exterior vent cover: Take the time to clean the exterior vent cover. Use a damp cloth or sponge to wipe away any dirt or debris that may have accumulated on the surface.
- Recheck for cleanliness: Once the vent opening and exterior vent cover are cleaned, visually inspect the area for any remaining lint or debris. If needed, repeat the cleaning process until everything is clear.
By thoroughly cleaning the vent opening, you improve the airflow and prevent any potential obstructions in the future. This not only enhances the efficiency of your dryer but also reduces the risk of fire hazards.
With the vent opening cleaned, let’s proceed to Step 7: Reinstalling the exterior vent cover to complete the process.
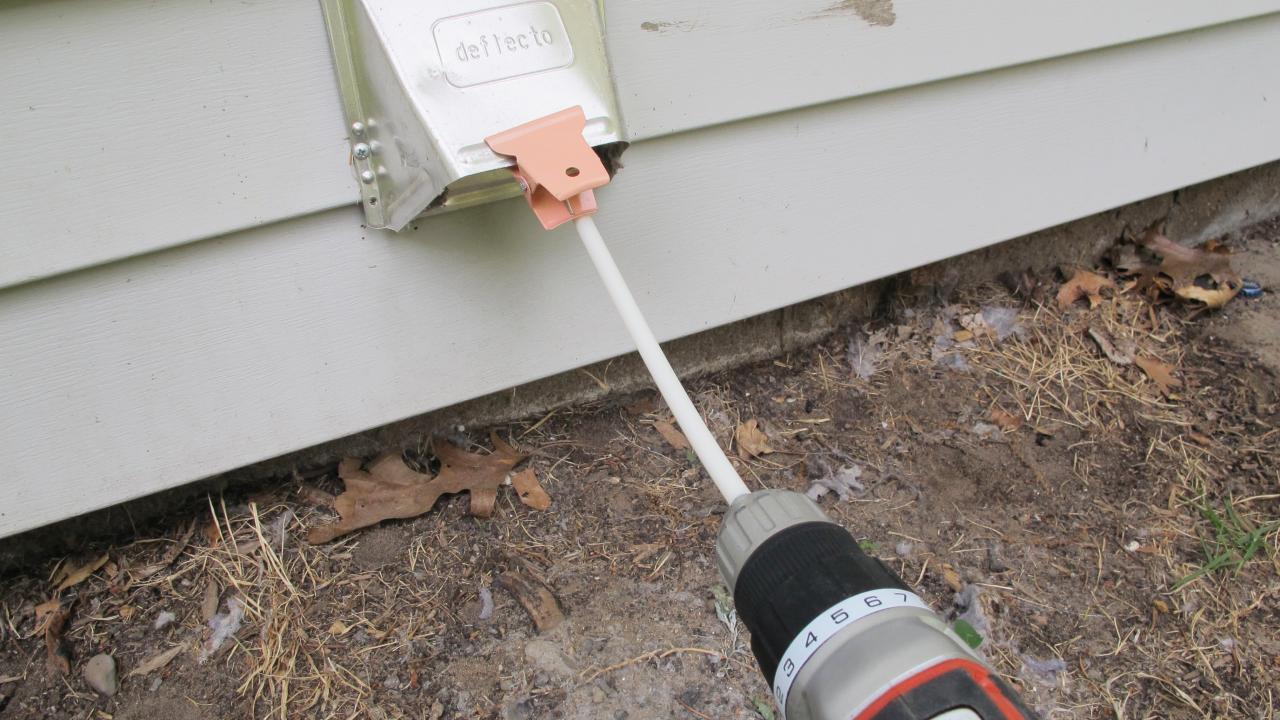
Step 7: Reinstall the Exterior Vent Cover
After removing the brush stuck in the dryer vent and cleaning the vent opening, it’s time to reinstall the exterior vent cover. The cover plays an important role in protecting the vent while allowing proper airflow. Follow these steps to reinstall the exterior vent cover:
- Position the vent cover: Align the screw holes on the vent cover with the corresponding holes on the vent opening. Make sure the cover is positioned correctly and sits flush against the exterior wall.
- Insert the screws: Take the screws that you set aside earlier and insert them through the screw holes on the vent cover. This will secure the cover in place.
- Tighten the screws: Use a screwdriver to tighten the screws, but be careful not to overtighten them, as it may cause damage to the cover or vent opening. Ensure that the cover is secure but still allows for easy removal in the future if needed.
- Give it a final check: Once the screws are tightened, give the vent cover a final inspection. Ensure that it is properly aligned, secure, and free from any gaps or misalignment.
By reinstalling the exterior vent cover, you safeguard the vent opening and prevent debris or pests from entering the vent system. It also improves the overall aesthetics of your home’s exterior.
With the vent cover securely in place, we are almost done. Proceed to Step 8: Reconnecting the dryer to complete the process.
Step 8: Reconnect the Dryer
Now that the brush stuck in the dryer vent has been removed, the vent opening has been cleaned, and the exterior vent cover has been reinstalled, it’s time to reconnect the dryer. Follow these steps to safely reconnect the dryer:
- Position the dryer: Move the dryer back into its original position, aligning it with the vent opening. Ensure that the dryer is stable and level.
- Reattach the vent hose: Connect the dryer vent hose back to the dryer exhaust. Depending on the type of connection, you may need to secure it with a clamp or simply push it firmly into place.
- Check for proper connection: Make sure that the vent hose is securely attached and there are no leaks or gaps. A loose or damaged connection can impact the dryer’s efficiency and increase the risk of lint buildup.
- Plug in the dryer: Insert the power plug into the electrical outlet. Ensure that it is fully inserted and there are no loose connections.
- Turn on the dryer: Switch on the dryer and verify that it is functioning properly. Listen for any unusual noises or vibrations and check for proper airflow.
By reconnecting the dryer, you ensure that it is safely and securely attached to the vent system. This allows for proper ventilation and efficient drying performance.
Congratulations! You have successfully removed a brush stuck in a dryer vent and completed the entire process. Regular maintenance and periodic cleaning of the dryer vent will help prevent such issues from reoccurring and ensure the safety and longevity of your dryer.
Remember, if you encounter any difficulties or are unsure about any step of the process, it’s always best to seek professional assistance. They have the expertise and necessary tools to handle complex situations and ensure optimal dryer performance.
Conclusion
Dealing with a brush stuck in a dryer vent can be a frustrating and potentially hazardous situation. However, by following the step-by-step process outlined in this guide, you can safely and effectively remove the brush and restore proper airflow to your dryer vent.
Throughout the process, it is important to prioritize safety by disconnecting the dryer, wearing protective gear, and working in a well-ventilated area. Additionally, using the right tools and materials will help make the task more manageable and efficient.
Remember to inspect the vent opening, clean it thoroughly, and reinstall the exterior vent cover to prevent future blockages and ensure optimal dryer performance. Regular maintenance and cleaning of the dryer vent will prolong the lifespan of your dryer, save energy, and reduce the risk of fire hazards.
If you are unsure about any step or encounter difficulties during the process, it is always recommended to seek professional help. Experienced technicians have the knowledge and expertise to tackle complex situations and ensure the job is done safely and effectively.
By taking the time to remove a brush stuck in a dryer vent, you are not only improving the efficiency of your dryer but also prioritizing the safety of your home and loved ones. So, roll up your sleeves, gather the necessary tools, and tackle this task with confidence.
Remember, a properly functioning dryer vent allows for faster drying times, reduces energy consumption, and provides you with peace of mind knowing that your home is safe from potential fire hazards. So, don’t delay—take action and maintain a clean and obstruction-free dryer vent today!
Frequently Asked Questions about How To Remove A Brush Stuck In A Dryer Vent
Was this page helpful?
At Storables.com, we guarantee accurate and reliable information. Our content, validated by Expert Board Contributors, is crafted following stringent Editorial Policies. We're committed to providing you with well-researched, expert-backed insights for all your informational needs.