Home>Home Maintenance>How To Clean A Mitsubishi Air Conditioner
Home Maintenance
How To Clean A Mitsubishi Air Conditioner
Modified: October 20, 2024
Learn how to effectively clean your Mitsubishi air conditioner with our expert home maintenance tips. Ensure your unit stays efficient and extends its lifespan.
(Many of the links in this article redirect to a specific reviewed product. Your purchase of these products through affiliate links helps to generate commission for Storables.com, at no extra cost. Learn more)
Introduction
Welcome to our comprehensive guide on how to clean a Mitsubishi air conditioner. Regular maintenance is essential to keep your air conditioner running efficiently and to ensure clean and healthy air in your home. Cleaning your air conditioner not only improves its performance but also extends its lifespan.
Mitsubishi air conditioners are known for their quality and reliability. However, like any other appliance, they require regular cleaning to maintain their optimal functionality. In this guide, we will walk you through the step-by-step process of cleaning your Mitsubishi air conditioner, from removing and cleaning the filter to cleaning the evaporator and condenser coils. Whether you’re a DIY enthusiast or a homeowner looking to save money on professional maintenance, this guide is for you.
Before we dive into the cleaning process, let’s take a look at the tools and materials you’ll need to get started.
Key Takeaways:
- Regular cleaning of your Mitsubishi air conditioner, including the filter, vents, and coils, ensures efficient airflow and clean air quality in your home, extending the lifespan of the unit.
- Prioritize safety by turning off the power and wearing protective gloves when cleaning your Mitsubishi air conditioner. Regular maintenance saves on energy costs and maximizes the unit’s efficiency.
Read more: How Much Is A Mitsubishi Air Conditioner
Tools and Materials Needed
Before you begin cleaning your Mitsubishi air conditioner, gather the following tools and materials:
- Soft cloth or microfiber cloth
- Vacuum cleaner with brush attachment
- Bristle brush or toothbrush
- Mild dish soap or air conditioner coil cleaner
- Garden hose with sprayer attachment
- Screwdriver (if necessary for removing the filter or accessing internal components)
- Pan or bucket for collecting water runoff
- Plastic bags or garbage bags
- Disposable gloves
Having these tools and materials handy will make the cleaning process much easier and more efficient.
Additionally, it’s important to take some safety precautions before you start cleaning your Mitsubishi air conditioner. Let’s discuss these precautions in the next section.
Safety Precautions
Before you begin cleaning your Mitsubishi air conditioner, it’s important to prioritize safety. Here are some important safety precautions to keep in mind:
- Turn off the power: Before starting any cleaning procedures, make sure to turn off the power supply to your air conditioner. This can typically be done by switching off the circuit breaker dedicated to the unit. This will prevent any accidental electrical shock while working on the unit.
- Wear protective gloves: To protect your hands from dirt, dust, and any potentially harmful chemicals, it’s recommended to wear a pair of disposable gloves throughout the cleaning process. This will also help prevent any skin irritation or allergic reactions.
- Avoid direct contact with electrical components: While cleaning, be cautious and avoid direct contact with electrical components such as the fan blades, motor, or wiring. Even when the power is turned off, it’s important to handle these components with care to prevent any damage.
- Use suitable cleaning products: When cleaning sensitive parts like the coils or filters, it’s important to use the correct cleaning products. Mild dish soap mixed with water or an air conditioner coil cleaner are usually safe options. Avoid using harsh chemicals or abrasive cleaners that could potentially damage the components.
- Protect nearby surfaces: Before you start cleaning, cover any nearby surfaces or furniture with plastic bags or a protective cloth to prevent them from getting wet or damaged during the process. This will save you from potential cleanup and repair later on.
- Consult the owner’s manual: Every air conditioner model has specific cleaning instructions provided by the manufacturer. It’s important to consult the owner’s manual for your specific Mitsubishi model to ensure you follow the recommended cleaning procedures and safety guidelines.
By following these safety precautions, you can ensure a safe and efficient cleaning process for your Mitsubishi air conditioner. Now, let’s move on to the step-by-step cleaning instructions.
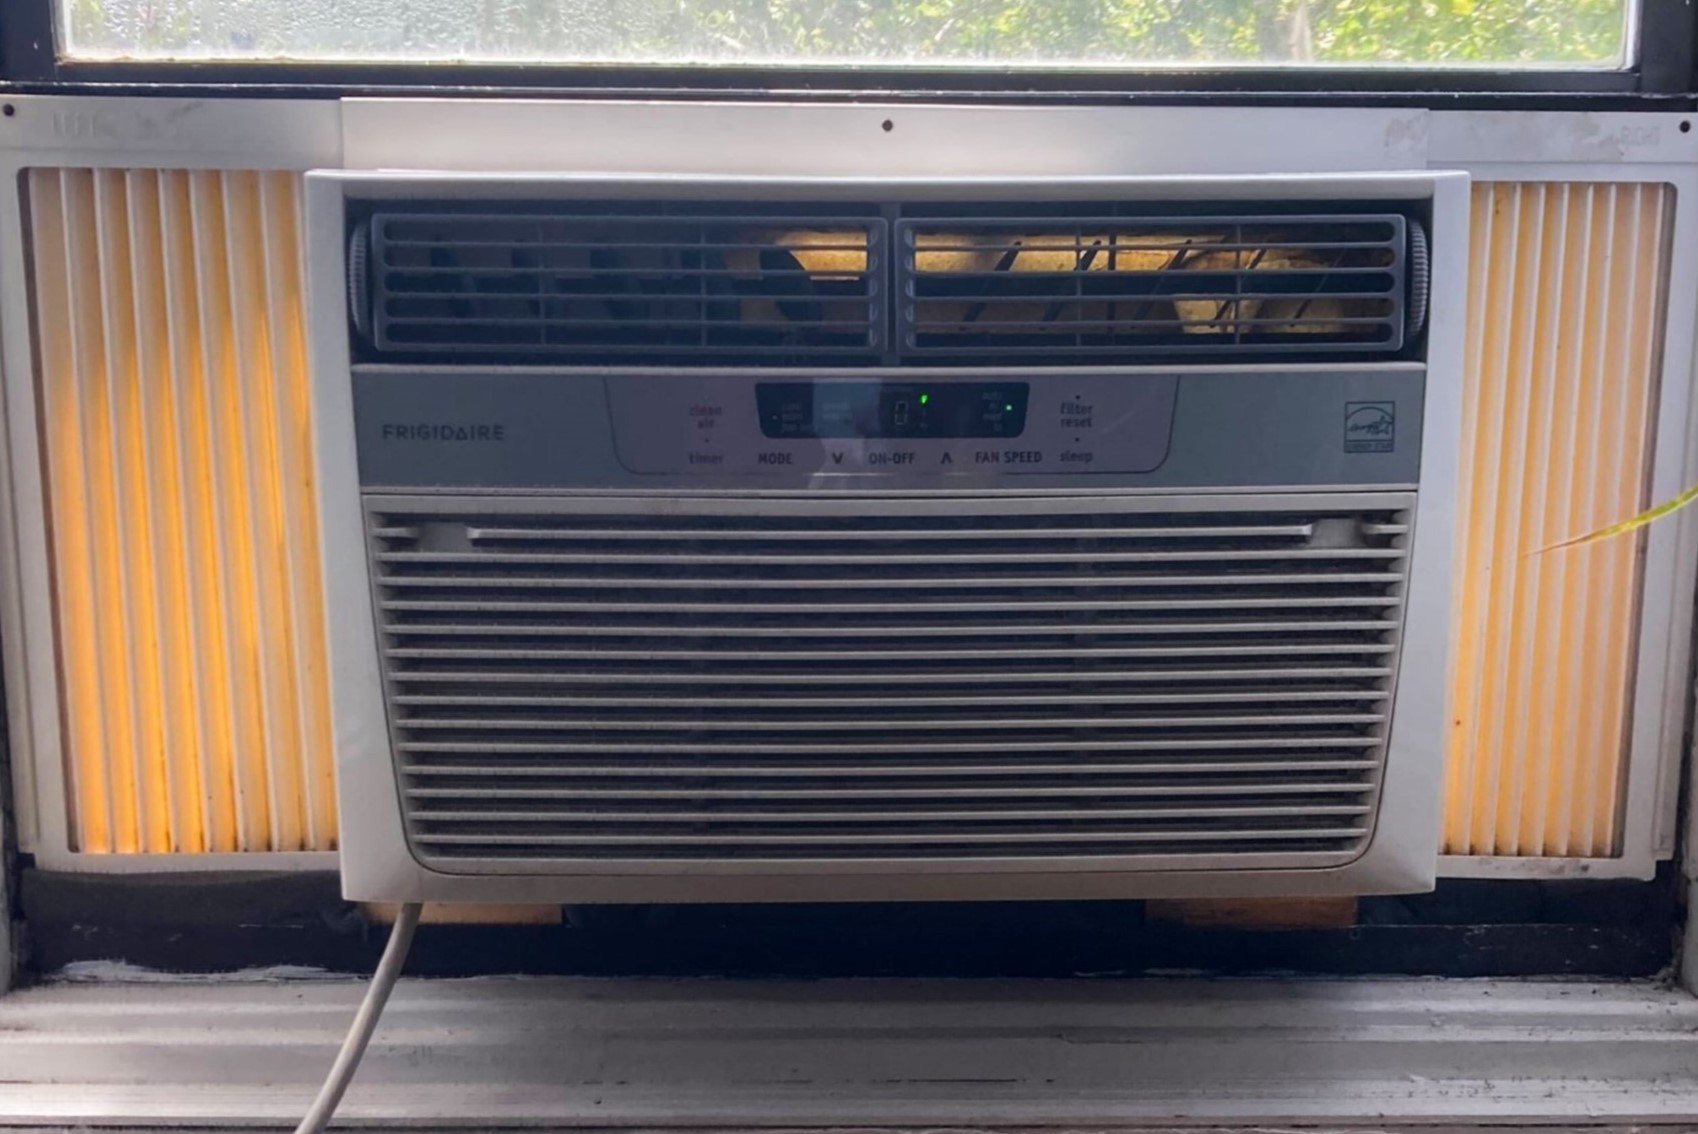
Step 1: Turn off the Air Conditioner
Before you begin cleaning your Mitsubishi air conditioner, the first step is to turn off the unit and make sure it is completely powered down. This ensures your safety and prevents any damage to the components during the cleaning process.
Here’s how you can turn off your Mitsubishi air conditioner:
- Locate the main power switch: The main power switch is typically located near the outdoor unit of your air conditioner. It may be a toggle switch or a circuit breaker.
- Switch off the main power switch: Flip the toggle switch to the “Off” position or switch off the circuit breaker that supplies power to the air conditioner. This will cut off the power supply to the unit.
- Ensure the air conditioner is completely turned off: Once you’ve switched off the main power switch, give it a few moments to ensure that the air conditioner is completely turned off. You can also test this by trying to adjust the temperature or turn on the unit using the remote control. If it doesn’t respond, the air conditioner is properly turned off.
By turning off the air conditioner, you eliminate the risk of electrical shock and provide a safe environment for cleaning the unit. Once you’ve confirmed that the air conditioner is powered down, you can move on to the next steps of the cleaning process.
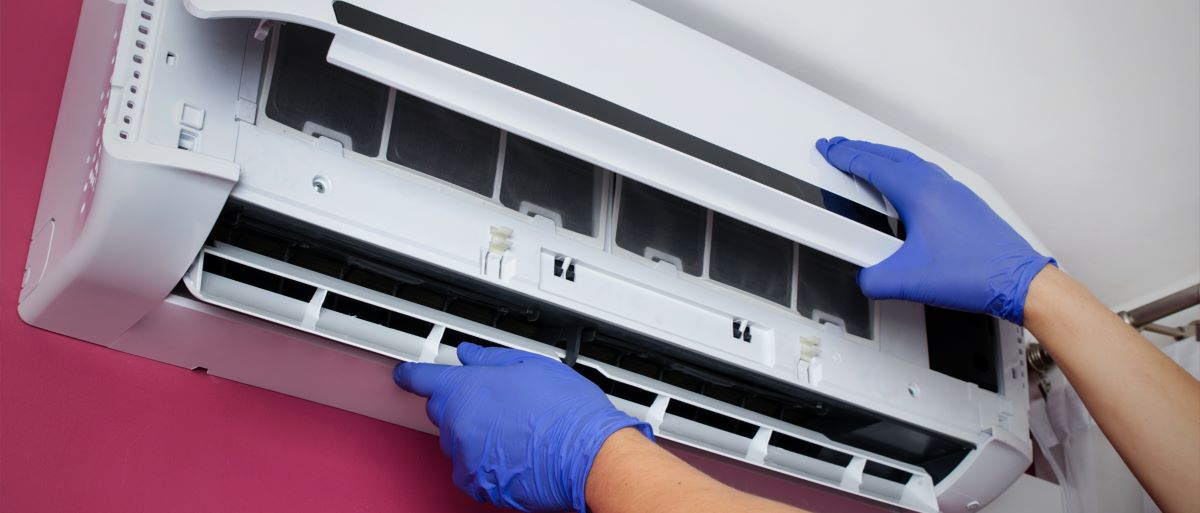
Step 2: Remove the Filter
Once you’ve turned off the power to your Mitsubishi air conditioner, the next step is to locate and remove the filter. The filter is responsible for capturing dust, dirt, and other particles, preventing them from circulating in your home and clogging the internal components of the air conditioner.
Here’s how you can remove the filter:
- Locate the filter access panel: The filter access panel is usually located on the unit’s indoor unit, which is commonly found on a wall, ceiling, or near the floor. The panel can typically be opened by sliding or pulling it.
- Open the filter access panel: Carefully open the filter access panel to reveal the filter behind it. Use a screwdriver if needed to remove any screws securing the panel in place.
- Inspect the filter: Take a moment to inspect the condition of the filter. If it is visibly dirty or clogged with dust and debris, it’s time to clean or replace it. Mitsubishi air conditioners generally have reusable filters, so cleaning them is often sufficient. However, if the filter is damaged or very old, it may be time to replace it with a new one.
- Remove the filter: Gently pull out the filter from its slot. Be cautious not to bend or damage the filter during removal.
Removing the air filter is an important step in the cleaning process as it allows for easy access to other components that need to be cleaned. Once you have removed the filter, you can move on to the next step of cleaning it thoroughly.
Step 3: Clean the Filter
After removing the filter from your Mitsubishi air conditioner, it’s time to clean it. Cleaning the filter regularly is crucial to maintain efficient airflow and ensure clean, fresh air in your home.
Follow these steps to clean the filter:
- Inspect the filter: Take a close look at the filter to assess its condition. If it is only lightly soiled, you may be able to clean it. However, if the filter is torn, heavily clogged, or damaged, it is recommended to replace it with a new one.
- Remove loose debris: Start by gently tapping the filter on a hard surface or using a soft brush to remove any loose dirt, dust, or debris that has accumulated on the surface. This will help loosen and remove the larger particles.
- Rinse the filter: Fill a basin or sink with lukewarm water and add a mild dish soap. Submerge the filter in the soapy water and swish it around gently to loosen and remove the remaining dirt and grime. Use a soft brush or your fingers to gently scrub the filter, paying attention to both sides.
- Rinse thoroughly: After scrubbing, thoroughly rinse the filter with clean water to remove the soap and any remaining dirt. Hold the filter under running water or use a gentle stream from a hose. Ensure all soap residue is washed away.
- Allow the filter to dry: Shake off any excess water from the filter and place it on a clean towel or surface to air dry. Make sure the filter is completely dry before reinstalling it to prevent mold or mildew growth.
It’s important to clean the filter regularly, ideally once every one to three months, depending on the usage and air quality. A clean filter ensures optimal airflow and efficient operation of your Mitsubishi air conditioner.
Now that the filter is clean and dry, you can proceed to the next steps to clean other components of your Mitsubishi air conditioner.
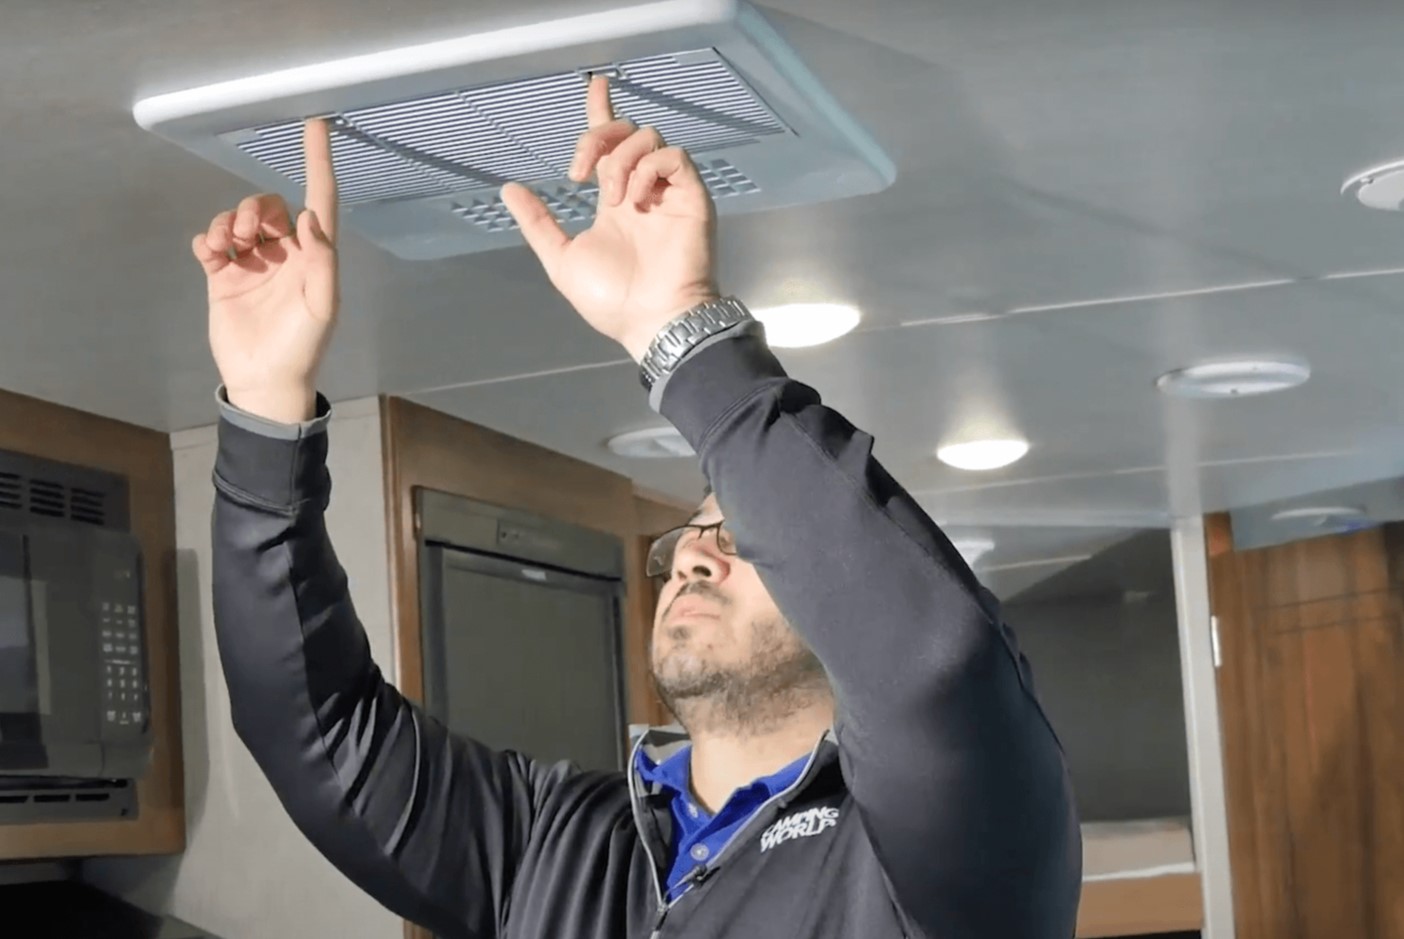
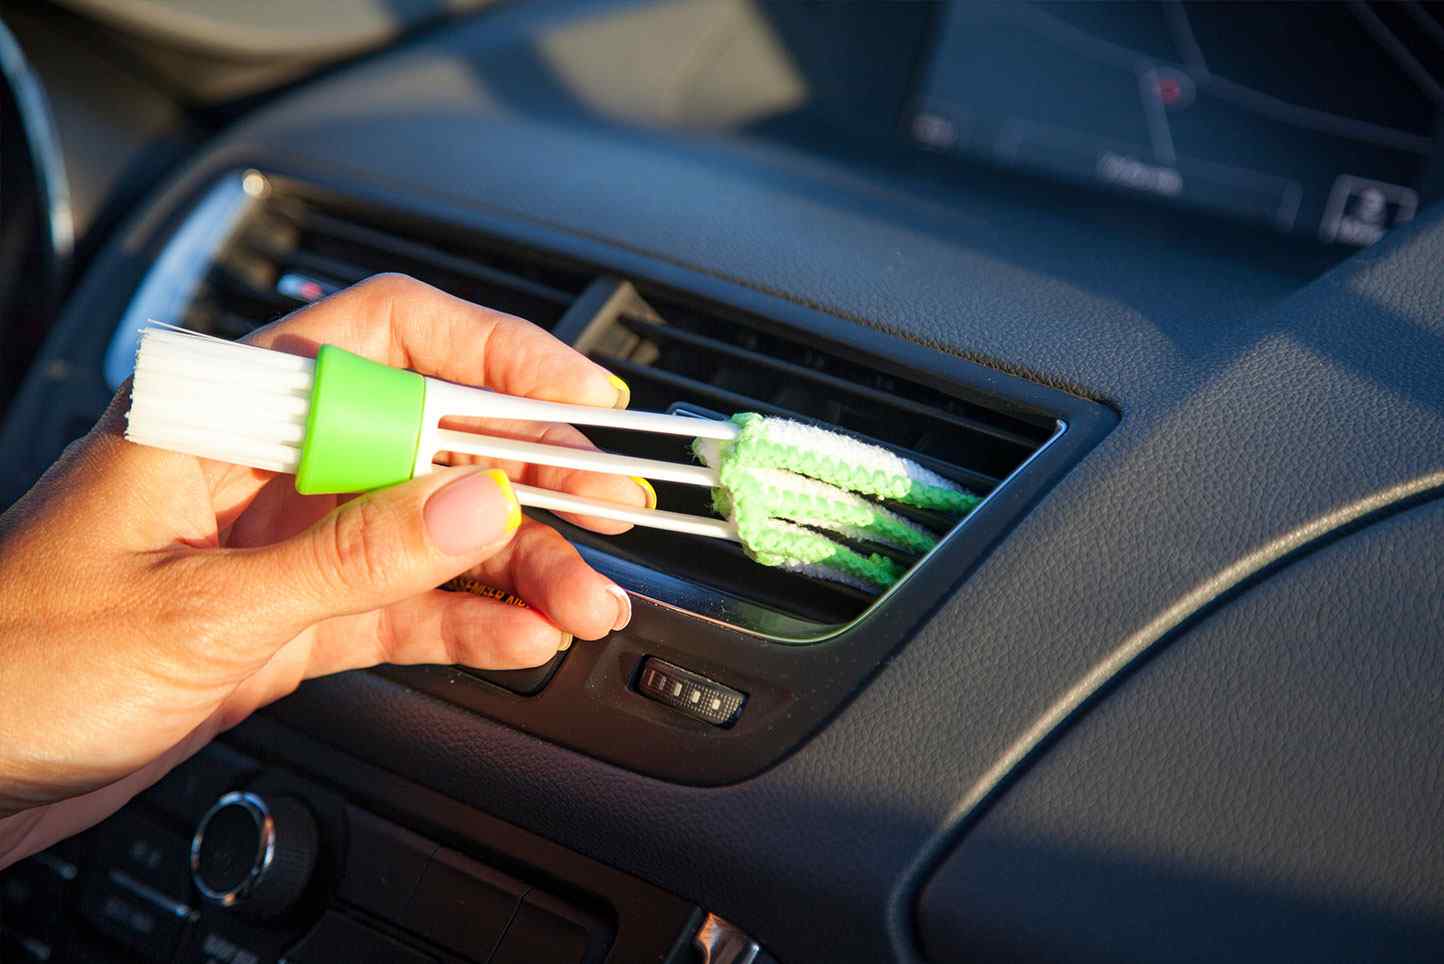
Step 4: Clean the Air Vents
Now that you have cleaned the filter, it’s time to move on to cleaning the air vents of your Mitsubishi air conditioner. Over time, dust and debris can accumulate on the vents, reducing airflow and decreasing the overall efficiency of the unit.
Follow these steps to clean the air vents:
- Inspect the air vents: Take a close look at the air vents to assess their condition. If you notice any visible dust or dirt buildup, it’s time to clean them.
- Prepare the vacuum cleaner: Use a vacuum cleaner with a brush attachment to effectively clean the air vents. Attach the brush nozzle to the vacuum cleaner hose to ensure gentle and thorough cleaning.
- Gently vacuum the vents: With the vacuum cleaner in hand, gently run the brush attachment over each air vent. Start from the top and work your way down, making sure to cover all sides and angles of the vent. This will effectively remove any surface dust or debris.
- Brush the vents: For stubborn dirt or debris that the vacuum cleaner couldn’t remove, use a soft-bristle brush or an old toothbrush. Gently scrub the vents in a circular motion to dislodge the particles and brush them away.
- Wipe down the vents: Once you have vacuumed and brushed the vents, use a soft cloth or microfiber cloth to wipe down the surface. This will help remove any remaining dust particles and give the vents a clean and polished appearance.
Cleaning the air vents not only improves the airflow but also helps maintain a cleaner and healthier indoor environment. By removing dust and debris from the vents, you ensure that the air conditioner can function at its best.
With the air vents cleaned, you are ready to move on to the next step of cleaning the fan blades of your Mitsubishi air conditioner.
Regularly clean or replace the air filters in your Mitsubishi air conditioner to maintain efficient airflow and prevent dust and debris buildup. This will help improve the air quality and extend the lifespan of your unit.
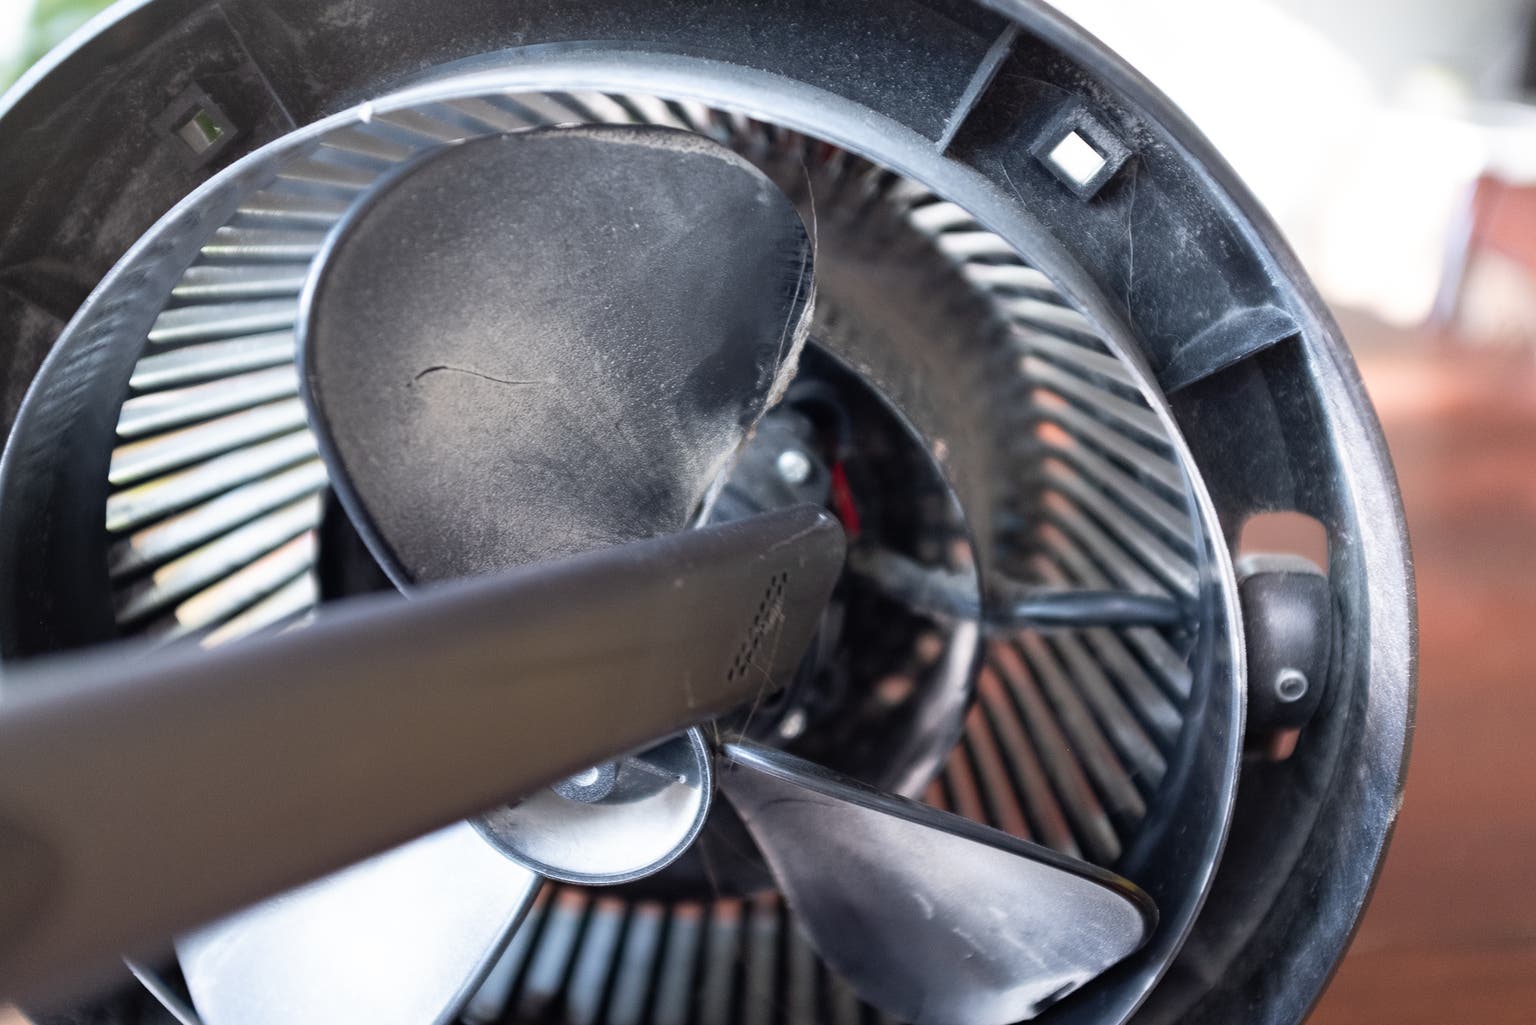
Step 5: Clean the Fan Blades
Cleaning the fan blades of your Mitsubishi air conditioner is essential to maintain optimal airflow and prevent the buildup of dust and debris. Over time, dirt can accumulate on the blades, causing the air conditioner to work harder and reducing its efficiency.
Follow these steps to clean the fan blades:
- Access the fan blades: Locate the fan blades inside your Mitsubishi air conditioner. They are usually located behind a protective cover or panel. You may need to remove screws or clips to access the blades.
- Inspect the fan blades: Take a close look at the fan blades to assess their condition. Check for any visible dirt, dust, or debris buildup. If the blades are caked with dirt or have excessive grime, they need to be cleaned.
- Prepare a cleaning solution: Fill a bucket or basin with warm water and add a mild dish soap or air conditioner coil cleaner. Mix the solution well to create a cleaning solution.
- Clean the blades: Dip a soft cloth or sponge into the cleaning solution and wring out any excess liquid. Gently wipe down each fan blade, being careful not to bend or damage the blades. Pay close attention to both sides of the blades to ensure a thorough cleaning.
- Remove stubborn dirt: If there is stubborn dirt or grime on the fan blades, you may need to use a soft brush or toothbrush to scrub the blades. Dip the brush into the cleaning solution and gently scrub away the dirt, focusing on the areas with the most buildup.
- Rinse the blades: Once you have cleaned the fan blades, rinse them thoroughly with clean water. You can use a hose with a gentle stream of water or a damp cloth to remove any soap residue and ensure the blades are clean.
- Allow the blades to dry: After rinsing, let the fan blades air dry completely before reassembling the unit. Make sure there is no moisture remaining on the blades to prevent any damage or corrosion.
By regularly cleaning the fan blades, you can improve the airflow and efficiency of your Mitsubishi air conditioner. This will help keep the unit running smoothly and maintain a comfortable indoor environment.
Now that the fan blades are clean, it’s time to move on to cleaning the evaporator coil of your Mitsubishi air conditioner.
Step 6: Clean the Evaporator Coil
The evaporator coil is a critical component of your Mitsubishi air conditioner that is responsible for cooling the air. Over time, the evaporator coil can accumulate dust, dirt, and debris, which can impede its performance and reduce cooling efficiency. Cleaning the evaporator coil is essential to maintain optimal airflow and ensure the smooth operation of your air conditioner.
Here’s how you can clean the evaporator coil:
- Locate the evaporator coil: The evaporator coil is typically located inside the indoor unit of your Mitsubishi air conditioner. It is enclosed in a metal housing and may be covered by a removable access panel. Refer to your owner’s manual or manufacturer’s instructions to locate the evaporator coil.
- Remove the access panel: Remove the screws or clips securing the access panel, if applicable, to expose the evaporator coil. Set aside the screws or clips in a safe place for reinstallation later.
- Inspect the evaporator coil: Take a close look at the evaporator coil to assess its condition. If you see a significant amount of dirt, dust, or debris, it’s time to clean it. You may also notice signs of mold or mildew growth, which should be addressed during the cleaning process.
- Clean the evaporator coil: Start by using a soft brush or a vacuum cleaner with a brush attachment to gently remove loose debris from the surface of the evaporator coil. Be cautious to avoid bending the delicate fins of the coil. Then, mix a solution of mild dish soap and water or use a specific air conditioner coil cleaner as recommended by the manufacturer. Apply the cleaning solution to the evaporator coil using a spray bottle or a soft brush, making sure to cover the entire surface.
- Let the cleaning solution sit: Allow the cleaning solution to sit on the evaporator coil for a few minutes to loosen any stubborn dirt or grime. This will help make the cleaning process more effective.
- Rinse the evaporator coil: Once the cleaning solution has had time to work, rinse the evaporator coil thoroughly with clean water. You can use a hose with a gentle spray attachment or a spray bottle filled with water. Take care not to use excessive pressure that could damage the coil or force water into other sensitive components of the unit.
- Dry the evaporator coil: After rinsing, gently pat the evaporator coil with a soft cloth or allow it to air dry completely. Make sure there is no moisture remaining on the coil before reassembling the unit.
Cleaning the evaporator coil of your Mitsubishi air conditioner improves cooling efficiency and helps maintain clean and fresh air in your home. Regular maintenance of the evaporator coil can prolong the lifespan of your air conditioner and ensure its optimal performance.
Now that the evaporator coil is clean, let’s proceed to the next step, which is cleaning the condenser coil.
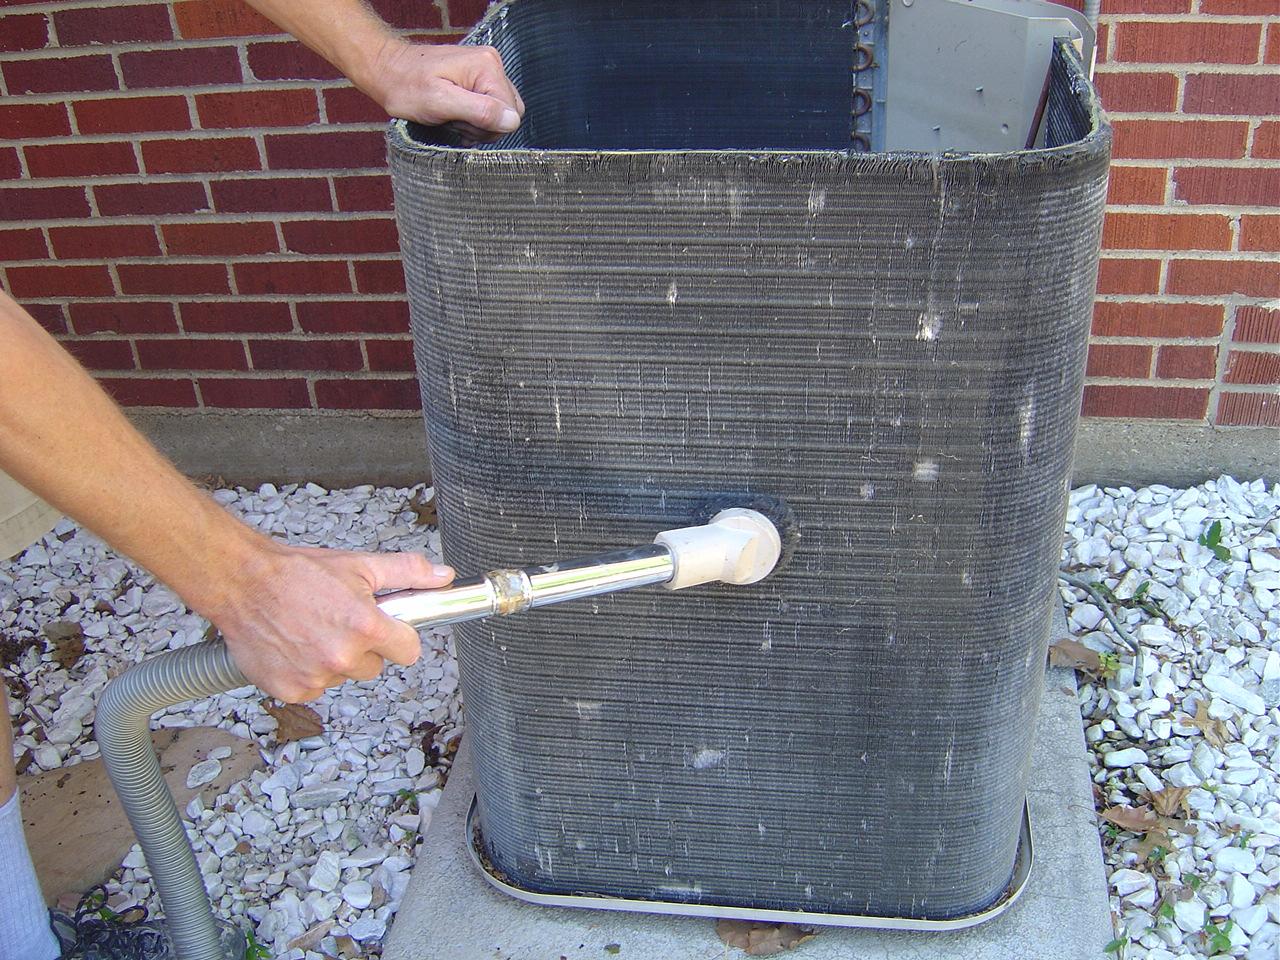
Step 7: Clean the Condenser Coil
The condenser coil is an important component of your Mitsubishi air conditioner that is responsible for dissipating heat. Over time, the condenser coil can become dirty and covered in debris, which can hinder its ability to release heat effectively. Cleaning the condenser coil is essential to maintain optimal cooling performance and energy efficiency.
Follow these steps to clean the condenser coil:
- Locate the condenser unit: The condenser unit is typically located outside your home and houses the condenser coil. It is a large metal box and contains the fan, compressor, and other vital components. Be cautious when working around the condenser as it may have moving parts.
- Turn off the power: Before cleaning the condenser coil, it is crucial to turn off the power supply to the condenser unit. Locate the circuit breaker or disconnect switch near the unit and switch it off.
- Remove debris from the unit: Use a soft brush or a vacuum cleaner with a brush attachment to remove any debris such as leaves, grass, or dirt from the surface of the condenser unit. Clear away any obstructions around the unit that might impede airflow.
- Clean the condenser coil: Use a fin comb or a soft brush to gently clean the condenser coil. Brush in a horizontal motion, following the direction of the fins, to remove any dirt or debris that may have accumulated. Be careful not to bend or damage the delicate fins of the coil.
- Rinse the condenser coil: After brushing, rinse the condenser coil with a garden hose. Start from the top and work your way down, ensuring that the water flows through the coil and washes away any remaining dirt or debris. Use a gentle spray or a nozzle attachment to avoid applying too much pressure on the coil.
- Allow the condenser coil to dry: Let the condenser coil air dry completely before you switch the power back on and reassemble the unit. Make sure there is no moisture left on the coil to prevent any damage or corrosion.
Cleaning the condenser coil of your Mitsubishi air conditioner improves its cooling efficiency, reduces energy consumption, and prolongs the lifespan of the unit. By keeping the condenser coil clean, you ensure that your air conditioner operates at its best, providing you with cool and comfortable indoor temperatures.
Now, with both the evaporator and condenser coils clean, we can move on to the next step, which focuses on cleaning the drain pan and drain line of your Mitsubishi air conditioner.
Step 8: Clean the Drain Pan and Drain Line
The drain pan and drain line are important components of your Mitsubishi air conditioner that help remove excess moisture created during the cooling process. Over time, these components can become clogged with dirt, mold, or algae, leading to water leaks or drainage issues. Cleaning the drain pan and drain line is essential to maintain proper drainage and prevent any potential damage.
Here’s how you can clean the drain pan and drain line:
- Locate the drain pan and drain line: The drain pan is typically located beneath the evaporator coil in the indoor unit of your Mitsubishi air conditioner. The drain line is connected to the drain pan and extends either outside your home or into a designated drain.
- Inspect the drain pan and drain line: Take a look at the drain pan and drain line to check for any visible signs of dirt, mold, or algae buildup. If you notice any blockages or standing water, it’s time to clean them.
- Remove standing water: If there is standing water in the drain pan, carefully empty it into a container or bucket. Be cautious not to spill the water on any electrical components. You may also use a wet/dry vacuum to remove the water from the drain pan.
- Clean the drain pan: Mix a solution of mild dish soap and warm water. Using a soft cloth or sponge, gently scrub the inside of the drain pan to remove any dirt, mold, or algae. Rinse the drain pan thoroughly with clean water to remove any leftover soap or debris.
- Clean the drain line: To clean the drain line, you can use a wet/dry vacuum or a small brush to remove any blockages or buildup. Insert the vacuum or brush into the opening of the drain line and carefully work it back and forth to dislodge any debris. You can also blow compressed air into the drain line to clear any clogs.
- Flush the drain line: After removing the blockages, use a garden hose or pour a mixture of water and vinegar into the drain line to flush out any remaining dirt or buildup. Start from the indoor unit and work your way towards the outdoor end of the drain line.
- Ensure proper drainage: Once you have cleaned the drain pan and drain line, make sure that water is flowing freely through the drain line. Check for any leaks or obstructions and ensure that the drain line is properly connected.
Cleaning the drain pan and drain line of your Mitsubishi air conditioner helps prevent water leaks and maintain efficient drainage. By keeping these components clean, you ensure that excess moisture is properly removed, minimizing the risk of damage to your air conditioner.
With the drain pan and drain line cleaned, we can now move on to the next step, which focuses on cleaning the exterior of the unit.
Step 9: Clean the Exterior of the Unit
Keeping the exterior of your Mitsubishi air conditioner clean not only enhances its aesthetic appeal but also ensures its longevity and proper functioning. Over time, the outdoor unit can accumulate dirt, dust, leaves, and debris, which can hinder airflow and reduce the efficiency of the unit.
Follow these steps to clean the exterior of your Mitsubishi air conditioner:
- Disconnect the power: Before you begin cleaning the exterior of the unit, it is important to disconnect the power supply. Locate the circuit breaker or disconnect switch near the unit and switch it off.
- Remove debris: Start by gently removing any debris, such as leaves, grass, or twigs, from the fins and surface of the outdoor unit. Use your hands or a soft brush to carefully brush away the larger particles. Be mindful not to damage the delicate fins in the process.
- Clean the fins: Use a garden hose with a gentle spray or a nozzle attachment to clean the fins. Direct the water in a downward motion, working from the top to the bottom of the unit. This will help remove any remaining dirt or debris that may be lodged between the fins.
- Be cautious of electrical components: While cleaning, be mindful of any electrical components or wiring near the outdoor unit. Avoid direct contact with these components to prevent any damage or electrical shock. If you’re unsure, it’s best to consult a professional.
- Inspect the coil and fan blades: Take a closer look at the condenser coil and fan blades. If you notice any stubborn dirt or debris, you can use a soft brush or a cloth to gently remove it. Avoid using excessive force, as this may damage the components.
- Dry the unit: After cleaning, allow the unit to air dry completely before restoring the power. Make sure there is no excess moisture on the surfaces or within the unit to prevent any potential damage or corrosion.
Cleaning the exterior of your Mitsubishi air conditioner helps maintain proper airflow and improves the overall efficiency of the unit. Regular maintenance of the outdoor unit ensures the longevity of your air conditioner and contributes to its effective cooling performance.
With the exterior of the unit now cleaned, it’s time to move on to the final step: reassembling the air conditioner.
Step 10: Reassemble the Air Conditioner
After completing all the necessary cleaning steps for your Mitsubishi air conditioner, it’s time to reassemble the unit. Proper reassembly ensures that all components are securely in place and ready for operation.
Here’s how to reassemble your air conditioner:
- Ensure all components are dry: Before reassembling, verify that all the cleaned components, such as the filter, fan blades, evaporator coil, condenser coil, drain pan, and drain line, are completely dry. Damp or wet components can lead to mold growth or damage to the unit.
- Place the filter back: Carefully insert the cleaned filter back into its designated slot. Make sure it fits snugly and securely. Refer to your owner’s manual for proper installation instructions if needed.
- Reattach the access panels: If you removed any access panels during the cleaning process, now is the time to reattach them. Use the screws or clips previously removed to secure the panels in place. Ensure that the panels are properly aligned and tightly fastened.
- Reconnect the power: Restore power to the unit by turning on the circuit breaker or reconnecting the disconnect switch. Double-check that the power is back on and functioning properly.
- Test the air conditioner: Once the power is restored, test your Mitsubishi air conditioner to ensure that it is operating as expected. Adjust the temperature settings and listen for the sound of the unit starting up. Monitor the airflow and cooling performance to ensure everything is functioning correctly.
- Regular maintenance schedule: It’s important to establish a regular maintenance schedule for your air conditioner. Set reminders to clean or replace the filter regularly, inspect the coils, and check the drain pan and drain line for any potential issues. Regular maintenance will help keep your Mitsubishi air conditioner in top condition.
By reassembling the air conditioner properly, you ensure that all the cleaned components are correctly positioned and secure. Regular maintenance and timely reassembly contribute to the longevity and optimal performance of your Mitsubishi air conditioner.
Congratulations! You have successfully completed the cleaning and reassembly process for your Mitsubishi air conditioner. By following these steps and performing regular maintenance, you can enjoy clean, efficient cooling for years to come.
Read more: How To Clean A Lennox Air Conditioner
Conclusion
Cleaning your Mitsubishi air conditioner is a vital part of its maintenance that should not be overlooked. By following the comprehensive steps outlined in this guide, you can effectively clean and maintain your air conditioner, ensuring optimal performance and prolonging its lifespan.
Regular cleaning of the air filter helps maintain clean air quality in your home and prevents the buildup of dust and debris on internal components. Cleaning the air vents and fan blades promotes efficient airflow, while cleaning the evaporator and condenser coils maximizes cooling efficiency. Additionally, cleaning the drain pan and drain line prevents water leaks and ensures proper drainage.
Throughout the cleaning process, it is crucial to prioritize safety by turning off the power and wearing protective gloves. Following the manufacturer’s instructions and consulting the owner’s manual ensures that you clean your Mitsubishi air conditioner correctly and efficiently.
By integrating regular air conditioner maintenance into your routine, you not only improve its performance but also save on energy costs. A well-maintained air conditioner operates more efficiently, reducing energy consumption and extending its lifespan.
Remember to establish a regular maintenance schedule and be proactive in caring for your Mitsubishi air conditioner. By dedicating time to clean and maintain your unit, you can enjoy a comfortable indoor environment while maximizing the longevity and efficiency of your air conditioner.
We hope this comprehensive guide has provided you with valuable insights and instructions on how to clean your Mitsubishi air conditioner. By investing the time and effort into proper maintenance, you can enjoy reliable cooling and a comfortable living space year-round.
Frequently Asked Questions about How To Clean A Mitsubishi Air Conditioner
Was this page helpful?
At Storables.com, we guarantee accurate and reliable information. Our content, validated by Expert Board Contributors, is crafted following stringent Editorial Policies. We're committed to providing you with well-researched, expert-backed insights for all your informational needs.