Home>Home Security and Surveillance>How To Access Home Security Camera Over The Internet
Home Security and Surveillance
How To Access Home Security Camera Over The Internet
Modified: October 28, 2024
Learn how to access your home security camera over the internet with our step-by-step guide. Ensure your home security and surveillance system is always accessible and secure.
(Many of the links in this article redirect to a specific reviewed product. Your purchase of these products through affiliate links helps to generate commission for Storables.com, at no extra cost. Learn more)
Introduction
Welcome to the world of home security and surveillance! As technology continues to advance, protecting our homes and loved ones has become easier and more accessible than ever before. Gone are the days of relying solely on traditional alarm systems. Now, we have the ability to monitor our homes in real-time through home security cameras.
Home security cameras not only act as a visual deterrent to potential intruders, but also provide us with peace of mind by allowing us to keep an eye on our property, no matter where we are. With the advent of the internet and mobile technology, we can now access these cameras remotely, ensuring that our homes are safe and secure at all times.
In this article, we will explore how to access home security cameras over the internet. We will discuss the different types of home security cameras available, the setup process, and the various methods you can use to access your cameras remotely. So, let’s dive in and gain a deeper understanding of how to protect our homes in the digital age!
Key Takeaways:
- You can access home security cameras over the internet using mobile apps or web browsers. This allows you to monitor your property remotely and ensure peace of mind, no matter where you are.
- Troubleshooting common issues, such as connection problems or low-quality video, can help ensure smooth operation of your home security camera system. Prioritize security and enjoy the benefits of modern technology!
Read more: How To Access Security Cameras Remotely
Understanding Home Security Cameras
Before we delve into the technical aspects of accessing home security cameras over the internet, it’s important to have a solid understanding of what these cameras are and how they work.
Home security cameras, also known as surveillance cameras, are devices that capture and record video footage of the areas they are installed in. They are designed to monitor and protect your property, providing a visual record of any activity that takes place.
Modern home security cameras come equipped with advanced features such as high-resolution video recording, night vision, motion detection, and even two-way audio communication. These features allow you to not only capture clear footage but also communicate with anyone on your property, even if you are not physically present.
Most home security cameras utilize either a wired or wireless connection to transmit video footage. Wired cameras are connected directly to a recording device or a central monitoring system via cables. On the other hand, wireless cameras use Wi-Fi or cellular networks to transmit the video feed to your viewing device or a cloud storage system.
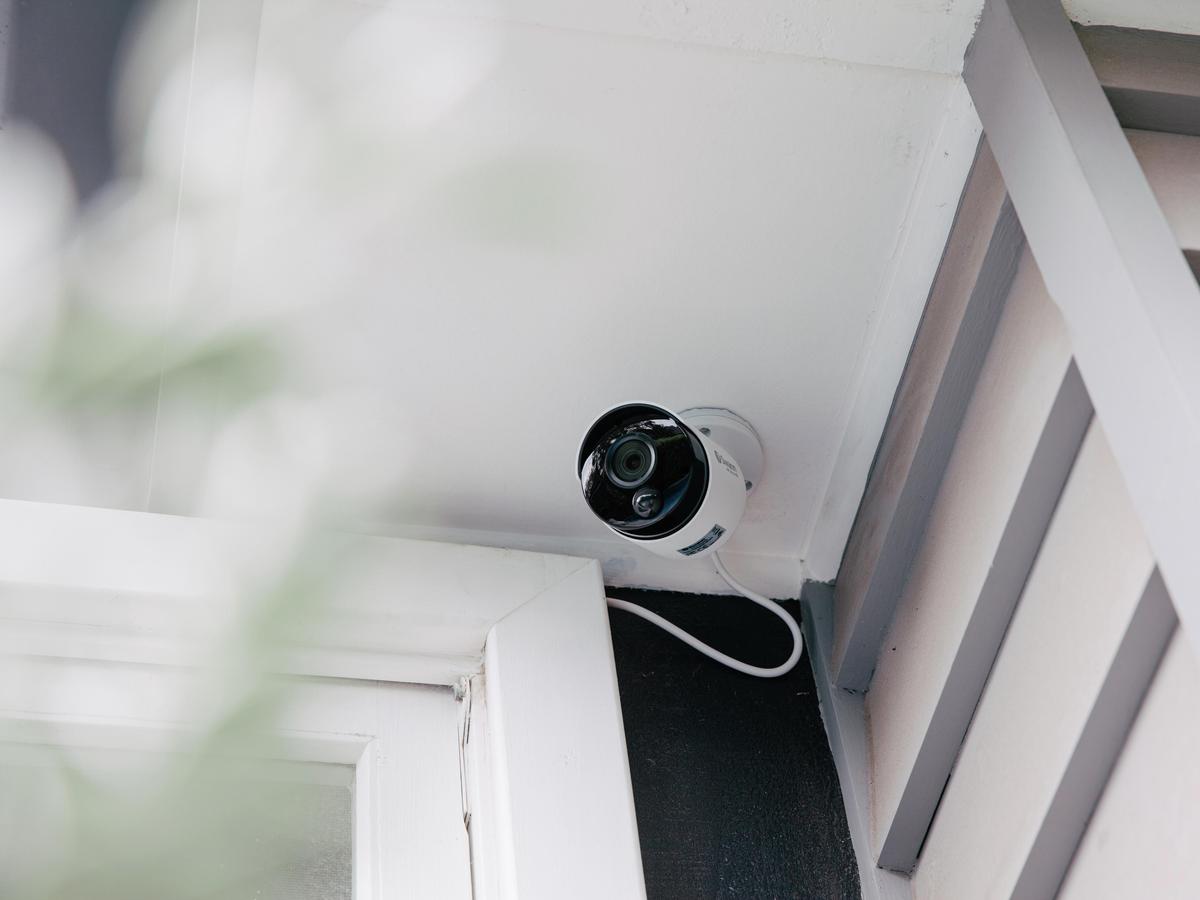
Some cameras are designed for indoor use, while others are built to withstand outdoor conditions. Outdoor cameras are typically weatherproof and have features such as vandal resistance and infrared night vision to ensure optimal performance in various weather conditions and lighting situations.
It’s important to consider the specific needs and requirements of your home when choosing a security camera system. Factors such as the size of your property, the desired coverage area, and the level of detail you require in the video footage will all play a role in determining the best camera for your needs.
Now that we have a basic understanding of home security cameras, let’s move on to exploring the different types of cameras available in the market.
Types of Home Security Cameras
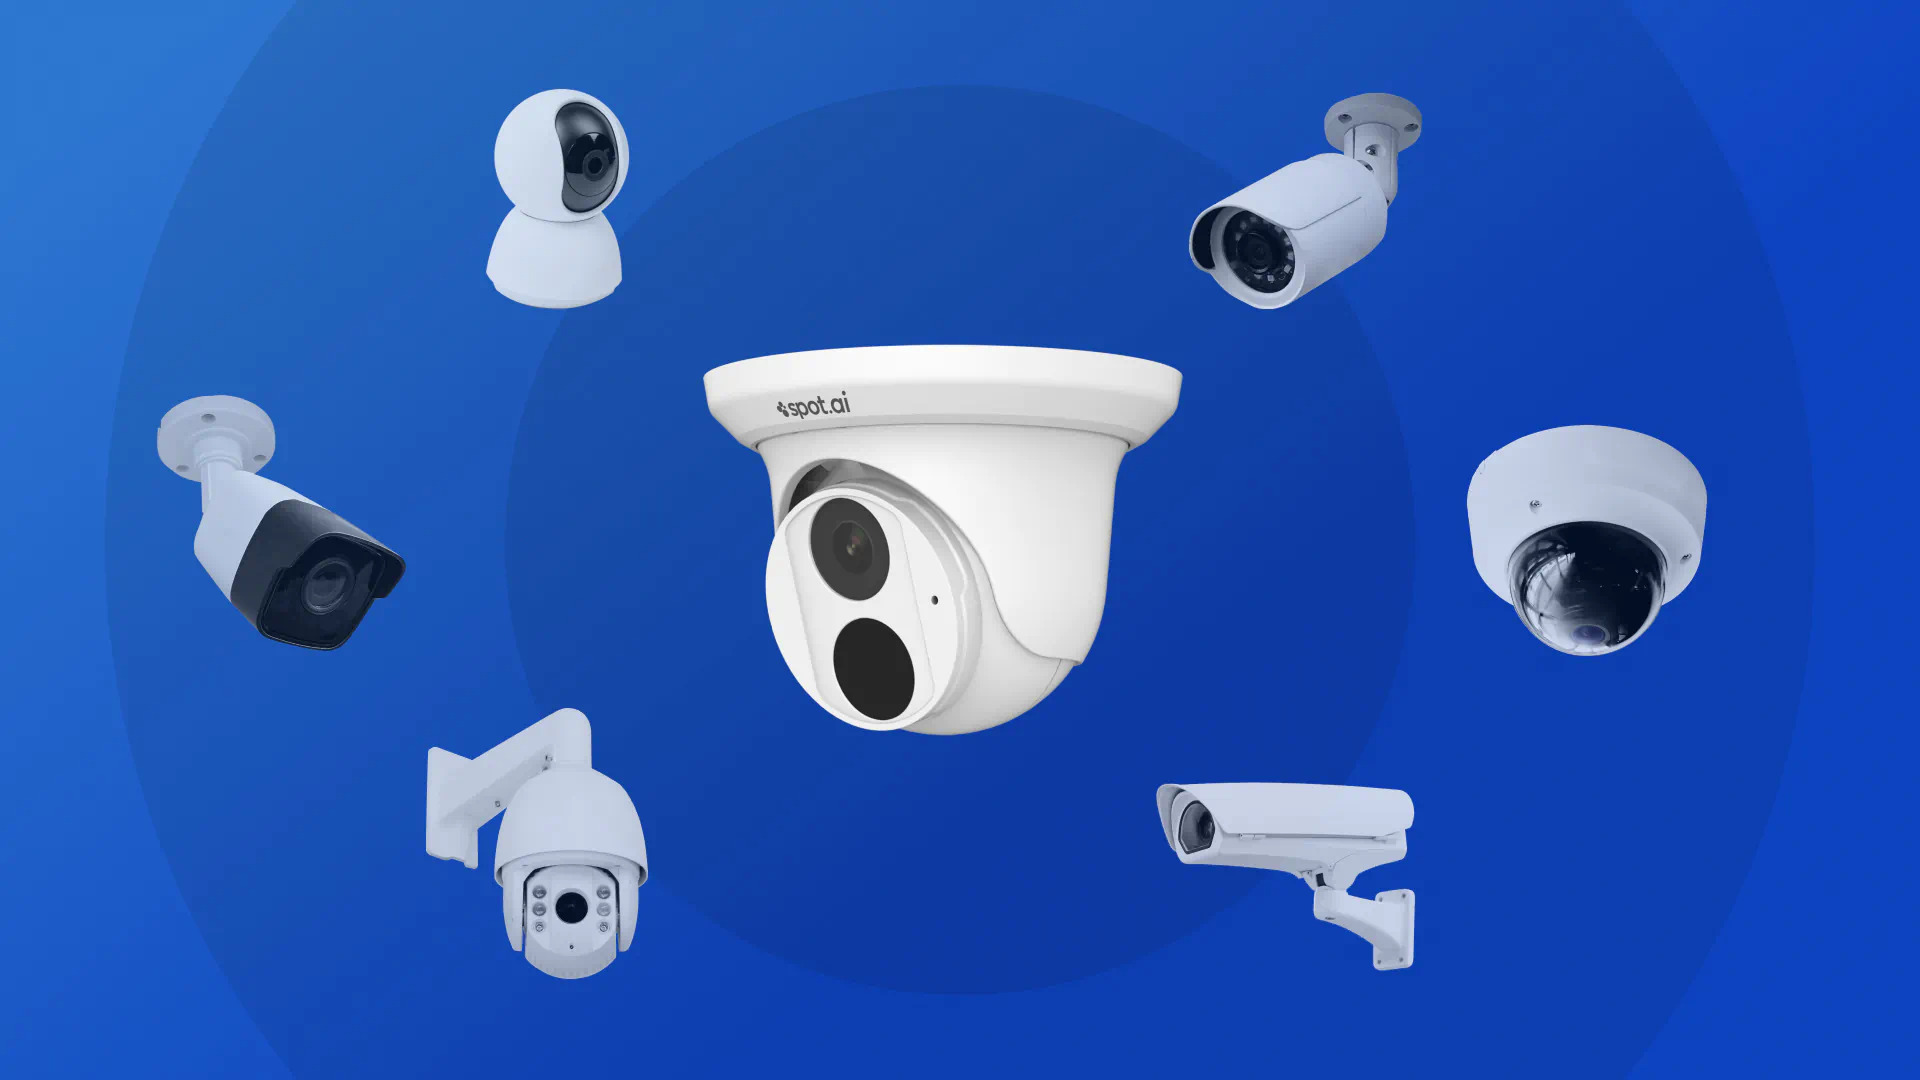
When it comes to choosing a home security camera, you’ll find a variety of options available in the market. Each type of camera offers unique features and benefits, so it’s important to consider your specific needs before making a decision. Here are some common types of home security cameras:
- Indoor Cameras: As the name suggests, indoor cameras are designed to be installed inside your home. They are typically smaller in size and discreet, making them ideal for placement in living rooms, bedrooms, or other indoor areas. Indoor cameras are great for monitoring activities inside your home, such as checking in on pets, monitoring children, or keeping an eye on household staff.
- Outdoor Cameras: Outdoor cameras are built to withstand outdoor conditions, including rain, snow, and extreme temperatures. They are usually larger in size and come with features like weatherproof housing, infrared night vision, and wide-angle lenses. Outdoor cameras are perfect for monitoring the exterior of your home, such as driveways, gardens, and entry points, providing a clear view of any suspicious activity or potential intruders.
- Wireless Cameras: Wireless cameras make use of Wi-Fi or cellular networks to transmit video footage to your viewing device. They offer flexibility in terms of installation, as they don’t require any hardwiring. Wireless cameras are easy to set up and can be placed anywhere within the range of your Wi-Fi network, allowing you to monitor different areas of your home without the need for extensive cabling.
- Wired Cameras: Wired cameras, also known as analog cameras, require physical connections to a recording device or monitoring system via cables. They offer a reliable and stable connection, ensuring that you receive high-quality video footage without any potential interference from Wi-Fi signals or network congestion. Wired cameras are a suitable choice for those who prioritize a secure and uninterrupted video feed.
- PTZ Cameras: Pan-Tilt-Zoom (PTZ) cameras are motorized cameras that can be remotely controlled to pan, tilt, and zoom in on specific areas of interest. This allows you to adjust the camera’s field of view and track any movement within the monitored area. PTZ cameras are commonly used in areas where there is a need for active surveillance and monitoring, such as large properties or commercial establishments.
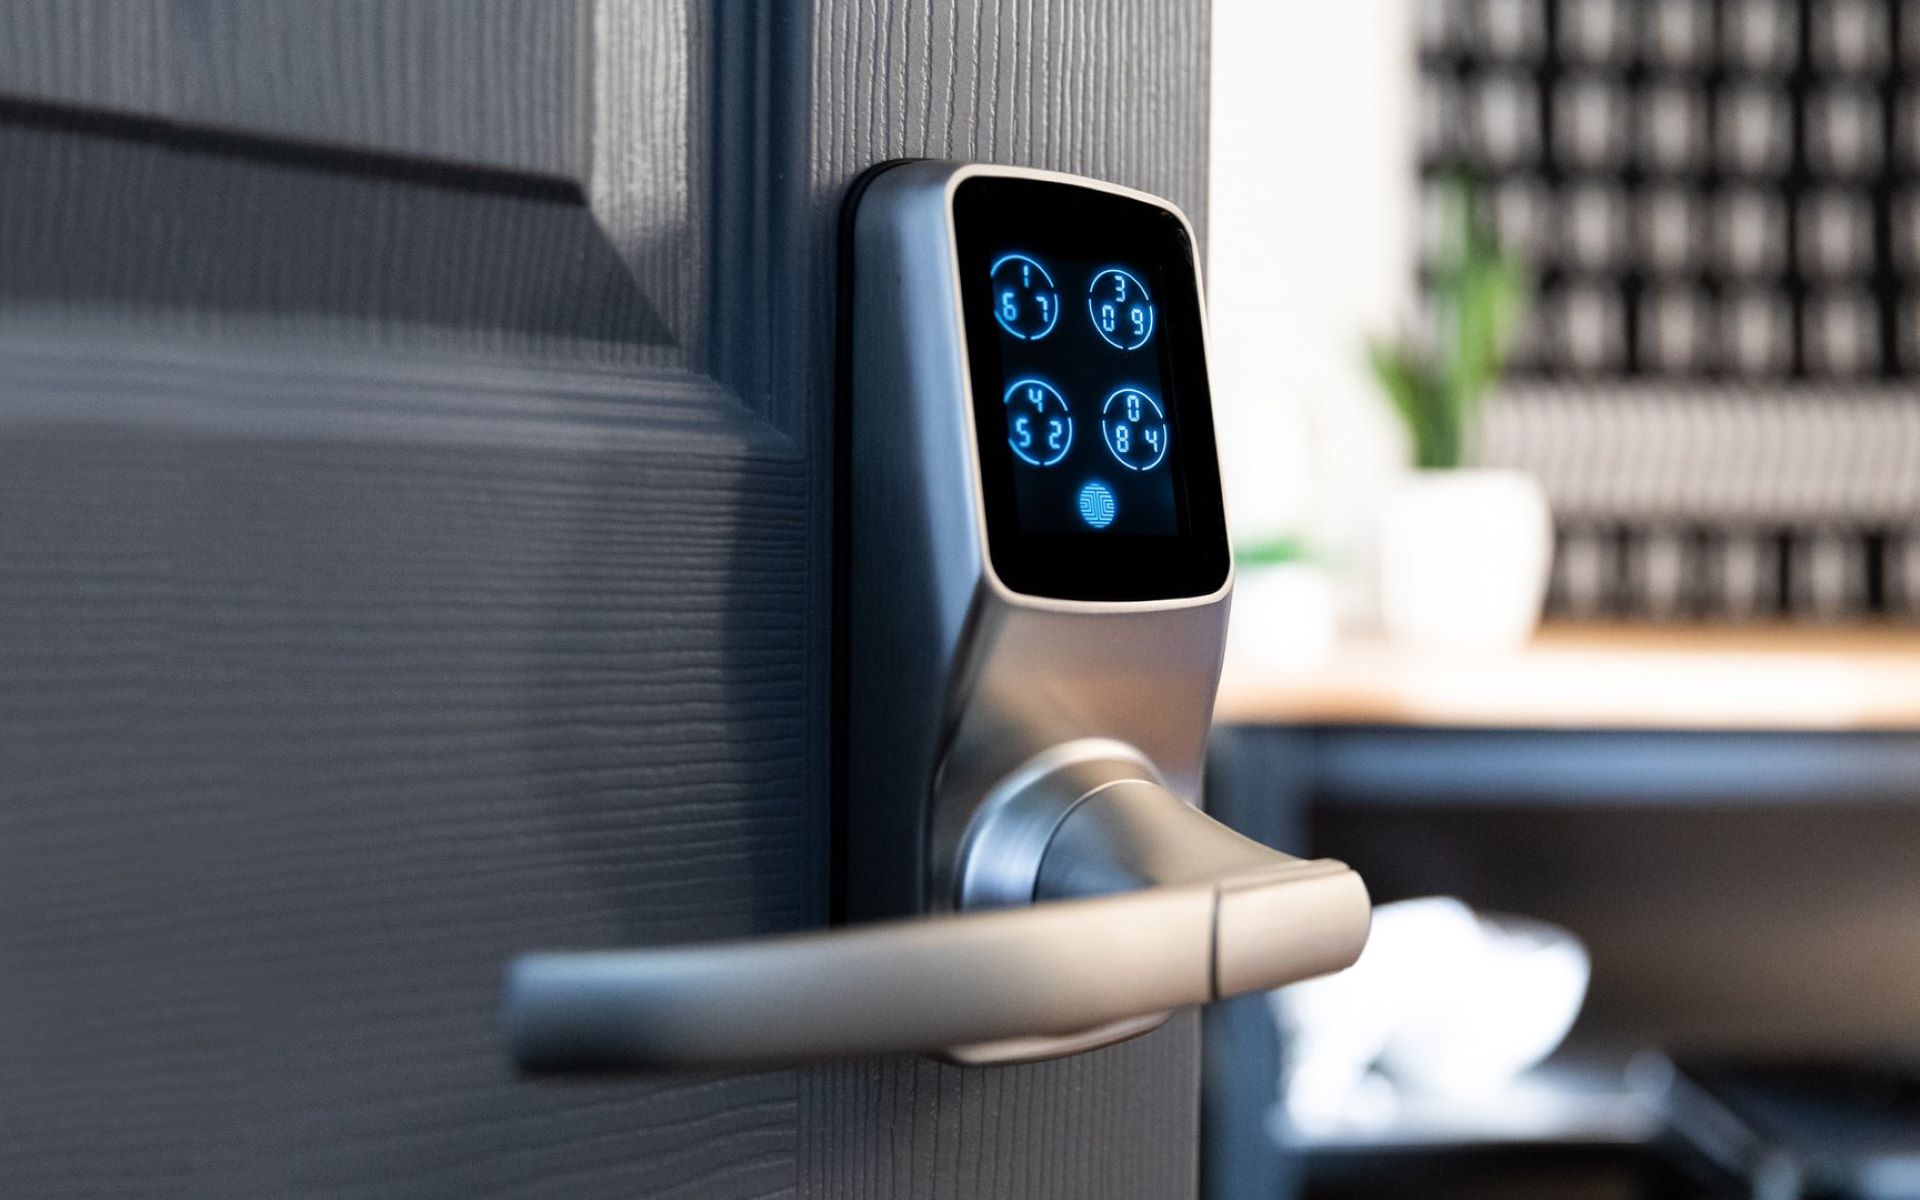
- Doorbell Cameras: Doorbell cameras are a relatively new addition to the home security market. They are typically installed near the front door and provide both video surveillance and intercom functionality. Doorbell cameras allow you to see and communicate with anyone at your front door, whether you are inside your home or away. They are a popular choice for enhancing home security and deterring potential package theft or home invasions.
These are just a few examples of the types of home security cameras available. Each type has its own advantages and considerations, so it’s important to evaluate your specific needs and budget before making a purchase.
Now that we understand the different types of cameras, let’s move on to the process of setting up your home security camera system.
Setting up Your Home Security Camera
Setting up your home security camera system is an essential step to ensure proper functionality and optimal performance. Here are the key steps to follow when setting up your home security cameras:
- Determine the Locations: Start by identifying the areas you want to monitor. This could include entry points, the backyard, or any other areas of concern. Consider the camera type and placement options based on the specific requirements of each location.
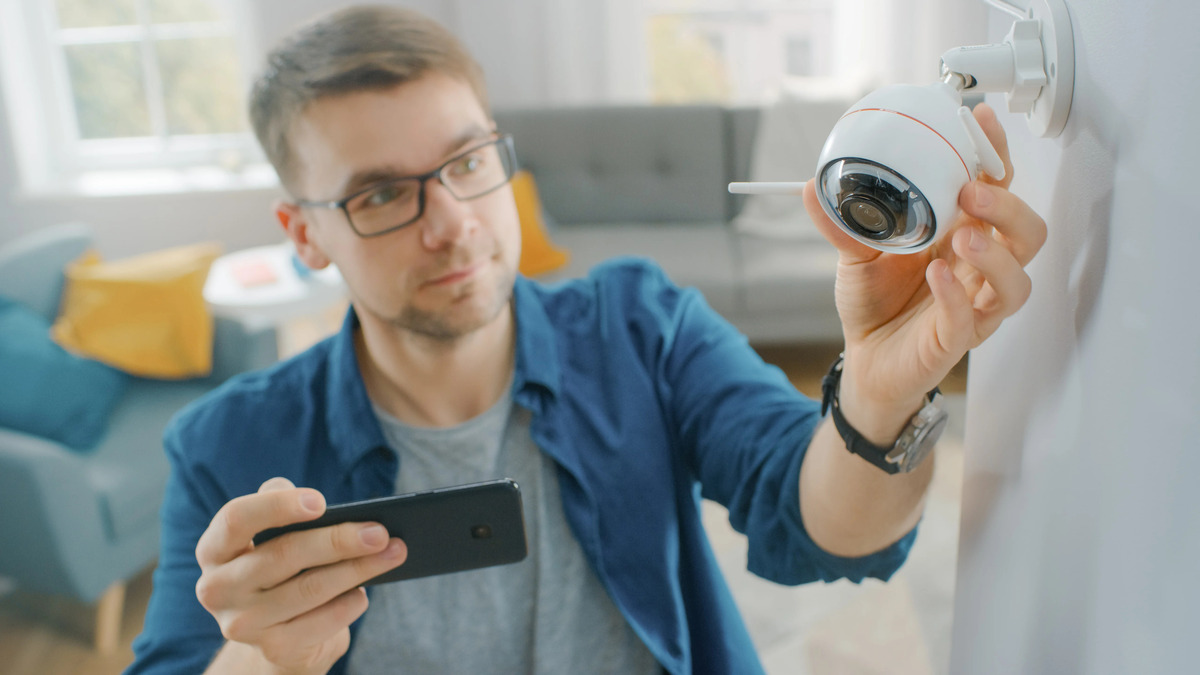
- Mounting the Cameras: Depending on the camera type, you may need to mount them on a wall, ceiling, or other surfaces. Follow the manufacturer’s instructions to securely mount the cameras, ensuring they have a clear view of the desired area.
- Power Supply: Ensure your cameras are properly connected to a power source. Wireless cameras may require batteries or need to be plugged into an electrical outlet, while wired cameras will need to be connected to a power supply using cables.
- Connect to the Network: If you’re using wireless cameras, connect them to your Wi-Fi network according to the manufacturer’s instructions. This typically involves entering your network credentials using a computer or mobile app.
- Configure Camera Settings: Once your cameras are connected to the network, access their individual settings to customize features such as motion detection sensitivity, video quality, and recording schedules. Refer to the user manual or manufacturer’s website for detailed instructions on configuring your specific camera model.
- Set Up a Recording Device: Decide how you want to store and manage the recorded footage. Options include using a network video recorder (NVR), a digital video recorder (DVR), or cloud-based storage solutions. Set up the recording device according to the manufacturer’s instructions and configure any necessary settings.
- Test Your Camera System: Before considering the setup complete, conduct a thorough testing of all cameras and the recording device to ensure they are functioning correctly. Check the video feed, test the motion detection, and verify that recordings are being saved as expected.
Remember to always follow the manufacturer’s instructions provided with your specific camera model to ensure a successful setup. Additionally, consider consulting with a professional if you’re unsure or need assistance with the installation process.
Now that you have set up your home security camera system, the next step is to configure the network settings to allow remote access. Let’s explore how to do that next!
Configuring Network Settings
Configuring the network settings for your home security camera system is an important step in ensuring remote access to your cameras. Here are the steps to follow:
- Assign Static IP Addresses: To easily identify and connect to your cameras, it’s recommended to assign static IP addresses for each camera. This ensures that the IP address of the camera remains the same, even if your network is restarted.
- Access Router Settings: To configure the network settings, you need to access your router’s administration panel. Open a web browser and enter your router’s IP address (usually something like 192.168.1.1) in the address bar. Login using the administrator credentials.
- Enable UPnP: Universal Plug and Play (UPnP) allows devices on your network to automatically configure necessary network settings. Enable UPnP in your router settings to simplify the process of remote access to your cameras.
- Port Forwarding: Port forwarding is required to allow external access to your cameras over the internet. It involves redirecting network traffic from a specific port on your router to the IP address and port of the camera. Consult your camera’s user manual or manufacturer’s website for the specific port number to be forwarded.
- Set Up Port Forwarding Rules: In your router settings, locate the port forwarding section and create rules for each camera. Enter the internal IP address of the camera and specify the port to be forwarded. Save the changes.
- Configure Firewall Settings: If you have a firewall enabled on your router, make sure it allows incoming connections on the port(s) that you have forwarded for your cameras. Adjust the firewall settings accordingly.
- Test Remote Access: Once you have configured the network settings, it’s important to test remote access to ensure it is working correctly. Connect to a different network (such as your mobile data) and try accessing your cameras using the external IP address and port number. If successful, you should be able to view the live video feed from your cameras.
Keep in mind that the process of configuring network settings may vary depending on your router make and model. It’s recommended to consult your router’s user manual or contact your internet service provider for specific instructions if you encounter any difficulties.
Next, we will explore how to set up Dynamic DNS to easily access your home security cameras remotely, even if your external IP address changes.
Read more: How To Access My Home Security Camera Online
Port Forwarding
Port forwarding is a crucial step to enable remote access to your home security cameras over the internet. It allows incoming traffic from external networks to reach your cameras by redirecting the traffic from a specific port on your router to the IP address and port of the camera. Here’s how to set up port forwarding:
- Identify the Port Number: Start by identifying the port number that needs to be forwarded for your specific camera model. This information can usually be found in the camera’s user manual or on the manufacturer’s website.
- Access Your Router Settings: Open a web browser and enter your router’s IP address in the address bar. You can find this IP address in the router’s documentation or by using the “ipconfig” command in the Command Prompt (for Windows) or “ifconfig” command in the Terminal (for Mac or Linux).
- Login to Router’s Configuration Panel: Enter the router’s administrator credentials to access the configuration panel. If you have never changed these credentials, refer to the router’s documentation or contact your internet service provider for the default login information.
- Locate the Port Forwarding Section: The exact location of the port forwarding settings may vary depending on your router’s firmware. Look for terms like “Virtual Server,” “Port Forwarding,” or “Applications & Gaming” in the router’s configuration panel.
- Create a Port Forwarding Rule: Within the port forwarding section, create a new rule for each camera you want to access remotely. Provide a descriptive name for the rule and enter the internal IP address of the camera, as well as the port number you identified in the previous step.
- Save the Settings: Once you have entered the necessary information for the port forwarding rule, save the settings. The router will now forward incoming traffic on the specified port to the IP address and port of the camera.
- Test the Port Forwarding: To ensure the port forwarding is working correctly, try accessing your camera from an external network using your router’s public IP address followed by a colon and the port number. For example, if your public IP address is 123.456.789.0 and the port number is 8080, enter “123.456.789.0:8080” in a web browser. If successful, you should be able to view the camera’s video feed.
It’s worth noting that the process of setting up port forwarding might vary slightly depending on your router’s make and model. If you encounter any difficulties, refer to your router’s documentation or contact your internet service provider for additional guidance.
Now that you have successfully set up port forwarding, let’s move on to understanding Dynamic DNS and its importance in accessing your home security cameras remotely, even if your external IP address changes.
Setting Up Dynamic DNS
Dynamic DNS (Domain Name System) is a service that allows you to assign a domain name to your home network, even if your internet service provider assigns you a dynamic IP address that can change over time. This is particularly useful for accessing your home security cameras remotely, as it provides a consistent and easy-to-remember address for accessing your network. Here’s how to set up Dynamic DNS:
- Choose a Dynamic DNS Provider: There are several Dynamic DNS service providers available, such as DynDNS, No-IP, and DuckDNS. Research and choose a provider that suits your needs. Many of these providers offer free plans with basic functionality.
- Create an Account: Sign up for an account with the Dynamic DNS provider of your choice. This typically involves providing your email address and creating a password.
- Register a Hostname: Once you have an account, register a hostname with your Dynamic DNS provider. This hostname will be used to access your home network remotely. Choose a unique and memorable hostname that is not already in use.
- Configure DNS Settings: In the configuration panel of your Dynamic DNS provider, enter the hostname you registered earlier. Select the appropriate domain extension (e.g., .org, .net, .com) and configure any additional settings as desired.
- Set Up Dynamic DNS on Your Router: Access your router’s configuration panel and look for the Dynamic DNS settings. Enter the account information provided by your Dynamic DNS provider, including the hostname and credentials. Save the settings.
- Update the IP Address: Your router will periodically update the IP address associated with your hostname. This ensures that your Dynamic DNS provider always has the correct IP address for your network, even if it changes.
- Verify Dynamic DNS: To verify that Dynamic DNS is set up correctly, access your network remotely using the hostname provided by your Dynamic DNS provider. Enter the hostname followed by a colon and the port number of your camera to access the camera’s video feed.
Dynamic DNS eliminates the need to remember and manually update your home network’s IP address every time it changes. With a registered hostname, you can easily access your home security cameras remotely using a consistent and user-friendly address.
Keep in mind that some routers may have built-in Dynamic DNS functionality, while others may require the use of a separate Dynamic DNS client. Refer to your router’s documentation for specific instructions on how to set up Dynamic DNS.
Now that you have completed the setup of Dynamic DNS, let’s explore the different methods you can use to access your home security cameras remotely, including mobile apps and web browsers.
Make sure your home security camera is connected to the internet and has a unique IP address. Then, use a web browser or a dedicated app to access the camera using its IP address. Always use strong, unique passwords to secure your camera.
Accessing Home Security Camera Remotely
Now that you have successfully set up your home security camera system and configured the necessary network settings, it’s time to explore the different methods you can use to access your cameras remotely. Here are two common methods: using mobile apps and using web browsers.
Using Mobile Apps
Most home security camera manufacturers provide mobile apps that allow you to access and manage your cameras remotely using your smartphone or tablet. Here’s how you can set up and use these mobile apps:
- Download and Install the App: Go to your device’s app store (such as the Google Play Store or the Apple App Store) and search for the mobile app provided by your camera’s manufacturer. Download and install the app onto your device.
- Launch the App: Open the mobile app and log in using your account credentials. This will usually be the same account you created during the initial camera setup.
- Add Your Cameras: In the app’s settings or device management section, you should find the option to add your cameras. Follow the prompts to connect your cameras to the app. This may involve scanning QR codes on the camera or entering the camera’s serial number.
- View and Manage Your Cameras: Once your cameras are added, you should be able to view live video feeds, review recorded footage, change camera settings, and receive notifications for events such as motion detection.
Using a mobile app provides the convenience of accessing your home security cameras on the go. You can check in on your home, receive alerts, and even control certain camera features from anywhere with an internet connection.
Using Web Browsers
In addition to using mobile apps, many home security cameras allow remote access through web browsers on your computer or laptop. Here’s how you can access your cameras using a web browser:
- Launch Your Preferred Web Browser: Open a web browser on your computer or laptop. It is recommended to use a modern, up-to-date browser for compatibility and security.
- Enter the Camera’s IP Address or Hostname: In the address bar of your web browser, enter the internal IP address of your camera or the hostname associated with your Dynamic DNS setup (if applicable). Include the port number if necessary (e.g., 192.168.1.100:8080).
- Log in to the Camera’s Interface: Depending on your camera model, you may be prompted to enter your camera’s login credentials. This is usually the same username and password you use to access the camera’s settings.
- View and Control Your Cameras: Once logged in, you should be able to view live video feeds, access recorded footage, adjust camera settings, and perform other functions depending on the camera’s features.
Using web browsers offers the flexibility of accessing your cameras from any computer or laptop with an internet connection. This method can be particularly convenient when you don’t have access to your mobile device or prefer a larger screen for viewing your cameras.
Remember to always protect your remote access by using strong and unique passwords for your camera accounts and keeping your camera firmware updated.
Now that you know how to access your home security cameras remotely, let’s move on to troubleshooting common issues you may encounter during the setup or usage of your camera system.
Using Mobile Apps
One of the most convenient ways to access and manage your home security cameras remotely is through mobile apps. By using the dedicated mobile app provided by your camera manufacturer, you can easily monitor your cameras on the go using your smartphone or tablet. Here’s how you can set up and use mobile apps for accessing your home security cameras:
- Download and Install the App: Begin by visiting your device’s app store, such as the Google Play Store for Android or the Apple App Store for iOS. Search for the mobile app provided by your camera manufacturer and download it to your device.
- Launch the App: Once the app is installed, open it on your mobile device. You’ll typically be greeted with a login screen.
- Create an Account: If you don’t already have an account, you may need to create one. Follow the app’s prompts to enter your email address and choose a password. Some apps may offer the option to sign in with an existing account (e.g., Google or Facebook).
- Add Your Cameras: In the app’s settings or device management section, you should find an option to add your cameras. This may involve scanning a QR code on the camera or manually entering the camera’s serial number or IP address.
- Configure Camera Settings: Once your cameras are added to the app, you can customize various settings. This includes adjusting motion detection sensitivity, defining activity zones, configuring recording schedules, and enabling push notifications for specific events.
- View and Manage Your Cameras: With the app configured and your cameras added, you can now view the live video feed from your cameras. Depending on the app and camera features, you may also be able to playback recorded footage, take snapshots, remotely tilt or pan PTZ cameras, and two-way audio communication.
- Enable Remote Access: To ensure remote access to your cameras, make sure your mobile device is connected to the internet via Wi-Fi or cellular data. This will allow you to access your cameras from anywhere, as long as you have an internet connection.
Using a mobile app provides you with the flexibility to monitor and manage your home security cameras from anywhere at any time. Whether you’re at work, traveling, or simply away from home, you can easily stay connected and keep an eye on your property.
Remember to regularly update the mobile app to ensure compatibility with your device’s operating system and access any new features or security enhancements provided by the camera manufacturer. Additionally, always use strong, unique passwords for your camera accounts to protect against unauthorized access.
Now that you’re familiar with using mobile apps for remote access, let’s explore another method: accessing your home security cameras through web browsers.
Using Web Browsers
In addition to using mobile apps, another method for accessing your home security cameras remotely is through web browsers on your computer or laptop. This allows you to view and manage your cameras using a larger screen and more advanced controls. Here’s how you can access your home security cameras using web browsers:
- Launch Your Preferred Web Browser: Open a web browser on your computer or laptop. It’s recommended to use a modern and up-to-date browser for optimal performance and security.
- Enter the Camera’s IP Address or Hostname: In the address bar of your web browser, enter the internal IP address of your camera or the hostname associated with your Dynamic DNS setup (if applicable). If using the IP address, it will typically have a format like “192.168.1.100”. If using a hostname, enter it without the quotation marks.
- Log Into the Camera’s Web Interface: Depending on your camera model, you may be prompted to enter the login credentials for your camera’s web interface. This is usually the same username and password you use to access the camera’s settings. Refer to your camera’s documentation for the default login information if you haven’t changed it.
- Navigate the Camera’s Web Interface: Once logged in, you should see the camera’s web interface, which provides access to various settings and features. This can include live video feeds, recording schedules, motion detection settings, and playback of recorded footage.
- View and Manage Your Cameras: Depending on the camera and its capabilities, you can view live video feeds, take snapshots, adjust camera settings, and perform other actions directly through the web interface. Some cameras may also offer the ability to download recorded footage or receive alerts.
- Ensure Security Measures: Ensure that you have taken necessary security measures to protect your camera’s web interface. This includes using strong and unique passwords, regularly updating firmware, and avoiding accessing your cameras using unsecured or public Wi-Fi networks.
Using web browsers to access your home security cameras remotely offers the advantage of a larger screen and more advanced controls. It allows you to closely monitor and manage your cameras with more precision, making it an ideal method for detailed surveillance and reviewing recorded footage.
Remember to bookmark or save the web address of your camera’s web interface for easy access in the future. Furthermore, always keep your web browser up to date to ensure compatibility with the camera’s web interface.
Now that you’re familiar with using web browsers for remote camera access, you have the flexibility to choose the method that best suits your needs and preferences.
Troubleshooting Common Issues
While setting up and accessing home security cameras remotely, you may encounter some common issues. Here are a few troubleshooting tips to help you resolve these issues:
- No Video Feed: If you’re unable to see a live video feed from your cameras, check the following:
- Ensure that the cameras are powered on and properly connected to the network.
- Verify that your mobile app or web browser is connected to the internet.
- Check the camera settings for any privacy or visibility options that may be affecting the video feed.
- Connection Issues: If you’re having trouble connecting to your cameras remotely, try the following:
- Restart your router and camera system. This can help resolve temporary network issues.
- Ensure that your mobile device or computer is connected to a stable internet connection. Switching between Wi-Fi and cellular data might also help troubleshoot connectivity problems.
- Double-check your port forwarding settings or Dynamic DNS configuration to ensure they are correctly set up.
- Low-Quality Video or Lag: If you experience poor video quality or lag during remote viewing, consider these solutions:
- Check your network bandwidth. If you have multiple devices or users consuming a large amount of bandwidth, it can affect the camera’s performance. Consider upgrading your internet connection to a higher speed or limiting simultaneous network usage.
- Reduce the video quality settings within your camera’s settings. Lowering the resolution or frame rate can help improve performance, especially when accessing cameras remotely over slower internet connections.
- Mobile App or Web Browser Compatibility: If you’re having trouble using a mobile app or accessing your cameras through a web browser, try the following:
- Make sure you have the latest version of the app installed on your mobile device. Check for any updates in the app store.
- Ensure that your web browser is updated to the latest version. Clear cache and cookies, or try using a different browser if the issue persists.
- Check the camera manufacturer’s website for compatibility issues or recommended app/browser versions for optimal performance.
- Resetting Cameras: If all else fails, you may need to reset your cameras to their factory settings and go through the setup process again. Refer to your camera’s documentation for instructions on how to perform a factory reset.
If you’re still experiencing issues after troubleshooting, it may be helpful to consult the camera’s user manual or contact the manufacturer’s technical support for further assistance. They can provide specific guidance based on your camera model and help resolve any persistent issues.
By following these troubleshooting tips, you should be able to address common issues related to setting up and accessing your home security cameras remotely. Enjoy the peace of mind that comes with being able to monitor your property from anywhere in the world!
Now, let’s wrap up this article.
Conclusion
Home security and surveillance have become increasingly important in today’s world, and home security cameras offer a reliable and effective solution to protect your property and loved ones. With the ability to access your cameras remotely over the internet, you can maintain peace of mind and monitor your home from anywhere at any time.
In this article, we explored the process of setting up and accessing home security cameras remotely. We discussed the different types of cameras available, including indoor and outdoor cameras, wired and wireless options, and specialized cameras like PTZ and doorbell cameras. We also covered important steps such as configuring network settings, port forwarding, and setting up Dynamic DNS to ensure seamless remote access.
Furthermore, we explored two common methods for accessing home security cameras remotely: through mobile apps and web browsers. Mobile apps provide the convenience of accessing cameras on the go through your smartphone or tablet, while web browsers give you more advanced controls and a larger viewing screen on your computer or laptop.
Lastly, we touched on troubleshooting common issues that may arise during setup or remote access, offering tips to help resolve these challenges and ensure smooth operation of your home security camera system.
Remember to prioritize security by using strong, unique passwords for your camera accounts, keeping your firmware up to date, and implementing other best practices to protect your cameras from unauthorized access.
With your home security cameras set up, network configured, and remote access established, you can now monitor your property, receive alerts for any suspicious activity, and have peace of mind knowing you can keep an eye on your home no matter where you are.
We hope this guide has provided valuable insights and guidance on accessing home security cameras remotely. Stay vigilant, stay safe, and enjoy the benefits of modern home security and surveillance technology!
Frequently Asked Questions about How To Access Home Security Camera Over The Internet
Was this page helpful?
At Storables.com, we guarantee accurate and reliable information. Our content, validated by Expert Board Contributors, is crafted following stringent Editorial Policies. We're committed to providing you with well-researched, expert-backed insights for all your informational needs.