Home>Ideas and Tips>DIY Guide: Building A Wooden Privacy Screen For Your Patio
Ideas and Tips
DIY Guide: Building A Wooden Privacy Screen For Your Patio
Published: September 26, 2024
Learn how to build a wooden privacy screen for your patio with our step-by-step DIY guide. Enhance privacy and aesthetics easily!
(Many of the links in this article redirect to a specific reviewed product. Your purchase of these products through affiliate links helps to generate commission for Storables.com, at no extra cost. Learn more)
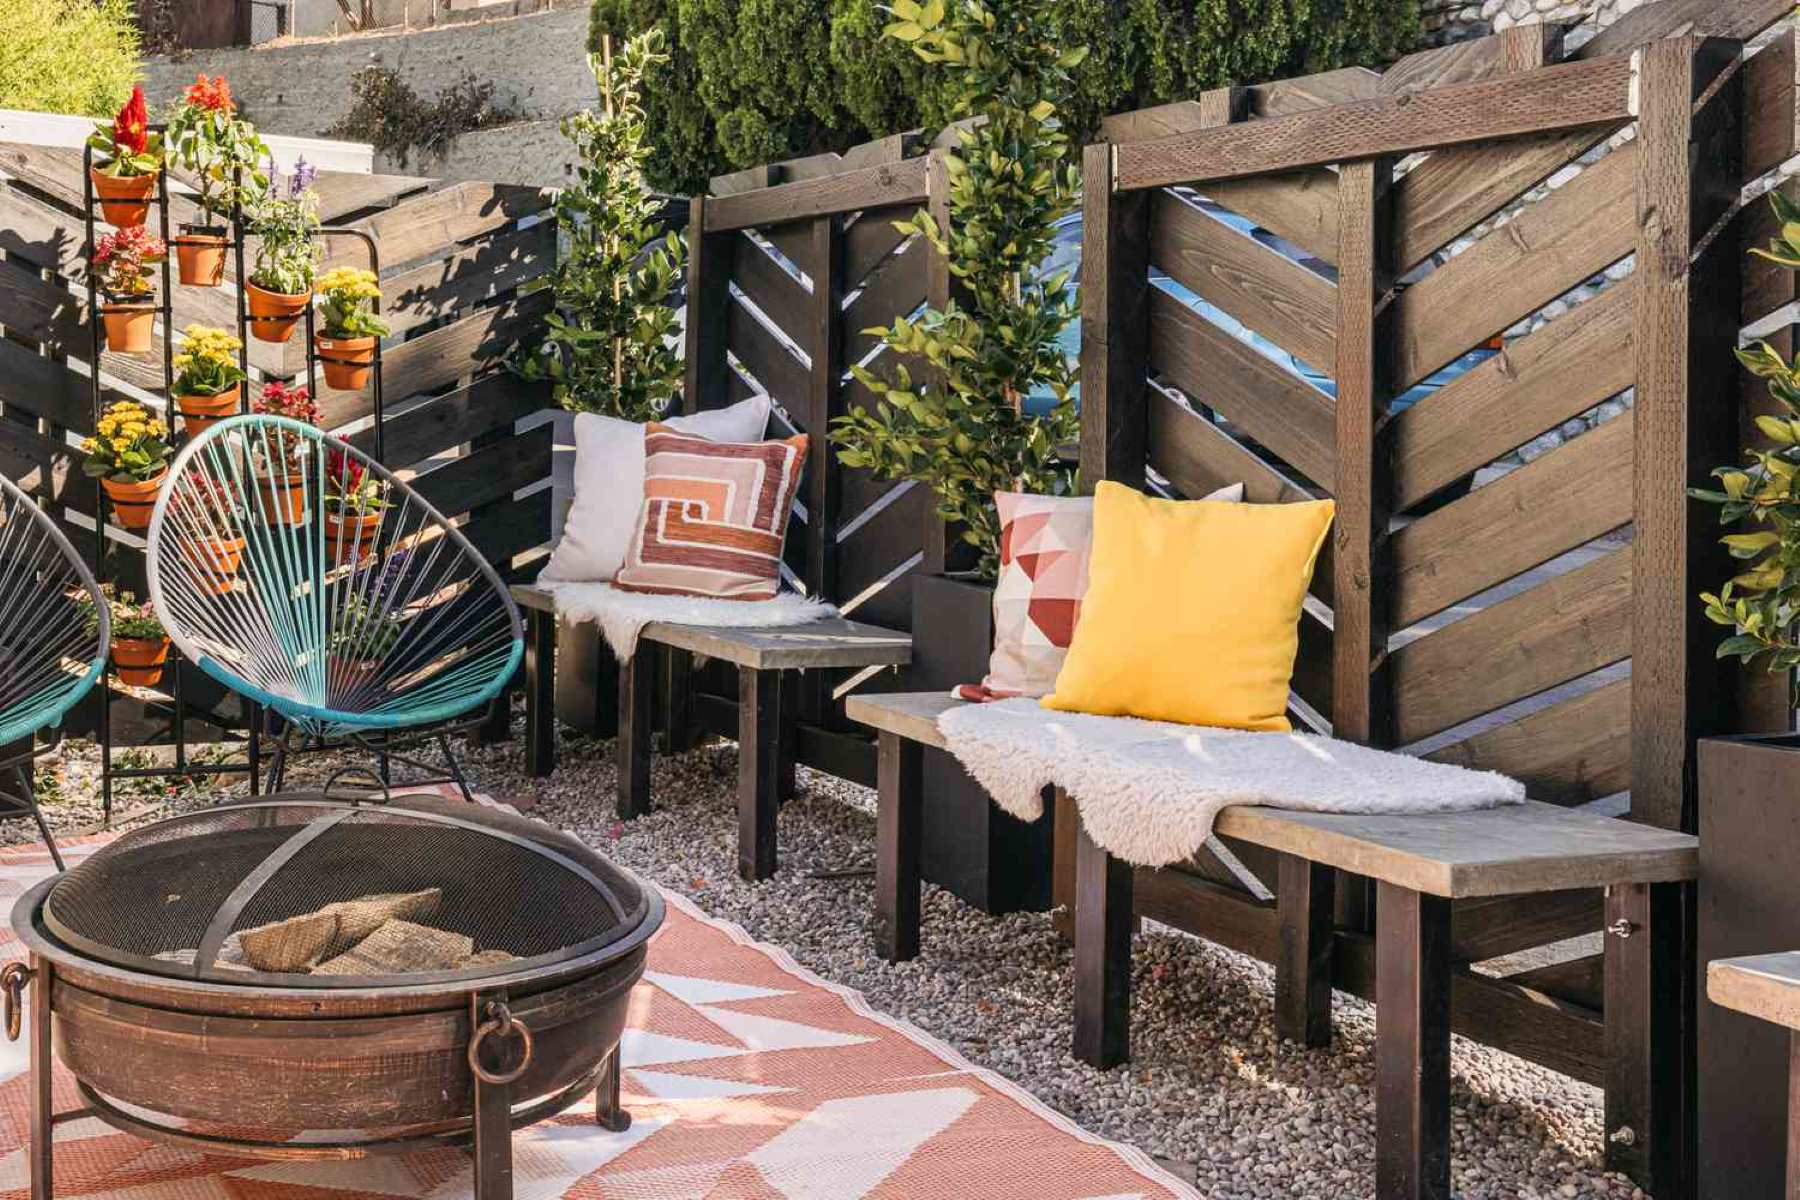
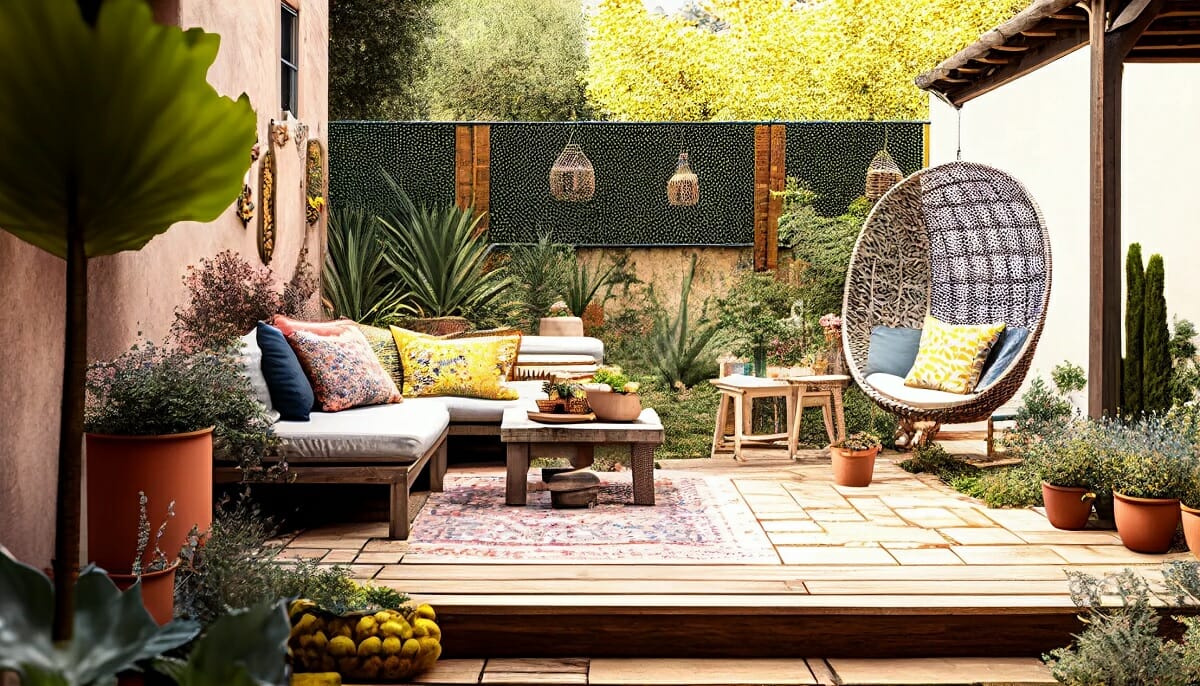
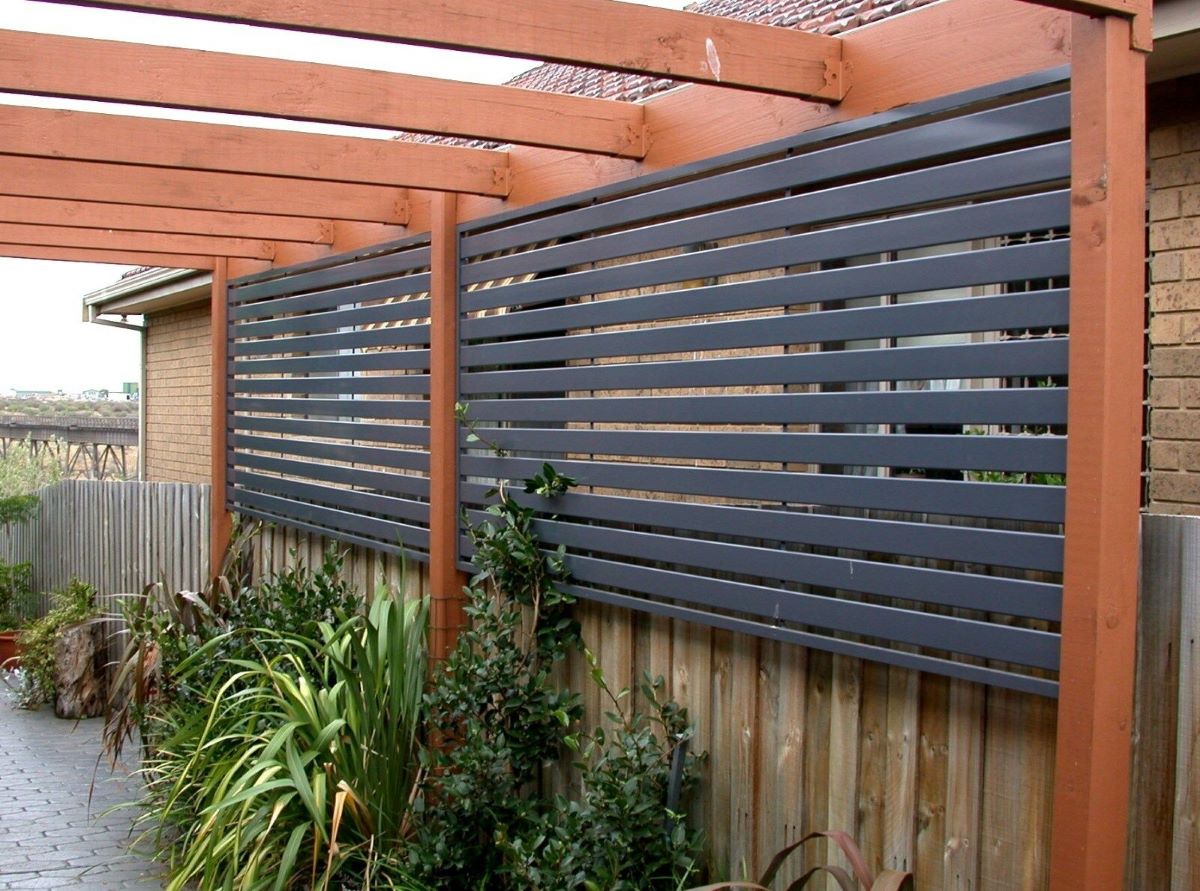
Creating a wooden privacy screen for your patio is an excellent way to enhance your outdoor living space while maintaining some level of seclusion. Whether you're looking to block the view of your neighbors, add some aesthetic appeal, or simply create a more intimate atmosphere, this DIY project is both rewarding and budget-friendly. In this article, we'll walk you through the steps to build a modern wood slatted outdoor privacy screen, providing you with all the necessary details and tips to ensure a successful project.
Why Build a Wooden Privacy Screen?
Building a wooden privacy screen is a fantastic idea for several reasons. First off, it gives you enhanced privacy. No one likes feeling like they're in a fishbowl, right? A wooden screen can effectively block the view of your neighbors, giving you a more private outdoor space. Plus, it adds aesthetic appeal. Wooden slats can add a modern and clean look to your patio, complementing your existing decor. You can also customize the size, design, and materials to fit your specific needs and style. And let's not forget, it's cost-effective. Compared to other privacy solutions like fencing or walls, a wooden privacy screen is relatively inexpensive.
Materials Needed
To build your wooden privacy screen, you'll need the following materials:
- Posts: Three to four 3-4' x 4' pressure-treated posts (depending on the size of your screen)
- Slats: 20 pieces of 1" x 3" pine wood (12 feet long)
- Nails and Spacers: 1.5" nails and spacers at 1.5"
- Level and Hammer: For ensuring the slats are even and secure
- Post Hole Digger: For digging holes for the posts
- Fine Gravel: To stabilize the base of each post
- Concrete (Optional): For securing the posts in place
- Stain (Optional): For adding color and protection to your wood
Step-by-Step Instructions
Step 1: Prepare the Site
Before starting your project, ensure you have a flat surface to work on. Clear any debris or obstructions from the area where you plan to install your privacy screen.
Step 2: Cut the Posts
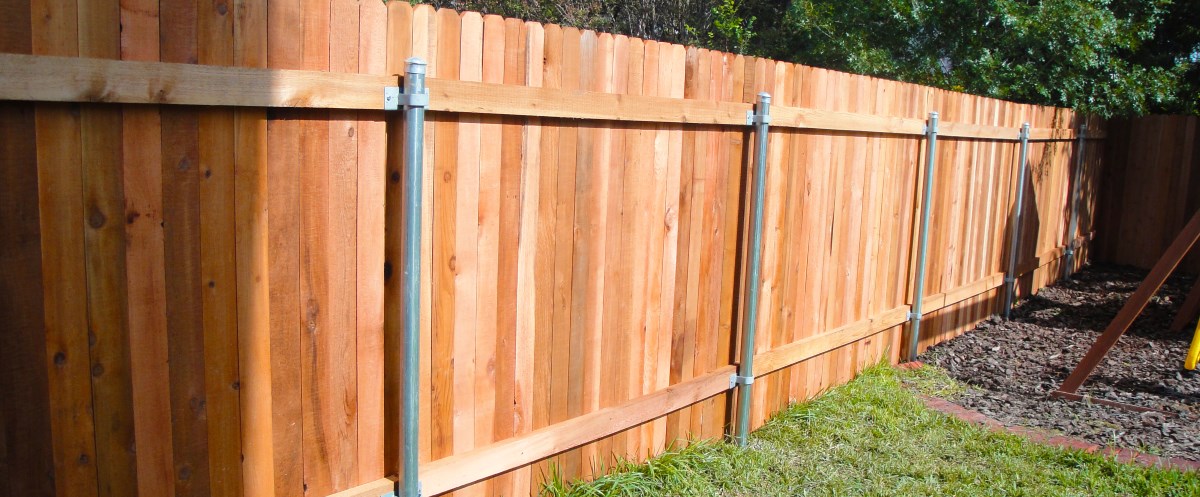
Cut your 3-4' x 4' posts to 84 inches. This will give you enough height for your screen while ensuring it remains stable.
Step 3: Lay Out the Posts
Lay your three posts on the ground, spaced evenly. There should be one post in the middle and one on either end. This will provide the necessary support for your screen.
Step 4: Add Slats
Begin adding your 1" x 3" lengths of pine wood horizontally, starting at the top. Secure each slat to the posts using a nail gun. Use your level to ensure that each slat is even and properly aligned.
Step 5: Use Spacers for Consistency
Use spacers to ensure that the distance between each slat is consistent. This will give your screen a uniform appearance and maintain its structural integrity.
Step 6: Secure All Slats
Continue securing all 20 pieces of wood, taking it down to the bottom. Leave about a 10-12" footing on your posts to secure them into the ground. Only about 6" will go into the ground initially; you can opt to set these in concrete later for added stability.
Read more: How To Build A Screened-In Patio
Step 7: Mark Post Holes
Take measurements of your pole distances and mark your post holes accordingly. Be sure to check if there are any utilities or sprinkler lines you may hit before starting to dig.
Step 8: Dig Post Holes
Dig three holes with a post hole digger about 7" deep. One hole should be on either side with one in the middle for added support.
Step 9: Stabilize Holes
Use fine gravel to tamp the bottom of each hole about 1". This will help stabilize the base of each post.
Step 10: Install Posts
Lift your privacy screen into place, ensuring each footing fits into its respective hole. Be sure it is level and tamp the soil well at the base of each post so it is stable. You can opt to set these in concrete at this time as well for added security.
Read more: DIY Guide To Building A Backyard Pergola
Step 11: Secure Screen
If you have a patio border, secure the screen to it using screws or brackets. This will prevent it from shifting over time.
Staining Your Privacy Screen (Optional)
If you want to add color and protection to your wood, now is the time to stain it. Here’s how you can do it:
- Prepare Your Wood: Ensure your wood is completely dry before staining.
- Lay Out Drop Cloth: Lay out a plastic drop cloth to protect your workspace from stains.
- Wear Protective Gear: Put on latex gloves to protect your hands from stains.
- Apply Stain: Apply two coats of Sherwin-Williams Super Deck in Semi-Transparent Baja Beige using an angled brush. Be sure to go with the grain of the wood, trying not to overlap strokes.
- Let Dry Overnight: Let each coat dry overnight before applying the next one.
Tips and Variations
Freestanding Privacy Screen
If you prefer not to dig holes or pour concrete, consider building a freestanding privacy screen using composite panels or wood slats. This method is quicker and doesn’t require any ground preparation.
Composite Panels
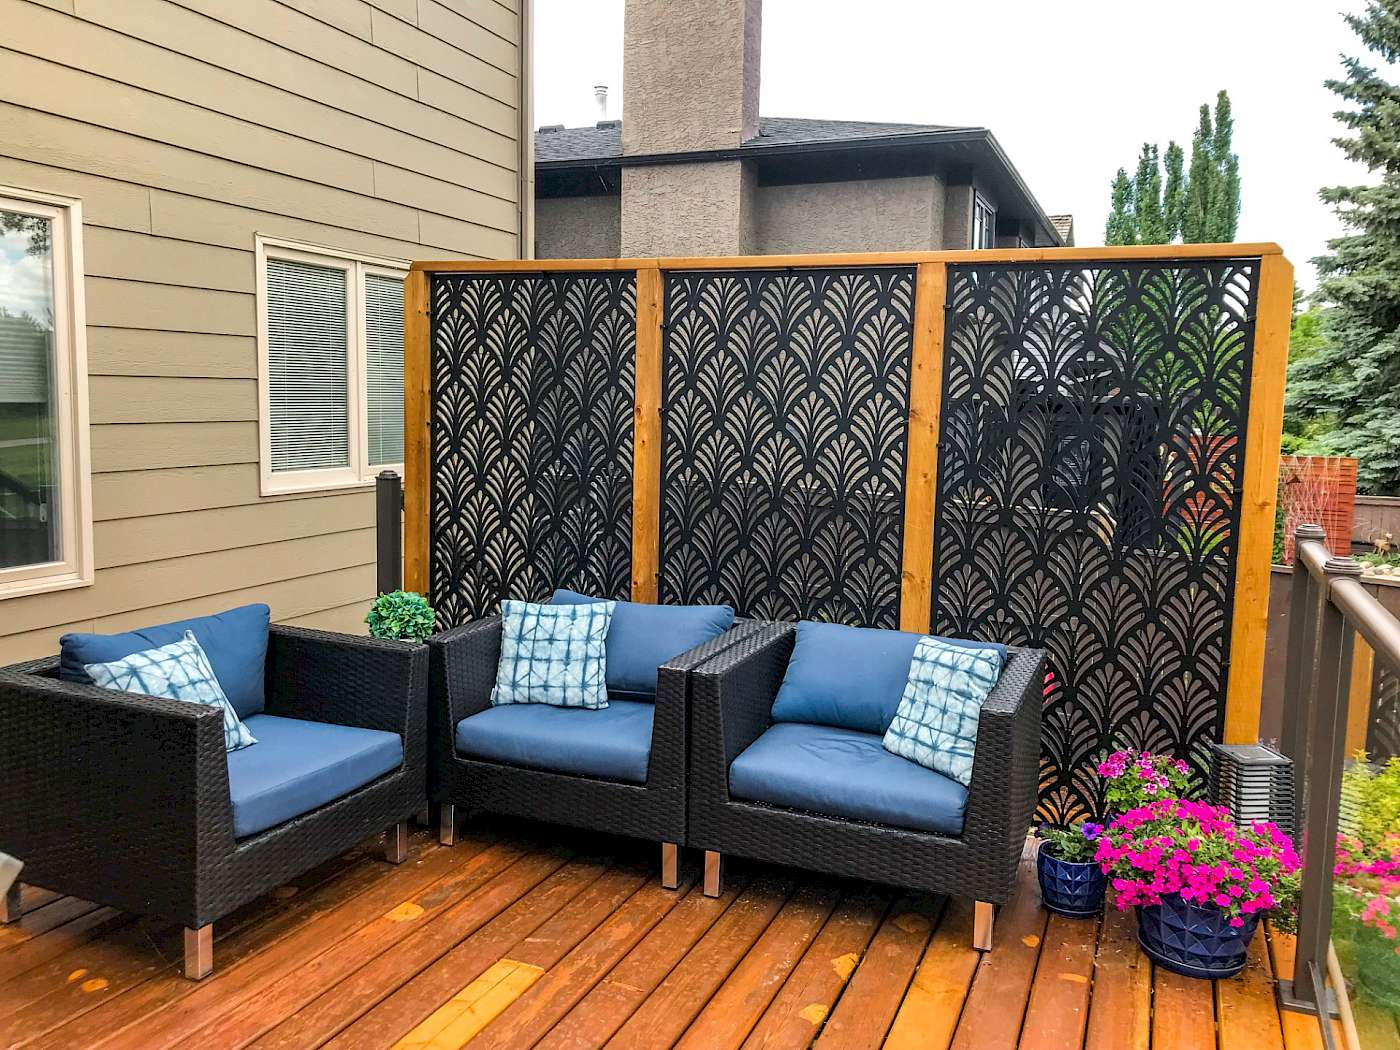
You can use composite privacy screen panels instead of wood slats for a more durable option. These panels come in various styles and can be easily attached to a frame using screws.
Trellis Design
For a more decorative look, consider using lattice and cedar boards to form a trellis-style privacy screen. This design not only adds privacy but also provides a beautiful backdrop for vines or climbing roses.
Customization
Feel free to customize your privacy screen by adding decorative elements like string lights, round baskets, or a wall garden. This will treat your outdoor space like an interior wall, enhancing its functionality and aesthetic appeal.
Conclusion
Building a wooden privacy screen for your patio is a rewarding DIY project that offers both practicality and style. By following these steps and tips, you can create a modern wood slatted outdoor privacy screen that complements your existing decor while providing the privacy you need. Whether you choose to stain it or keep it natural, this project is sure to enhance your outdoor living experience.
Read more: DIY Guide To Building A Backyard Fire Pit
Additional Resources
- City Farmhouse: For more detailed instructions on building a modern wood slatted outdoor privacy screen, visit City Farmhouse’s guide.
- Average Inspired: For a freestanding DIY outdoor privacy screen using composite panels, check out Average Inspired’s tutorial.
- H2OBungalow: For a comprehensive guide on building a DIY outdoor privacy screen using composite boards or wood, visit H2OBungalow’s instructions.
By following these guides and tips, you'll be well on your way to creating a beautiful and functional wooden privacy screen for your patio. Happy building
Was this page helpful?
At Storables.com, we guarantee accurate and reliable information. Our content, validated by Expert Board Contributors, is crafted following stringent Editorial Policies. We're committed to providing you with well-researched, expert-backed insights for all your informational needs.

0 thoughts on “DIY Guide: Building A Wooden Privacy Screen For Your Patio”