Home>Storage Ideas>Kitchen Storage>Your Guide To Building A Soffit For Kitchen Cabinets
Kitchen Storage
Your Guide To Building A Soffit For Kitchen Cabinets
Modified: February 27, 2024
Discover the ultimate kitchen storage solution with our step-by-step guide to building a soffit for kitchen cabinets. Transform your space with practical and stylish kitchen storage ideas.
(Many of the links in this article redirect to a specific reviewed product. Your purchase of these products through affiliate links helps to generate commission for Storables.com, at no extra cost. Learn more)
Introduction
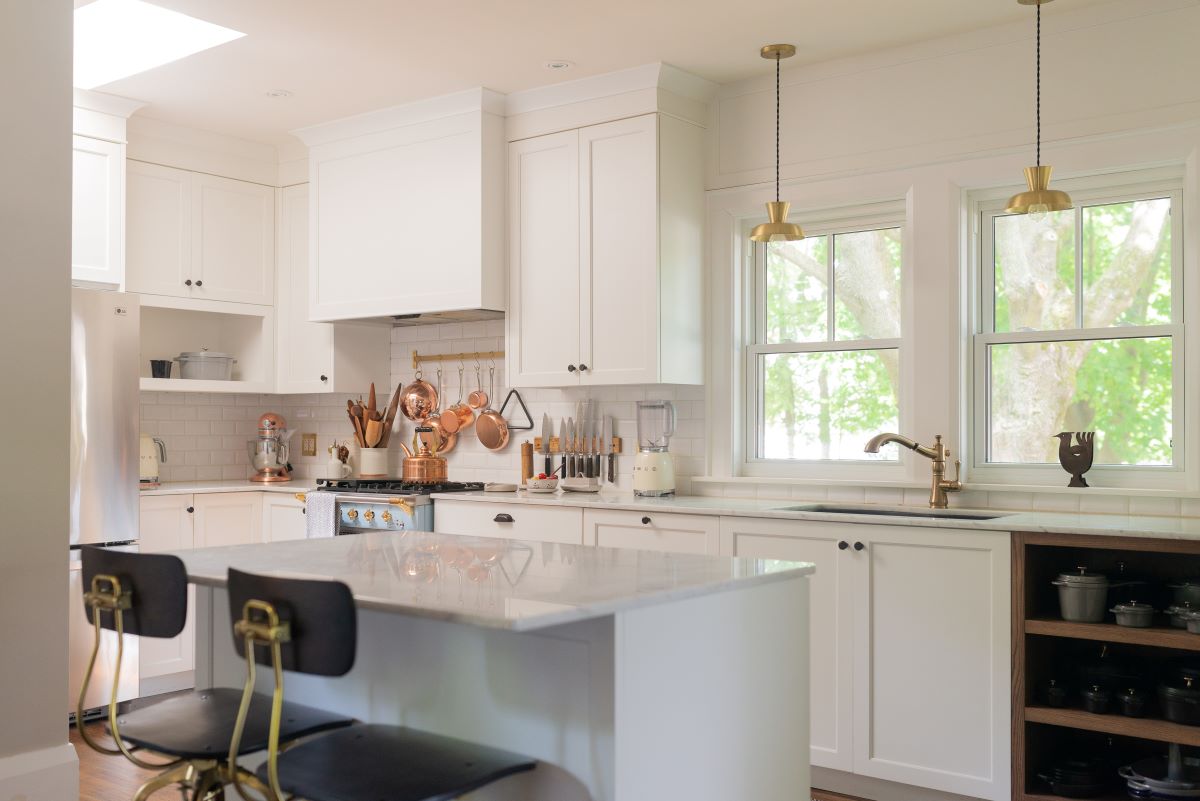
Welcome to your comprehensive guide to create a soffit for kitchen cabinets, a fantastic addition to your kitchen storage solutions. A soffit is a decorative and functional element that is installed above kitchen cabinets to bridge the gap between the cabinets and the ceiling. It not only adds a finishing touch to your kitchen design, but also provides valuable storage space for items that are not frequently used.
Adding a soffit to your kitchen cabinets offers a myriad of benefits. Firstly, it helps to conceal any exposed pipes, vents, or wiring that may be running along the ceiling, creating a polished and cohesive look. Additionally, it allows you to maximize your kitchen storage by utilizing the space above the cabinets – perfect for storing items such as large serving platters, seasonal dishes, or lesser-used appliances.
In this guide, we will walk you through the step-by-step process of building a soffit for your kitchen cabinets. With the right tools and materials, along with a little bit of patience and effort, you can transform your kitchen into an organized and visually appealing space.
Before we dive into the details, let’s take a quick look at the tools and materials you will need for this project:
- Measuring tape
- Pencil
- Table saw or circular saw
- Power drill
- Screwdriver
- Wood screws
- Drywall or plywood
- Drywall screws
- Drywall joint compound
- Sanding sponge or sandpaper
- Primer
- Paint
- Paintbrushes or rollers
Now that you have an idea of what you’ll need, let’s move on to the step-by-step process of building a soffit for kitchen cabinets.
Key Takeaways:
- Enhance Aesthetic Appeal and Storage
Building a soffit above kitchen cabinets not only conceals unsightly features but also adds extra storage space and a polished, cohesive look to your kitchen design. - Transform Kitchen Functionality
By adding a soffit, you can maximize vertical storage, hide clutter, and create a visually balanced kitchen, enhancing both functionality and aesthetic appeal.
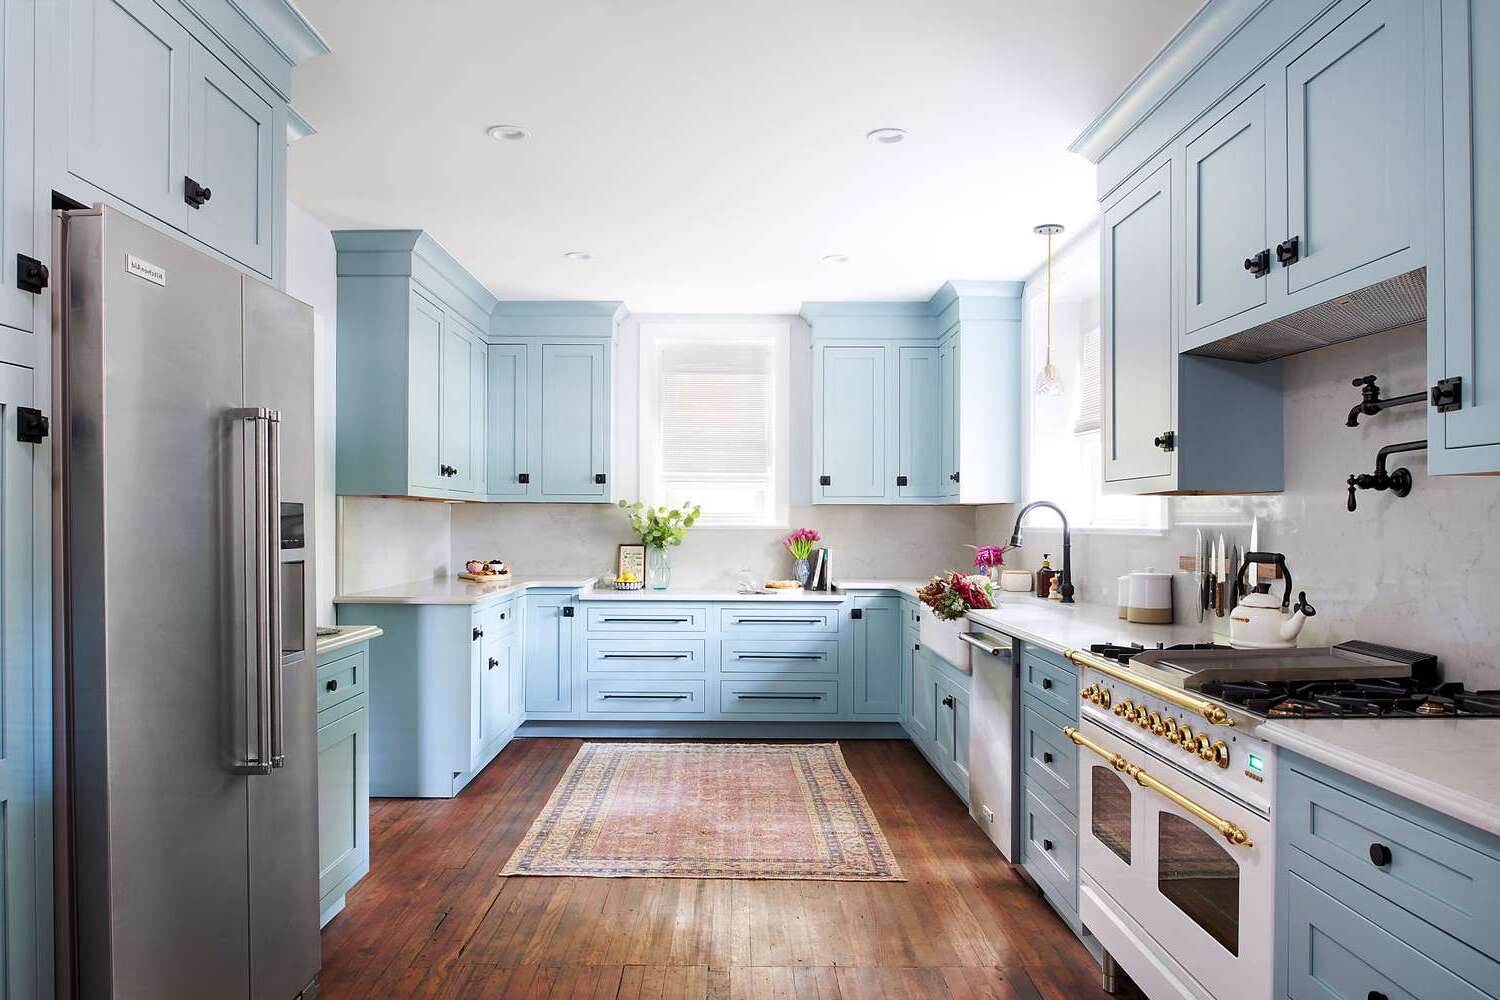
What is a Soffit?
A soffit, in the context of kitchen cabinets, refers to the space between the top of the cabinets and the ceiling. It is a horizontal surface or structure that is installed to fill the gap and create a seamless transition from the cabinets to the ceiling. Soffits can be made from various materials such as wood, drywall, or plywood.
In addition to its functional purpose of bridging the empty space, soffits also serve a decorative role. They add visual interest and help to complete the overall look of the kitchen by providing a finished appearance. Soffits can be customized to match the style of your kitchen, whether it’s modern, traditional, or rustic.
One of the primary reasons for installing a soffit is to hide any unsightly features that may be present above the cabinets. These features can include exposed wiring, plumbing pipes, or HVAC vents. By adding a soffit, you can effectively conceal these elements, creating a cleaner and more polished aesthetic.
A soffit also offers additional storage space in your kitchen. The area above the cabinets is often underutilized, and a soffit provides an opportunity to maximize this vertical space. It can be used to store items that are not frequently used, such as large serving platters, seasonal dishware, or small kitchen appliances.
Furthermore, a soffit helps to visually balance the cabinetry, especially in kitchens with high ceilings. It creates a cohesive look by filling the empty space and preventing the cabinets from appearing too short or disproportionate in relation to the ceiling height.
Overall, a soffit is a valuable addition to your kitchen cabinets. It not only enhances the aesthetic appeal of your kitchen, but it also offers practical benefits such as concealing unsightly features and providing extra storage space. In the following sections, we will guide you through the process of building a soffit for your kitchen cabinets, step-by-step.
Benefits of Adding a Soffit to Kitchen Cabinets
Adding a soffit to your kitchen cabinets offers a range of benefits that can greatly enhance your kitchen’s functionality and aesthetics. Let’s explore some of the key advantages:
1. Additional Storage: One of the primary benefits of installing a soffit is the opportunity to gain extra storage space. The area above the cabinets is often wasted, but with a soffit, you can utilize this vertical space to store items that are not frequently used. This can help declutter your kitchen and free up valuable cabinet space for everyday essentials.
2. Conceals Unsightly Features: The space above the cabinets can be home to exposed wiring, pipes, or HVAC vents, which can detract from the overall appearance of your kitchen. By adding a soffit, you can effectively hide these unsightly features and create a more visually appealing space. The soffit acts as a cover, providing a clean and seamless look.
3. Enhances Aesthetic Appeal: A soffit adds a stylish and finished look to your kitchen. It helps to create a cohesive design by filling the gap between the cabinets and the ceiling. Whether you prefer a sleek and modern look or a more traditional style, a well-designed soffit can enhance the overall aesthetic appeal of your kitchen.
4. Improves Lighting Control: If you have installed under-cabinet lighting, a soffit can help to better control the light distribution in your kitchen. By enclosing the space between the cabinets and the ceiling, the soffit acts as a barrier, preventing the light from spilling upward and providing focused illumination on the countertops and workspaces.
5. Hides Cabinet Tops: In some cases, the tops of kitchen cabinets may gather dust or become a catch-all for clutter. A soffit can be a great solution to hide these upper surfaces, creating a cleaner and more streamlined look. It eliminates the need for regular cleaning and minimizes the visual distraction of cabinet clutter.
6. Customization Possibilities: Soffits offer ample opportunities for customization to match your personal style and kitchen design. You can choose different materials, finishes, or decorative moldings to create a unique and personalized look. Whether you want to complement the existing cabinetry or make a statement with a contrasting color or texture, a soffit allows for creative expression.
7. Increases Property Value: Adding a soffit to your kitchen cabinets can also enhance the value of your home. Buyers appreciate a well-designed and organized kitchen, and the addition of a soffit demonstrates attention to detail and quality craftsmanship. It can make your kitchen stand out among the competition and potentially increase the resale value of your property.
Incorporating a soffit into your kitchen cabinet design brings many advantages, from extra storage space to improved aesthetics and functionality. Now, let’s move on to the next section where we will discuss the tools and materials needed for building a soffit for kitchen cabinets.
Tools and Materials Needed
Before beginning the process of building a soffit for your kitchen cabinets, it’s important to gather all the necessary tools and materials. Here’s a list of what you’ll need:
Tools:
– Measuring tape: To accurately measure the dimensions of the space above your cabinets.
– Pencil: For marking measurements and guidelines.
– Table saw or circular saw: To cut the wood or other materials for the soffit frame.
– Power drill: For drilling pilot holes and attaching the soffit frame to the ceiling and cabinets.
– Screwdriver: For driving screws into the soffit frame and cabinets.
– Wood screws: To secure the soffit frame together and attach it to the ceiling and cabinets.
– Drywall saw: If you plan on adding drywall to the soffit, a drywall saw will be needed to cut the sheets to size.
– Drywall joint compound: If you are finishing the soffit with drywall, you will need joint compound to fill in any gaps and seams.
– Sanding sponge or sandpaper: For smoothing out the joint compound and creating a seamless finish.
– Primer: To prime the surface of the soffit before painting.
– Paint: Choose a paint color that matches your kitchen decor or personal preference.
– Paintbrushes or rollers: For applying the primer and paint to the soffit.
Materials:
– Wood or plywood: Depending on your preference and budget, you’ll need materials to build the soffit frame. This can include 2×4 lumber or plywood sheets.
– Drywall or plywood: If you choose to add drywall to the soffit, you’ll need sheets of drywall or plywood to cover the frame.
– Drywall screws: These will be used to secure the drywall or plywood to the soffit frame.
– Construction adhesive: If you decide to attach the soffit frame directly to the cabinet tops, you may need construction adhesive to ensure a secure bond.
Make sure to gather all the tools and materials before starting the project. This will help streamline the construction process and ensure that you have everything you need on hand.
Now that you have all the necessary tools and materials, we can move on to the step-by-step process of building a soffit for your kitchen cabinets. But first, let’s take a few moments to measure and plan the installation.
Step 1: Measuring and Planning
Before diving into the construction of your soffit, it’s essential to take accurate measurements and plan the installation. Follow these steps to ensure a successful project:
1. Measure the space: Start by measuring the length, width, and height of the area where you plan to install the soffit. Use a measuring tape to obtain precise measurements. Take into account any obstructions such as light fixtures or molding that may affect the size and positioning of the soffit.
2. Determine the desired soffit height: Consider the height of your cabinets and the overall aesthetic you want to achieve. A common approach is to have the soffit height match the height of the cabinets, creating a seamless transition. However, you can also choose to have the soffit extend slightly above the cabinets for added visual impact.
3. Sketch out a plan: With your measurements in hand, create a rough sketch or diagram of the soffit design. Mark the dimensions, including the length, width, and height of the soffit. Indicate the positioning of cabinets, appliances, and any other elements that may affect the installation process.
4. Consider lighting and ventilation: If you plan to install lighting fixtures or require ventilation in the soffit, make sure to incorporate these considerations into your plan. Determine the placement of electrical wiring or ventilation ducts to ensure they align with your soffit design.
5. Check for support: Assess the stability and structural integrity of your cabinets and ceiling. Ensure that they can support the weight of the soffit and any additional objects you plan to store in it. If necessary, reinforce the cabinets or consult a professional to ensure a safe and secure installation.
6. Research building codes and regulations: Check local building codes and regulations to ensure compliance with any specific requirements related to soffit construction. This includes fire safety regulations, electrical codes, or any other guidelines that may impact your project.
By taking the time to measure accurately and plan your soffit installation, you can avoid potential issues and ensure a smoother construction process. With the planning phase complete, you’re now ready to move on to the next step: removing the existing cabinets.
Read more: DIY Guide To Painting Kitchen Cabinets
Step 2: Removing Existing Cabinets
Before you can begin building the soffit, you’ll need to remove any existing cabinets that may be in the way. Follow these steps to safely and efficiently remove the cabinets:
1. Clear the area: Start by clearing the surrounding area to create space to work. Remove any objects or items from the countertops and near the cabinets. This will ensure a safe and unobstructed work environment.
2. Turn off utilities: Before removing the cabinets, turn off the electricity and water supply to any appliances or fixtures that may be connected to them. This will help prevent accidental damage and ensure your safety during the removal process.
3. Remove cabinet doors and shelves: Begin by taking off any doors or shelves attached to the cabinets. Use a screwdriver to remove the screws or hinges holding them in place. Set aside the doors and shelves in a safe location to avoid any damage.
4. Disconnect plumbing and electrical connections: If there are any plumbing or electrical connections within the cabinets, shut off the water supply and disconnect the plumbing. For electrical connections, turn off the power at the main circuit breaker, and carefully disconnect any electrical wiring.
5. Unscrew the cabinets: Locate the screws or fasteners that secure the cabinets to the wall and neighboring cabinets. Use a screwdriver or power drill to remove these screws, taking care to support the weight of the cabinets as you do so. Enlist the help of another person if necessary to prevent accidents or injury.
6. Remove the cabinets: Once all the screws have been removed, gently lift and tilt the cabinets away from the wall. Take your time to ensure a smooth removal process, and be cautious of any sharp edges or corners.
7. Patch and repair: After the cabinets have been removed, examine the wall for any damage or holes left behind. Patch up any holes with spackle or putty, and sand them down until smooth. This will provide a clean surface for the installation of the soffit.
With the existing cabinets successfully removed, you are now ready to move on to the next step: building the soffit frame. Remember to take your time during the removal process to ensure the safety of yourself and your surroundings.
When building a soffit for kitchen cabinets, make sure to measure and plan carefully to ensure it fits seamlessly with the existing cabinets and the overall design of the kitchen.
Step 3: Building the Soffit Frame
With the cabinets removed, it’s time to start building the soffit frame. The frame will provide the structure and support for the soffit, ensuring its stability and durability. Follow these steps to construct the soffit frame:
1. Measure and mark: Begin by measuring the length and width of the space where the soffit will be installed. Transfer these measurements to your chosen material (such as 2×4 lumber or plywood) and mark the dimensions accordingly.
2. Cut the frame pieces: Use a table saw or circular saw to cut the pieces for the soffit frame according to your measurements. You’ll need four pieces: two longer pieces for the horizontal sides and two shorter pieces for the vertical ends.
3. Construct the frame: Assemble the frame by attaching the pieces together using wood screws. Predrill pilot holes to prevent splitting the wood, and then secure the pieces with screws at each corner. Ensure that the frame is square and sturdy.
4. Add cross supports: Depending on the dimensions of your frame, you may need to add additional cross supports to provide extra stability and support. Measure and cut these pieces to fit between the horizontal sides of the frame, and attach them using screws.
5. Consider access points: If you plan to have access points to the soffit for storage or maintenance purposes, you can incorporate these into the frame design. Add additional cross supports or vertical pieces to create openings in the frame where desired.
6. Double-check measurements and alignment: Before proceeding, double-check the measurements and ensure that the frame aligns with the space where the soffit will be installed. Dry-fit the frame into the kitchen area to confirm that it fits properly and sits level.
Once the soffit frame is constructed, you will be ready to move on to the next step: installing the soffit frame in your kitchen. Take your time during this step to ensure that the frame is built accurately and securely, as it will form the foundation for your soffit.
Step 4: Installing the Soffit Frame
With the soffit frame built, it’s time to move on to installing it in your kitchen. Follow these steps to properly install the soffit frame:
1. Position the frame: Carefully position the soffit frame in the designated area above the cabinets. Ensure that it is level and centered according to your measurements and desired design. Use a level to check for any deviations and make adjustments as necessary.
2. Attach the frame to the ceiling: Secure the top of the soffit frame to the ceiling using wood screws. Predrill pilot holes to prevent splitting the ceiling material, then drive the screws through the top of the frame and into the ceiling joists or support beams.
3. Attach the frame to the cabinets: For added stability, attach the sides of the soffit frame to the cabinet tops. Predrill pilot holes, then drive wood screws through the sides of the frame and into the cabinet tops. Ensure that the frame is securely fastened to both the ceiling and cabinets.
4. Check for alignment: Once the frame is attached, check for any misalignment or unevenness. Use the level to confirm that the soffit frame is still level both horizontally and vertically. Make any necessary adjustments by loosening or tightening screws.
5. Reinforce the frame (if necessary): Depending on the size and weight of the soffit frame, you may need additional reinforcement to ensure its stability. Consider adding extra support by attaching cross beams or brackets between the frame and adjacent walls or cabinets.
6. Test the stability: Give the soffit frame a gentle shake to test its stability. It should feel secure and firmly attached to the ceiling and cabinets. If you notice any wobbling or movement, reinforce the frame further until it is stable.
With the soffit frame properly installed, you’re one step closer to completing your kitchen storage project. In the next step, we will cover the process of adding drywall or plywood to the soffit frame to create a finished surface.
Step 5: Adding Drywall or Plywood
With the soffit frame securely in place, it’s time to add the finishing touches by covering it with drywall or plywood. Follow these steps to add the desired material to your soffit frame:
1. Measure and cut the material: Begin by measuring the dimensions of the sides and top of the soffit frame. Transfer these measurements to your chosen material, whether it be drywall or plywood. Use a saw to cut the material into the appropriate sizes.
2. Attach the material to the frame: Starting with one side of the soffit frame, position the drywall or plywood onto the frame and align it properly. Use screws or nails to attach the material to the frame, ensuring a secure fit. Repeat this process for the remaining sides and the top of the soffit frame.
3. Fill in any gaps: Once the material is attached to the frame, inspect for any gaps or seams between the pieces. Use joint compound or drywall mud to fill in these gaps and create a smooth, seamless surface. Apply the compound with a taping knife or putty knife and let it dry according to the manufacturer’s instructions.
4. Sand the surface: After the joint compound has dried, use a sanding sponge or sandpaper to smooth out any rough patches or imperfections. This will create a uniform surface for painting or finishing.
5. Apply primer: Before painting or finishing the soffit, it’s recommended to apply a coat of primer to the drywall or plywood. The primer will provide a base for the paint and improve the adherence of the finish coat. Allow the primer to dry completely before proceeding to the next step.
6. Paint or finish the soffit: Once the primer is dry, you can paint the soffit to match your kitchen’s aesthetic. Choose a paint color that complements the overall design and apply it evenly using a paintbrush or roller. Alternatively, you can finish the soffit with wallpaper, textured paint, or any other desired finish.
With the drywall or plywood installed and the soffit painted or finished, your kitchen’s soffit is now taking shape. In the next step, we will cover the process of reinstalling the cabinets to complete your kitchen storage project.
Step 6: Finishing and Painting the Soffit
Now that the soffit frame is covered with drywall or plywood, it’s time to give it a polished look by finishing and painting it. Follow these steps to complete the finishing and painting process:
1. Prep the surface: Before applying any finishes or paint, ensure that the surface of the soffit is clean and free from dust or debris. Use a damp cloth or sponge to wipe down the drywall or plywood, removing any dirt or residue. Allow it to dry completely before proceeding.
2. Apply joint compound (optional): If there are any visible seams or imperfections in the drywall, apply a thin layer of joint compound using a taping knife or putty knife. Smooth out the compound and let it dry according to the manufacturer’s instructions. Once dry, sand the area until it is smooth and flush with the rest of the surface.
3. Prime the surface: Applying a coat of primer to the soffit is recommended before painting. The primer will help the paint adhere better and provide a more uniform finish. Use a paintbrush or roller to apply the primer, following the manufacturer’s instructions. Allow the primer to dry completely before proceeding.
4. Choose your paint color: Select a paint color that matches your kitchen’s overall aesthetic or personal preference. Consider the existing color scheme and the desired look of the space. Opt for a high-quality paint that is appropriate for the soffit material and finish.
5. Paint the soffit: Using a paintbrush or roller, apply even coats of paint to the soffit surface. Work in one direction, covering the entire surface with smooth, overlapping strokes. Allow each coat to dry fully before applying additional coats, if necessary. Ensure that the paint is evenly spread and no brush or roller marks are visible.
6. Touch up and finalize: Once the paint is dry, inspect the soffit for any uneven areas or missed spots. Touch up any imperfections with additional paint, blending it seamlessly with the rest of the surface. Take the time to ensure that the soffit has a smooth and flawless finish.
With the soffit finished and painted, your kitchen storage project is almost complete. In the final step, we will cover the process of reinstalling the cabinets, allowing you to fully enjoy your newly enhanced kitchen space.
Step 7: Reinstalling Cabinets
With the soffit completed, it’s time to reinstall the cabinets to bring your kitchen storage project to a close. Follow these steps to reinstall the cabinets securely and efficiently:
1. Clean the cabinets: Before reinstallation, make sure to clean the cabinets thoroughly. Remove any dust, dirt, or debris that may have accumulated during the installation process. Wipe down the surfaces with a mild cleaner and allow them to dry completely.
2. Position the cabinets: Carefully position the cabinets back into their designated spaces, aligning them with the soffit and adjacent cabinets. Use a level to ensure they are level both horizontally and vertically. Make any necessary adjustments by shimming under the cabinets to achieve a level and seamless installation.
3. Secure the cabinets: Once the cabinets are positioned correctly, secure them to the wall using screws or brackets. Predrill pilot holes to prevent splitting and ensure a more secure attachment. Drive screws through the back of the cabinets and into the wall studs, making sure they are tightly secured.
4. Adjust the cabinet doors: Check that all cabinet doors and drawers are properly aligned and functioning smoothly. Make any necessary adjustments to the hinges or drawer slides to ensure that the doors and drawers open and close properly.
5. Reconnect plumbing and electrical connections: If you disconnected any plumbing or electrical connections during the removal process, now is the time to reconnect them. Follow proper procedures and safety measures when reconnecting pipes and electrical wires. Consult a professional if needed.
6. Test for stability: Give the cabinets a gentle shake to test their stability. They should feel secure and firmly attached to the wall. If you notice any wobbling or movement, double-check the screws and brackets, tightening them if necessary.
7. Final inspection: Take a step back and inspect the overall installation of the cabinets. Ensure that they are level, flush with the adjacent cabinets, and properly aligned with the soffit. Make any final adjustments or touch-ups as needed.
Congratulations! With the cabinets successfully reinstalled, your kitchen storage project is now complete. Take a moment to enjoy your newly enhanced kitchen space, now with the added functionality and aesthetic appeal of a soffit above the cabinets.
Conclusion
Congratulations on completing your kitchen storage project by adding a soffit to your cabinets! The addition of a soffit not only enhances the visual appeal of your kitchen but also provides valuable extra storage space. Throughout this comprehensive guide, we have covered the step-by-step process of building a soffit, from measuring and planning to reinstalling the cabinets. Let’s recap the key points:
– A soffit is a decorative and functional element installed above kitchen cabinets to bridge the gap between the cabinets and the ceiling, providing a polished and cohesive look.
– By adding a soffit, you can conceal unsightly features such as exposed wiring, pipes, and HVAC vents, while also maximizing your kitchen’s storage potential.
– The tools and materials needed for building a soffit include measuring tape, a saw, power drill, screws, drywall or plywood, joint compound, sanding materials, primer, paint, and brushes/rollers.
– The step-by-step process involves measuring and planning, removing existing cabinets, building the soffit frame, installing the frame, adding drywall or plywood, and finishing and painting the soffit.
– Finally, reinstallation of the cabinets completes the project, ensuring stability and functionality in your newly enhanced kitchen.
Remember, as you undertake this project, it’s essential to prioritize safety and accuracy. Double-check measurements, secure the soffit frame firmly, and follow proper installation techniques to achieve the best results.
Now that your kitchen boasts a stunning soffit and increased storage space, take the time to organize and arrange your cabinets to optimize functionality. Consider utilizing adjustable shelving, drawer dividers, and other storage solutions to maximize efficiency and accessibility.
We hope this guide has provided you with the necessary knowledge and inspiration to embark on your own soffit-building journey. Enjoy the benefits of your newly enhanced kitchen, and let your creativity shine through the customization options a soffit provides.
Happy cooking and organizing!
Frequently Asked Questions about Your Guide To Building A Soffit For Kitchen Cabinets
Was this page helpful?
At Storables.com, we guarantee accurate and reliable information. Our content, validated by Expert Board Contributors, is crafted following stringent Editorial Policies. We're committed to providing you with well-researched, expert-backed insights for all your informational needs.


0 thoughts on “Your Guide To Building A Soffit For Kitchen Cabinets”